¶ Purge Wiper
In this guide, we will show how to replace the purge wipers on the A1 Series and install a new one.

¶ When to use?
This guide is intended for use if there is visible damage to the filament purge wiper. Over time, the purge wiper can become damaged, and the metallic flap of the wiper may wear out or become bent.
Common issues that may indicate the need for replacement of the A1 purge wiper include:
- Inadequate cleaning of the nozzle during the pre-print preparation step
- Filament adhering to the purge wiper flap.
- Visible damage or wear on the purge wiper.
- Recommended by Bambu Lab Technical Support.
¶ Tools and materials needed
- Bambu Lab Purge Wiper - A1 Series
- H2.0 hex wrench
- 5 minutes of your time
¶ Safety Warning
IMPORTANT!
It's crucial to power off the printer before conducting any maintenance work, including work on the printer's electronics and tool head wires. Performing tasks with the printer on can result in a short circuit, leading to electronic damage and safety hazards.
During maintenance or troubleshooting, you may need to disassemble parts, including the hotend. This exposes wires and electrical components that could short circuit if they contact each other, other metal, or electronic components while the printer is still on. This can result in damage to the printer's electronics and additional issues.
Therefore, it's crucial to turn off the printer and disconnect it from the power source before conducting any maintenance. This prevents short circuits or damage to the printer's electronics, ensuring safe and effective maintenance. For any concerns or questions about following this guide, open a new ticket in our Support Page and we will do our best to respond promptly and provide the assistance you need.
¶ Steps to replace the Purge Wiper
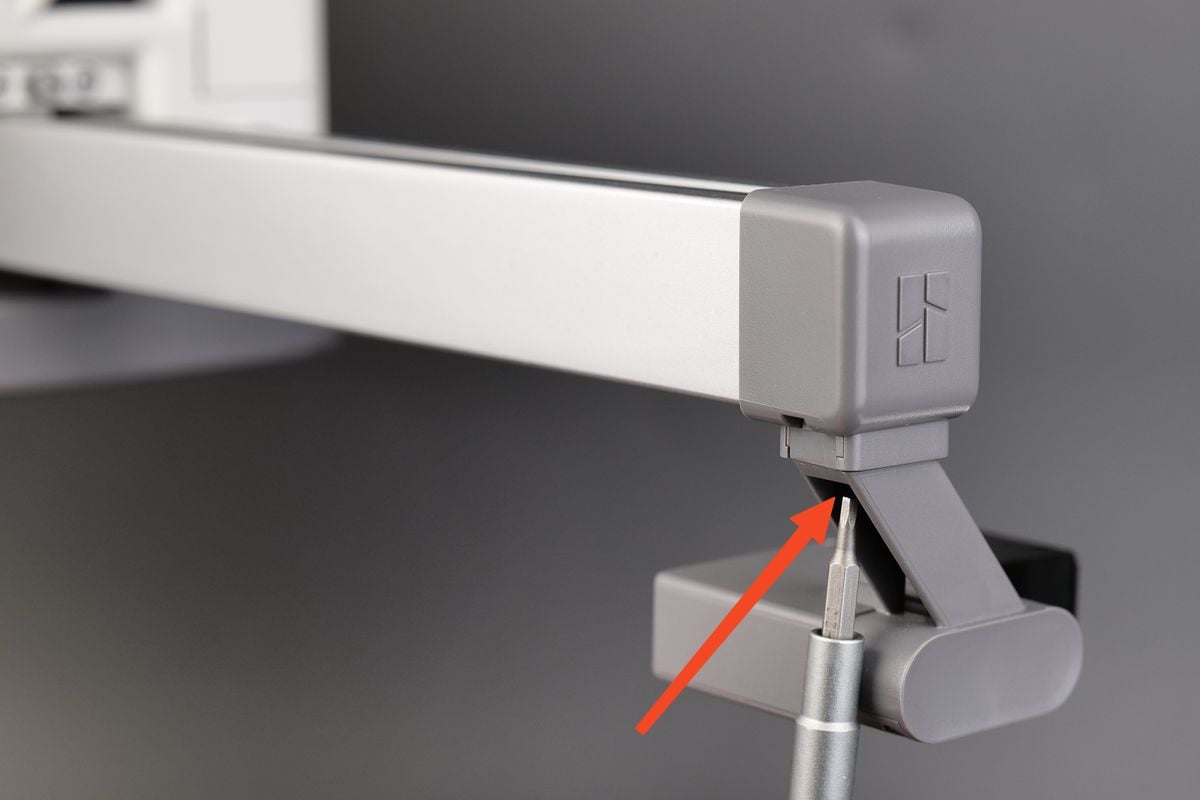
¶ 1. Remove the screw holding the purge wiper
The first step is to remove the screw holding the purge wiper in place. It is located underneath the purge wiper.

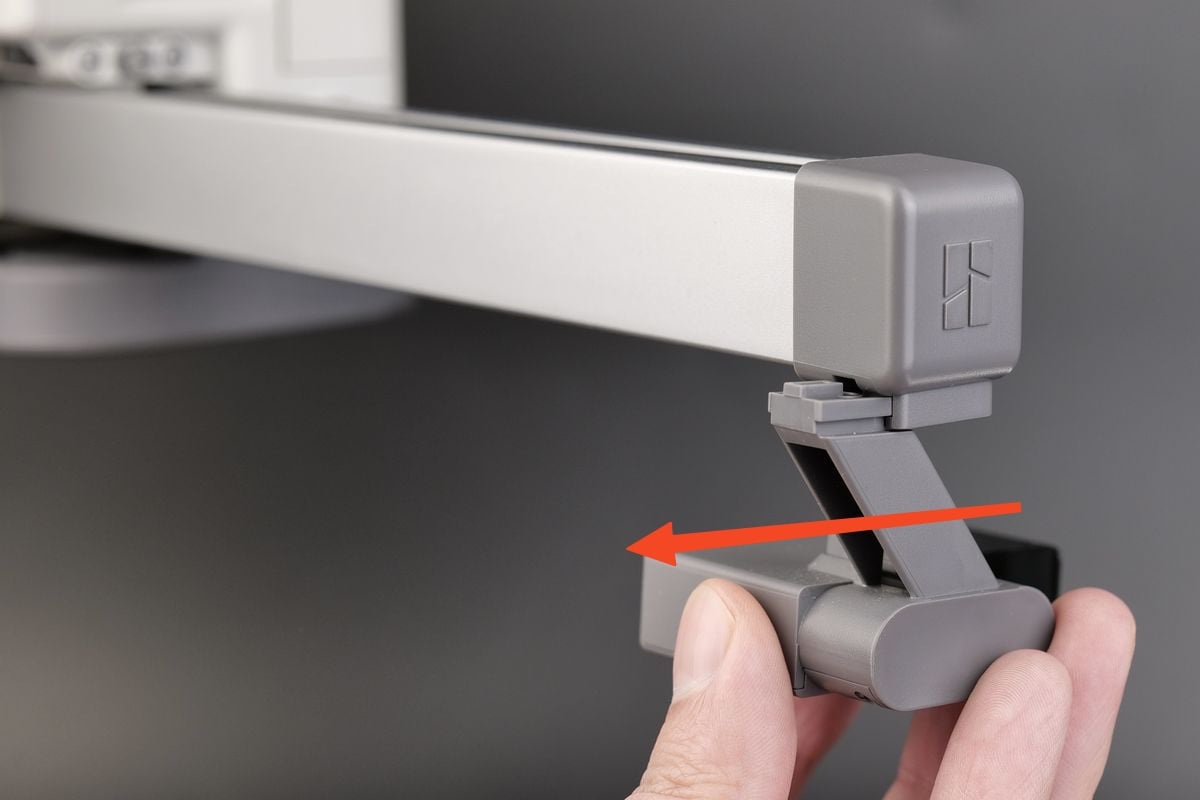
¶ 2. Slide the purge wiper out
After removing the screw, you can remove the purge wiper by sliding it out of the plastic holder

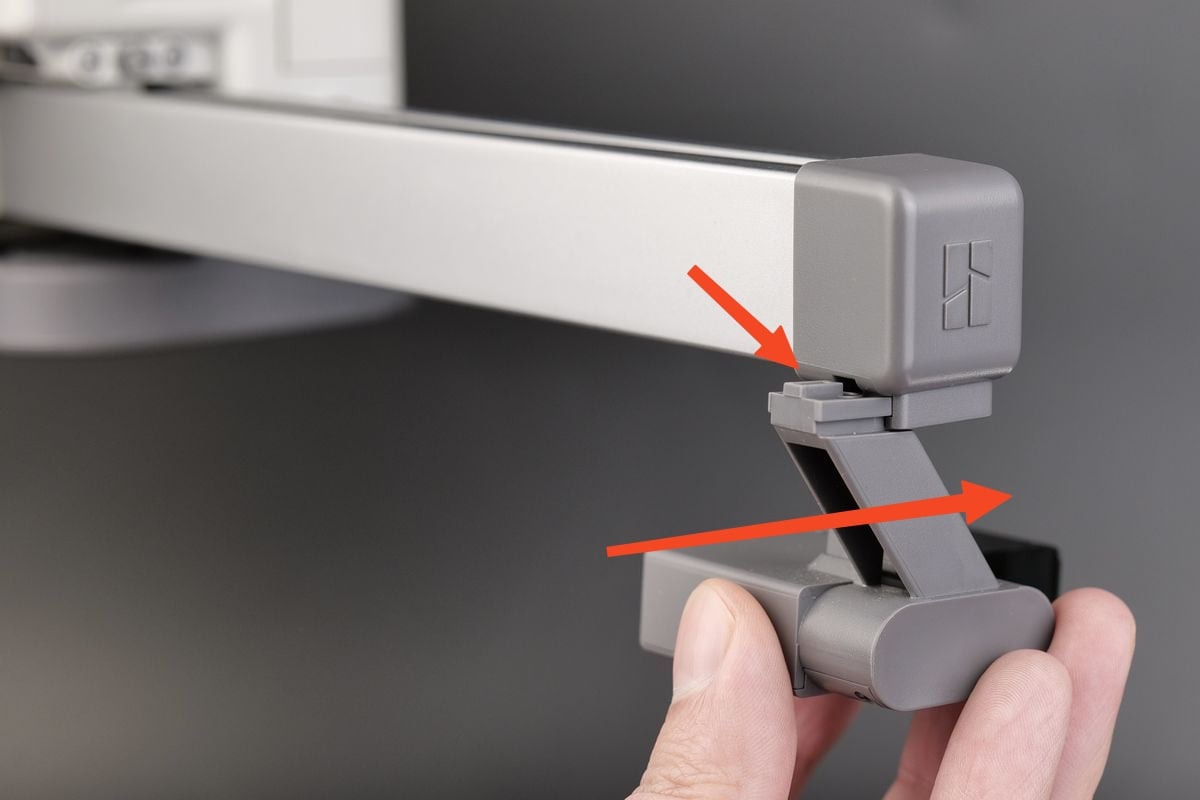
¶ 3. Install the new purge wiper
To install the new purge wiper, simply align the slots of the wiper to the plastic holder, then slide it in until the surface is flush

¶ 4. Tighten the screw
Simple re-insert the screw back in its original position, then re-tighten it.

Important! Do not overtighten the screw to avoid any potential damage or stripping.
¶ 5. Align the purge wiper
With the new purge wiper installed, the last thing remaining is to ensure the wiper flap is not touching the nozzle. There should be about 3 mm of clearance from the tip of the nozzle to the wiper.

If there are problems in alignment, we recommend checking this wiki article which explains how to ensure the right position of the purge wiper.
¶ Calibration step after the operation
No calibration is required
¶ End Notes
We hope the detailed guide provided has been helpful and informative.
To ensure a safe and effective execution, if you have any concerns or questions about the process described in this article, we recommend reaching out to technical support team before initiating the operation. We will do our best to respond promptly and provide the assistance you need. Click here to open a new ticket in our Support Page.