¶ Problem phenomenon:
In 3D printing, poor extrusion is a very common phenomenon. In printing, if the nozzle does not smoothly extrude the filament, or the surface of the printed model shows an obvious lack of filament (under-extrusion), it means that the extrusion is abnormal. It can also be caused by the extruder or hotend clogging, or slipping of the filament. This wiki will guide you through troubleshooting abnormal extrusion issues with the A1 Series printers.

¶ Precautions before troubleshooting
When you encounter the problem of extrusion, first of all, make sure that the printing Settings are correct, the printing temperature needs to match the filament used, the temperature is too low or the printing speed is too fast (such as enabling on the Ludicrous Mode), will also cause insufficient extrusion;
In addition, it is also necessary to ensure that the PTFE tube is properly connected to the printer, the tube is not overly bent, the filament is not entangled, and the "Filament Tangle Detection" function is enabled, sometimes too much resistance from the outside will cause the printer to extrude the filament unsucessfully.
Ensure that the settings are correct, if you still encounter extrusion problems, you can refer to the following troubleshooting steps.
¶ Print the first layer nozzle is too close to the heat bed
- When printing the first layer, the nozzle is too close to the heat bed, and the nozzle is almost against the surface of the heat bed, making it almost impossible to extrude the filaments. There is a significant under-extrusion of the first layer.
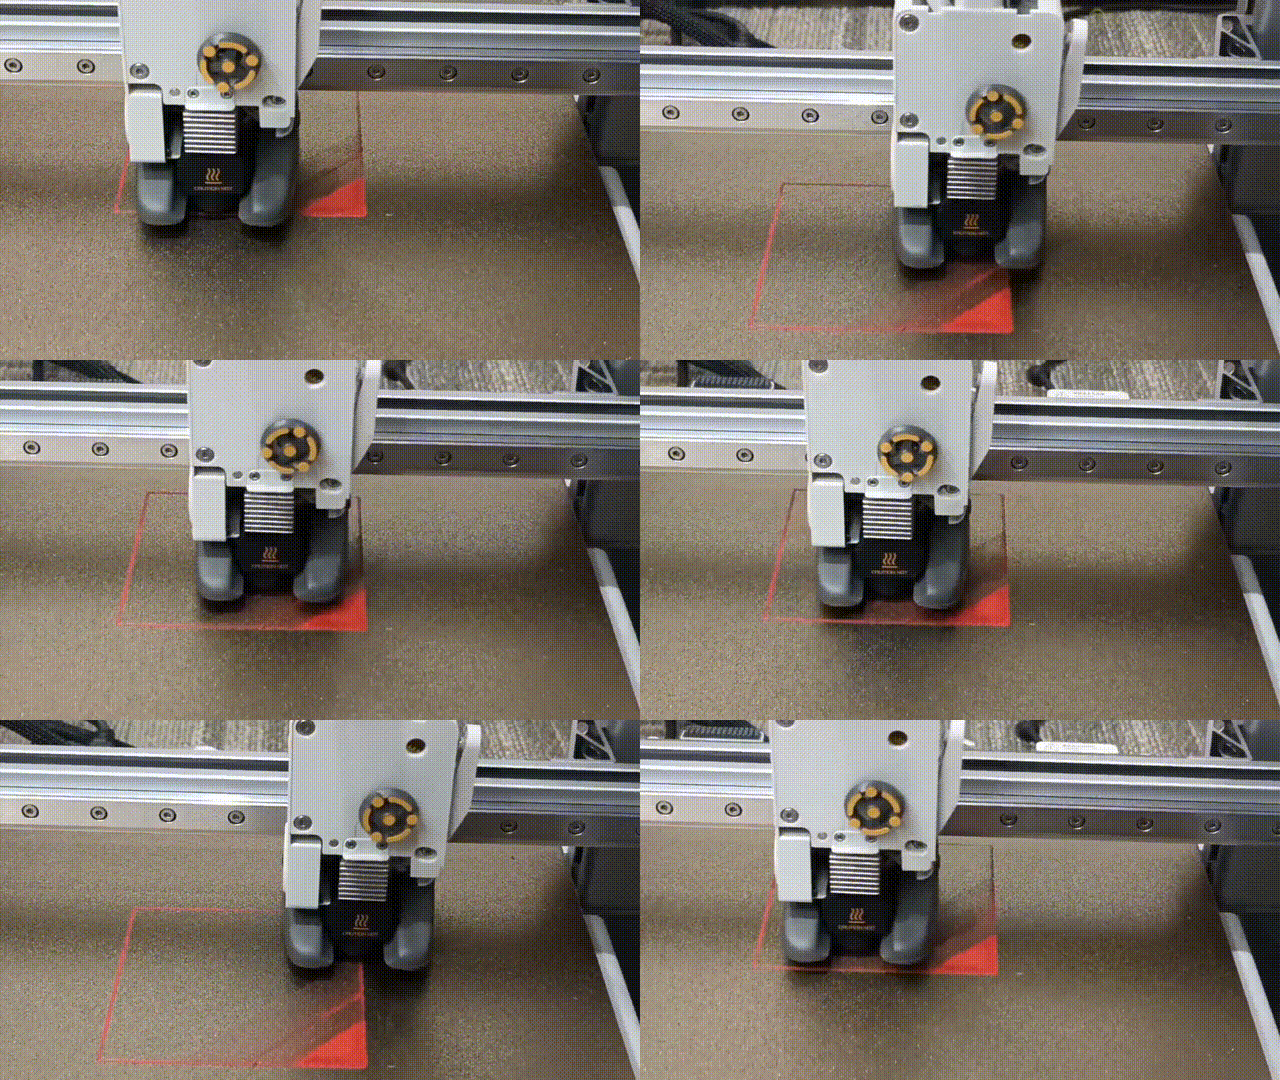
At this time, you can try to move the toolhead to the position of the purge wiper, and then set the nozzle temperature and click on the extrude. If it can be successfully extruded at the position of the purge wiper, it can be confirmed that the height of the nozzle when printing the first layer is too low, resulting in insufficient extrusion.

For this issue, we recommend referring to the following steps to troubleshoot:
a. Perform a complete bed leveling, it is recommended to run a full bed leveling in calibration to ensure that the nozzle height from the build plate is appropriate.

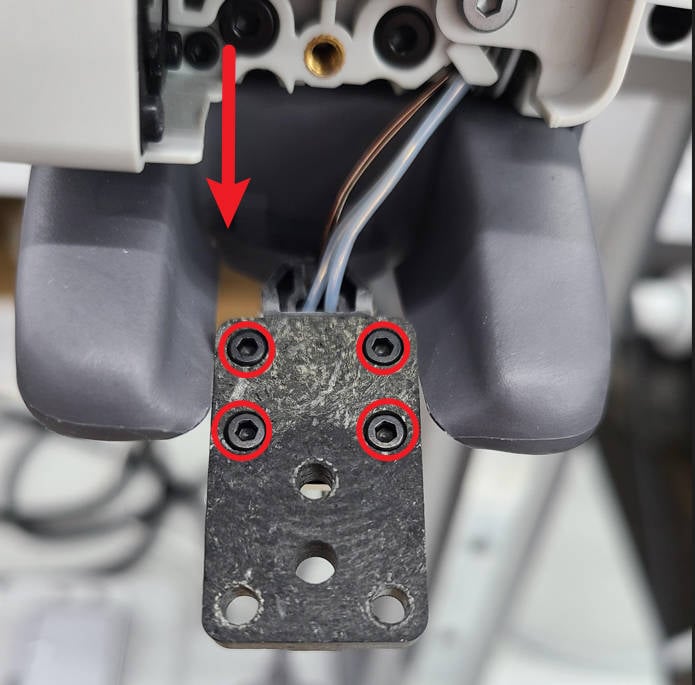
b. If the problem is still not resolved after complete leveling, it is possible that the hotend heating assembly screw is loose, or the lower part of the hotend is stripped out, causing the hotend to be pushed down some distance by the extrusion force to get closer to the heat bed. It is recommended that you refer to the wiki and re-tighten the hotend heating assembly screw: A1 Series First Layer Print Issues, and pull the hot end up and down slightly by hand to check whether the lower part is loose.
|
Tighten the hotend heating assembly screw |
Check whether the lower part of the hotend is loose |
|---|---|
 |
 |
3. When reinstalling the hotend, make sure to fasten the buckle of the heating assembly correctly (see the figure below), and manually check whether the hotend has obvious shaking. Note that if the heating assembly is not properly fastened or the clamp is damaged so that the hotend cannot be fixed, the nozzle will still be close to the heatbed or even scratch the build plate when printing.

|
Fasten the heating assembly correctly |
Fasten the heating assembly incorrectly |
 |
 |
¶ Hotend clogged
If you move the toolhead to the position of the purge wiper to test the extrusion, it still can not extrude the filament smoothly, there is a high probability that the hotend is clogged. Usually, you can also observe that the extruder gears do not rotate smoothly, and the sound of “clicking” and jumping gears keeps coming from the extruder. You can first remove the hotend, and enable maintenance mode in the printer settings - maintenance page. Then set the nozzle temperature to 170°C (the lowest extrudable temperature) and test the extrusion manually. If the extruder can extrude the filament smoothly without the hotend, it means the hotend is clogged, and you can refer to this wiki to cold-pull and unclog the hotend: A1 mini Nozzle Unclogging Guide. If you still cannot unclog the hotend, you can try replacing the hotend with a new one.
|
Extruder gear skipping |
Test extrusion without hotend |
|---|---|
 |
 |
¶ Filament slipping
During the loading or printing process, if you encounter the phenomenon that the filament cannot be extruded at all, but the extruder gears can rotate smoothly, it is possible that the extruder gears have not completely grabbed the filament, or the gears and the filament have slipped, and there are several possibilities.

1. The gear and filament slipped. The filament itself may be easily worn, Or the hot end is clogged, resulting in excessive extrusion resistance, and the filament is worn out by the gear.
Please turn off the printer first and follow the steps below to remove the filament and check for abrasive traces.
|
Press the cutter to cut the filament manually |
Press and hold the driven gear bracket to widen the gap between the gears and then pull out the filament |
A pit can be found on the top after removing the filament |
|---|---|---|
 |
 |
 |
Try feeding with another roll of filament to see if it can be extruded smoothly. If you can only see the gear rotating normally without filament extrusion when using any filament, please refer to the troubleshooting method above to check if the hot end is clogged. If only a certain filament is prone to wear, it may be a problem with the filament itself. We recommend that you replace it with another filament for printing. Some materials, such as PLA Aero, are more susceptible to gear wear and slip.
- If the hotend is not clogged and the filament is not worn out by the gears, the gear always turned normally but did not extrude the filament, it is possible that the driven wheel is not mounted properly and the gap between the gears is too large, so the gears cannot grab the filament.
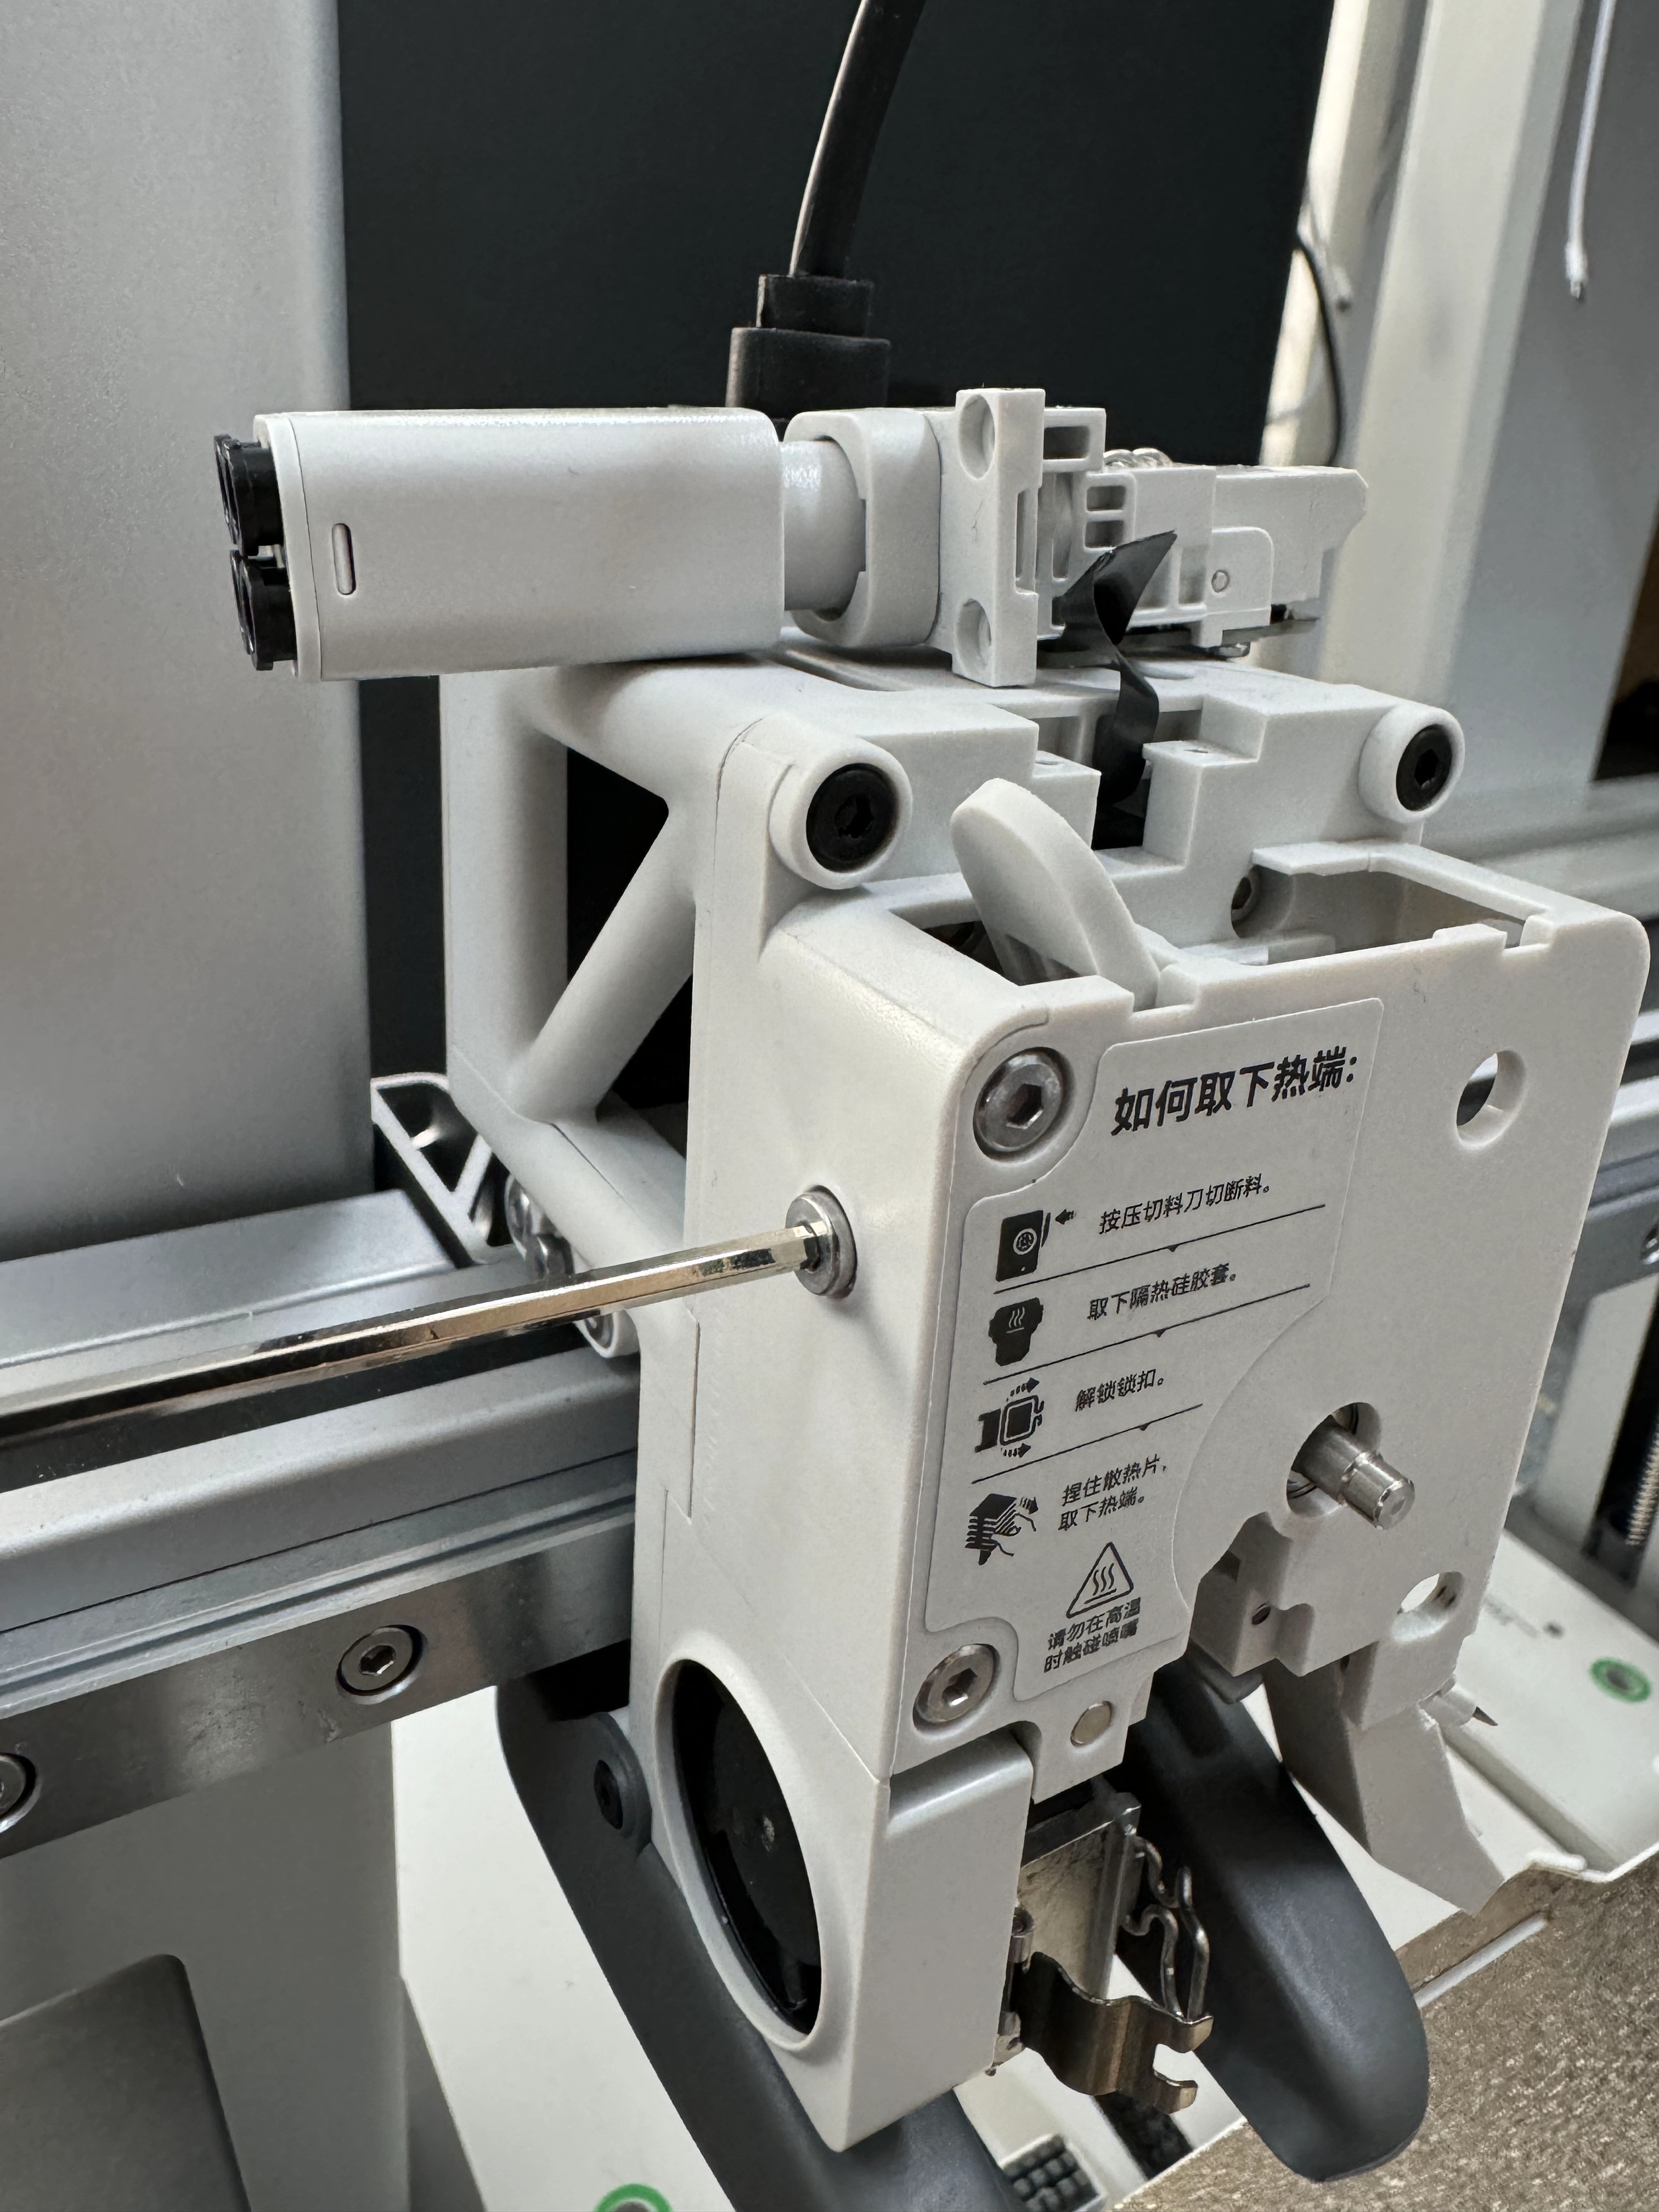
You can disassemble the extruder to check if the spring and metallic cap are installed correctly, and if the screw on the side are locked. If the side spring does not press the driven wheel bracket tightly, it will cause the gap between the driven wheel and the extrusion gear to be too large, making it impossible to fully grab the filament. As a result, the gear will spin freely when extruding. The complete steps for disassembling and assembling extruder gears can be found in the wiki: A1 series extruder cleaning tutorial.
|
Ensure that the metallic cap and spring inside the extruder are installed correctly |
Ensure that the screws on the side of the toolhead are locked in place |
|---|---|
 |
 |
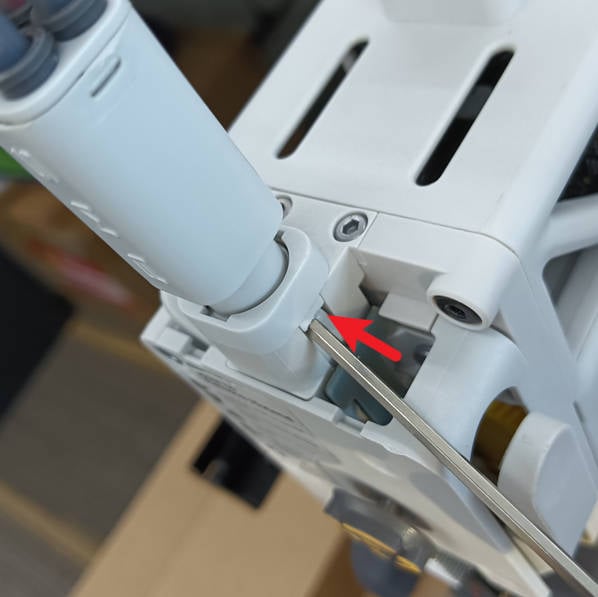
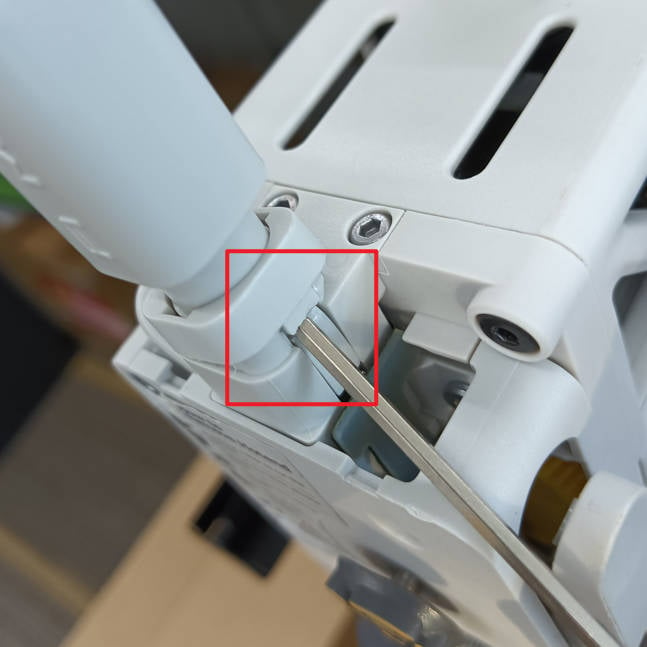
3. Multiple filaments are stuck in the filament hub, causing the filament cannot be extruded smoothly. Please check if there is more than one filament inserted into the hub, or if there is any broken filament inside the hub.
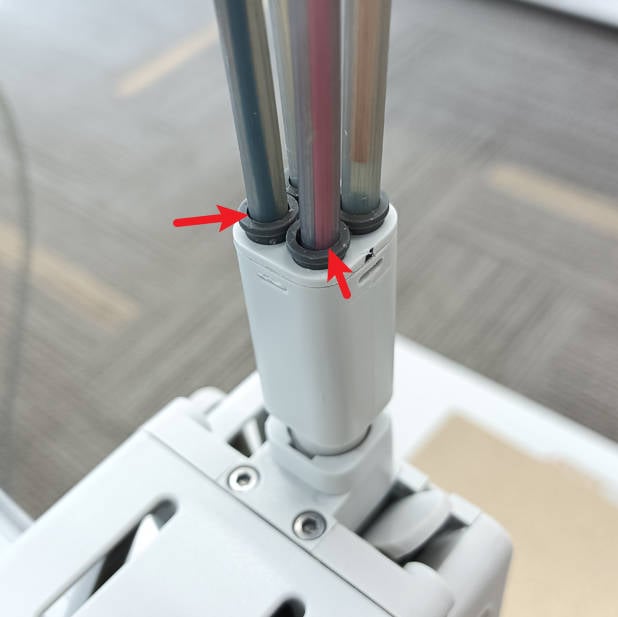
You can also refer to the following steps to disassemble the hub and check if any filament is broken inside.
 |
 |
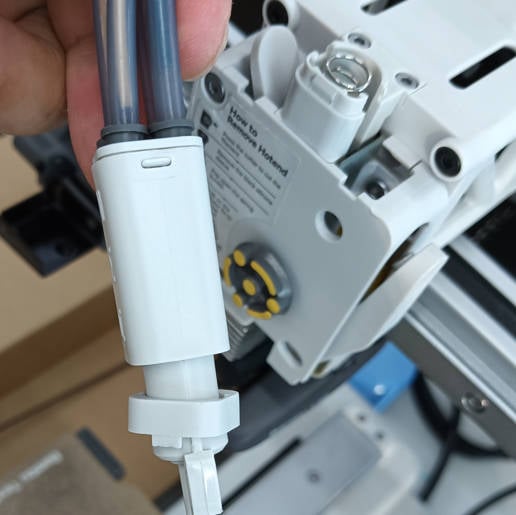 |
Then manually pull the filament back and forth to confirm that the internal channel is unobstructed.
 |
 |
¶ Extruder gear or motor abnormality
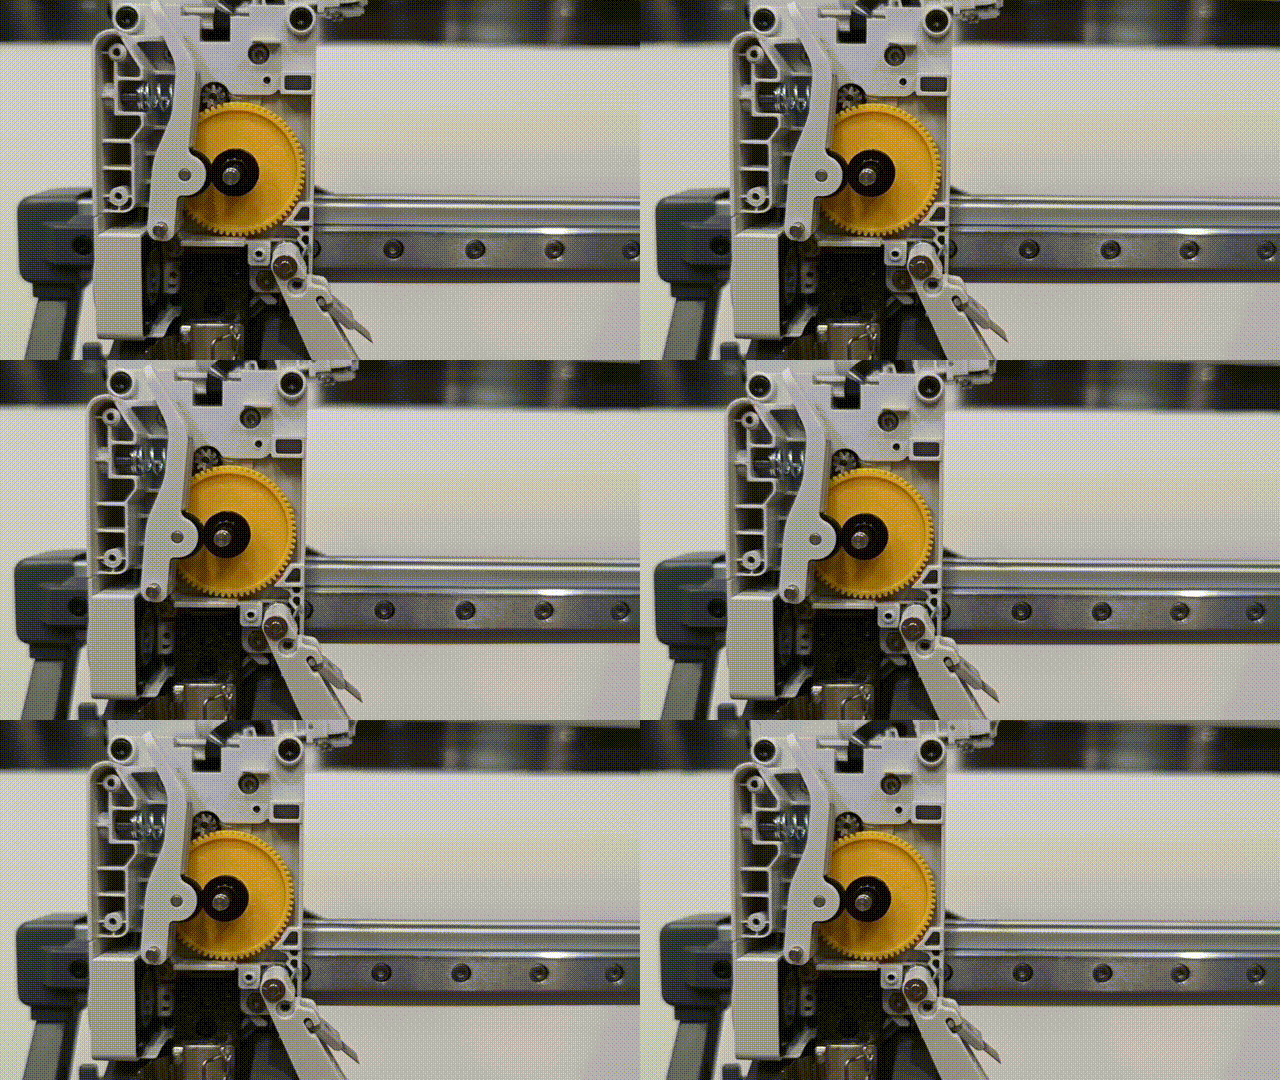
The hotend is not clogged, but by observing the gear of the extruder, it is obvious that the gear rotates abnormally or stops rotating, resulting in the inability to extrude the filament smoothly. You can disassemble the extruder and observe whether the extruder motor rotates smoothly and whether the yellow gear is worn or missing teeth.
Please refer to this wiki to disassemble the extruder: A1 series extruder cleaning tutorial.

¶ Abnormal extrusion when using AMS lite
If extrusion is normal when printing with an external spool, but when using AMS lite, there are often "extrusion failure" or "unable to extrude filament" errors when feeding or printing, there are several possibilities:
1. The filament is not suitable for printing with AMS lite, because when printing with AMS lite, the feed resistance is larger than the external spool, and some materials and extruder gear are easy to slip (such as Aero), and some materials are too soft (such as TPU), which is not suitable for printing with AMS lite. It is recommended to use an external spool for printing;
2. If the abnormal extrusion only occurs in a certain slot, it may be due to the following reasons:
a. If the odometer is stuck and experiencing excessive resistance, the extruder may have difficulty pulling the filaments smoothly, and the odometer may not rotate normally. You can insert the filament into the four slots in the AMS lite and manually pull the filament back and forth to see if the slots that often report errors have much greater resistance than the others. If yes, the odometer may be jammed and the feeding funnel needs to be replaced.
 |
 |
|
odometer |
Pull the filament back and forth to feel whether the resistance is normal |
b. When using AMS lite feed, the success of extrusion is determined by the odometer. When AMS lite sends the filament to the extruder, and the extruder extrudes a certain amount of filament, the odometer also needs to travel a certain distance to determine successful extrusion. If you observe that the filament is extruded normally but still reports extrusion failure error, it is likely due to the odometer failure, so it is judged that the filament has not been extruded. Maybe the feeding funnel needs to be replaced.
¶ End notes
We hope that the detailed guide we shared with you was helpful and informative.
We want to ensure that you can perform it safely and effectively. If you have any concerns or questions regarding the process described in this article, we encourage you to reach out to our friendly customer service team before starting the operation. Our team is always ready to help you and answer any questions you may have.
Click here to open a new ticket in our Support Page.
We will do our best to respond promptly and provide you with the assistance you need.