¶ Important Note
The printers can eject the micro SD card, just like we eject the micro SD card on a computer.
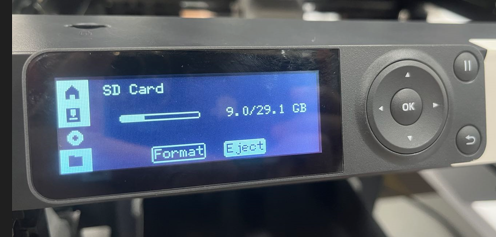
When you need to remove the micro SD card from the P1 and A1 series, please select eject in advance; otherwise, frequent hot plugging and unplugging may cause the micro SD card to be damaged or corrupted.
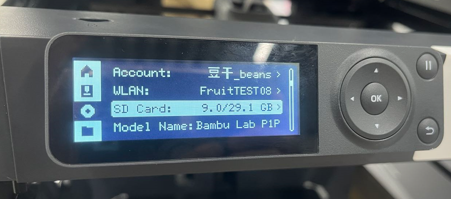
On P1 series printers, you can eject the SD card by navigating to Settings → SD Card → Eject
 |
 |
¶ How can you print via a micro SD card?
The steps for printing from the micro SD card are available on this Wiki
¶ Printer requirements for SD card specifications
Our printers support a micro SD card of up to 2TB if formatted using the printer option, supported in FAT32 format.
We recommend that you use an SD card with a Class 10 or U1 (minimum write speed of 10M/S) grade or higher.
Note: SD card abnormalities may cause printing to be interrupted and the toolhead may remain in a certain position.
You can format the SD card by navigating to Settings → SD Card → Format

¶ How does the micro SD card work?
Our printer will only use 85% of the micro SD card's memory at most. When the memory of the micro SD card is occupied 85% or more, the video cannot be recorded. If the remaining micro SD card memory exceeds 15%, you can record printing videos until 85% of the micro SD card memory is occupied. After that, the new video will flush out the old video.
The printer supports FAT32 format only. For Windows, the default format would be exFAT if the micro SD Card storage is over 32GB, while there is no such limitation for Linux and Mac. If you want to use a 64GB to 2TB micro SD card, you could format it to FAT32 using a Linux or Mac system or the printer.
¶ If I send a plate to the micro SD card and use the print or reprint functions from the X1 screen, I don't get any notifications. Is there a setting that I'm overlooking?
You will only get notifications on the Handy app when you send a plate using the cloud from the Bambu Studio;
The printing through a micro SD card bypasses the cloud server. Therefore, it is not processed through the cloud; normally, you don't get any notification if you are using a micro SD card; that is currently how printing through a micro SD card works.
¶ With the P1 series printers, the Timelapse and Bed Leveling features cannot be selected when printing via the Micro SD. What should I do?
When the P1 Series starts the printing directly from the Micro SD, Timelapse, and Bed Leveling cannot be selected on the screen, so Bed Leveling is turned on by default and Timelapse is not turned on by default.