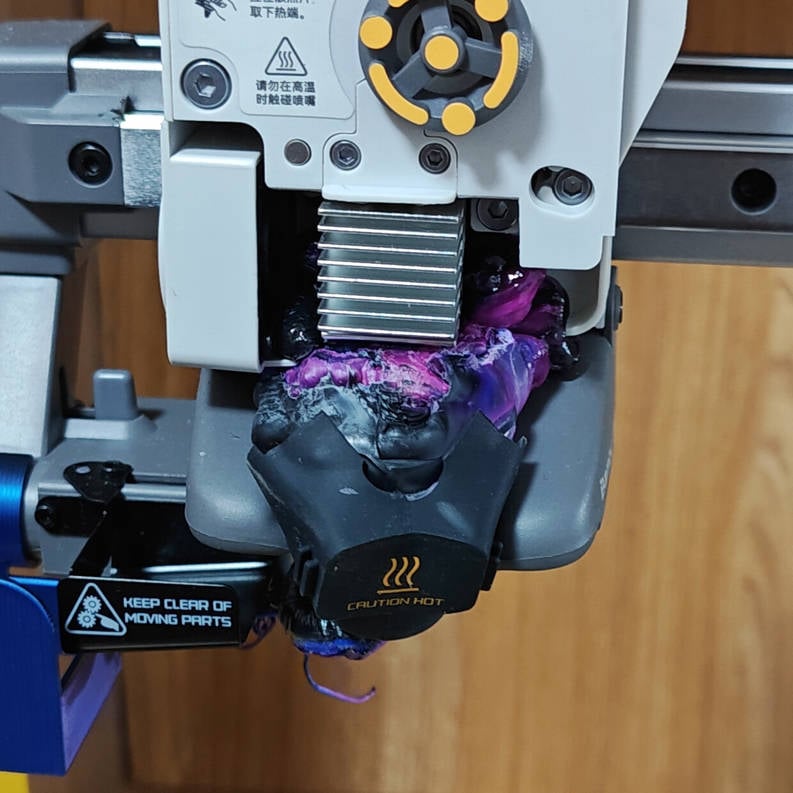
¶ Hotend Clumping
Hotend Clumping, also called Hotend Blob is a mass of plastic accumulated around the hotend. When the model detaches during the first few layers of printing for various reasons, it may adhere to the nozzle. As the nozzle continues to extrude, this can result in a more serious “clumping” issue.
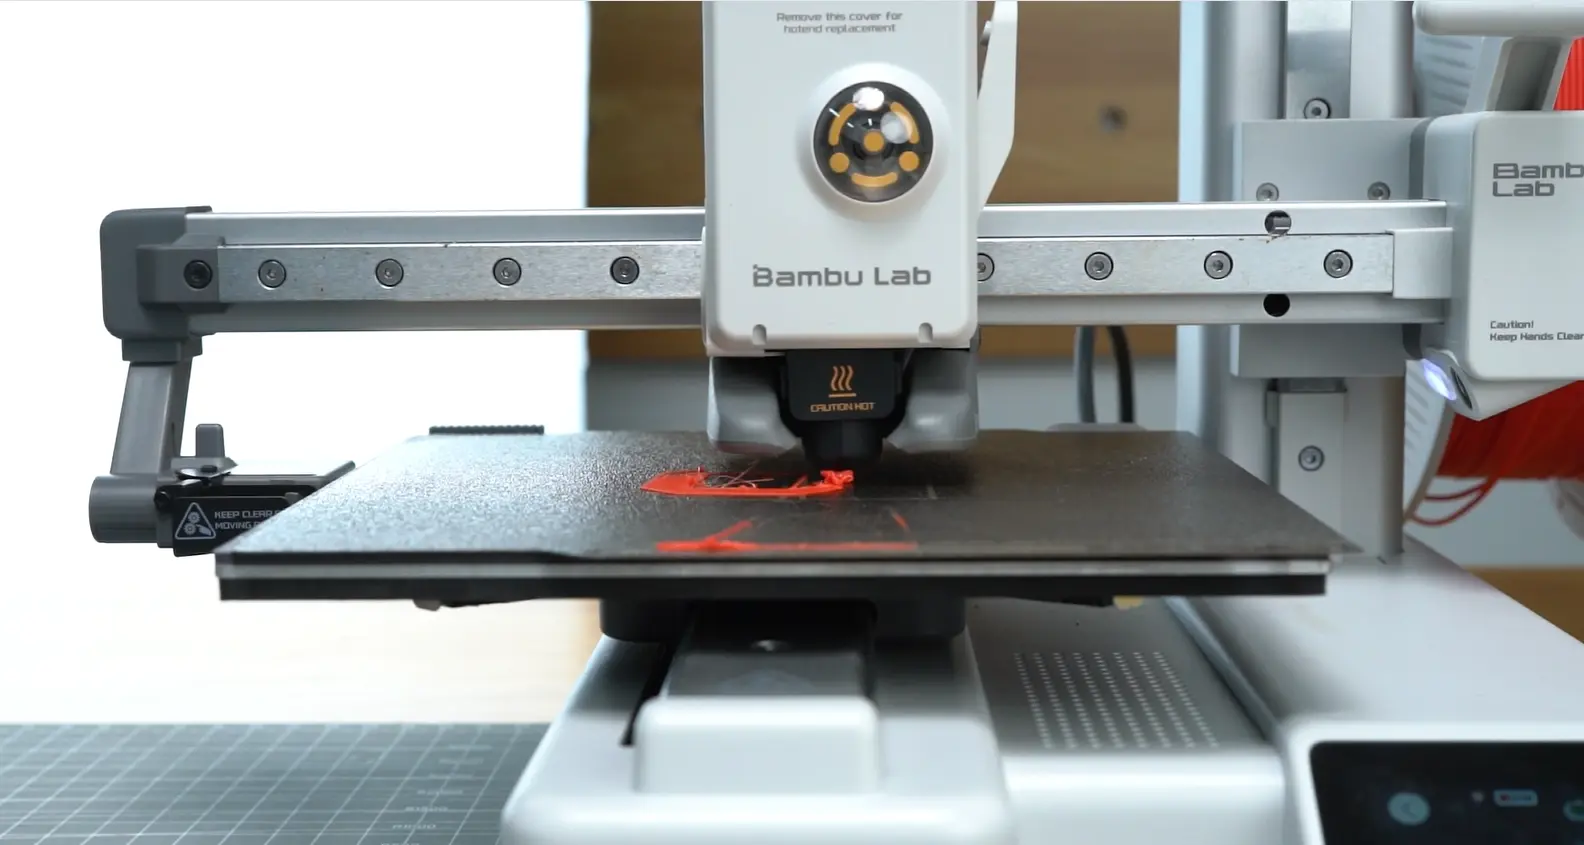
This can be one of the most challenging issues you may face when 3D printing. Removing it can be tricky, but there are methods you can try to clean it up.
In order to help and guide users to complete the cleaning operation, we have prepared this wiki, hoping to help you confirm the damage and reduce secondary damage to the parts on it.
 |
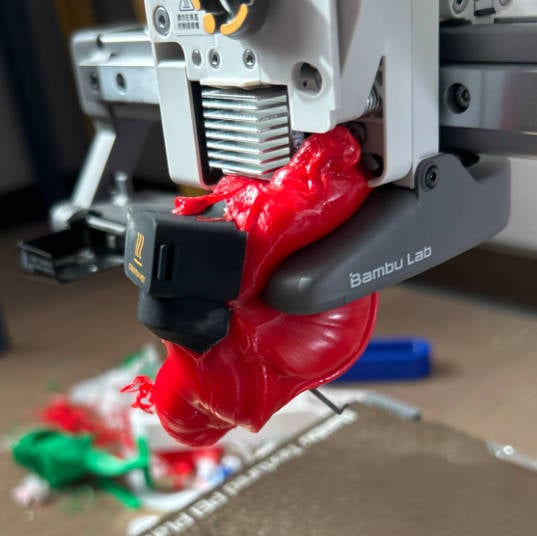 |
This problem usually occurs when the plate is not correctly cleaned before printing. We recommend following this Wiki article for guidance on how to clean the plate before starting a print to avoid this issue in the future.
¶ Video Guide
¶ Preparation
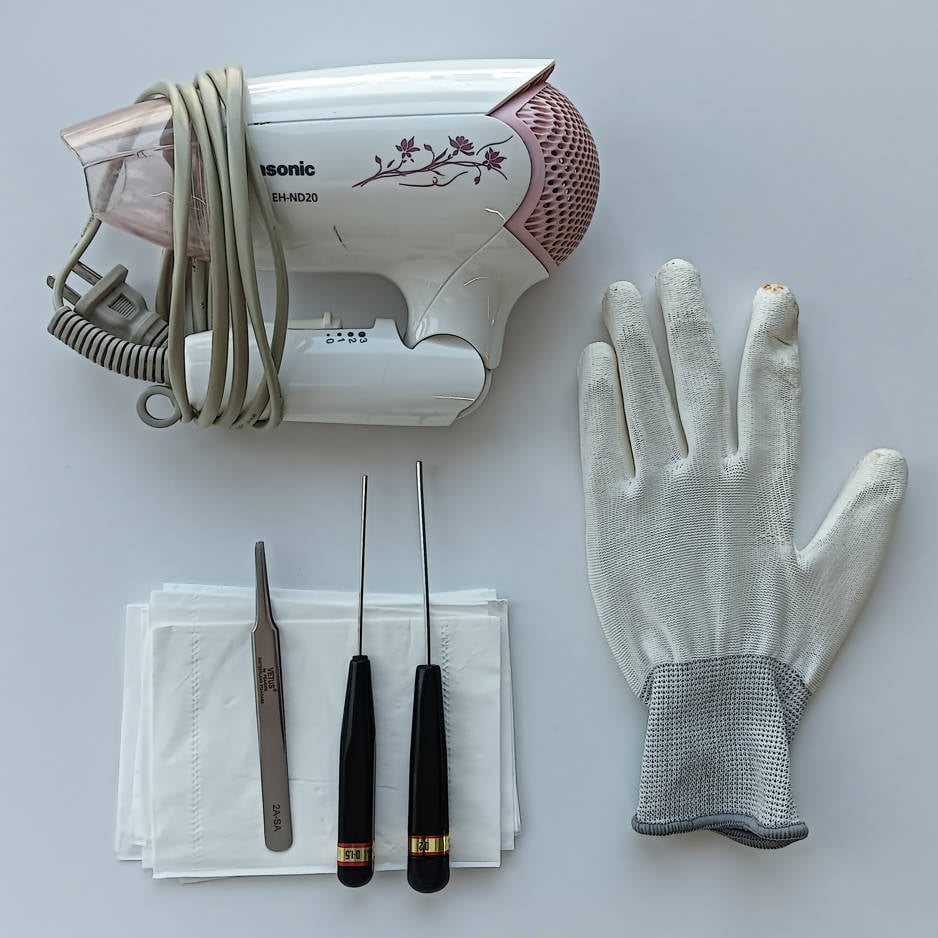
¶ 1. Tools
- Hair dryer (High-temperature setting)
- Flat head tweezers
- Paper
- Heat resistant gloves
- H1.5/H2.0 Allen key
¶ 2. Set the printer status
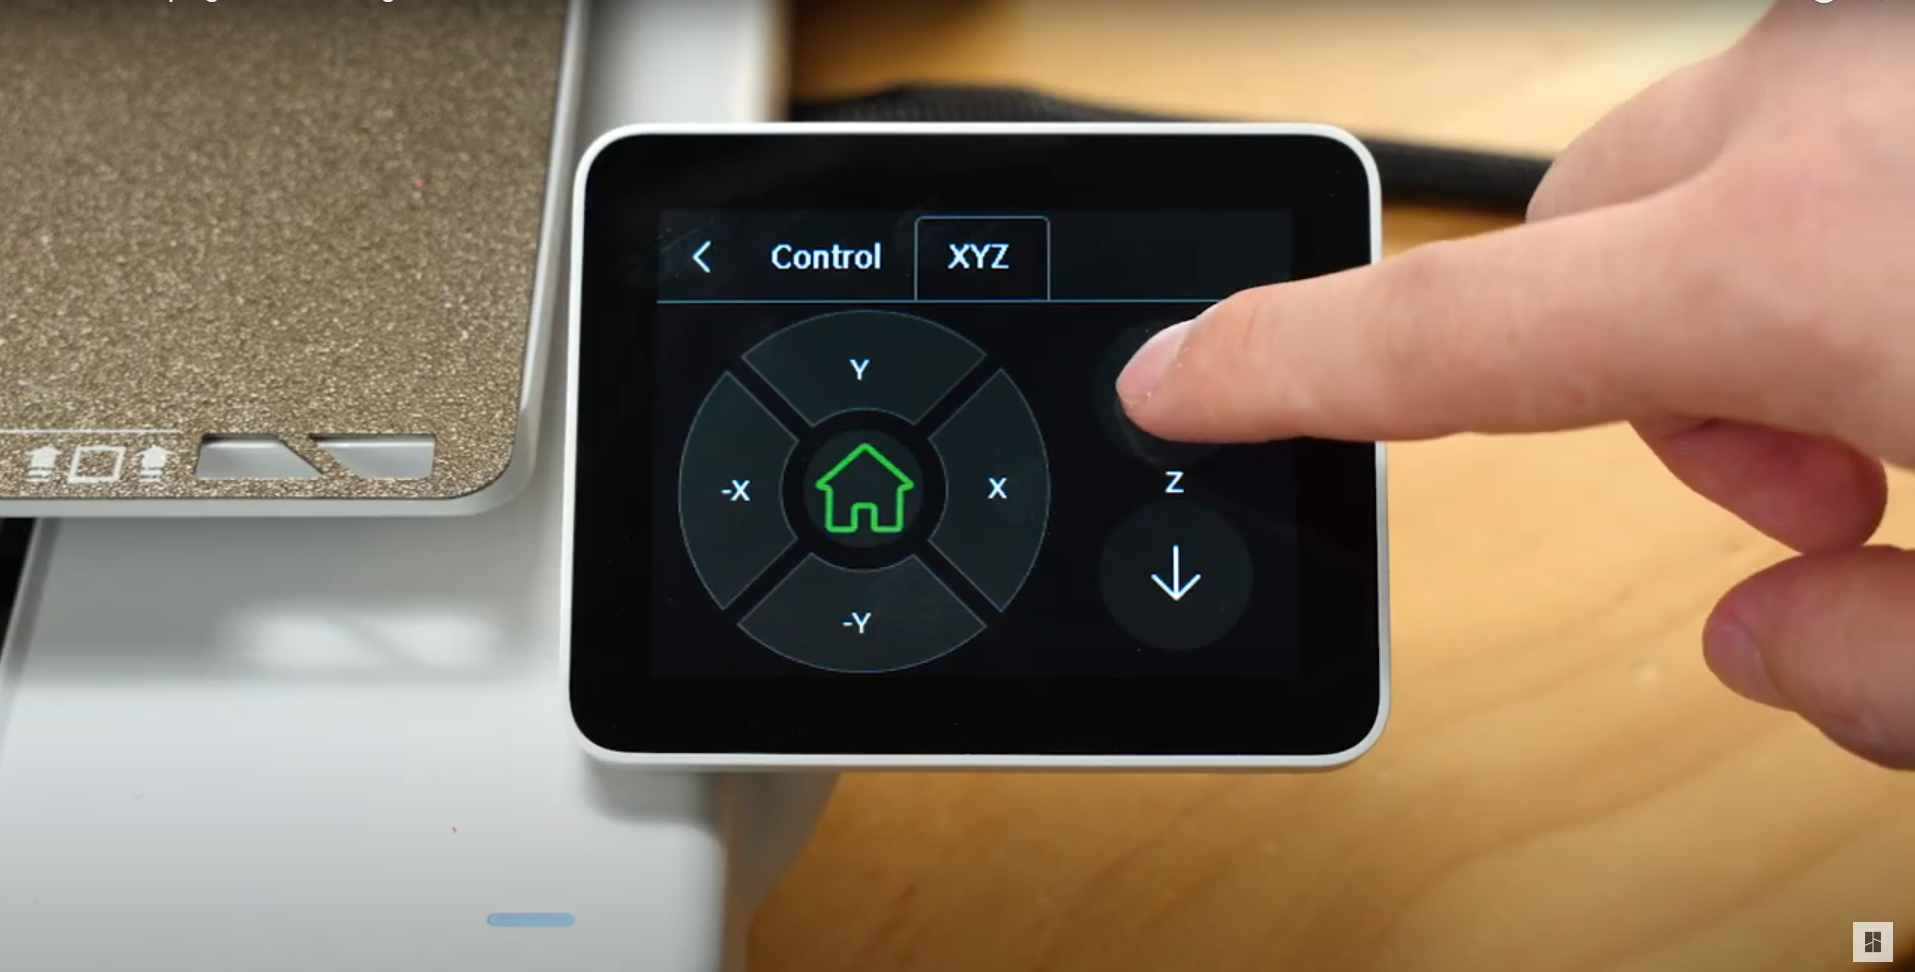
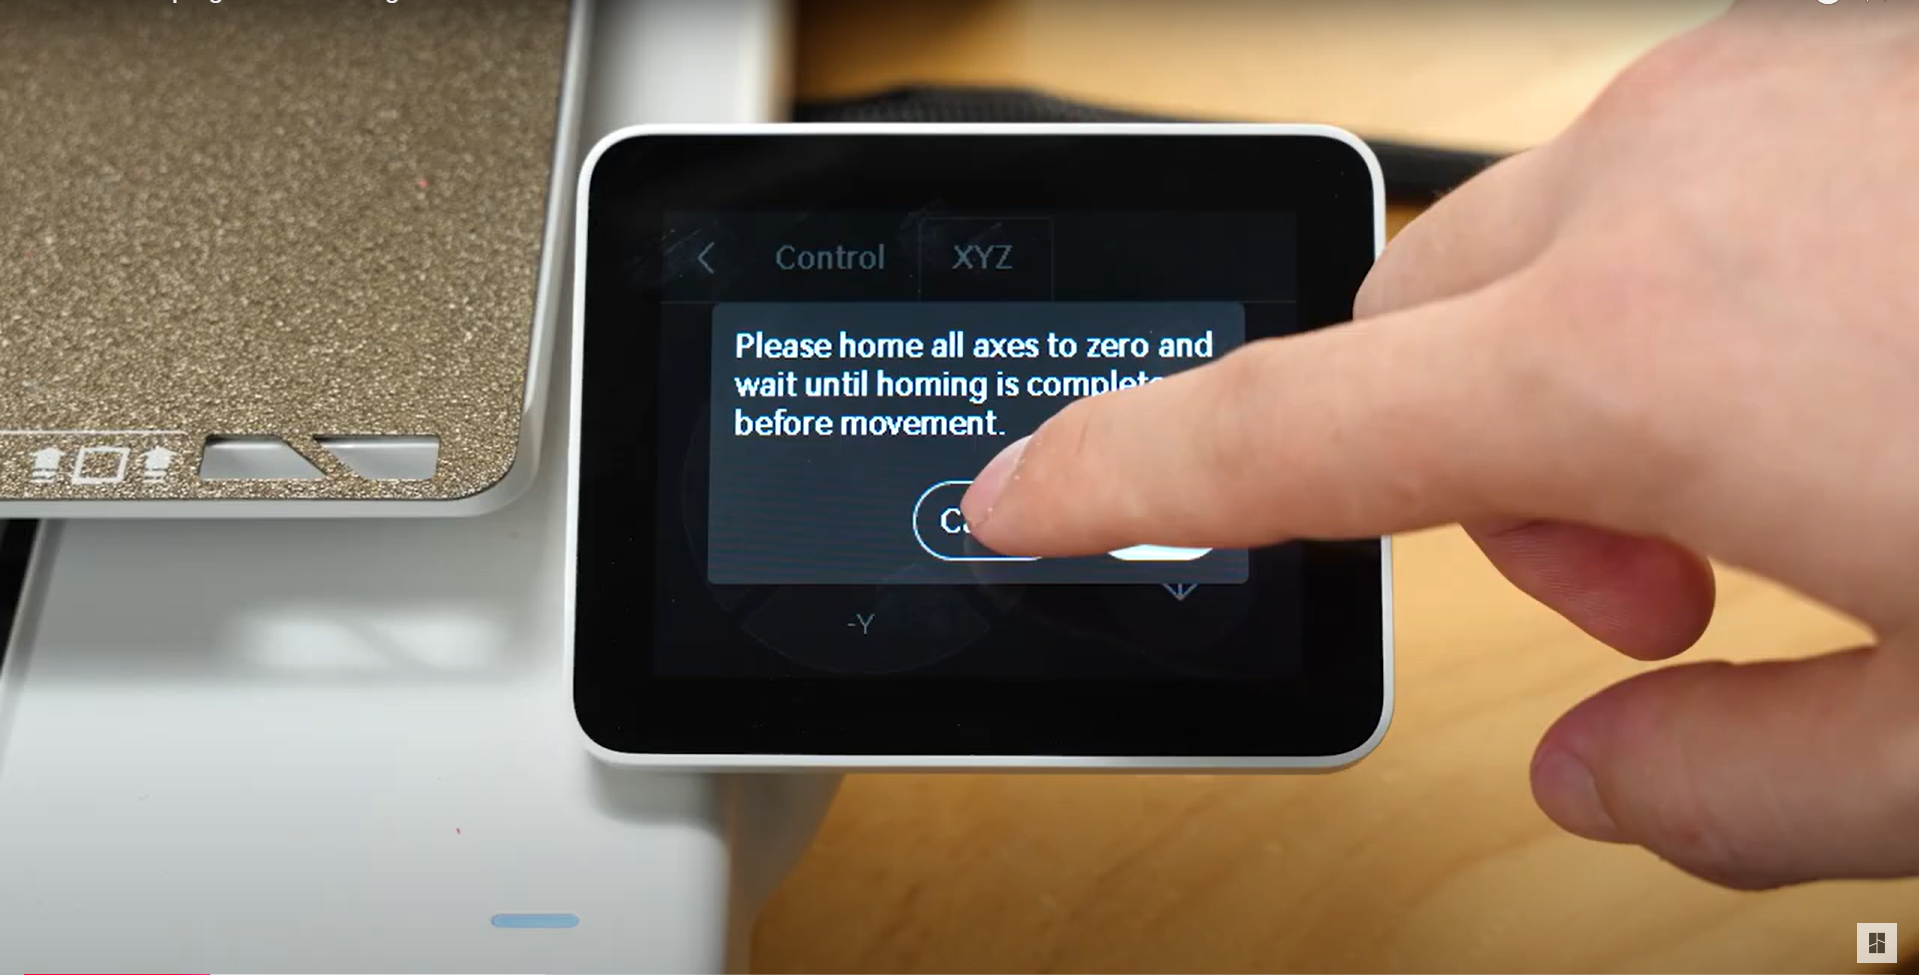
¶ Raise the X-axis and move the heatbed forward
To create more working space, raise the X-axis higher using the on-screen buttons.
 |
 |
 |
 |
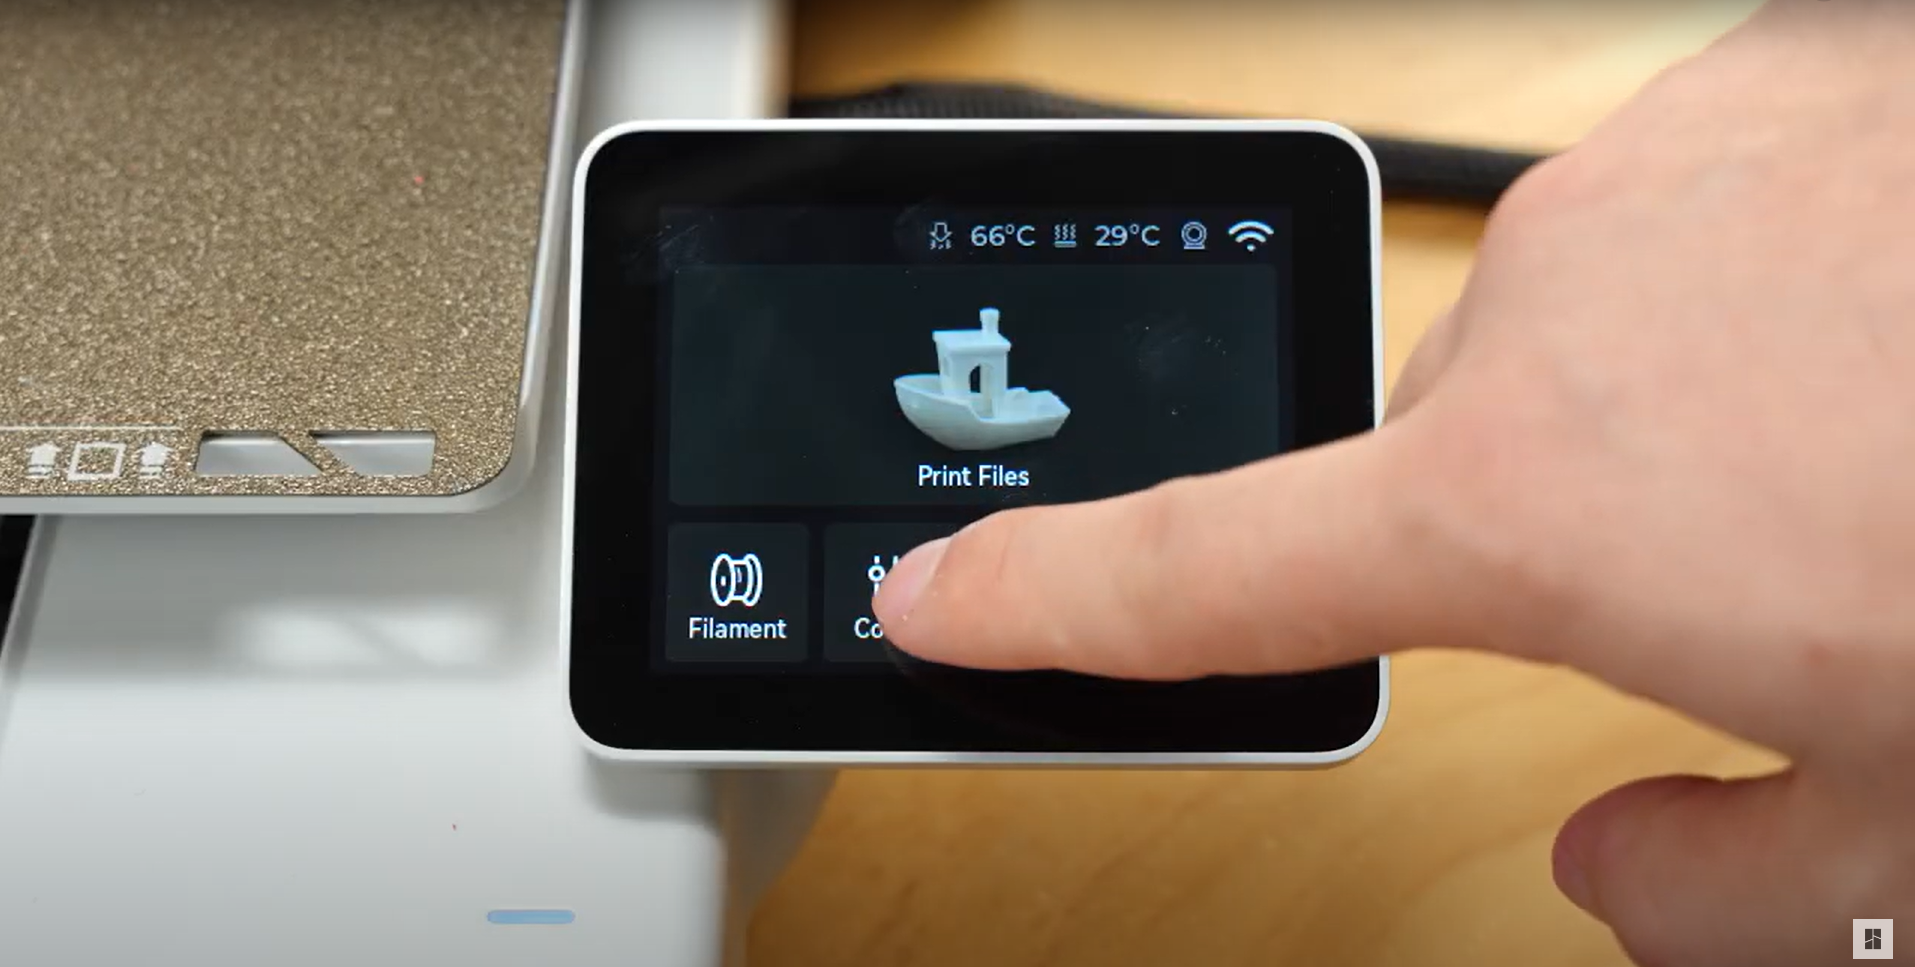
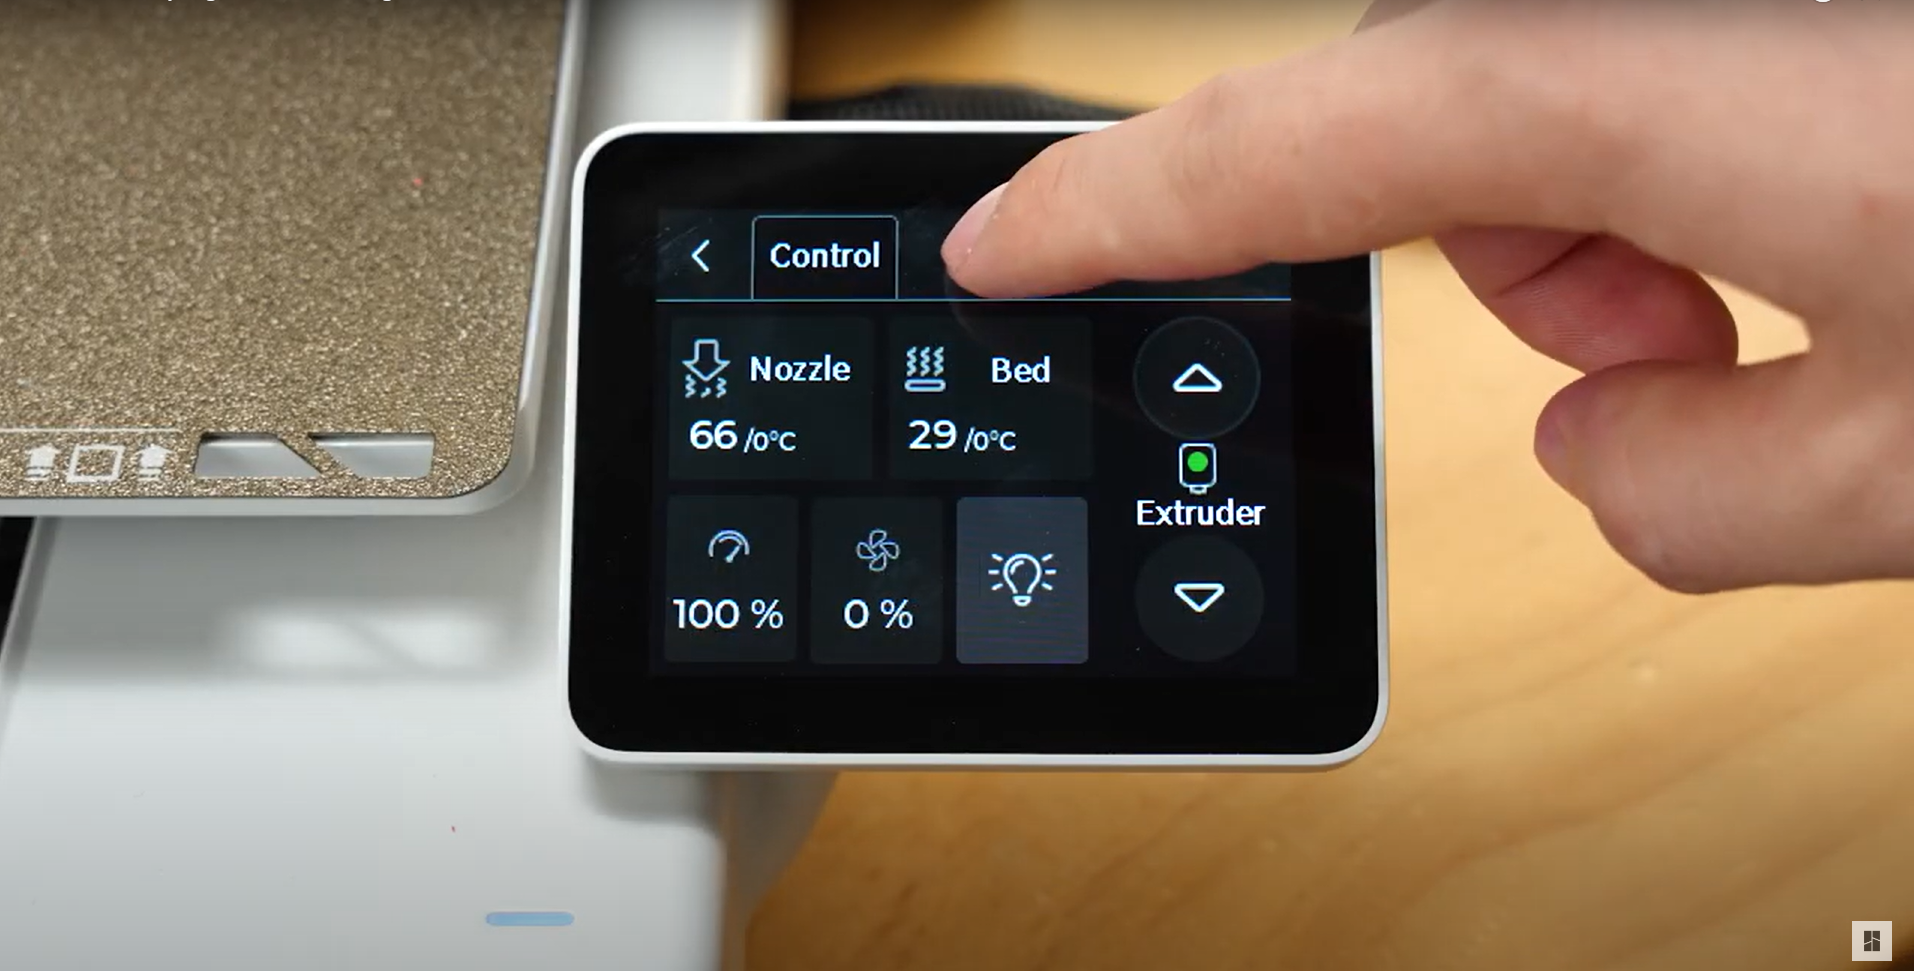
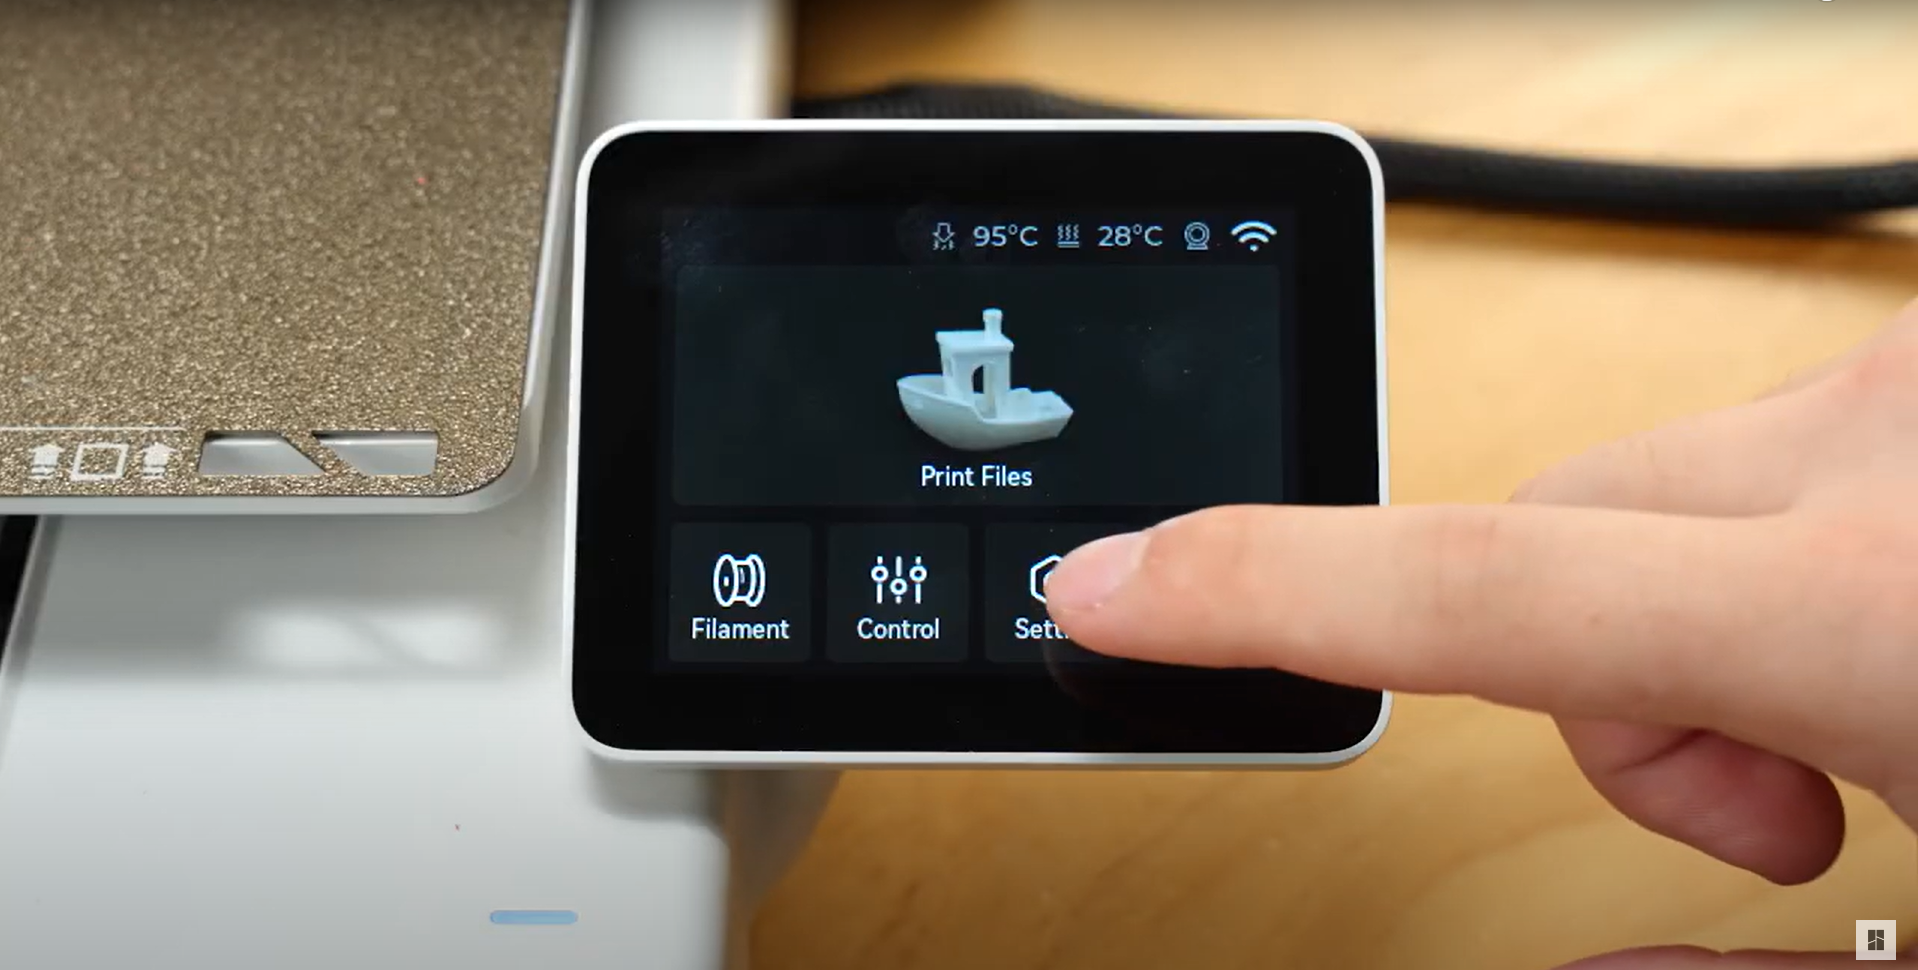
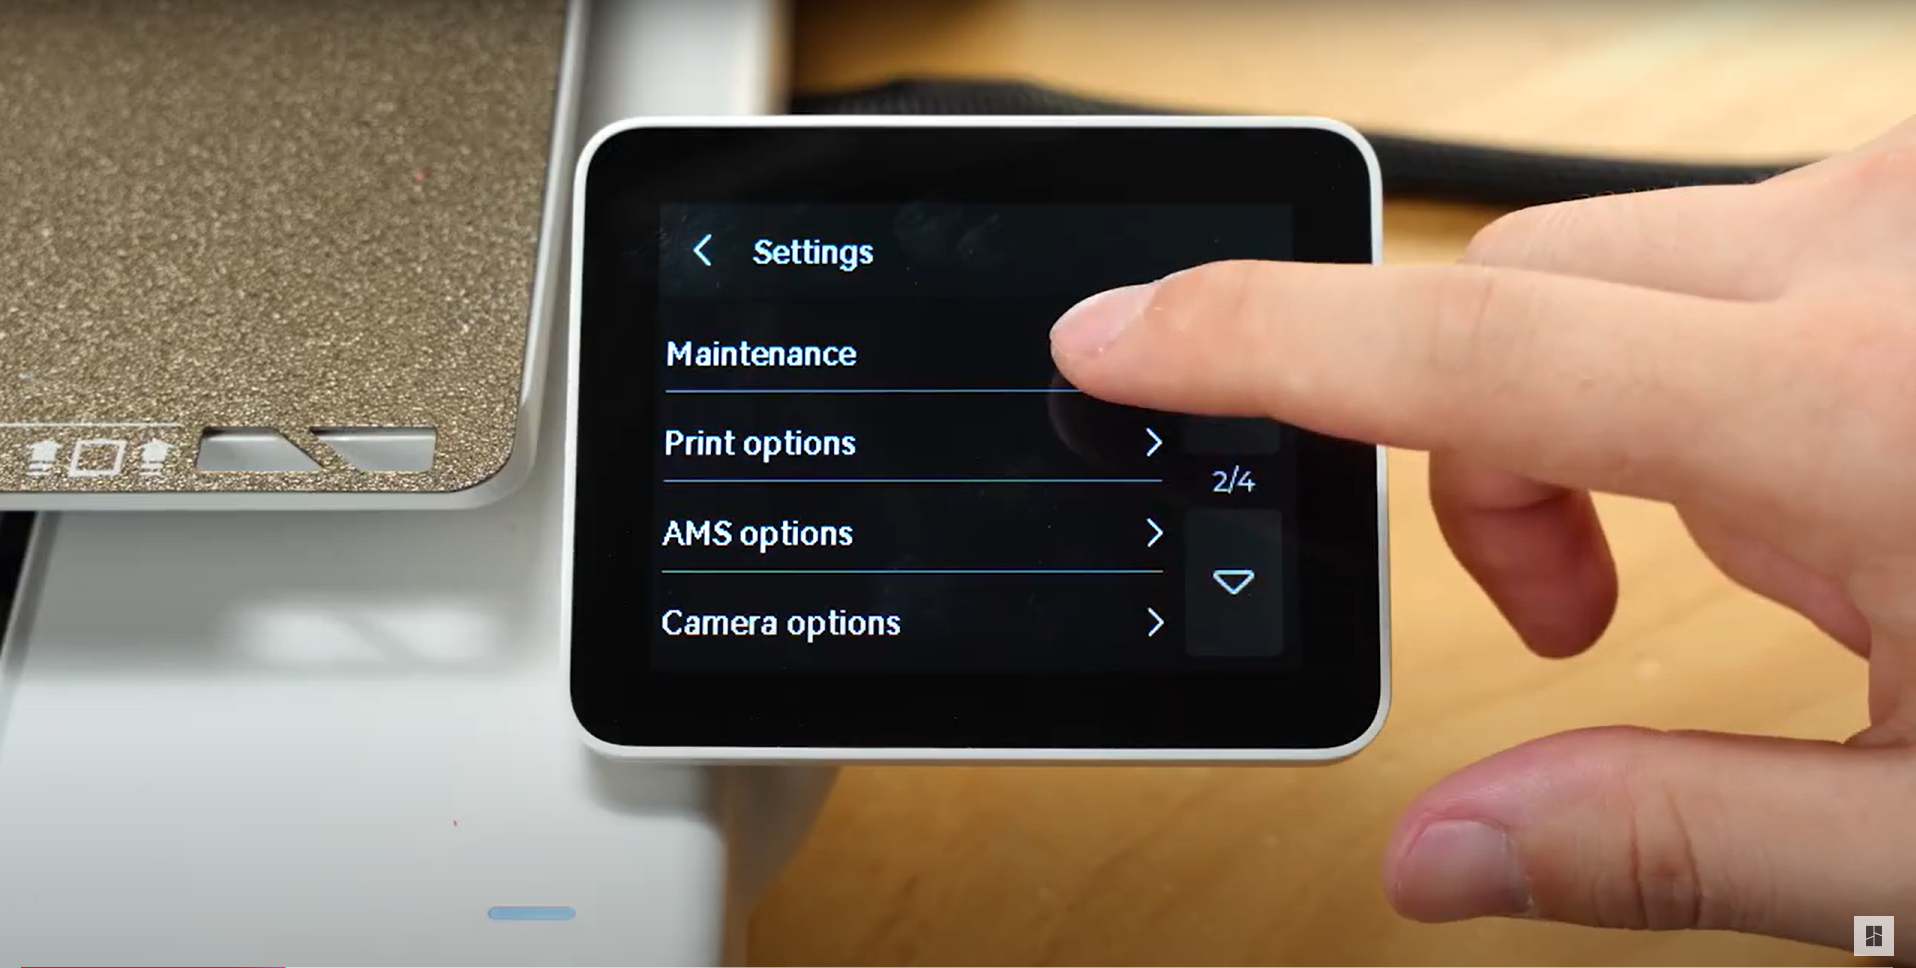
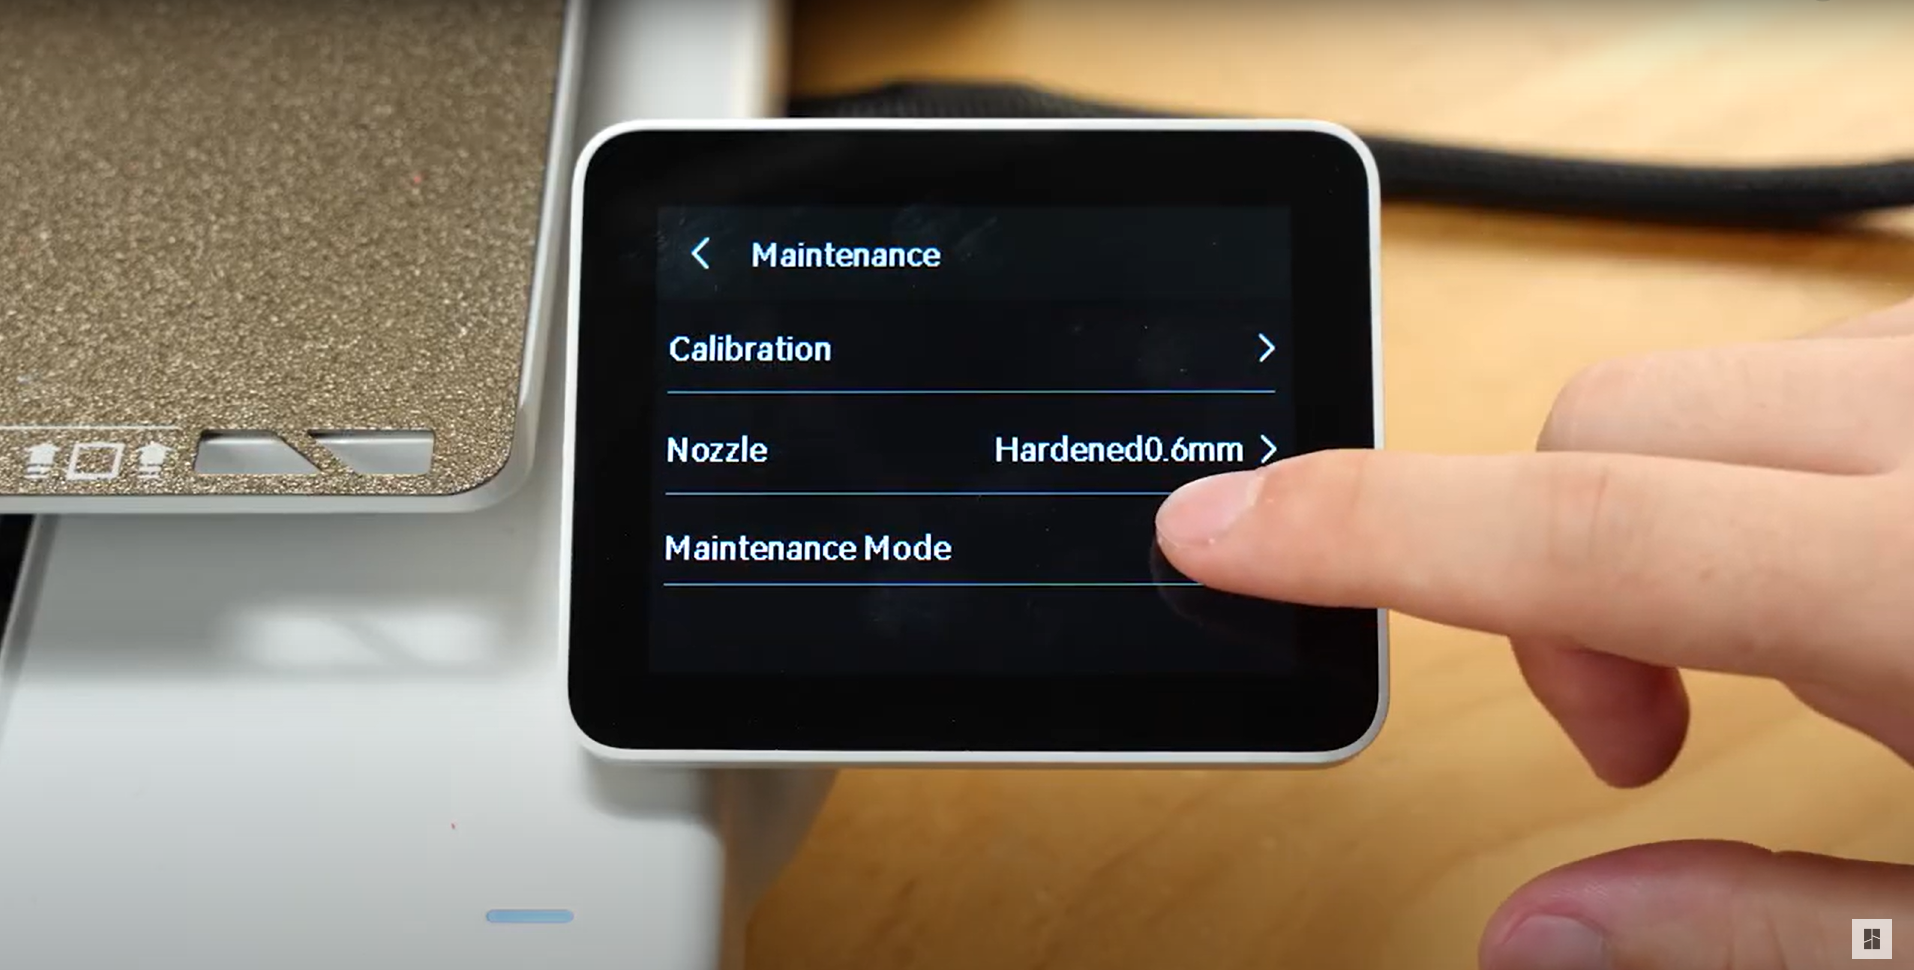
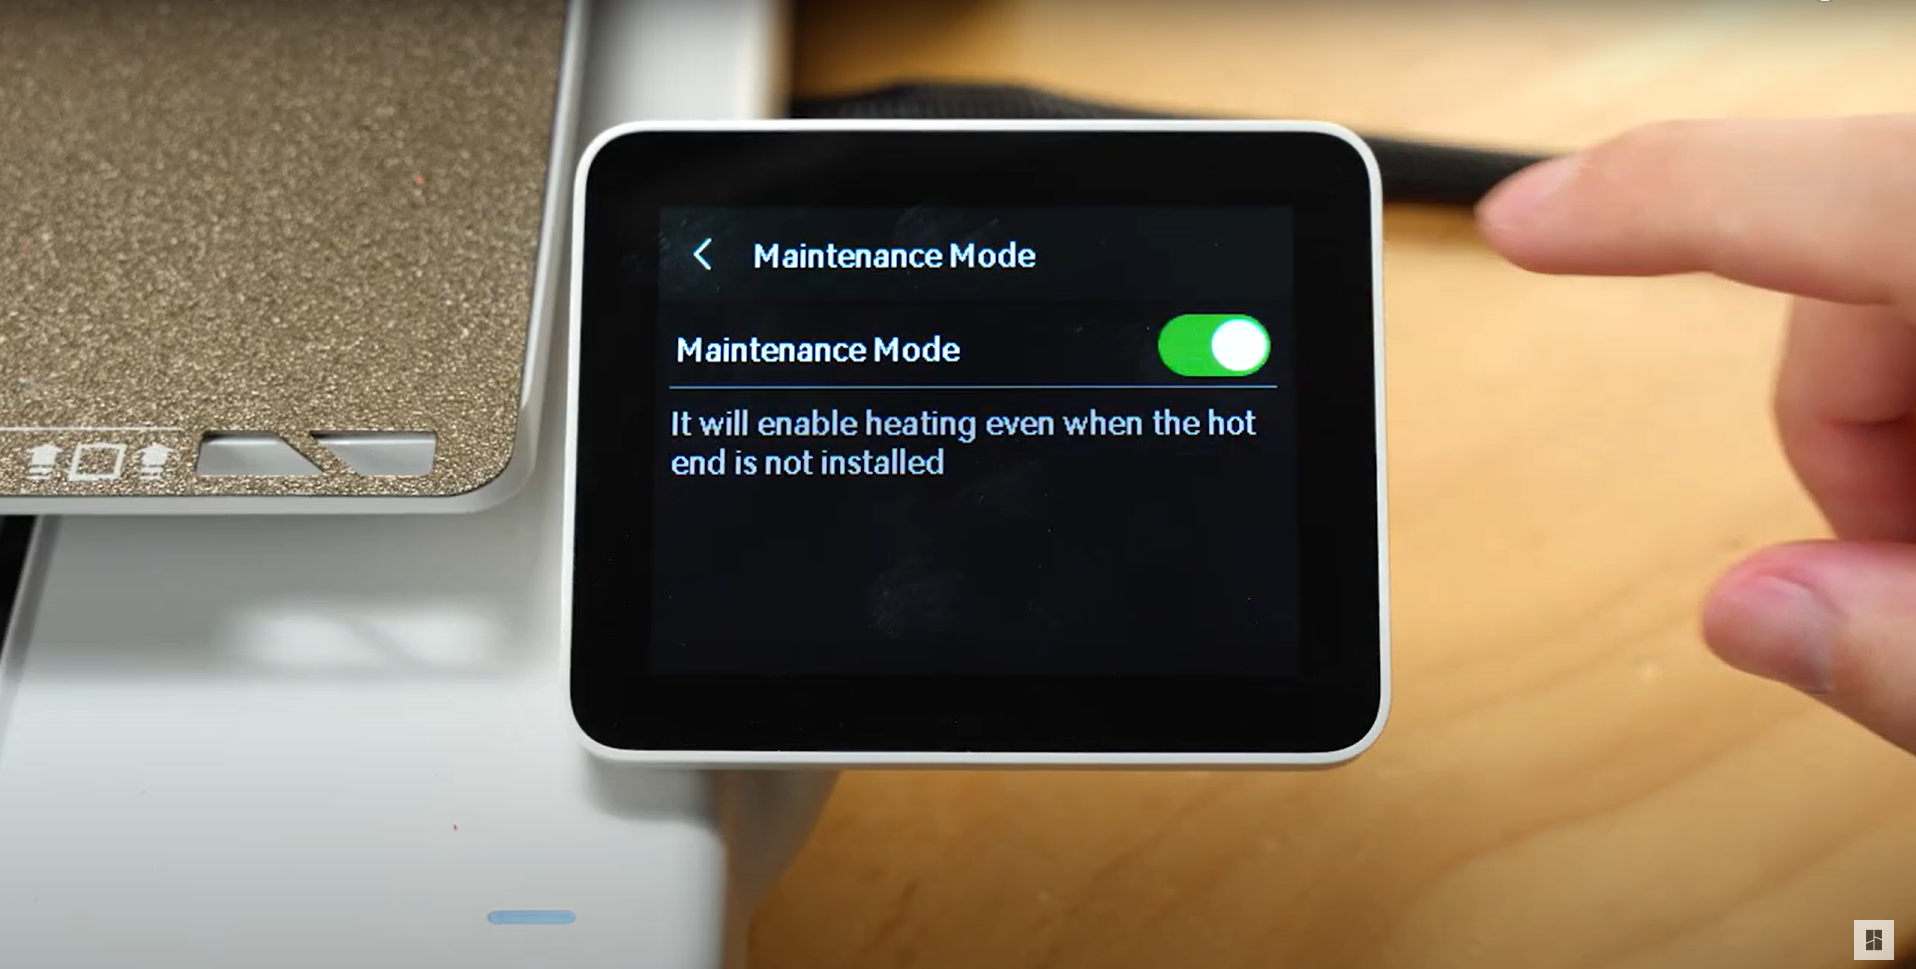
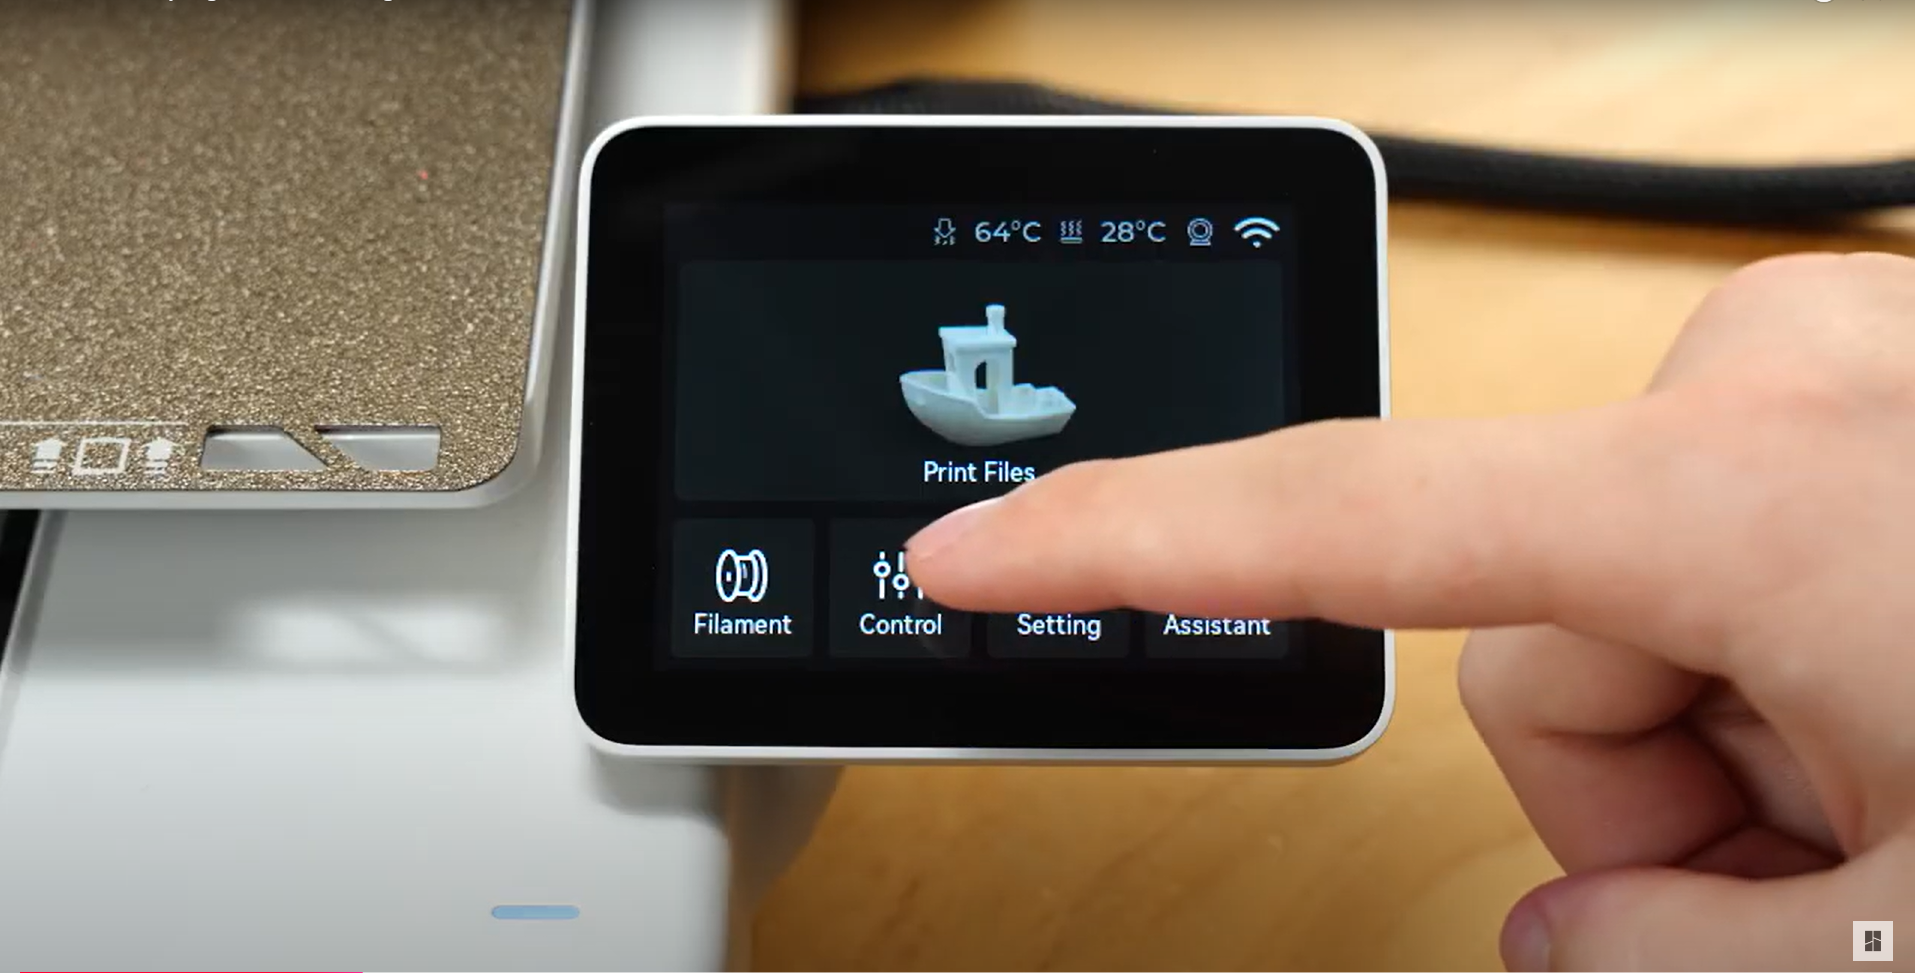
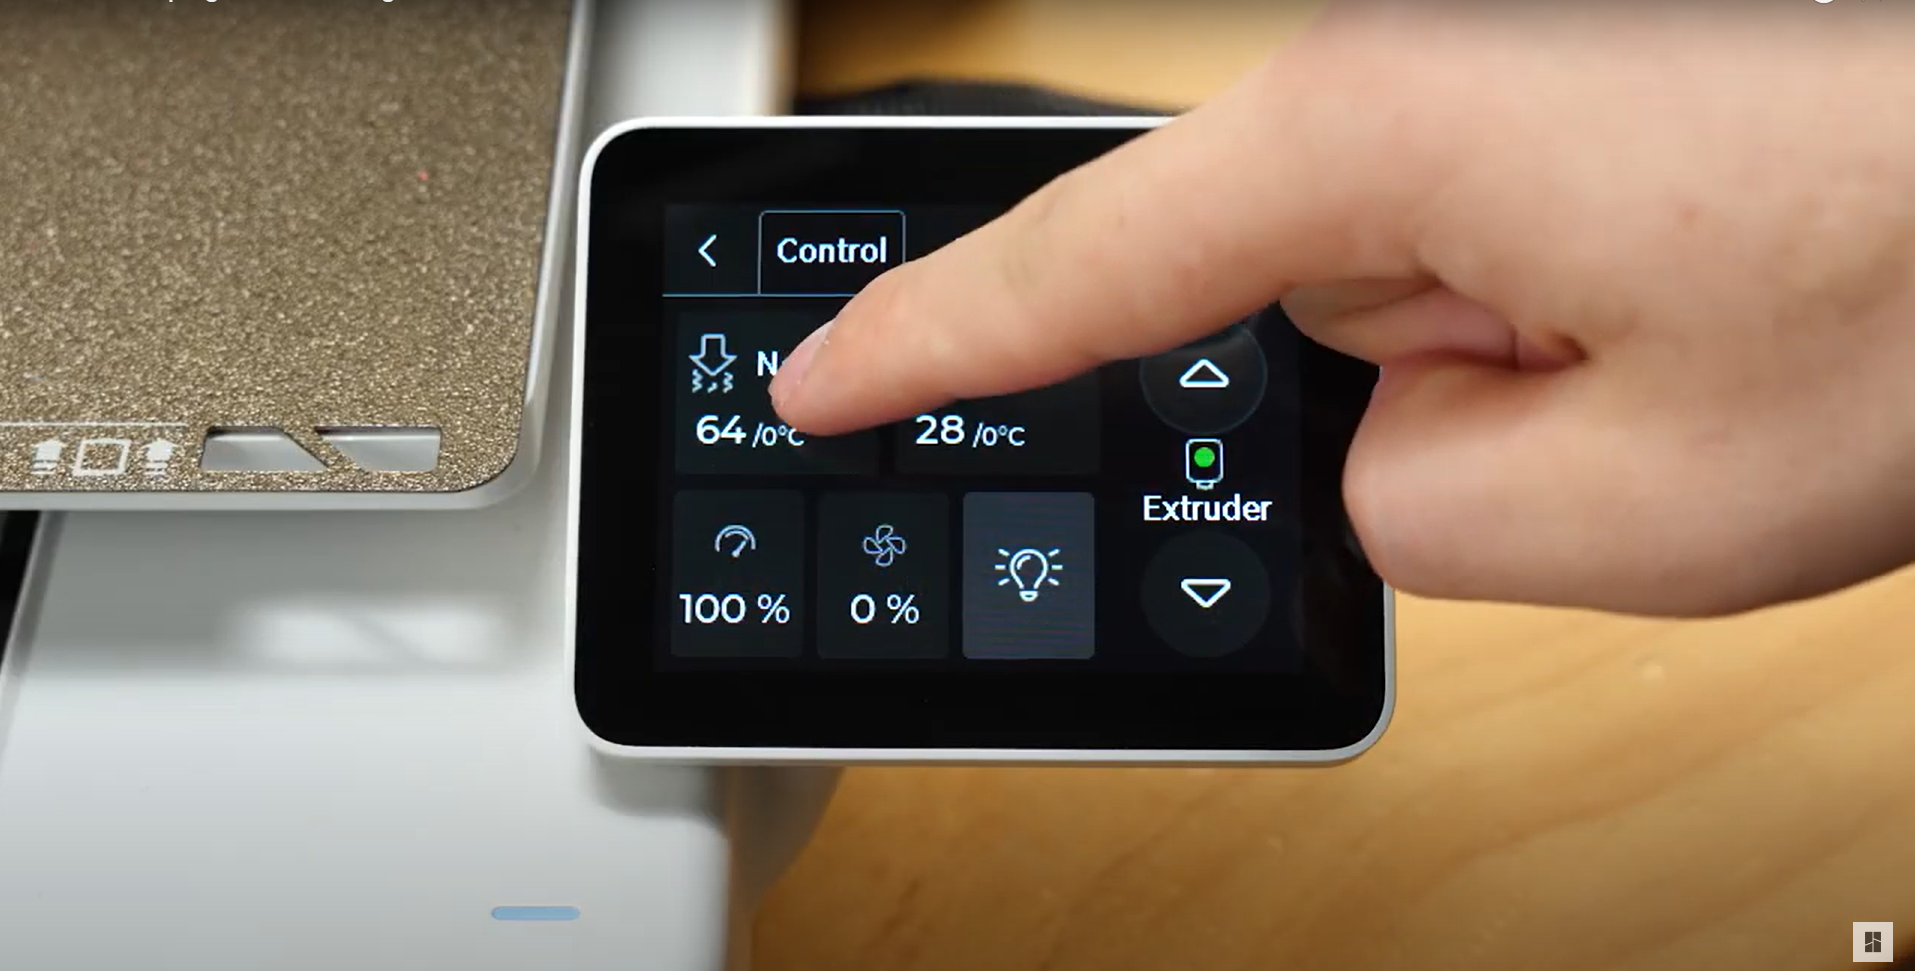
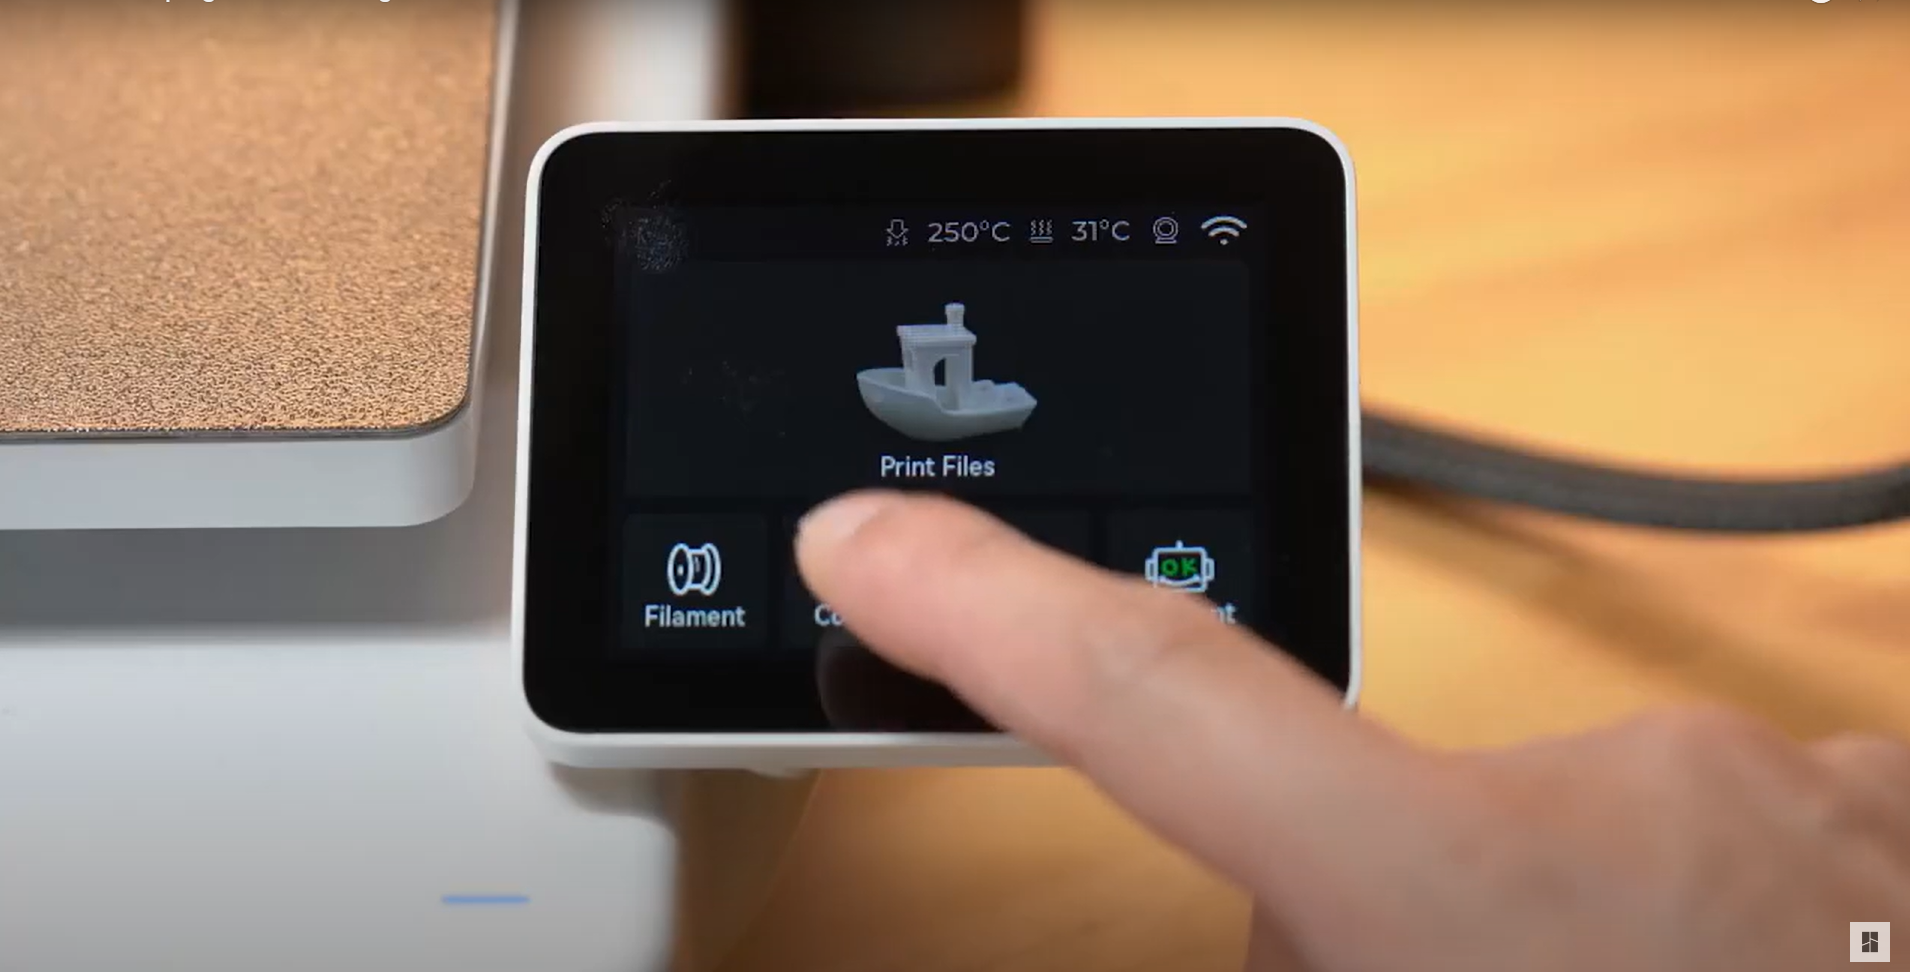
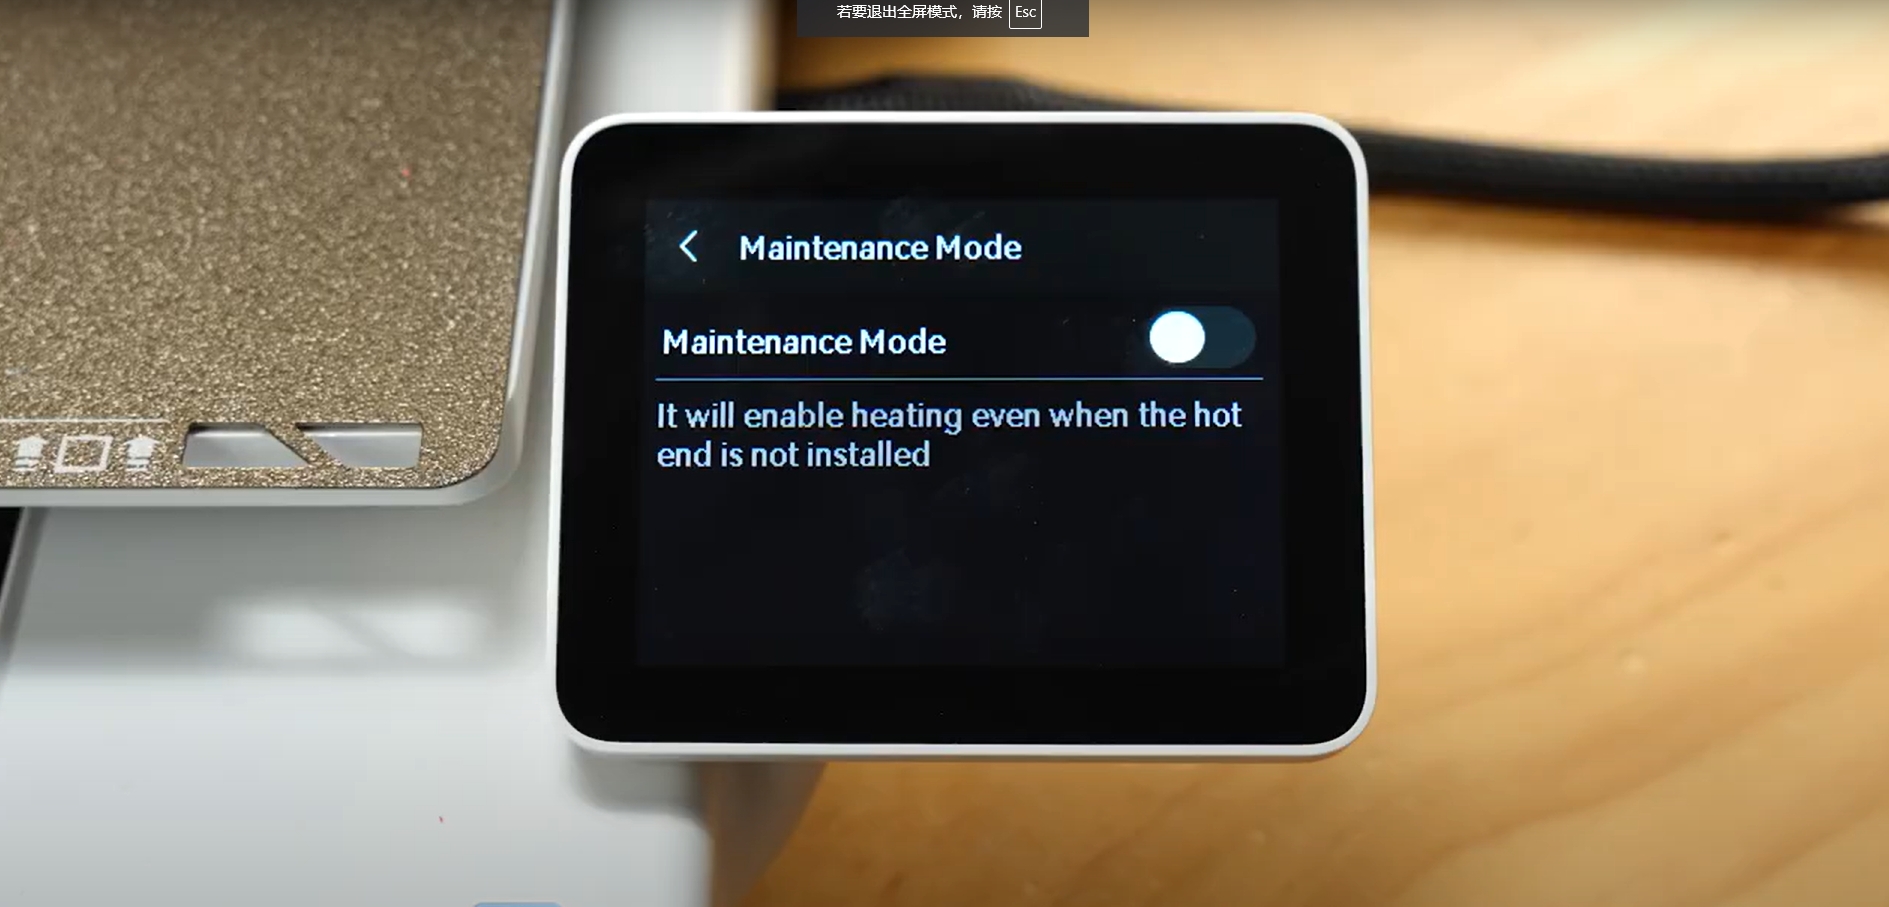
¶ Enter printer maintenance mode
To perform the cleaning operation, enable the Maintenance Mode. This will allow the hotend to remain heated during the operation.
 |
 |
 |
 |
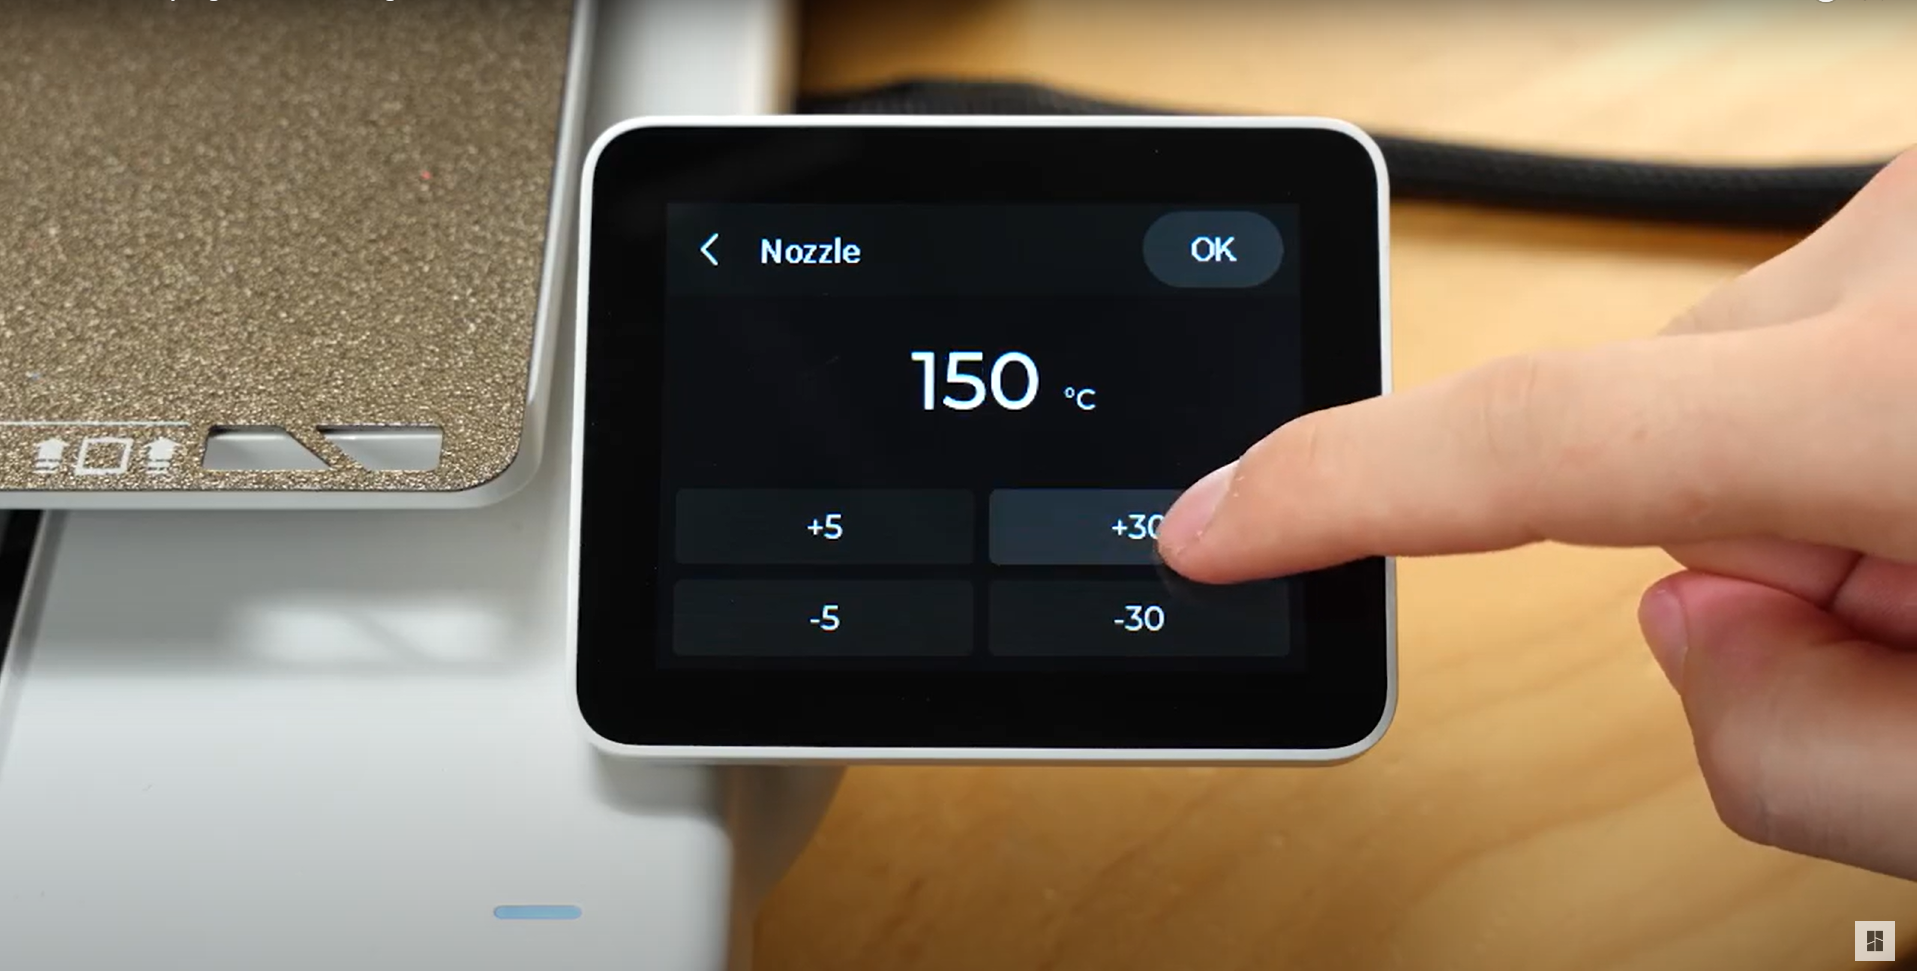
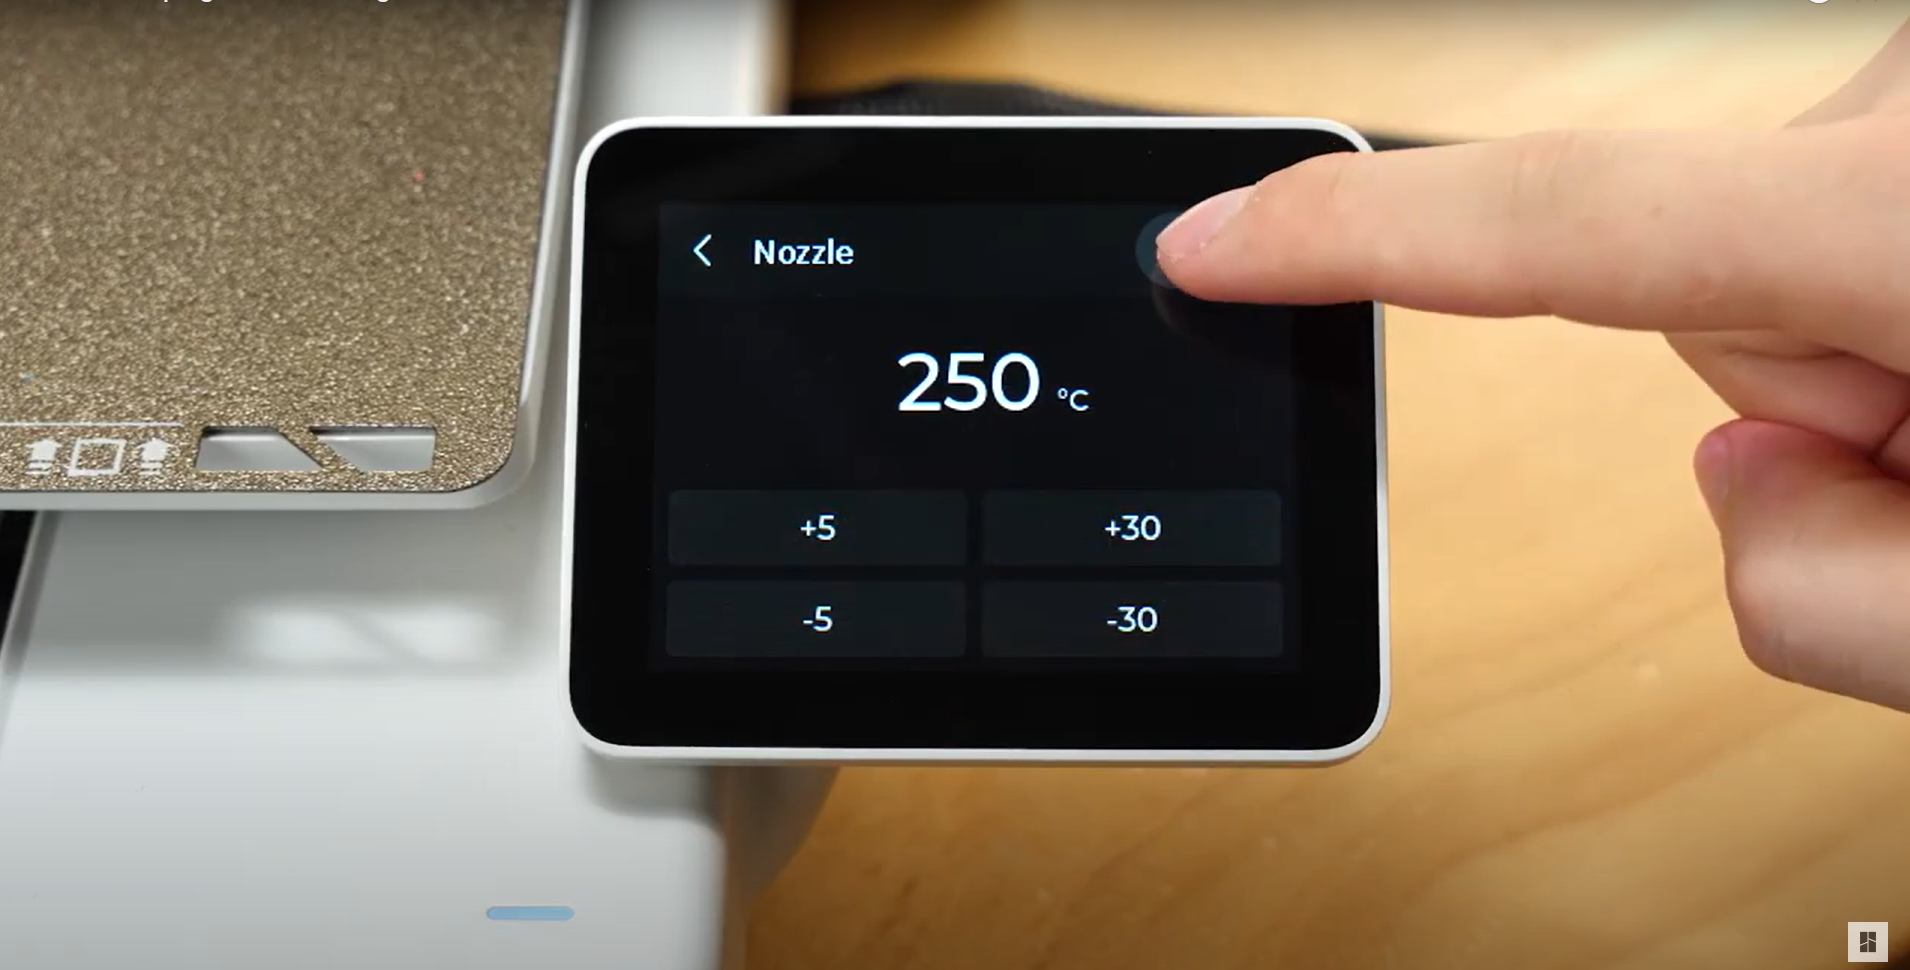
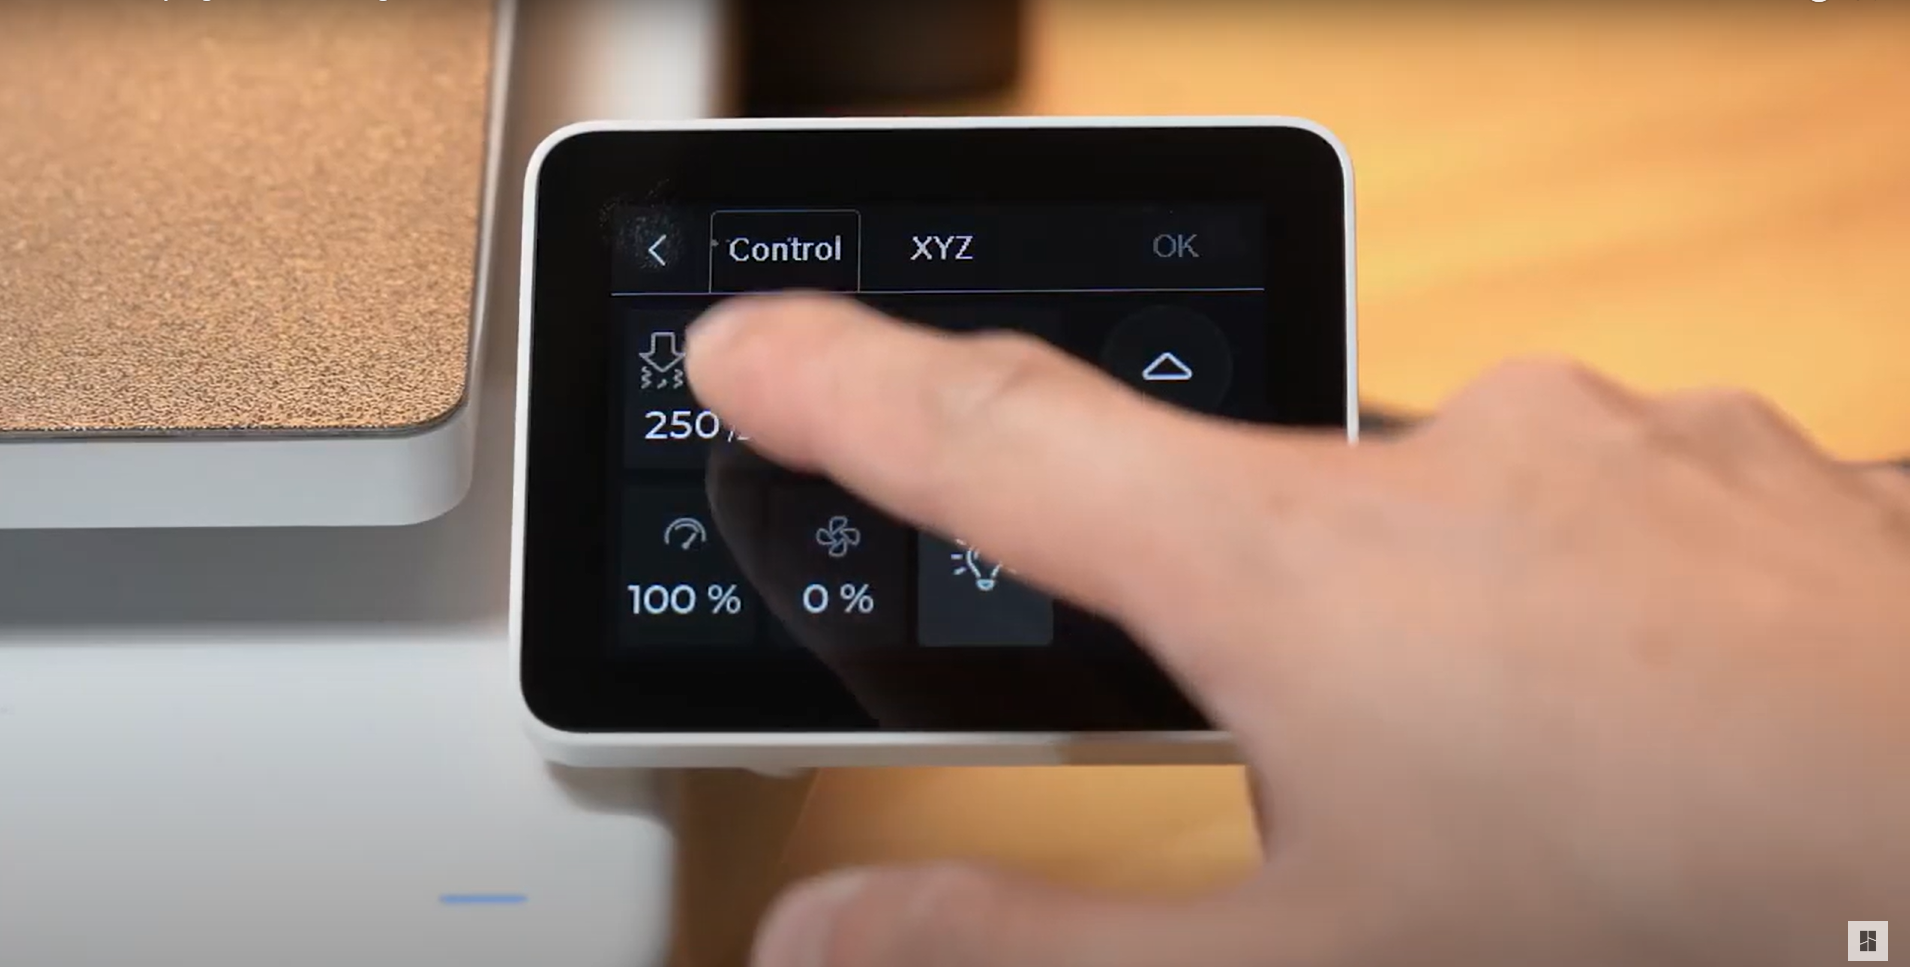
¶ Heating the hotend
Set the hotend temperature slightly higher than the printing temperature of the material used before, to soften the blob. Taking PLA as an example, the hotend can be heated to around 250 degrees Celsius.
 |
 |
 |
 |
Note: For safety reasons, when the printer is not in its normal working condition, the hotend will automatically stop heating after being maintained at a high temperature for a certain period of time. If you have not completed the necessary processing within this time, please remember to reheat the hotend.
¶ Safety Warning
IMPORTANT!
When you perform maintenance or troubleshooting on the printer, please first confirm the temperature of the hot end and hot bed to avoid operating at high temperatures. If you must operate at high temperatures, please wear heat-insulating gloves to ensure safe and effective execution.
If you have any concerns or questions about following this guide, open a new ticket in our Support Page and we will do our best to respond promptly and provide you with the assistance you need.
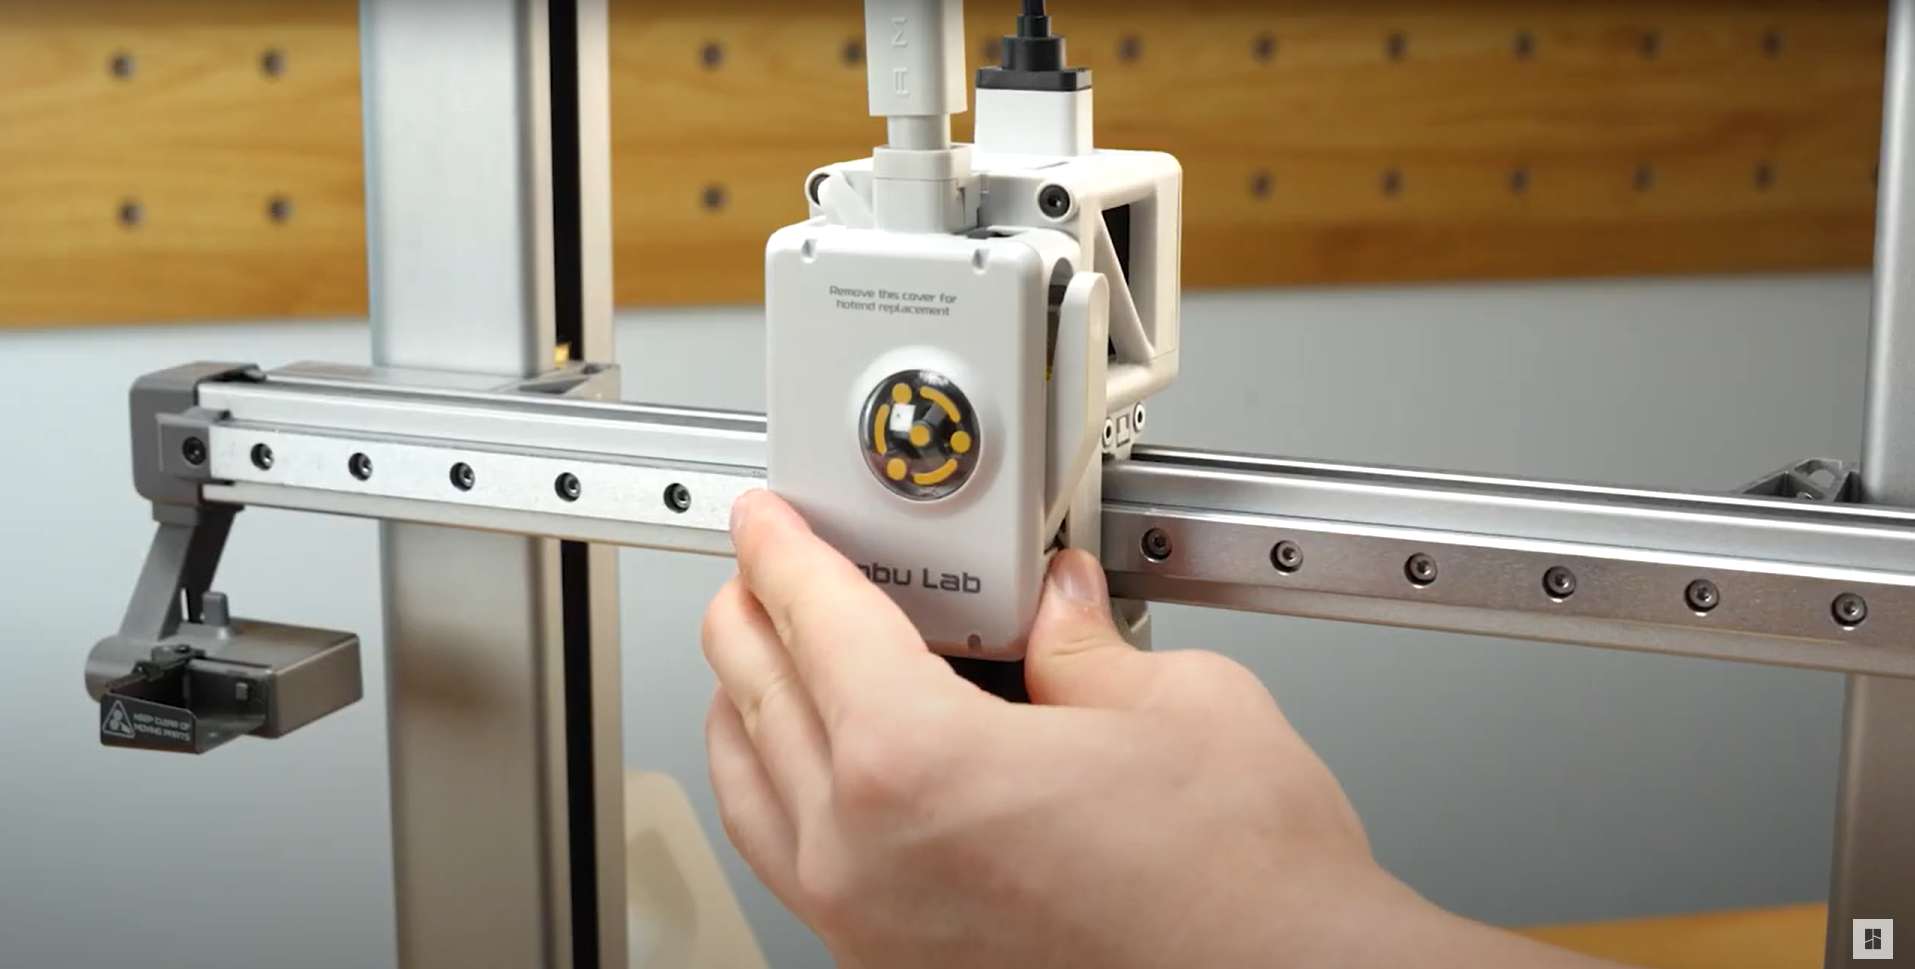
¶ Clear the Clumping/Blob
After completing the aforementioned preparations, you can proceed to clear the clumping from the hotend.
During the cleaning process, avoid removing the toolhead from the X-axis linear rail as much as possible, as this may cause the steel balls inside the slider to fall out.
¶ Remove the Fans
Step 1. Remove the front cover of the toolhead.
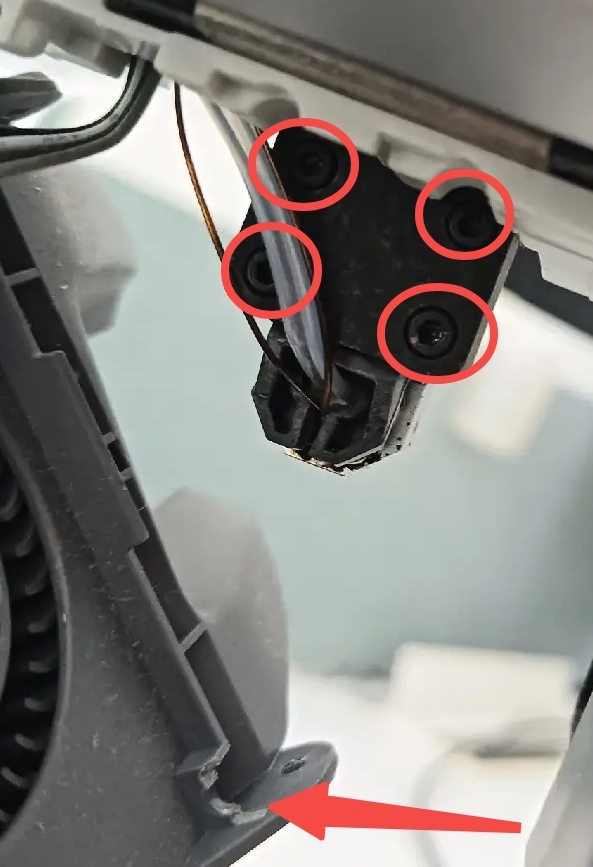
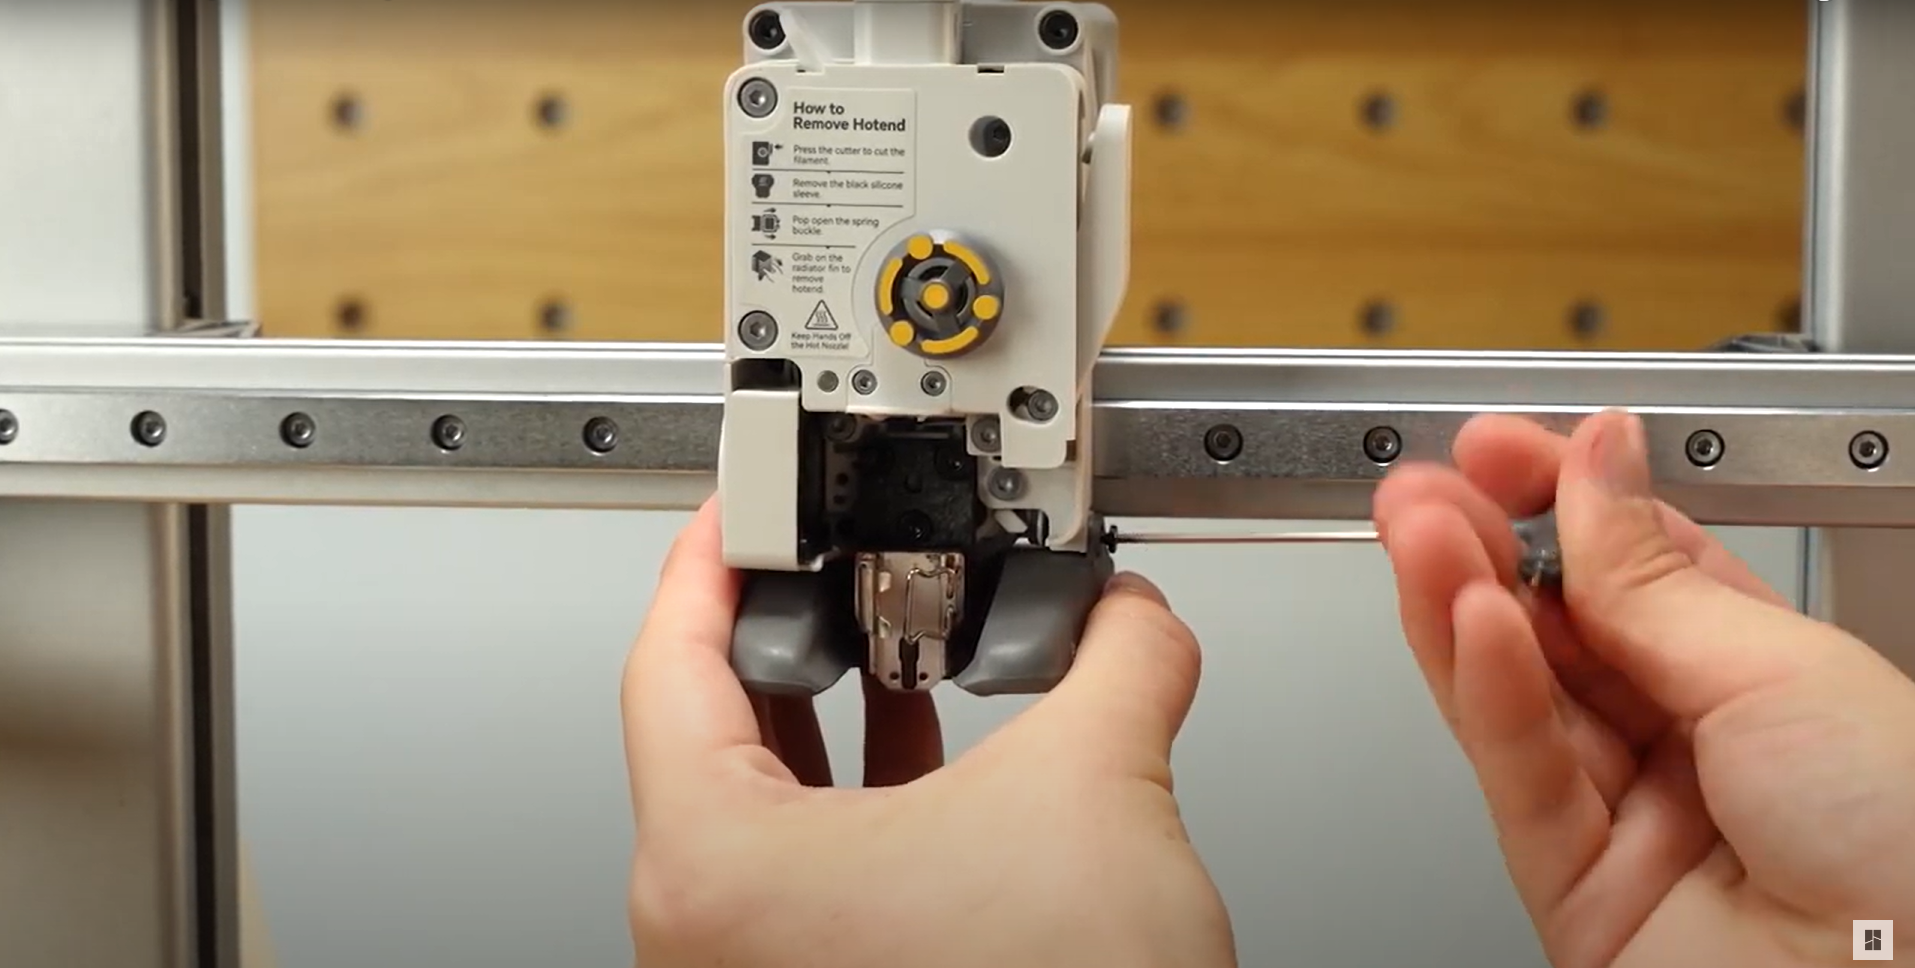
Step 2. Remove the two screws holding the hotend fan.
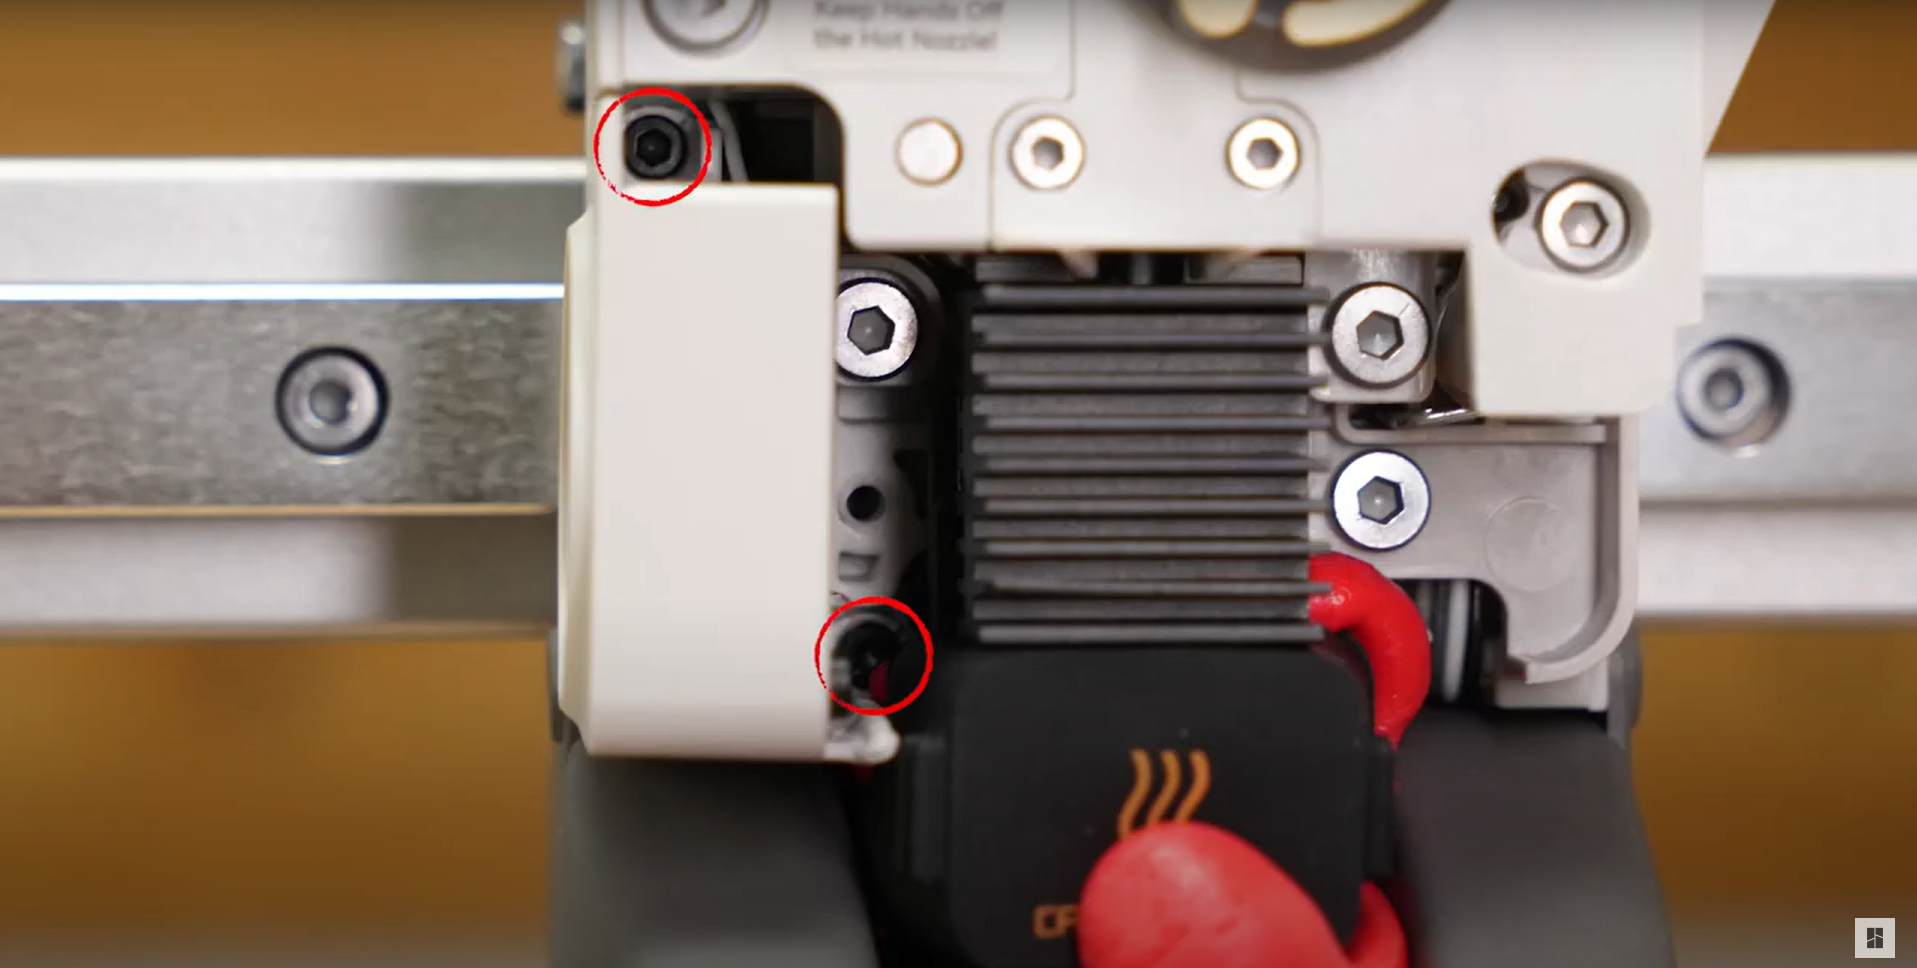
Step 3. Remove the three screws holding the part cooling fan.
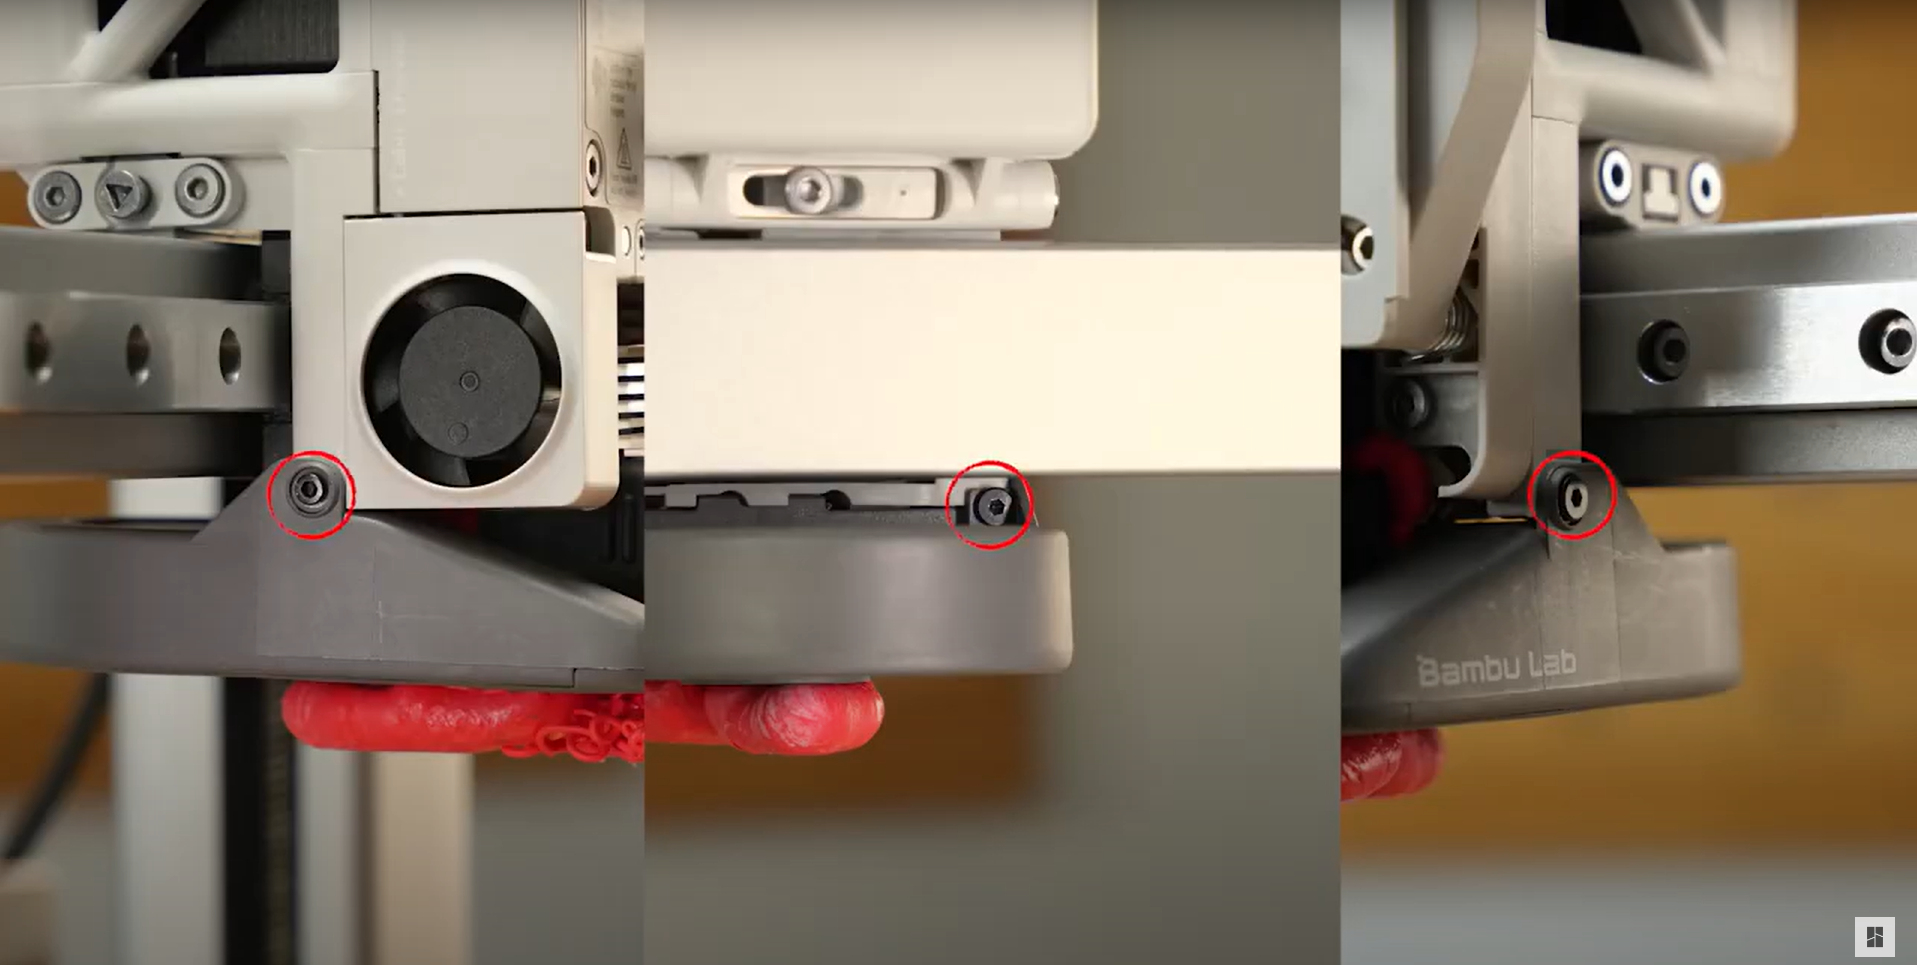
Step 4. Gently pull the part cooling fan downwards. The heated hotend will make it easier to remove a minor clump.
If the hotend clumping is severe and cannot be directly removed, you can forcibly pull off the part cooling fan (which may damage the screw holes), then unscrew the four screws from the back to remove the hotend heating assembly.
¶ Clean the Silicone Hotend Sock
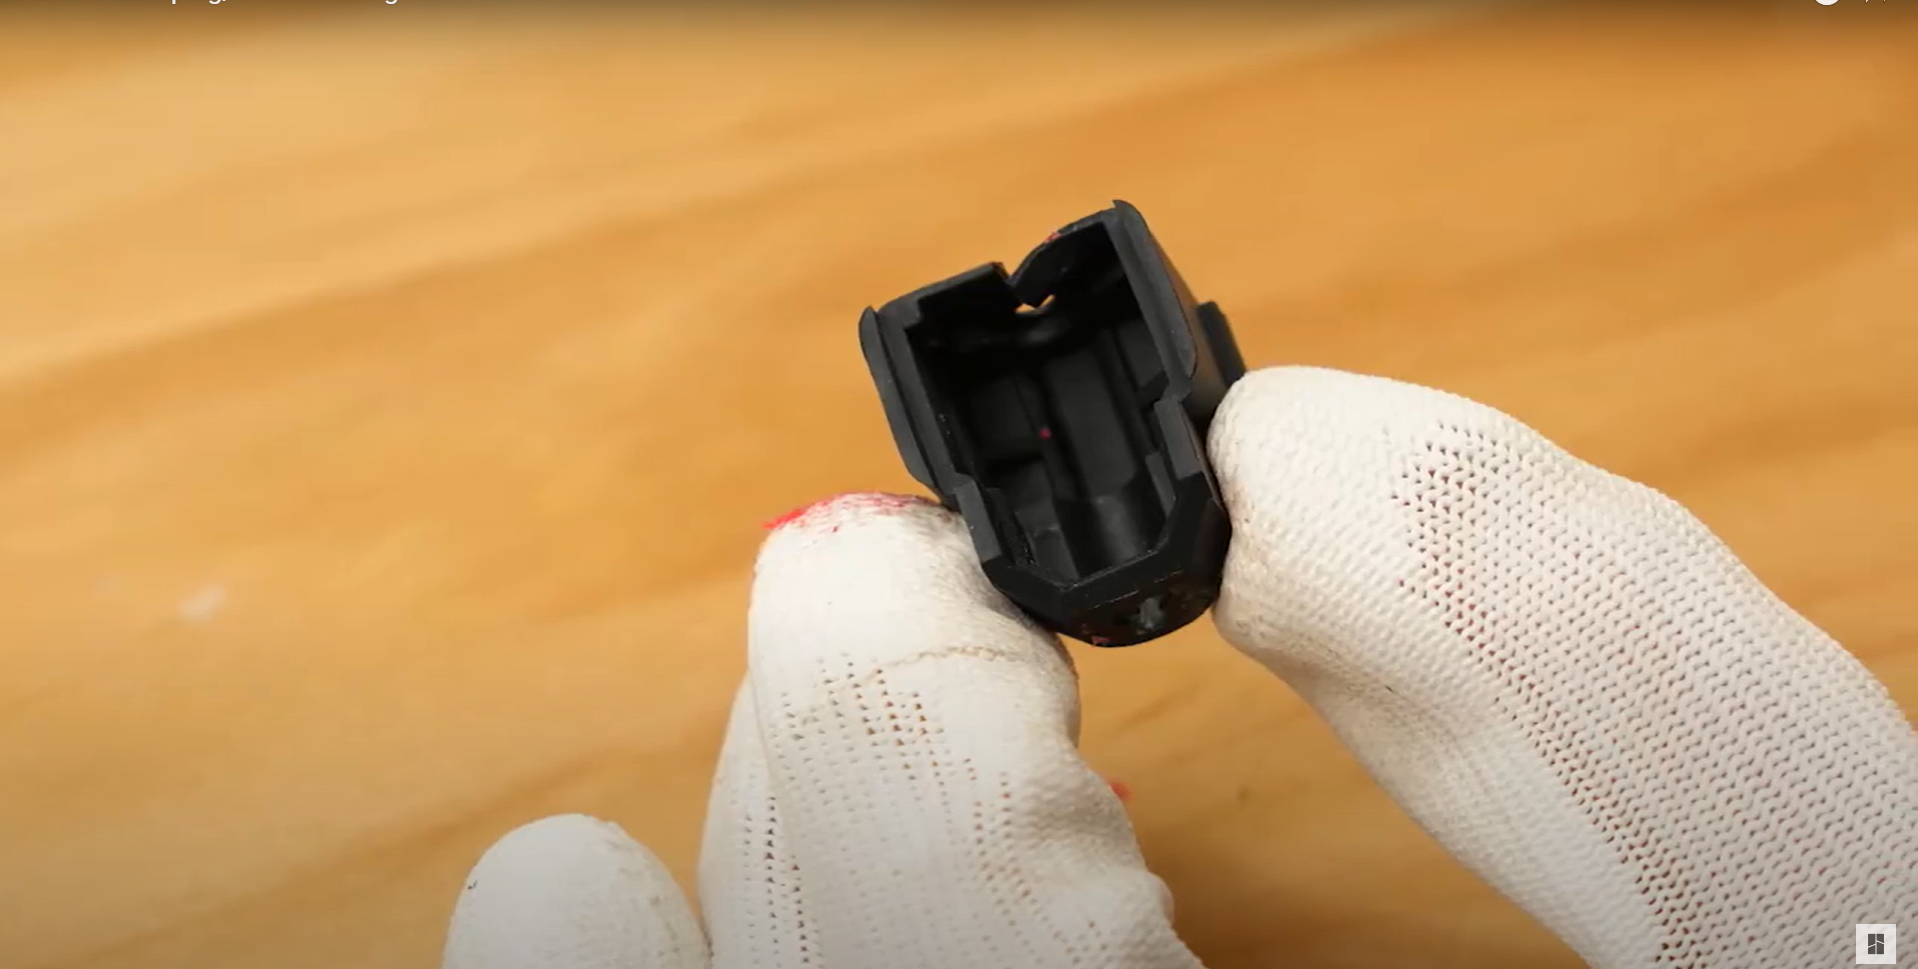
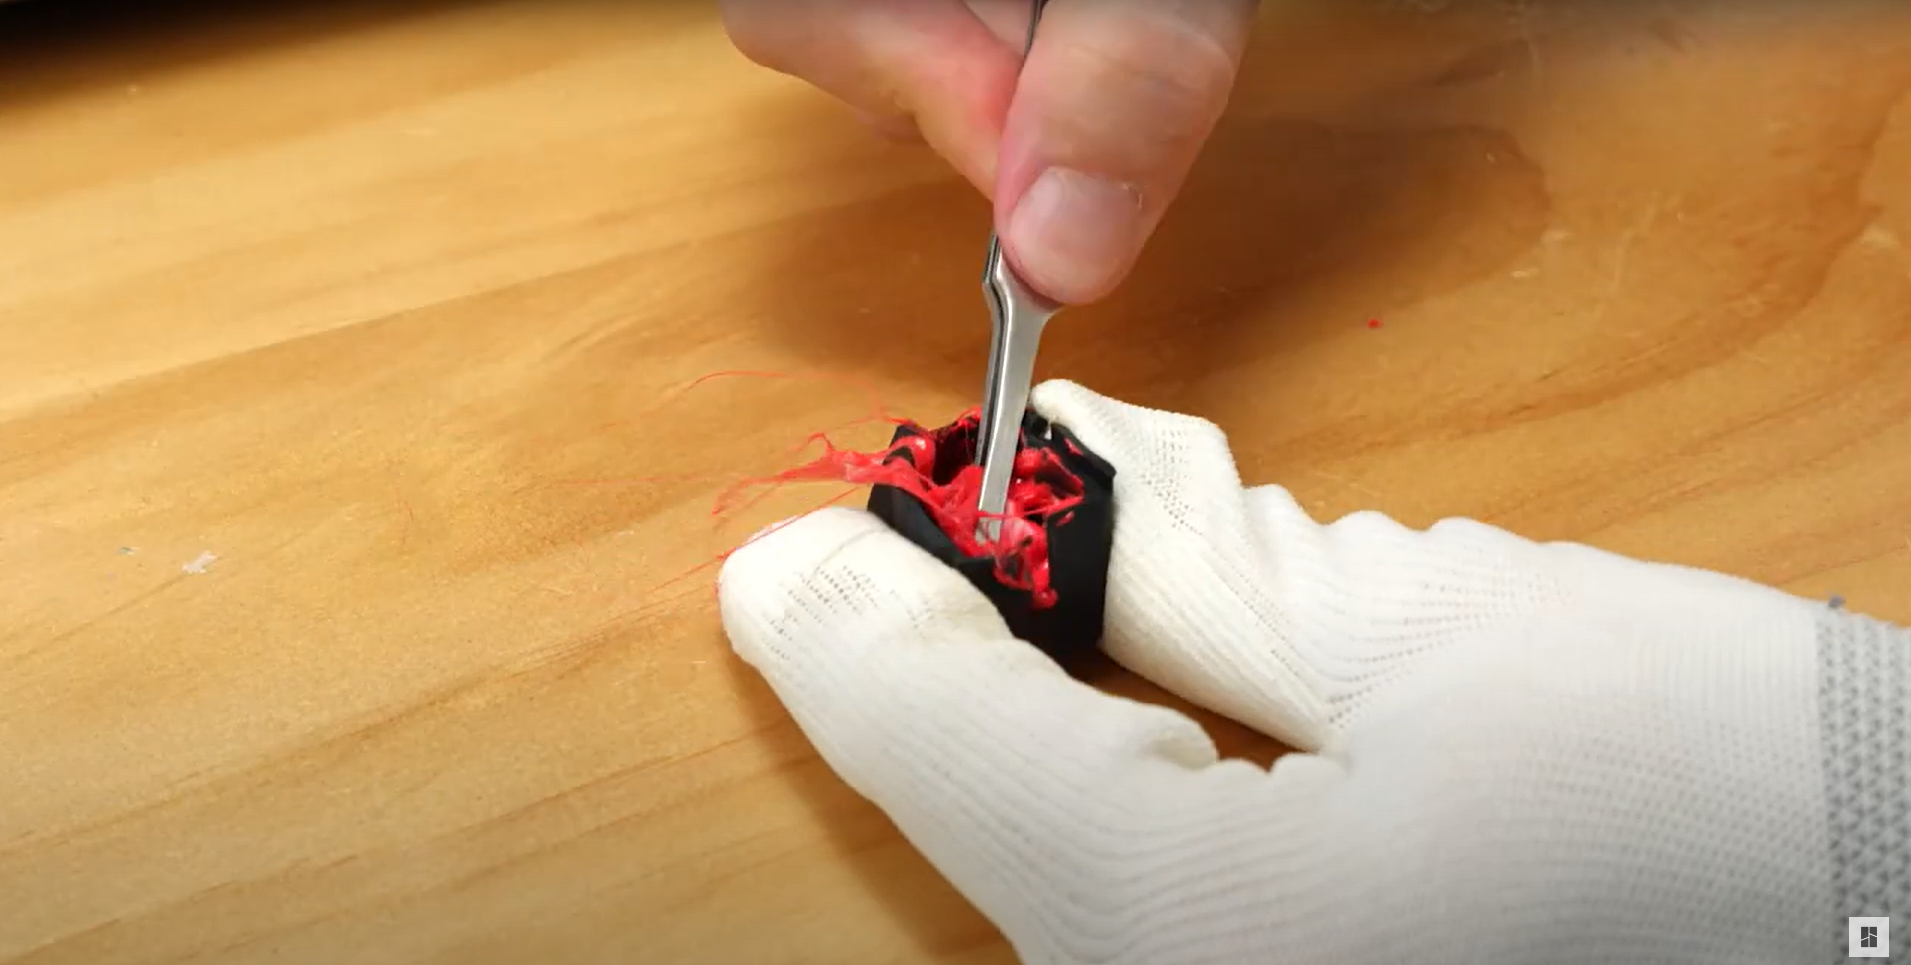
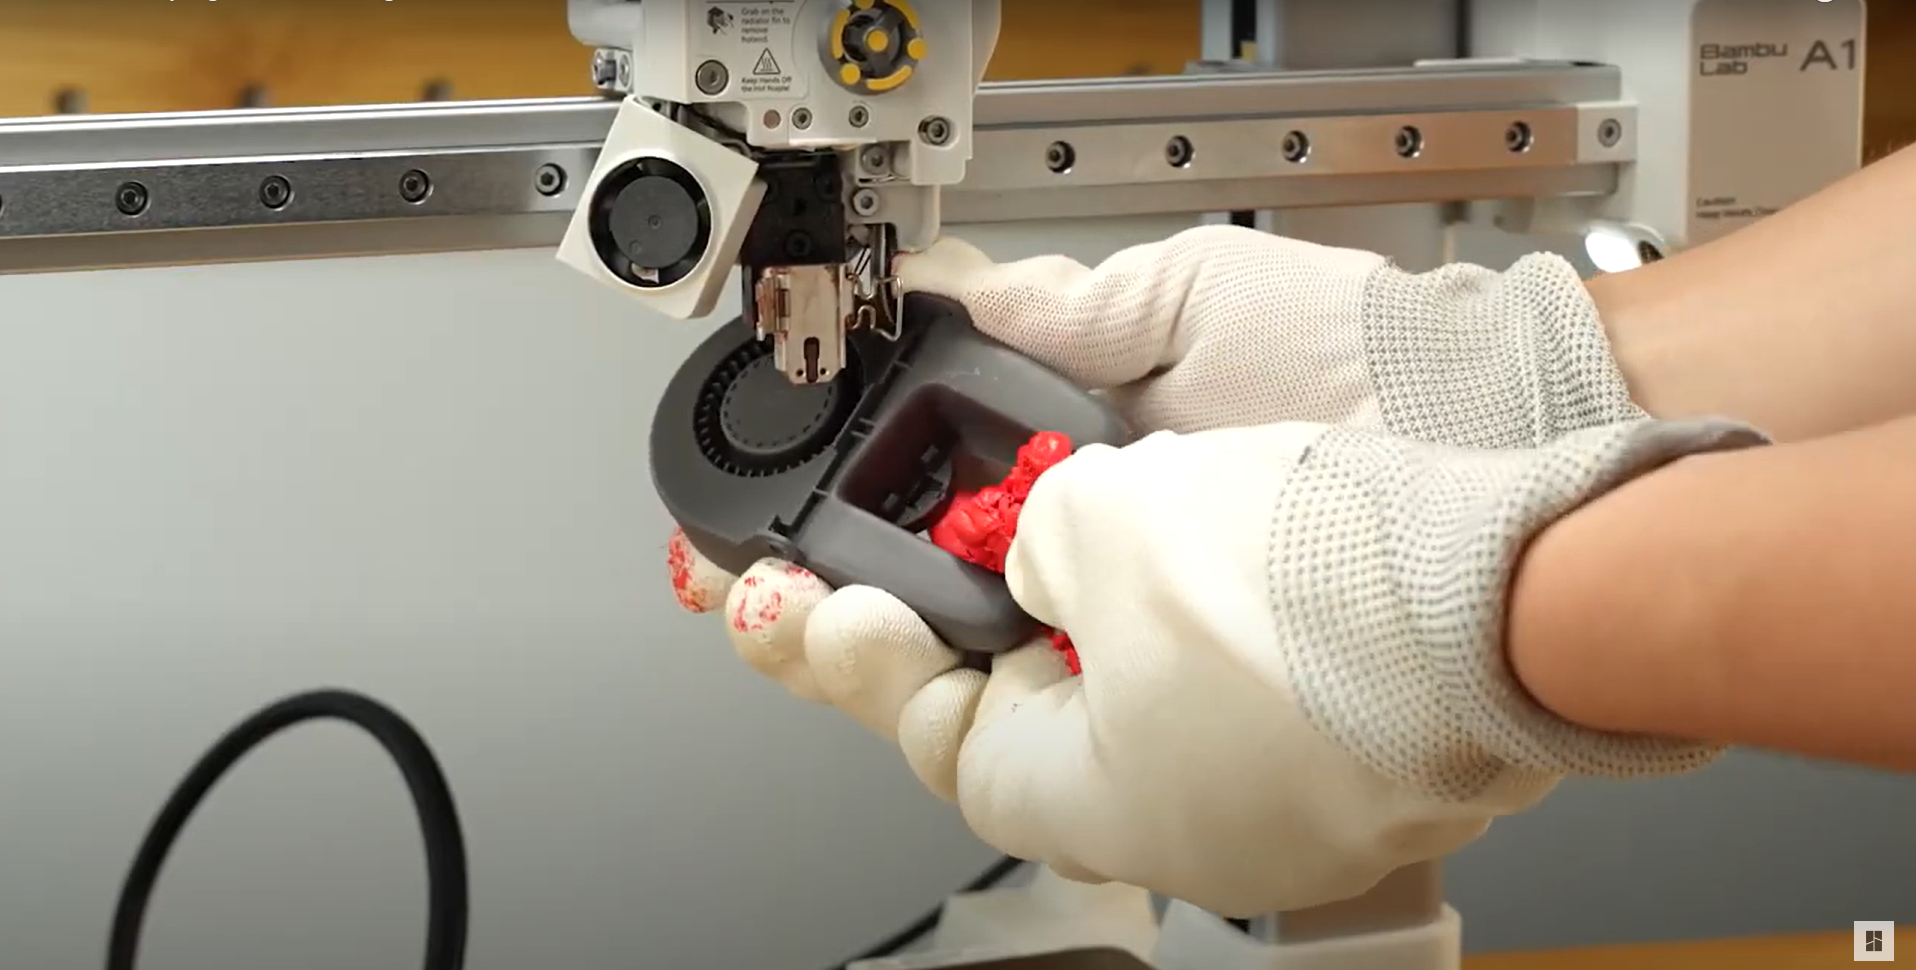
Step 1. Using the heat resistant gloves, remove the silicone sock and clean it.

Step 2. This is the silicone sock after cleaning. Ensure no filament is left on it.
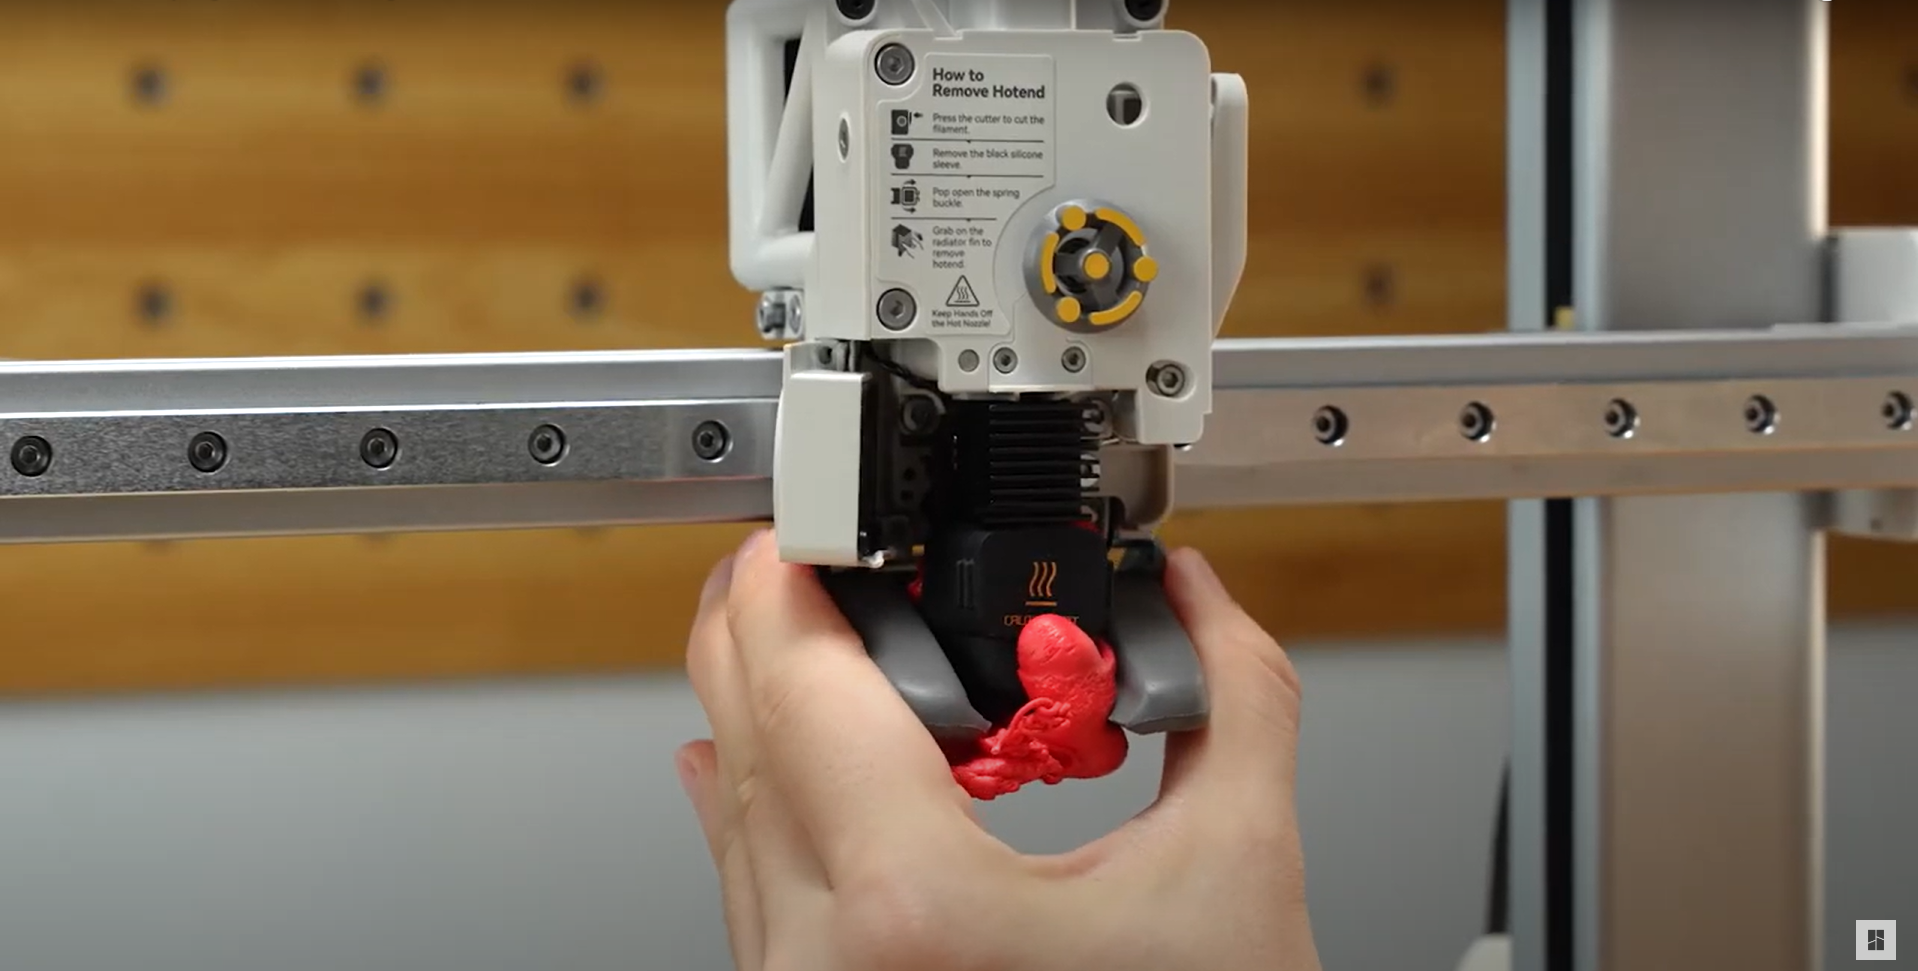
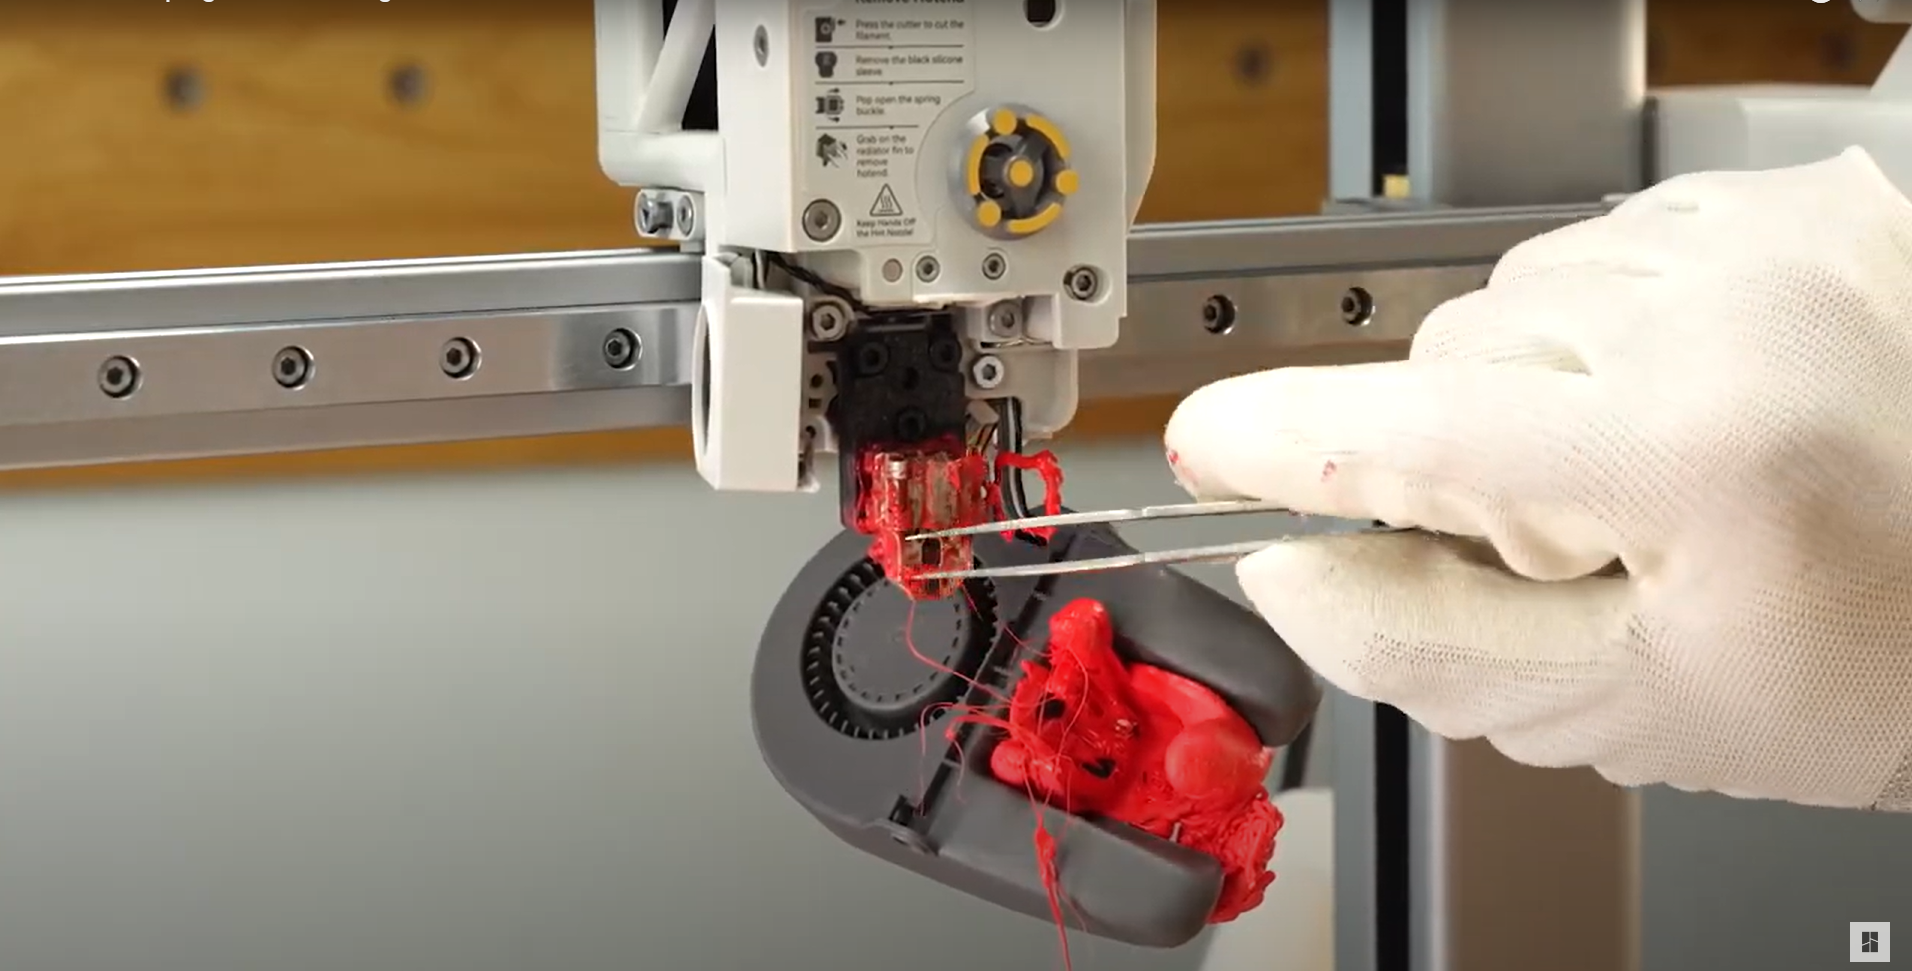
¶ Clean the Hotend
Step 1. Press the filament cutter lever, to cut the filament.
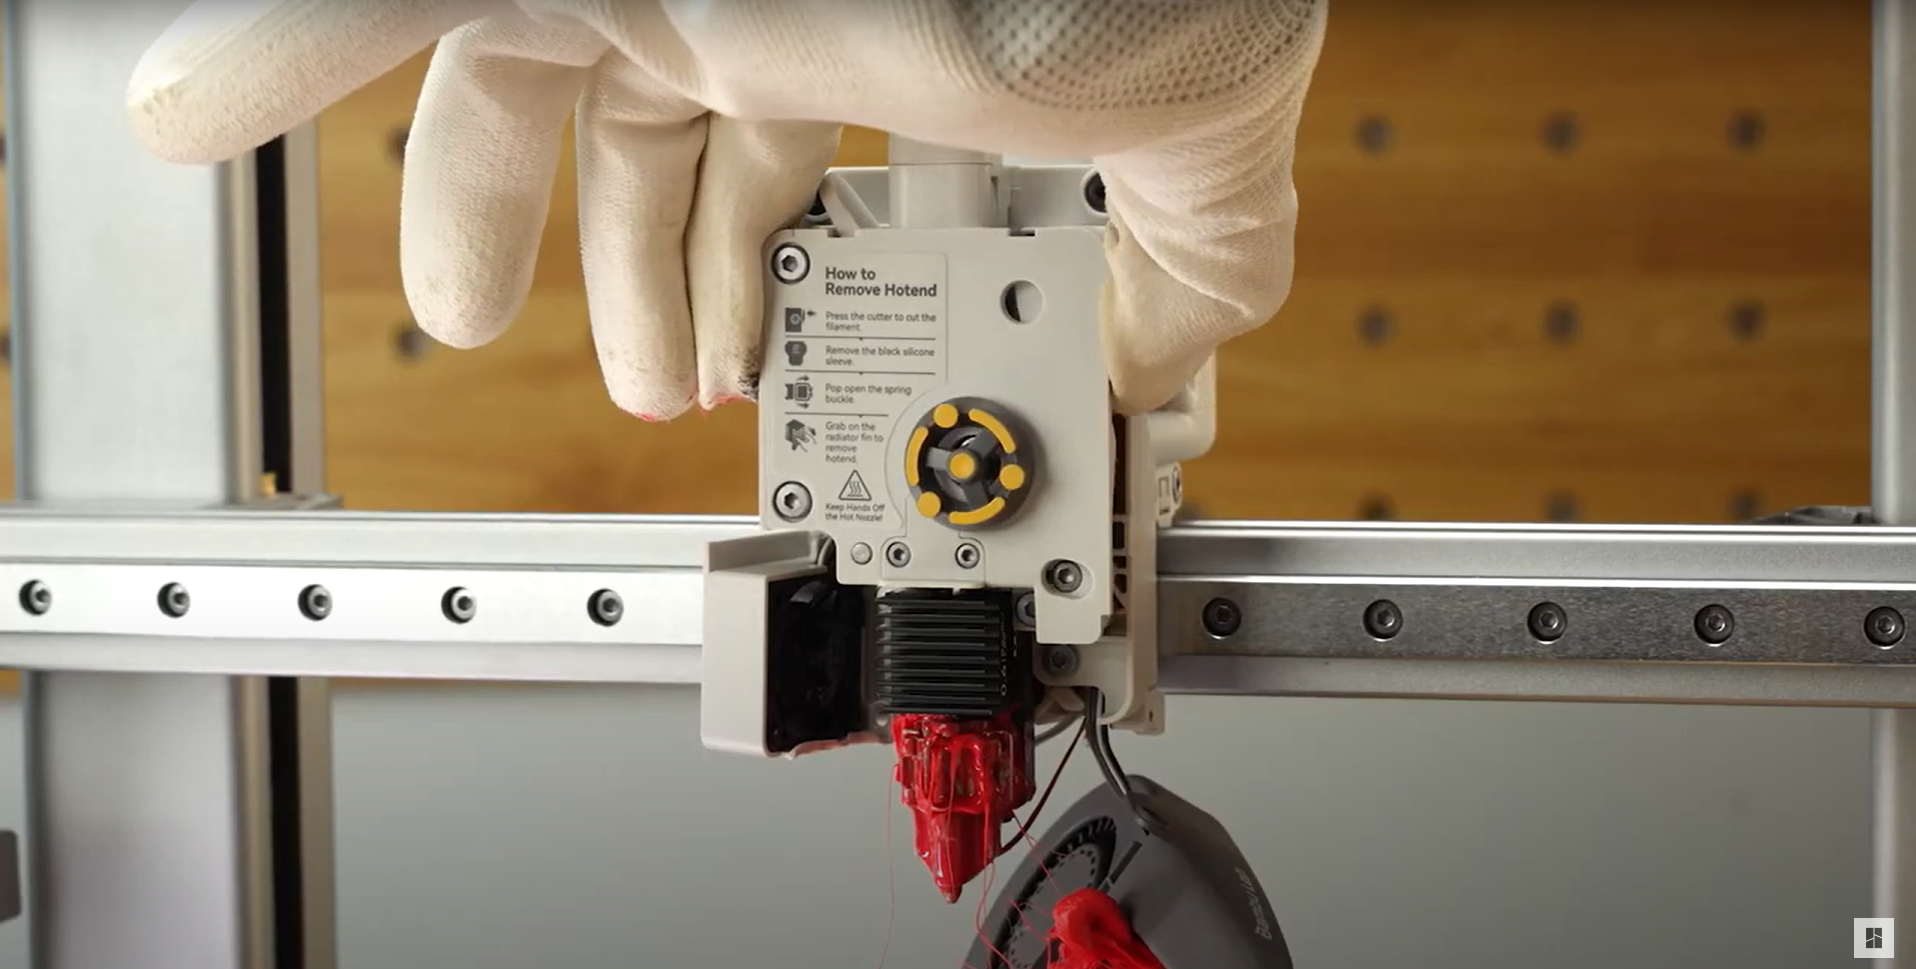
Step 2. While the hotend is heated, open the hotend buckle and remove the nozzle.
Step 3. Right after removing the nozzle, start cleaning the filament while it's soft, until the nozzle is free from any debris.
 |
 |
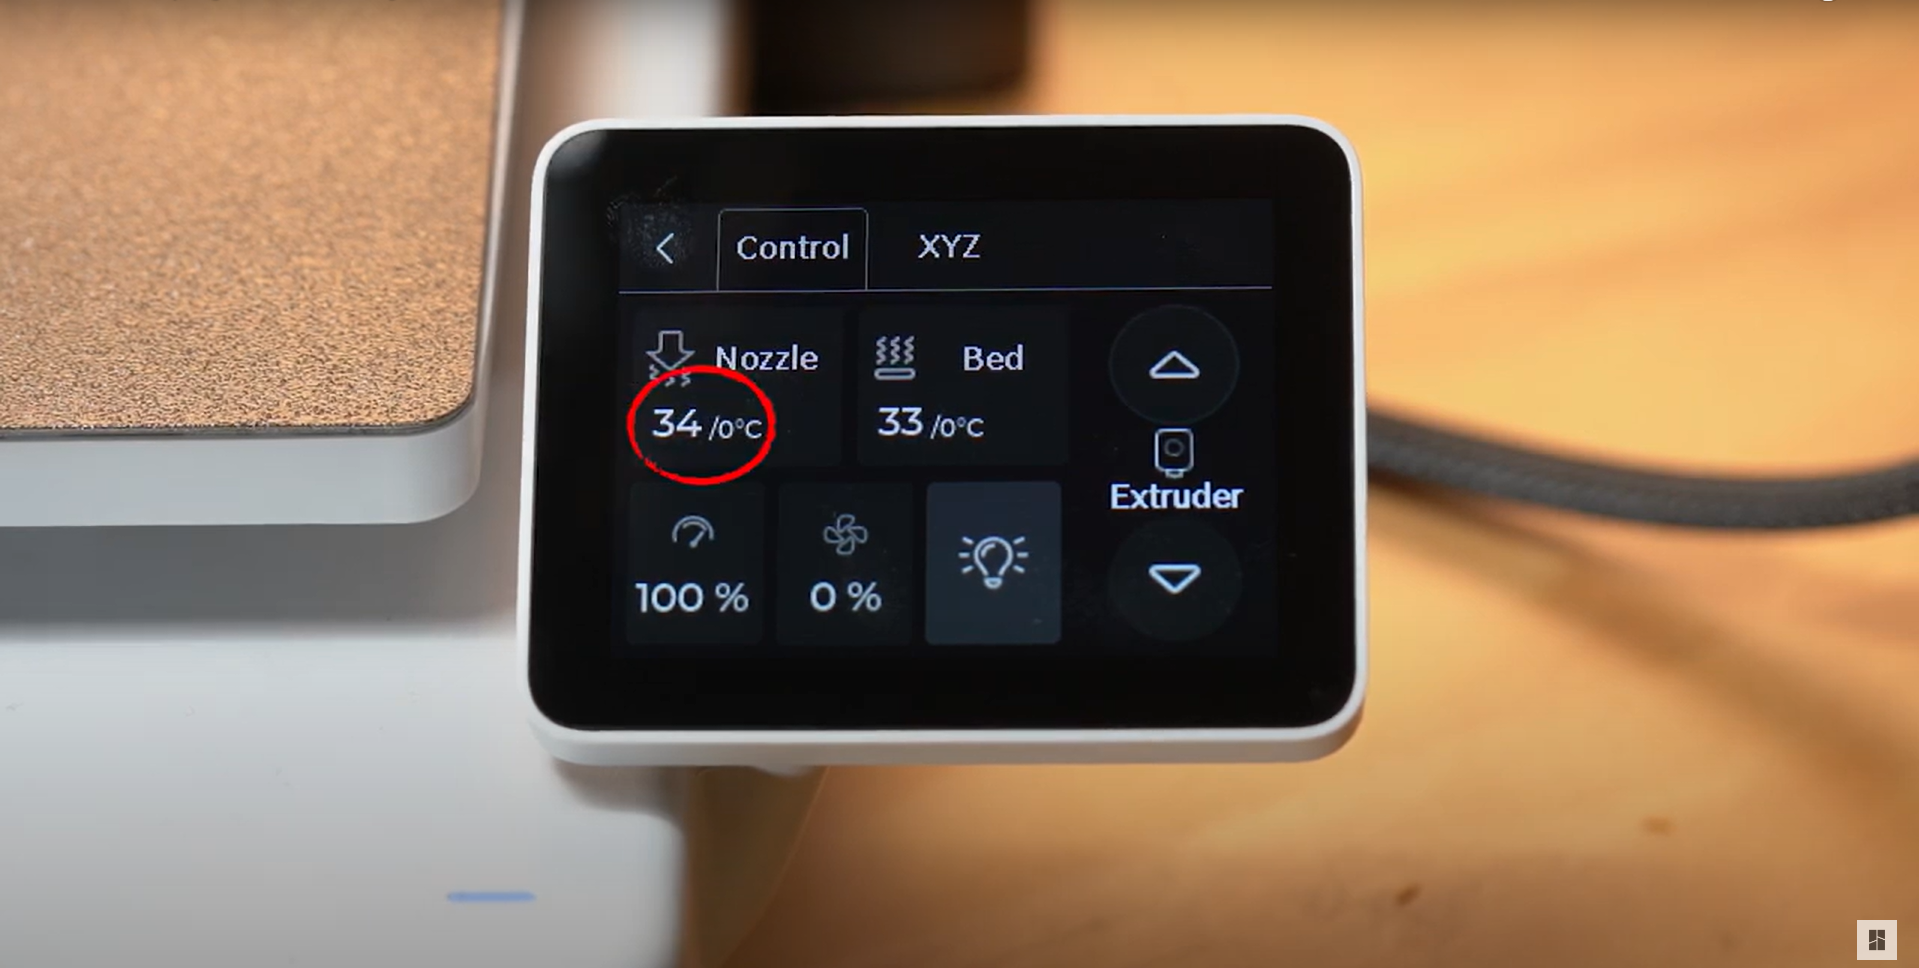
¶ Clean the Hotend Heating Assembly
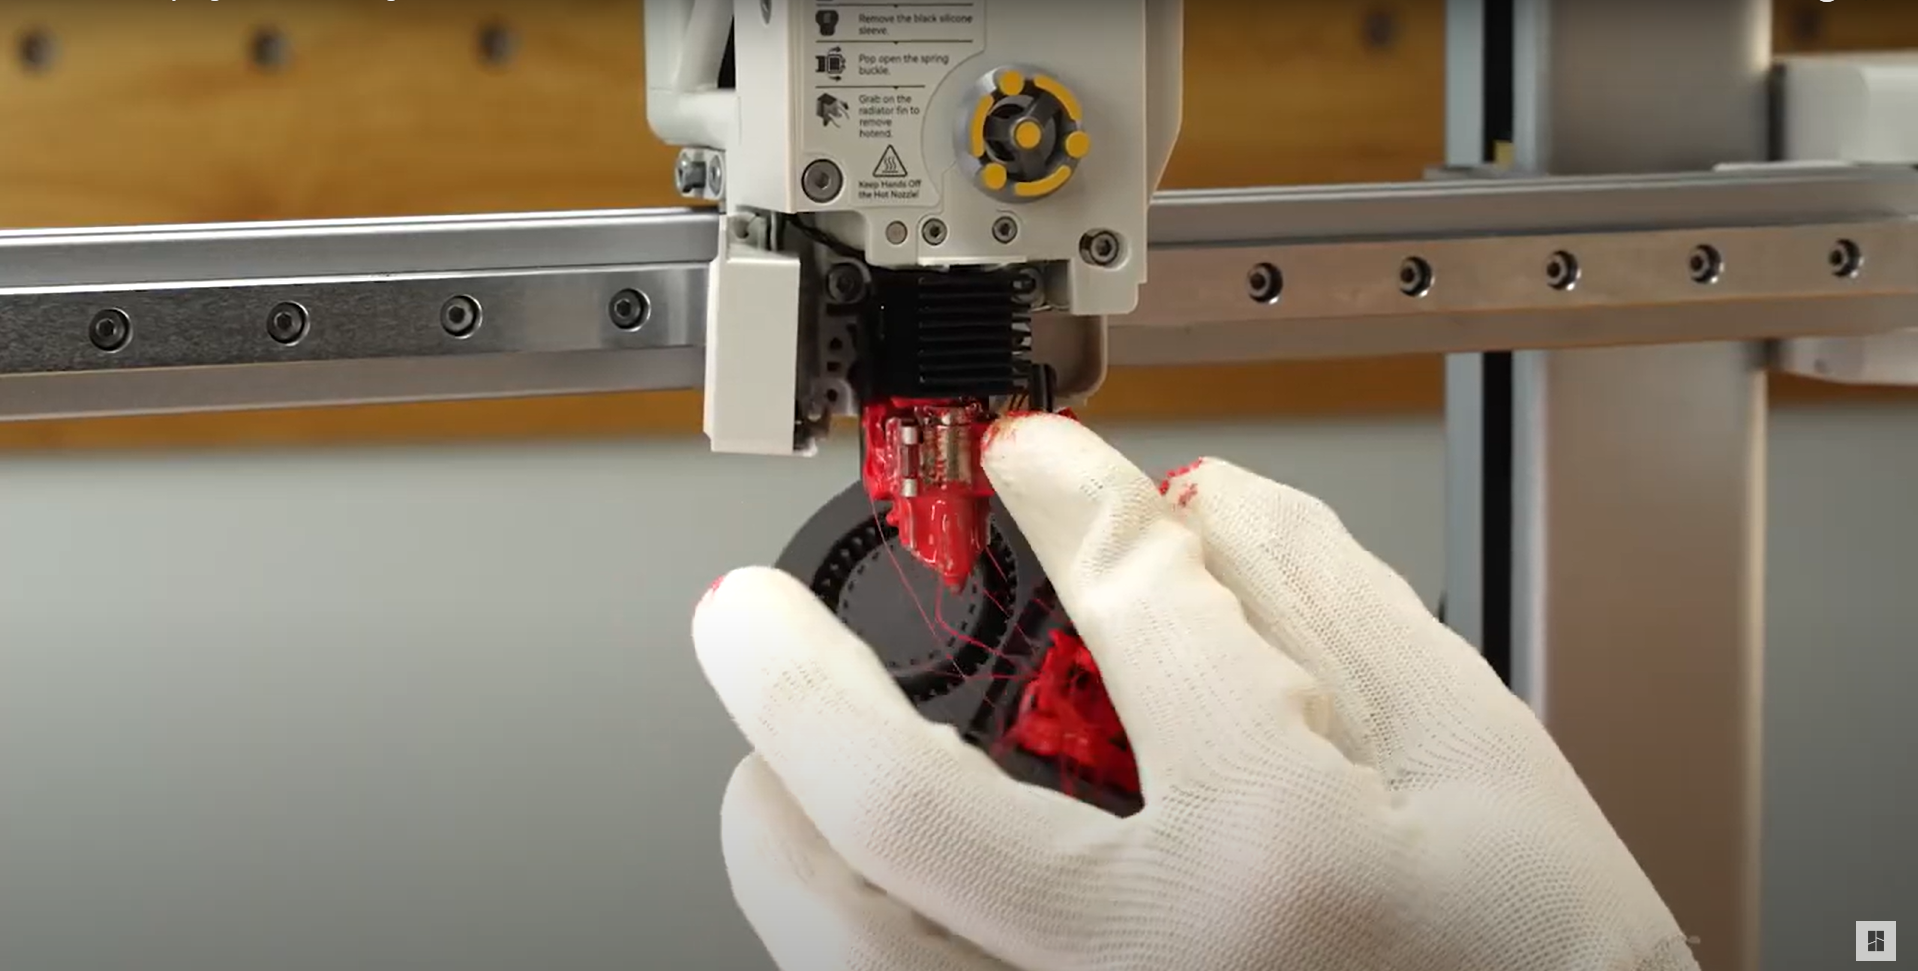
Step 1. Carefully remove all the soft filament around the hotend heating assembly until there is no residue left.
 |
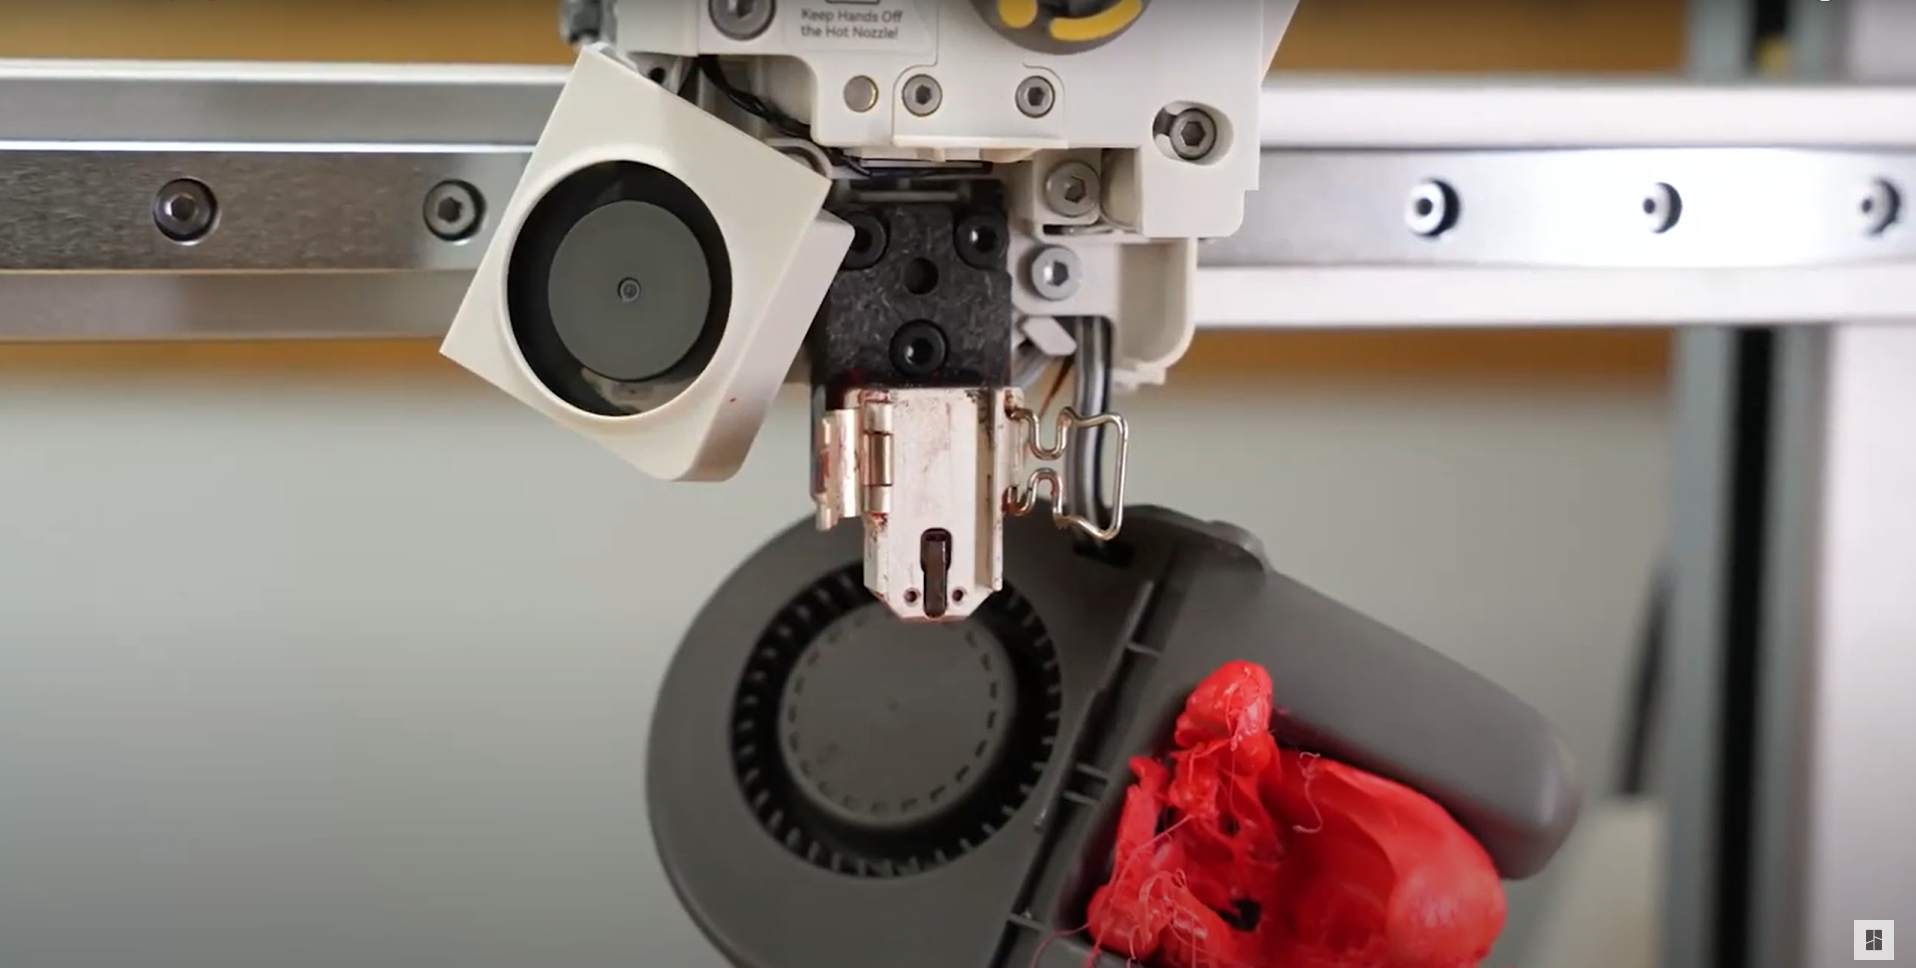 |
Step 2. Set the hotend temperature to 0℃ and wait for it to cool.
 |
 |
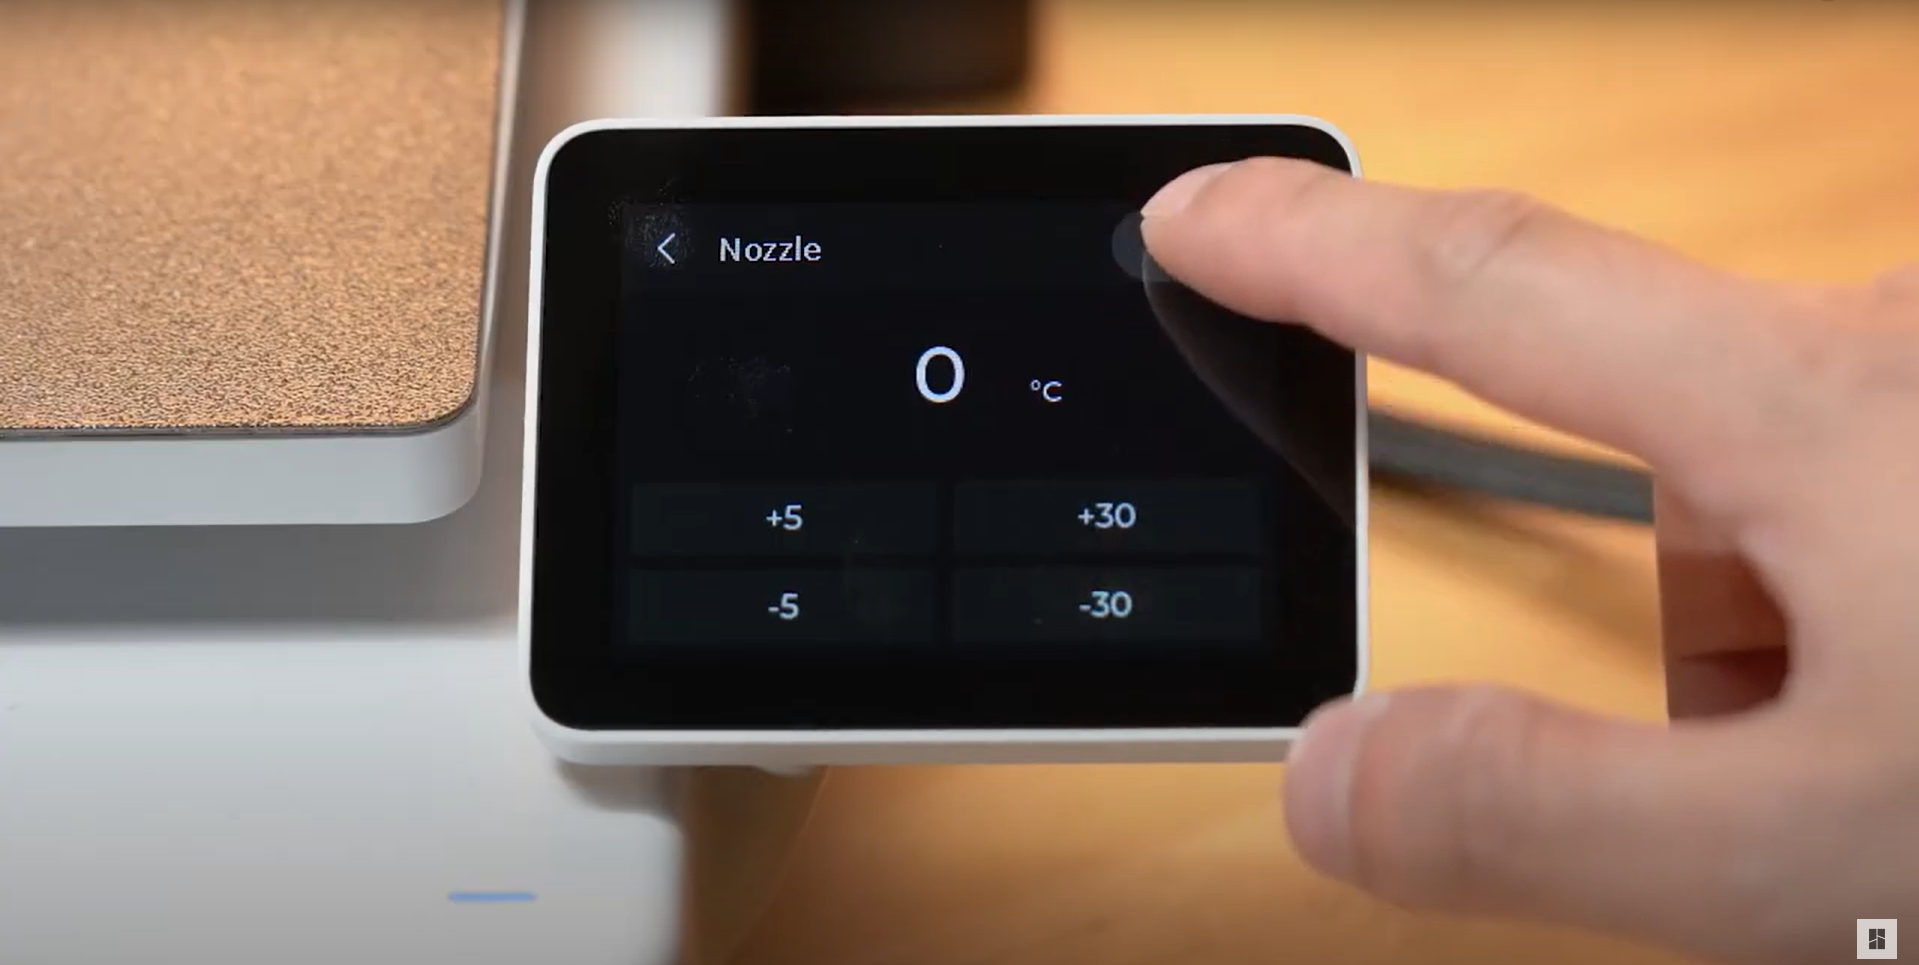 |
 |
¶ Clean the Parts Cooling Fan
Step 1. Use the hair dryer at higher heating temperatures and maintain the heat for 1-2 minutes until the blob starts to become soft.
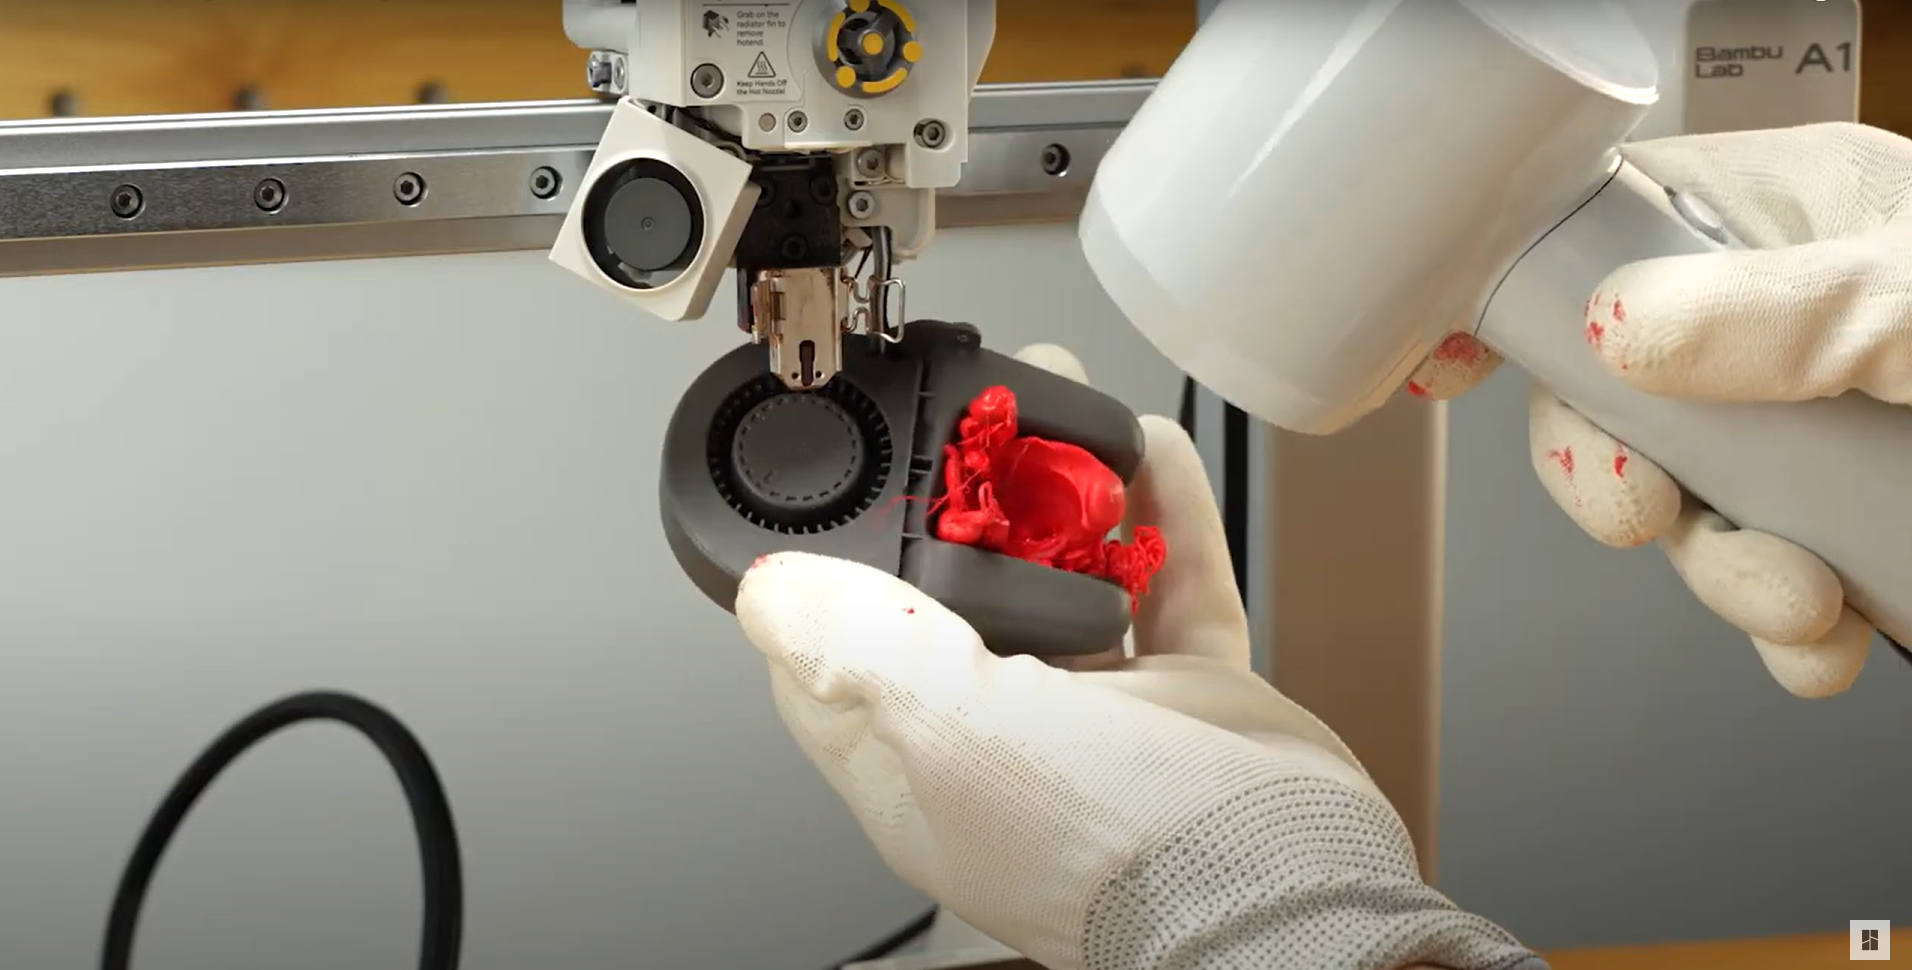
Be careful when using the heairdryer or hot gun on the plastic parts for too long or too near. According to actual policy, the warranty does not support the replacement of this part.
Step 2. When the blob is soft, gently pull it away from the part cooling fan.
Additionally, cease heating the hotend at this point to prevent the risk of burns during the operation.
¶ Assembly
Step 1. Once the treatment is completed and there is no apparent damage, reinstall the previously removed parts.
Step 2. Re-install the nozzle and secure it with the buckle, then attach the silicone sock
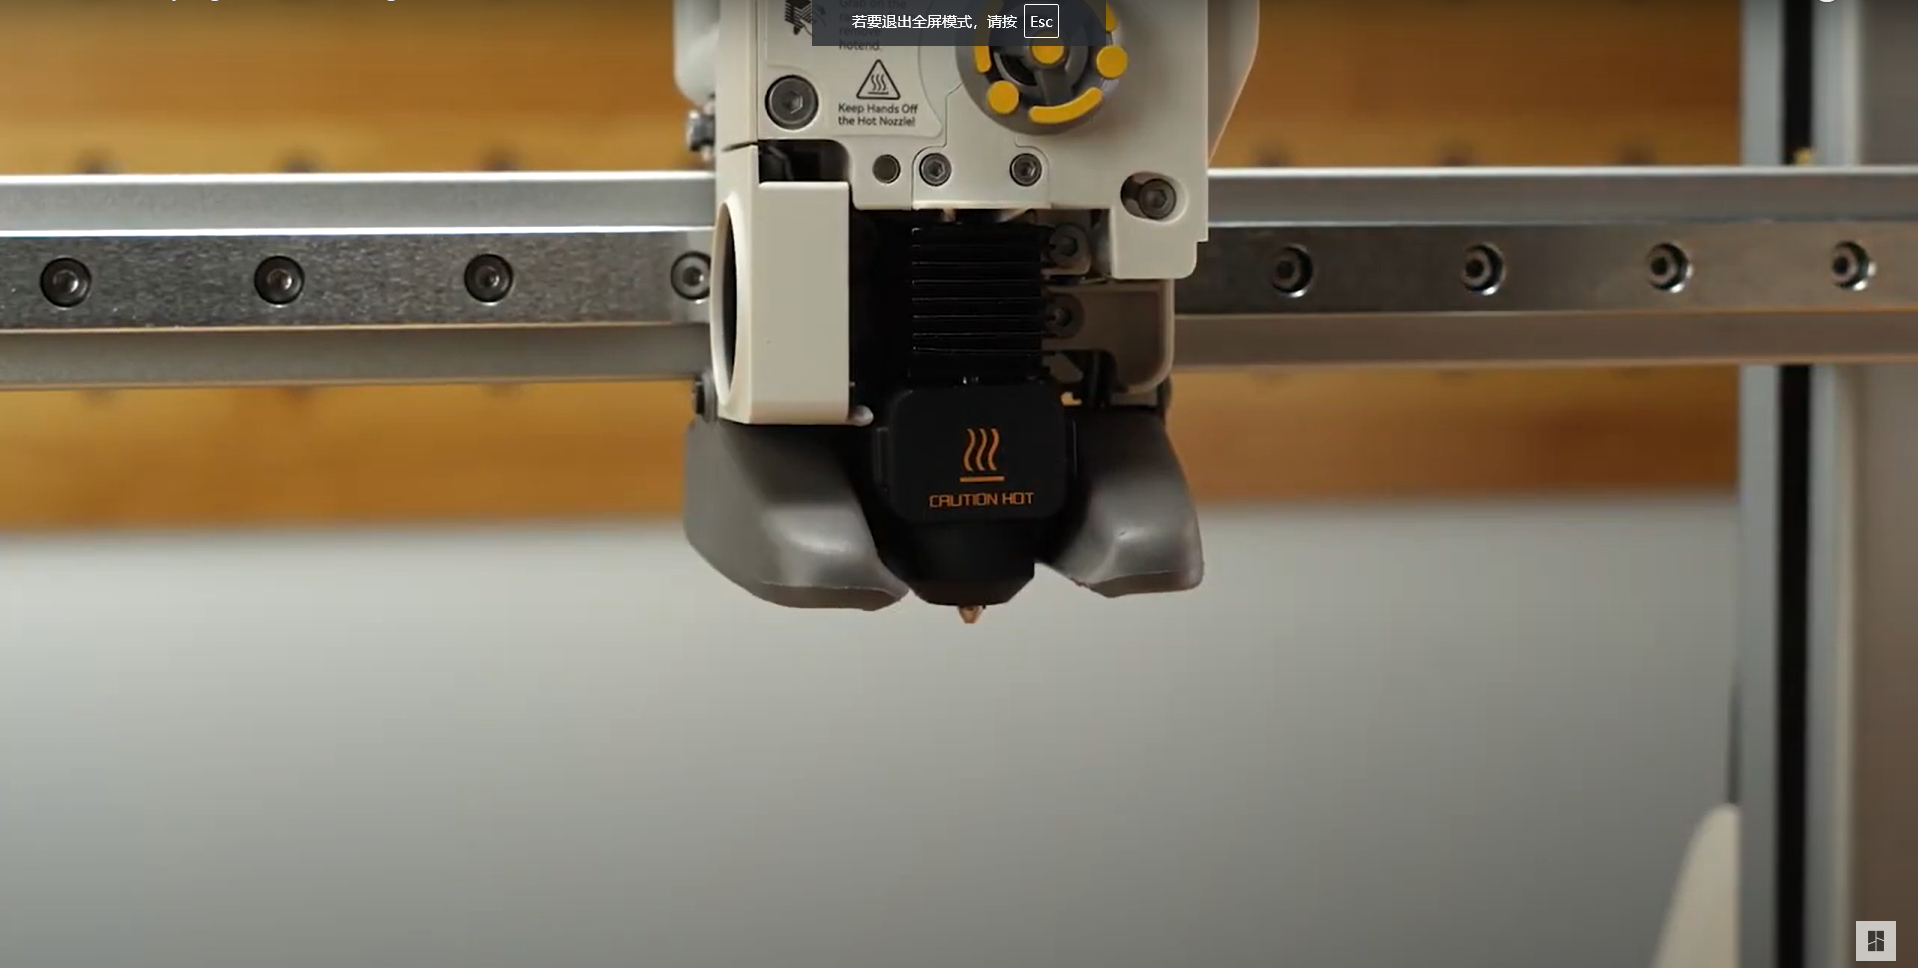
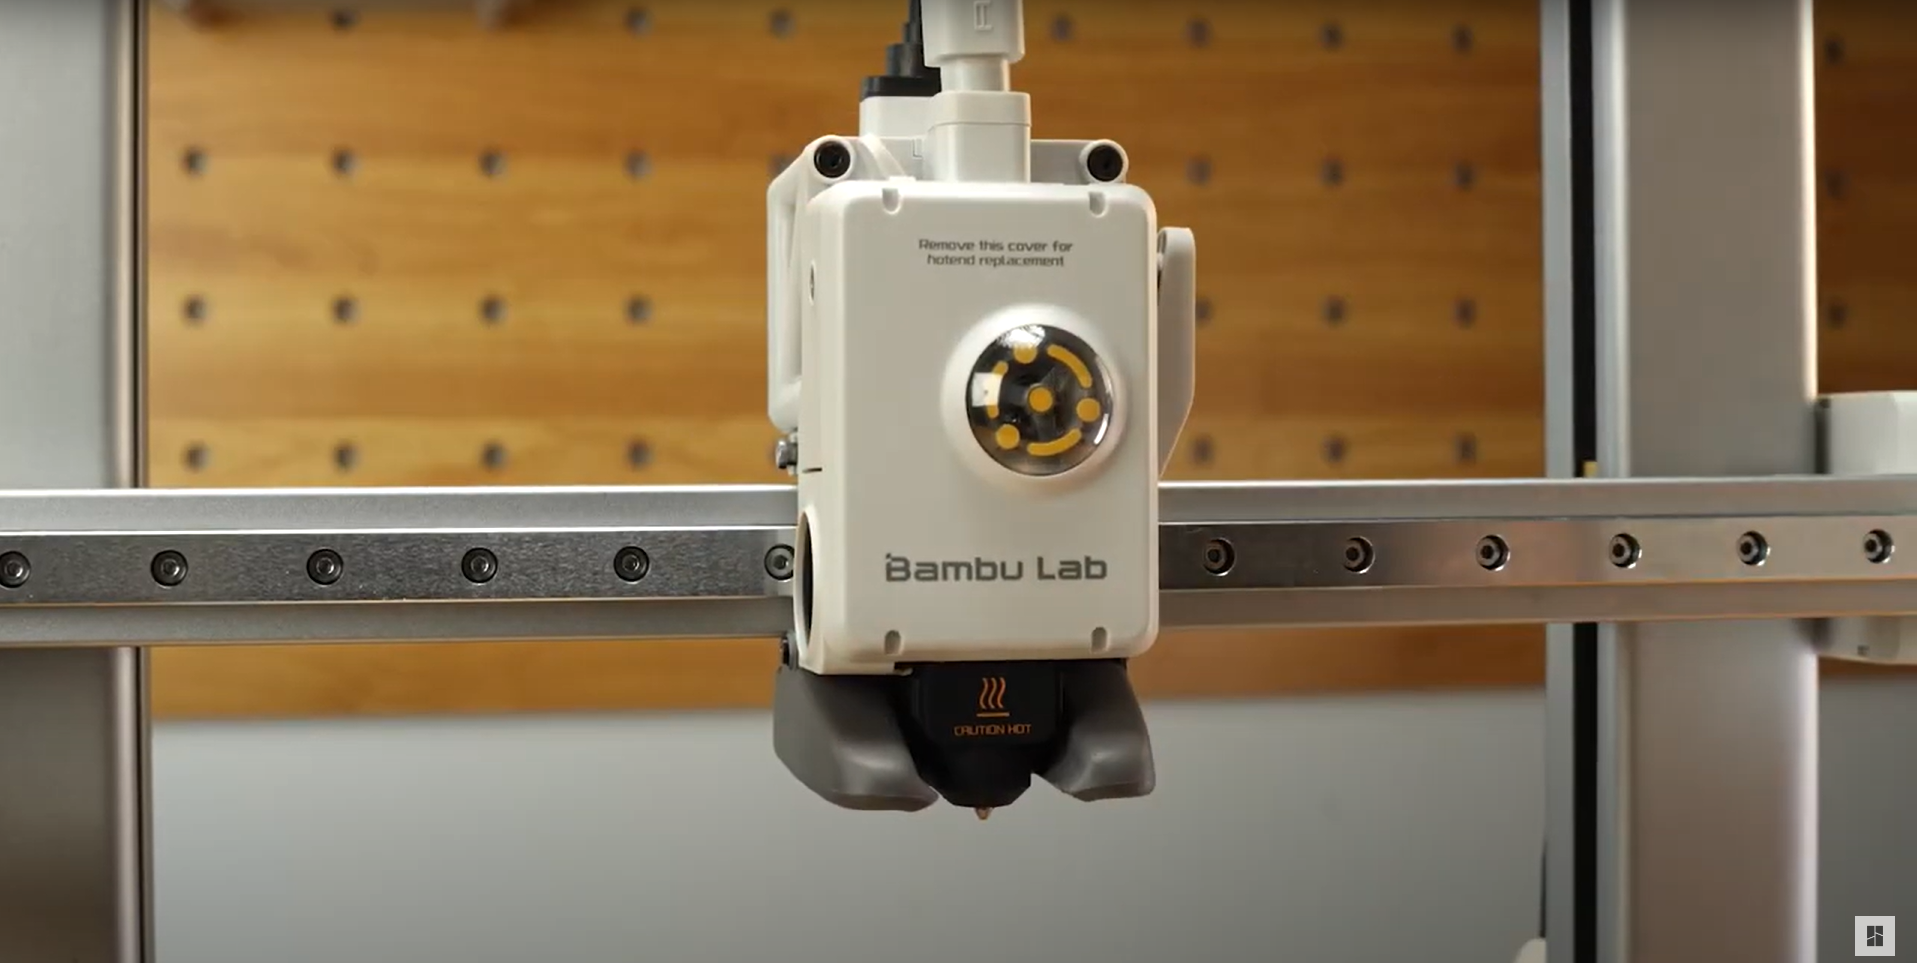
Step 3. Reinstall the toolhead front cover.
Step 4. After completing the assembly, refer to the maintenance mode setup instructions from the preparation stage to exit maintenance mode.
Note: If any damage is detected, the necessary parts can be purchased through the online store.
¶ End notes
We hope that the detailed guide we shared with you was helpful and informative.
We want to ensure that you can perform it safely and effectively. If you have any concerns or questions regarding the process described in this article, we encourage you to reach out to our friendly customer service team before starting the operation. Our team is always ready to help you and answer any questions you may have.
Click here to open a new ticket in our Support Page.
We will do our best to respond promptly and provide you with the assistance you need.