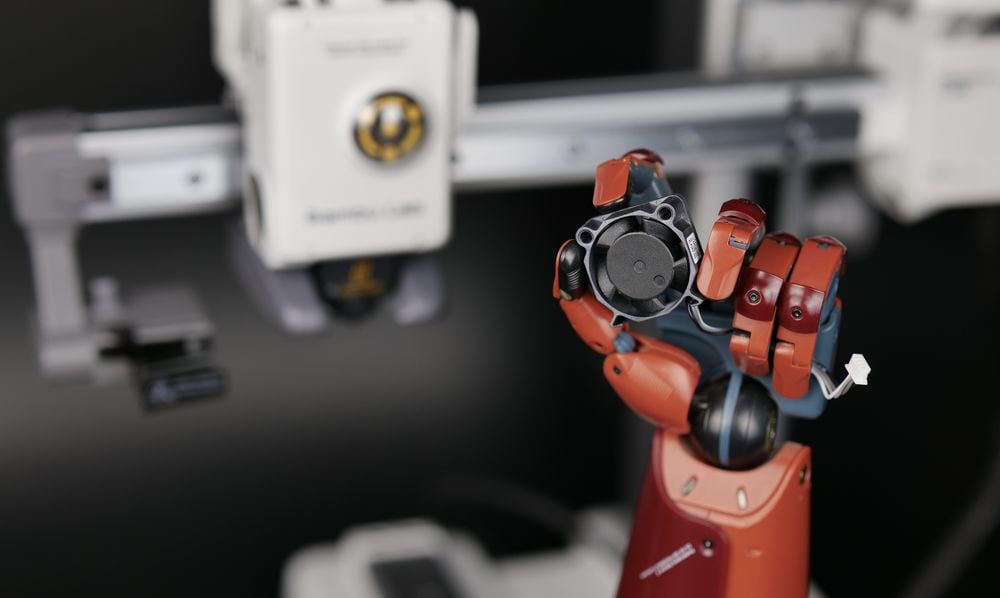
This guide shows the process of replacing the MC Board Fan for the A1 mini.
The A1 mini uses the same type of fan as the one used by the X1C Hotend, and can be purchased from our store.
¶ Tools Required
- 2mm Hex Wrench
- X1C Hotend Fan
- 15 minutes of your time
¶ Steps to replace the MC Board Fan on A1 mini
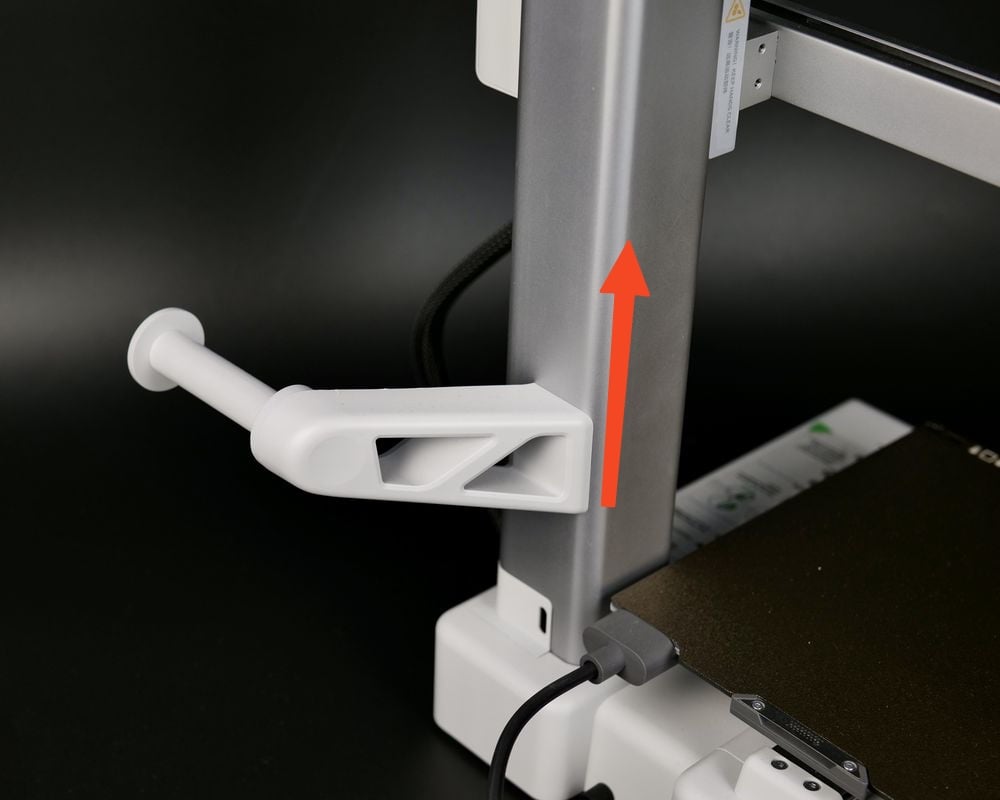
¶ 1. Remove the spool holder from the printer (optional)
The first step before replacing the A1 mini MC board fan is to remove the spool holder. You will need to place the printer on its side in the next step, and removing the spool holder will help.
This is an optional step.
If you are using the A1 mini Combo version with the AMS Lite, you will need to disconnect the AMS Lite PTFE tubes from the print head, and the AMS lite cable.
¶ 2. Remove the printer's bottom housing cover
Place the printer on its side, with the Z axis facing the table.
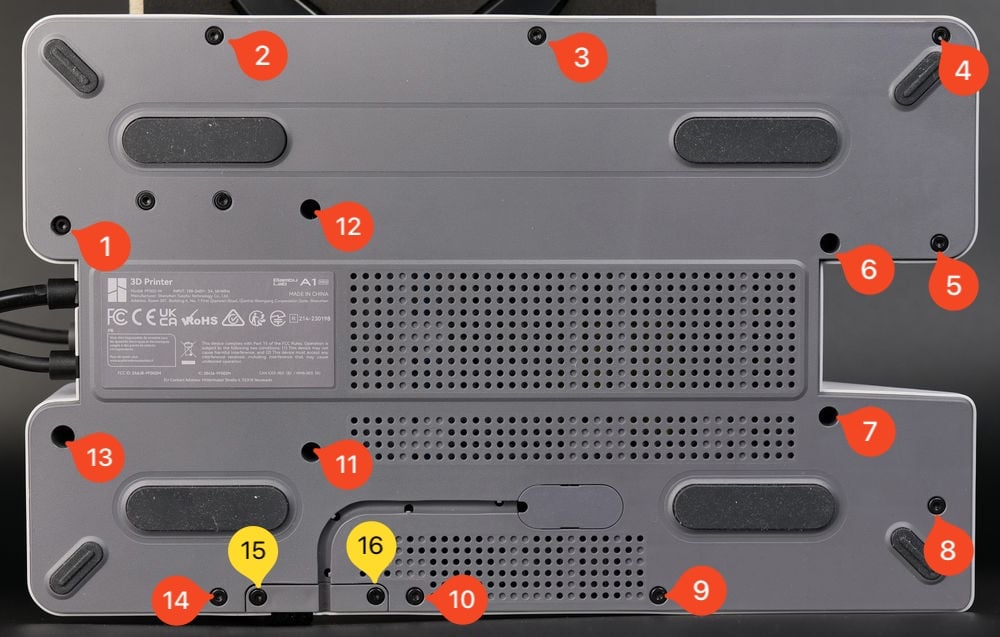
Then, remove the 16 screws holding the bottom cover in place, to access the MC board fan.
Please note that screws 15 and 16 are different, so keep track of them for when you will re-assemble the bottom cover.
After removing the screws, gently pry out the plastic bottom cover.
You can start from the top right side, and gently work your way around the printer until the cover gets loose.
¶ 3. Remove the old MC board fan
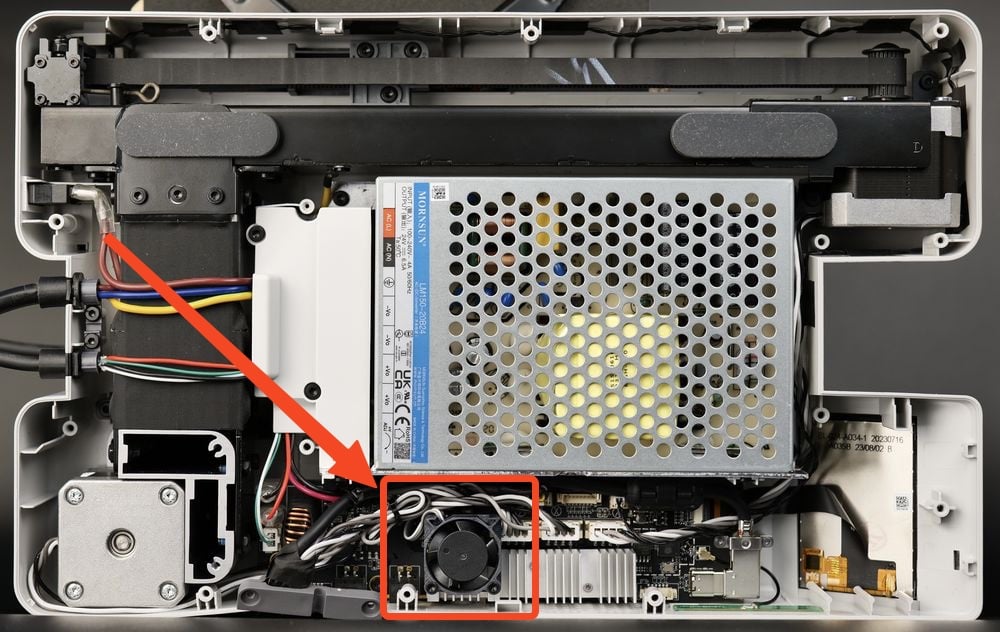
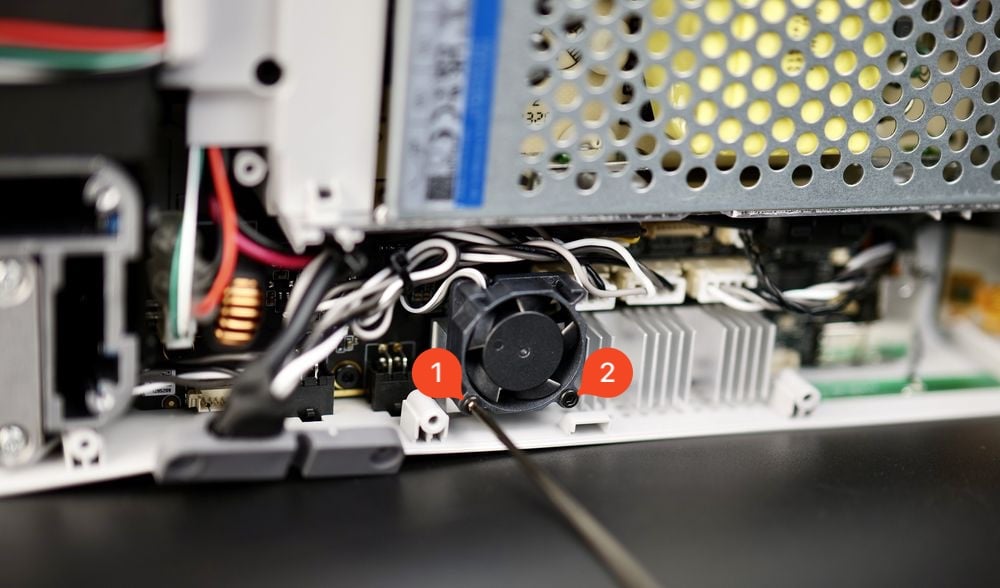
With the plastic bottom cover removed, you now have access to the MC board fan and the connector.
Please note that the MC Board fan position could be slightly different, where it is attached to the heatsink towards the right side.
The same information applies, and the functionality is identical
|

|
Start by removing the two screws holding the fan in place.
|

|
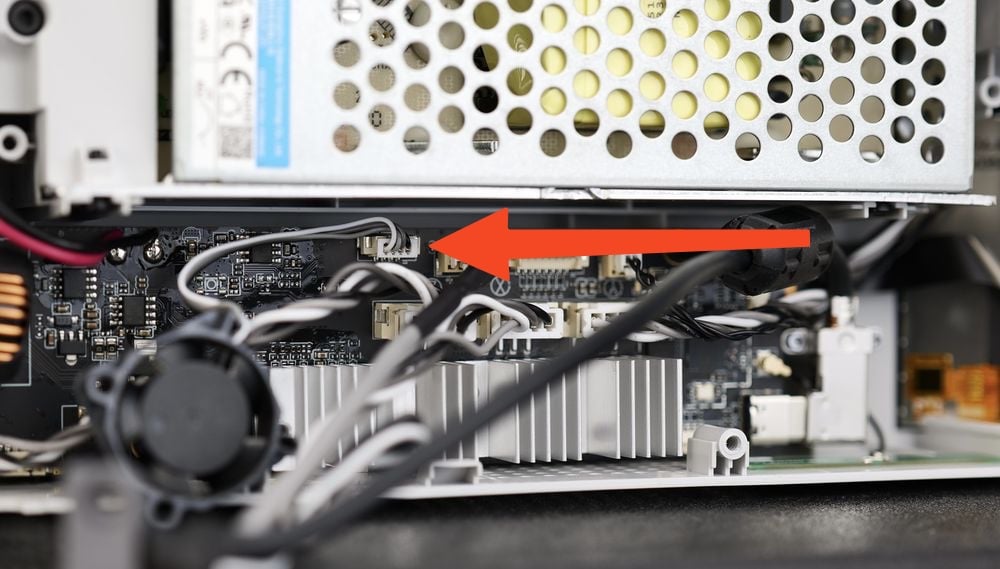
With the screws removed, gently pull the fan towards you and locate the fan cable connector.
Gently pull on the fan connector to disconnect the cable from the MC board.
|
|

|
|
You will need to move away the other cables to get a better view of the connector. Please do this carefully, to ensure you do not disconnect other cables.
¶ 4. Install the new MC board fan
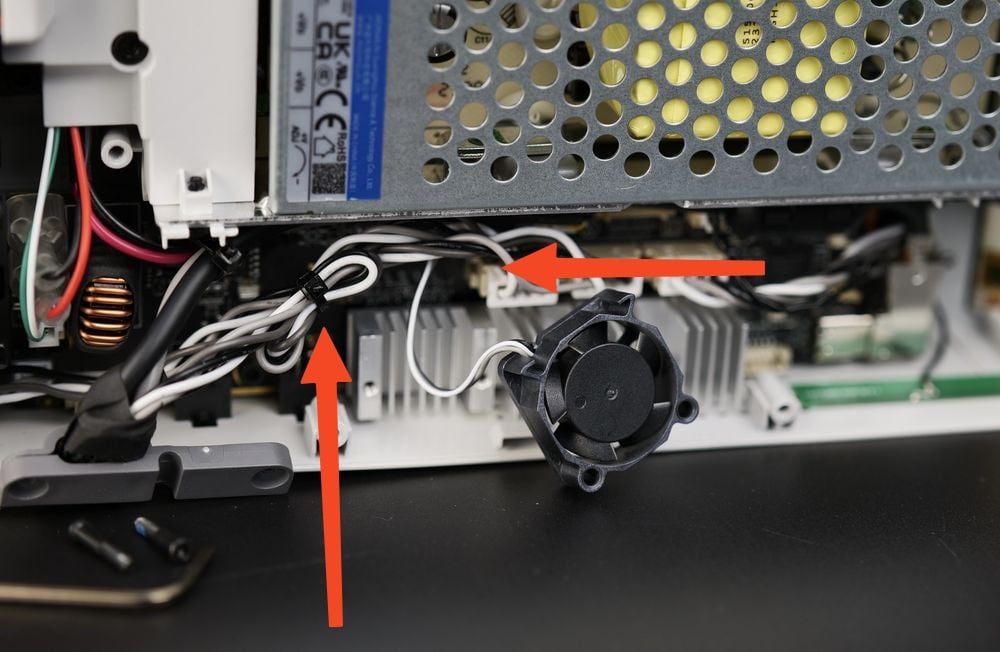
To install the new fan, you first need to connect the wire as shown in the image above.
The correct way to connect it is with the white wire on the left, and the black wire on the right side
After connecting the MC board fan wire, arrange the cables as shown in the image below, while also ensuring all other connectors are correctly installed and have not been disconnected during this procedure.
Ensure that all cables are carefully arranged so they do not reach the
blades of the fan to interfere with its operation.
|
|

|
¶ 5. Attach the MC board fan to the printer
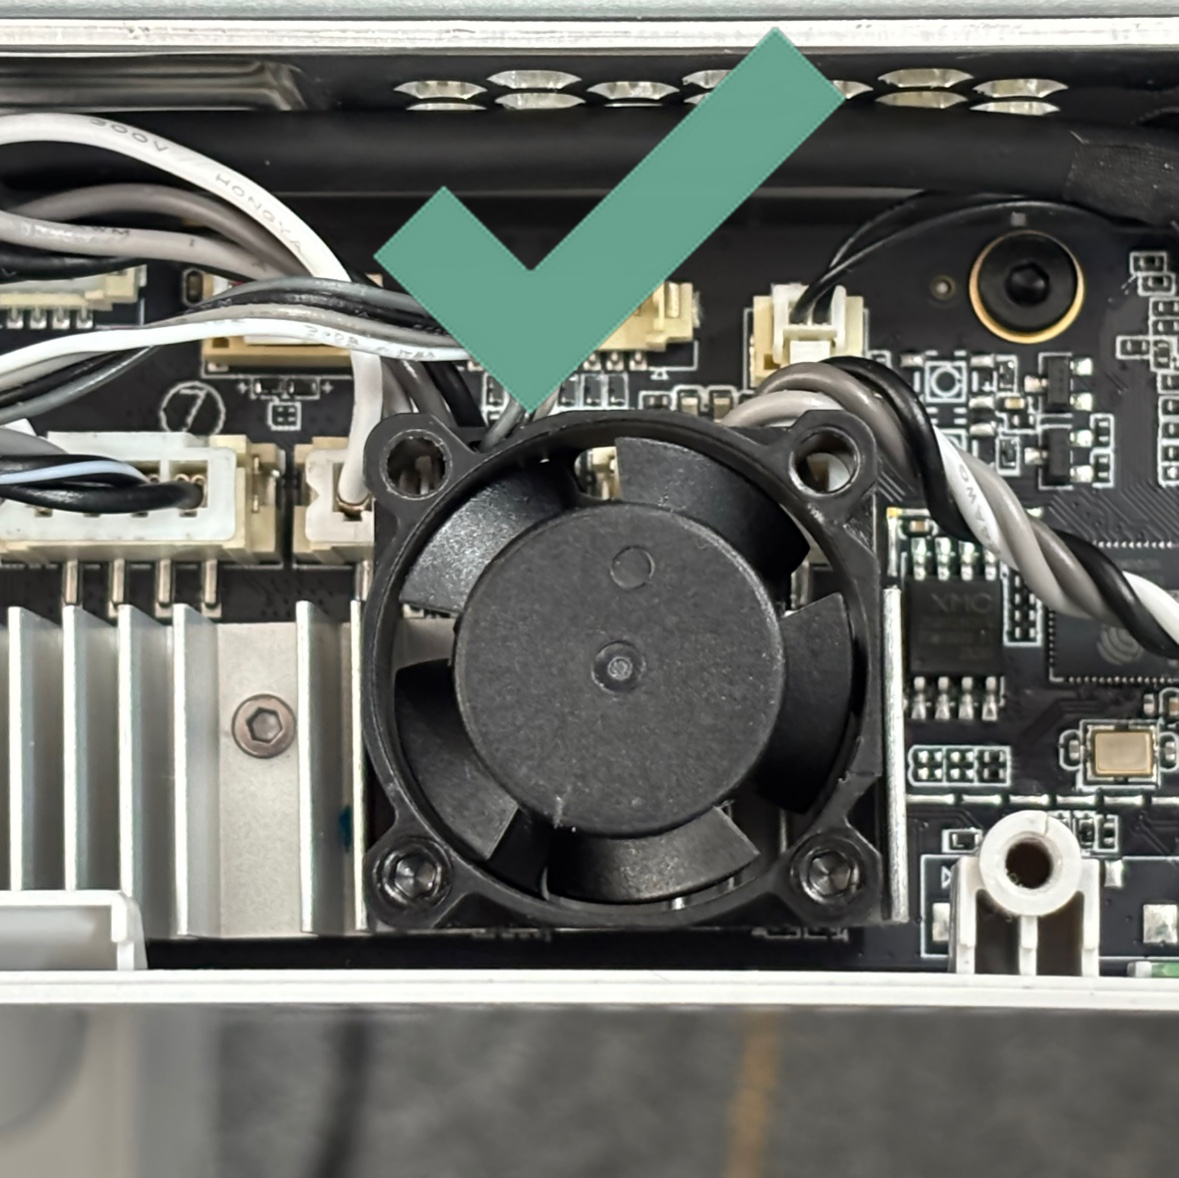
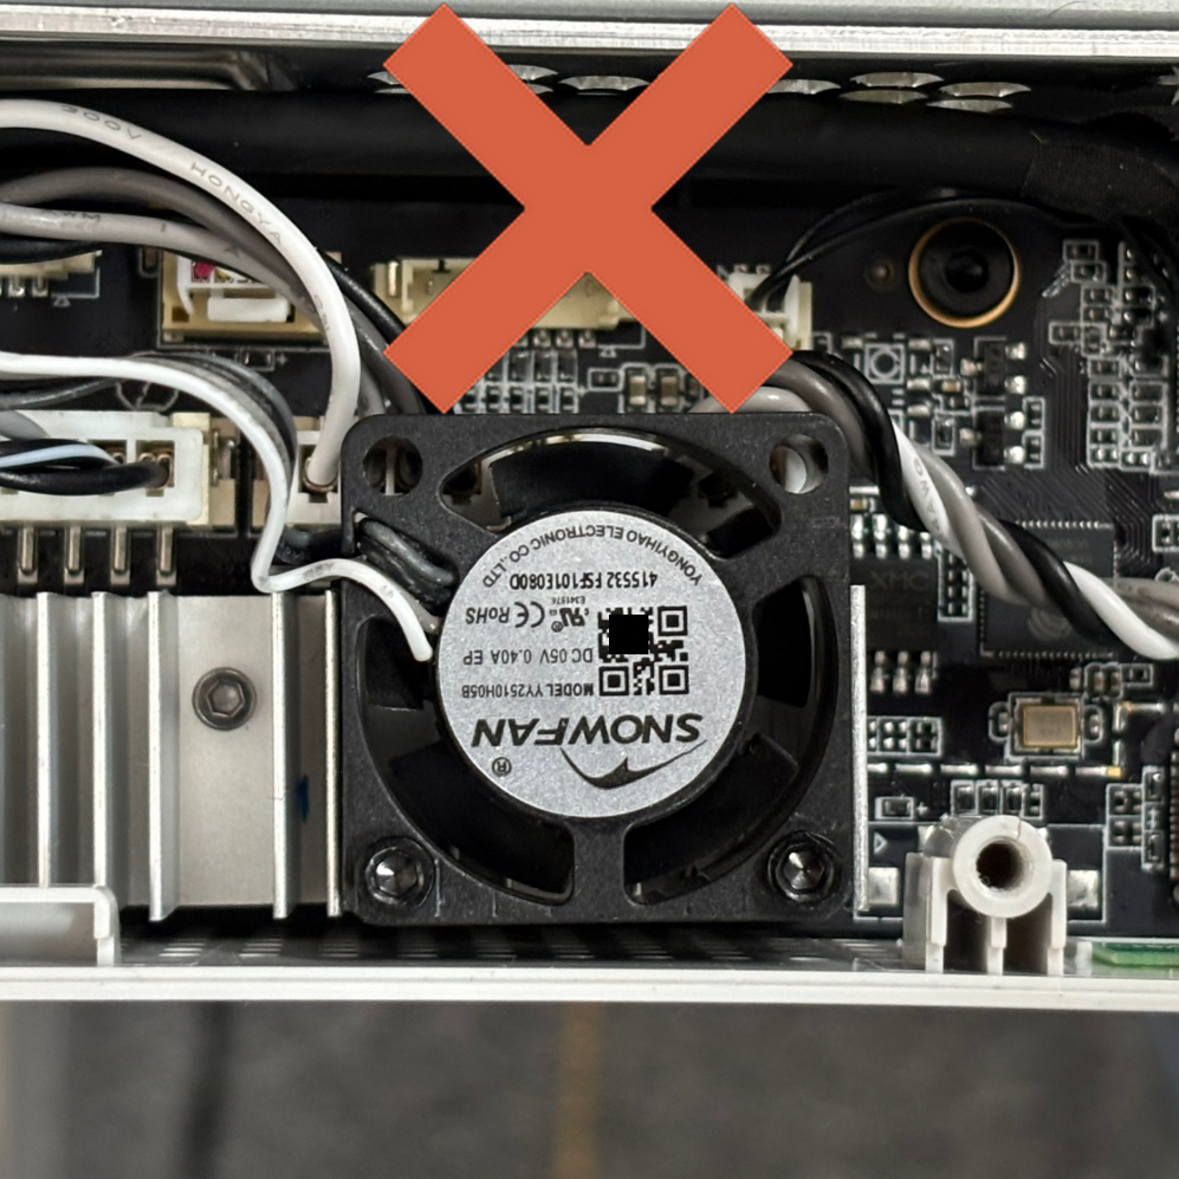
Using the two screws, re-attach the MC board fan to the printer's MC board heatsink, as shown in the image below.

|

|
Please install the fan correctly, as shown in the picture. The nameplate is NOT visible when the fan is facing correctly.
|
|
¶ 6. Install the back cover
With the fan installed, you can proceed with installing the bottom cover back to the printer.
Start by tightening screws 15 and 16 to ensure the side wire loom sits correctly.
Then, proceed with installing the other remaining screws, while ensuring you do not over-tighten them.

Please note that the screws are installed directly into the plastic. You should avoid tightening them too much, as they can strip the plastic frame.
When reinserting the screw into the hole, turn it gently and slowly in the counterclockwise direction (opposite of the tightening direction), applying only a slight amount of pressure.After about half a turn (this can vary, such as a quarter or three-quarters of a turn, depending on the screw's position relative to the original thread), you should hear a faint "click" and feel it in the hex wrench.
This "click" signifies that the screw has aligned with the start of the original thread. At this point, you can begin turning the screw in the clockwise direction to tighten it, and it will properly engage with the original thread.
¶ 7. Test the new fan
Now that the printer is re-assembled, you can test the new MC board fan.
To do so, you simply need to start the printer and wait for a few seconds. After the printer turns on, you will hear the new fan running.
If there is no fan noise after installation, perform a homing procedure using the on-screen buttons, which should turn it on.
If the fan is still not working, you will need to follow the steps again and ensure the MC board fan wire is connected as expected.
¶ Potential problems and solutions
If you encounter problems during the installation of a new MC Board Fan, please check the potential problems and solutions listed below:
¶ Motherboard Board Cooling Fan not working
Re-connect the Motherboard Cooling Fan as shown in the Step 6: Install the new MC board fan
¶ End Notes
We hope that the detailed guide we shared with you was helpful and informative.
We want to ensure that you can perform it safely and effectively. If you have any concerns or questions regarding the process described in this article, we encourage you to reach out to our friendly customer service team before starting the operation. Our team is always ready to help you and answer any questions you may have.
Click here to open a new ticket in our Support Page.
We will do our best to respond promptly and provide you with the assistance you need.