Please note that the information on this page is specific to A1 series printers only.
¶ First Layer
The quality of the first layer is crucial for 3D printers. If the first layer is not properly laid, it can lead to overall printing failures for the entire model.
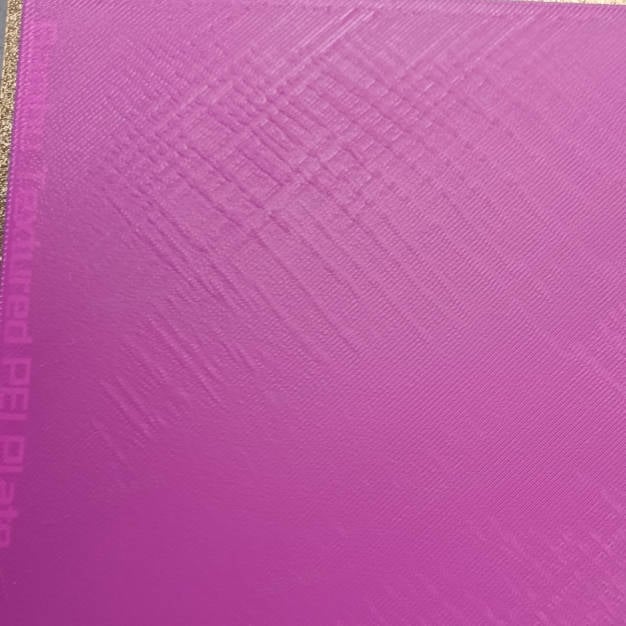
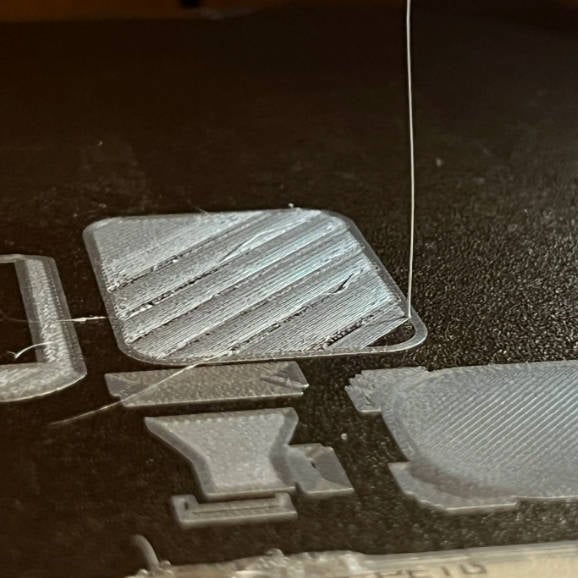
In this section, we will discuss the reasons behind a too low first layer during printing and provide solutions. When we refer to a "too low" first layer, it means that the distance between the nozzle and the build plate is too close, resulting in issues such as "peeling," "bulging," and "wavy lines" during the first layer printing process.
The figure below illustrates the phenomenon.
¶ Cause
¶ Heatbed leveling has not been performed
It is crucial to perform heat bed leveling, particularly when changing or replacing the build plate, to ensure accurate leveling for the new print task.
Neglecting this step may result in discrepancies compared to the previous leveling data.
¶ The position of the hotend changed
The position of the hot end changes when printing compared with the bed leveling, and the nozzle is closer to the heat bed resulting in excessive extrusion of the first layer.
¶ Solution
¶ Perform bed leveling before starting a print
Running bed leveling before printing is recommended, especially when changing or replacing the PEI printing plate.
This is required for the best results and will ensure consistent first-layer results.
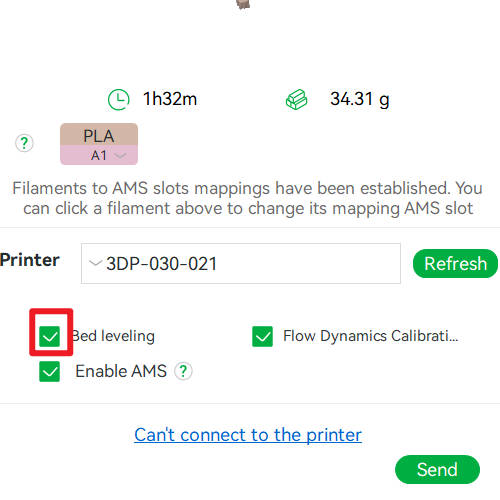
You can do so by enabling the Bed Leveling feature in the slicer, right before starting a print.
¶ Check the Hotend and Heater
If bed leveling is performed during the current printing and no improvement is observed, you can try tightening the secure screws of the hotend heater screws.
Start by confirming that the hotend temperature is below 50℃ by checking the screen.
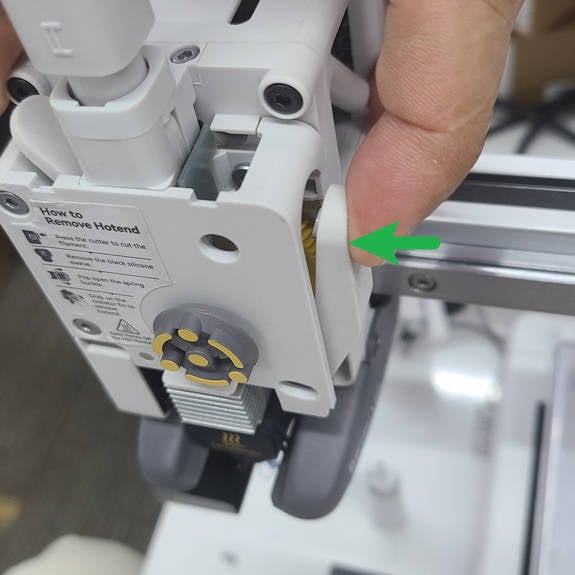
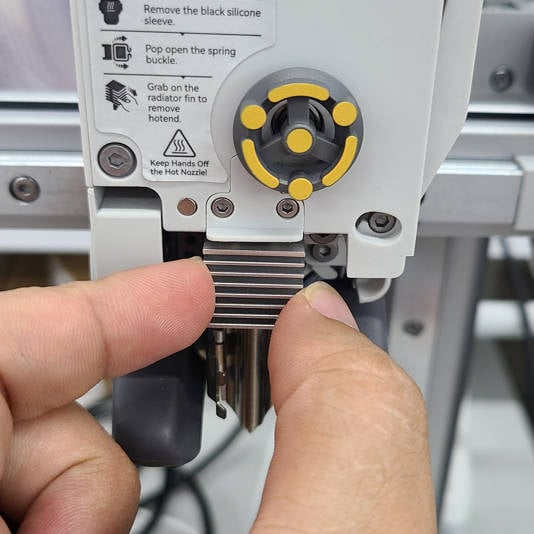
Next, turn off the printer and remove the front cover. Follow the instructions on the guide sticker to remove the hotend.
 |
 |
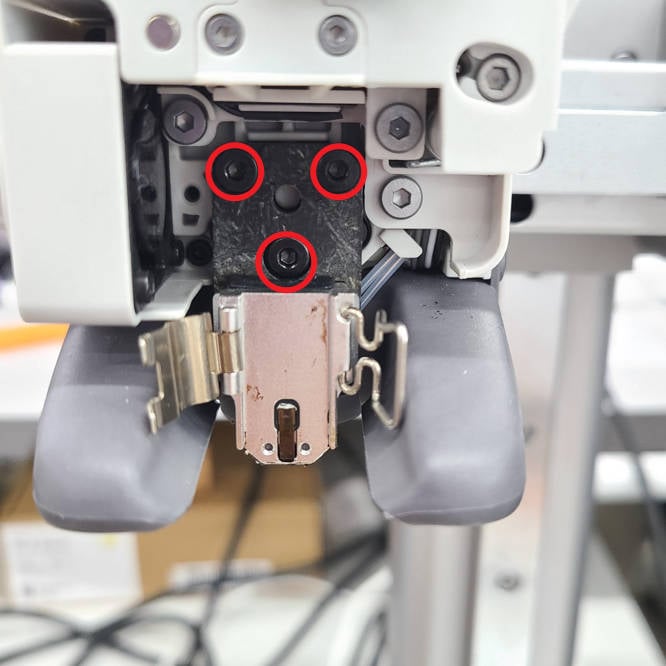
In the next step, remove the 3 screws that secure the heater assembly using an H2.0 hex key.
Flip the heater assembly over to access the 4 small screws at the back and use an H1.5 hex key to retighten the screws as shown in the images below.
Please be cautious as these screws are relatively small.
 |
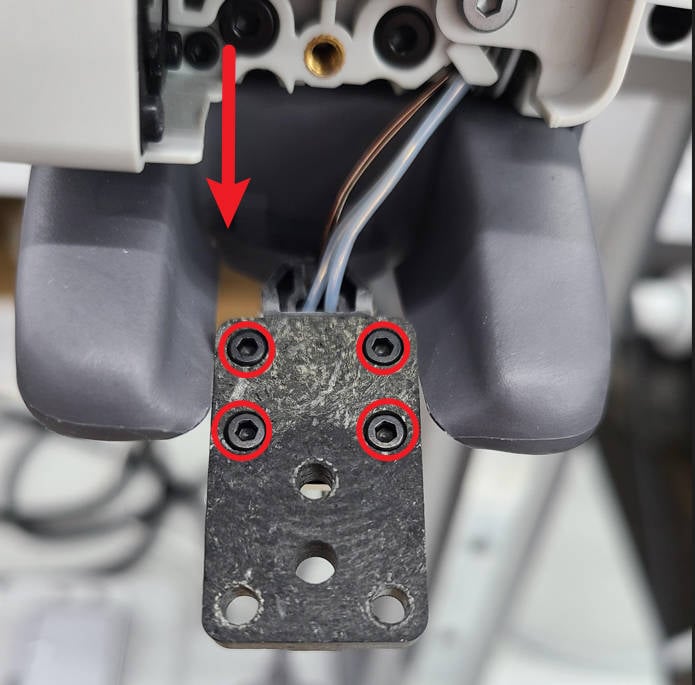 |
Note: The 3 screws fixing the hotend heating assembly are M3*10; the 4 small screws at the back are M2*6 (with flat gasket and spring gasket).
¶ Check if the heating assembly buckle is properly fastened
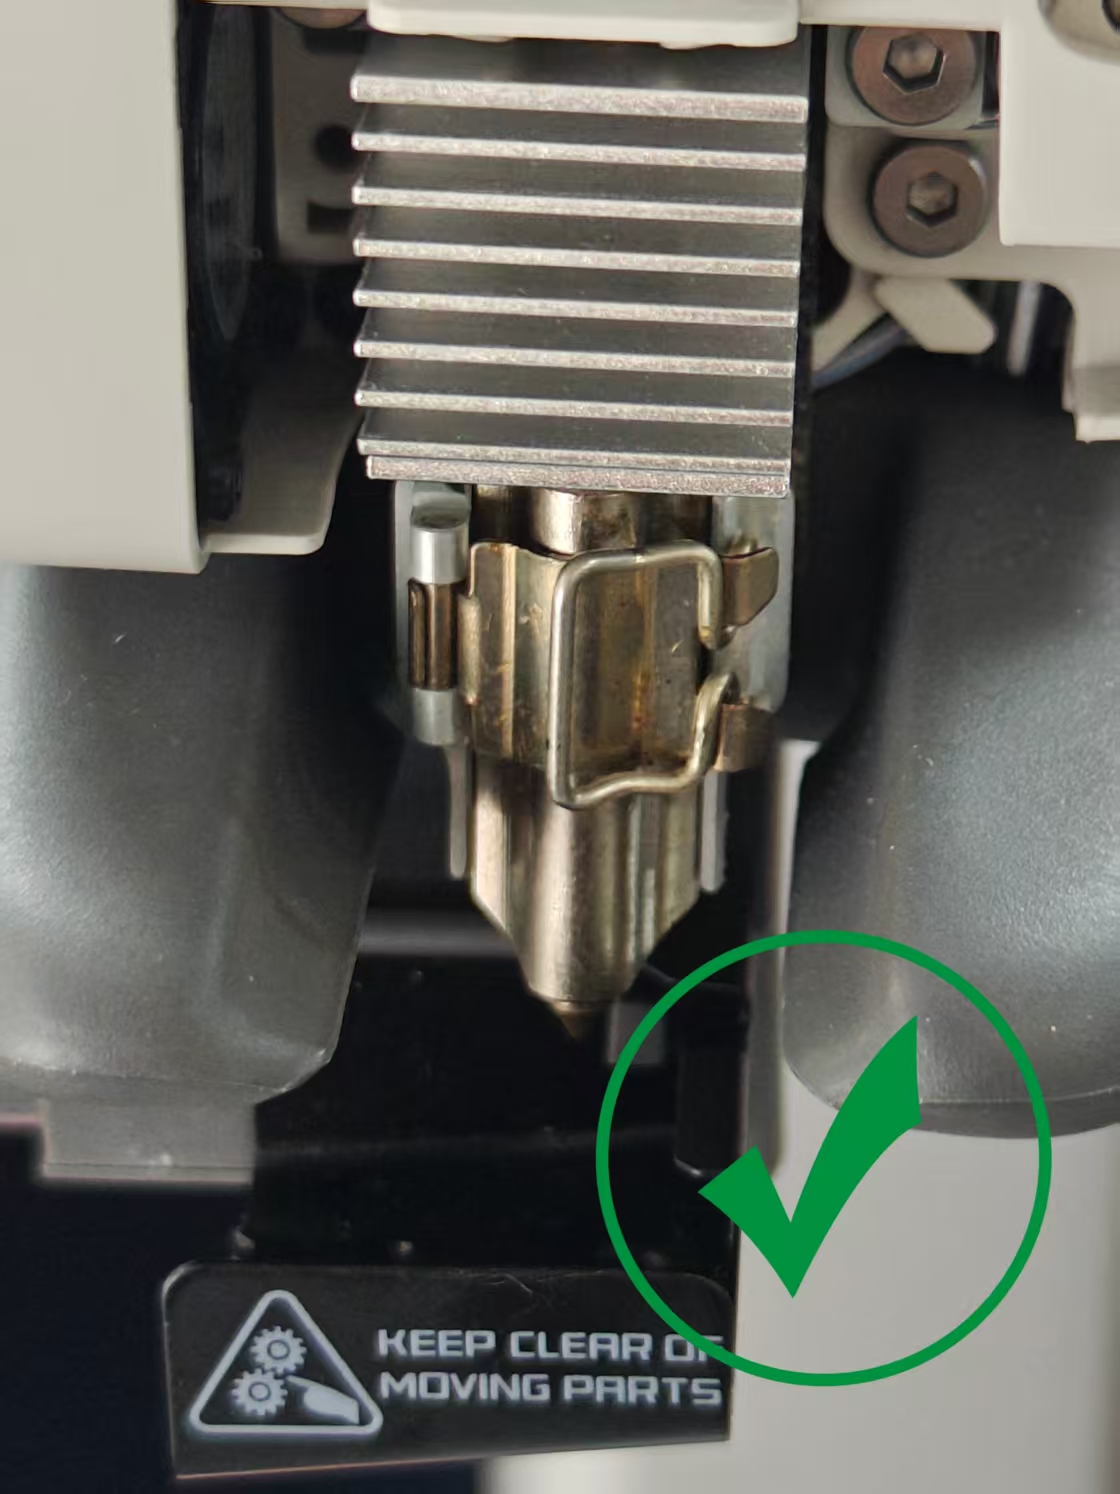
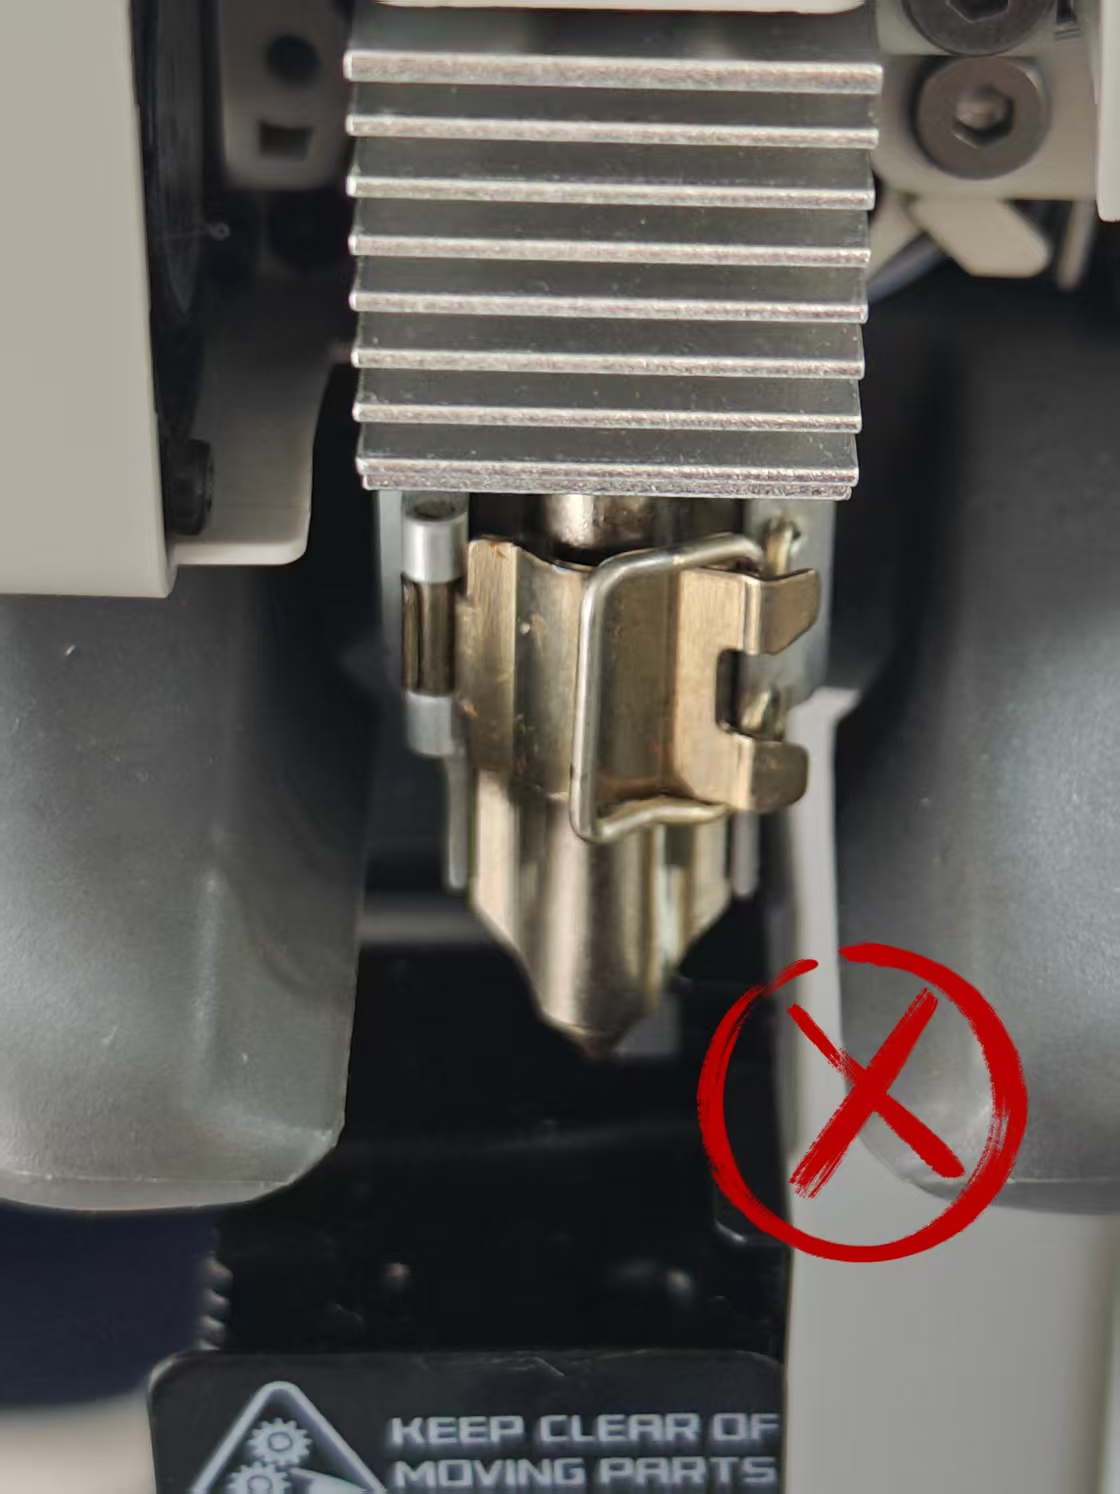
Please ensure that the buckle of the heating assembly is correctly fastened (refer to the figure below) and that the hot end is securely fastened. You can manually check for obvious shaking on the hot end. Attention: If the heating assembly is not properly secured or the clip is damaged, causing the hot end to be unable to be fixed, this will cause the hot end to be closer to the heat bed during the printing due to extrusion pressure, resulting in excessive compression of the first layer or even nozzle scratching of the build plate.
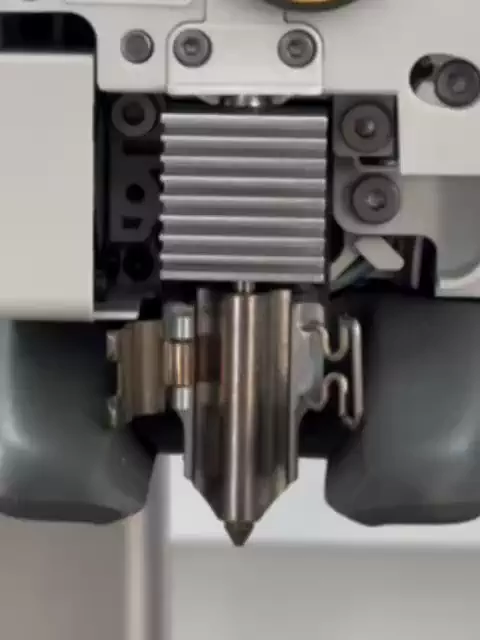
| Fasten the heating assembly correctly | Fasten the heating assembly incorrectly |
 |
 |
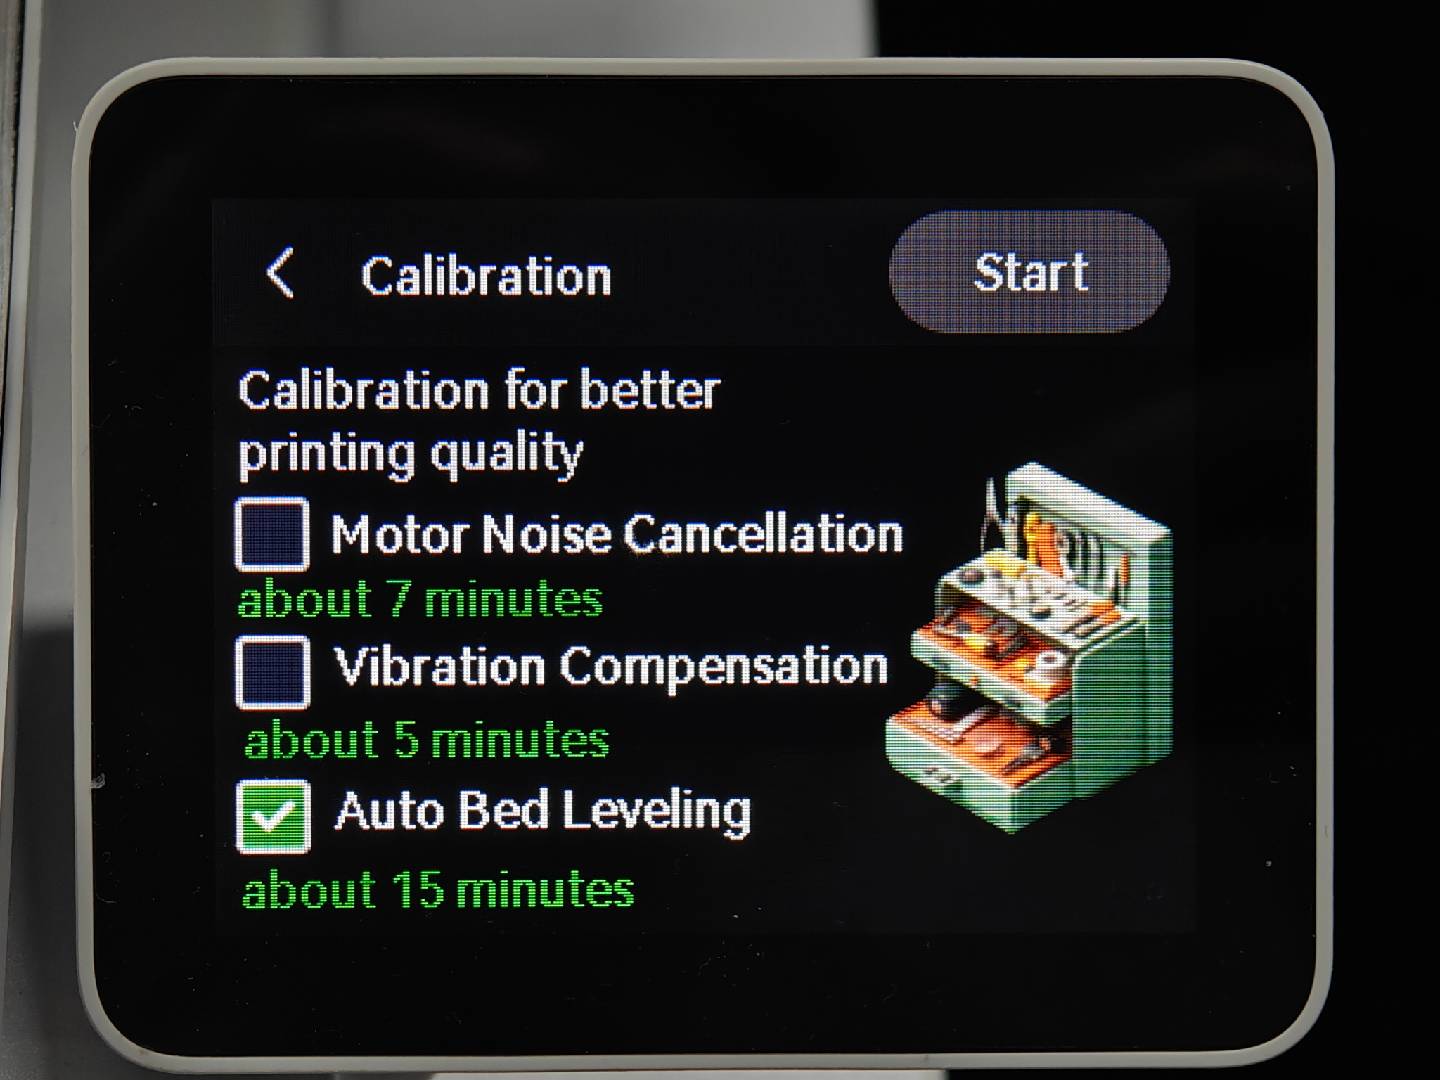
After reinstalling the equipment, start the printer and locate the auto bed leveling option in the calibration menu to perform the auto-leveling process.
¶ End Notes
We hope the detailed guide provided has been helpful and informative.
To ensure a safe and effective execution, if you have any concerns or questions about the process described in this article, we recommend submitting a Technical ticket regarding your issue. Please include a picture or video illustrating the problem, as well as any additional information related to your inquiry.