In this guide, we will present the steps required for printing from the Micro SD card used by the A1 series 3D printers.
¶ Applicable Printer Models
- A1
- A1 mini
¶ When to Use?
- When the printer is not networked, you can export files to the SD card and initiate print jobs from there;
- When the printer is networked, a print job can be initiated through the cloud server, or you can choose to send the file to the SD card over the LAN and initiate a print job from the printer screen.
¶ How to Print From SD Card on A1 / A1 Mini?
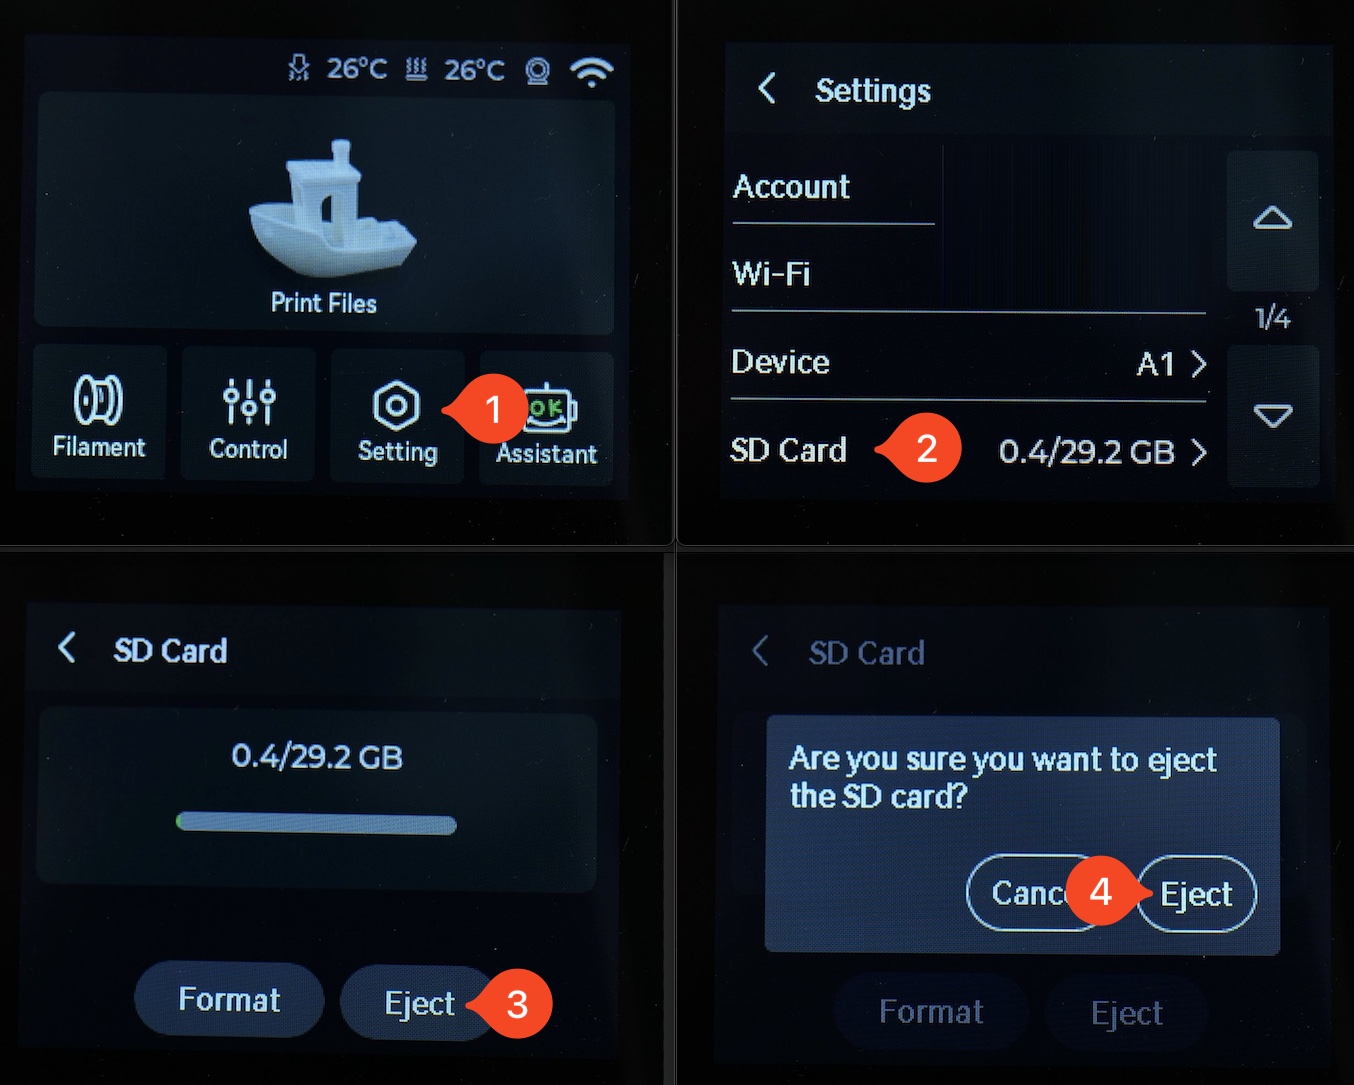
¶ 1. Eject the Micro SD Card
The Bambu Lab A1 series of 3D printers does not have a hot swappable card.
This means that every time when you remove the Micro SD card, it is very important to safely eject it from the menu, by following these steps:
- Navigate to Settings → SD Card
- From the SD Card menu, select Eject.
- Confirm the selection with Eject
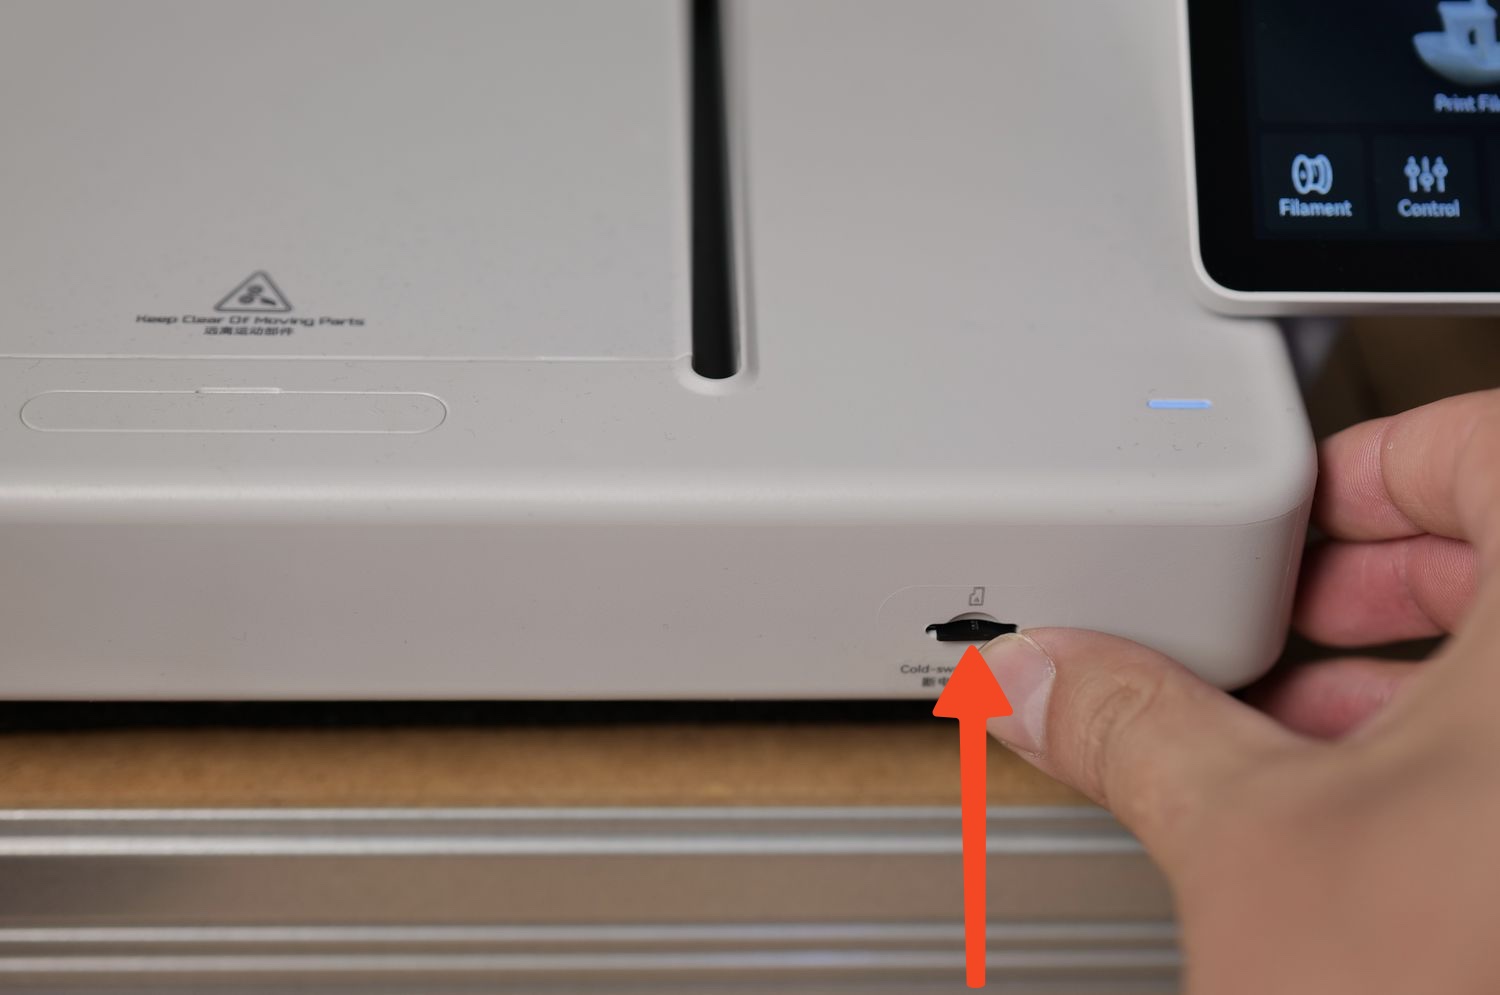
The micro SD card can now be removed from the printer. Simply press on the Micro SD card then release it, to eject it from the printer.
¶ 2. Slice the 3D Model using Bambu Studio
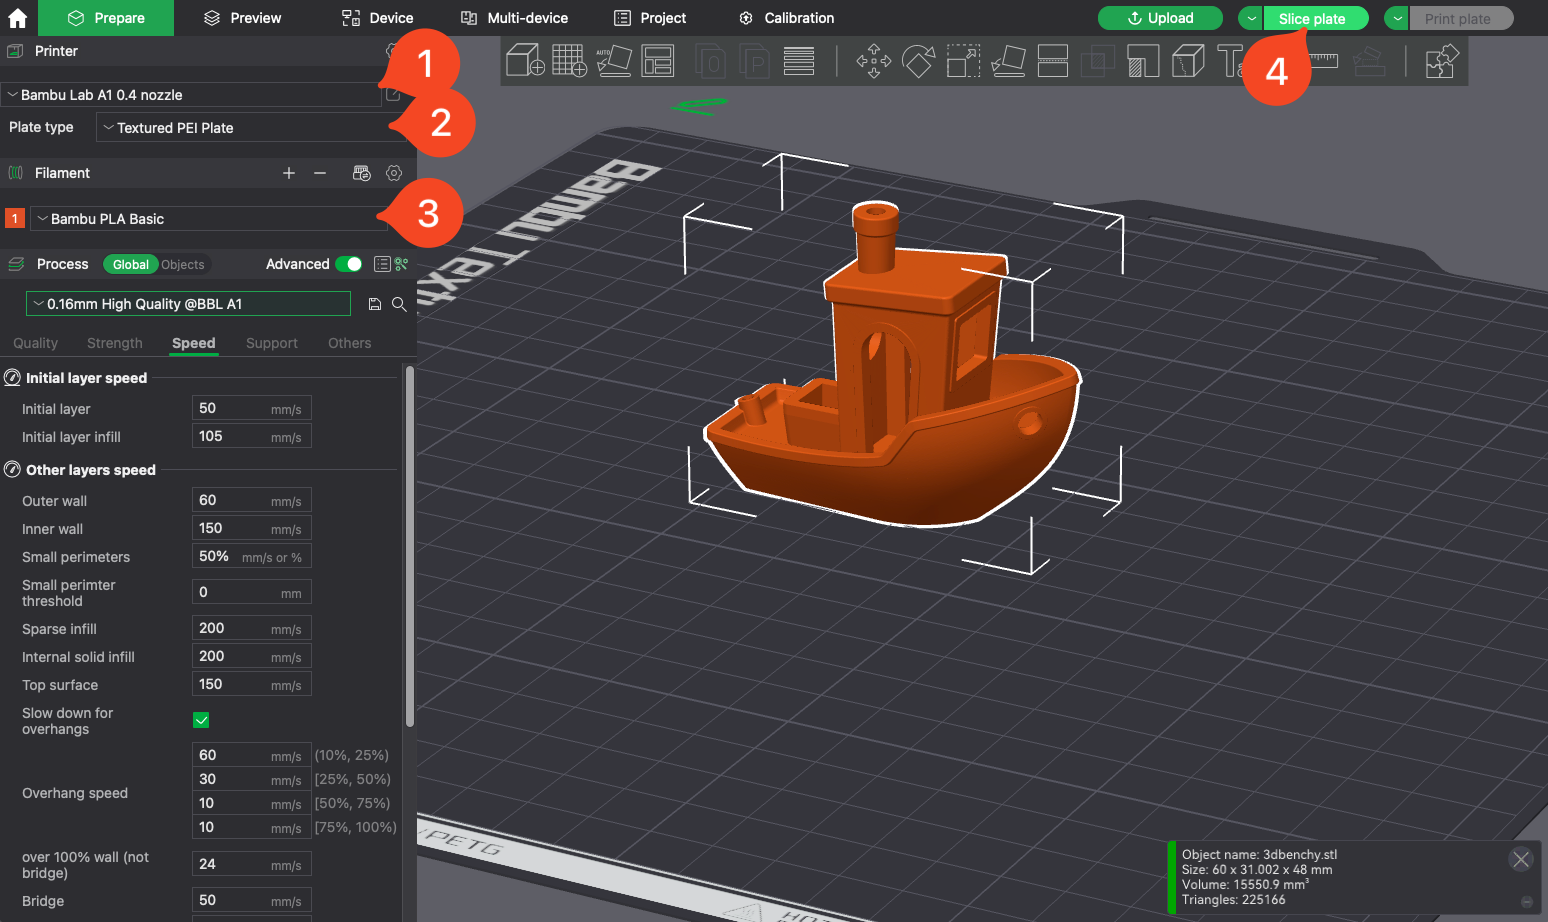
On your computer, open Bambu Studio and import the model you wish to print, then follow these steps:
- Select the correct Printer Type
- Select the correct Plate Type
- Select the type of filament you wish to print with
- Click on Slice Plate
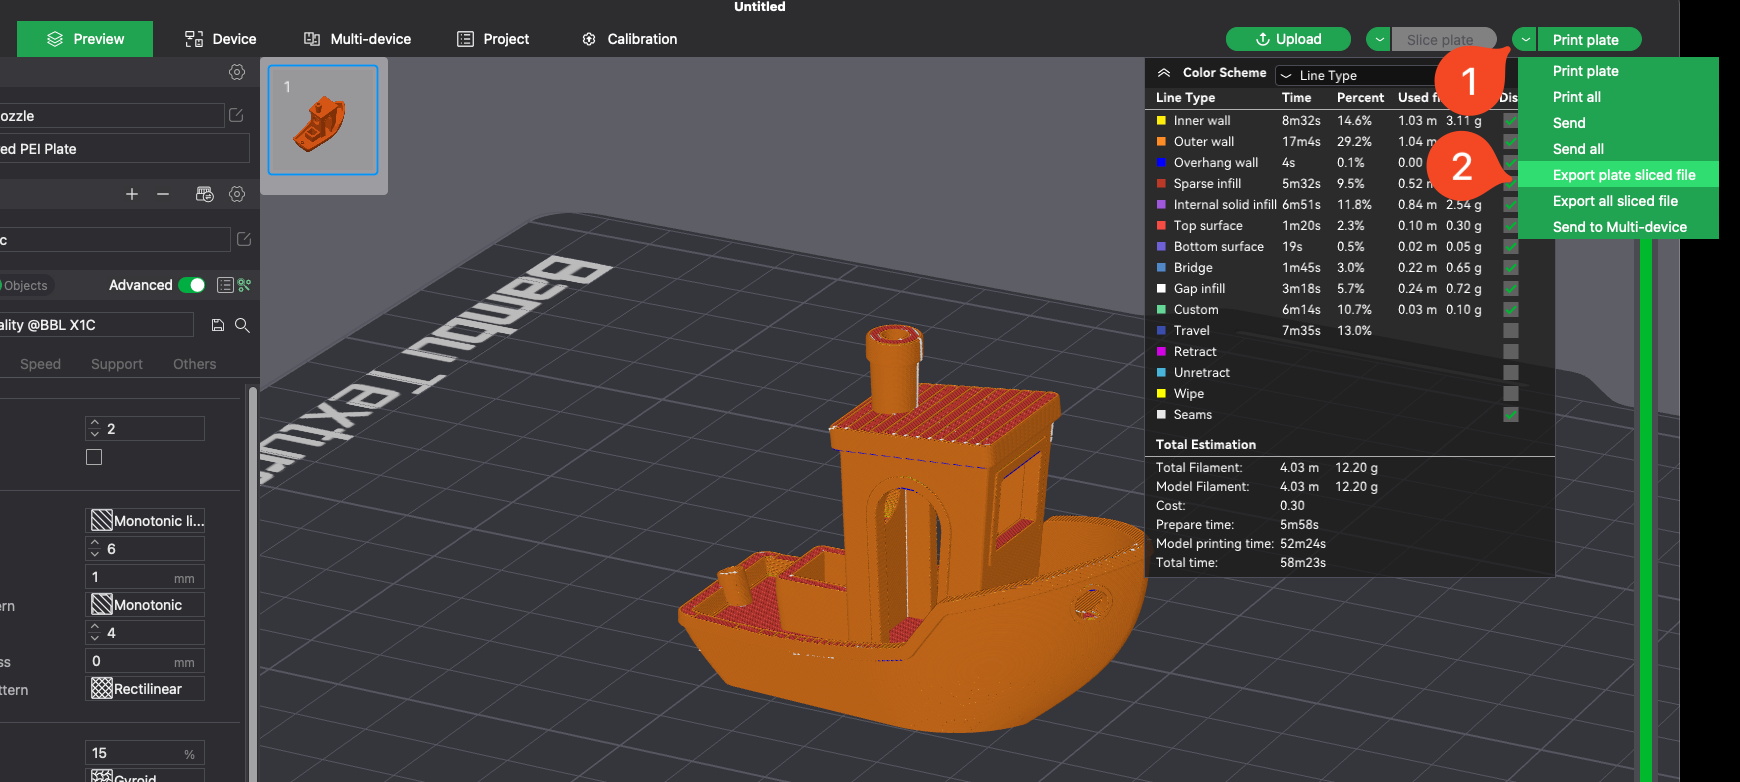
Once the file has been sliced, the model preview will be shown.
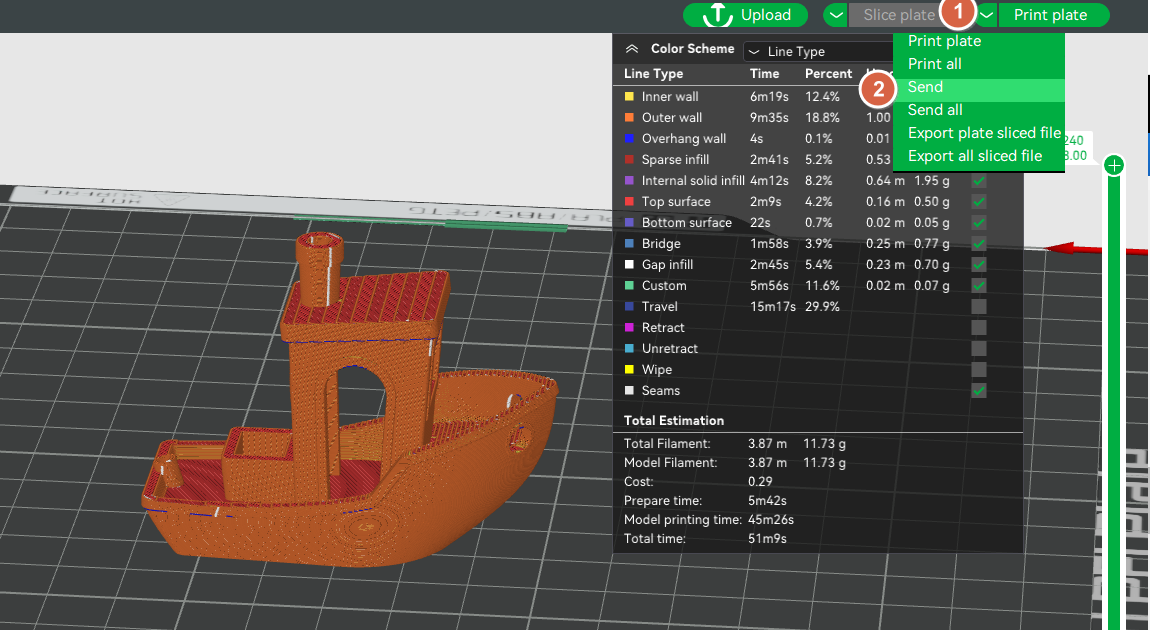
- Select the small arrow next to Print Plate
- Click on Export plate sliced file option
- Click again on the main Export plate sliced file option.
A prompt will show up allowing you to select where to save the file.
¶ 3. Copy the file and insert the Micro SD Card to the printer
When the Save prompt appears on your computer:
- Set a file name for your model
- Select the location where you wish to save it. In this case, it is the Micro SD card from the printer
- Click on Save
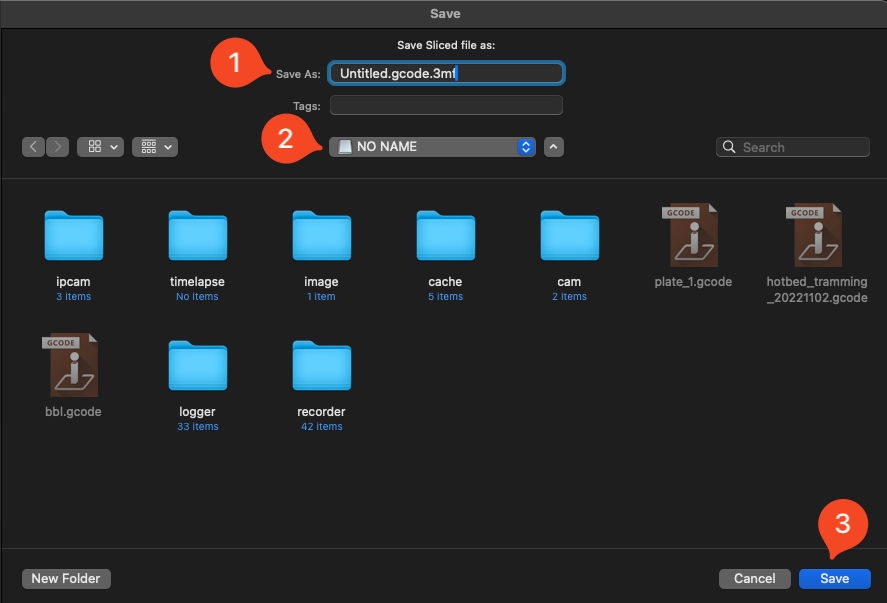
Important. Do not save it in any of the folders seen on the Micro SD card. It should be on the root of the SD card.
Next, remove the Micro SD card from your computer, and insert it into the printer Micro SD card slot
¶ 4. Start the Print
With the file sliced and copied on the Micro SD card of the printer, you can start the print.
To do so:
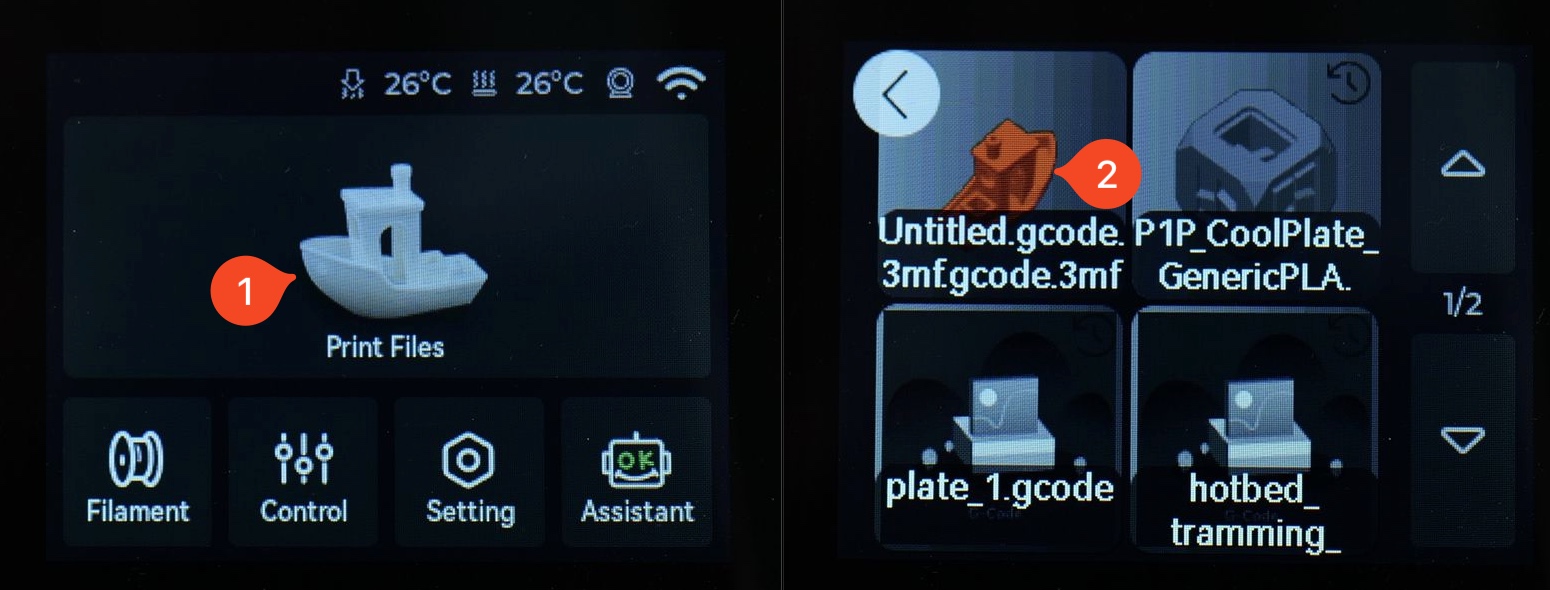
- Tap on Print Files
- Select the file you have previously saved
- Click Start Printing
¶ Print from SD Card with Wi-Fi Transfer
¶ 1. Slice the 3D Model Using Bambu Studio
On your computer, open Bambu Studio and import the model you wish to print, then follow these steps:
- Select the correct Printer Type
- Select the correct Plate Type
- Select the type of filament you wish to print with
- Click on Slice Plate

¶ 2. Send the Model to the Printer Micro SD Card
Once the file has been sliced, the model preview will be shown.
- Select the small arrow next to the Print Plate
- Click on the Send option
- Click Send again
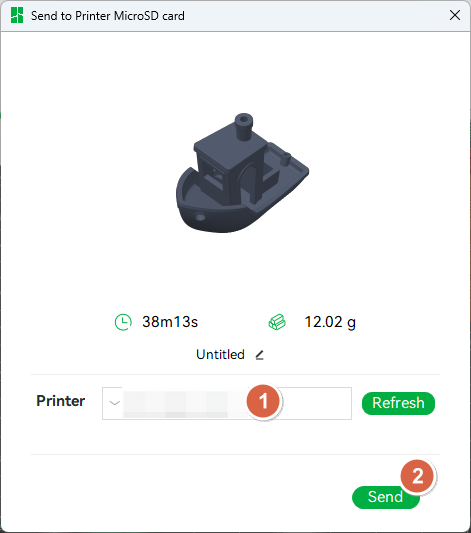
Select the printer you want to send to in the pop-up window and click Send.
Important. It is strongly recommended to wash the print surface before starting the print.
This will ensure the highest chances of success for the print, and will minimise the chances of a print failure due to adhesion.
Please follow this wiki article to learn more: Bambu Lab Textrued PEI Plate Cleaning Guide
¶ End Notes
We hope our guide was helpful. If you have any questions or concerns about the process, please contact our customer service team. We're here to assist you.
Click here to open a new ticket in our Support Page.
We will do our best to respond promptly and provide you with the assistance you need.