¶ Introduction to each module
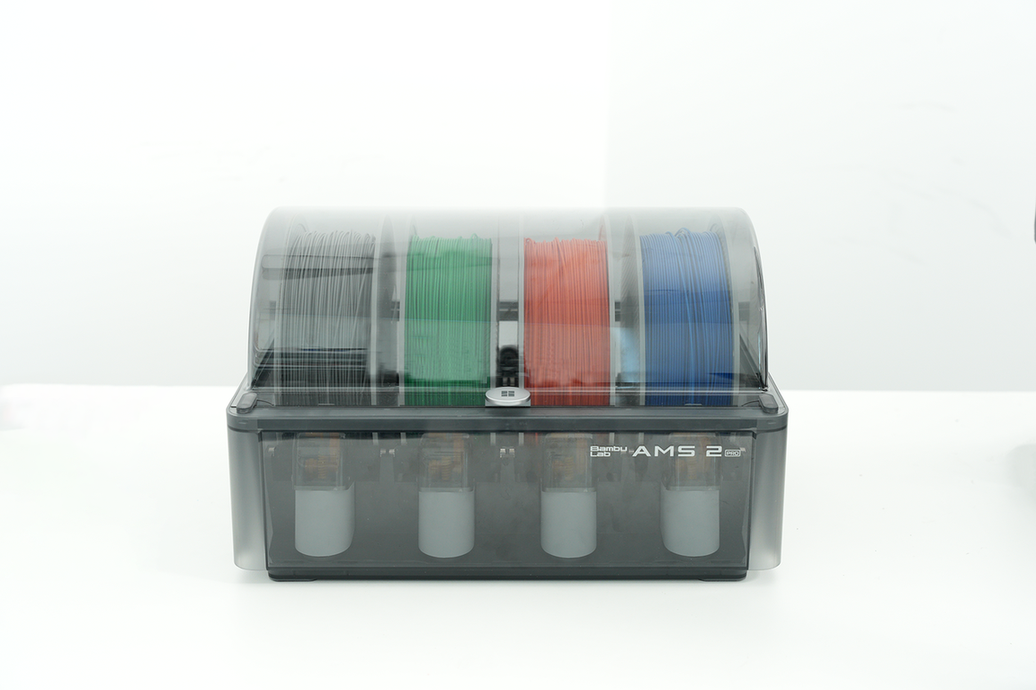
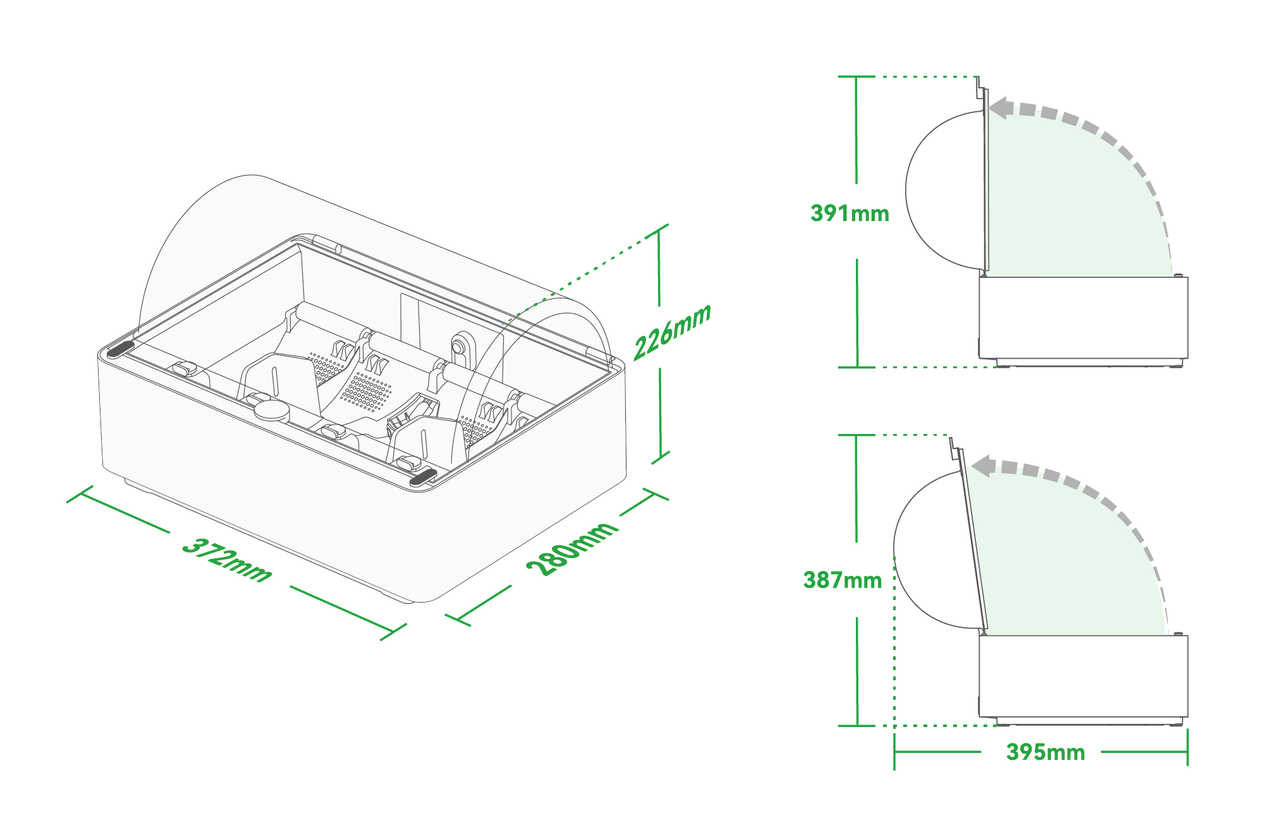
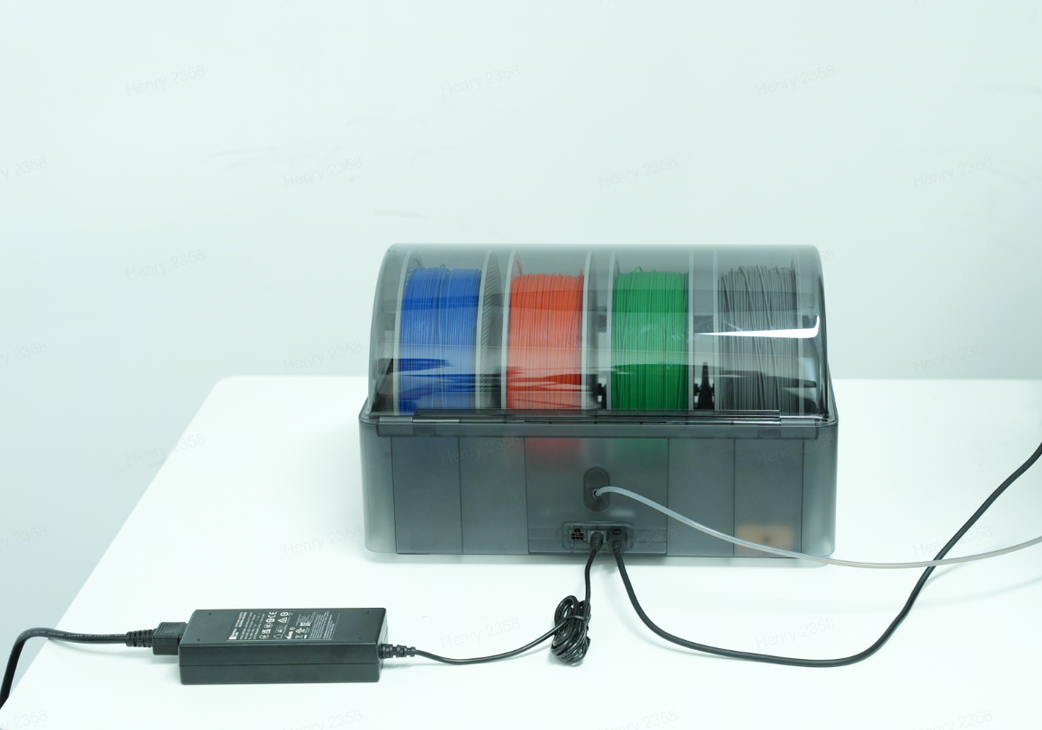
¶ Appearance and 3D dimension diagram
| The appearance of AMS 2 Pro | 3D dimension diagram |
|---|---|
 |
 |
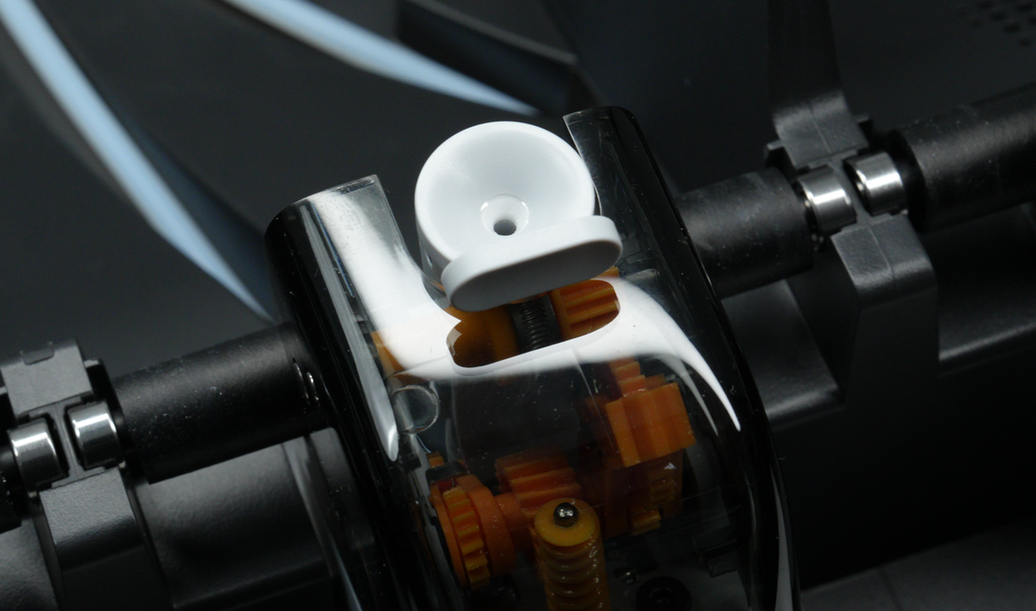
¶ Filament slots
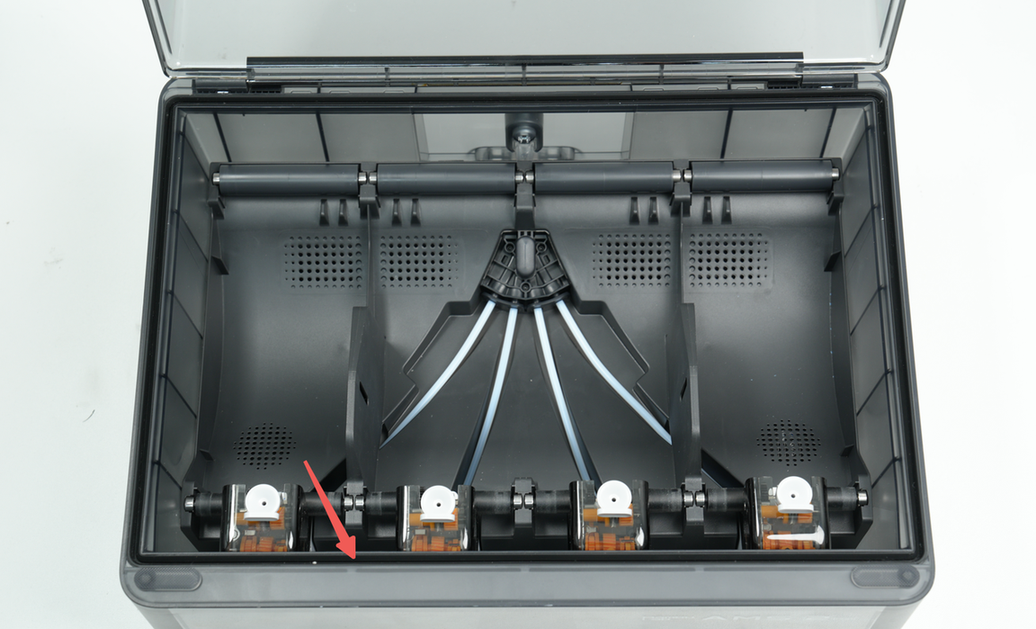
The AMS 2 Pro has four filament slots, each with one feeder inside. It has a separate motor and gears to push the filament forward or pull it back to the spool, and a sensor to detect the filament. When the filament is inserted, the feeder pulls the filament inward. When it needs to pull the filament back into the spool, the drive shaft will turn the spool to rewind it. Ceramic-reinforced anti-wear bushings are embedded in each feeder inlet to better protect the inlet from being worn by the filament after prolonged use.
| Filament slots | Feeder inlet |
|---|---|
 |
 |
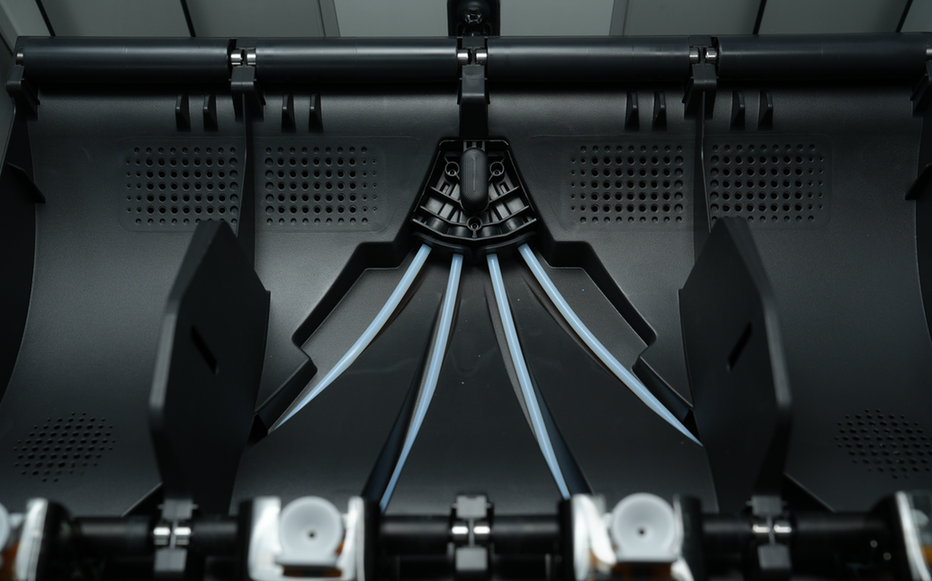
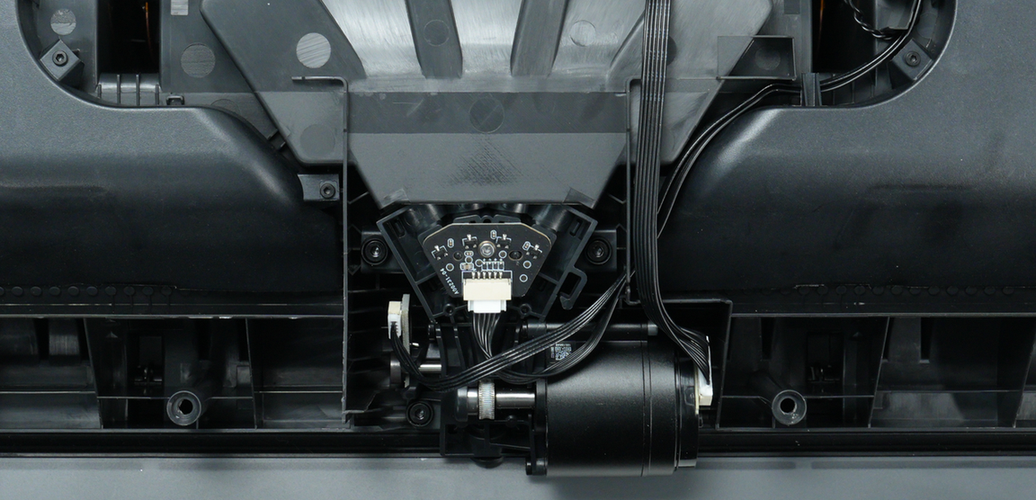
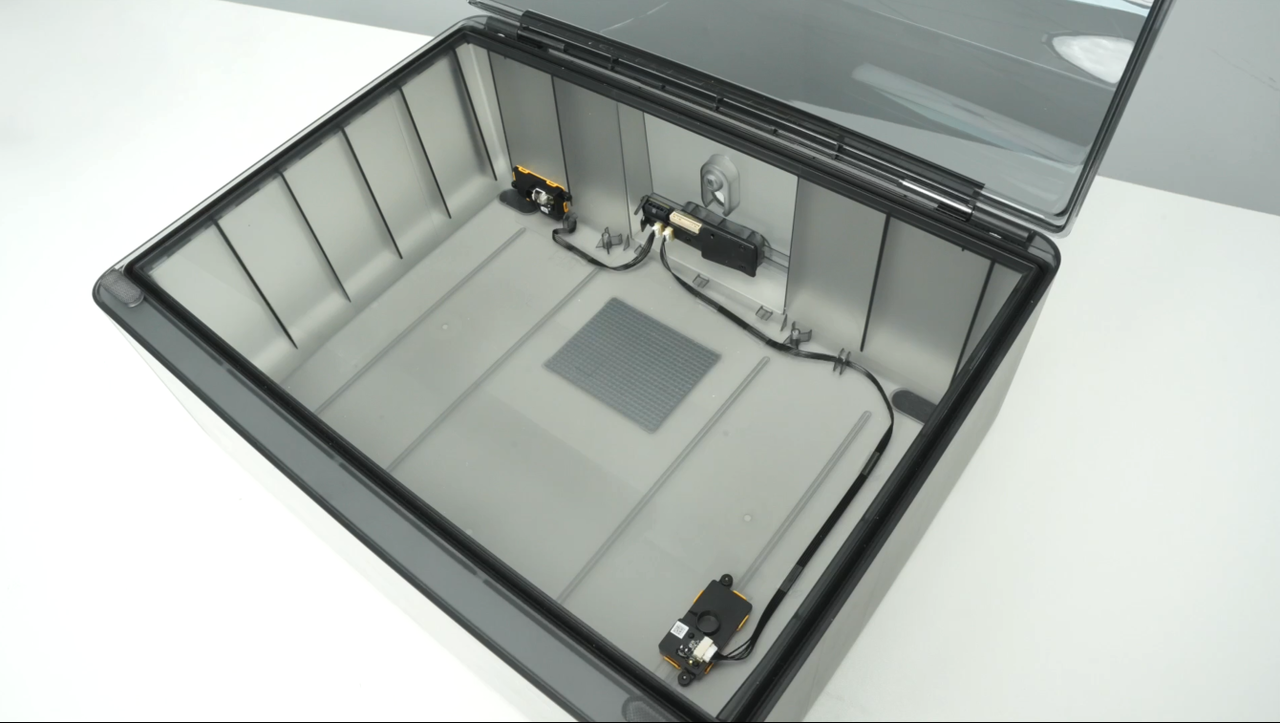
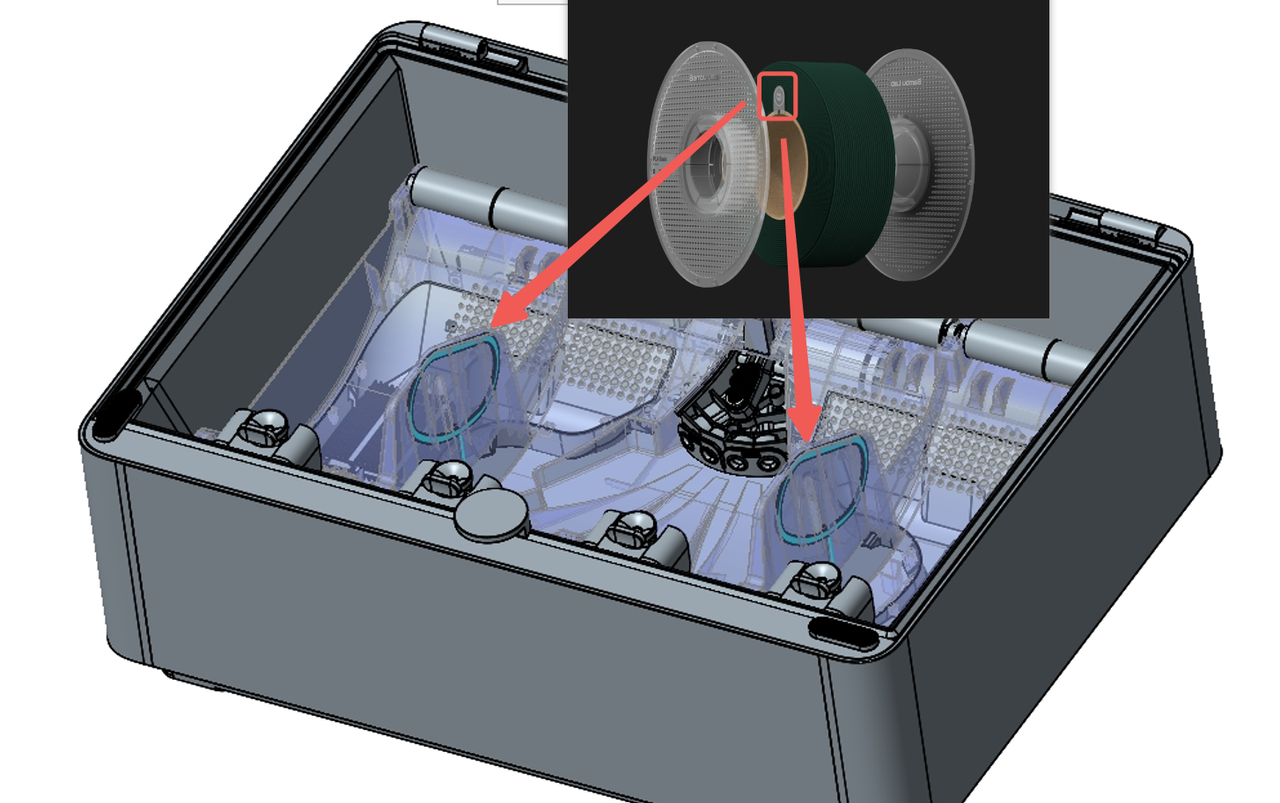
¶ Internal hub
The internal hub is located at the rear of AMS 2 Pro and consists of four Hall sensors, a magnetic rotary encoder, and a brushless motor. It merges four filament slots into one. The Hall sensor detects when the filament reaches a specific position and activates the brushless motor to provide a second-level driving force for feeding the filament.
 |
 |
|---|
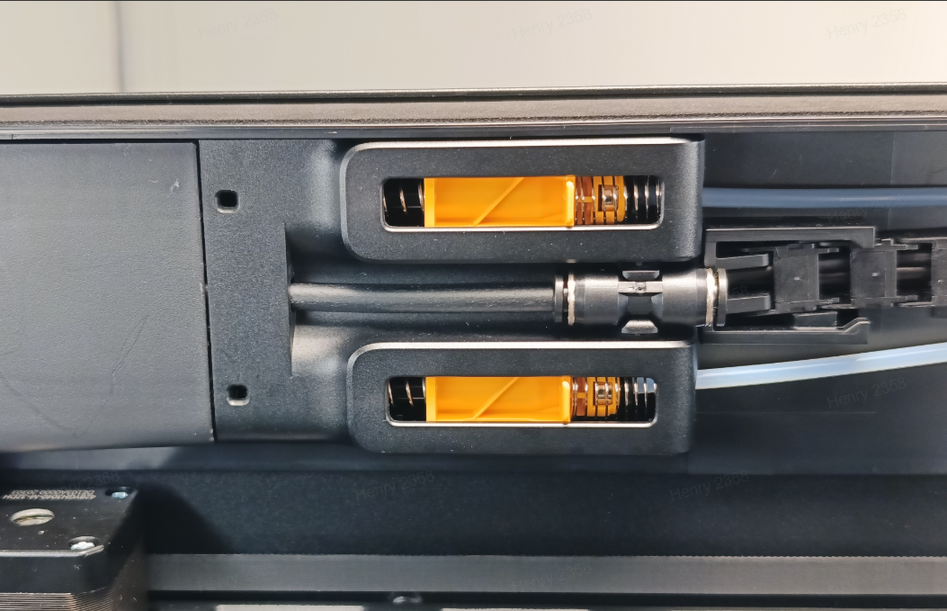
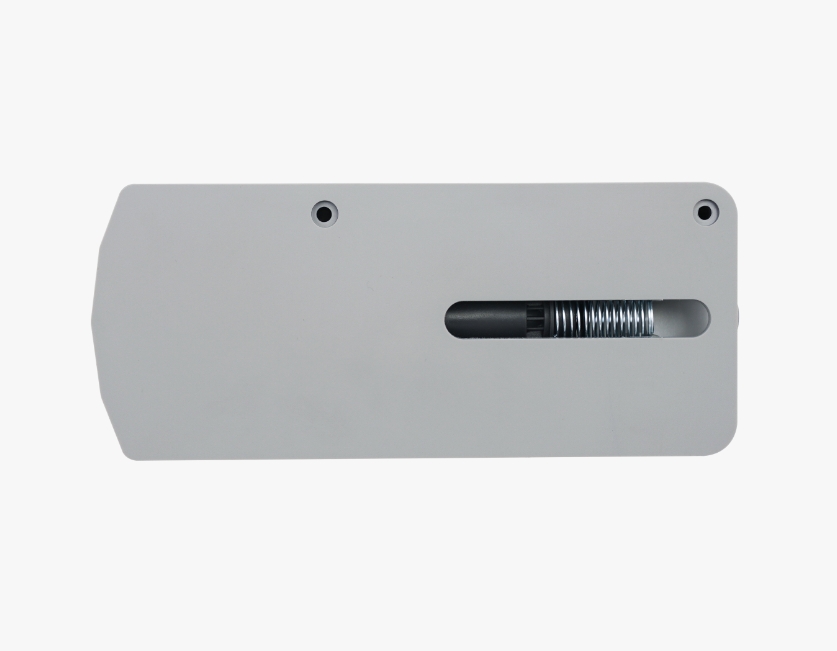
¶ Buffer
The AMS 2 Pro and printer need to be connected via a buffer, which consists of a slider, a spring, and a Hall sensor. When the AMS pushes the filament into the extruder, the slider moves forward due to the pressure of the filament. The Hall sensor detects the slider's position, and the buffer sends the signal back to the AMS and the printer. By controlling the feeding speed of the AMS, the tension of the filament can be kept within a controlled range, allowing the extruder to work smoothly and precisely.
The H2D printer comes with a built-in feeding buffer, which also includes a filament sensor inside. This sensor can detect whether the filament is passing through the buffer or if the filament has broken inside the buffer. Additionally, when printing with an external spool, the buffer also features a tangle detection function, which can detect whether the external spool has tangled filament.
If you need to connect the AMS 2 Pro to an X1 or P1 series printer, you will need to purchase an additional buffer (for connecting one unit) or an AMS Hub (for connecting multiple units) to set up the connection.
¶ Moisture-proof system
¶ Humidity sensor
The AMS 2 Pro is equipped with a humidity sensor in front of it, which detects humidity and temperature in the AMS cabin. You can check the current humidity status of AMS 2 Pro in the printer's display /Bambu Studio/Bambu Handy.
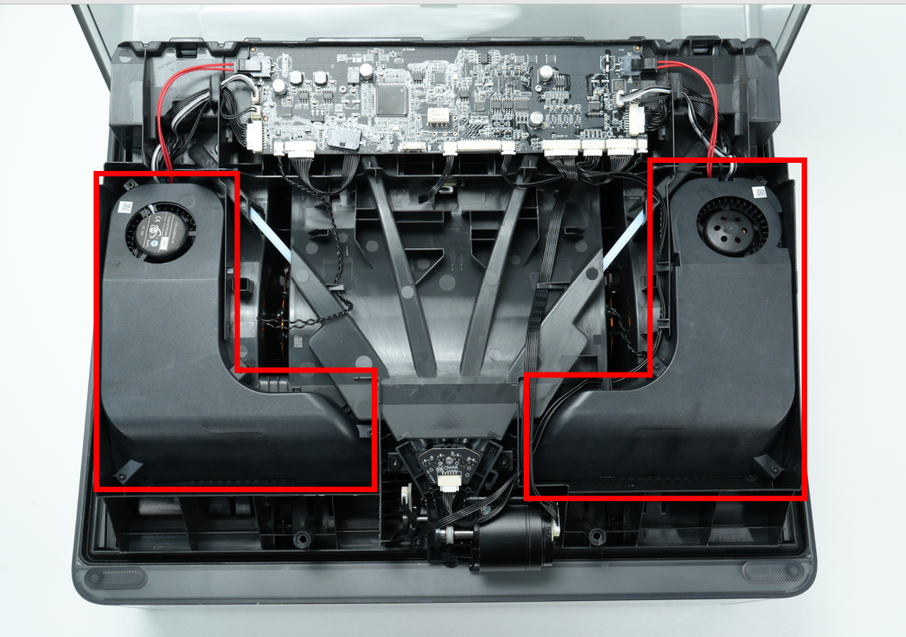
¶ Drying module
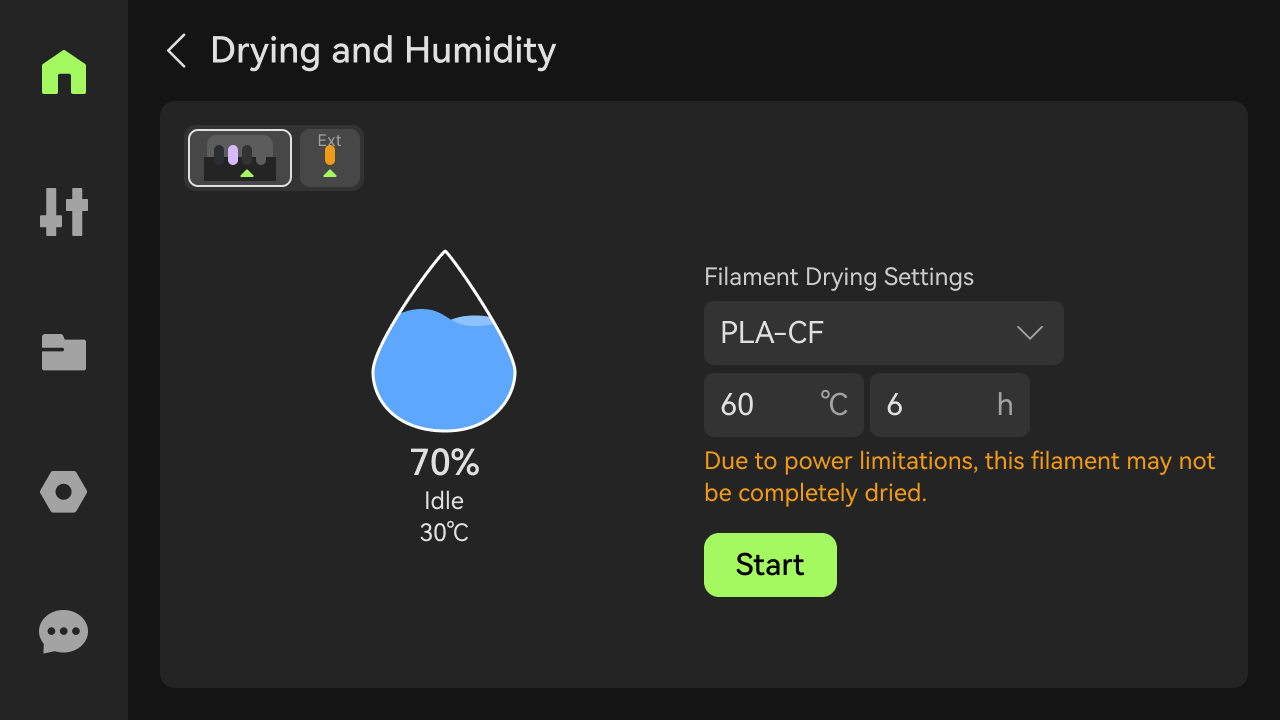
The AMS 2 Pro has two drying modules, consisting of heaters, fans, and temperature sensors, with a maximum drying temperature of 65 ℃.
¶ Internal circulation system
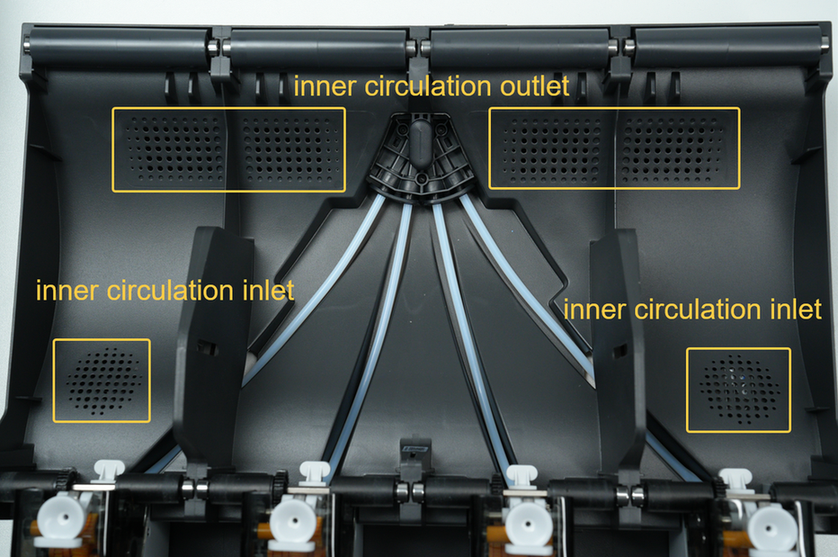
The drying module is located under the AMS main frame. During drying, the hot air is blown out of the inner circulation outlets (near the internal hub), and after heating the filament, the air is sucked into the heating module from the front two inner circulation inlets, and then heated again to form a set of the inner circulation system.
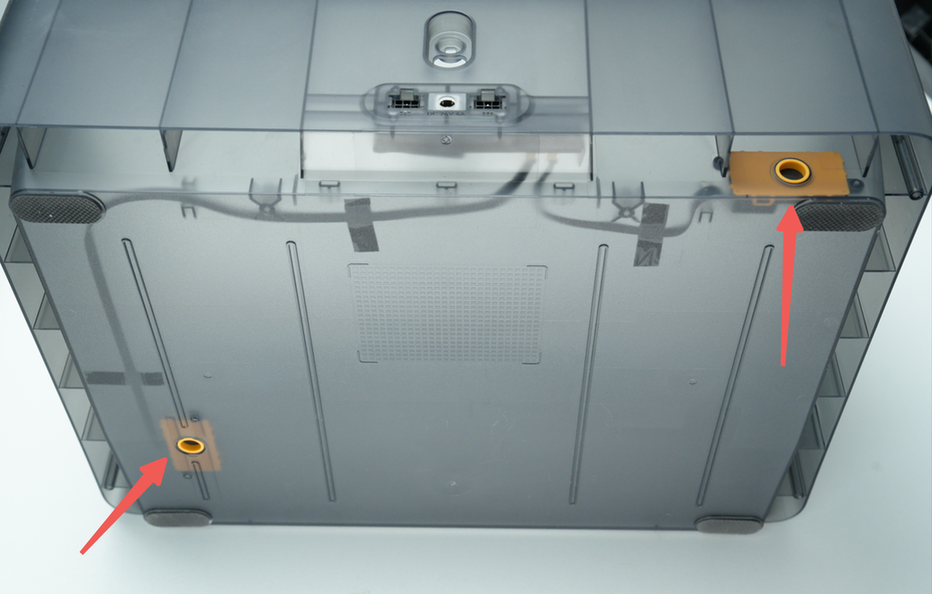
¶ Air Vents
The AMS 2 Pro is equipped with two actively controlled air vents: the bottom vent is the intake, and the rear vent is the exhaust.
During drying, the AMS 2 Pro expels moisture through external circulation. Ensure the vents are not blocked for optimal drying performance.
 |
 |
|---|
¶ Desiccant and sealing rubber ring
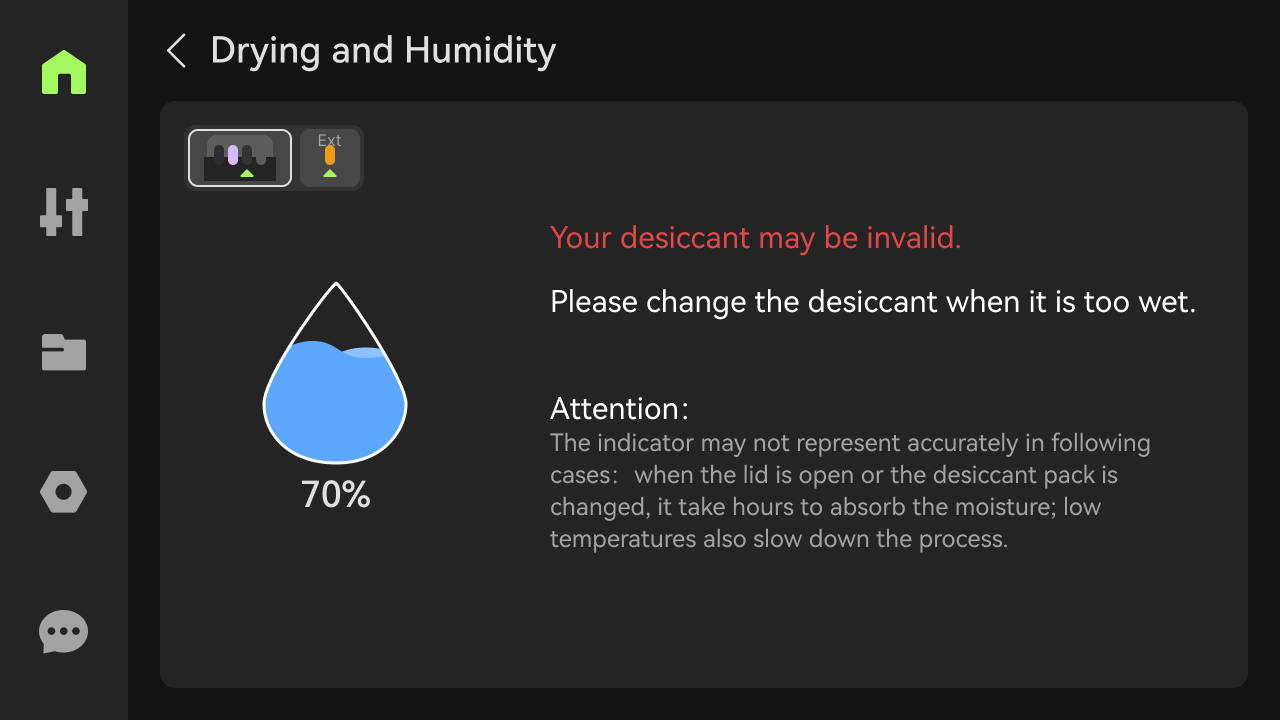
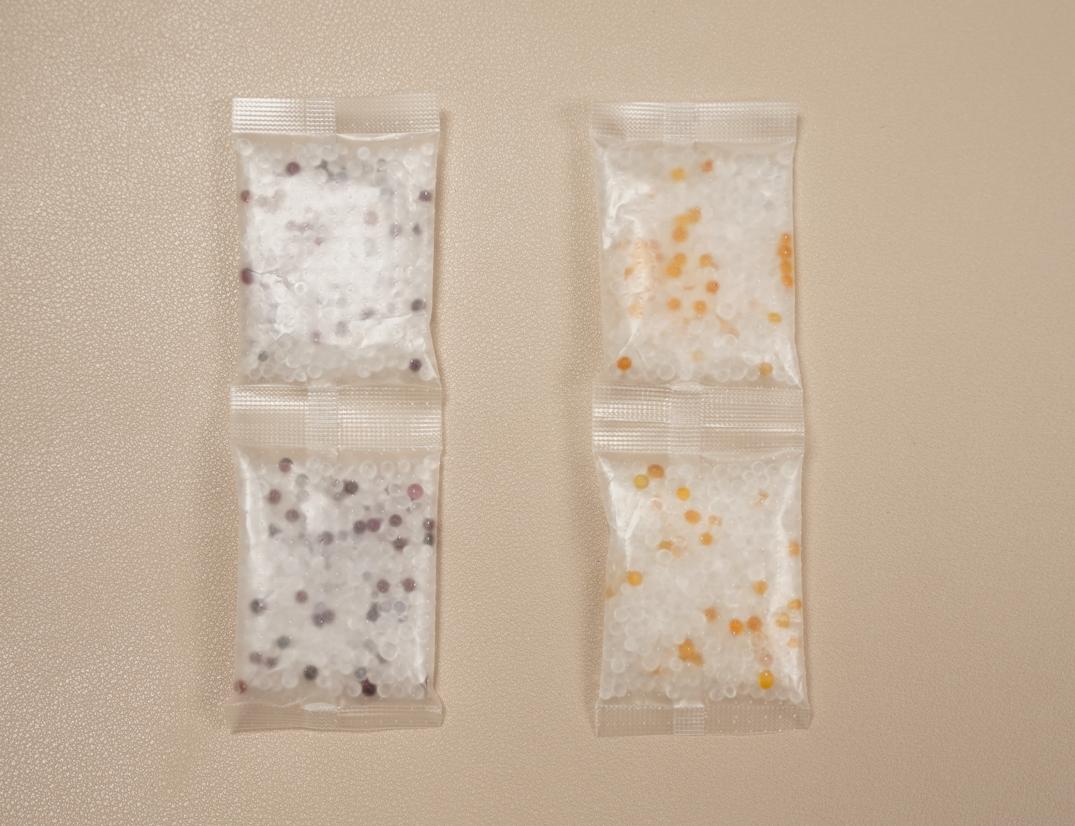
AMS 2 Pro is equipped with a color-changing silicone desiccant at the factory, which absorbs moisture and keeps the air inside AMS dry. After the desiccant absorbs sufficient moisture, the yellow particles inside will turn purple. When the desiccant turns purple, it needs to be replaced with a new desiccant, or the moisture-absorbing desiccant needs to be dried and reused.
The sealing rubber ring between the upper cover and the outer shell can maintain AMS sealing, preventing external moisture from entering and causing the filament to absorb moisture.
When the air humidity exceeds the AMS preset standard, the humidity sensor will detect and alert the user.
| Desiccant status | Sealing rubber | Desiccant |
|---|---|---|
 |
 |
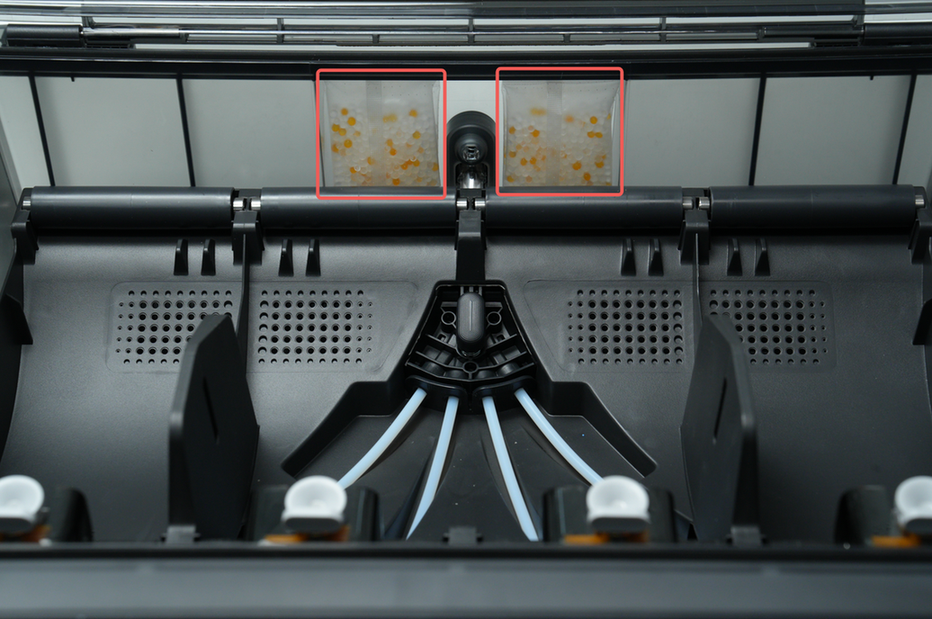 |
Note: The desiccant should be removed from the sealed transparent plastic bag before being placed in the AMS 2 Pro.
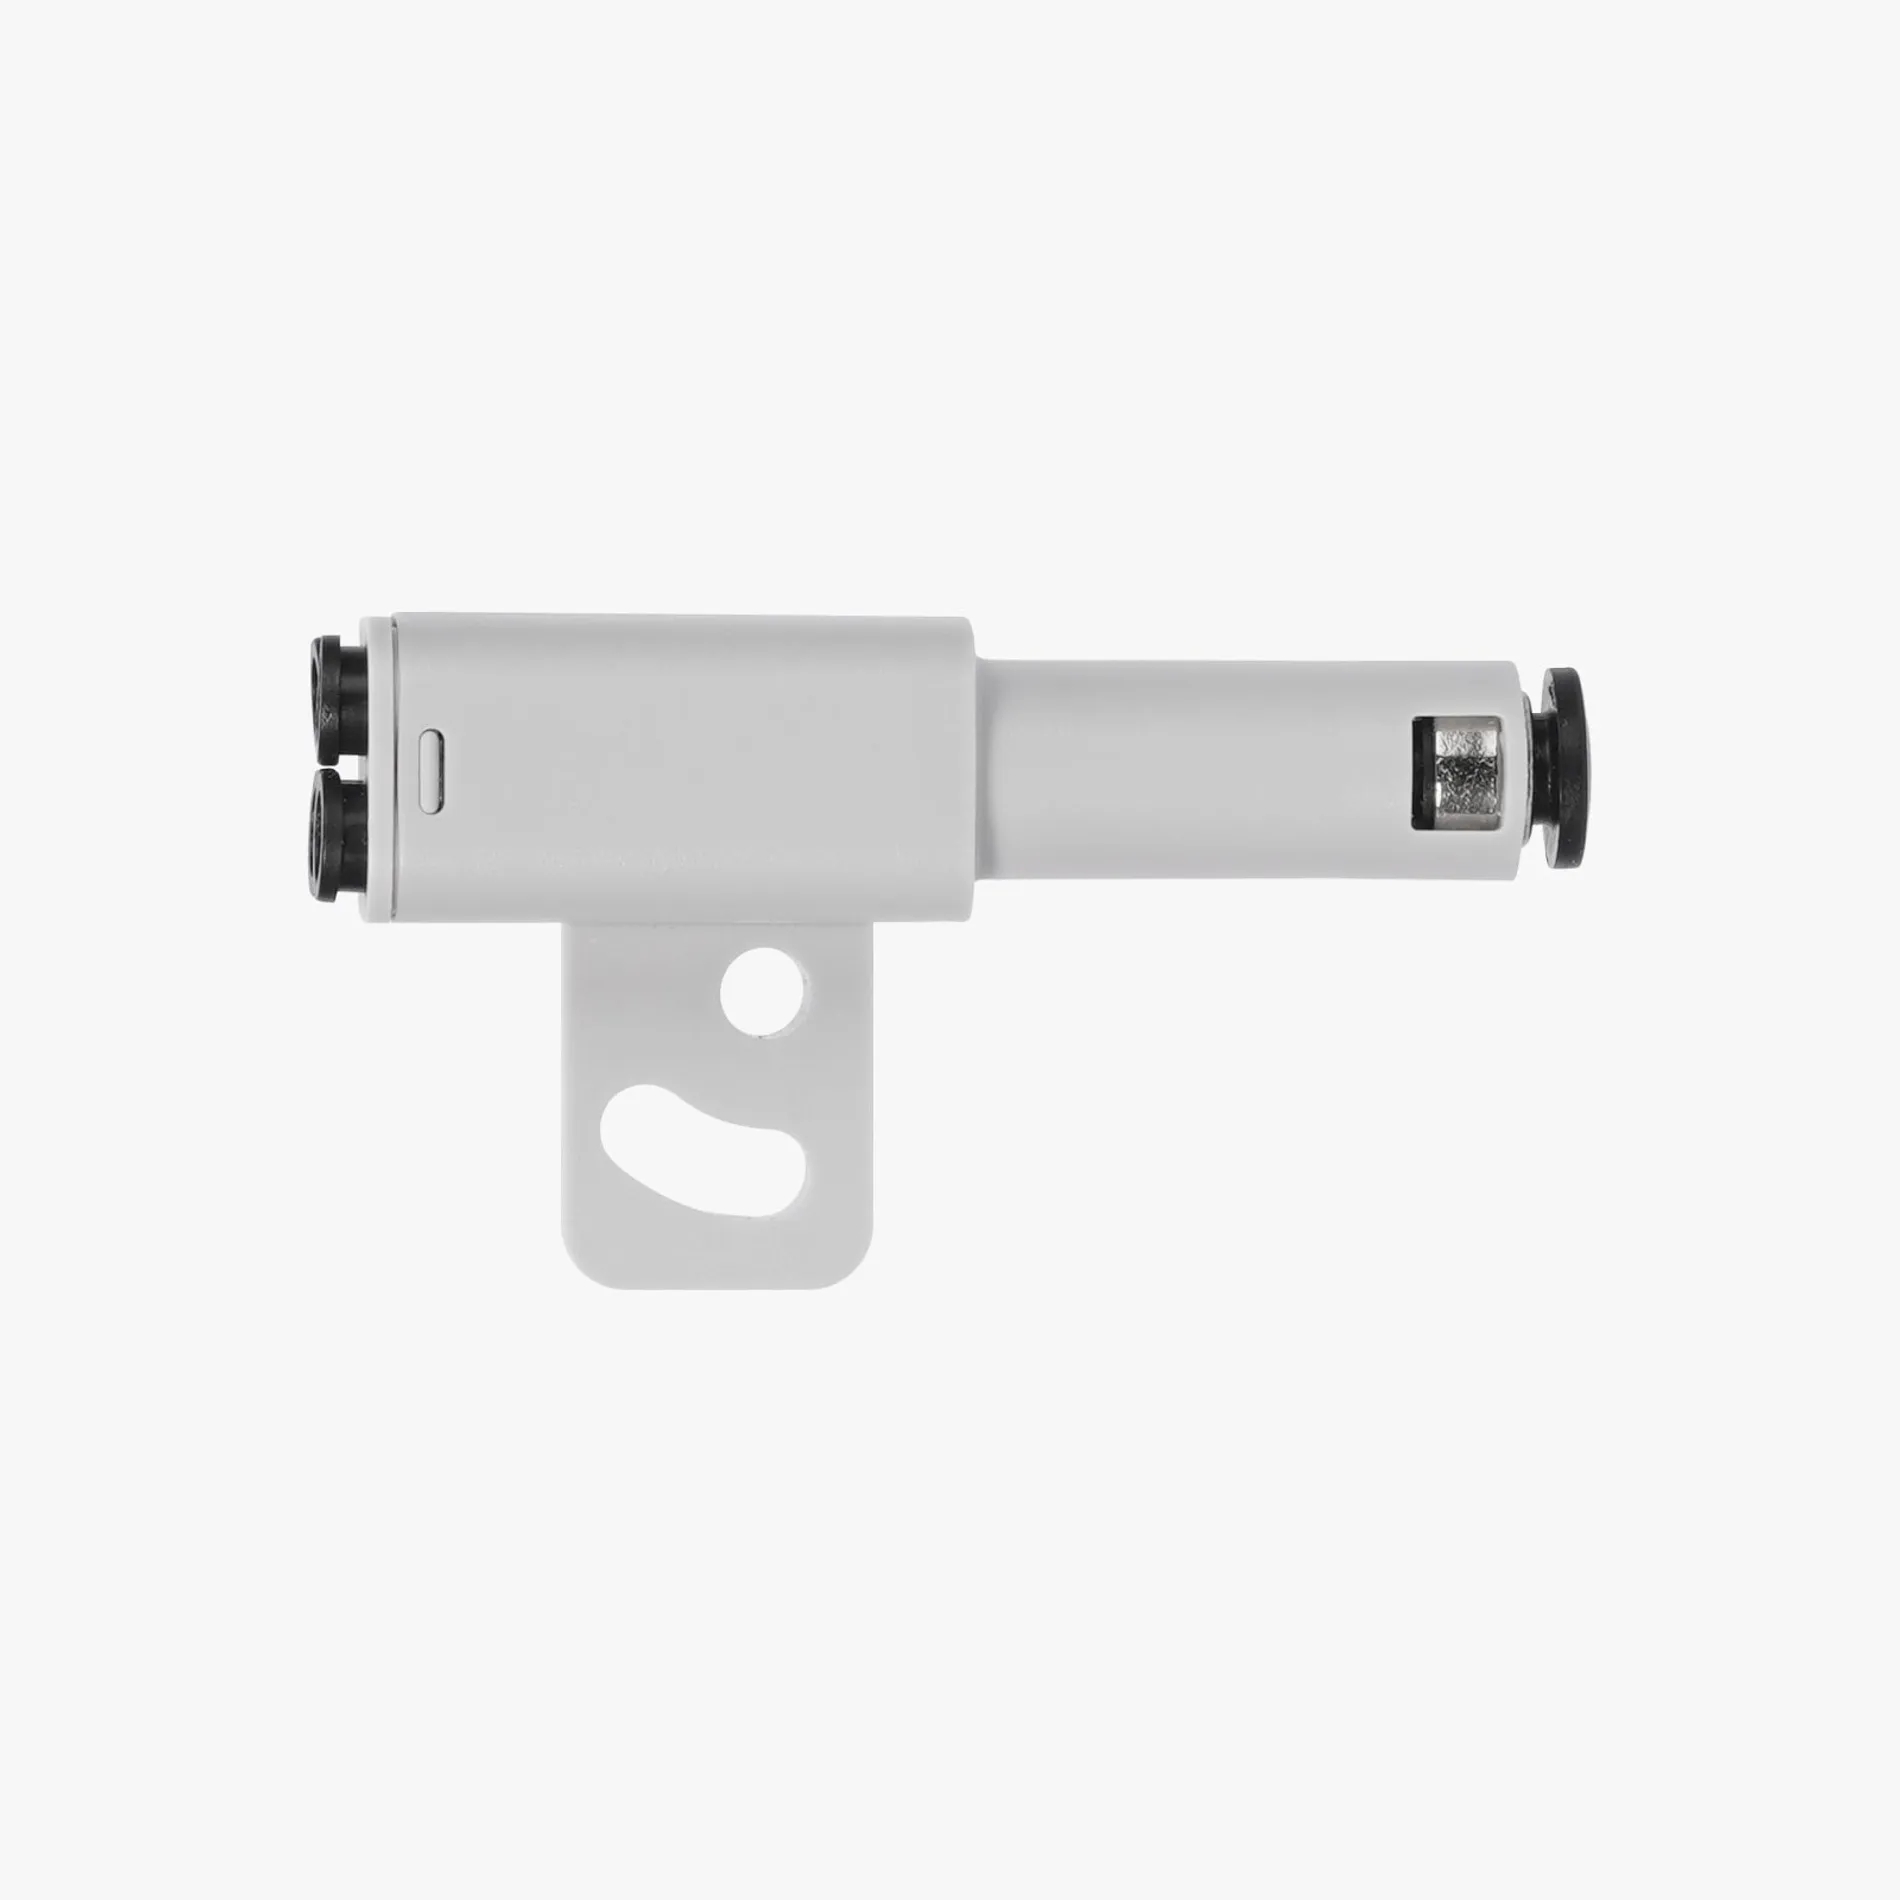
¶ Power adapter
Connect the H2 series printer to a single AMS 2 Pro using a 6-pin cable to use the AMS 2 Pro's drying function. If you need to dry the filaments in more than one AMS 2 Pro at the same time, you will need to use the Bambu Lab official power adapter to power the remaining AMS 2 Pro.
Note: Be sure to use the new 6-pin cable included with AMS 2 Pro and AMS HT. Using the 6-pin cable from the previous generation AMS may cause unstable communication between the AMS and the printer, while the previous generation AMS is compatible with the new 6-pin cable.
If the X1 or P1 series printer is used with the AMS 2 Pro and uses the AMS 2 Pro's drying function, each AMS 2 Pro requires an official Bambu Lab power adapter to power it. The use of the power adapter is shown in the following figure:
¶ RFID system
The AMS 2 Pro has two RFID coils, which can recognize the RFID tags on the official Bambu Lab filament and enable functions such as filament remaining estimation and auto filament backup.
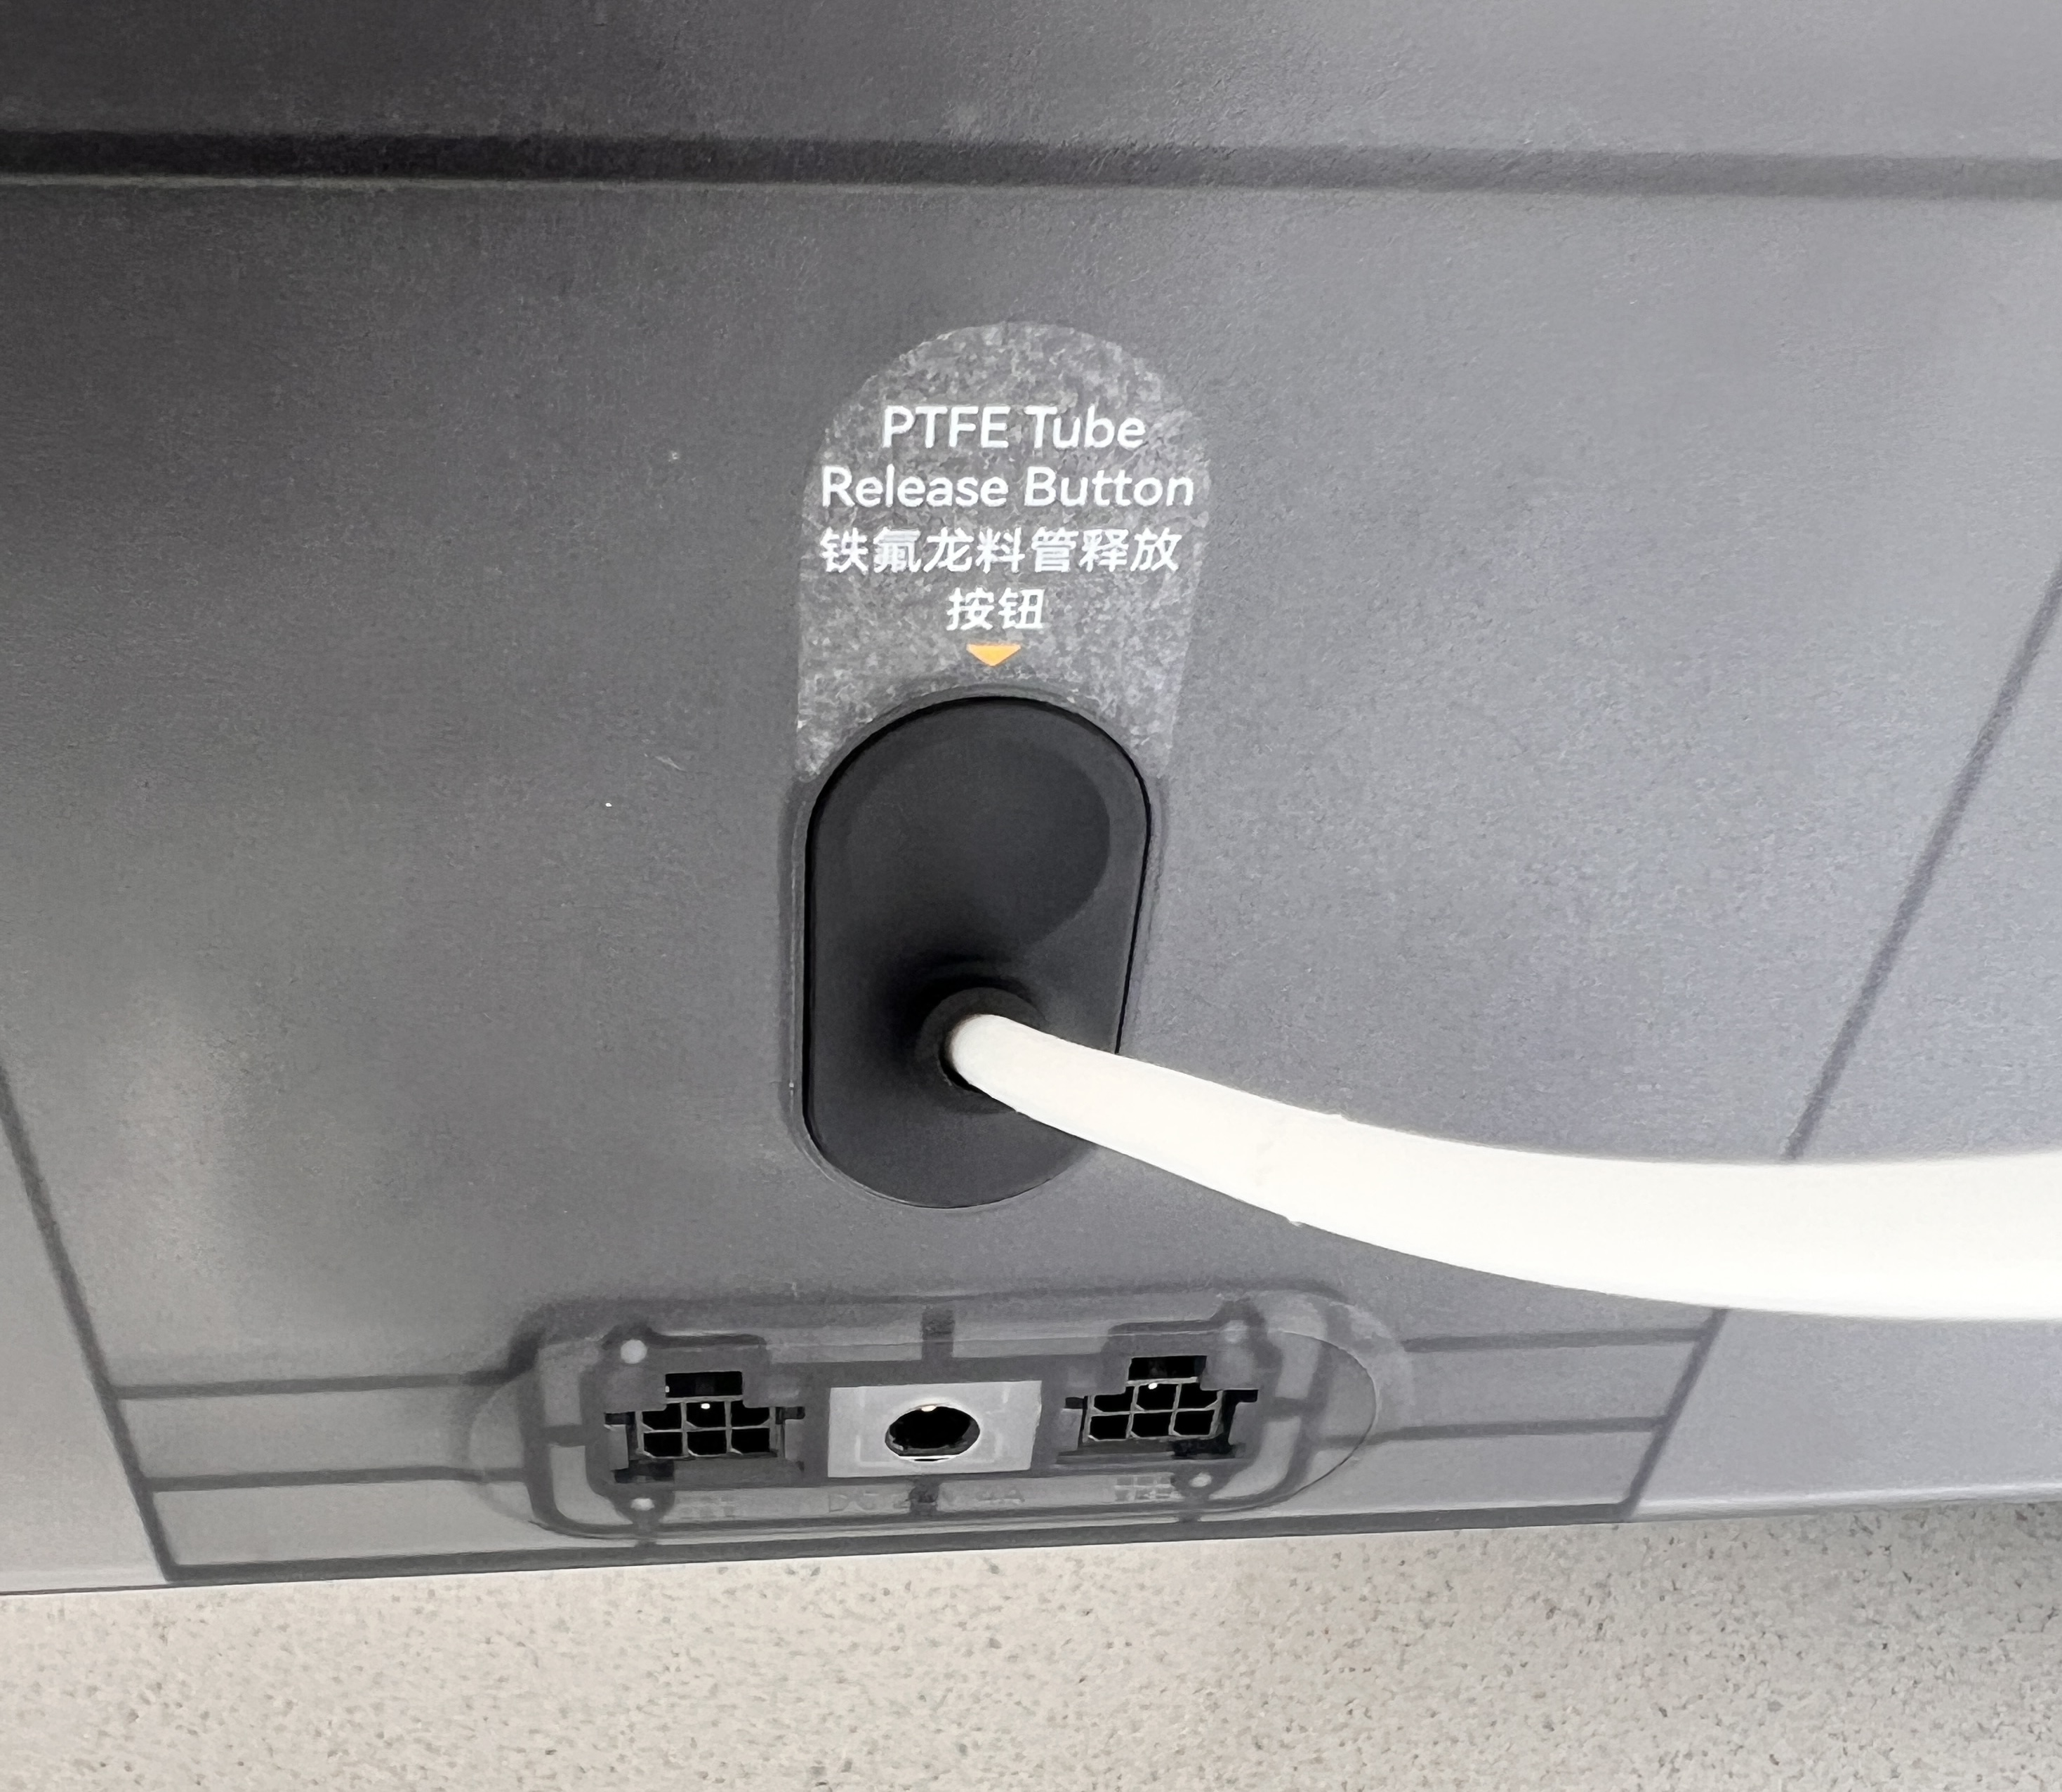
¶ PTFE adapter
PTFE tube can connect 4 feed tubes to the printer at the same time. When connecting multiple AMS 2 Pro to H2 series printers, the PTFE adapter is required.

¶ Connect and configure AMS 2 Pro
The original buffer of the H2 series printer can only connect 2 AMS. If used with a PTFE adapter, the H2 series printer can connect up to 4 AMS 2 Pro.
¶ Connect the AMS 2 Pro to H2 series printers
-
Place the top glass cover and AMS 2 Pro on top of the printer.
Insert the PTFE tube into the AMS 2 Pro's filament outlet and any PTFE tube coupler of the printer, and push the tube forward for approximately 10 cm until it stops (if you can see the PTFE tube from the window next to the buffer from the front of the printer, it is correctly inserted)
The upper and lower PTFE tube couplers correspond to different hotends. Connecting the AMS 2 Pro to the upper coupler allows the right hotend to print in multiple colors. Connecting it to the lower coupler allows multi-color printing with the left hotend. Using two AMS 2 Pro units allows both hotends to support multi-color printing independently
Connect PTFE tubes Make sure you can see the tube in this window 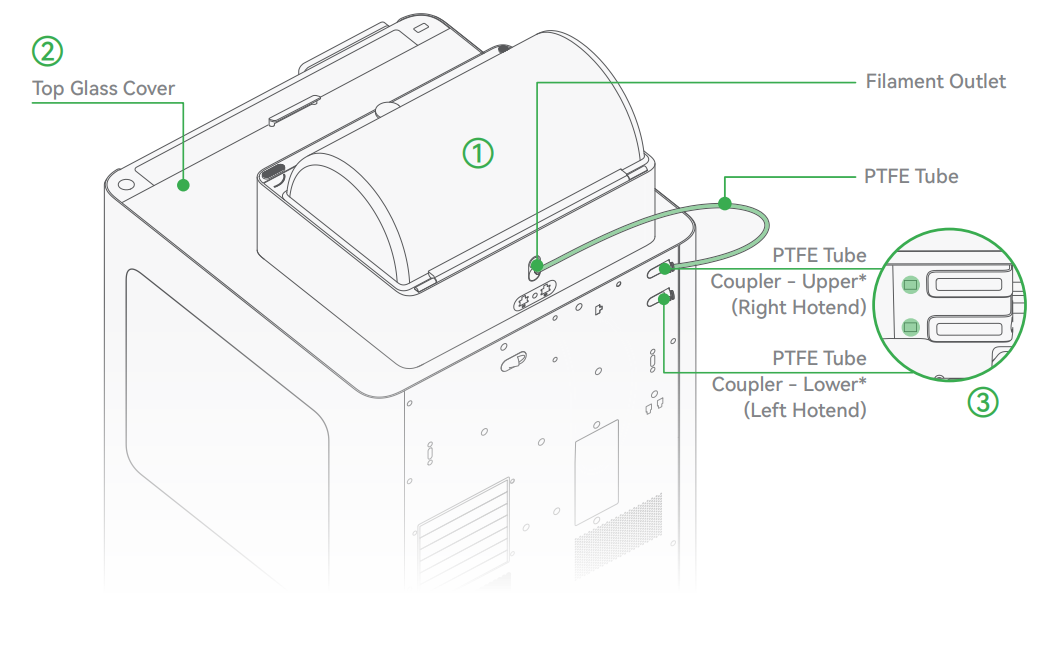
-
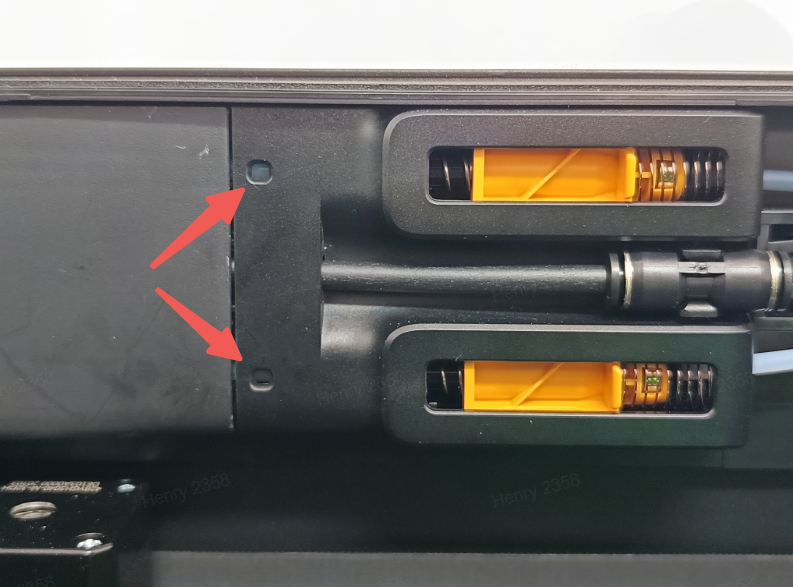
Connect the Bambu Bus Cable 6-pin to the printer and either 6-pin port of the AMS 2 Pro.
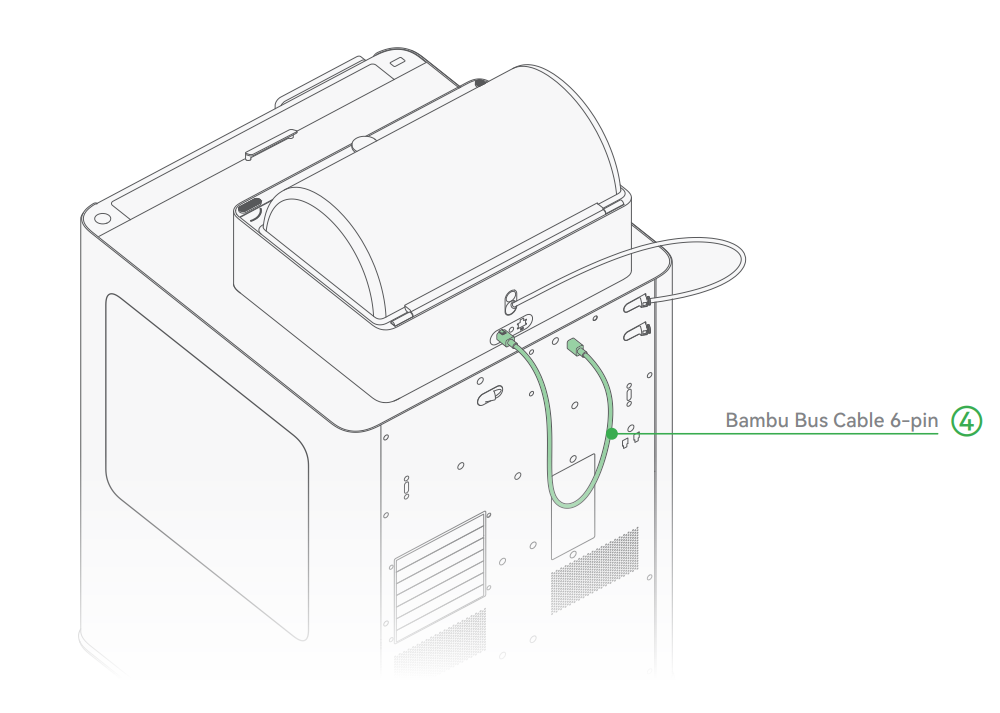
At this point, the connection of a single AMS 2 Pro is complete. If you only use one AMS 2 Pro, this connection method can normally use all AMS functions (including drying) without the need for an additional power adapter.
¶ Connect the AMS 2 Pro to X1 and P1 series printers
-
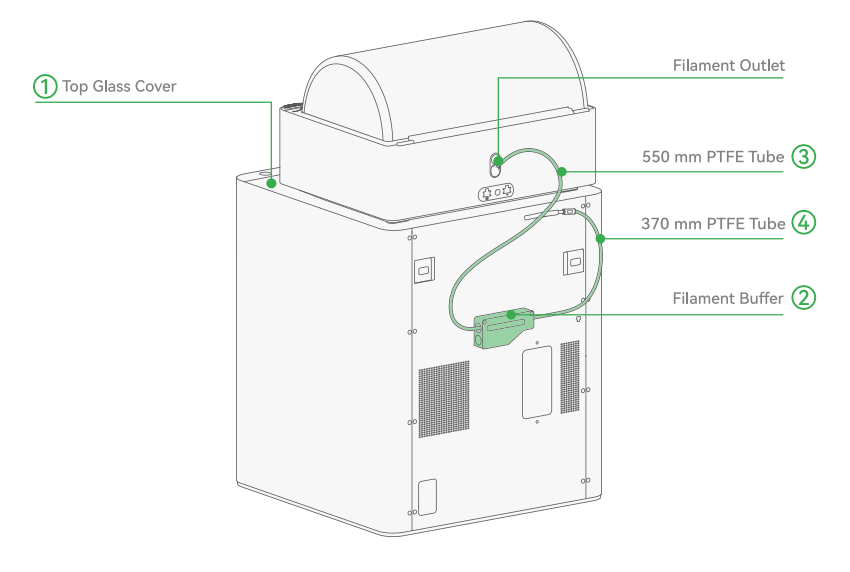
Place the top glass cover on the top of the printer.
Use 2 M3*21.5 screws to fix the filament buffer to the printer. Insert one end of the 550 mm PTFE tube to the filament outlet of the AMS 2 Pro, and the other end to the left of the filament buffer. Insert one end of the 370 mm PTFE tube to the PTFE tube coupler of the printer, and the other end to the right of the filament buffer.
-
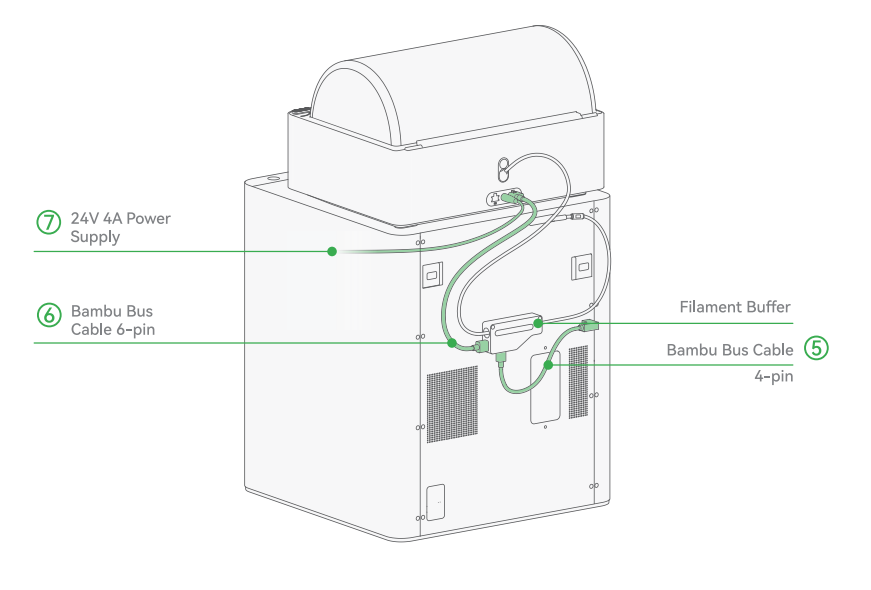
Connect the L-shape end of the Bambu Bus cable 4-pin to the printer, and the other end to the bottom the filament buffer. Connect one end of the Bambu Bus cable 6-pin to either 6-pin port of the AMS 2 Pro, and the other end to the left of the filament buffer. Connect the 24V 4A power supply to the power connector of the AMS 2 Pro if you need to use the drying function.
Please use the 6-pin cable for AMS 2 Pro and AMS HT. The cable for the previous generation of AMS is not compatible with AMS 2 Pro.
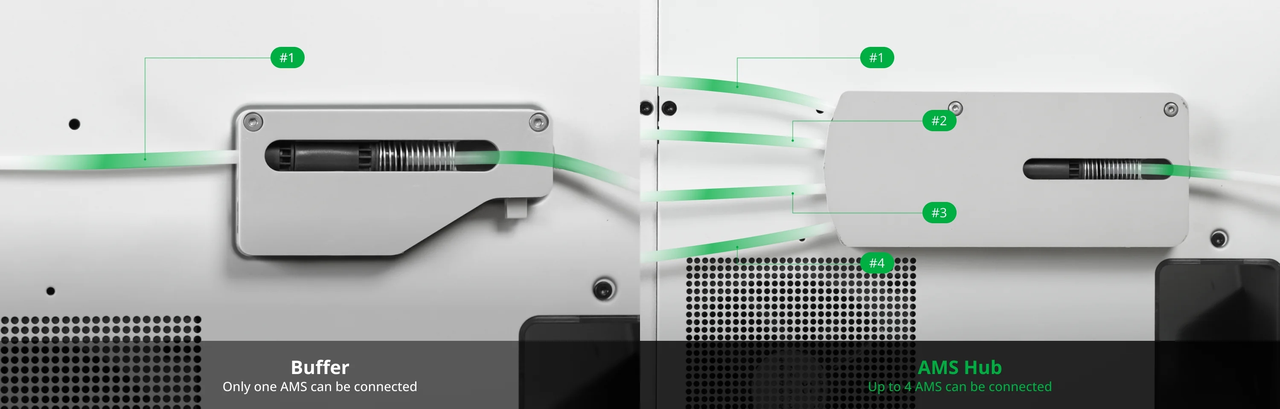
¶ Methods for Connecting Multiple AMS Units to X1 or P1 series printers
Bambu Lab printers support connecting more than one AMS unit.
This allows you to store and feed a wider variety of filaments without manual swapping.
There are two main connection methods: using the AMS Hub (recommended) or using a PTFE Tube Adapter.
¶ Method 1 — Using the AMS Hub (Recommended)
The AMS Hub is designed for stable and efficient multi-AMS connections. It ensures smooth filament switching and minimizes feeding errors.
For a complete walkthrough, refer to:
Connecting the AMS Hub and Multiple AMS Units
¶ Method 2 — Using the PTFE Tube Adapter
You can also connect multiple AMS units through a PTFE Tube Adapter: Bambu 4-in-1 PTFE Adapter.
When using this method, two points are critical for reliable operation:
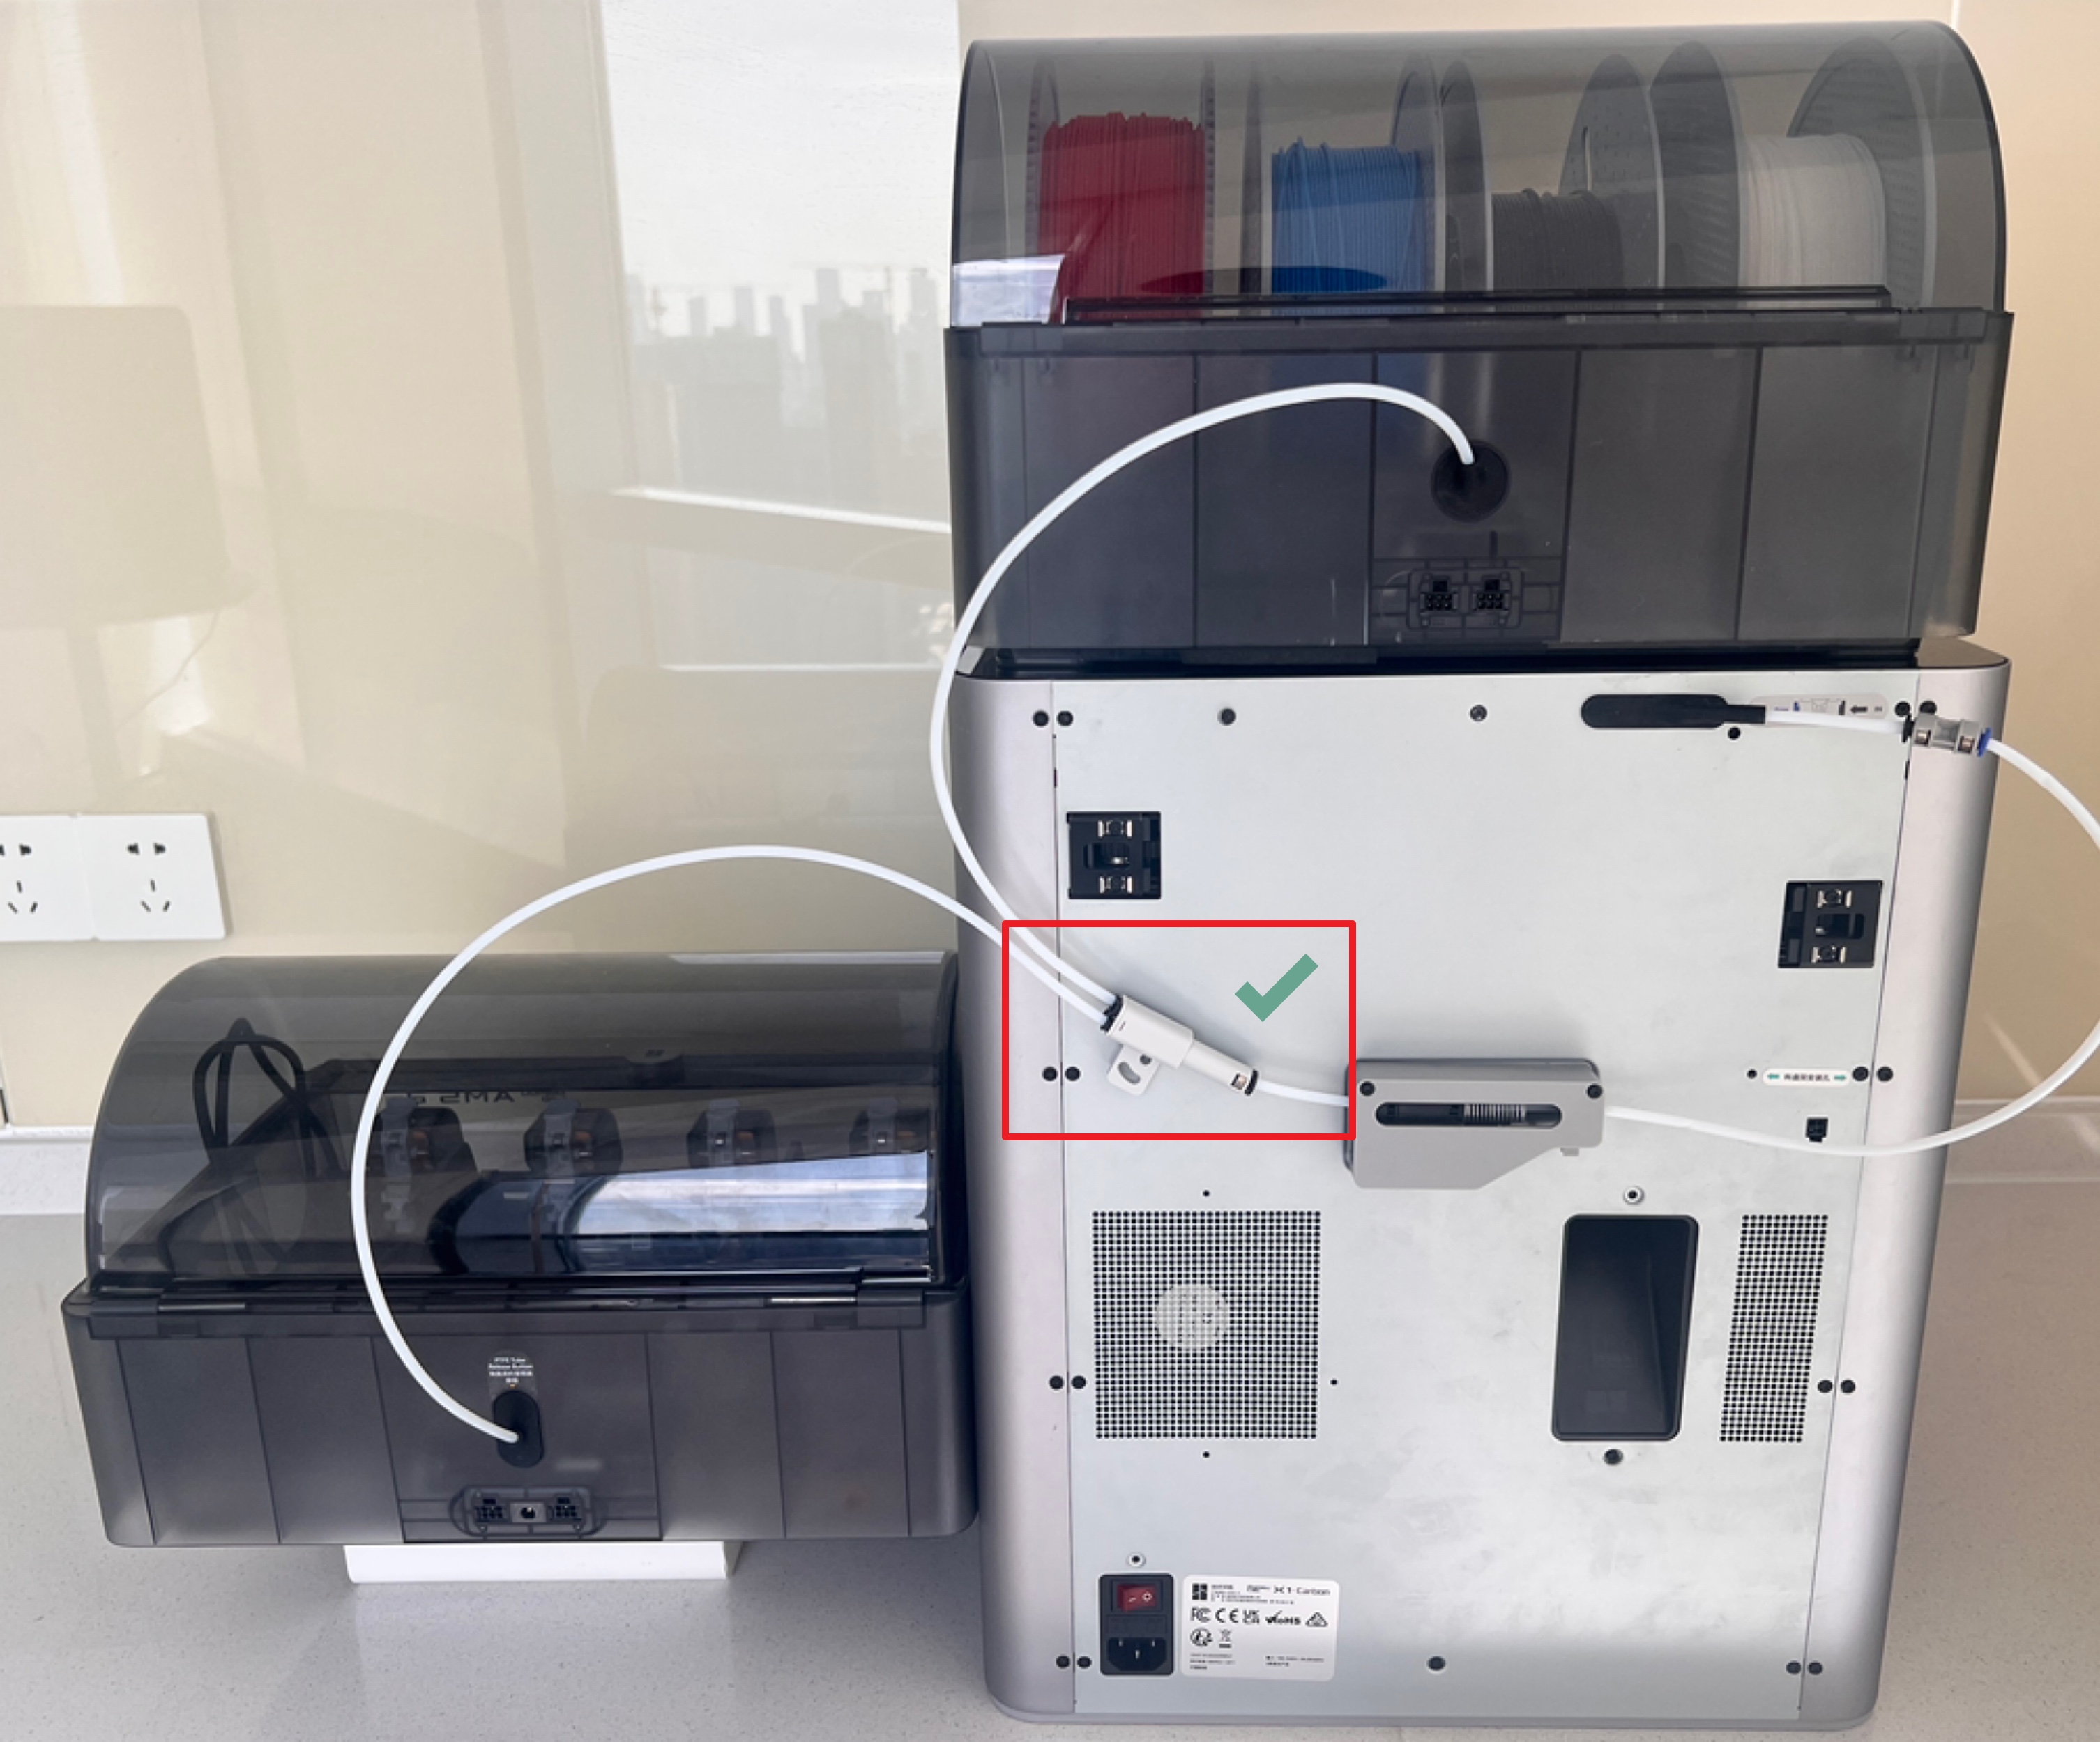
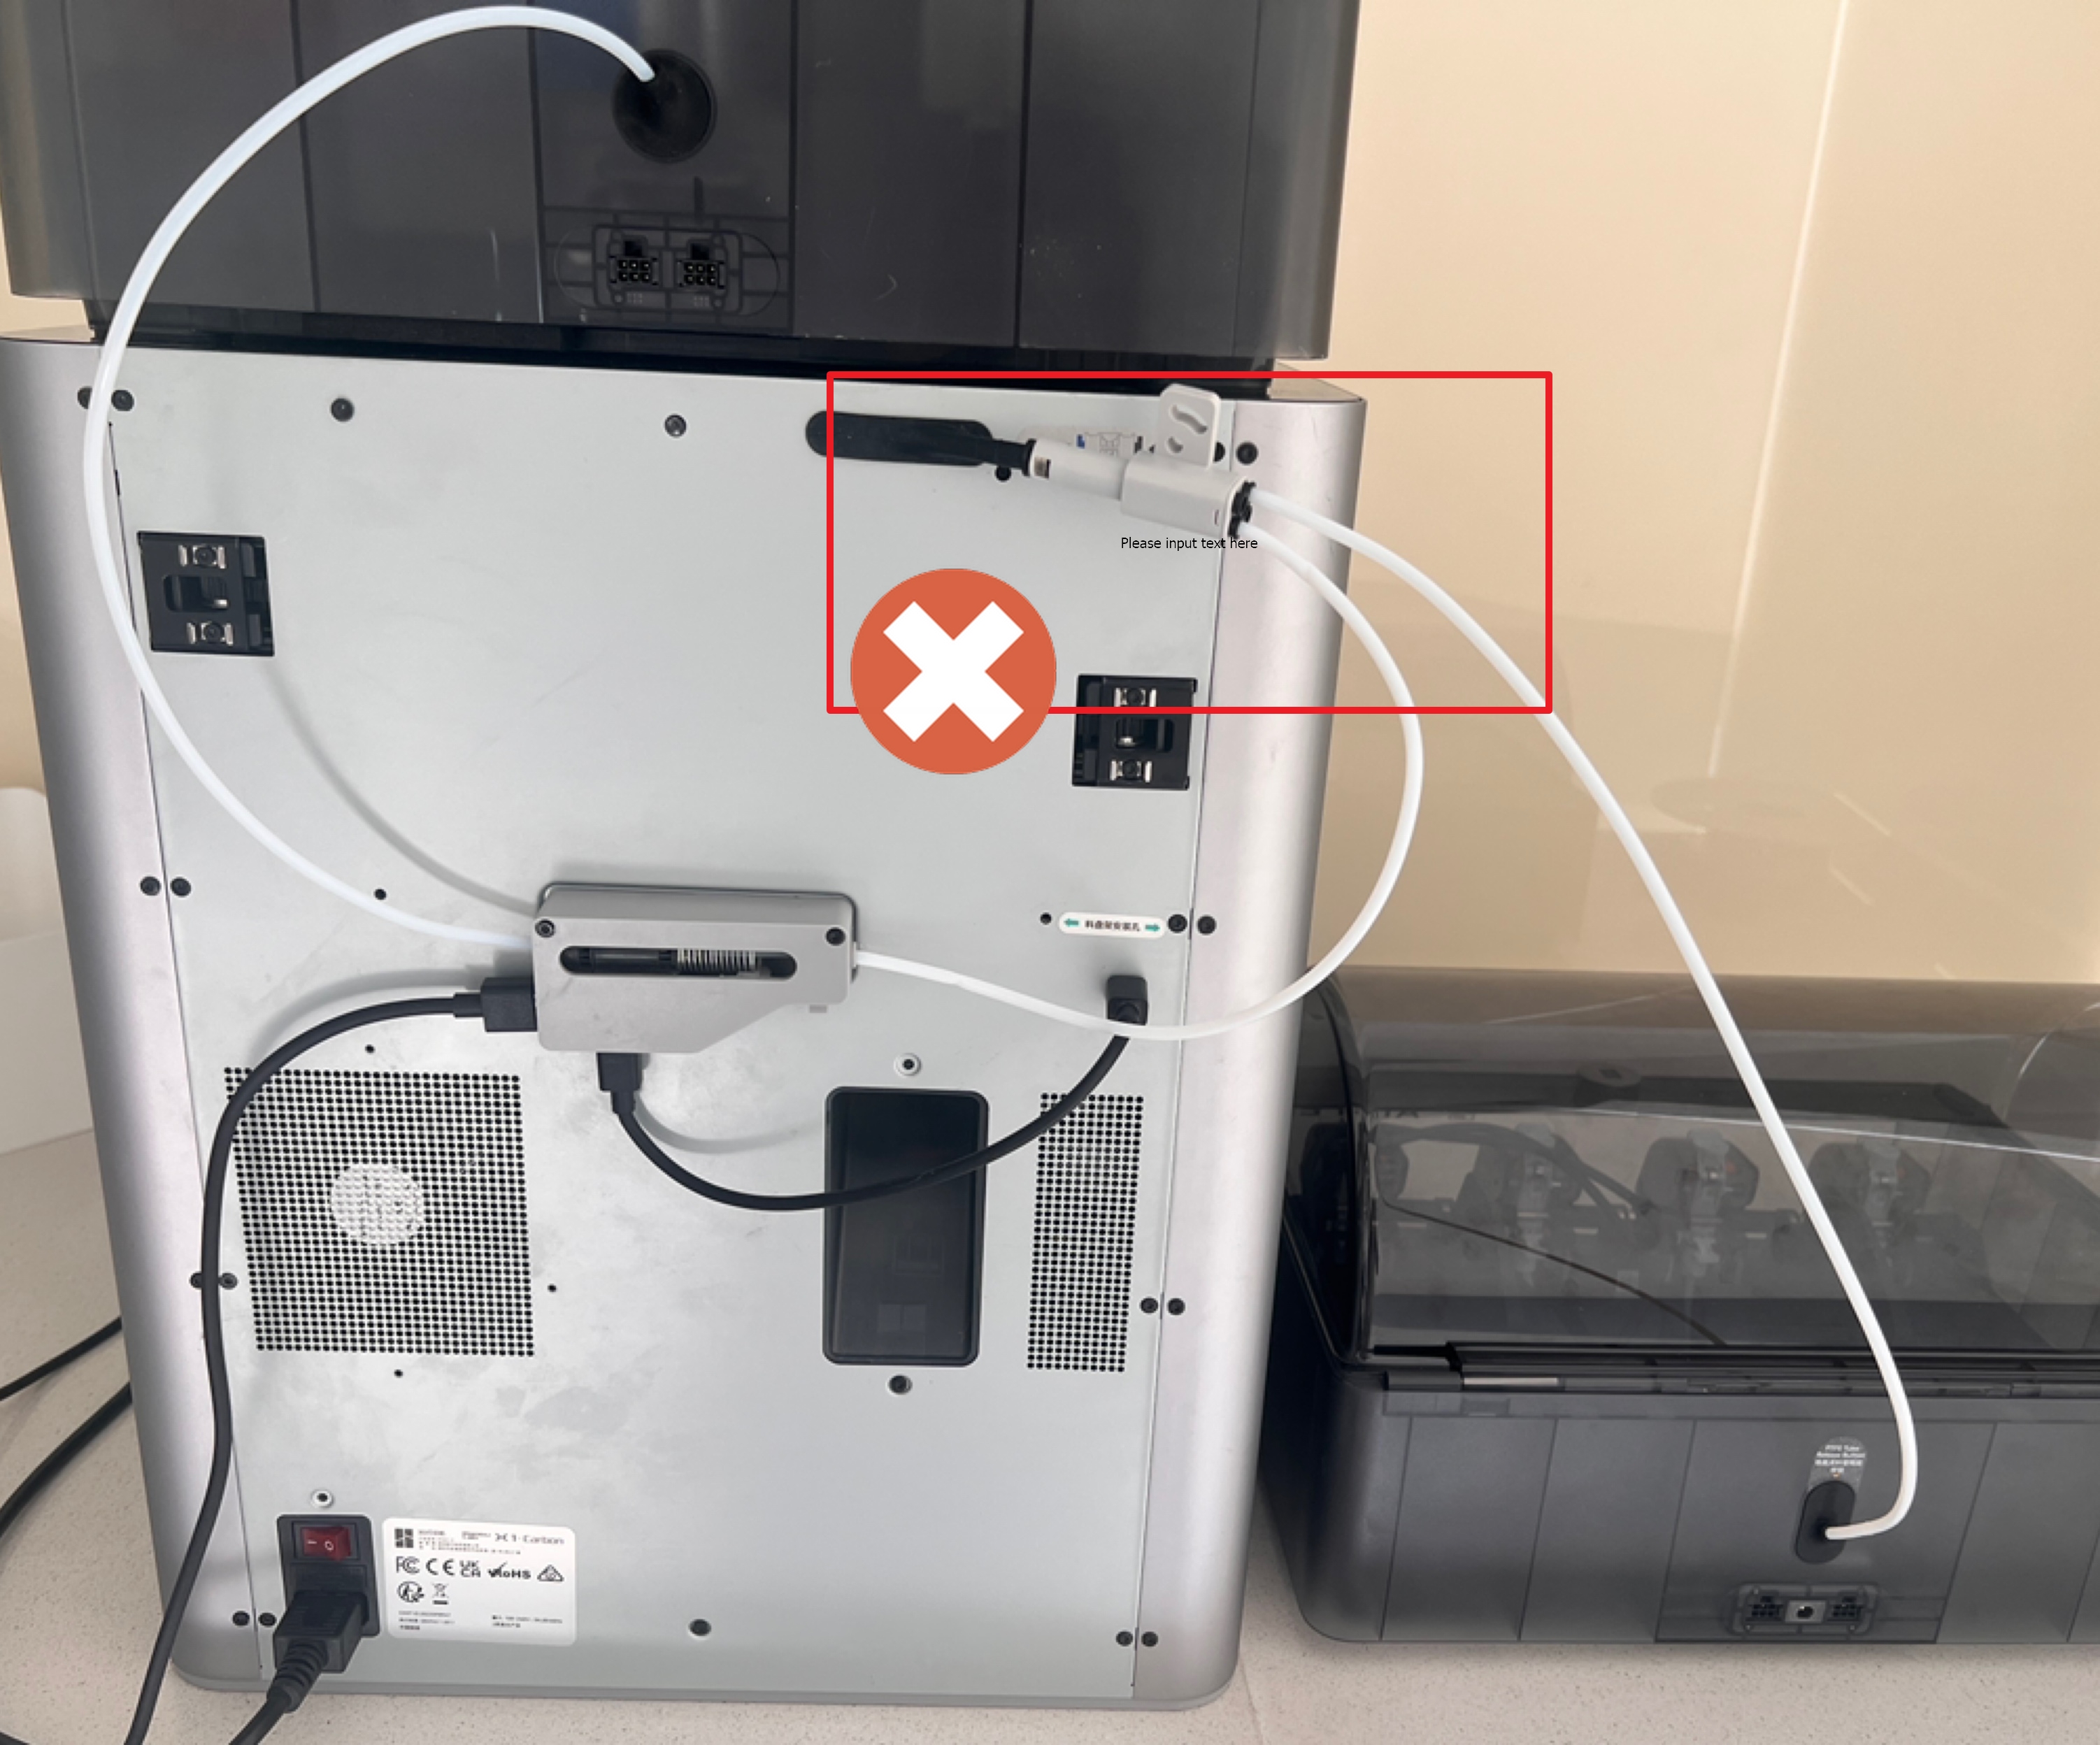
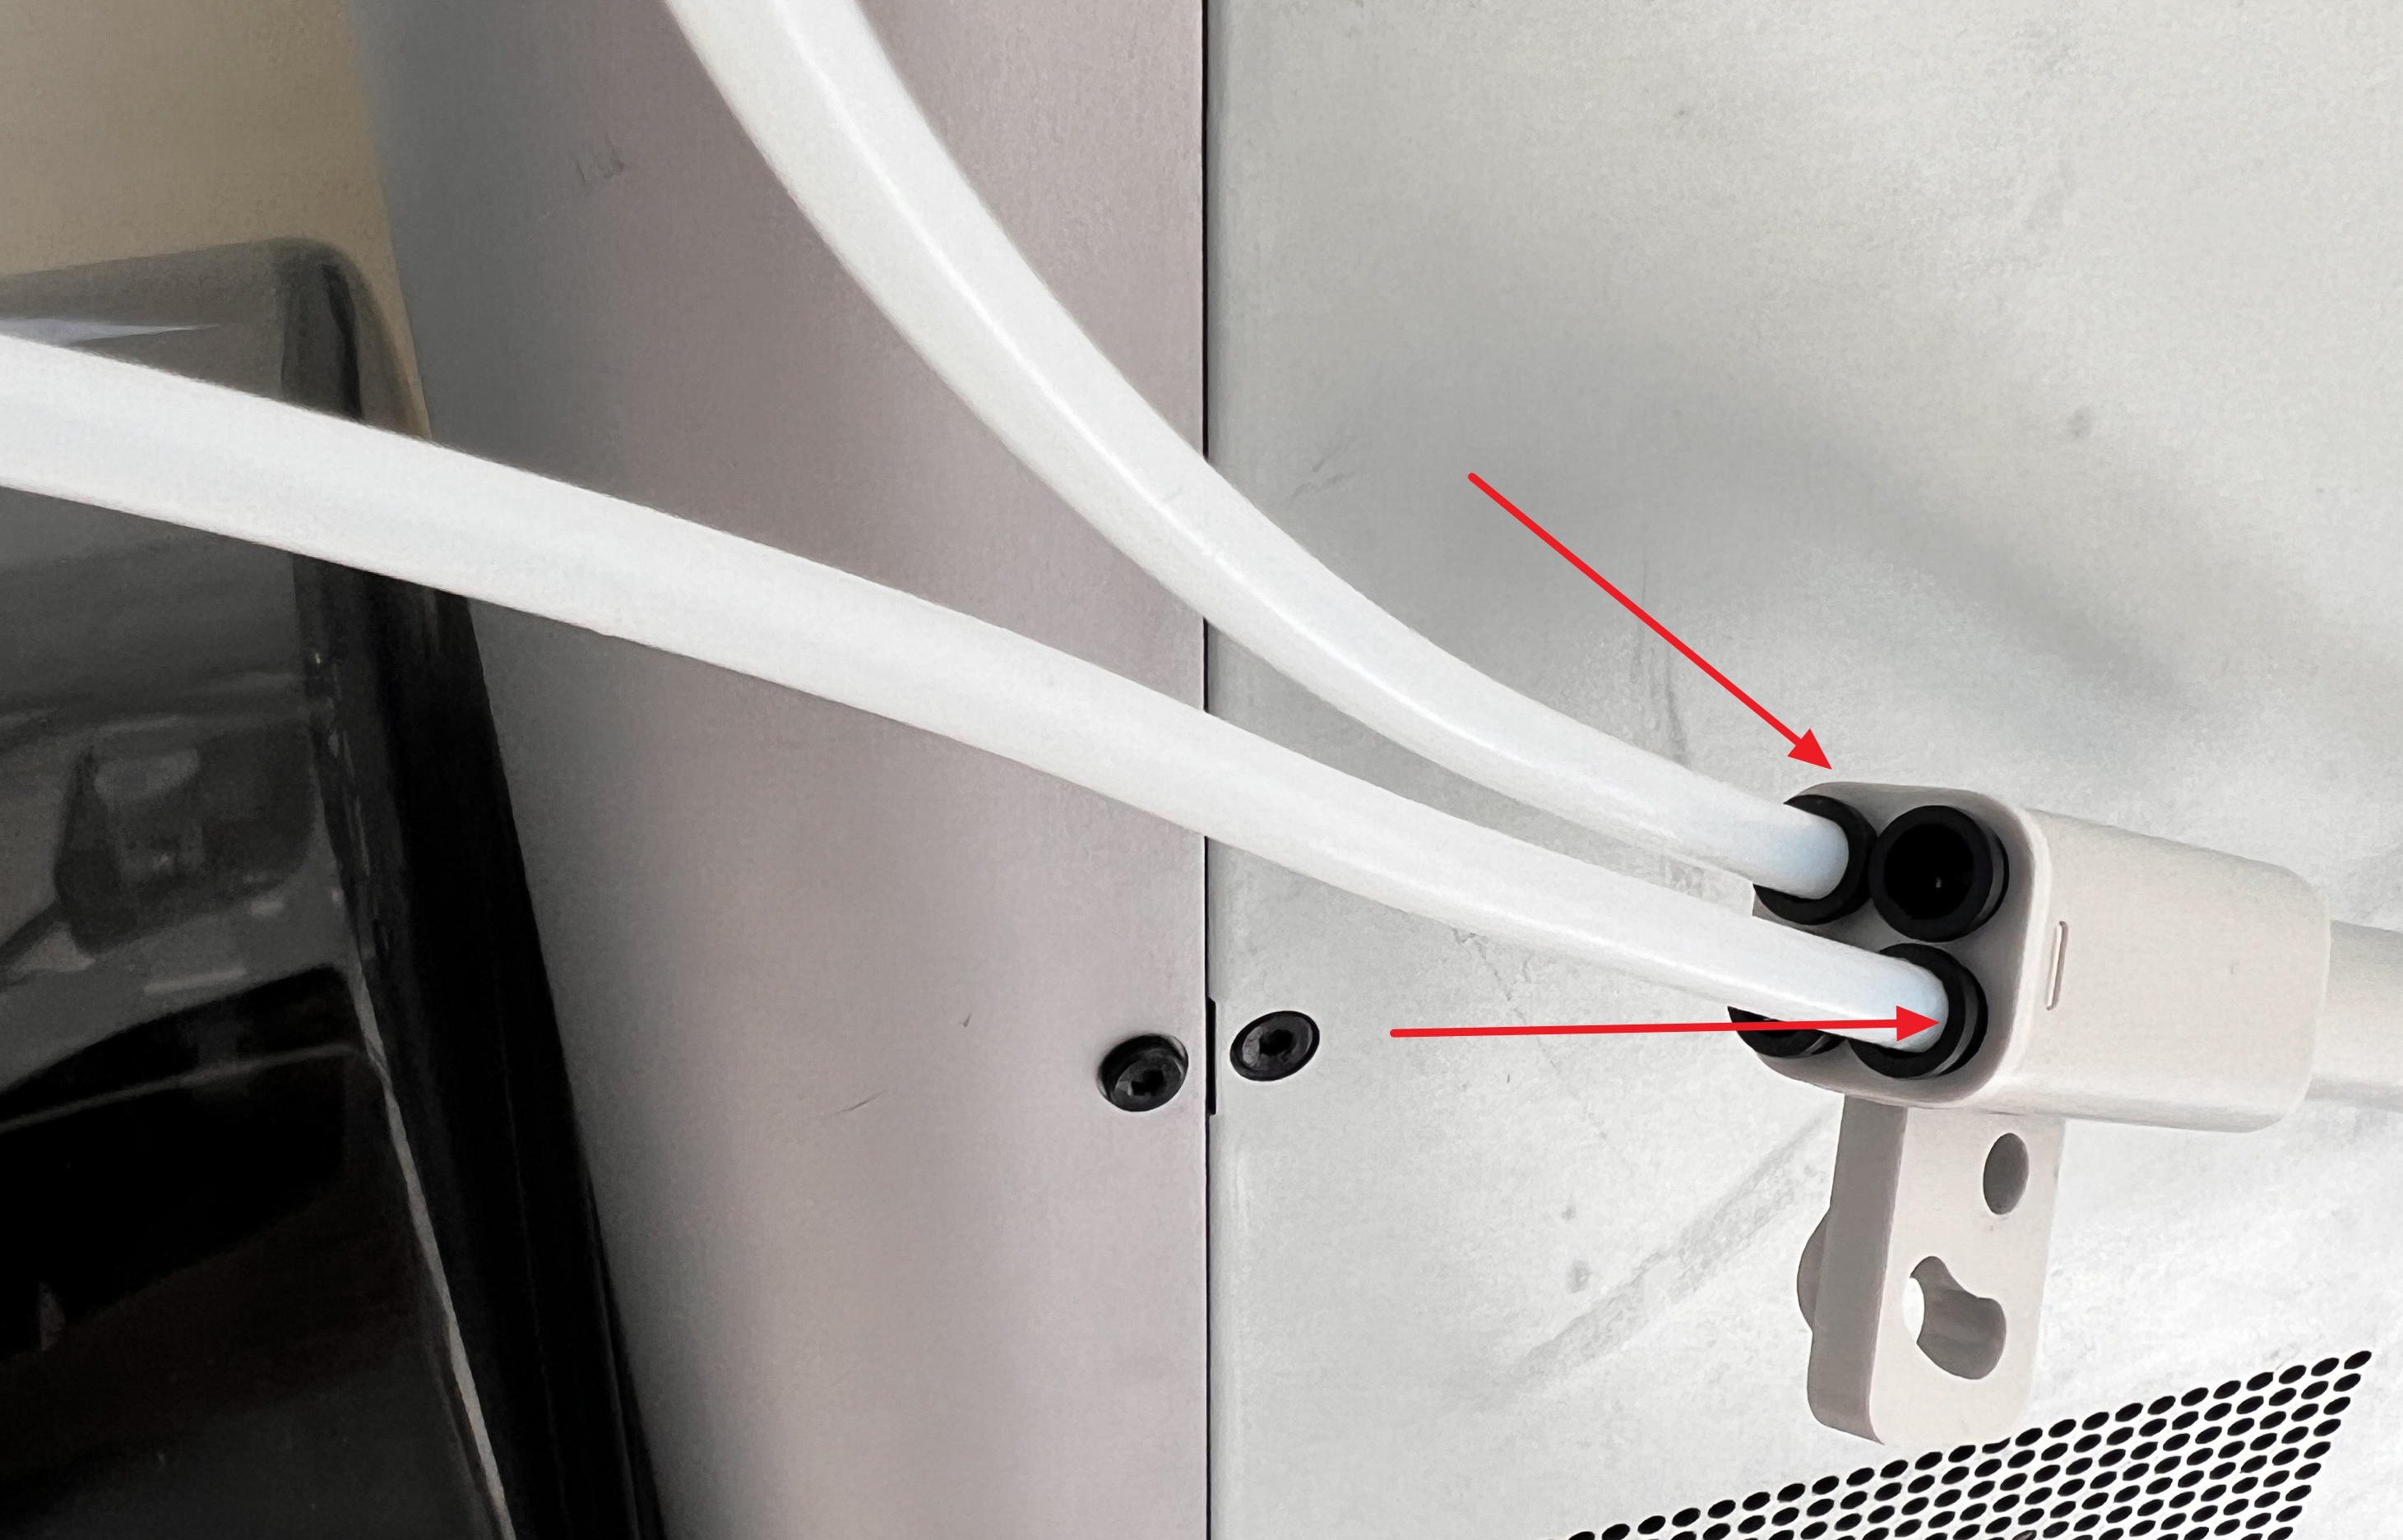
¶ 1. Position the PTFE Tube Adapter on the Left Side of the Filament Buffer
- Why left side?
Connecting on the left side allows all AMS units to feed through the Filament Buffer before reaching the printer.
This helps maintain consistent tension and prevents feeding failures. - What happens if it’s on the right?
The filament bypasses the buffer, increasing the risk of jams or failed loads.
| Correct Installation | Incorrect Installation |
|---|---|
 |
 |
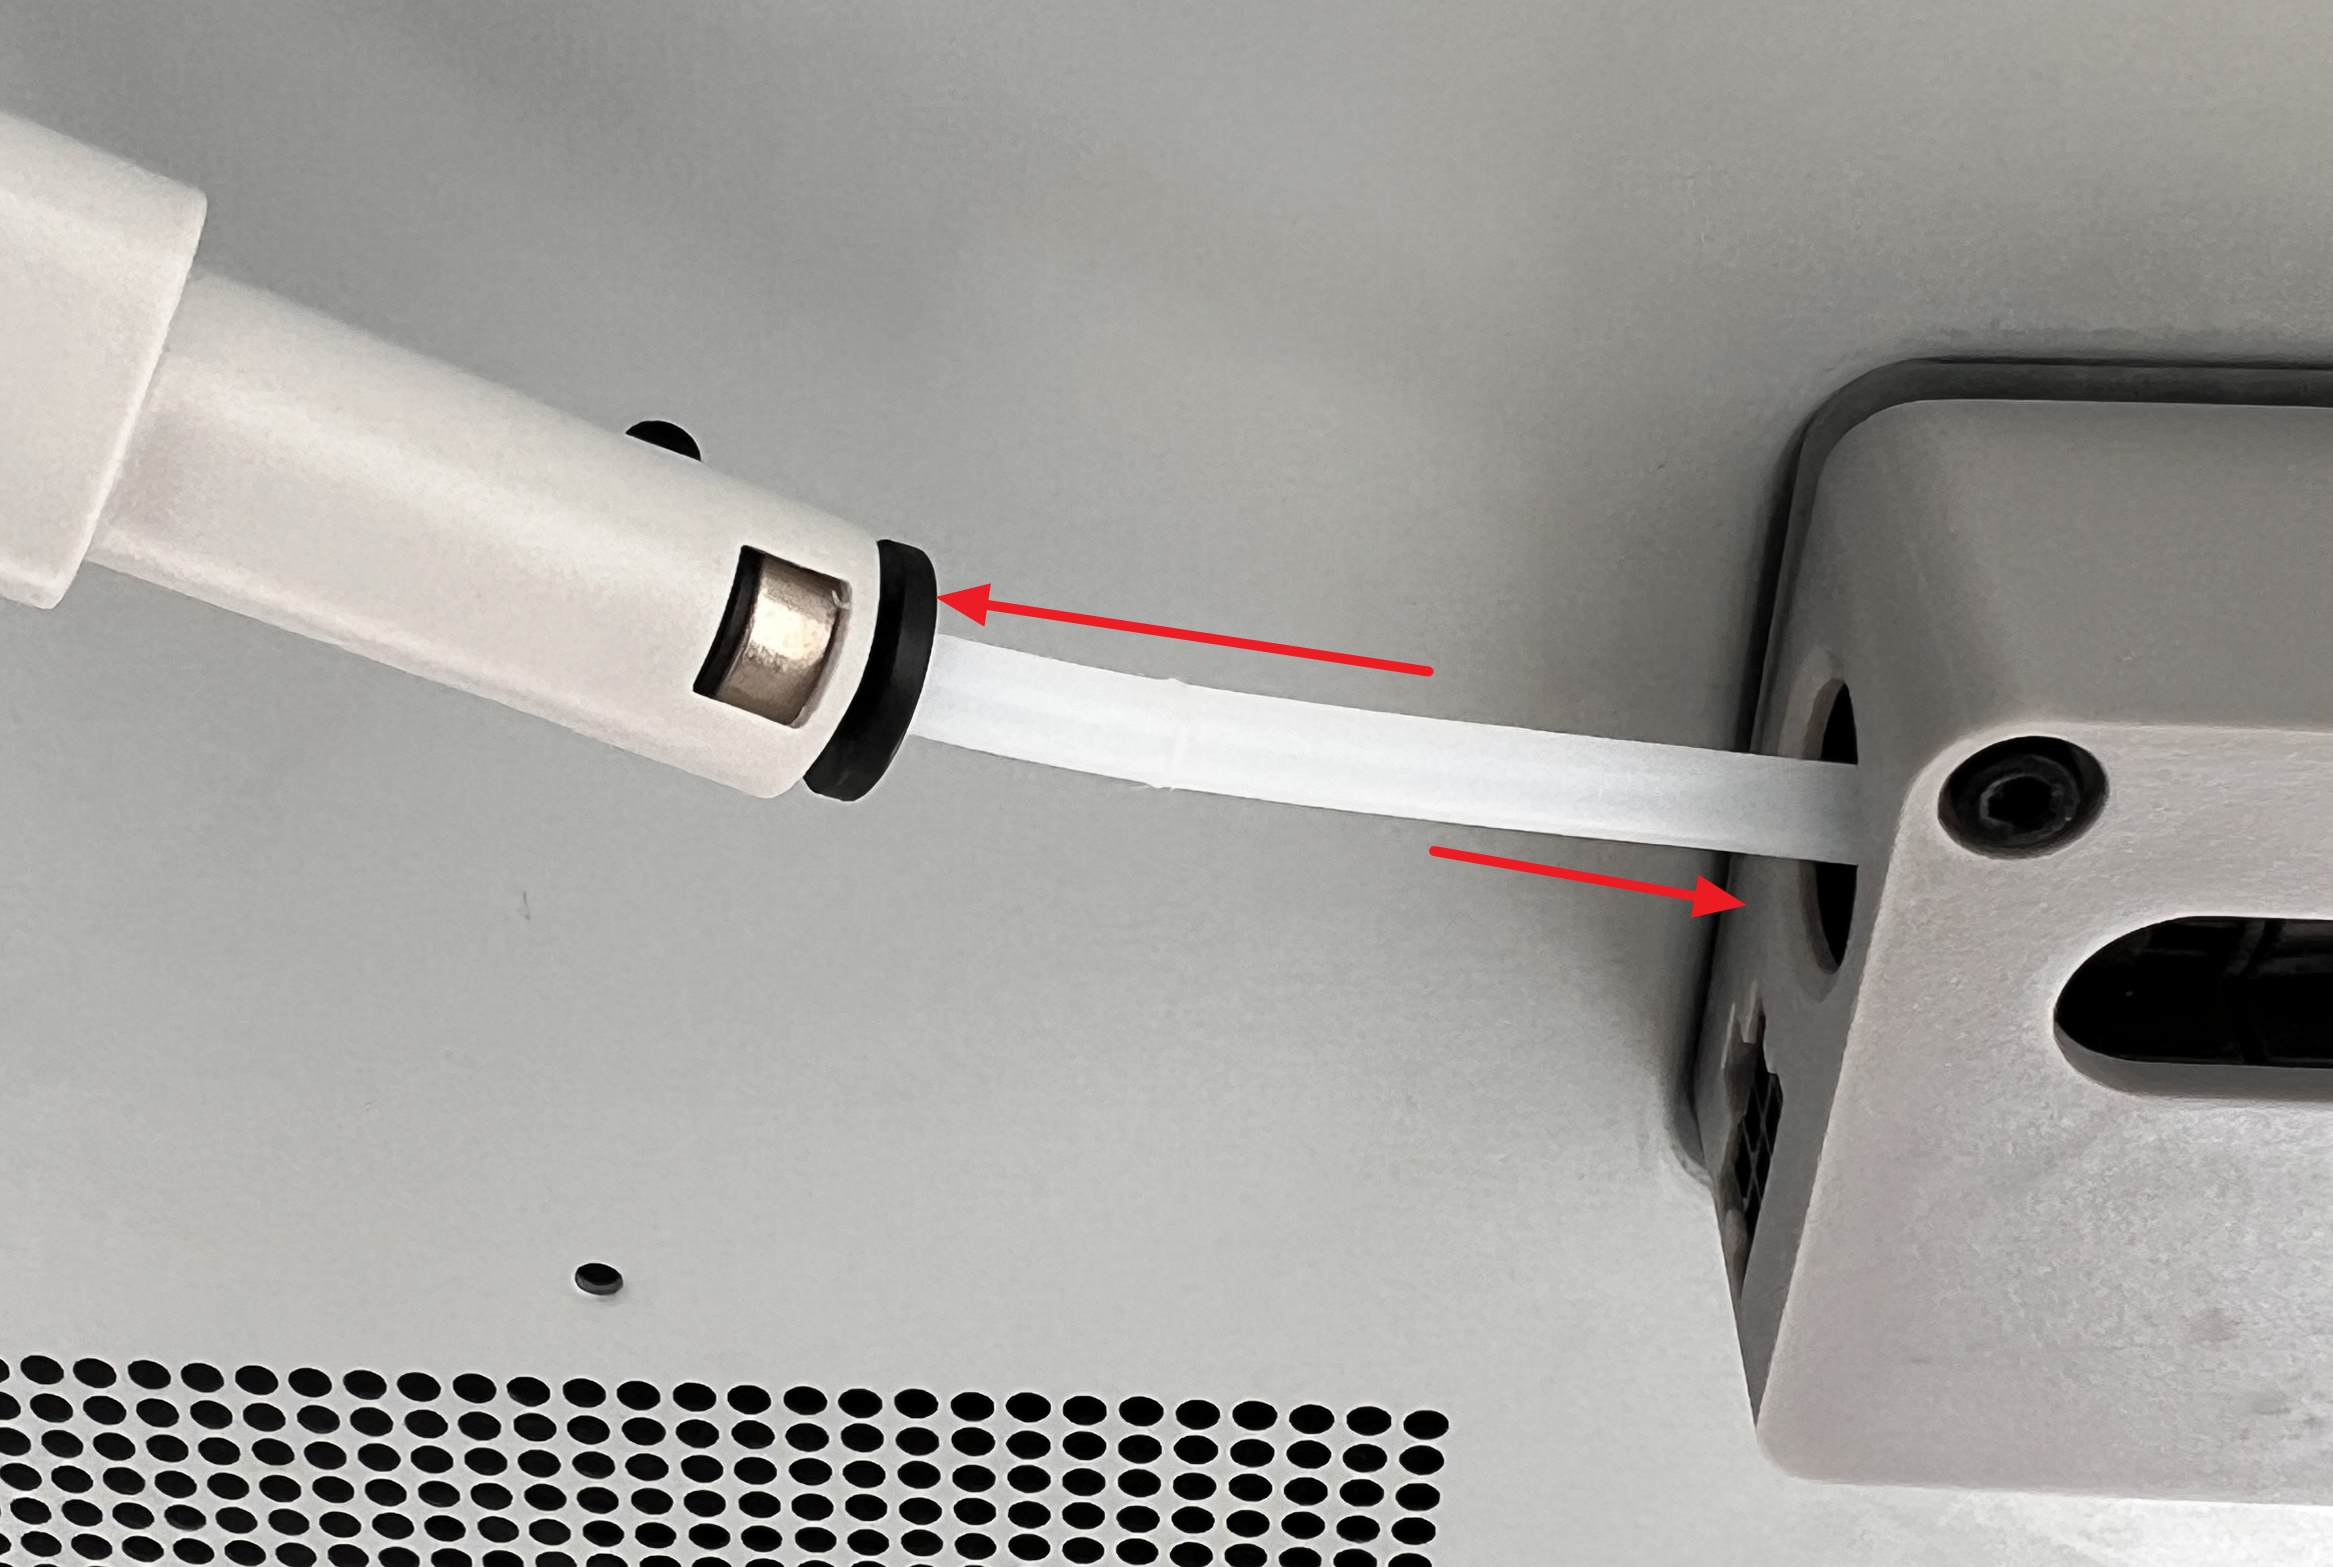
¶ 2. Keep the PTFE Tube Between Adapter and Buffer Short
- Recommended length: Around 10 cm (4 inches).
- Why? A long or sharply bent tube increases friction, which can slow or block filament movement.
- Cut the tube so that it’s just long enough for a smooth, unobstructed feeding.
| Correct Short Tube | Excessive Tube Length |
|---|---|
 |
 |
¶ Installation Guide
¶ Required Tools & Parts
- 1 × Bambu Lab printer
- 2 or more AMS 2 Pro or AMS units
- Several PTFE tubes (cuttable to length)
- PTFE Tube Adapter
¶ Step 1 — Preparation
- Power off all AMS units and stop the printer.
- Confirm the Filament Buffer is securely installed on the printer.
- Gather all PTFE tubes and cut them to the required lengths.
- Pre-cut a 10 cm PTFE tube for connecting the adapter to the buffer.
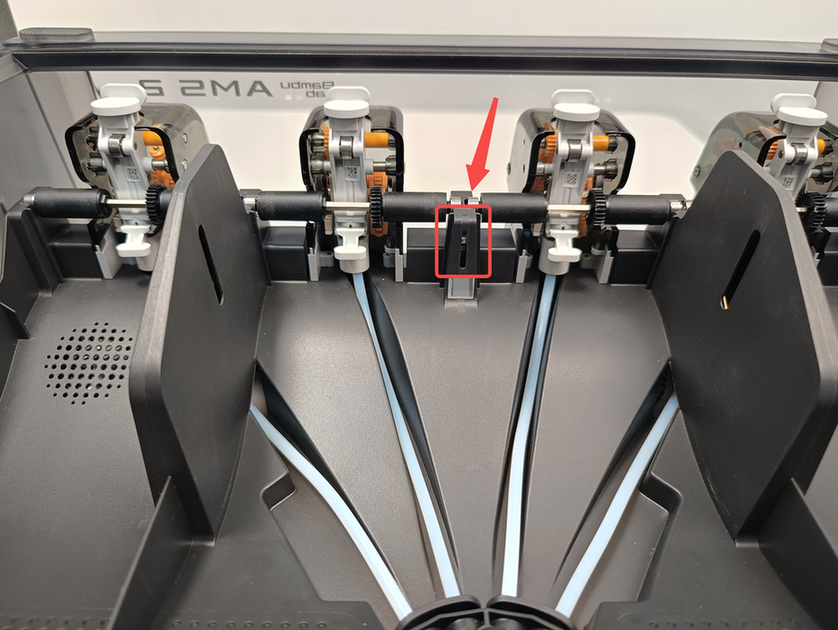
¶ Step 2 — Connect PTFE Tubes to the AMS Units
Insert PTFE tubes into the rear push-fit connectors on each AMS unit.
Push until you feel resistance, then check for a secure fit.
¶ Step 3 — Attach the PTFE Tube Adapter
- Position the adapter on the left side of the Filament Buffer.
- Insert the PTFE tube from each AMS unit into the adapter’s input ports.
- Push firmly until the connection is tight and there is no wobble.
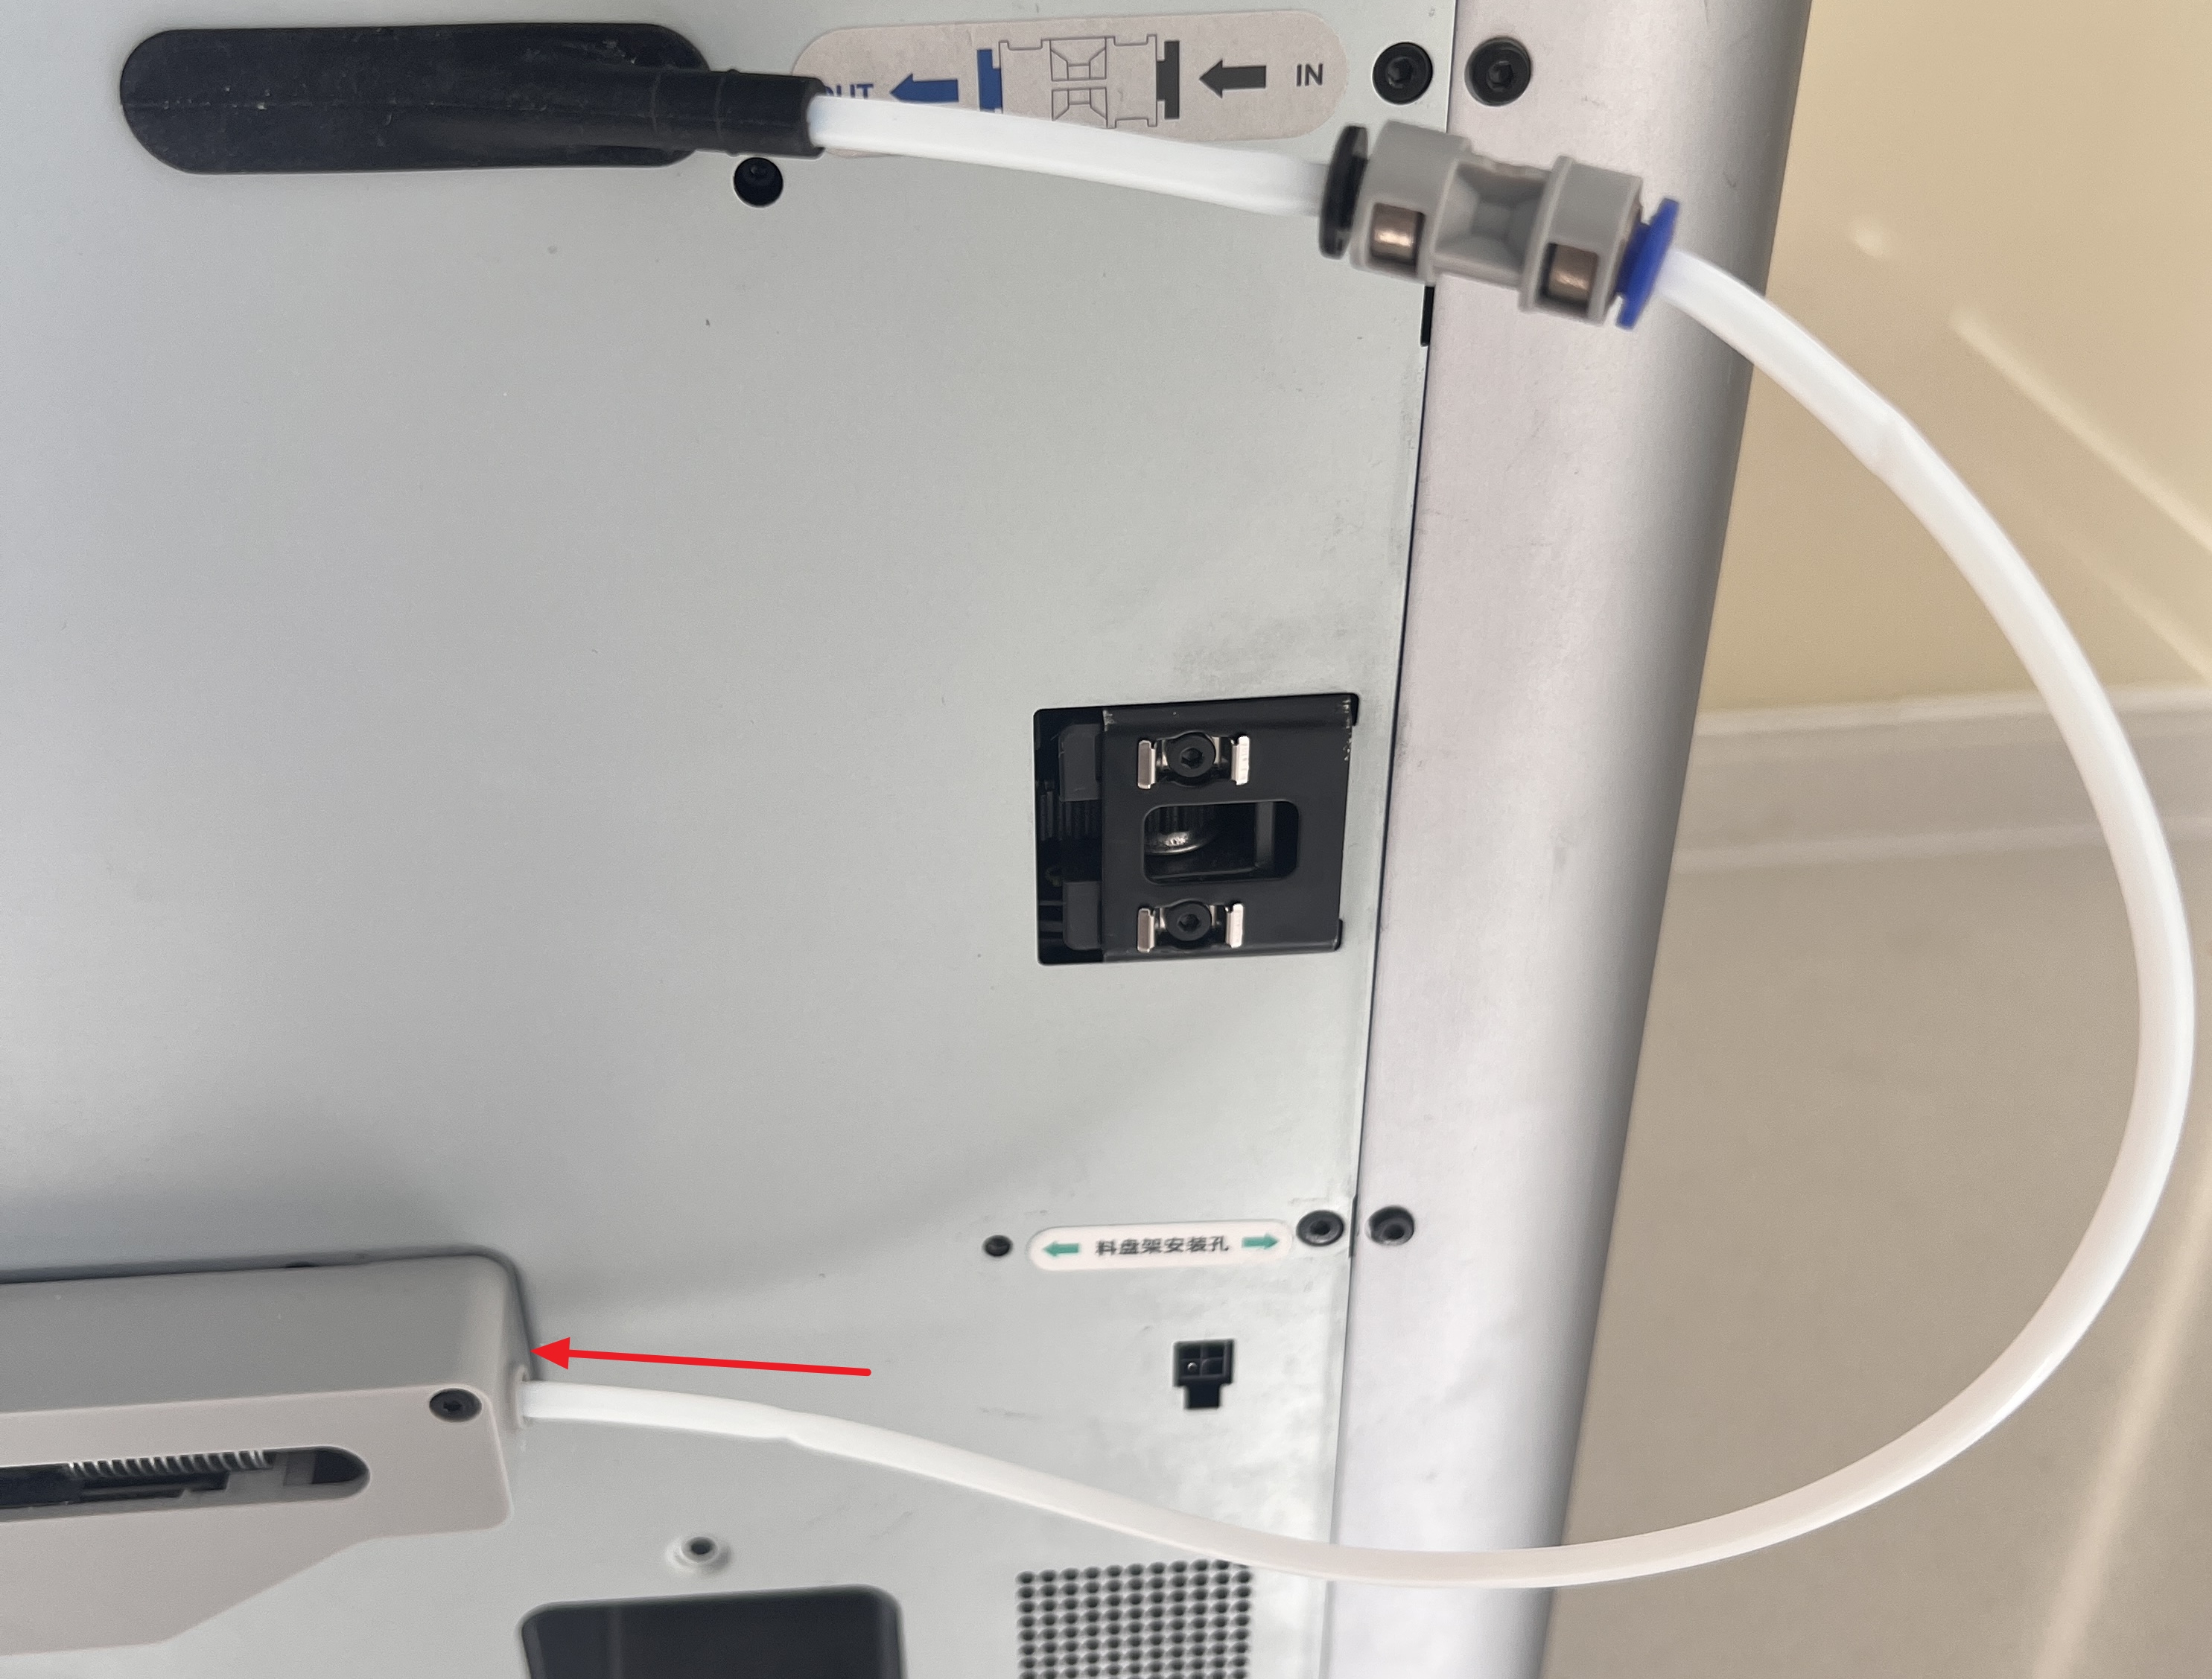
¶ Step 4 — Connect Adapter to Filament Buffer
- Take the pre-cut 10 cm PTFE tube.
- Insert one end into the output port of the PTFE Tube Adapter.
- Insert the other end into the left-side input port of the Filament Buffer.
¶ Step 5 — Connect the Printer
Insert the printer’s original PTFE tube into the output port of the Filament Buffer.
¶ Step 6 — Final Checks
- Gently pull on each PTFE connection to confirm it’s locked in place.
- Power on the AMS units and the printer.
- Load filament from each AMS slot to confirm smooth feeding.
- Run a small test print to verify proper switching between filaments.
Tips for Best Performance
- Avoid sharp bends in PTFE tubes — keep curves gentle.
- Store AMS units on the same level as the printer to reduce gravity-related tension.
- Periodically check tube ends for wear and trim if necessary.
¶ End Notes
We hope the detailed guide provided has been helpful and informative.
If this guide does not solve your problem, please submit a technical ticket, we will answer your questions and provide assistance.
If you have any suggestions or feedback on this Wiki, please leave a message in the comment area. Thank you for your support and attention!