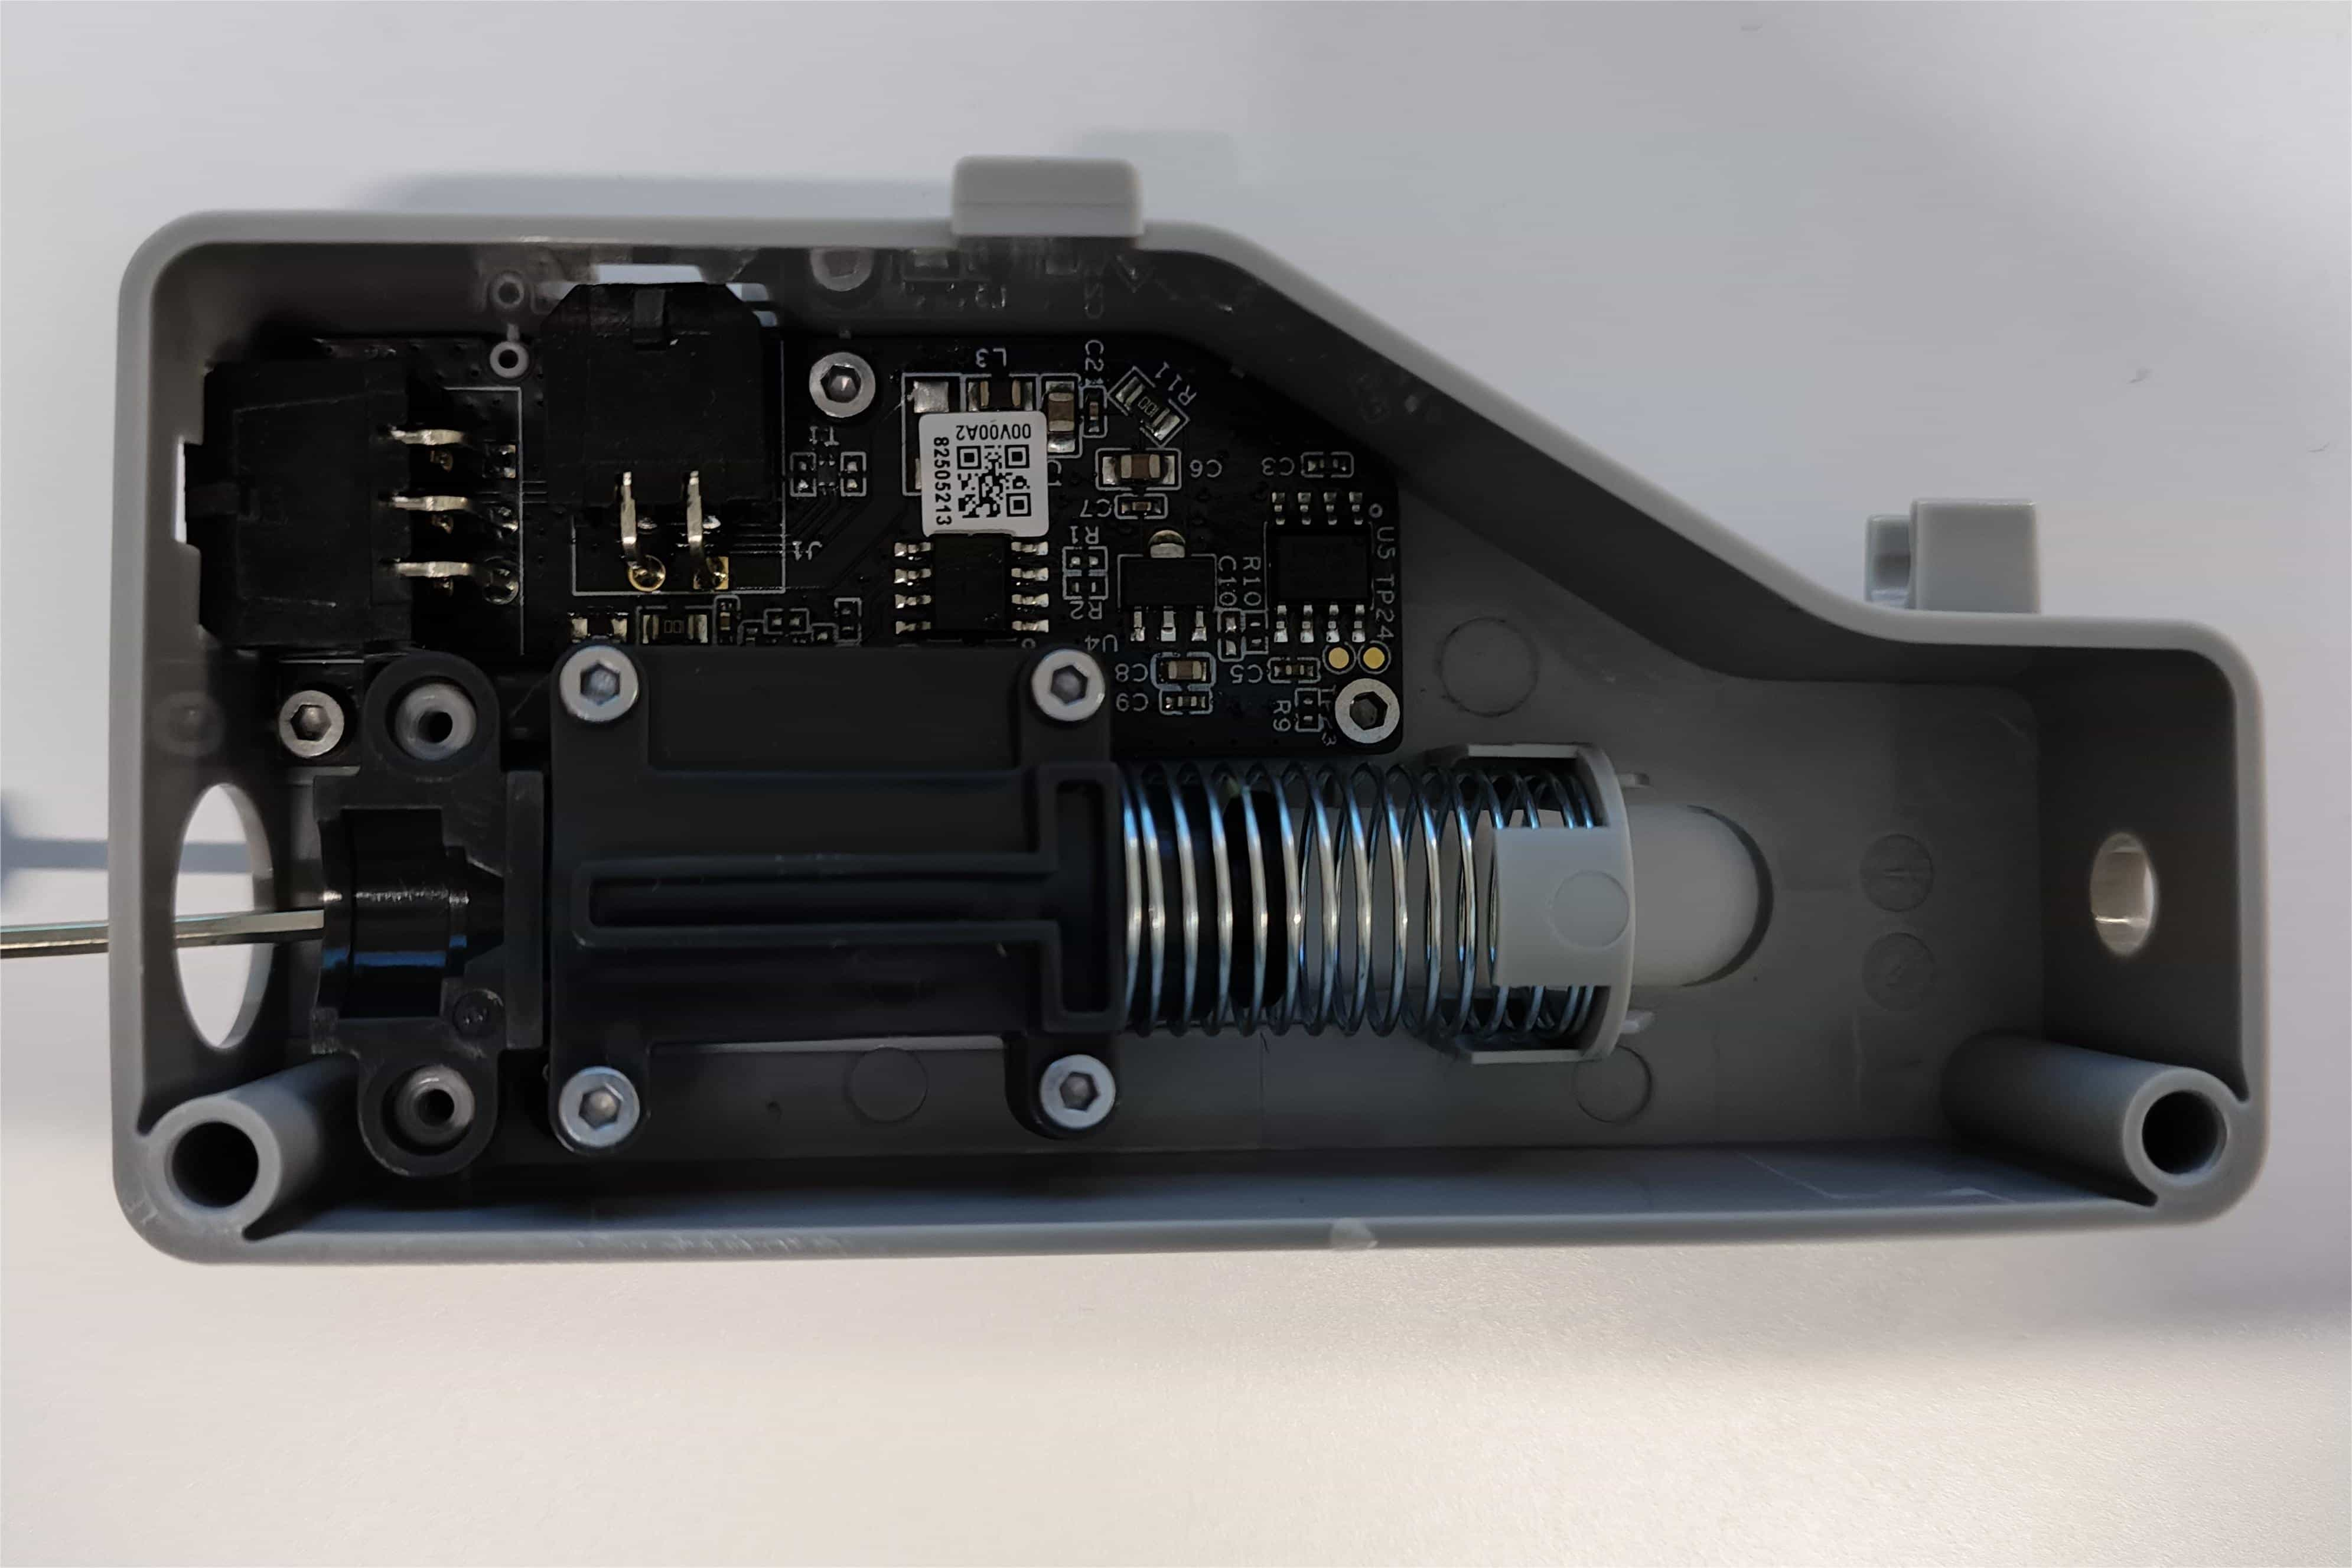
The filament buffer connection board is located inside the AMS filament buffer and is equipped with a Hall sensor. It monitors the filament loading status by detecting the position changes of the buffer slider.
During the use of the AMS Filament Buffer, it may be necessary to replace the connection board under the following circumstances:
The AMS is not functioning properly and the evident component damage is inspected on the connection board.
During printer operation, an error message is displayed indicating "The filament buffer signal is lost, the cable or position sensor may be malfunctioning" After measuring voltage and resistance, it is determined that the connection board is faulty. The relevant guidelines refer to The filament buffer signal lost,the cable or position sensor may be malfunctioning
After analysis and investigation by the technical team, it was determined that the connection board needs to be replaced.
It's crucial to power off the printer before performing any maintenance work on the printer and its electronics, including tool head wires, because leaving the printer on while conducting such tasks can cause a short circuit, which can lead to additional electronic damage and safety hazards.
When you perform maintenane or troubleshooting on the printer, you may be required to disassemble some parts, including the hotend. This process can expose wires and electrical components that could potentially short circuit if they come into contact with each other or with other metal or electronic components while the printer is still on. This can damage the electronics of the printer and cause further damage.
Therefore, it's essential to switch off the printer and disconnect it from the power source before doing any maintenance work. This will prevent any short circuits or damage to the printer's electronics. By doing so, you can avoid potential damage to the printer's electronic components and ensure that the maintenance work is performed safely and effectively.
If you have any concerns or questions about following this guide, open a new ticket in our Support Page and we will do our best to respond promptly and provide you with the assistance you need.
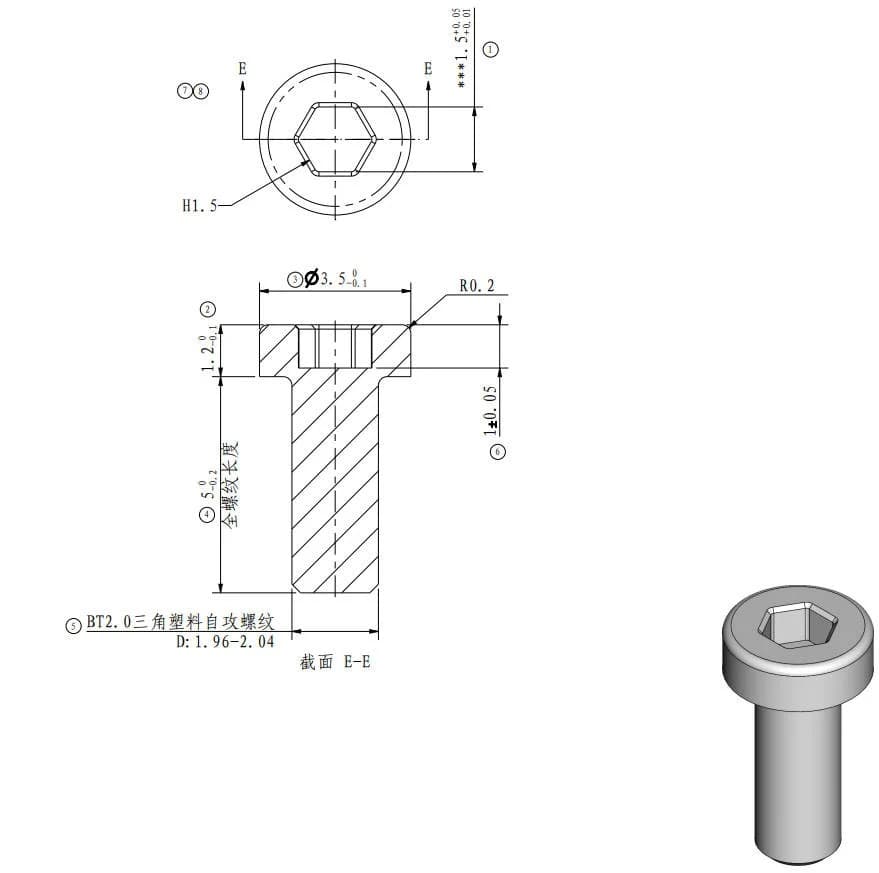
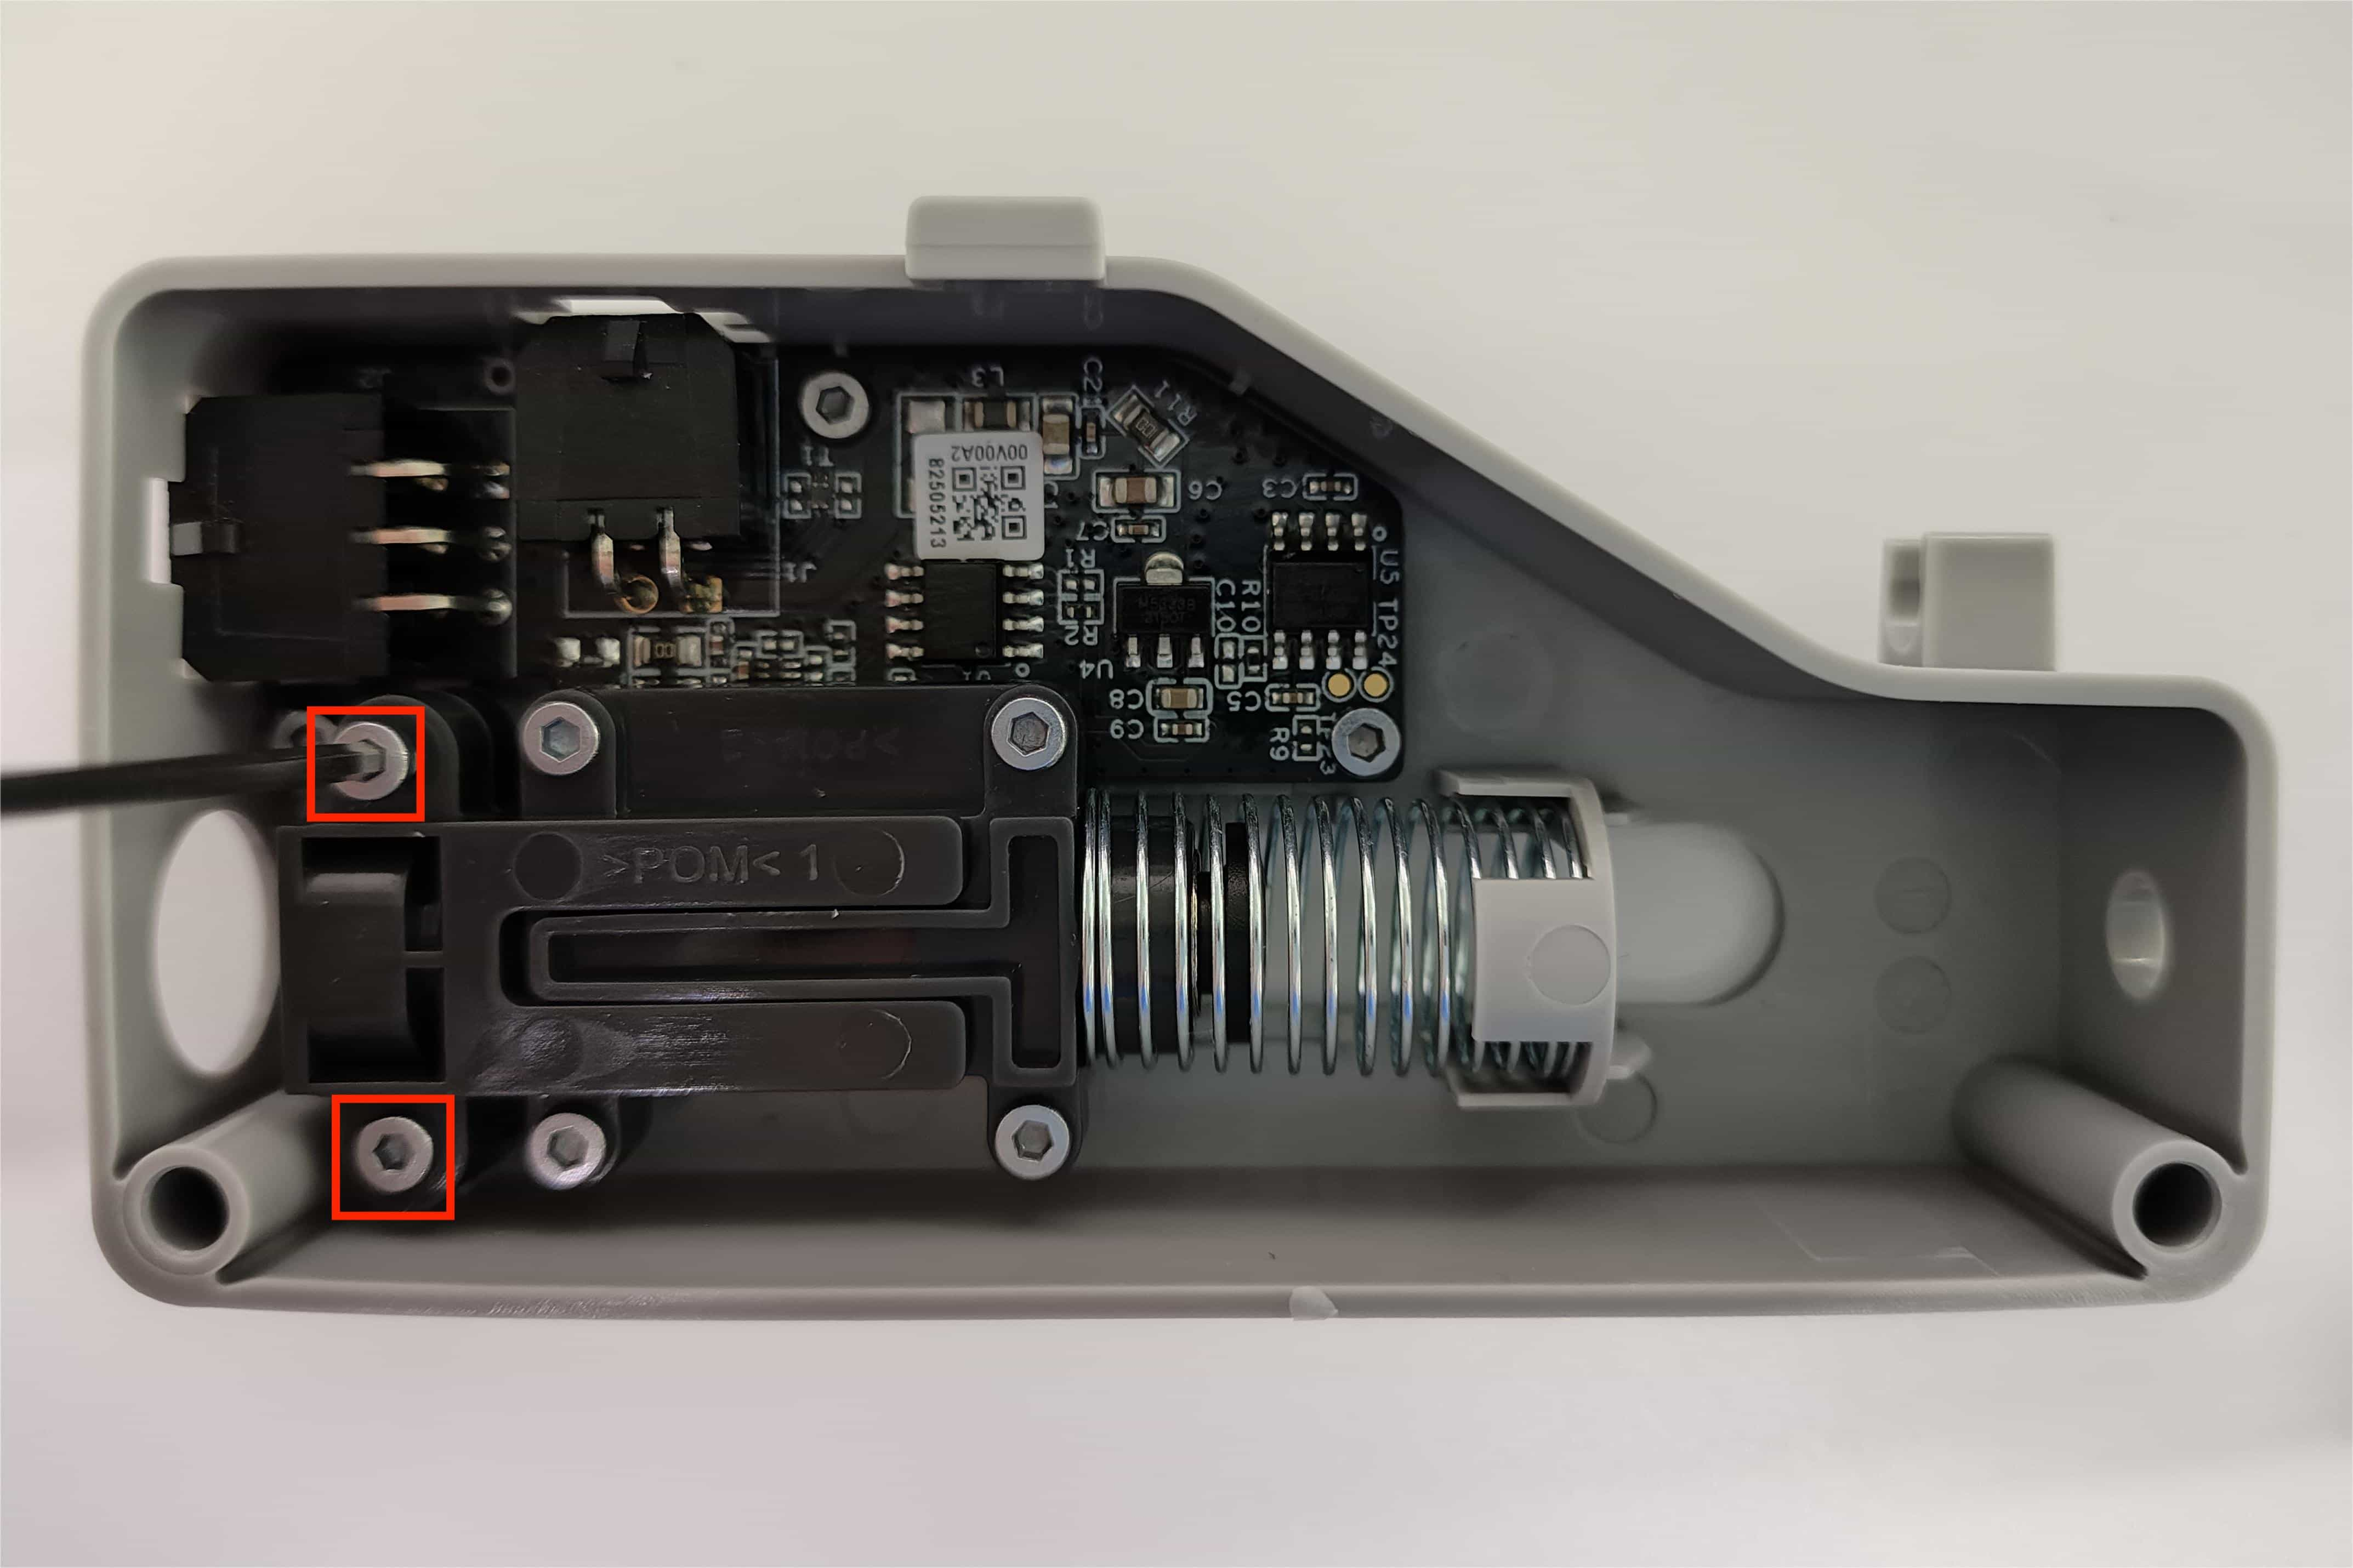
Remove the tamper-evident tape on the screw of the buffer slider (for first-time disassembly/installation)
2. Use an H1.5 hex key to loosen the two screws on the left end of the buffer slider. Then, take off the cover plate on the top of the buffer slider.
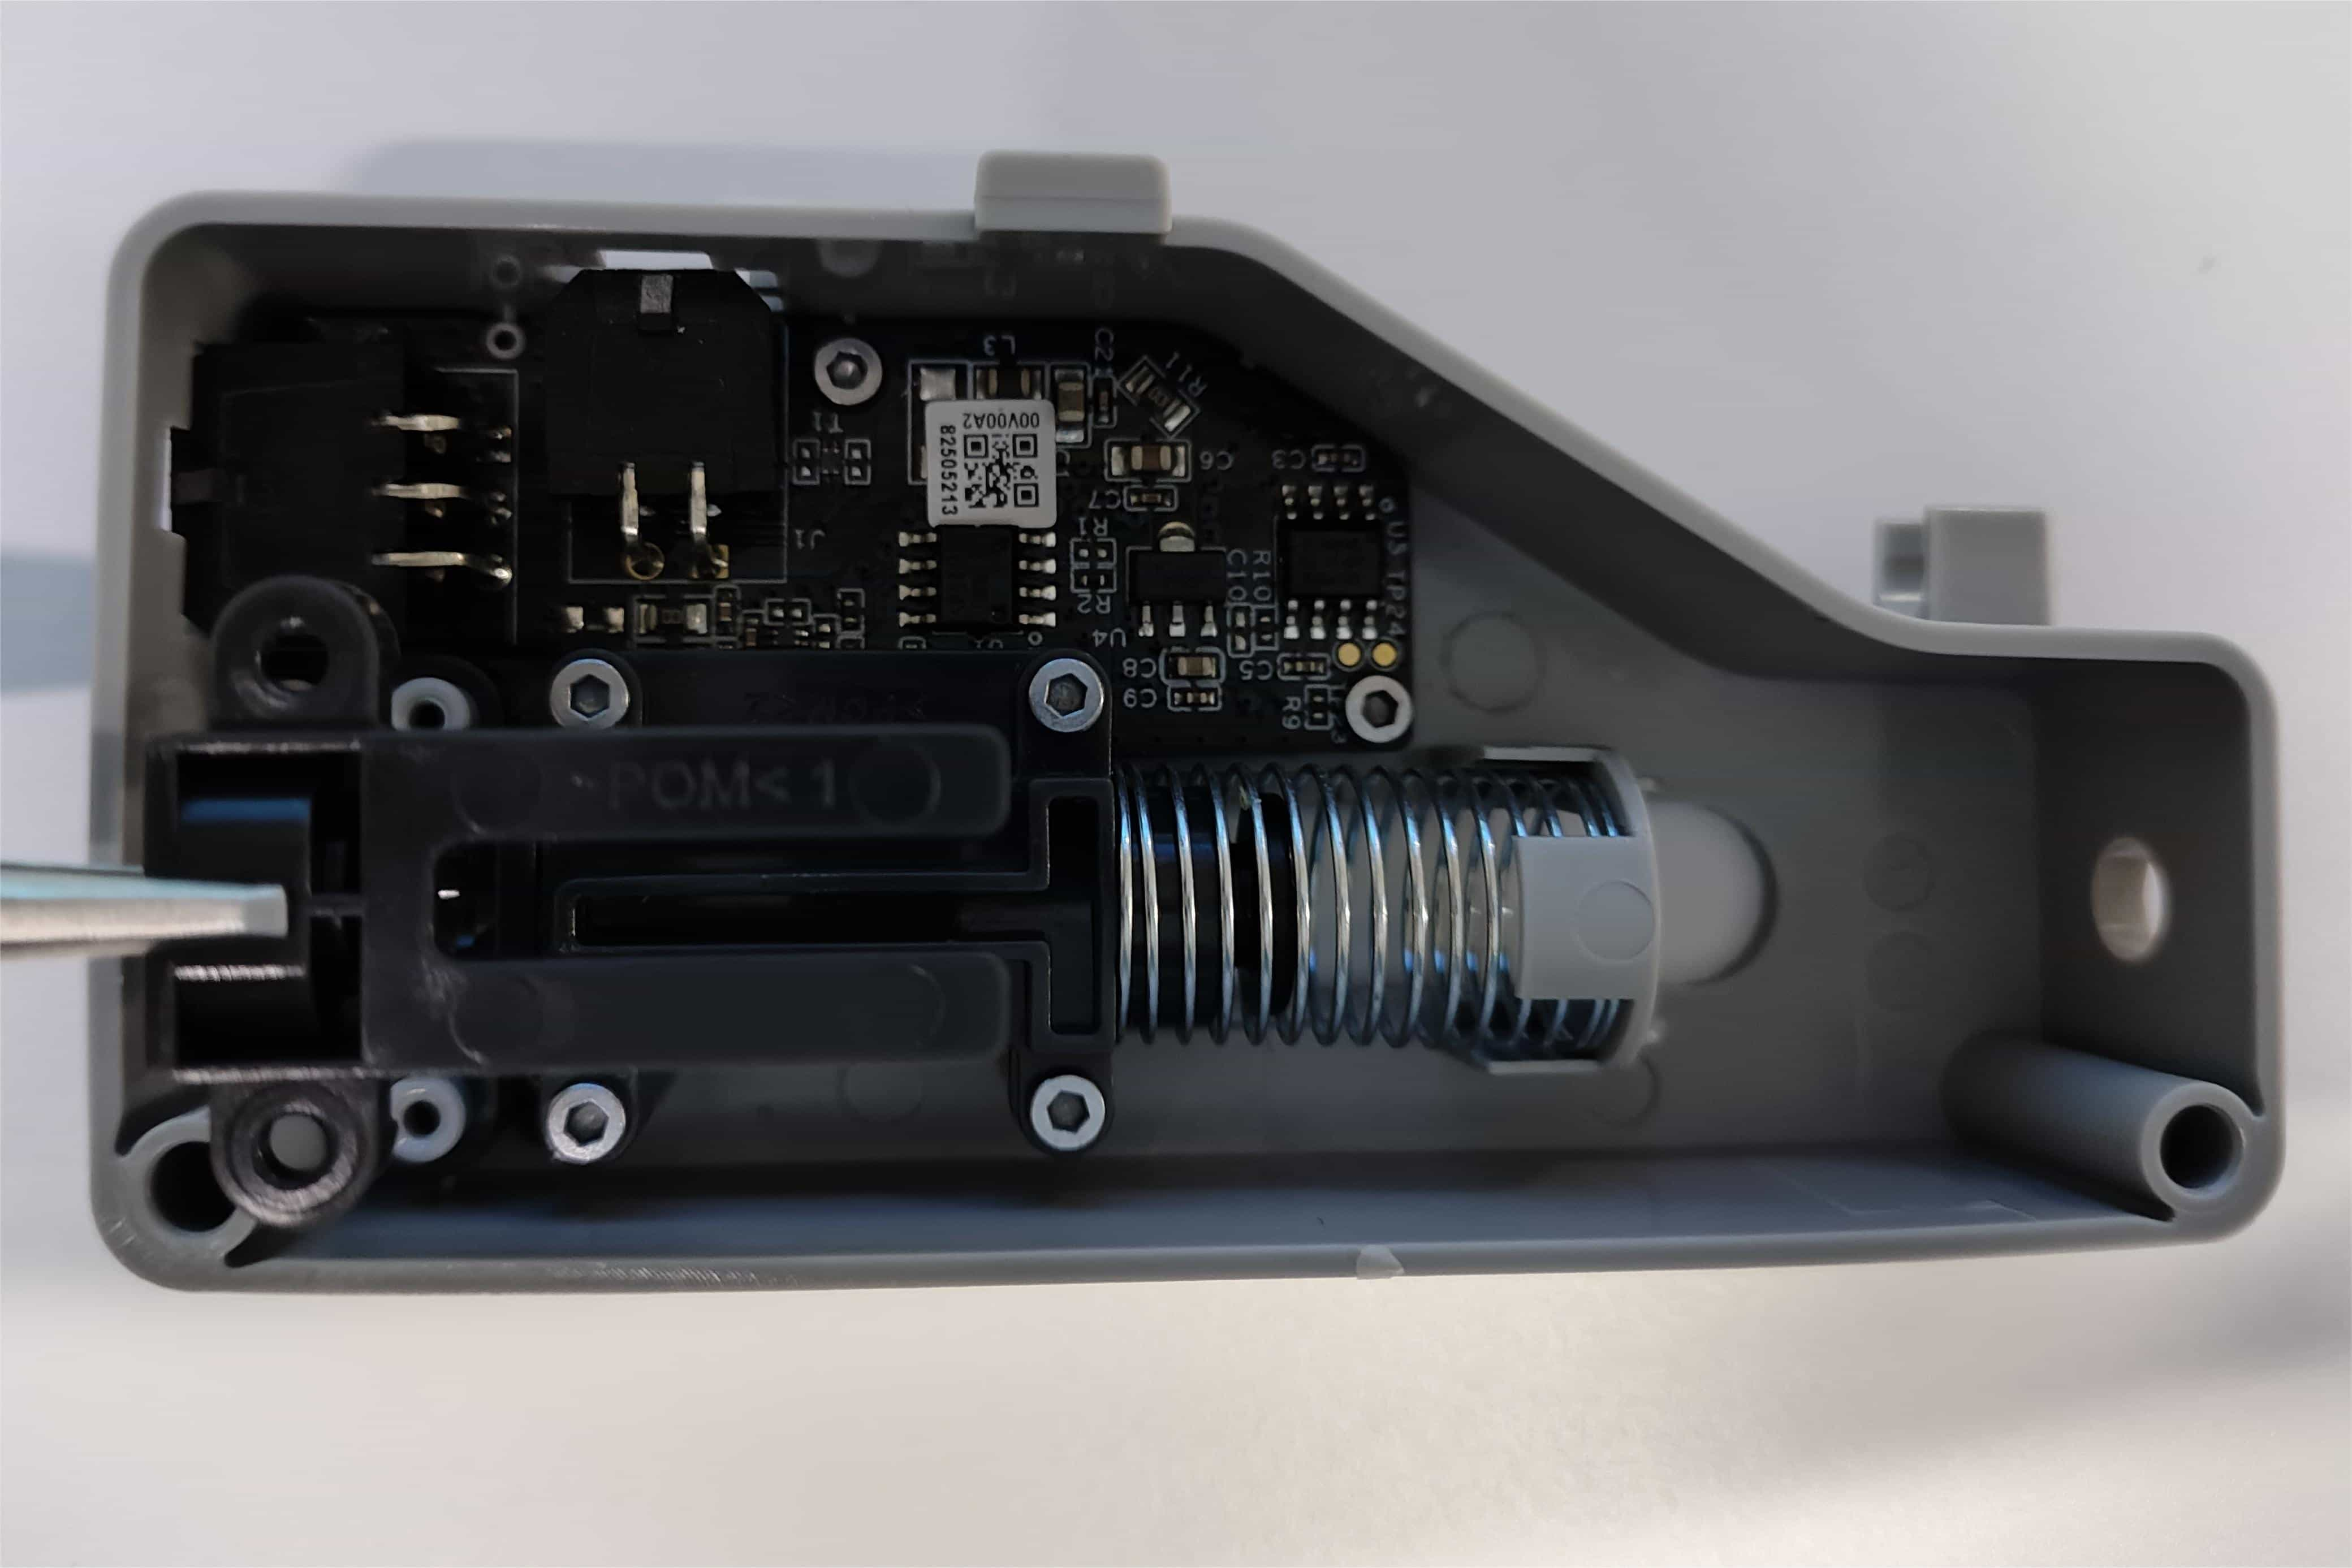
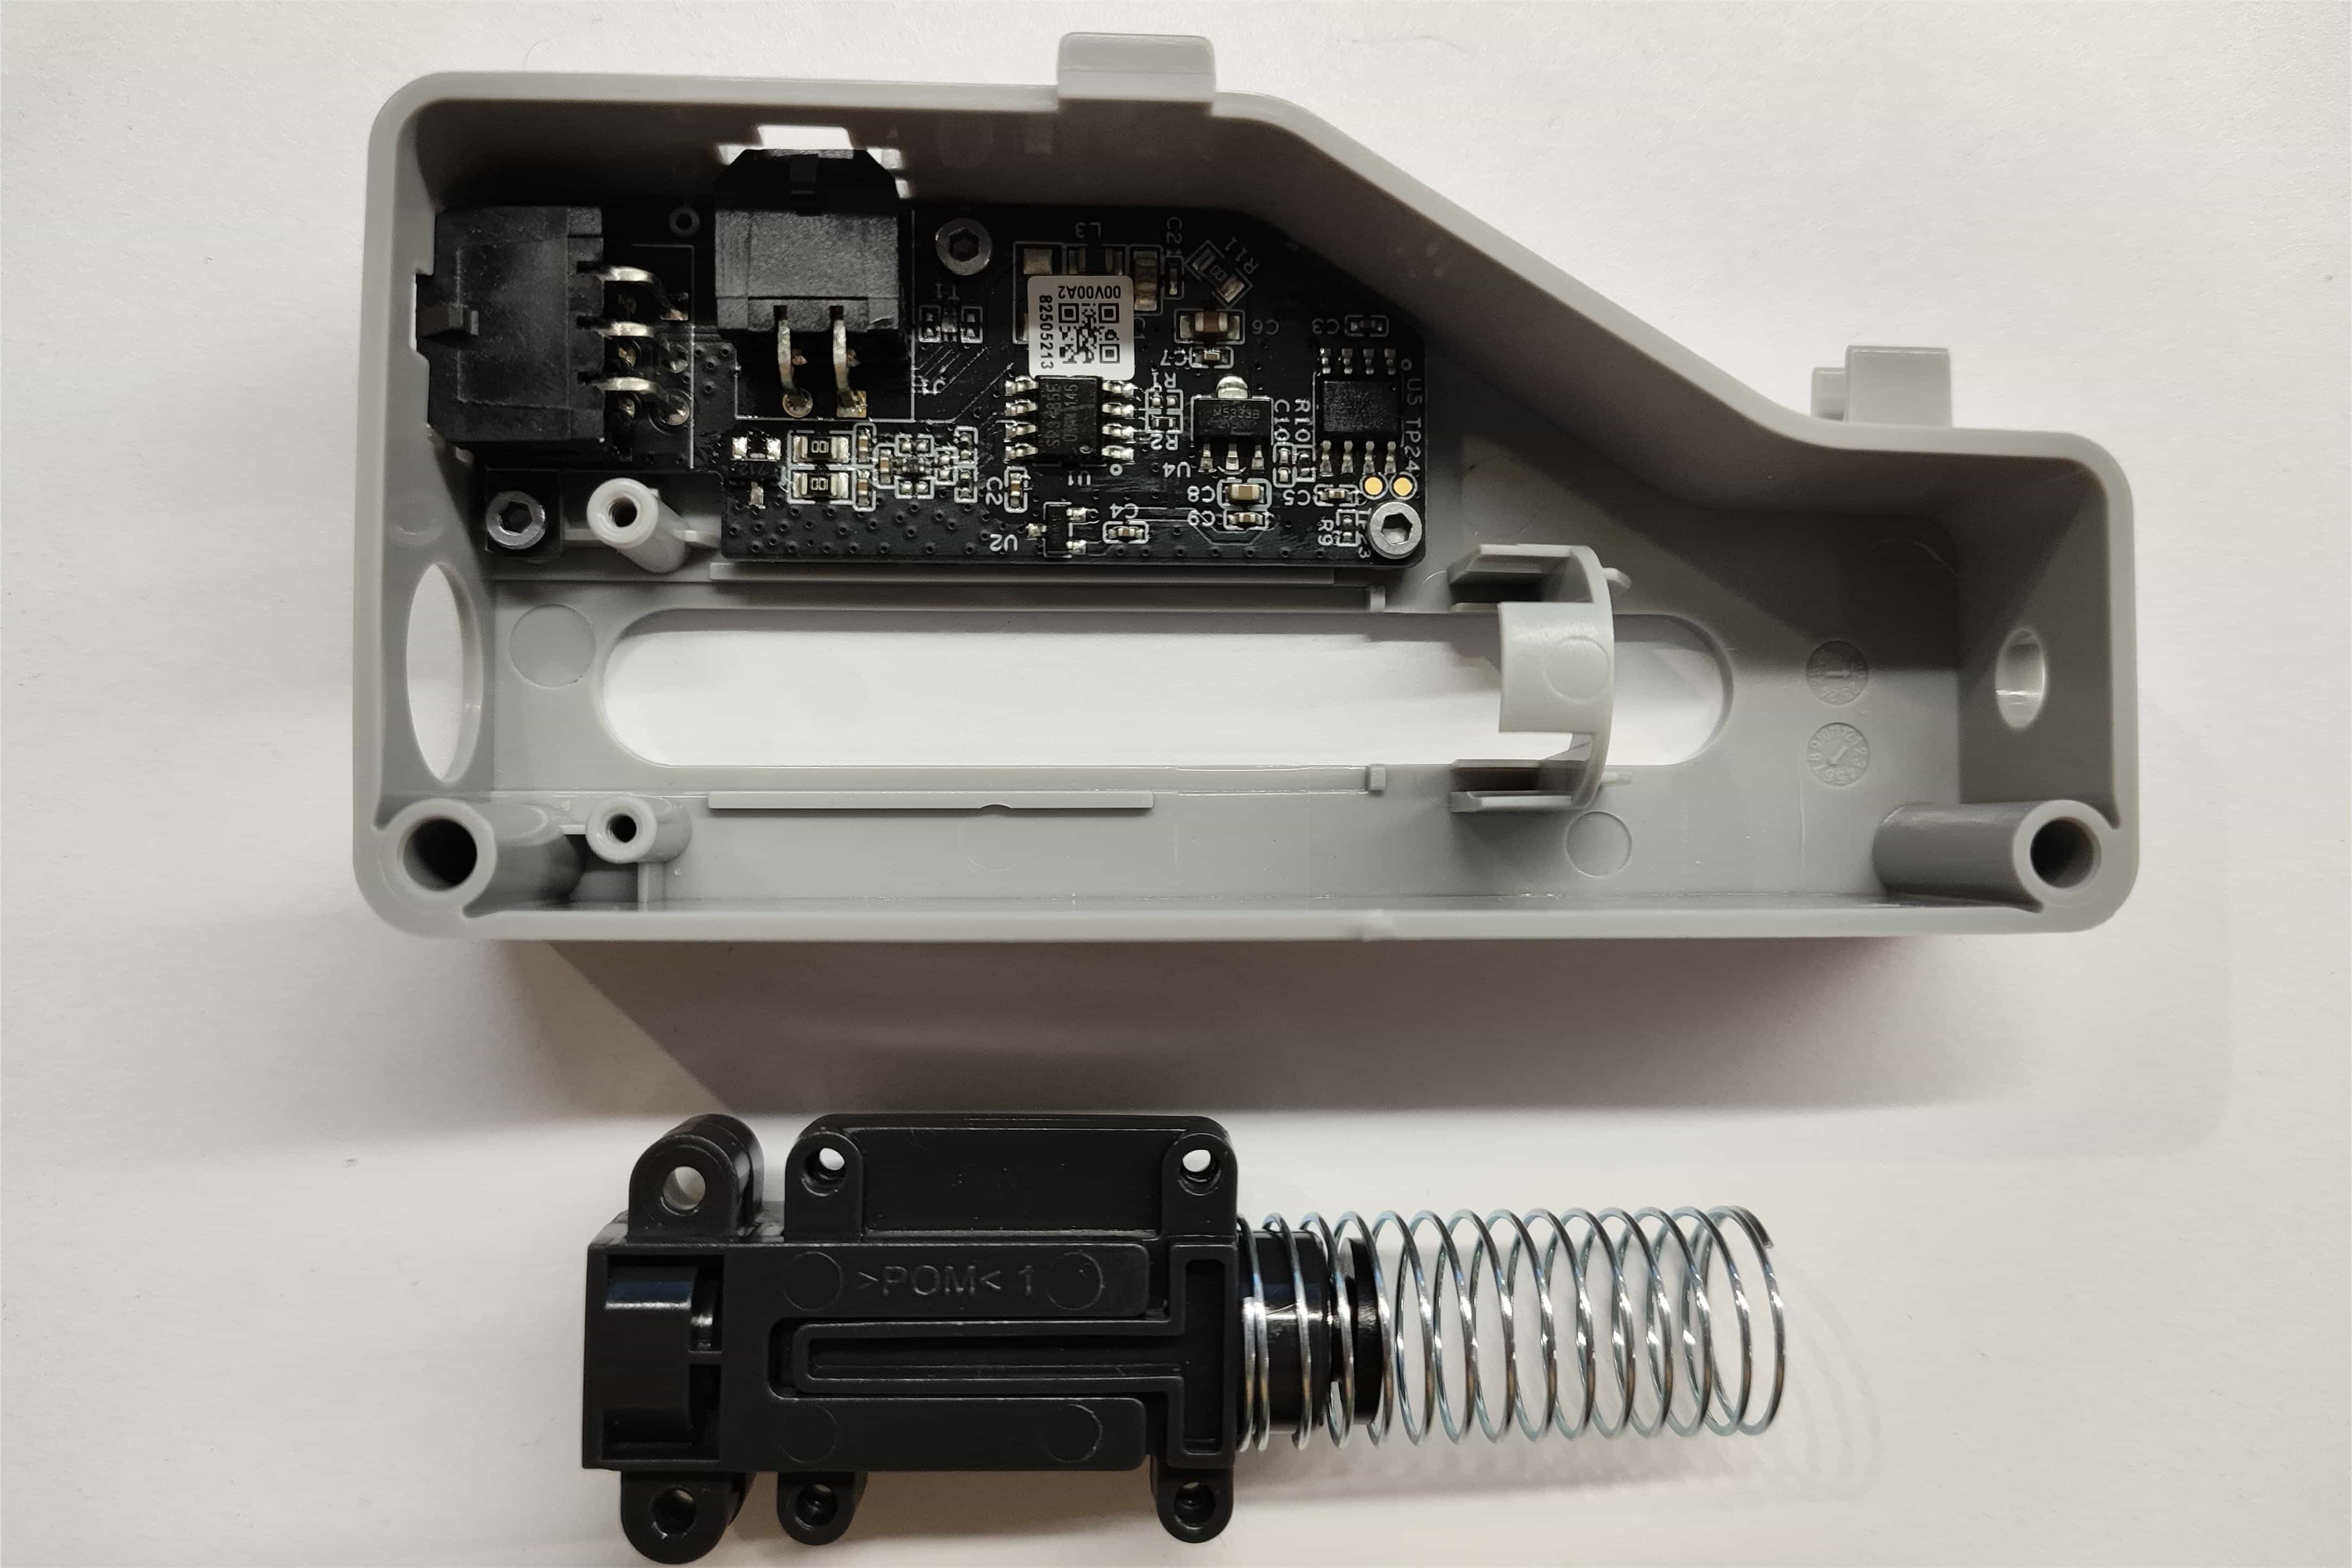
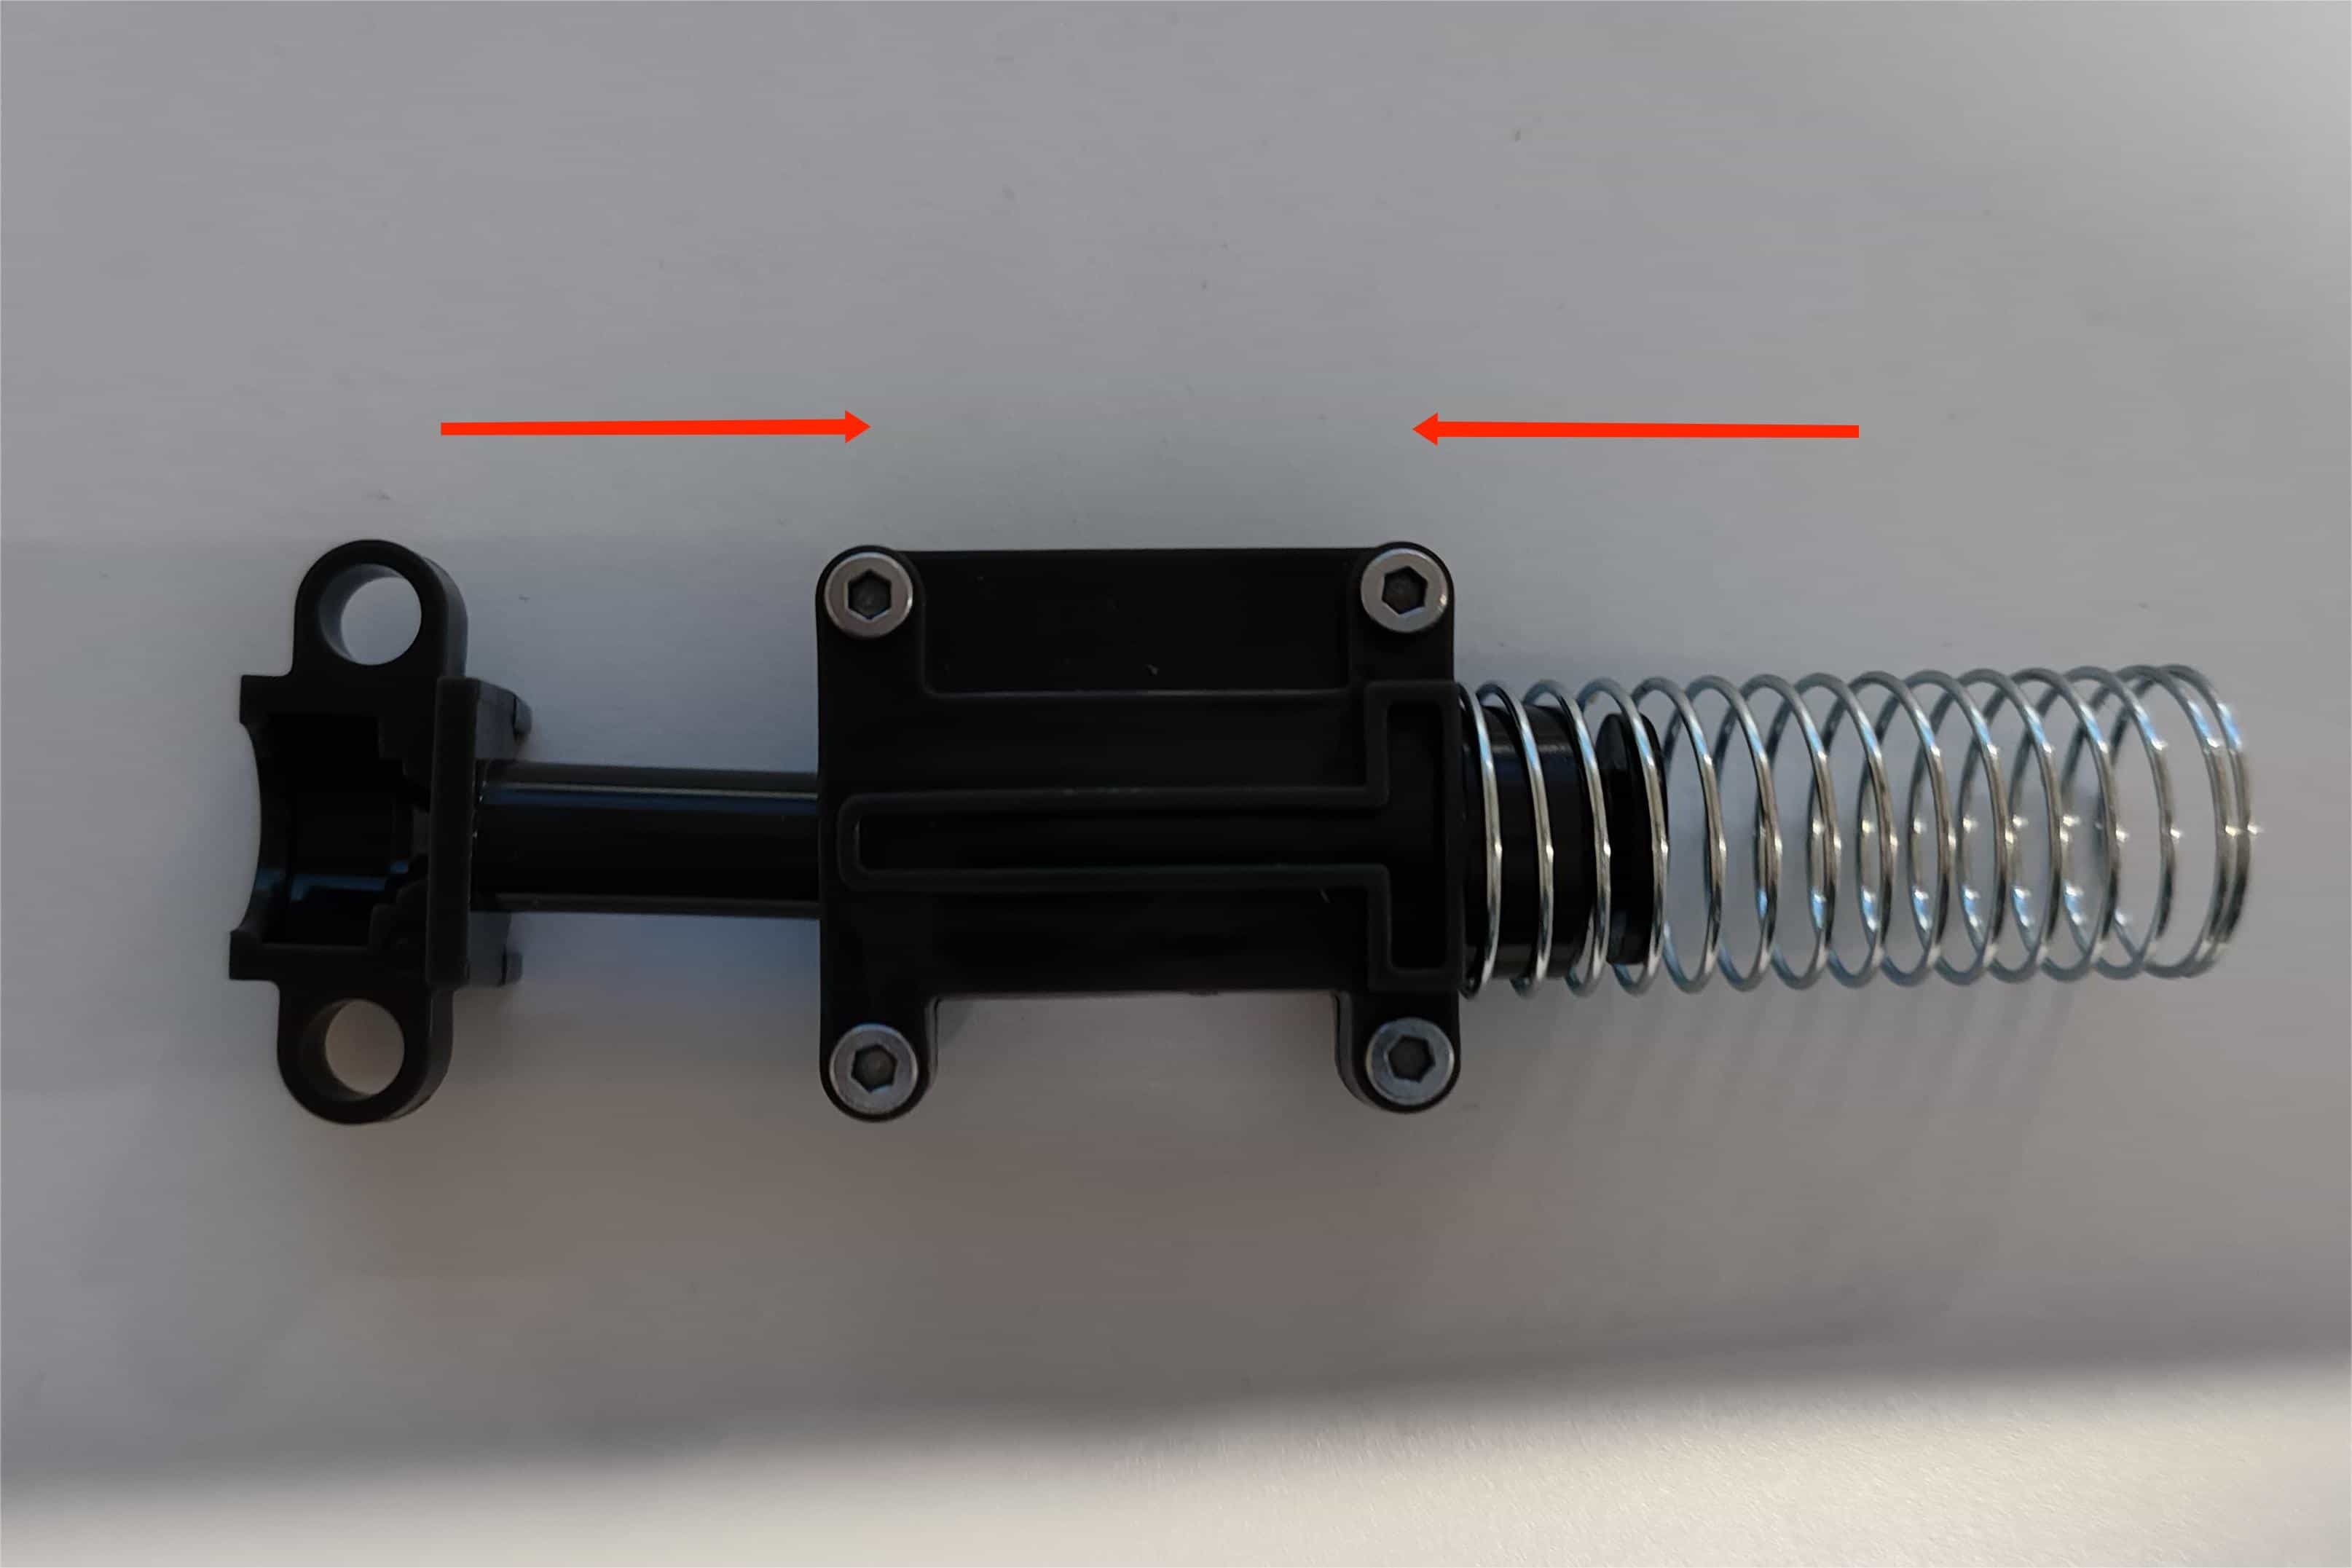
3. Using an H1.5 hex hey to pry up and remove the buffer slider along with the spring from the left end
Note: This step may cause the buffer slider components to come loose. When reassembling, please follow the step 2 in "Steps for Installation Operation" to reinstall it, which will not cause any damage.
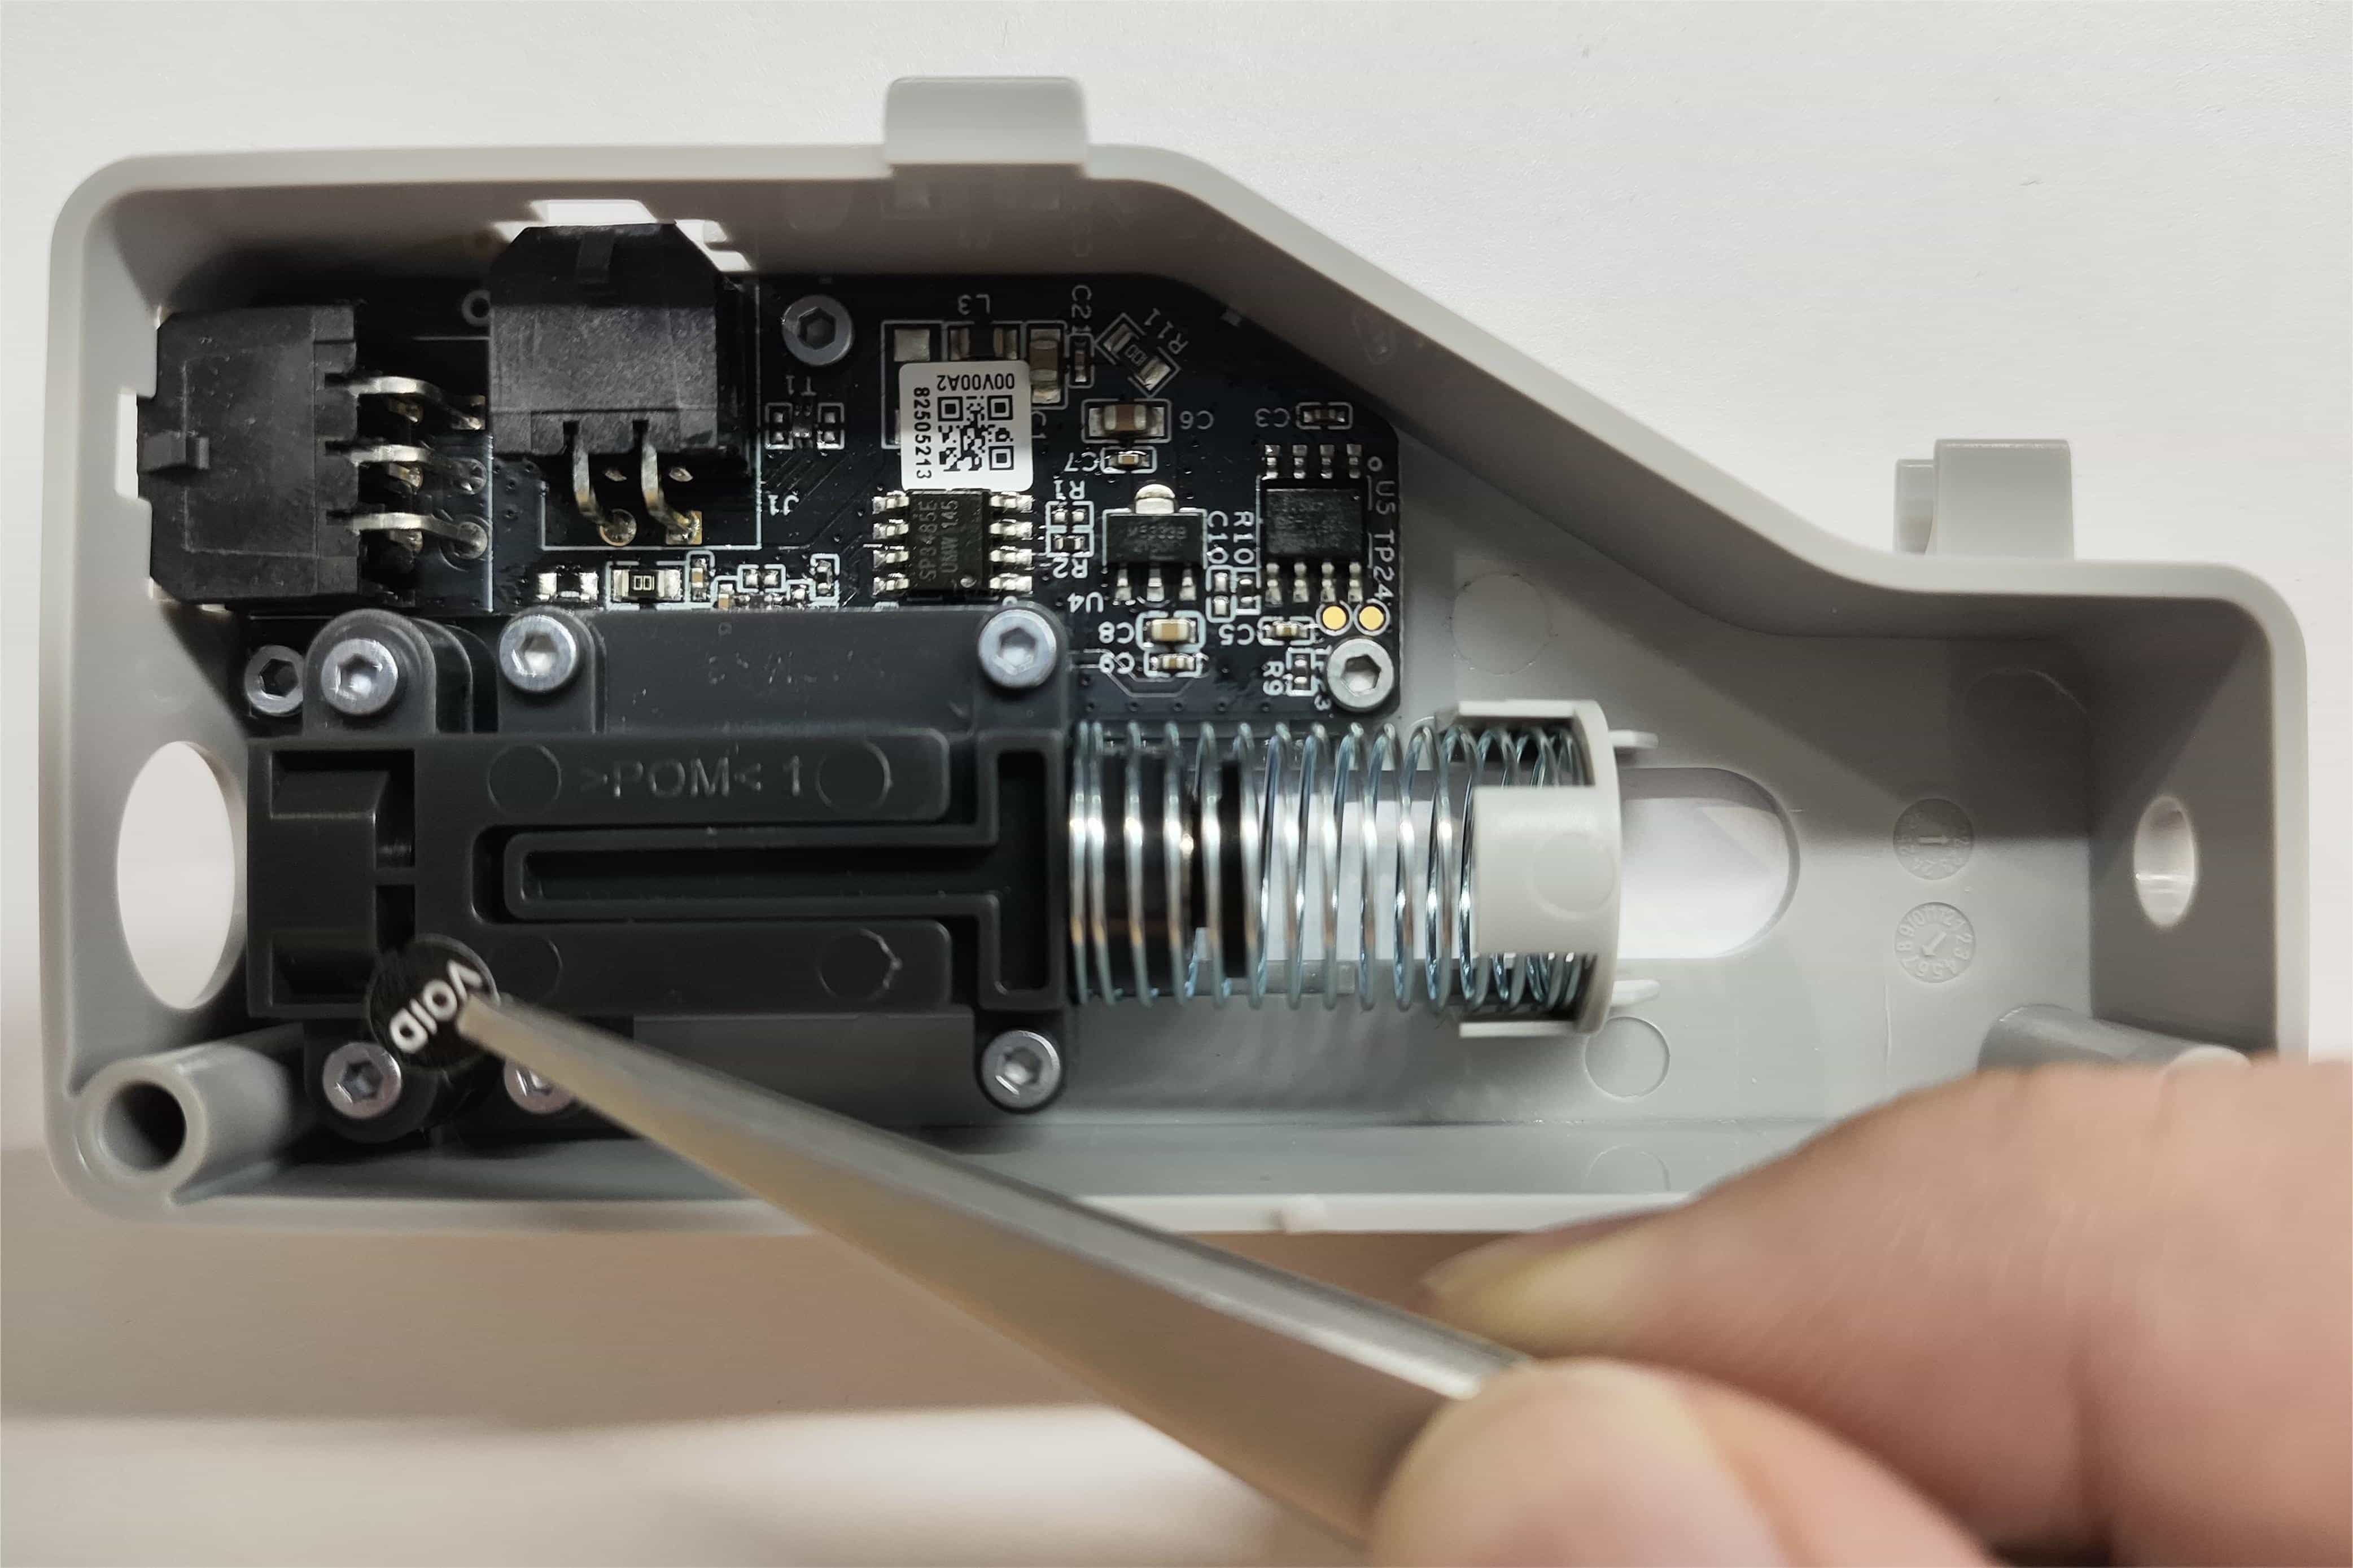
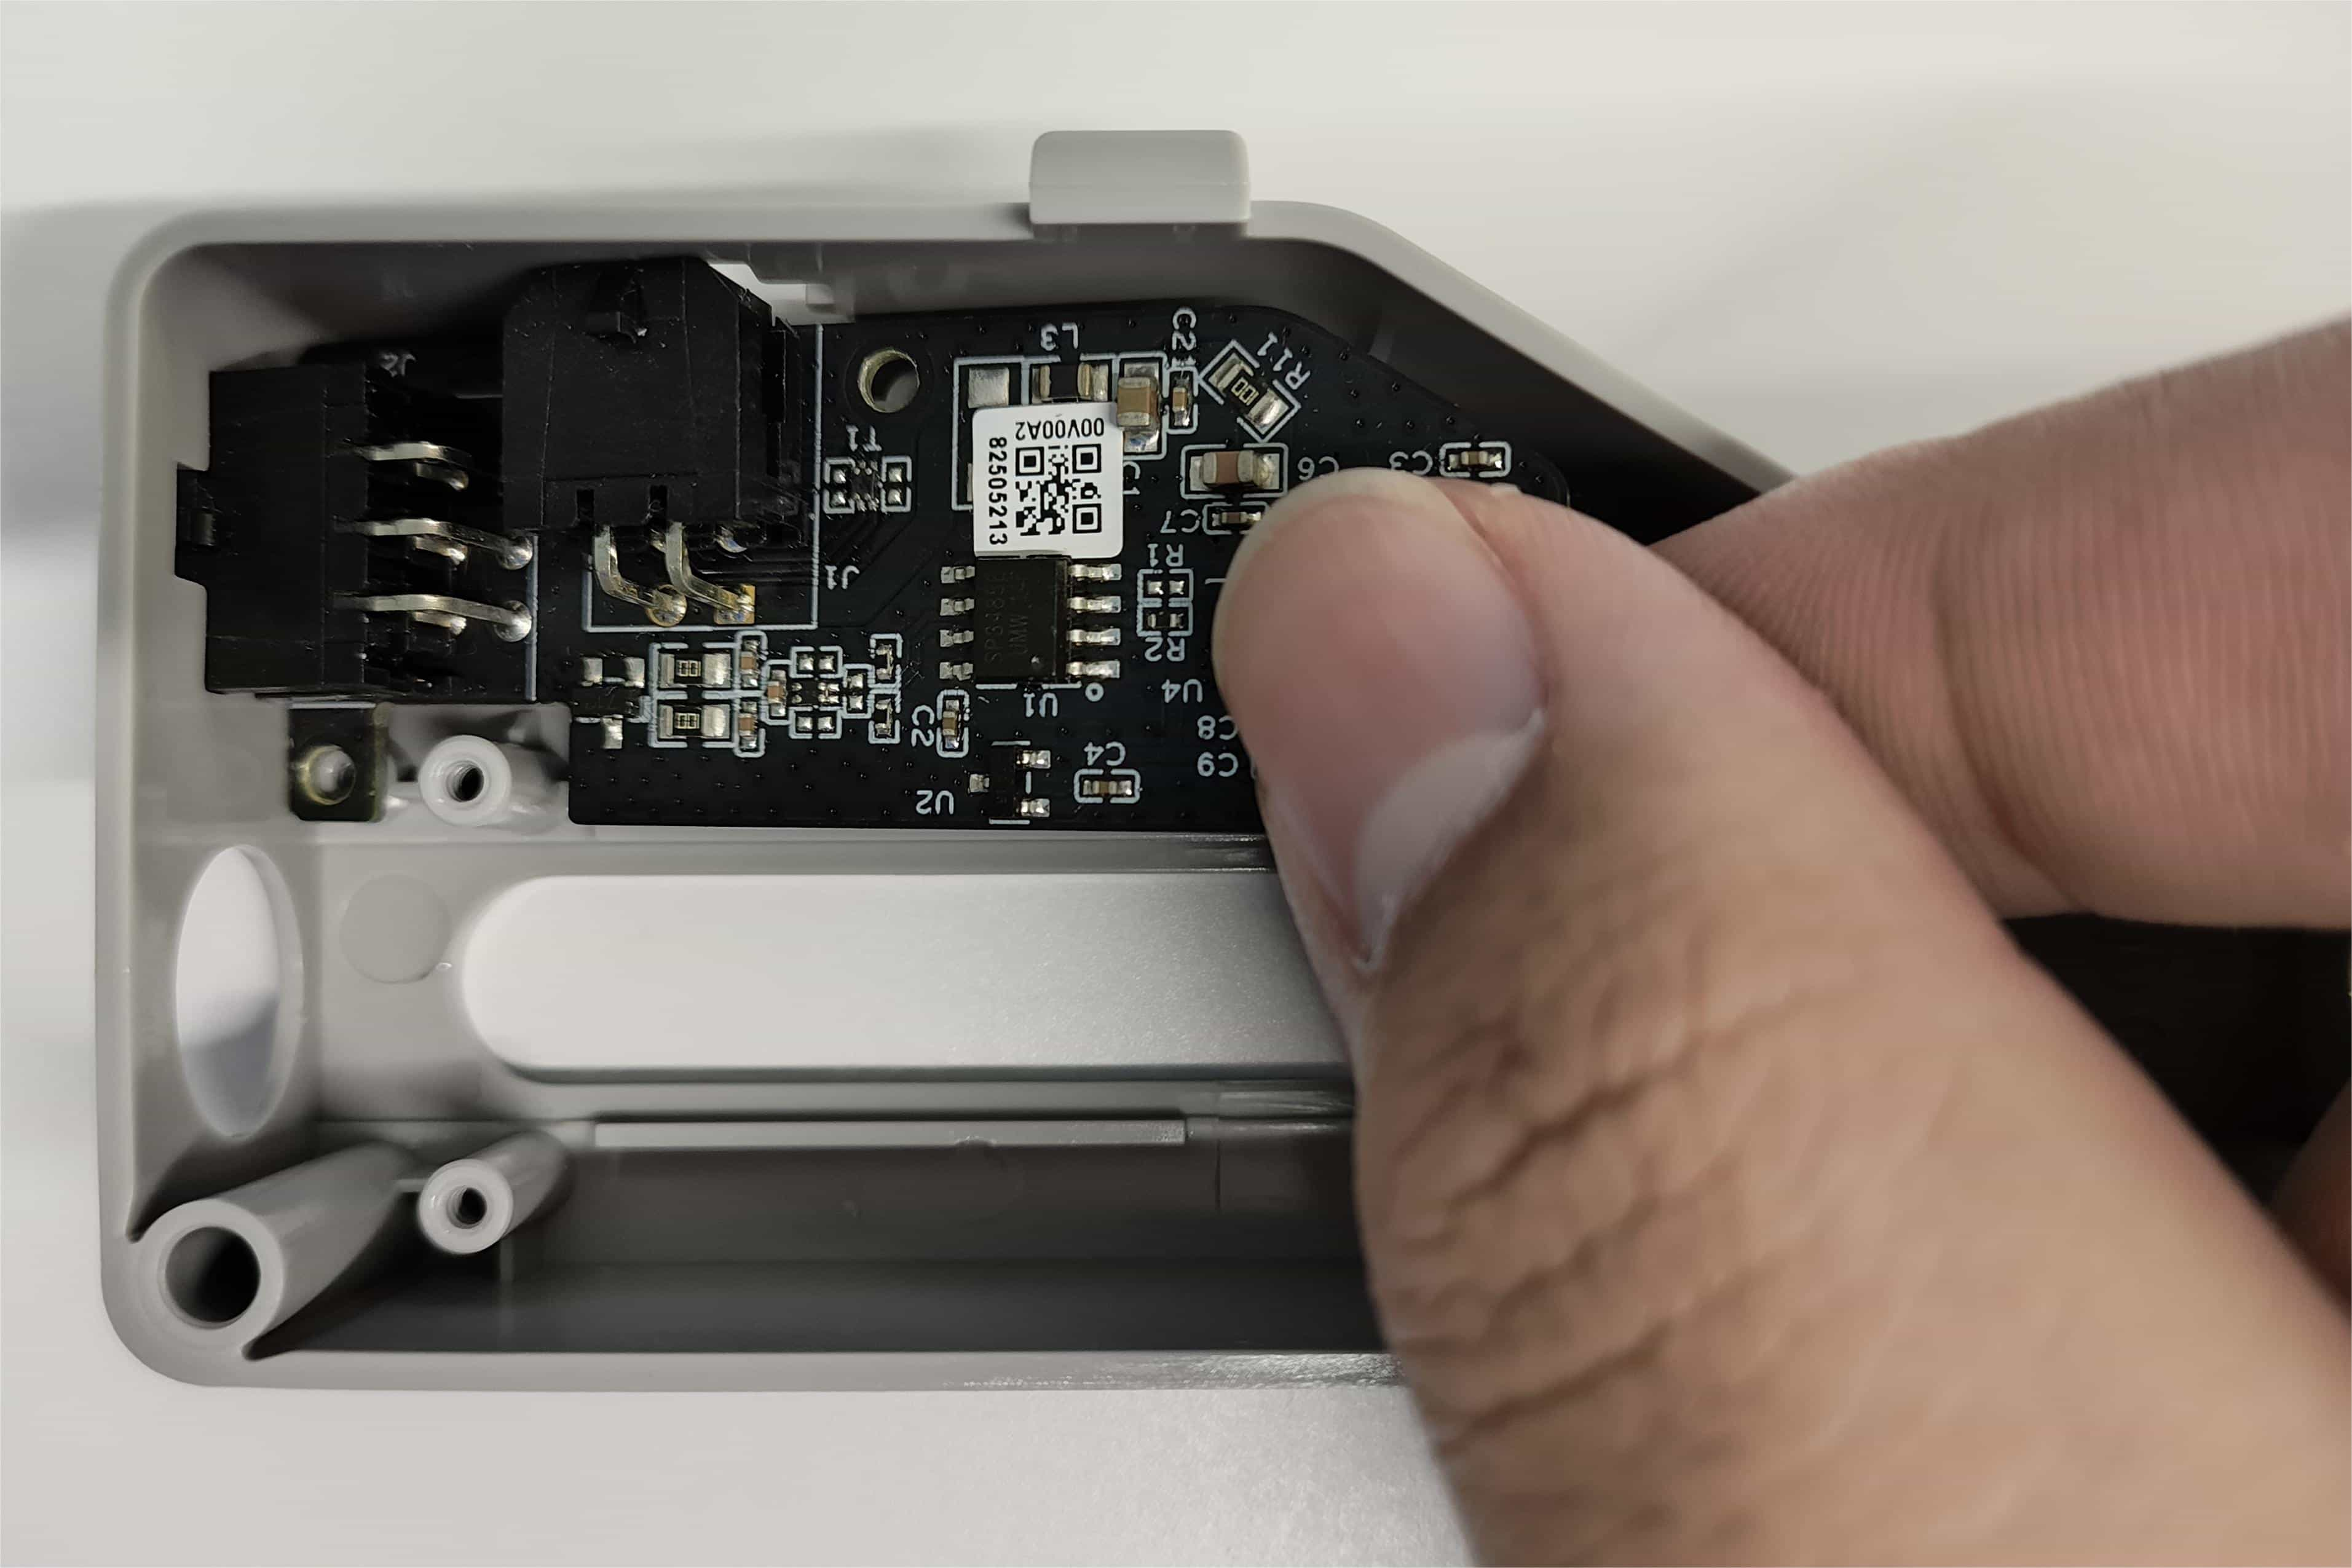
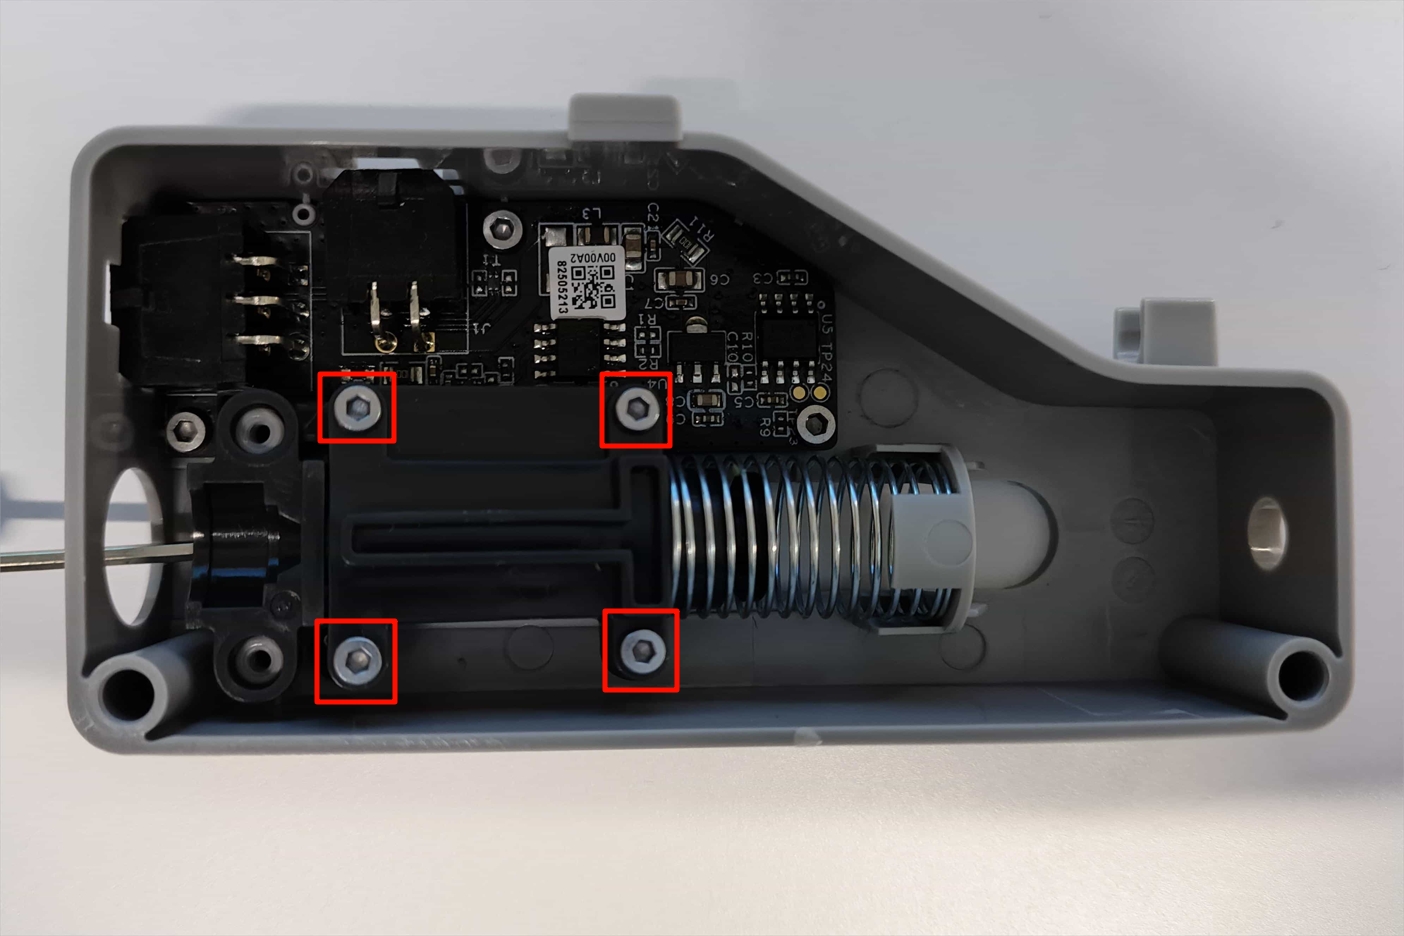
¶ Step 2: Remove the filament buffer connection board
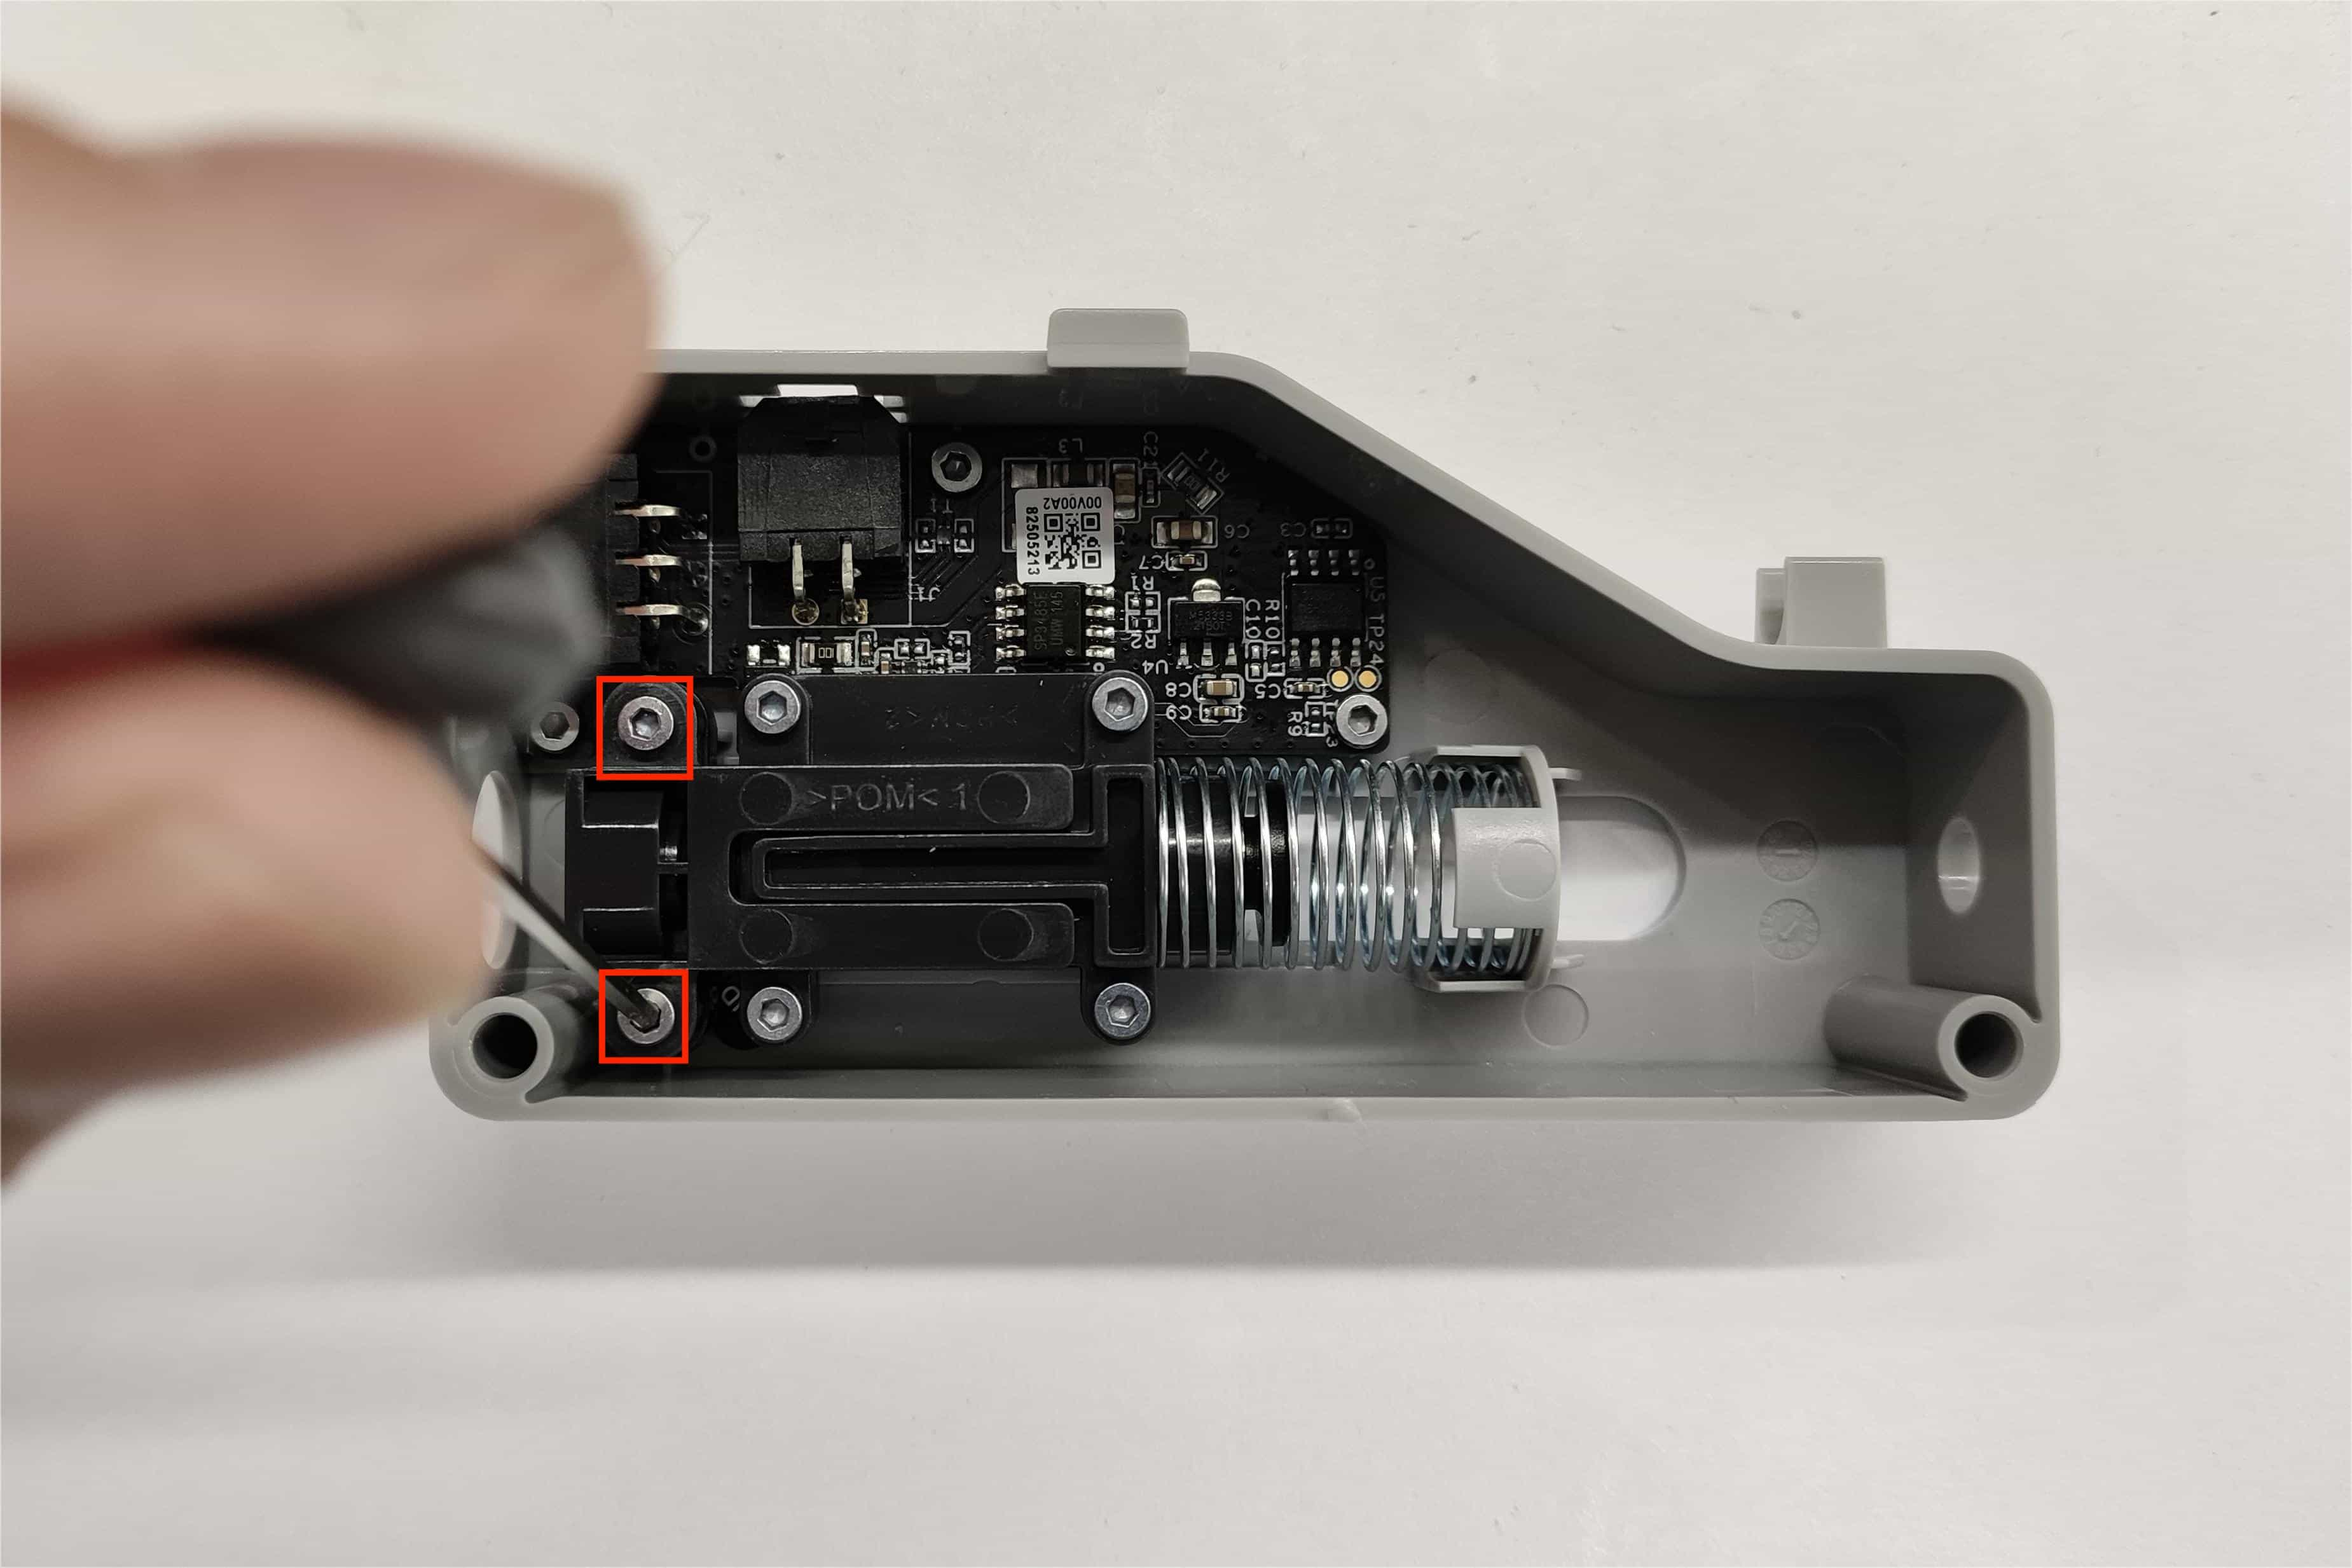
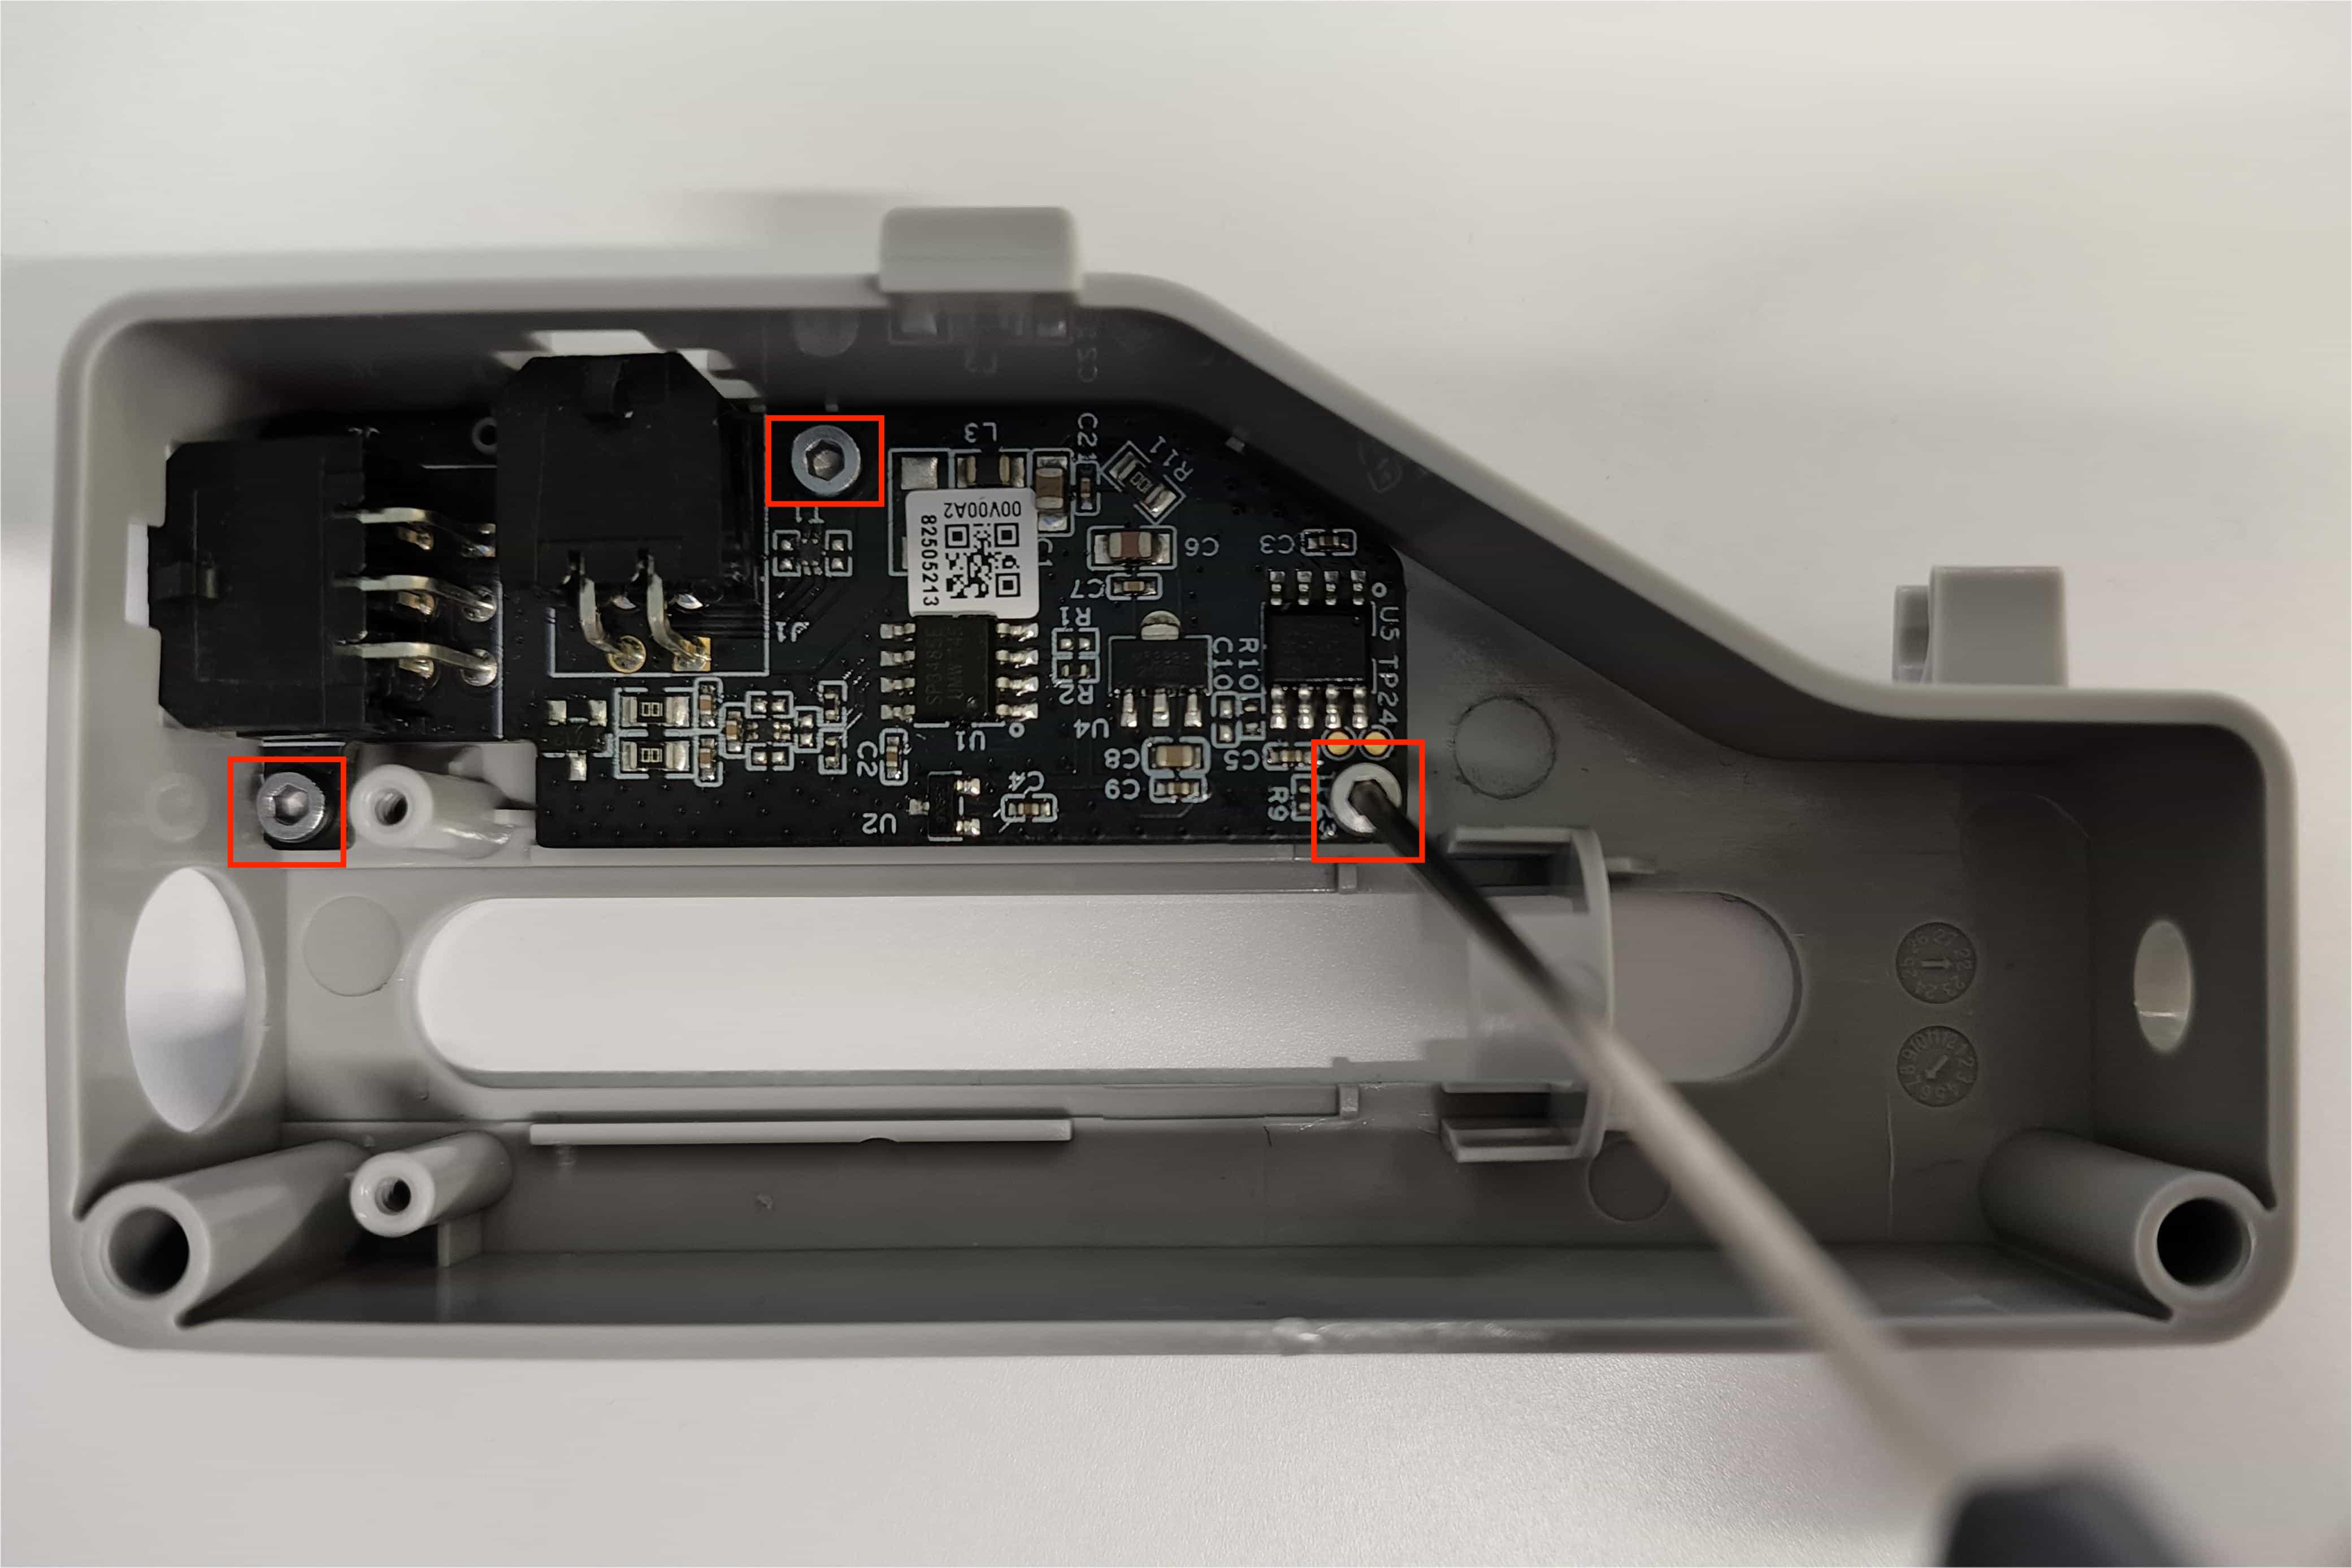
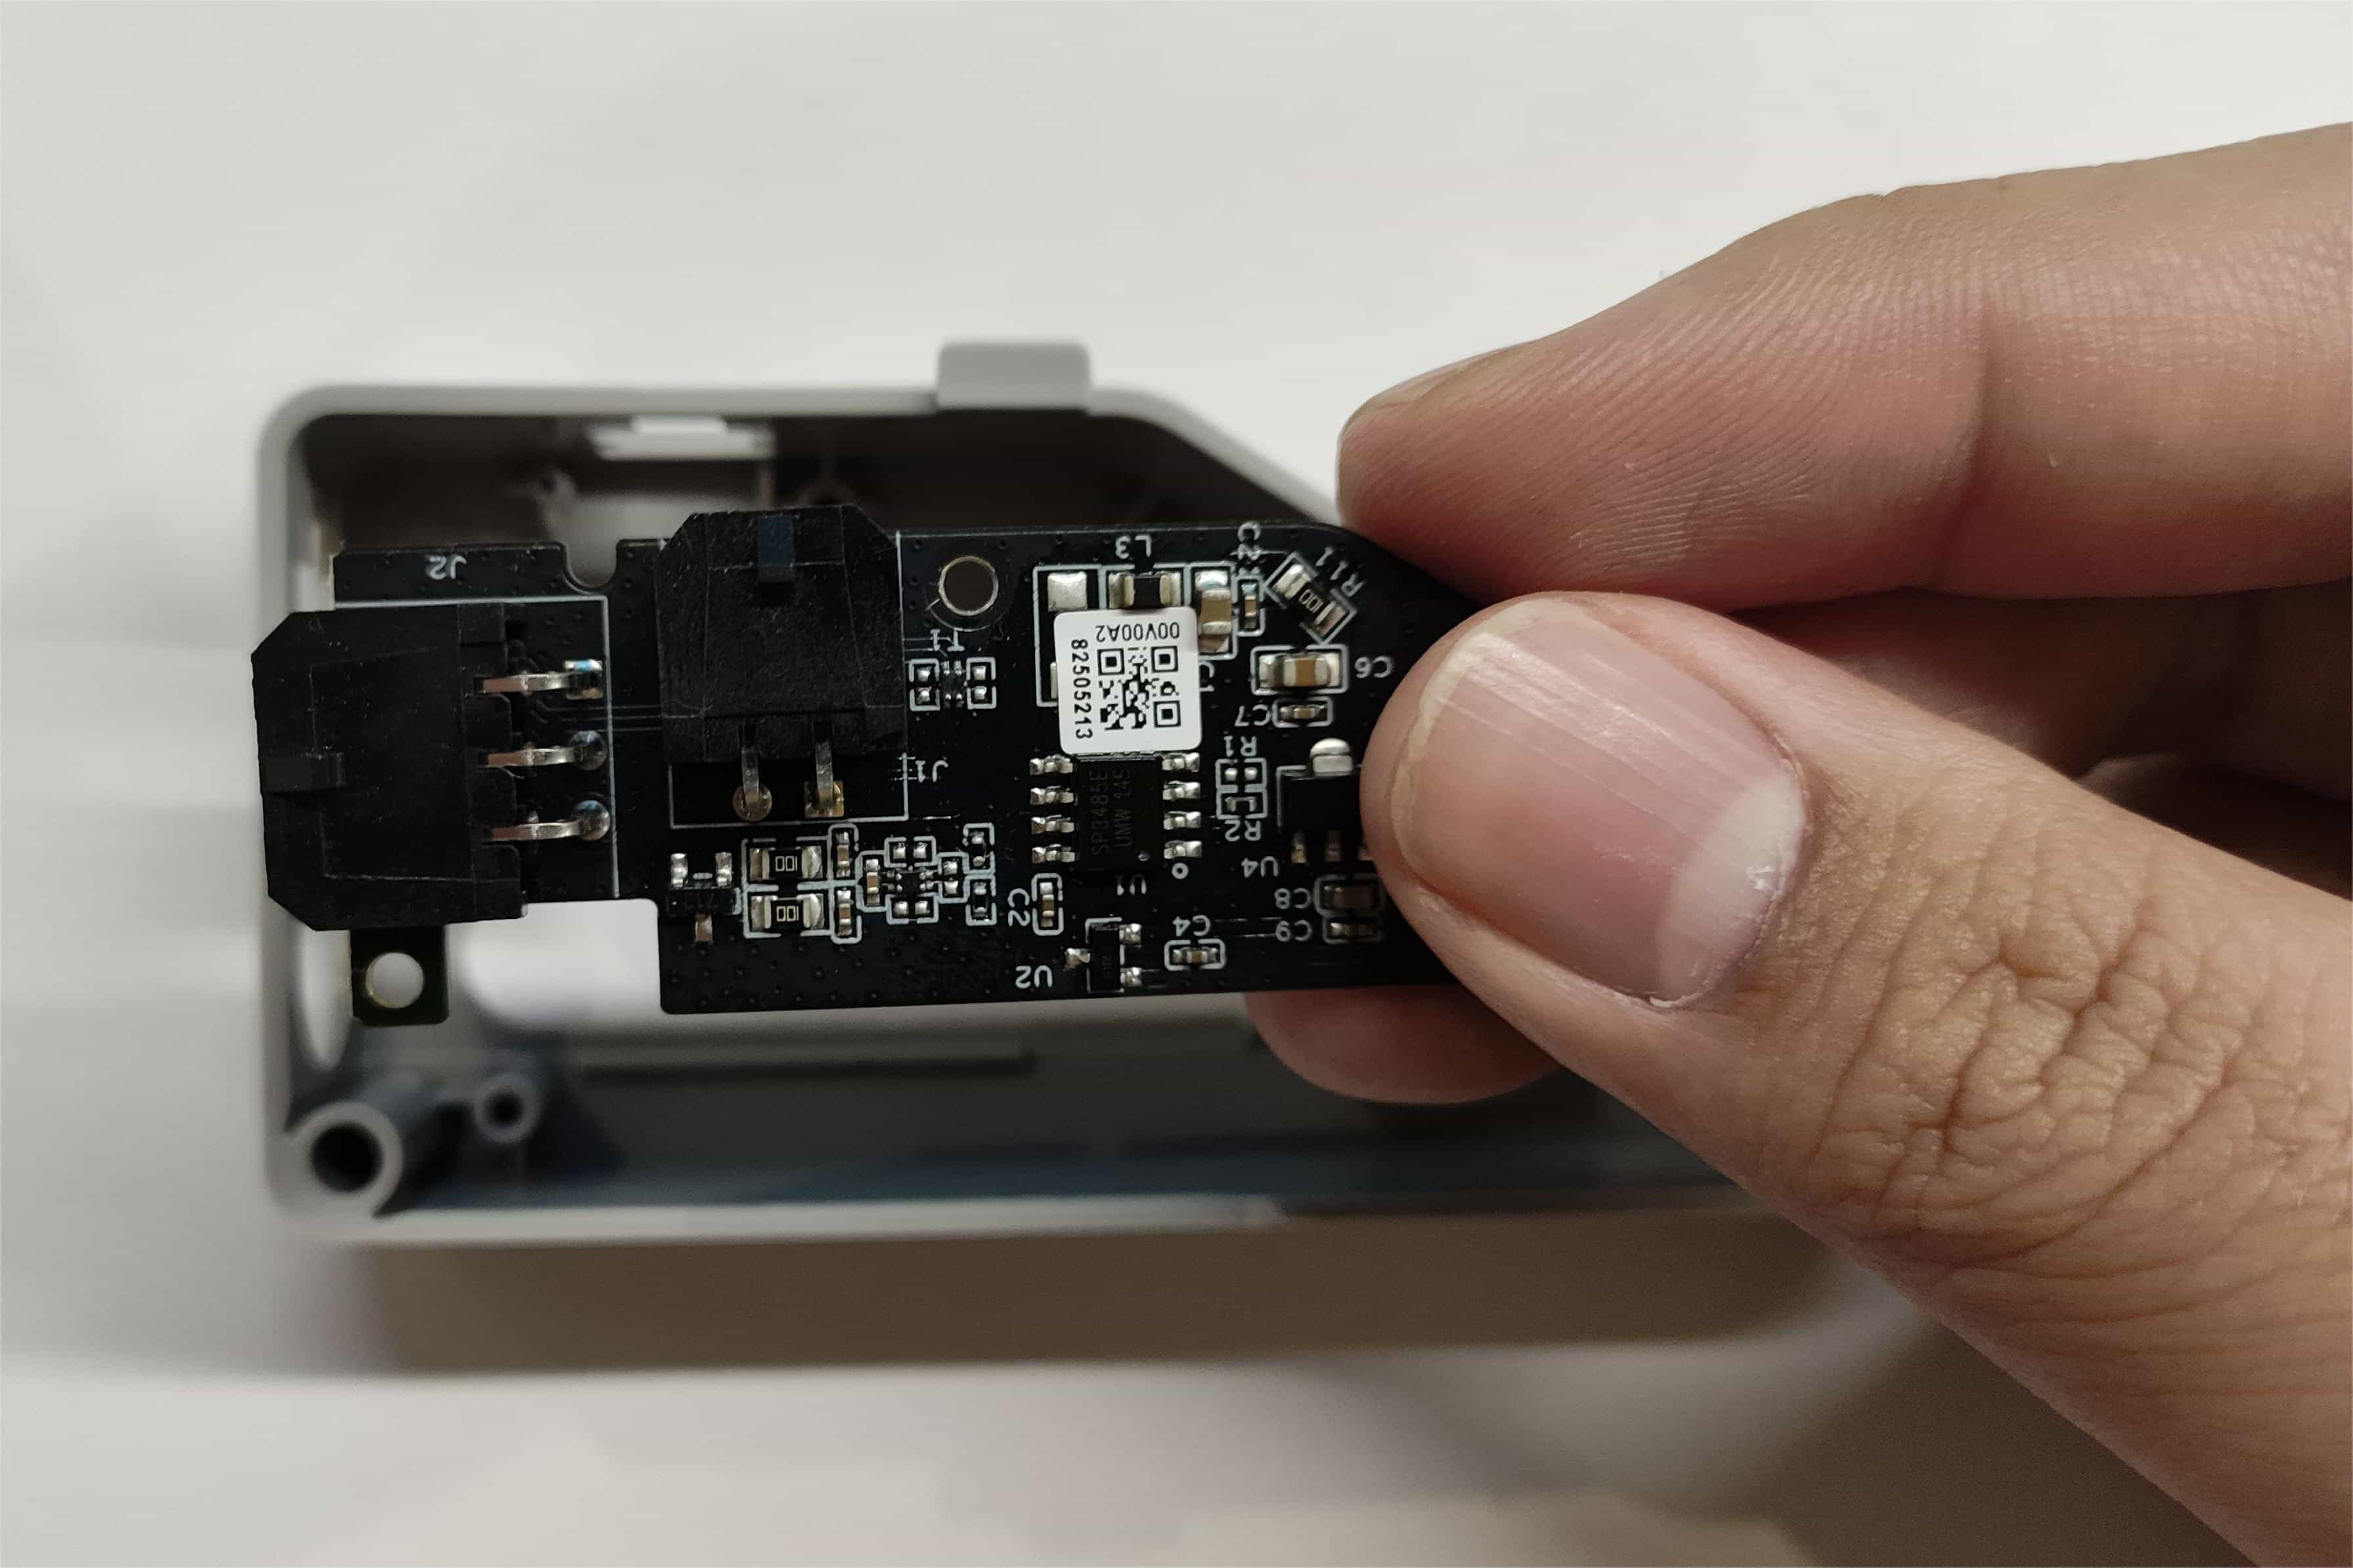
Loosen the three screws on the connection board using an H1.5 hex key, and gently pull up the board from the right end.
Note: If the connection board is stuck in the shell, you can move it slightly to the right before lifting it up.
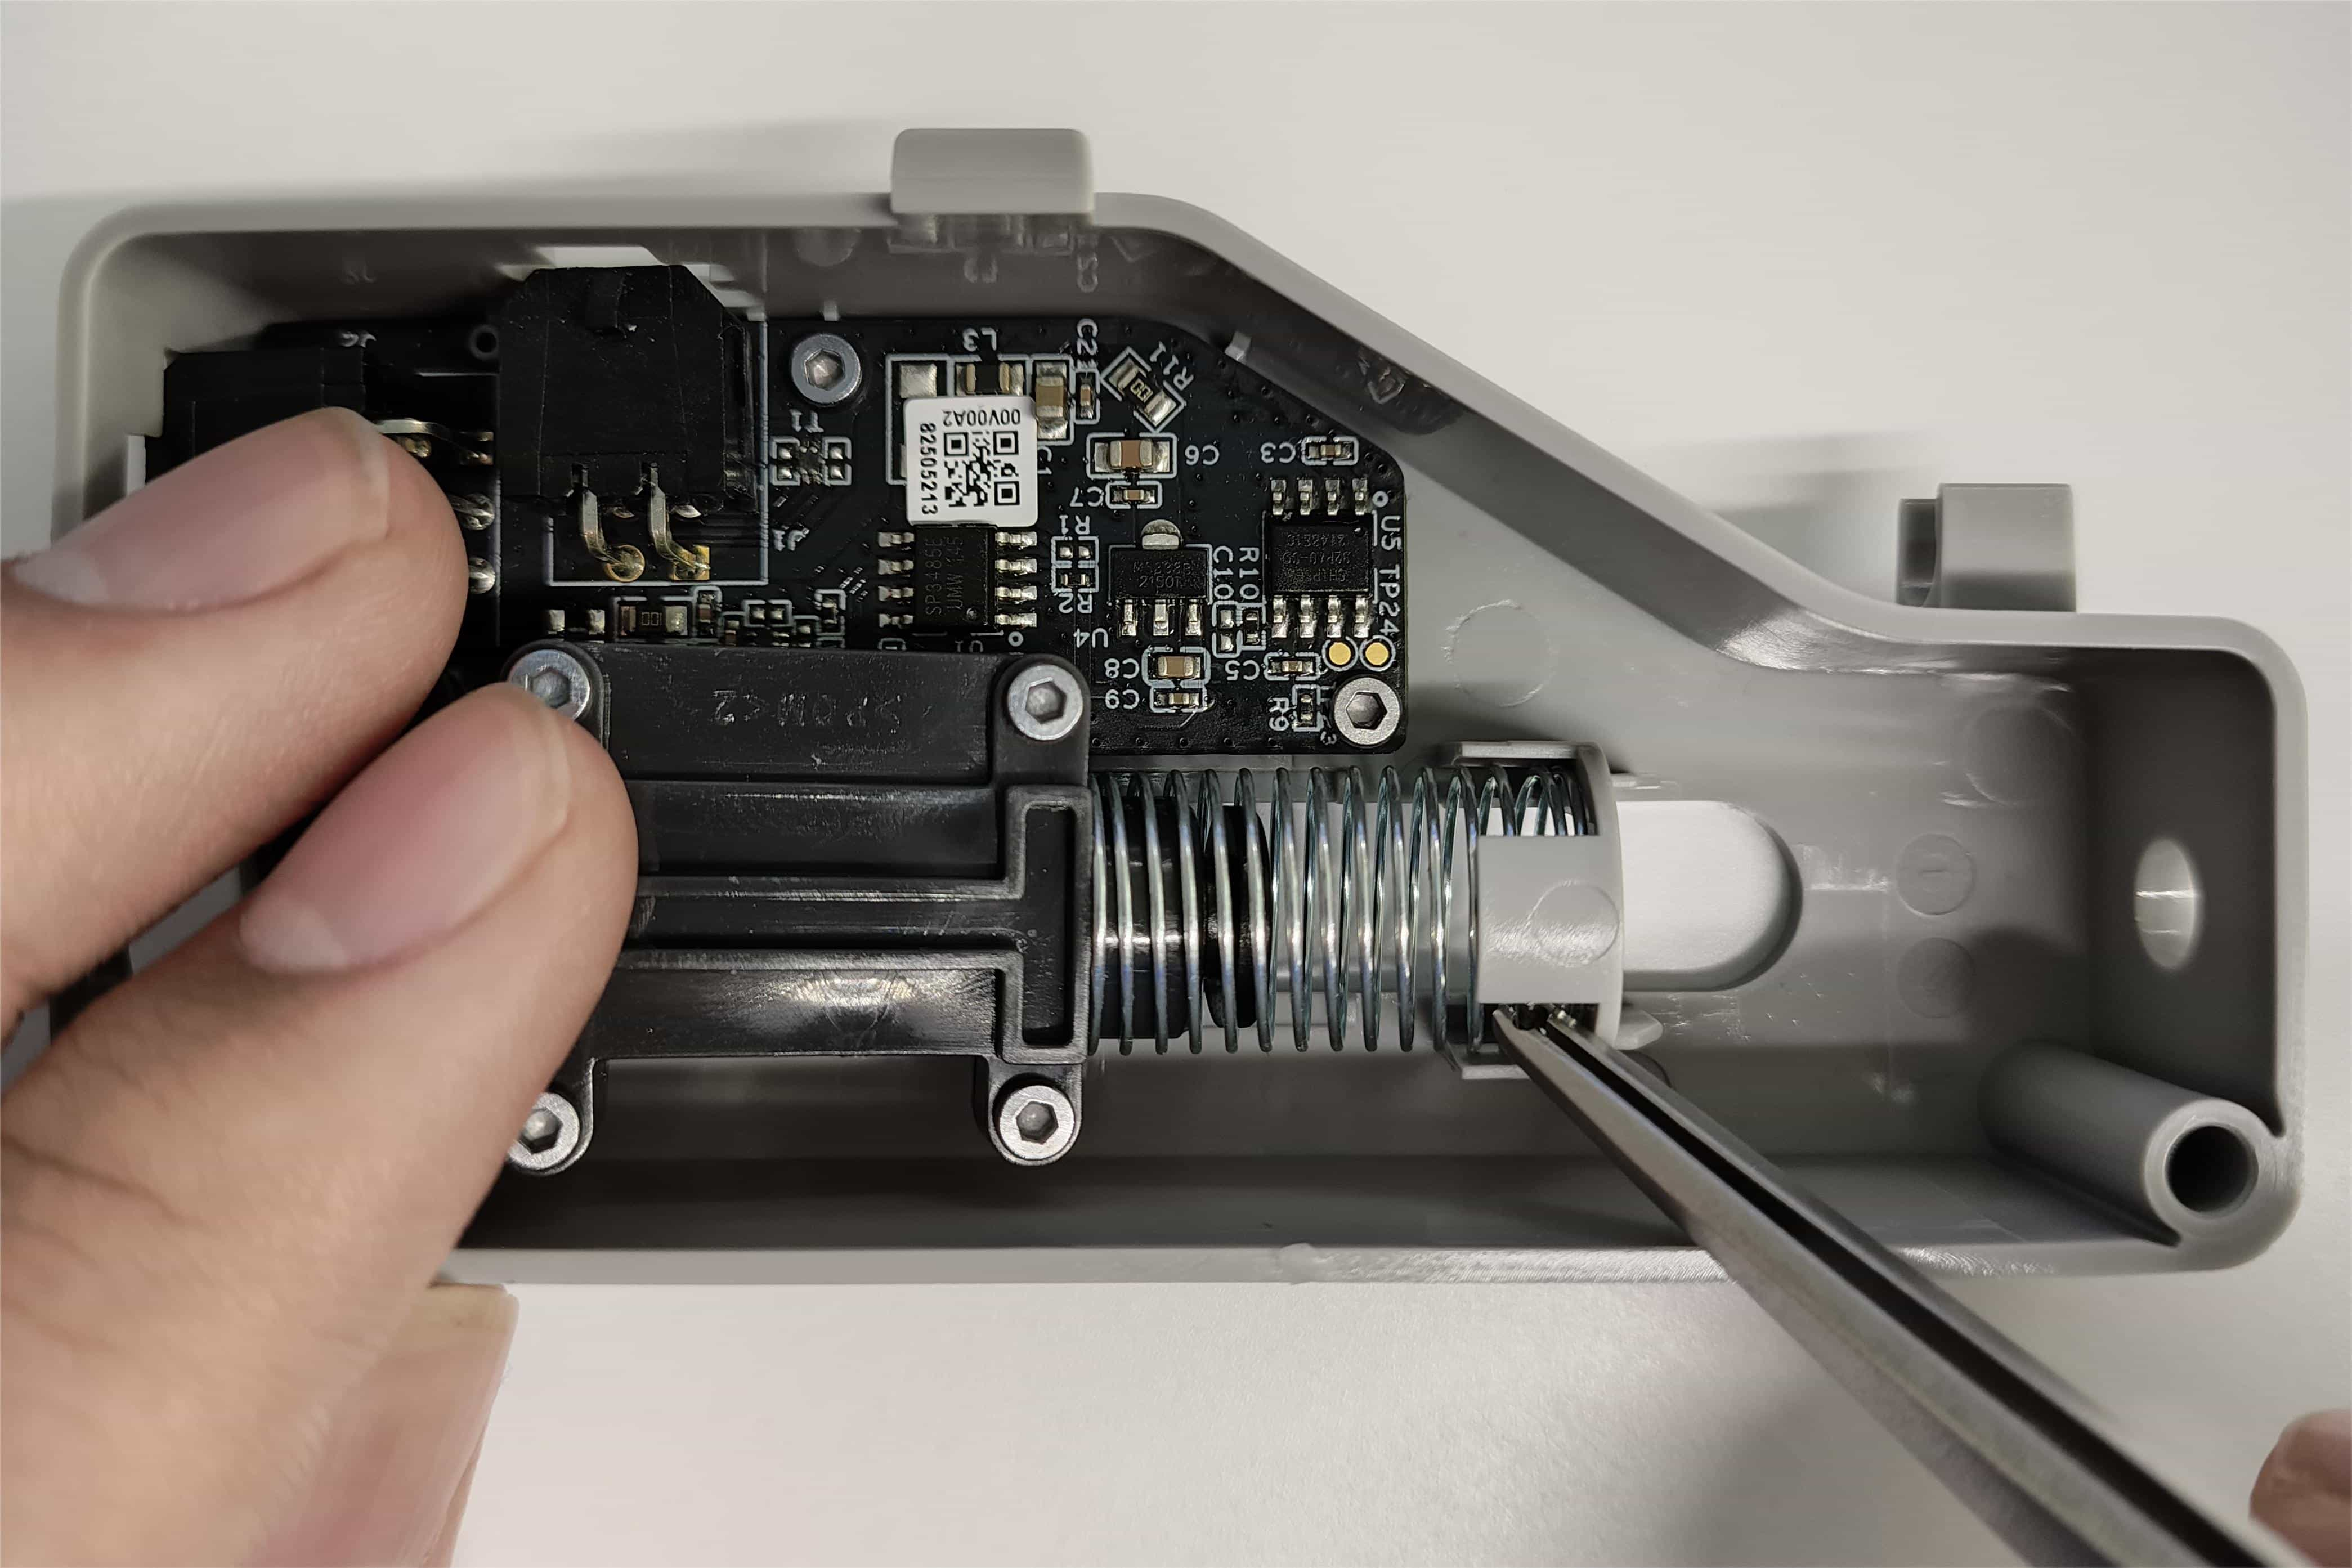
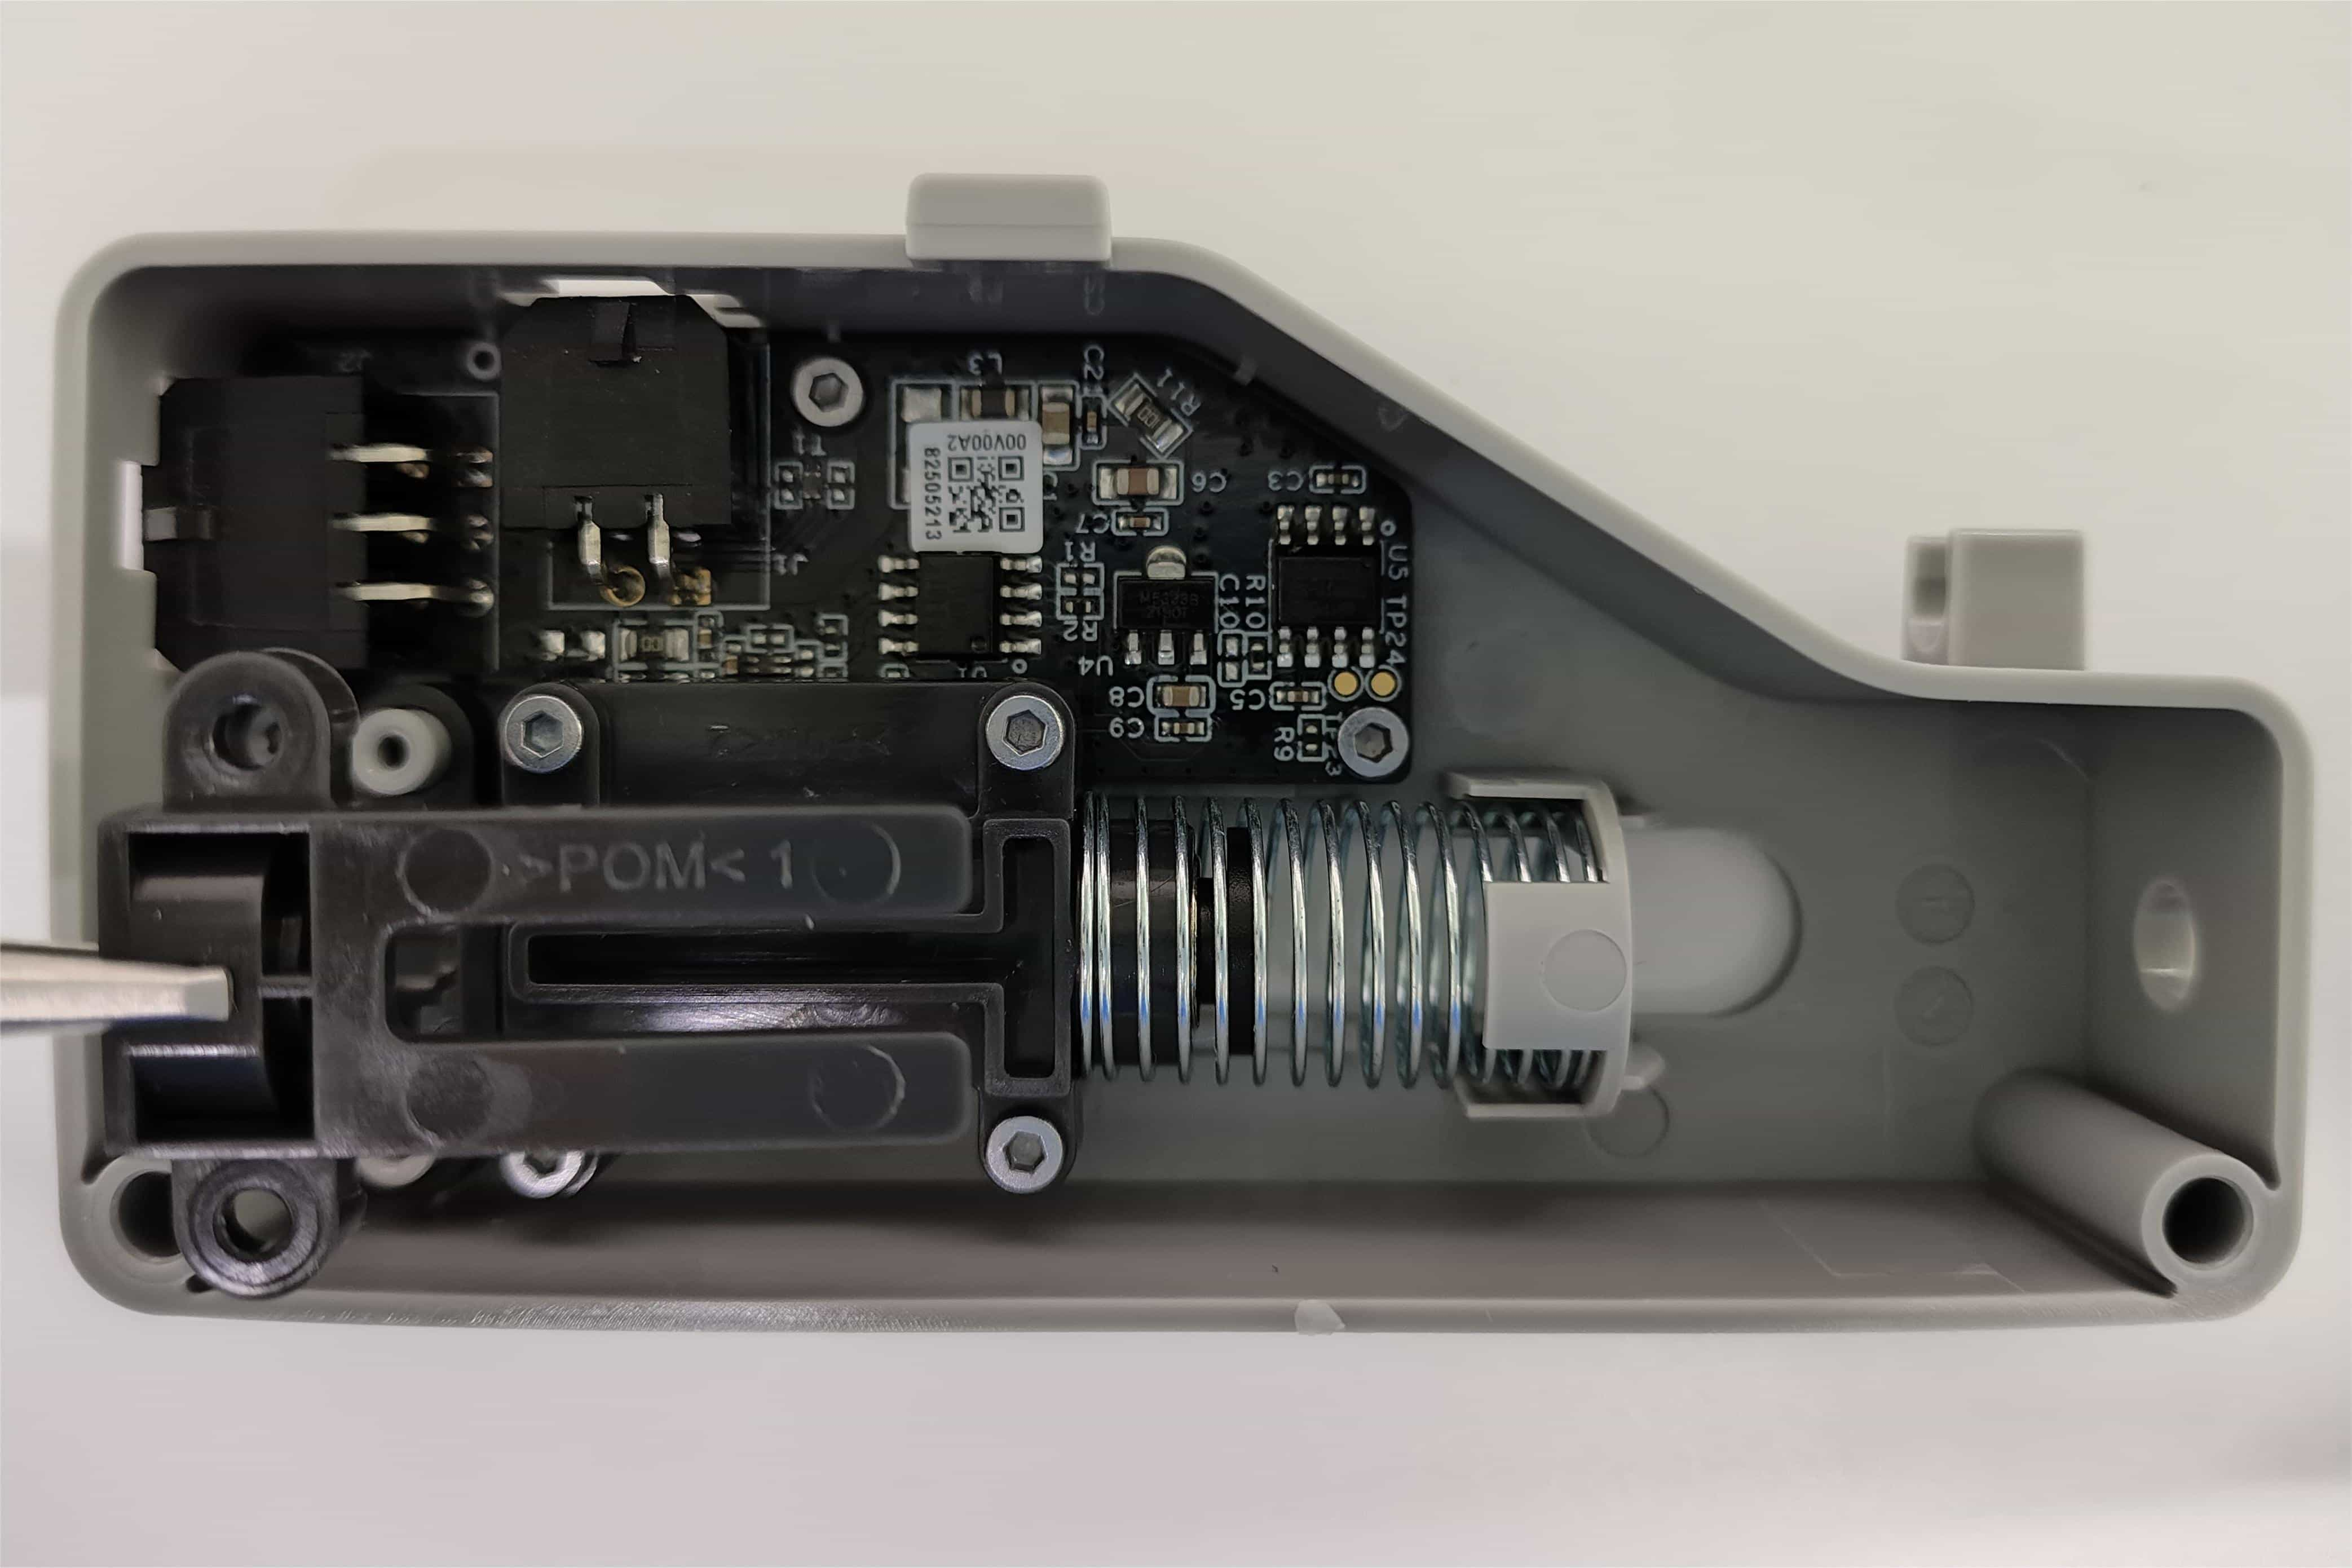
1. Reassemble the buffer slider with the spring (if they came loose during disassembly). Use a flat-head tweezer to insert the spring into the fixed groove, and insert the left end of the buffer slider into the fixed pillar.
2. Install the cover plate onto the buffer slider and use an H1.5 hex key to tighten the two screws on it.
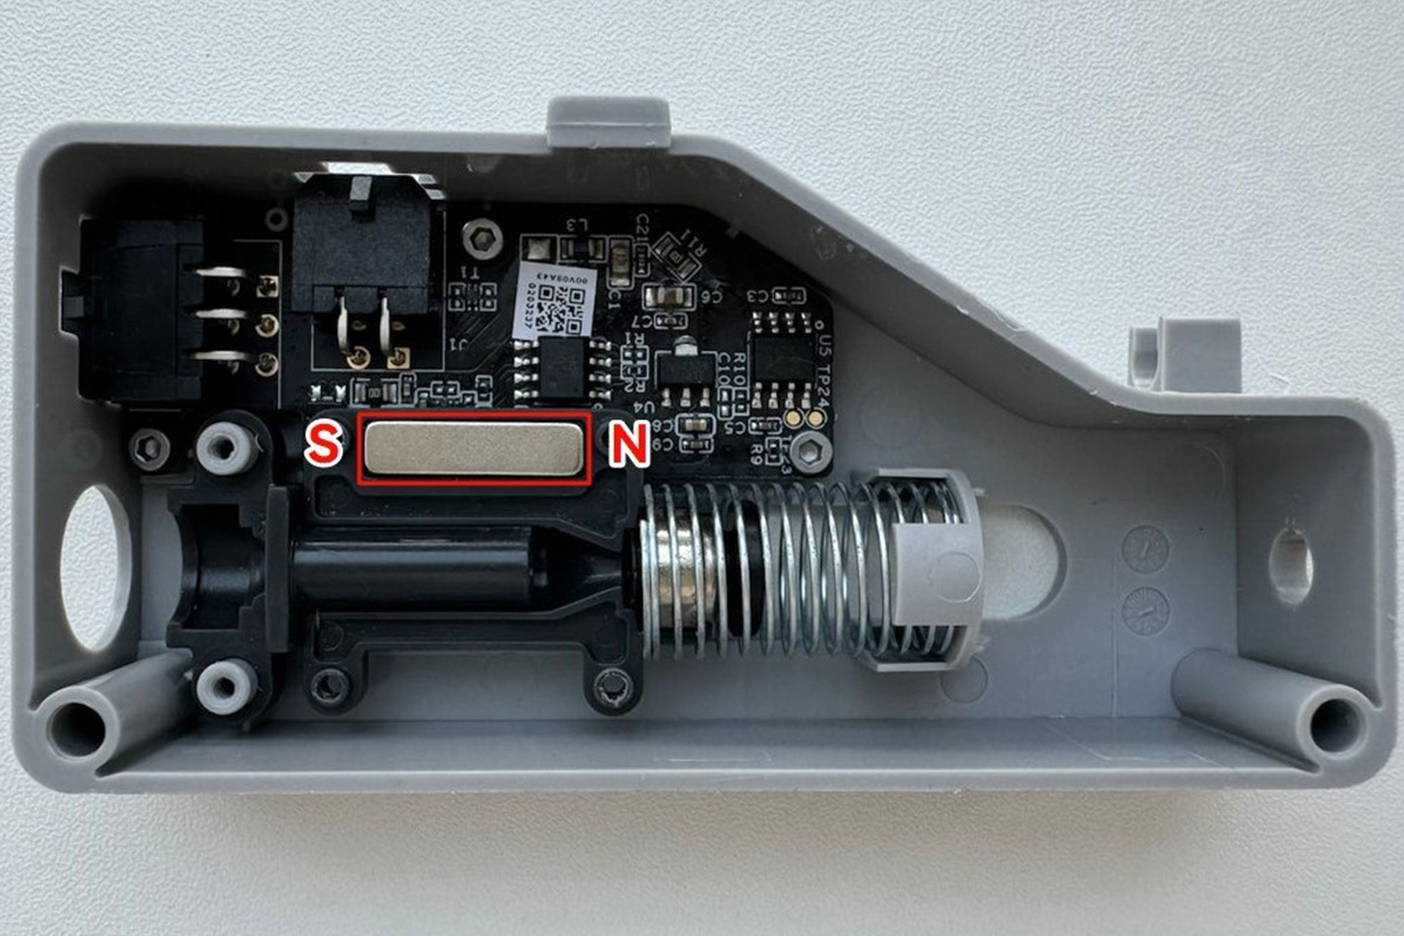
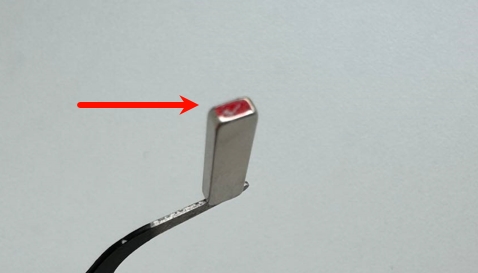
Warning: If you mistakenly remove the four screws shown in the left image during disassembly, the internal magnet (shown in the right image) may fall out. Please note that when reinstalling the magnet, its north-south polarity must match the orientation shown in the right image; otherwise, the error described in the following link may occur: HMS_0700-4000-0002-0001: The filament buffer signal lost,the cable or position sensor may be malfunctioning.
The side highlighted in red in the figure indicates the North Pole (N). Please use this marking as a reference when installing the magnet.
We hope that the detailed guide we shared with you was helpful and informative.
We want to ensure that you can perform it safely and effectively. If you have any concerns or questions regarding the process described in this article, we encourage you to reach out to our friendly customer service team before starting the operation. Our team is always ready to help you and answer any questions you may have.