The Assemble Tool lets you align, snap, and merge models with precision. It makes assembling or tweaking small alignments easy, without the need to export back and forth between CAD and slicer software. It's useful for:
- Combining multi-part models: Assemble the various components of the design into a single, precise part.
- Adding details: Align primitive shapes, such as cylinders or cubes, with existing models.
- Avoid gluing files: You don’t need to have parts 3D printed in separate pieces so that they can be combined by gluing; you can simply use the Assemble tool to combine them.
- Fixing misalignments: Quickly reposition imported STLs that were modeled in different orientations.
¶ How to Use the Assemble Tool
The 3D model we will use as a sample in this article is the Stackable Shelf Organizer by LinkDesigns, which can be found on MakerWorld. After importing the file, you’ll find the Assemble Tool in the Toolbar at the top-right section.
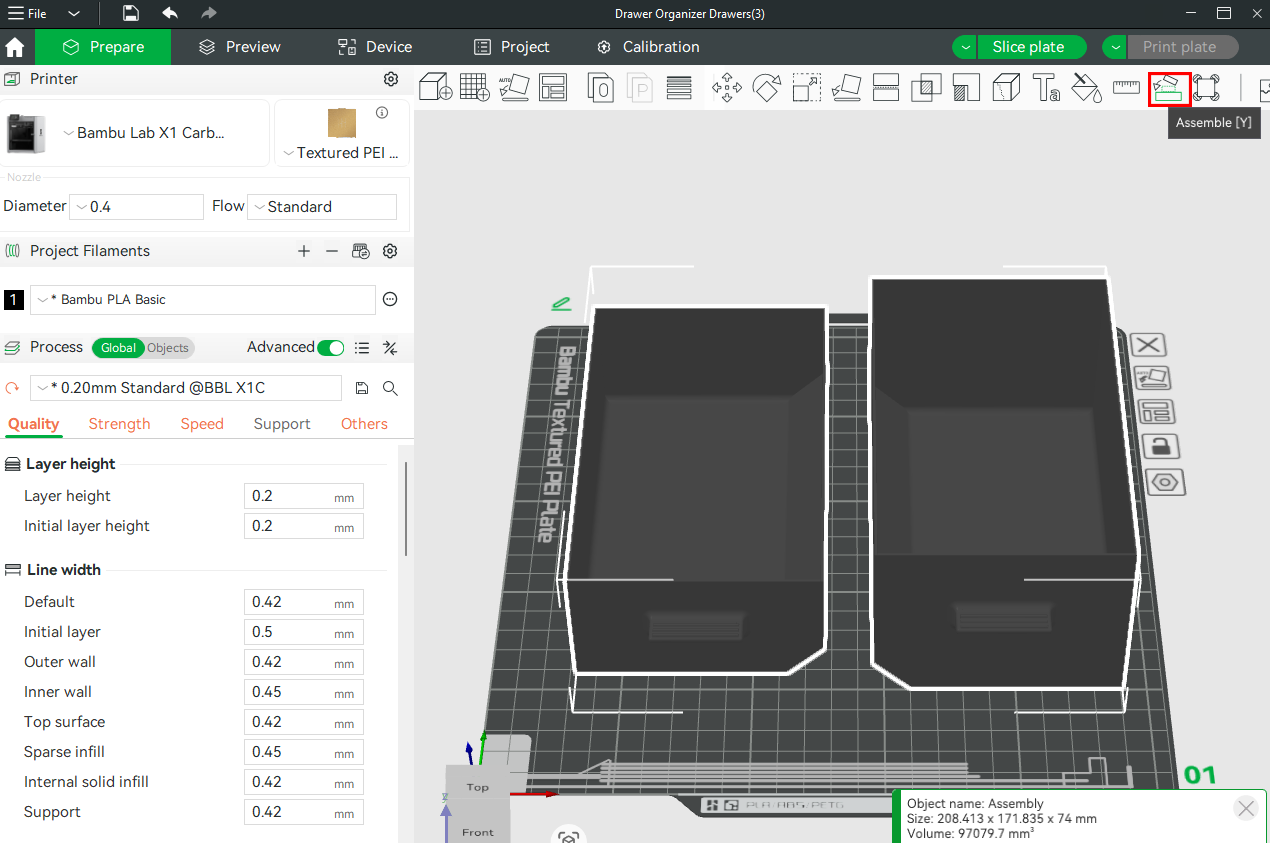
Once you select multiple parts (at least two), the Assemble Tool (or click Y on your keyboard) will activate. Click it, and the tool opens with two modes:
- Face and Face Assembly
- Point and Point Assembly
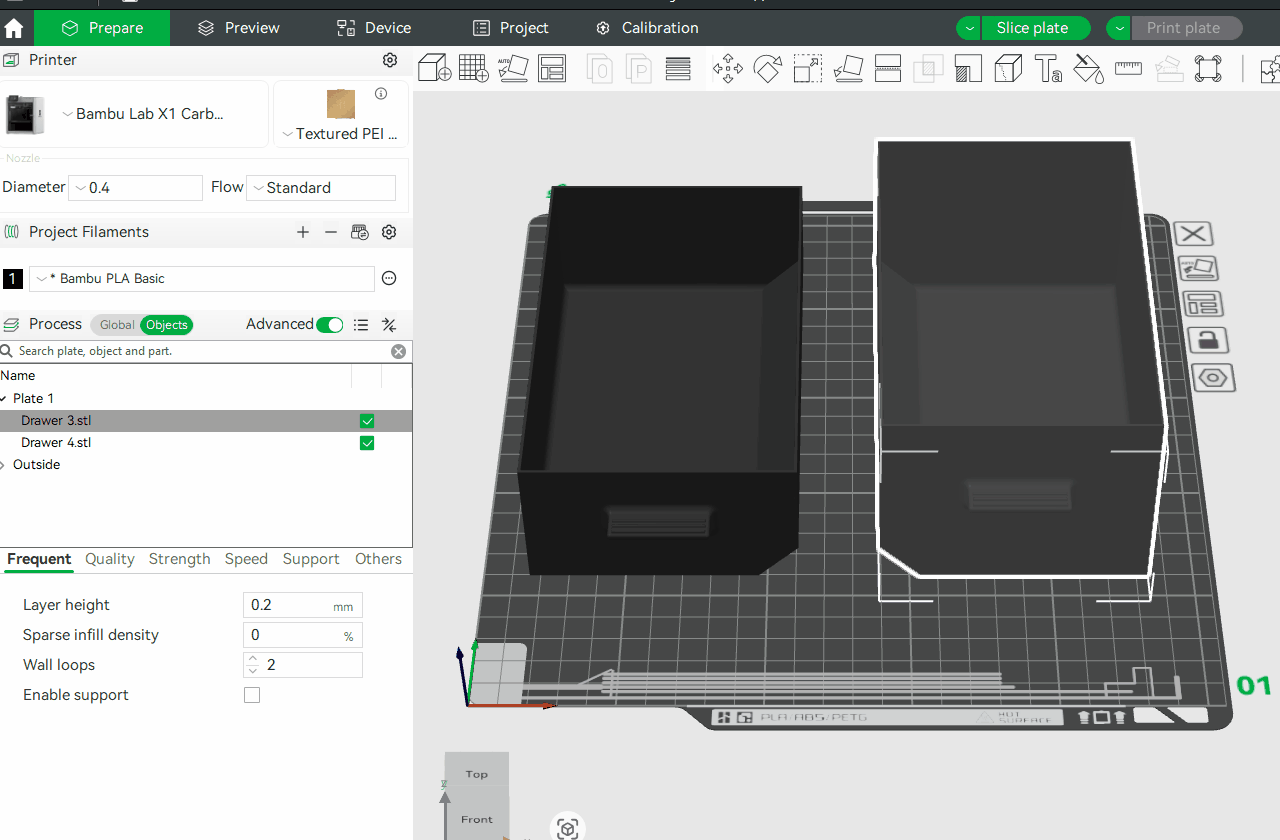
Before using these options, it’s essential to merge the objects first. Doing this allows the software to treat all selected parts as part of a single assembly context. This makes it much easier to snap one object to another, use anchor points appropriately, and apply accurate face-to-face or point-to-point assembly. To do this, select at least two objects or parts, then right-click and choose Merge.
Below, we describe the two different modes in the Assemble Tool.
¶ Modes in the Assemble Tool
¶ 1. Face and Face Assembly
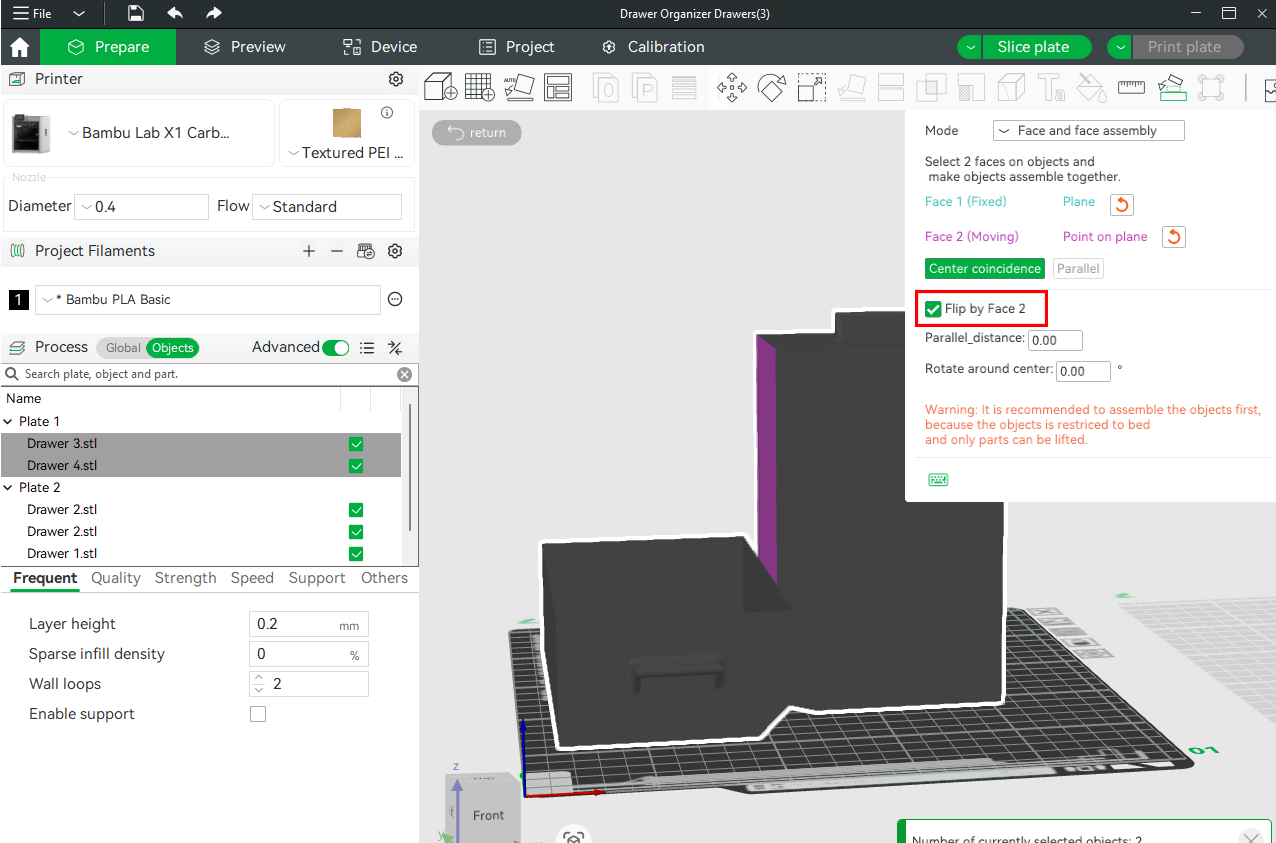
This is the default and most commonly used mode. It allows you to snap two flat surfaces of different models together, aligning them perfectly. Think of placing the drawers side by side. Face and Face lets you do that with ease, without requiring manual movement. You can start by selecting the face of the part you would like to attach to. Doing this will mark that part blue. Then select the other part, and it will be marked with a pink color. This is the part that will be moving.

After selecting the faces, several options will appear in the Assemble tool. These include:
- Center coincidence: In the face-to-face option, this setting tells the software to align the center points of the two selected faces, in addition to making the surfaces touch. That is, it aligns the center of Face 1 with the center of Face 2, both in terms of position and orientation. When I click on it, they snap together, as shown below.
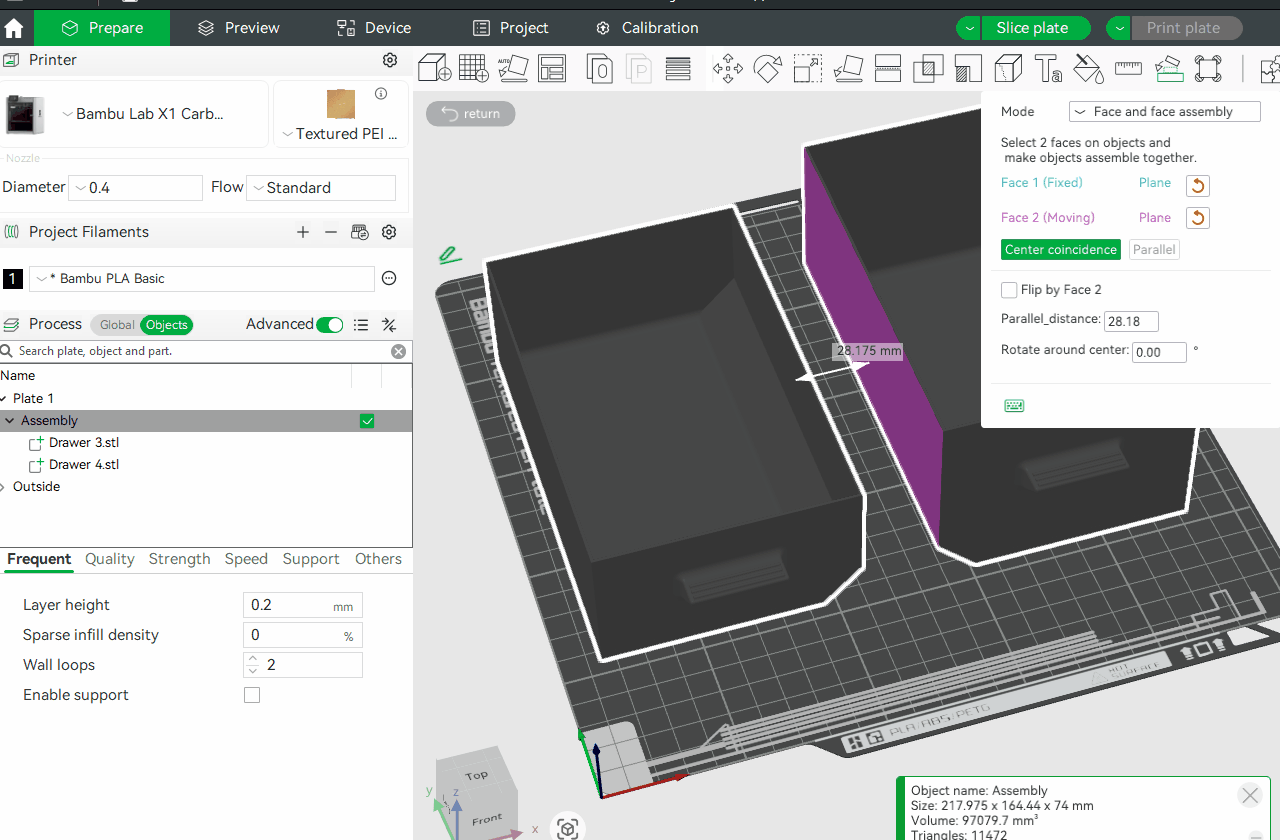
You can use this option when the parts have flat contact surfaces.
- Parallel: It rotates the second object so that the selected face becomes parallel to the first face you selected.
- Flip by face: When you click on the checkbox in this option, it rotates the second selected face (the pink one) by 180 degrees, ensuring it faces the correct direction relative to the first face.
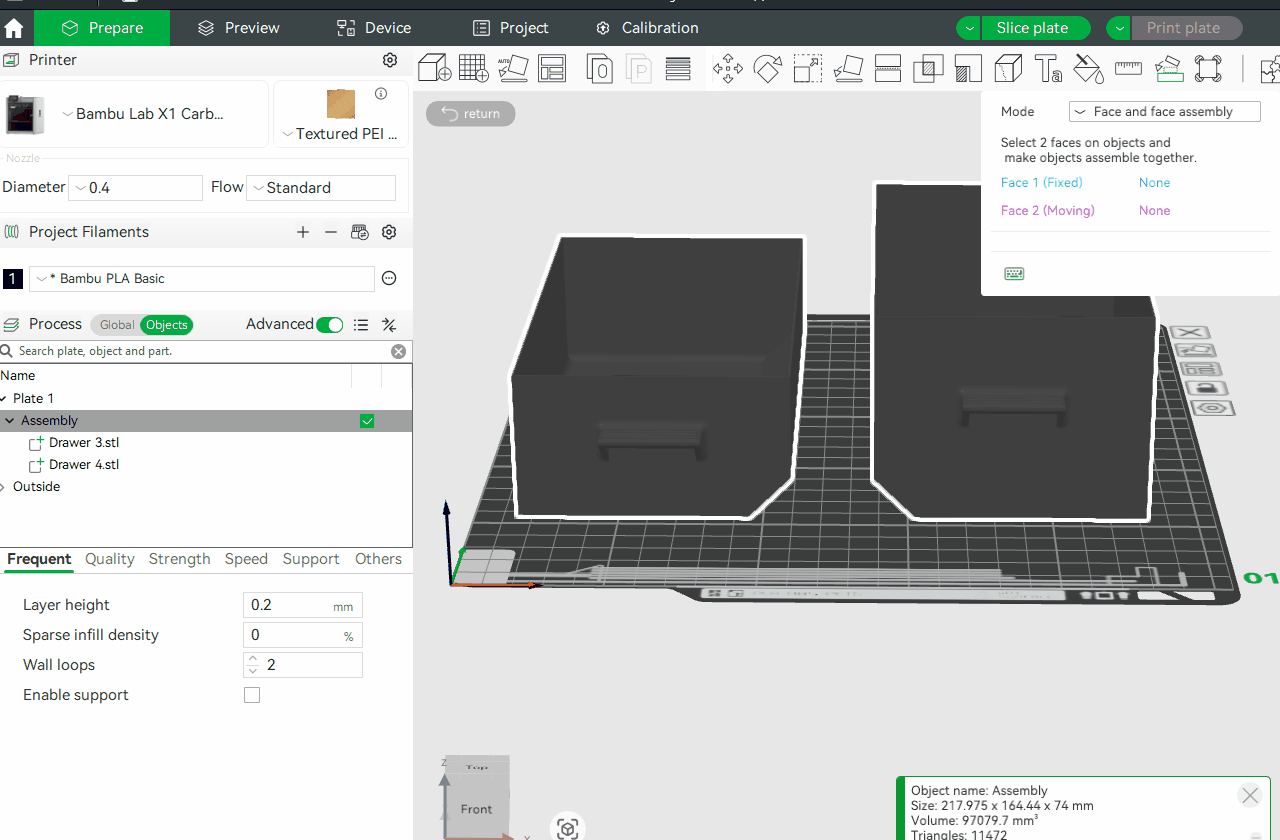
¶ 2. Point and Point Assembly
Sometimes, faces don’t give you the control you need, especially for irregular or curved surfaces. In that case, switch to Point and Point Assembly. This option lets you align two specific points between two models. After selecting this option, hover your cursor over the parts, and you'll see snap points appear, color-coded (blue and pink). Then, specify the distance.
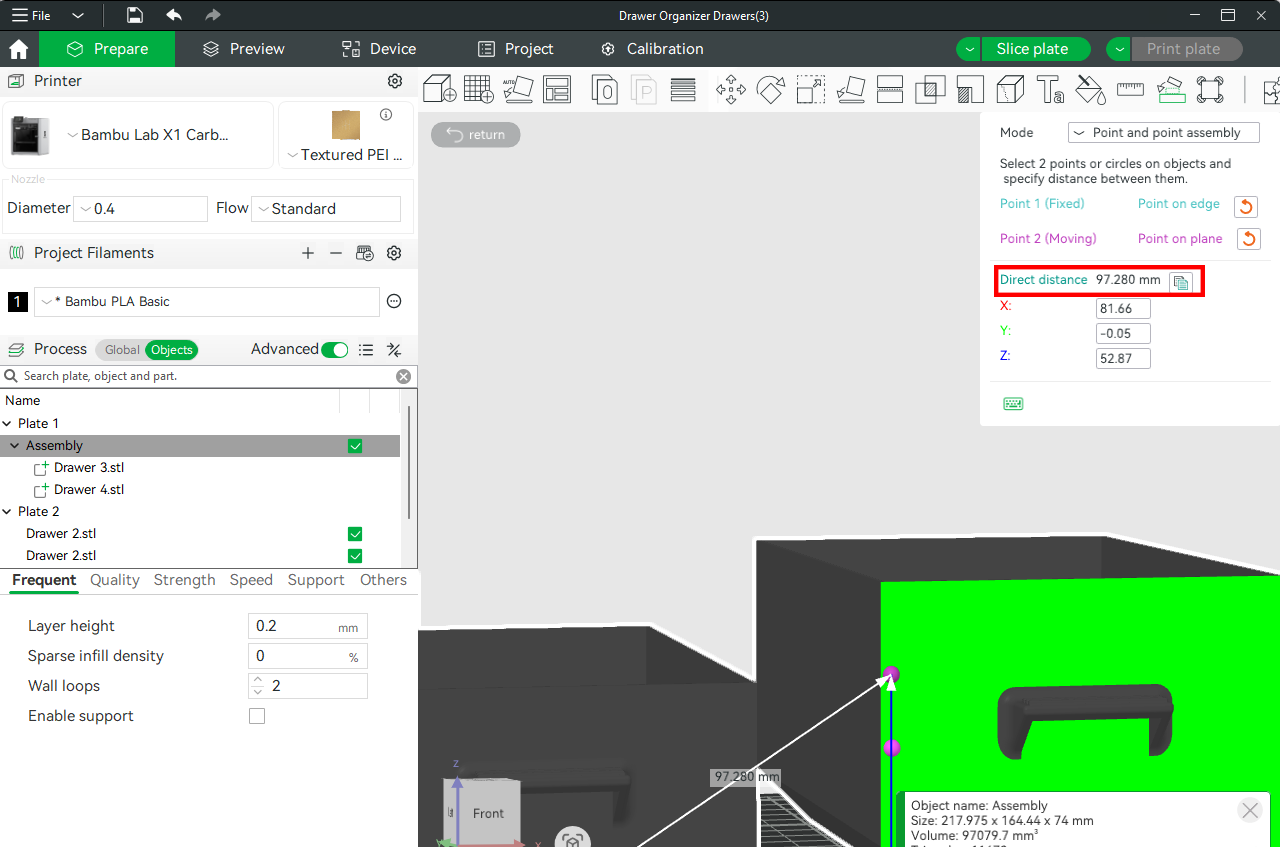
Once selected and the distance specified, they will automatically snap together at those points, creating a precise point-to-point alignment. You can also adjust the X, Y, and Z axes if the parts need rotation or fine-tuning.
¶ Finalize the Connection Between the Meshes
When you use the Assemble Tool to position or align two objects, you're only arranging them to fit together precisely, but they still remain as separate meshes. This means that even though the objects are touching each other, they’re still treated as individual parts when it comes to slicing and printing. To ensure a complete merge, you need to use the Union option of Mesh Boolean. You can find it in the middle section of the menu bar.
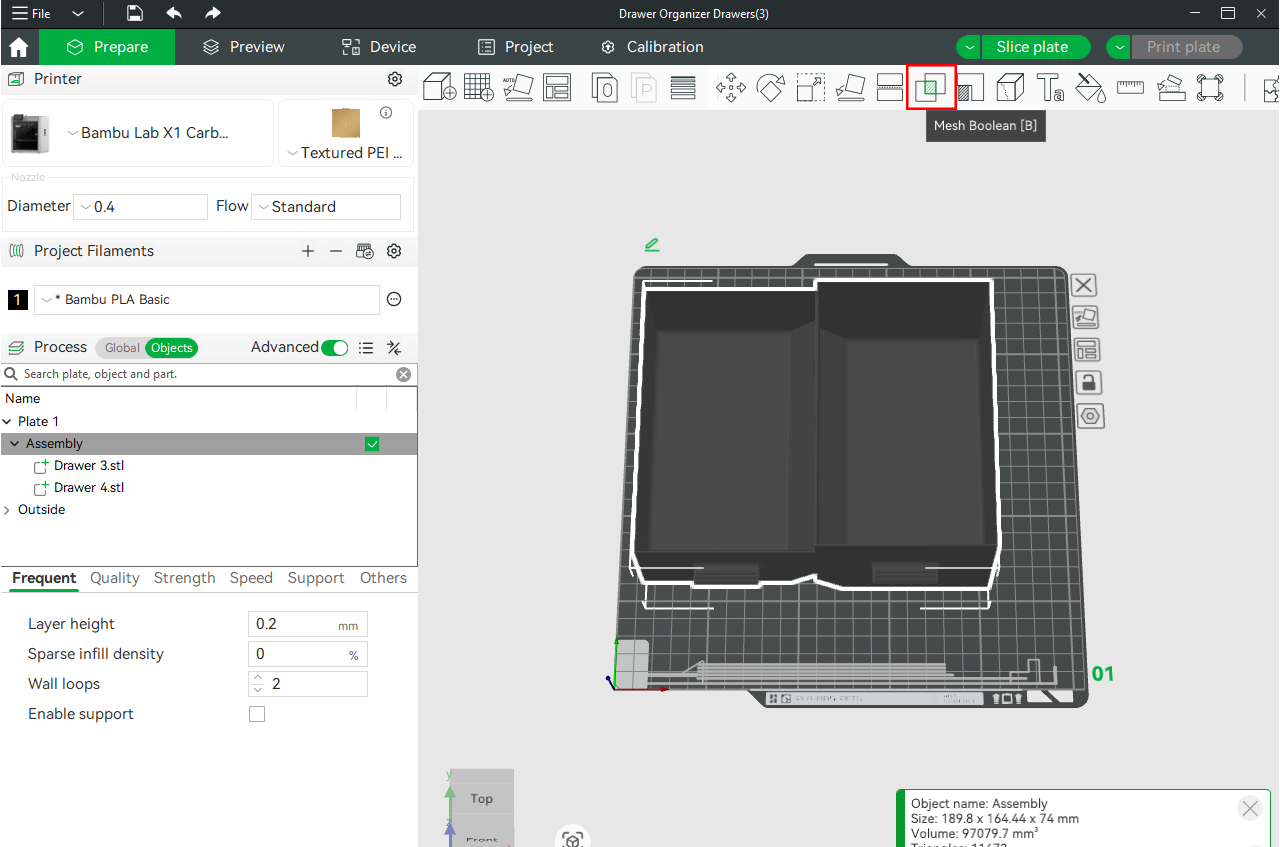
Ensure the Union is selected, then select the two parts. Next, click Union, and those parts will now become a single object.
If you can check the left-middle section before applying the union, there are two parts in the Assembly section, and after using it, a single file remains.
Applying union is helpful in removing internal faces where objects intersect and blending them into a single, continuous, watertight mesh, thereby eliminating slicing artifacts such as gaps, seams, or duplicated sections. Additionally, without a union, the slicer might attempt to print internal walls where the objects overlap, which wastes filament and can also lead to structural weaknesses.
¶ End Notes
We hope the detailed guide provided has been helpful and informative.
To ensure a safe and effective execution, if you have any concerns or questions about the process described in this article, we recommend submitting a technical ticket regarding your issue. Please include a picture or video illustrating the problem, as well as any additional information related to your inquiry.