¶ What is Auto Calibration?
Auto-Calibration is a feature that automatically adjusts key printer settings, such as bed leveling, nozzle height, vibration compensation and motor noise using sensors to ensure optimal printing conditions without manual intervention. This automation simplifies the setup process, reduces user error, and ensures consistent print quality by maintaining accurate measurements over time.
¶ Perform calibration through the printer screen
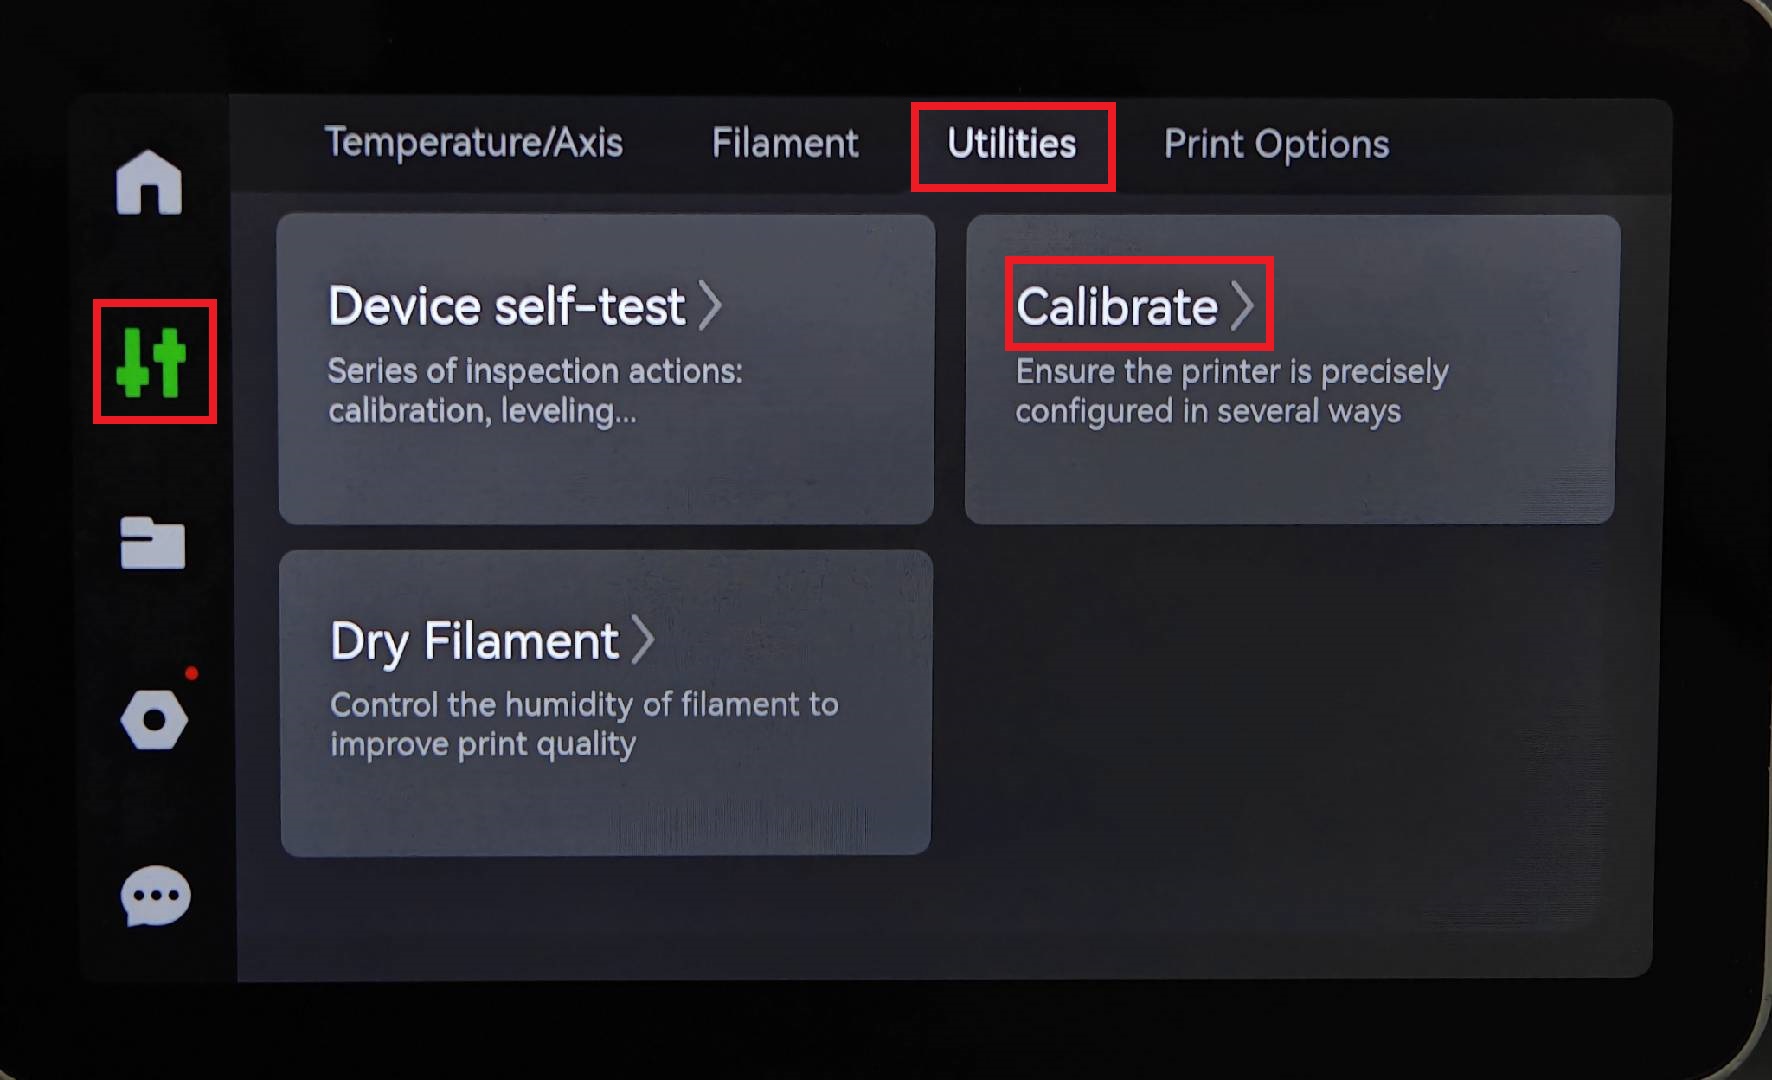
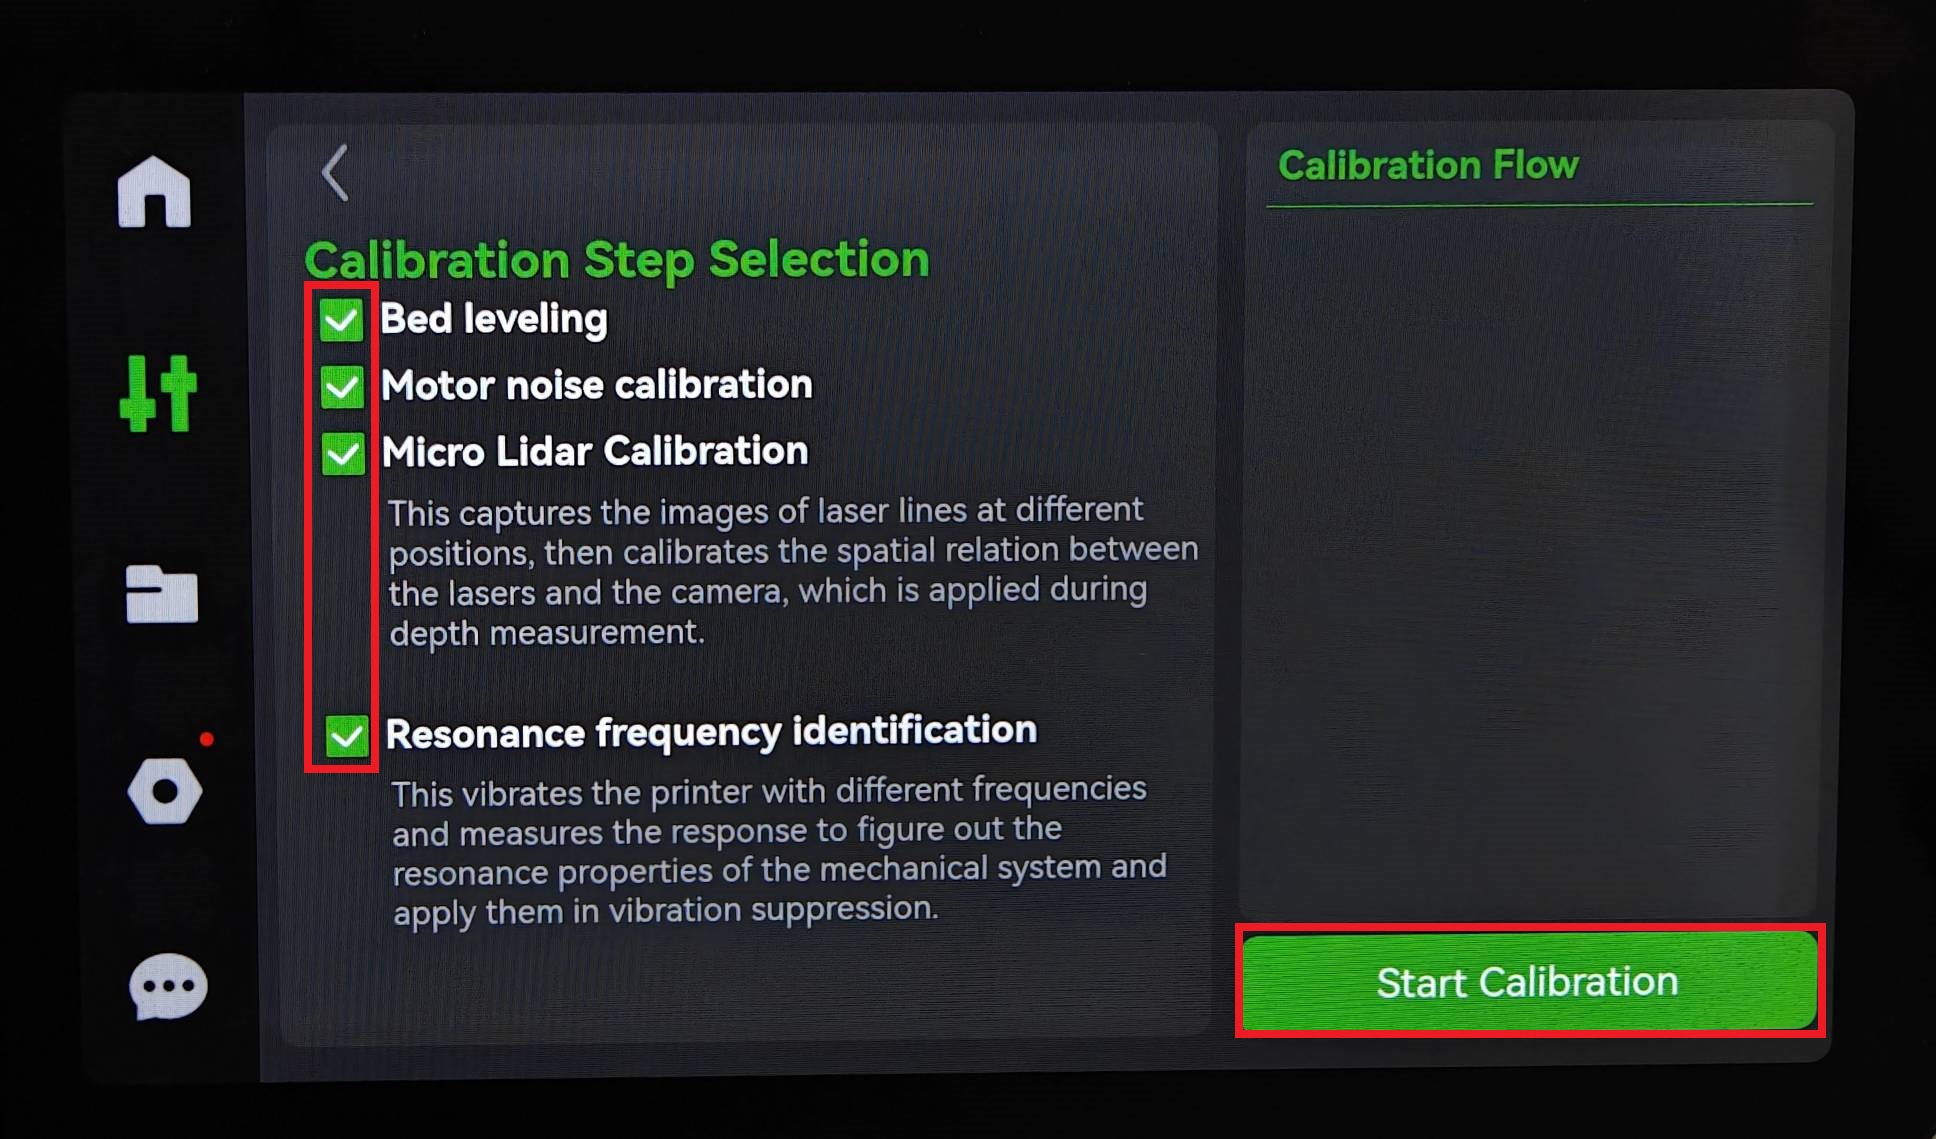
¶ X1 Series
Click the "Control" button on the left side of the screen, then go to the tool interface and click "Calibrate". Four calibration options will pop up. You can select one as needed.
 |
 |
¶ P1 Series
Click the "Settings" button on the right side of the screen, scroll down to find the "Calibration" button, you can choose whether to perform the calibration.
The calibration items include vibration compensation,motor noise cancellation,and auto bed leveling.
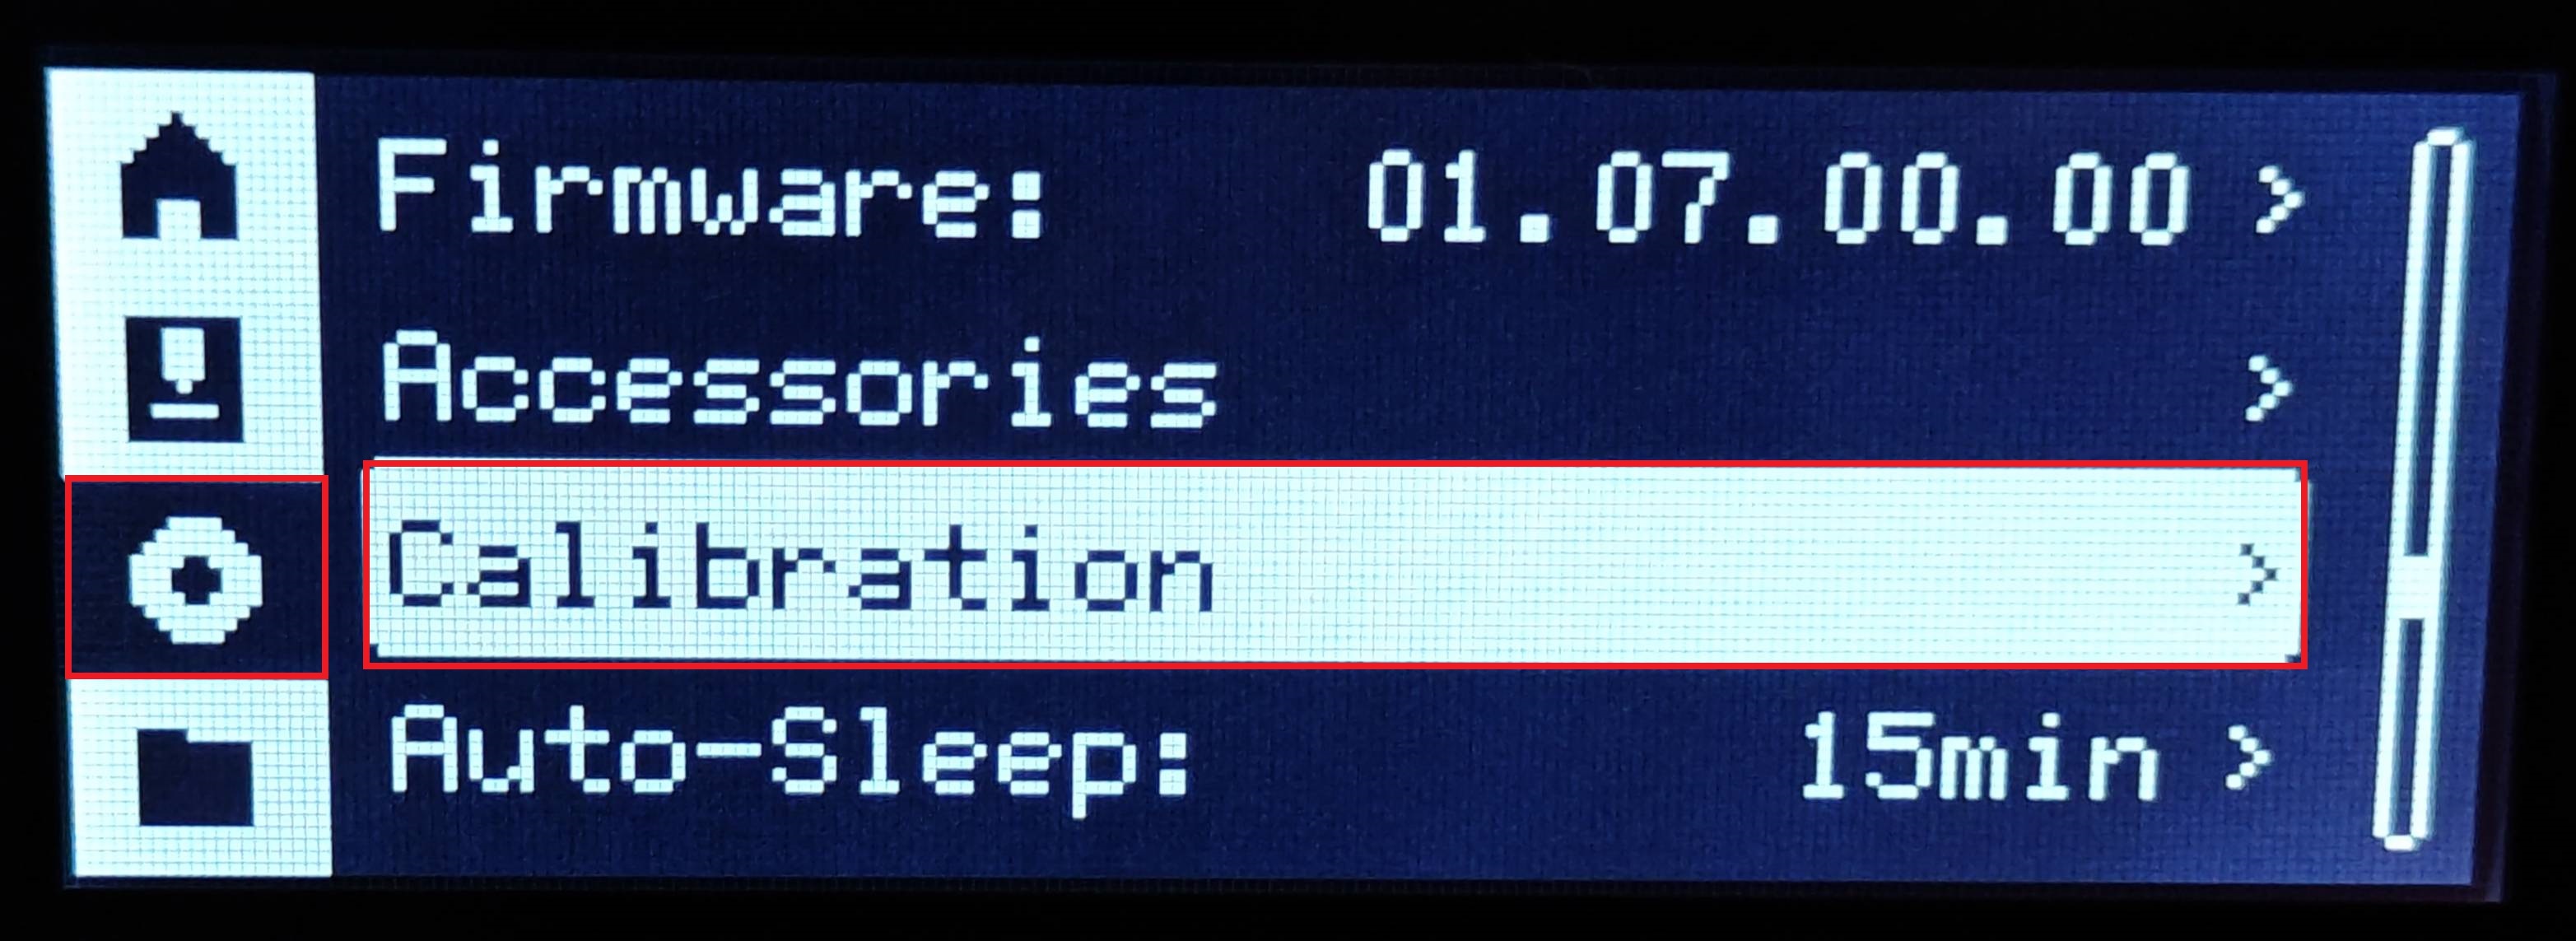
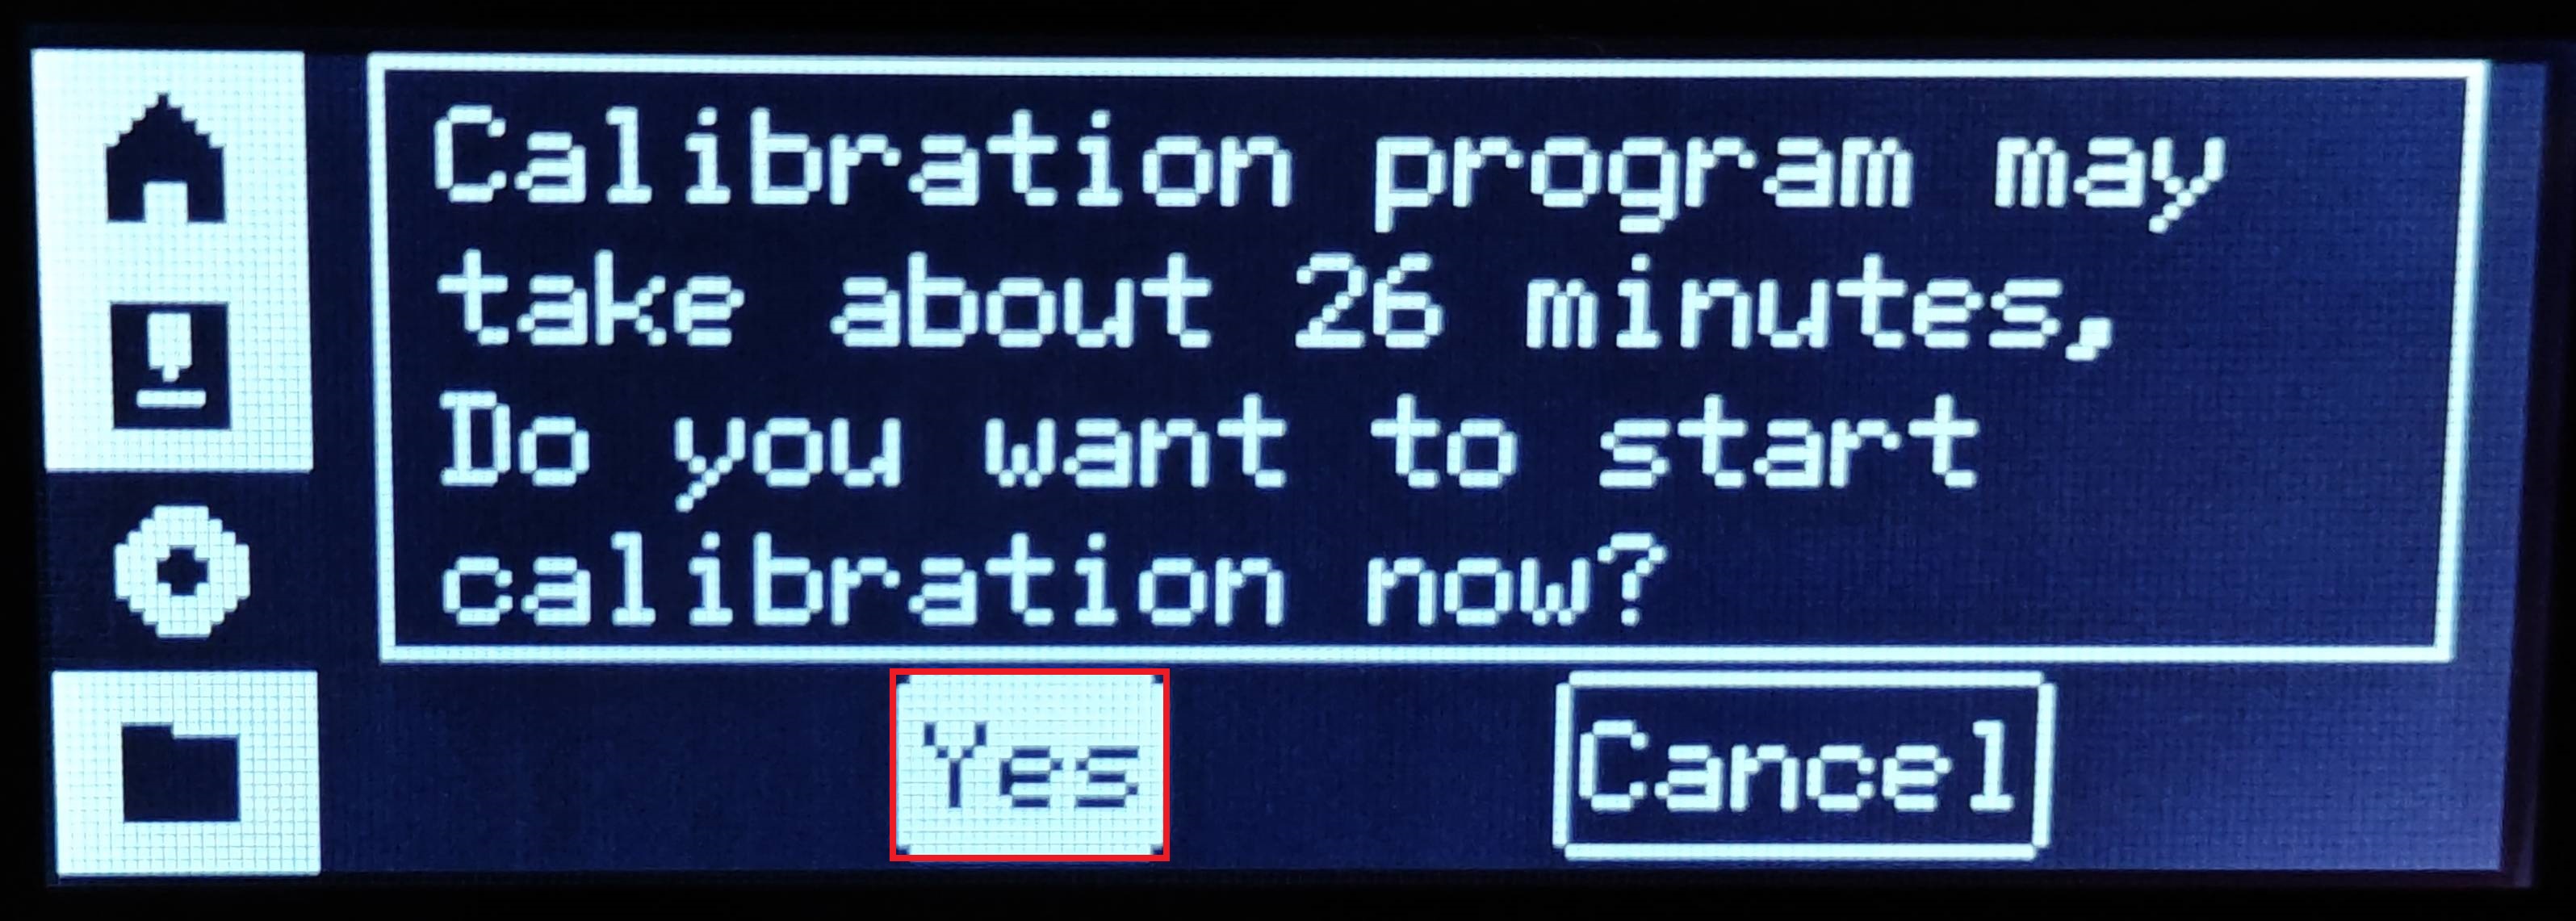
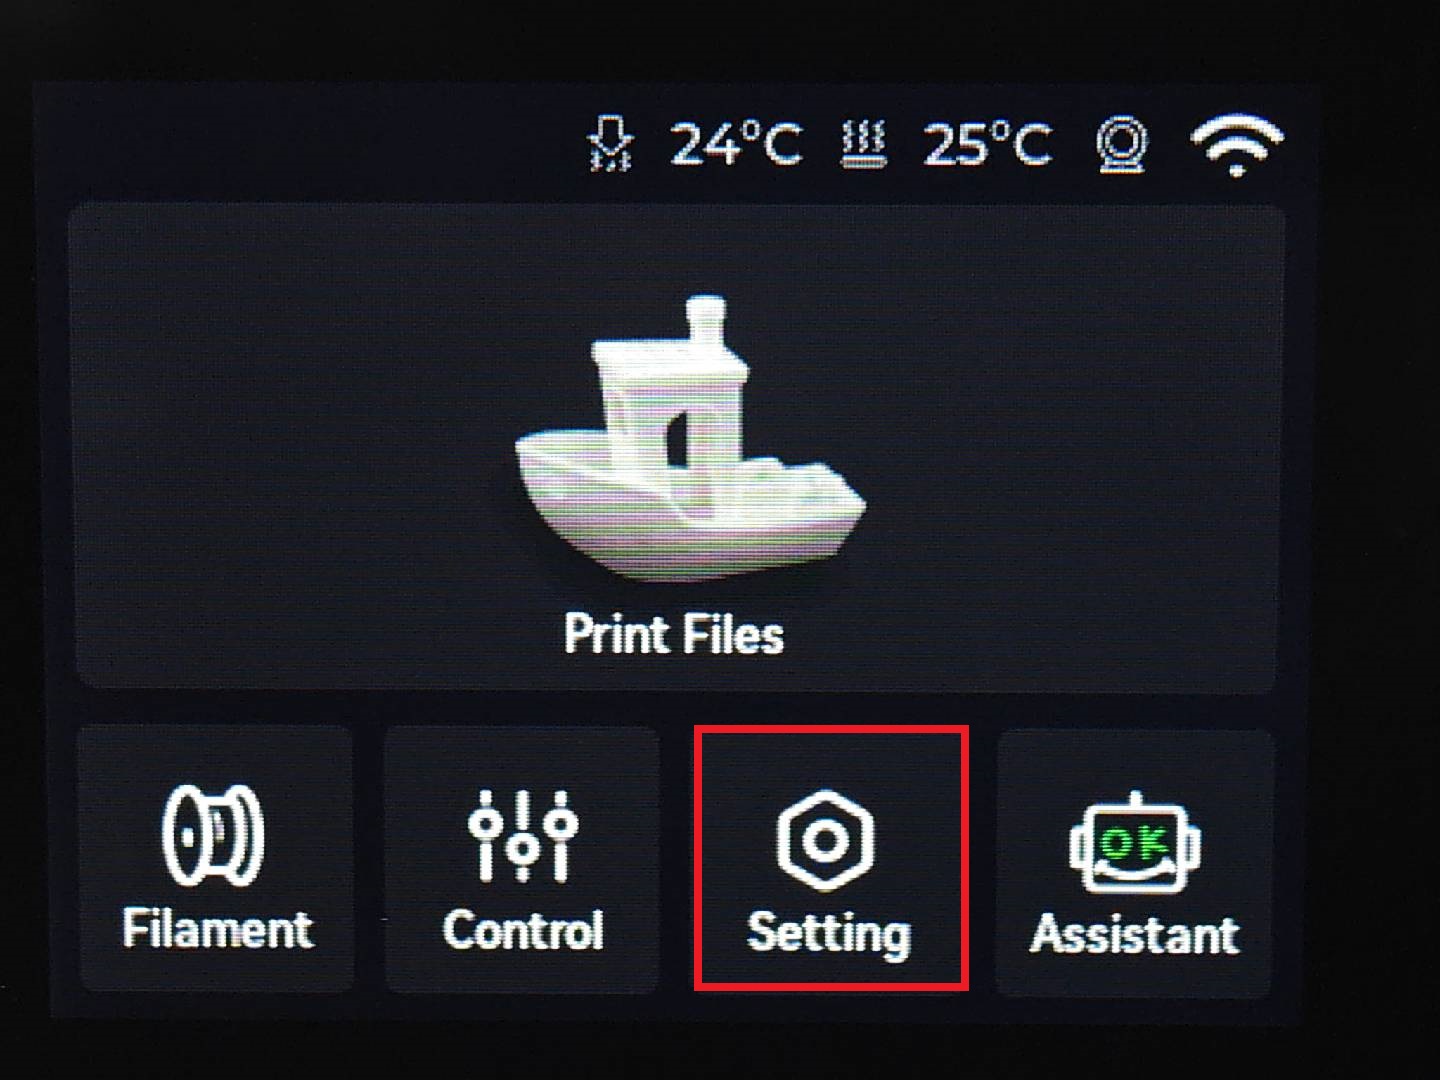
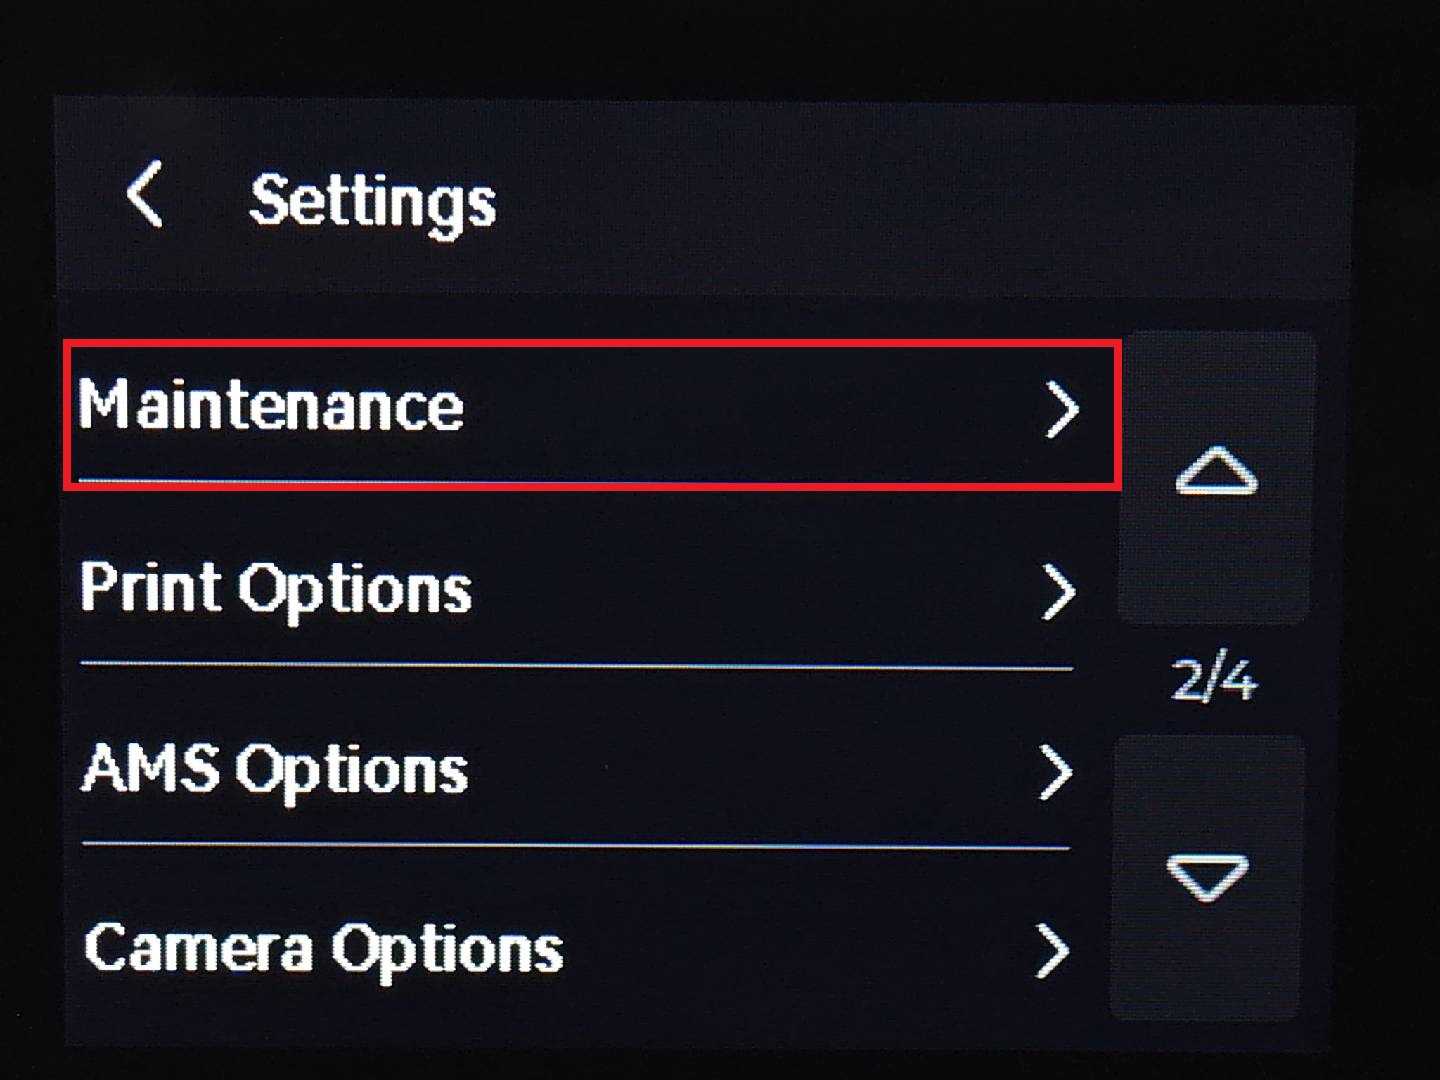
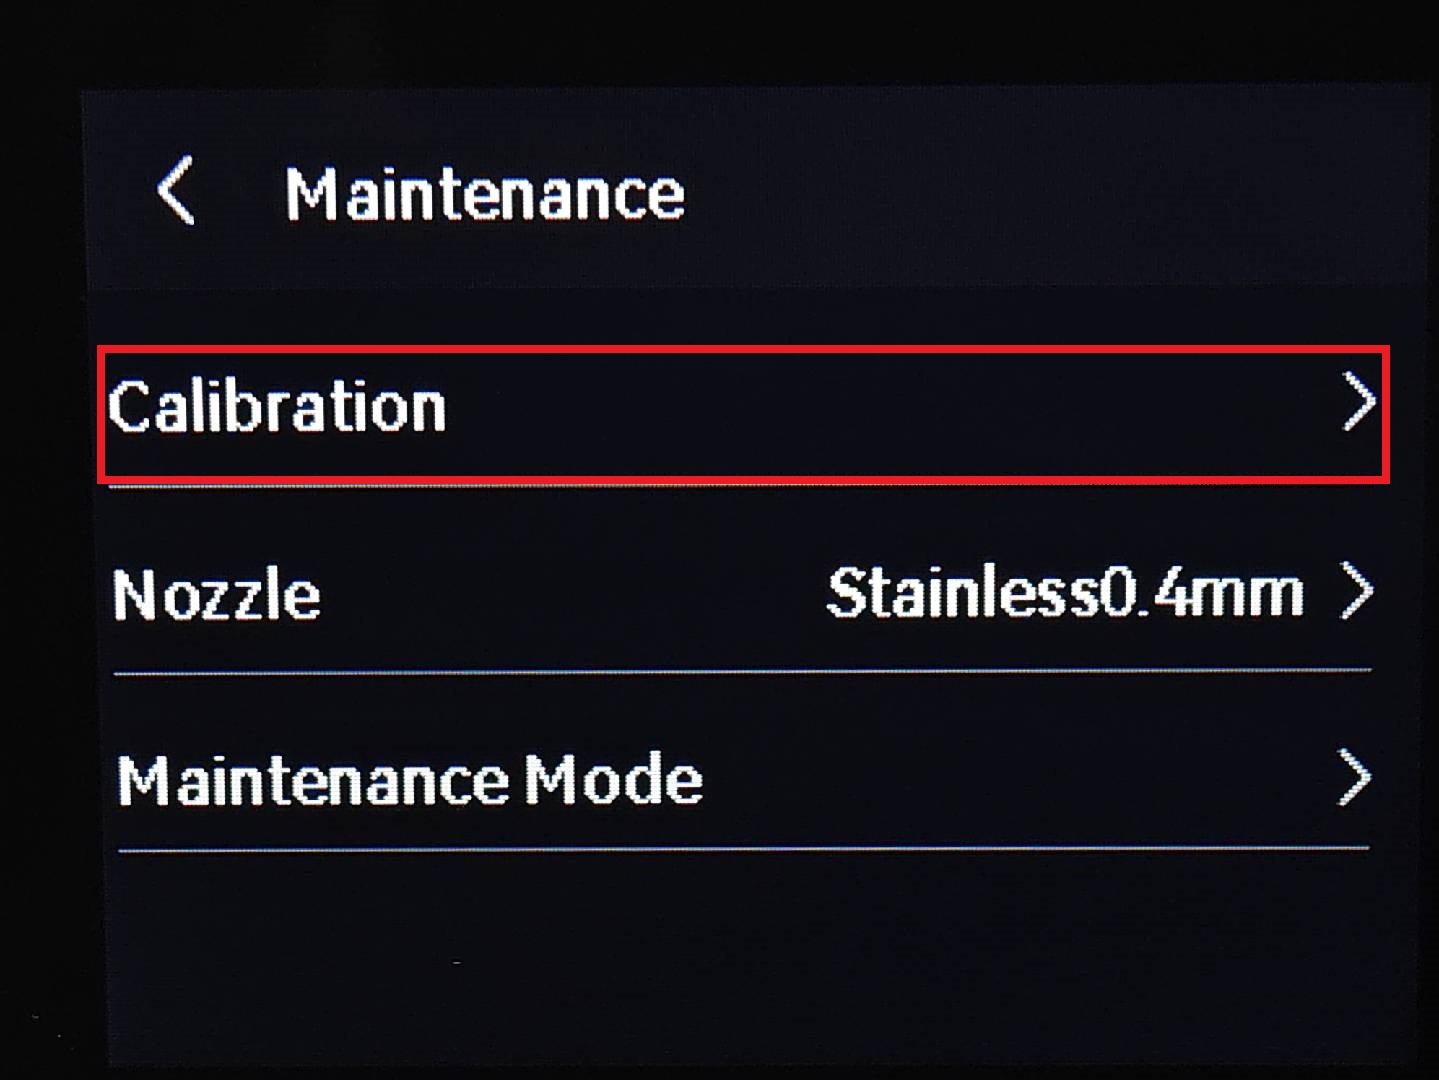
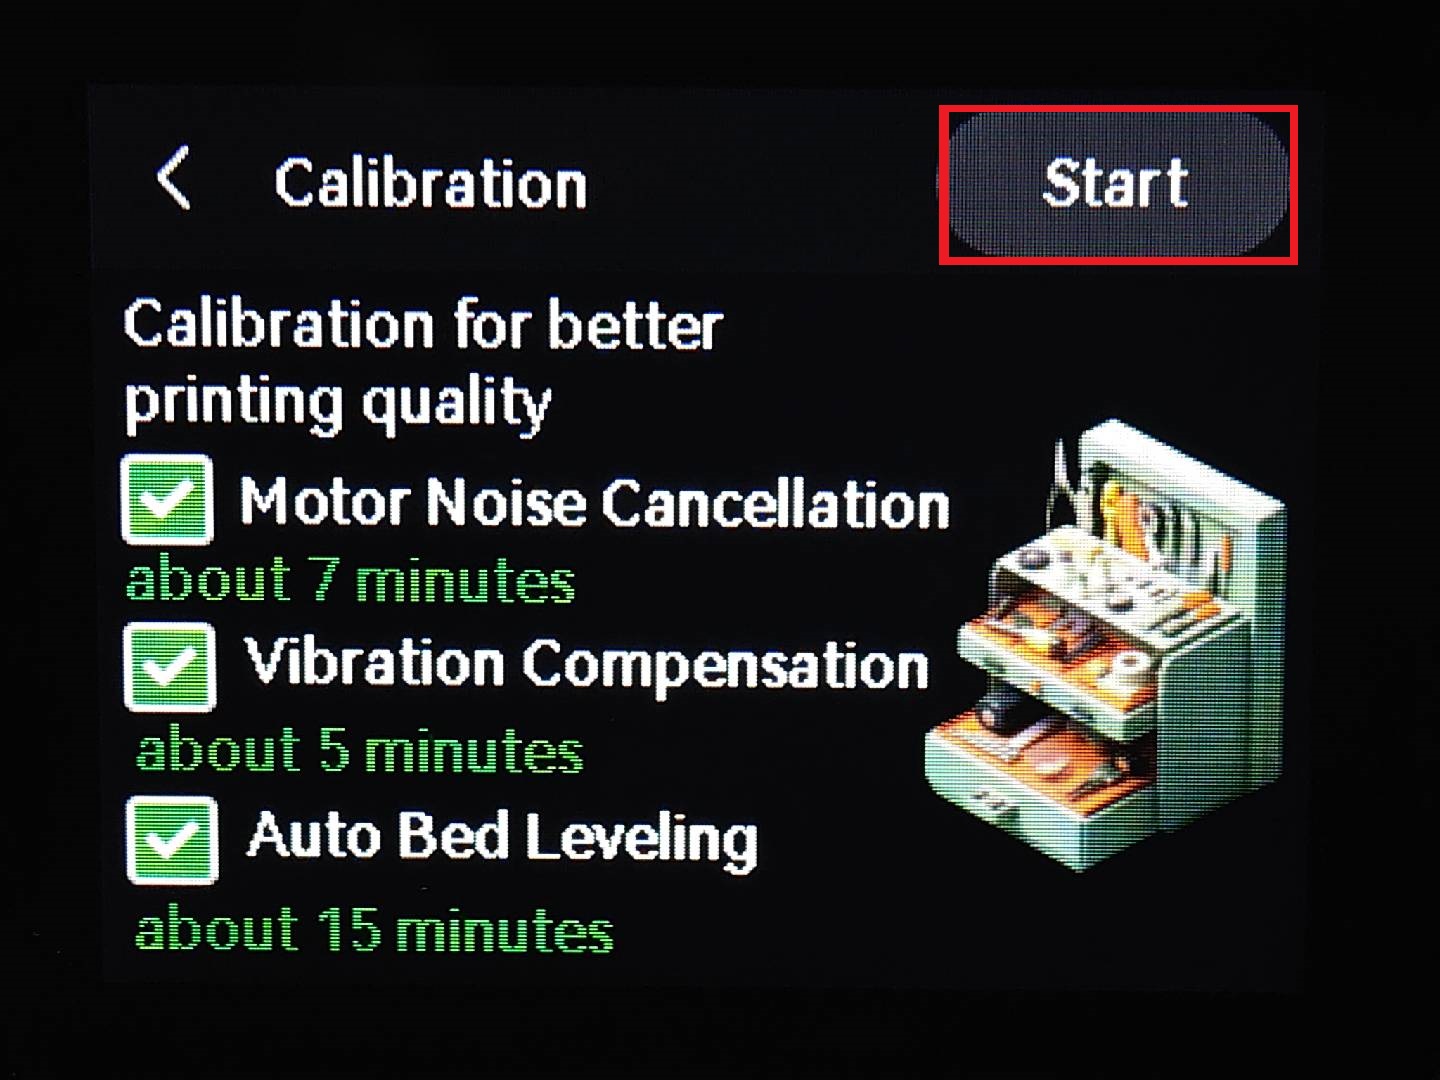
¶ A1 Series
After clicking "Settings", scroll down to enter the "Maintenance" interface. Then, click "Calibration", and three calibration options will appear. You can select them as needed.
 |
 |
 |
 |
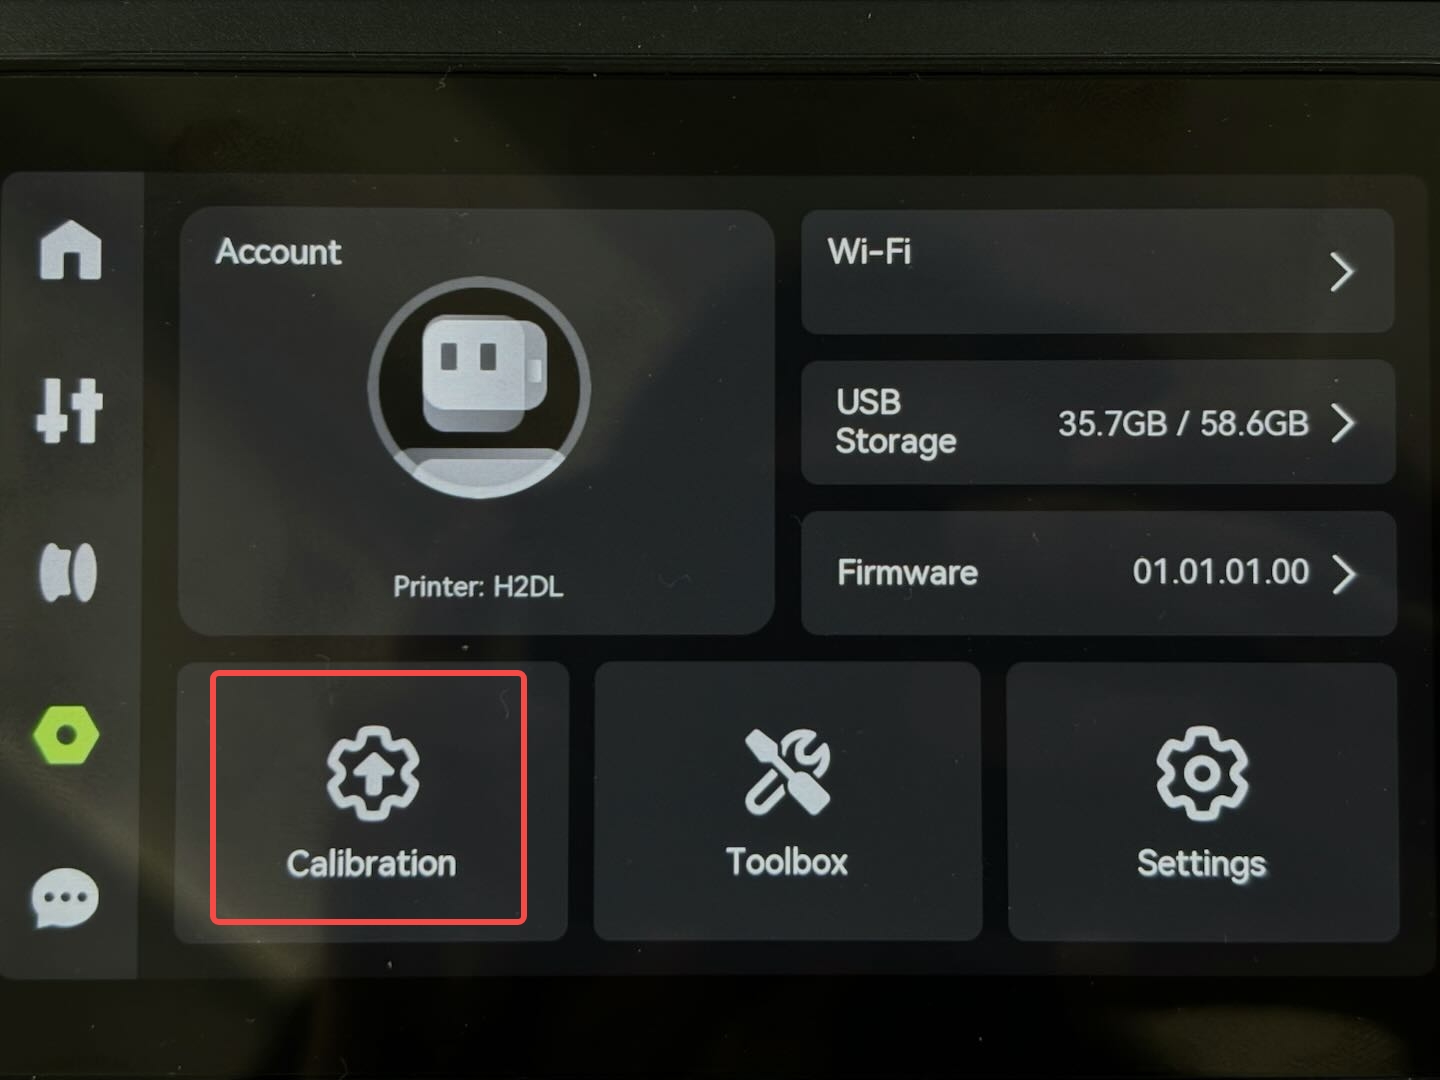
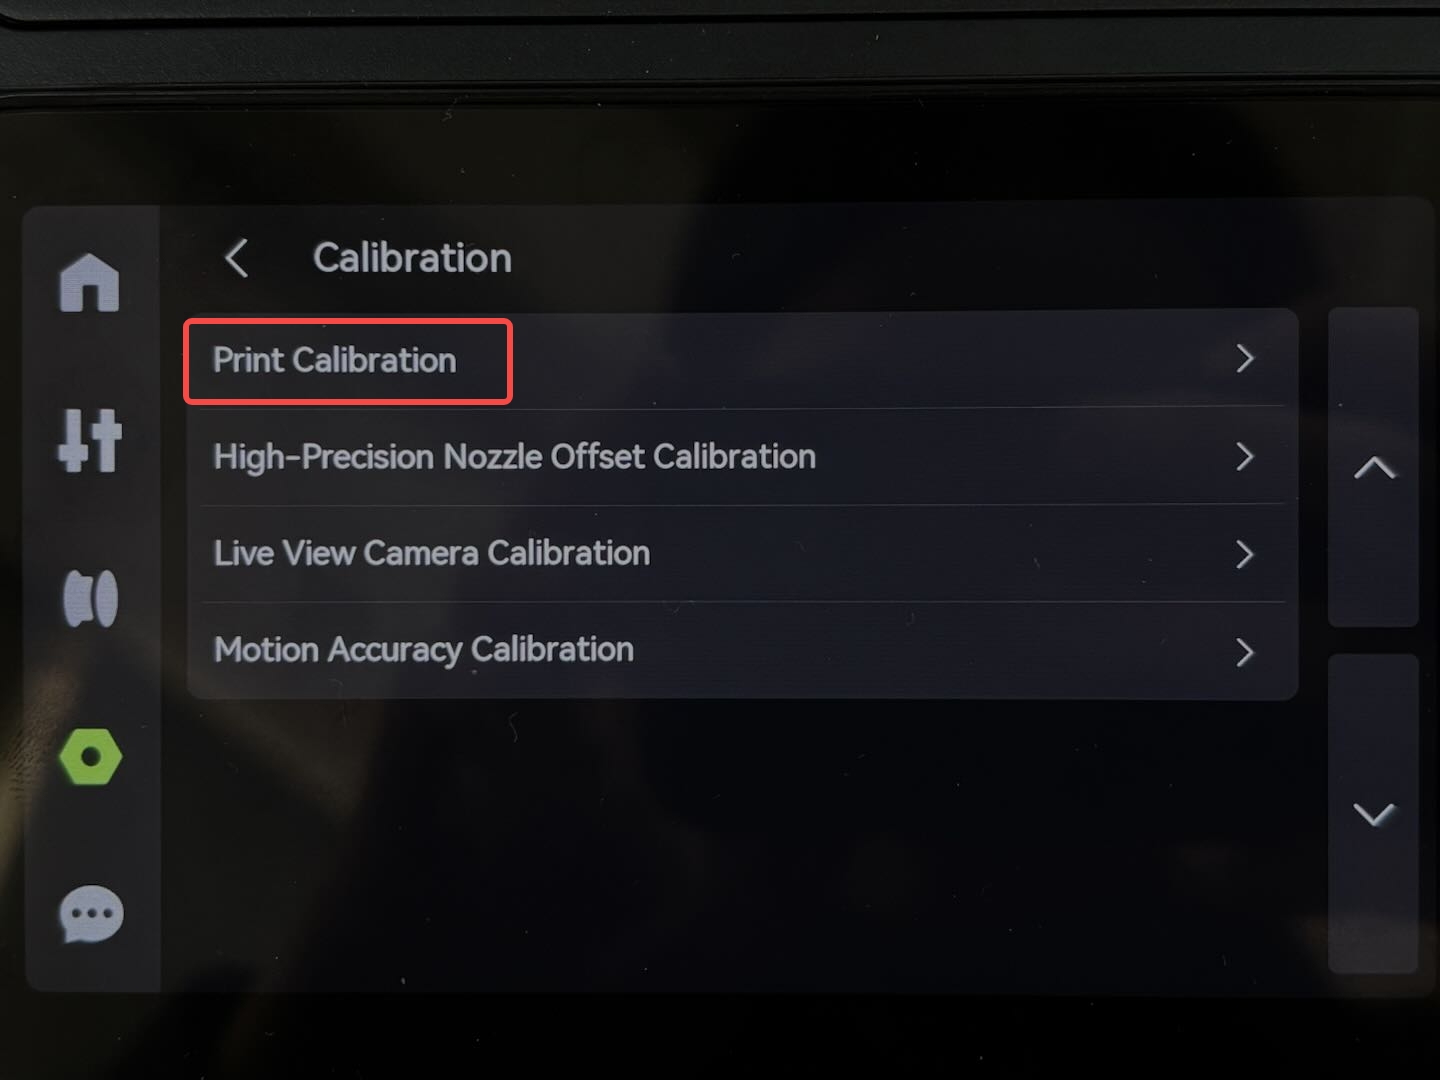
¶ H2D
Click Settings > Calibration on the H2D screen, and select calibration options needed, such as Print Calibration.
 |
 |
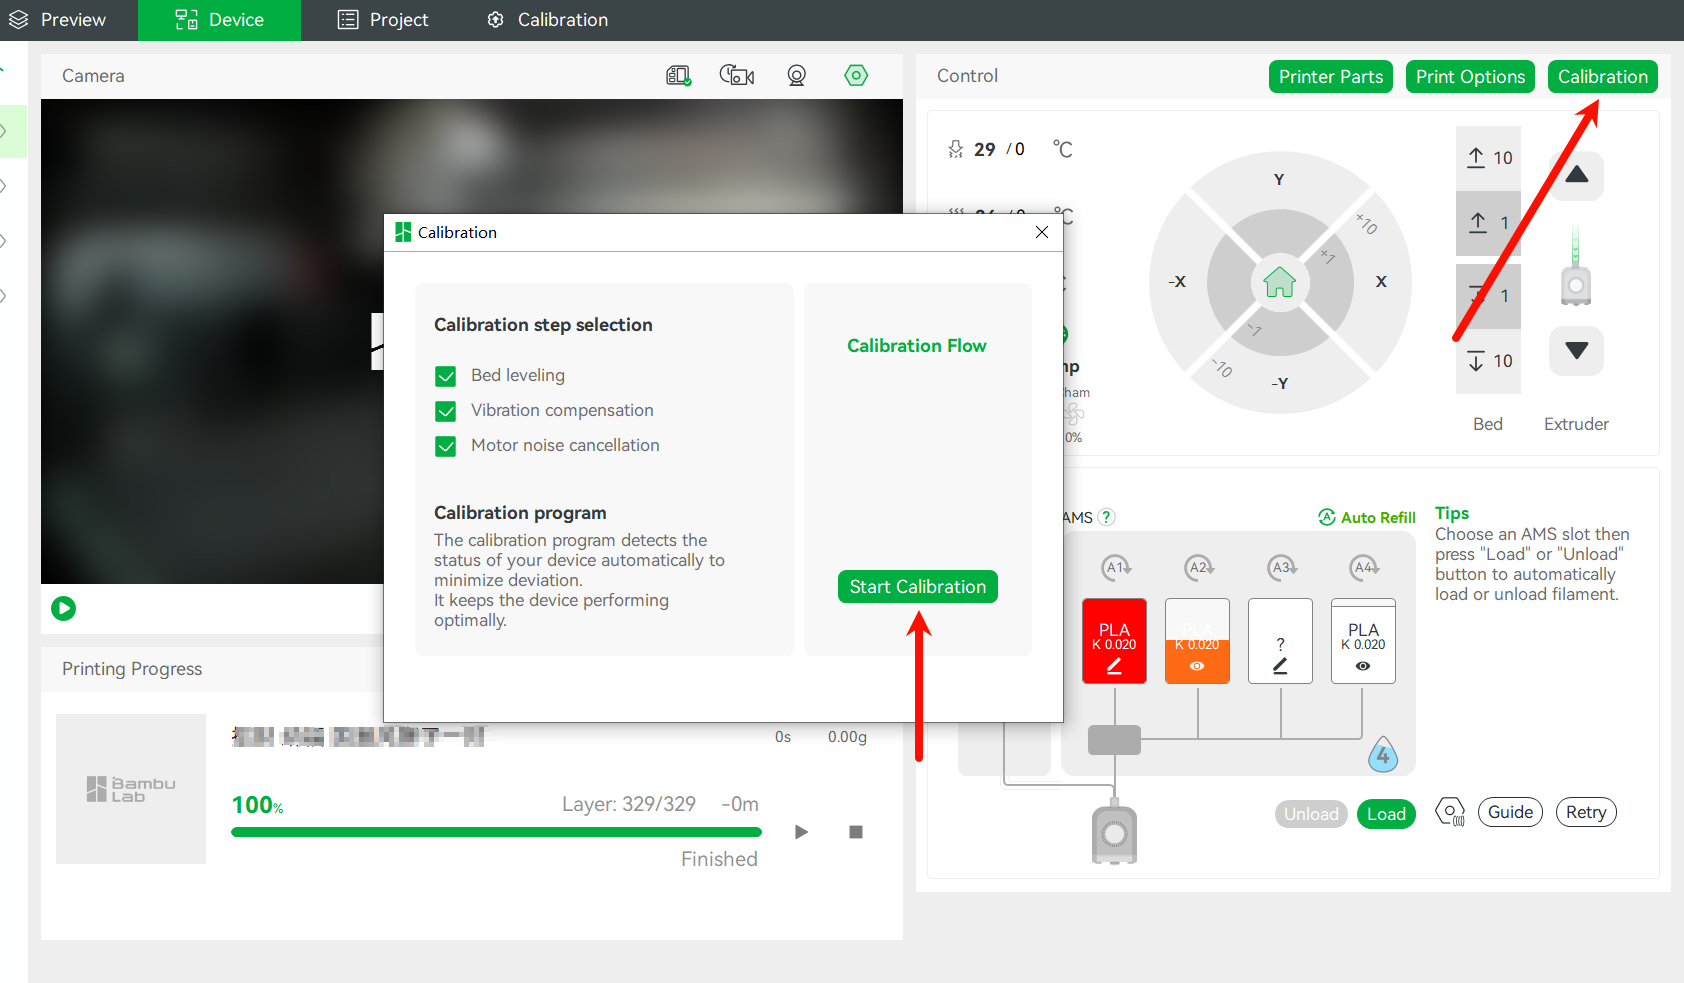
¶ Perform calibration through Bambu Studio
To enter Bambu Studio, find the "Devices" interface at the top. Click "Calibrate" in the upper right corner. Then a calibration option will pop up. You can select it as needed.
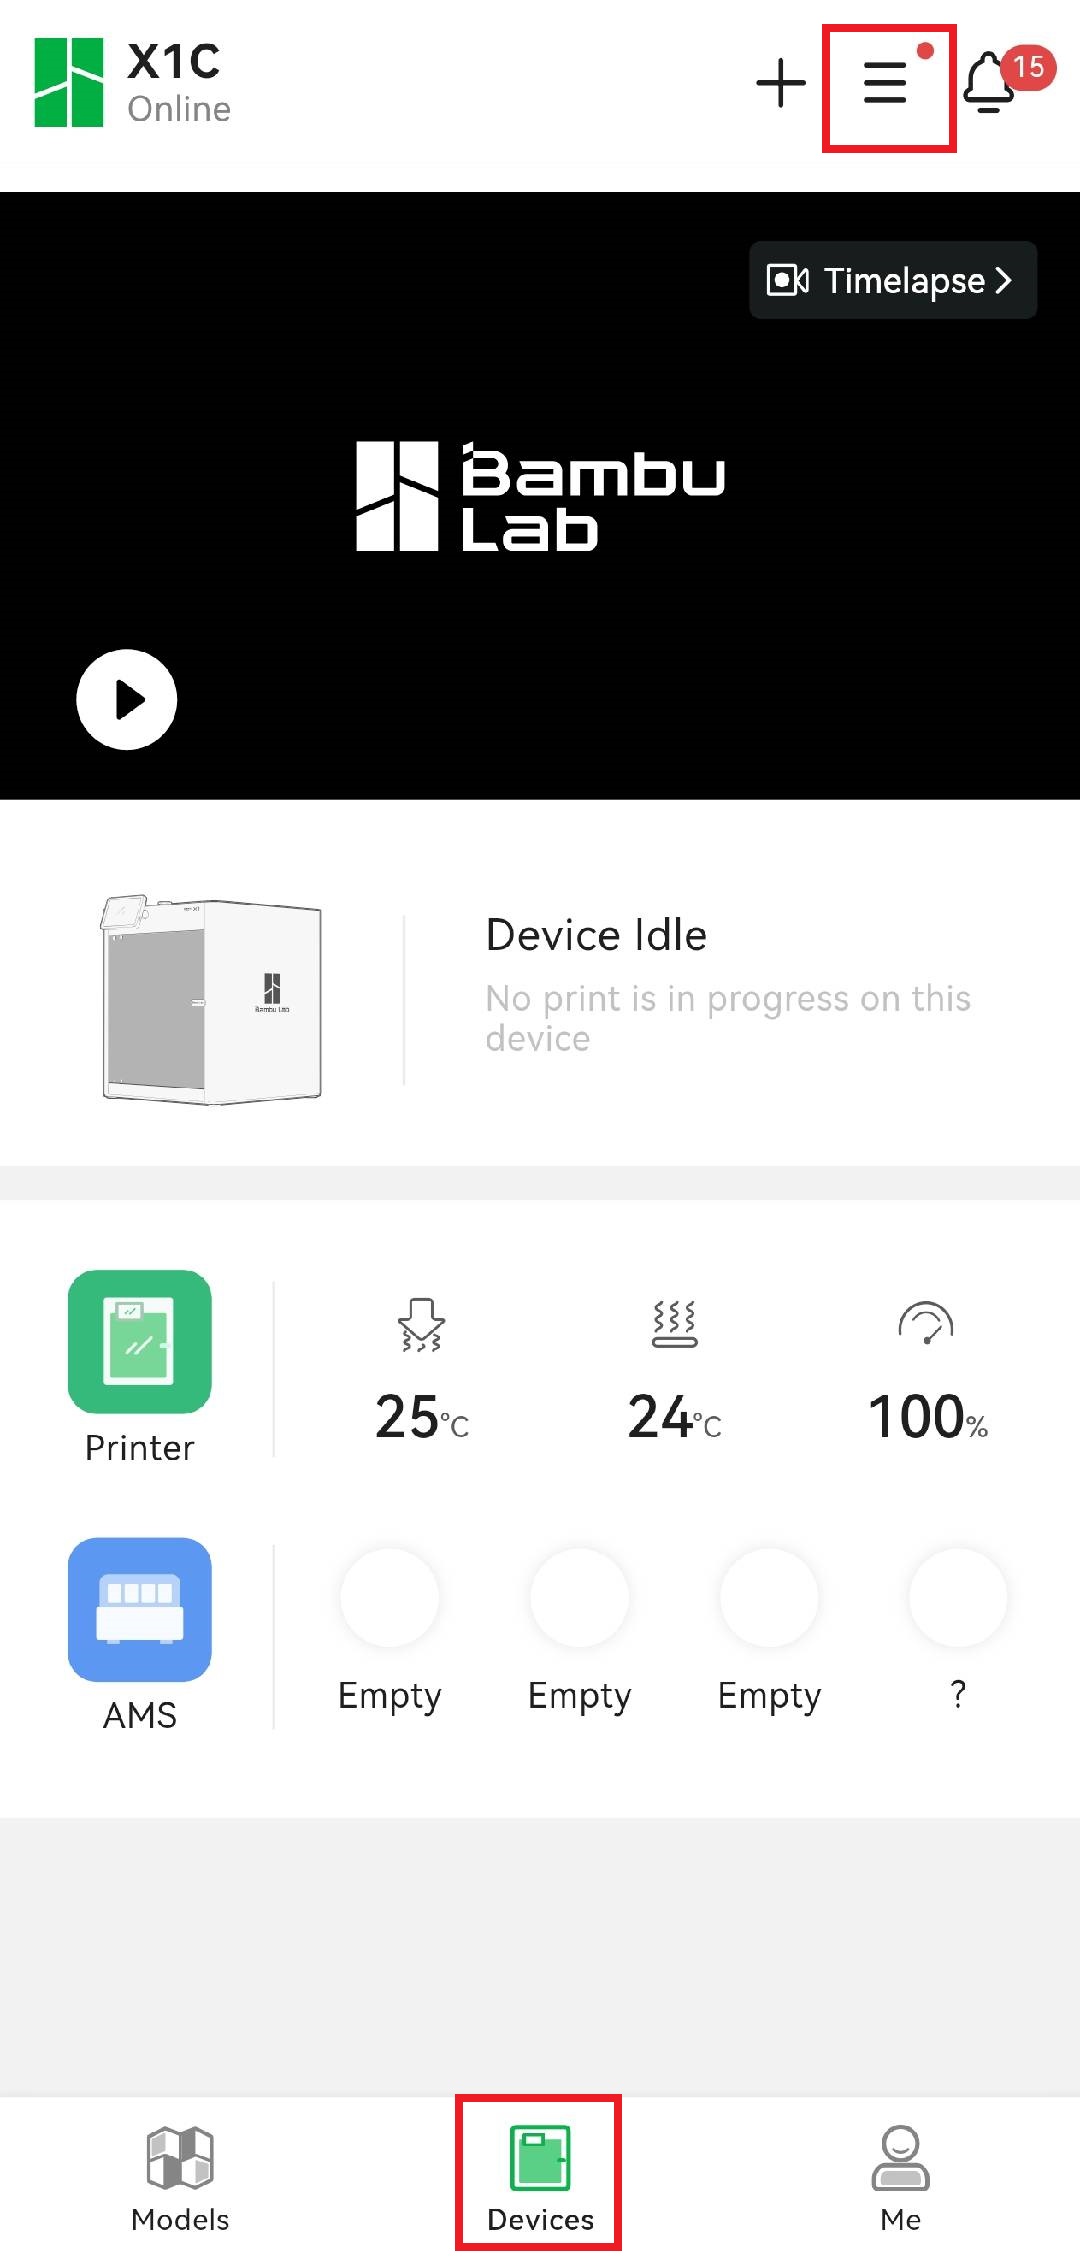
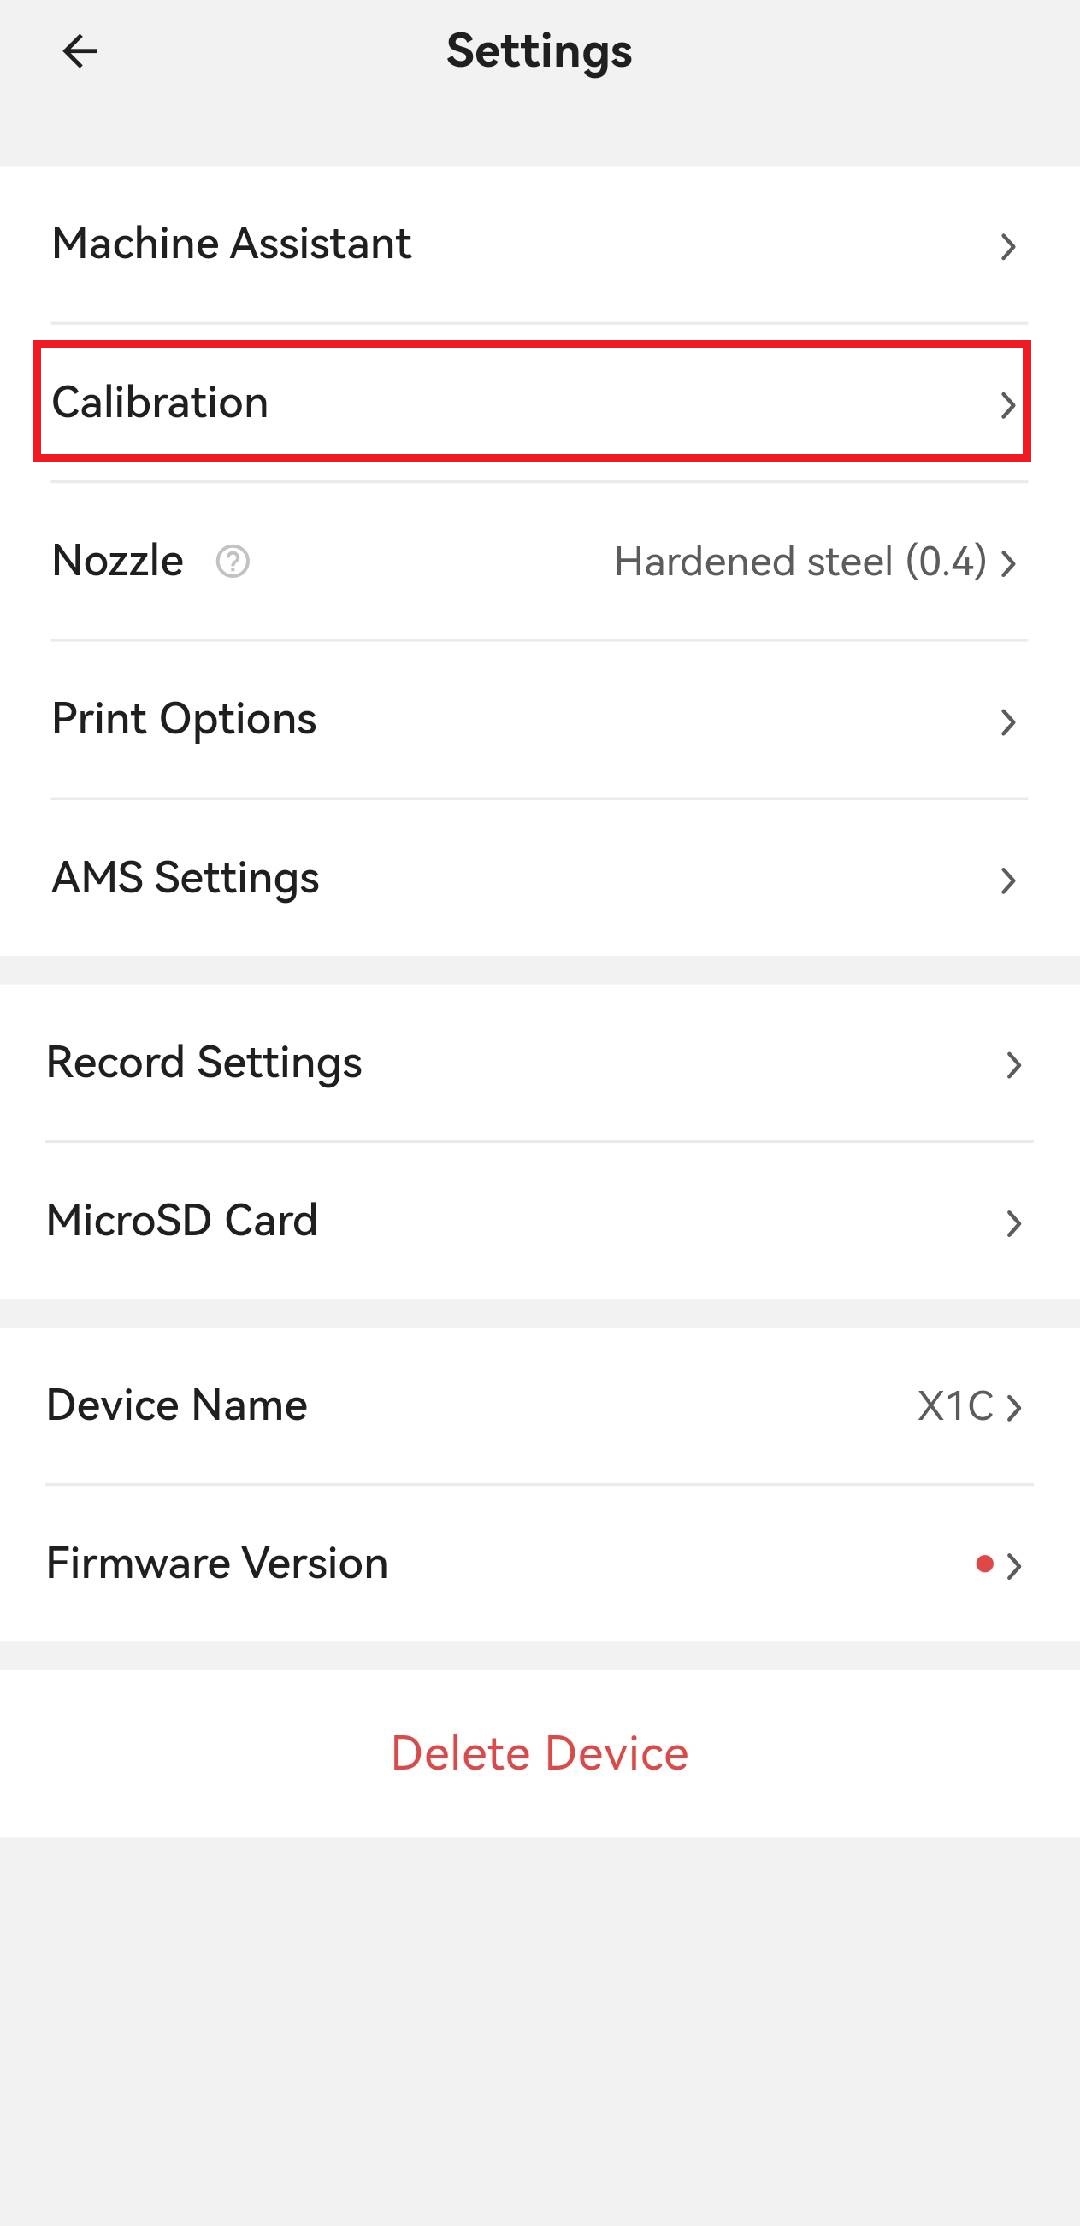
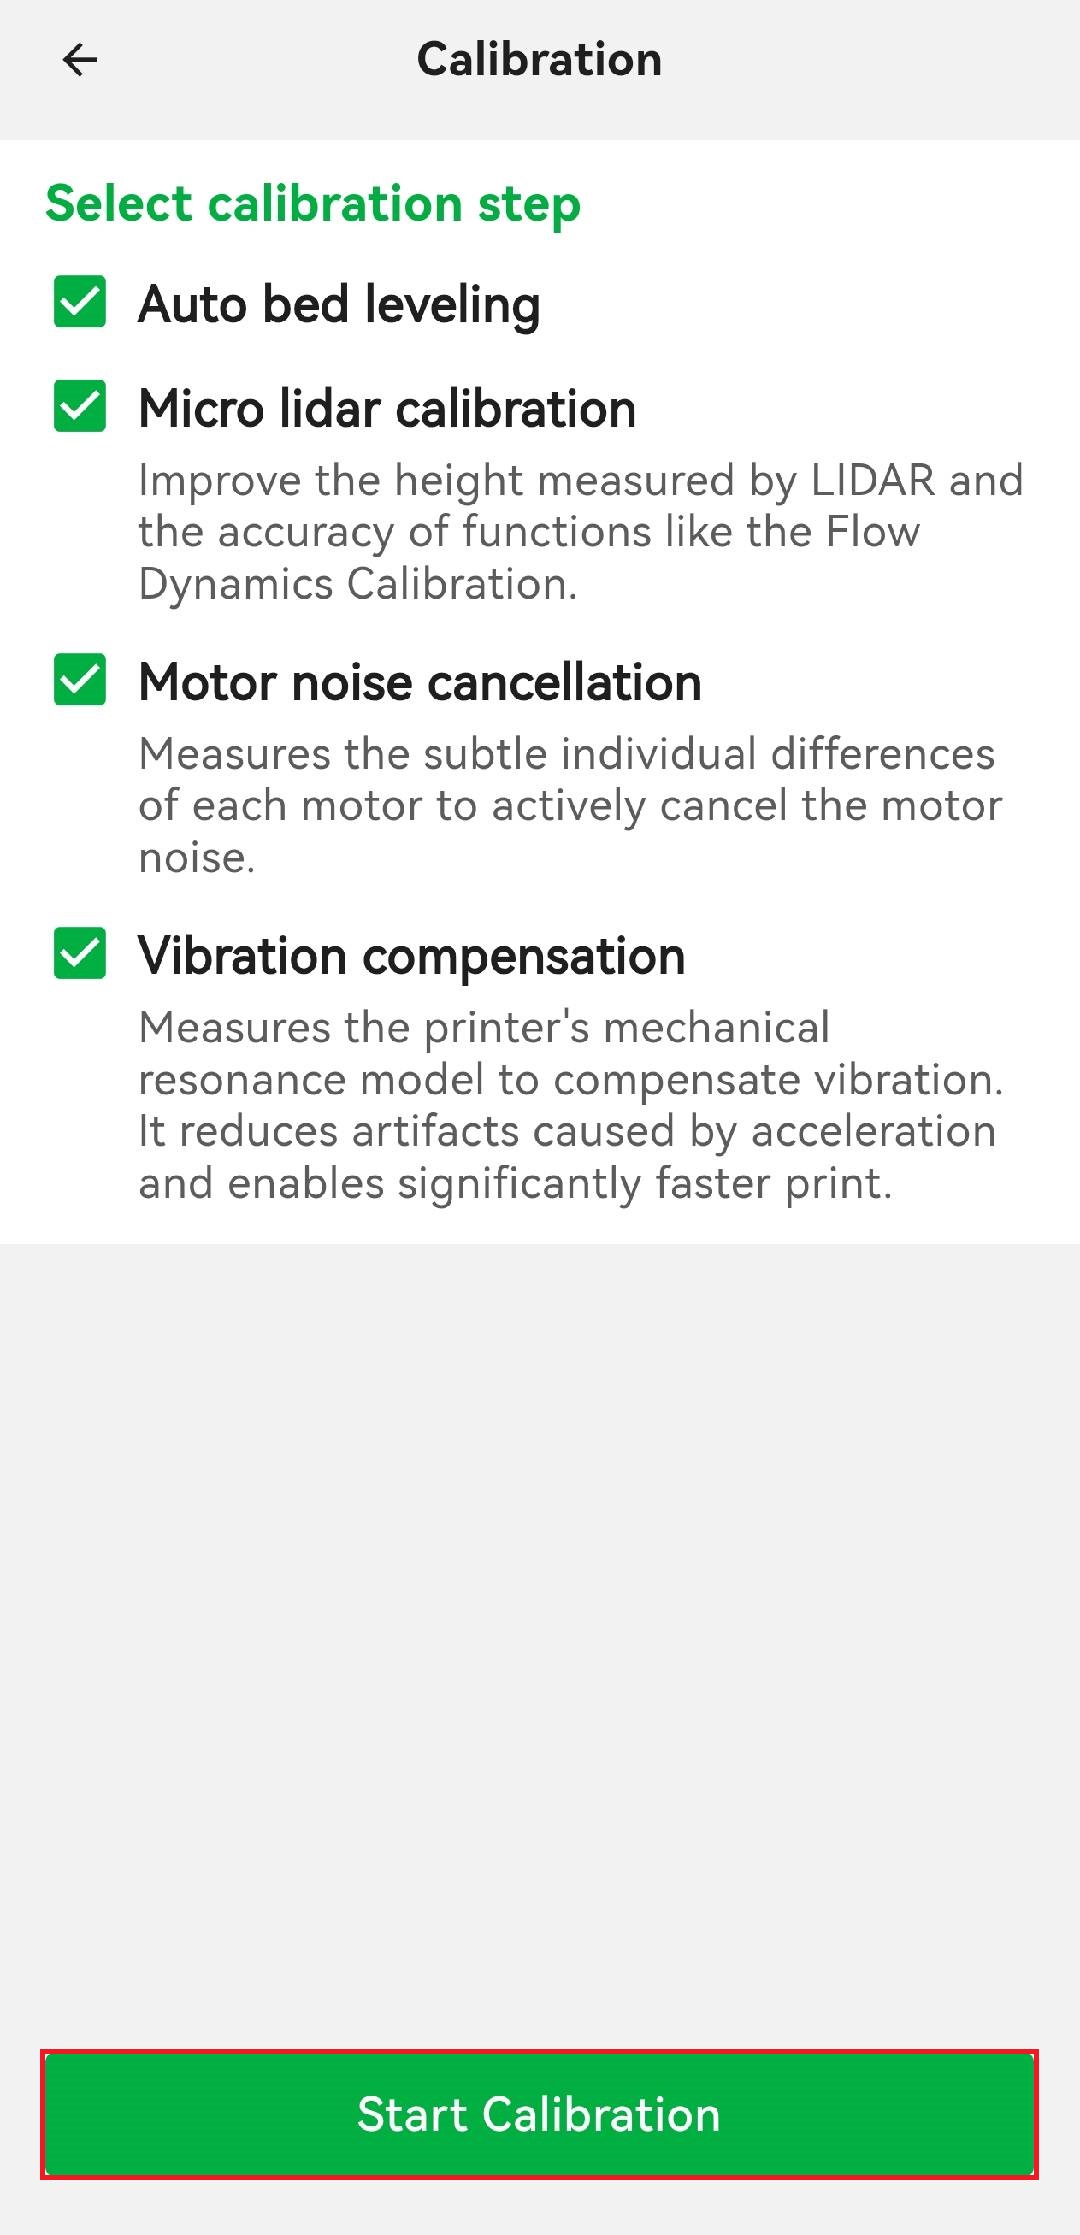
¶ Perform calibration through Bambu Handy
Go to the bottom of Bambu Handy and select the "Device" interface. Click on "Settings" in the upper right corner and choose "Calibration". You can select the calibration items you need.
 |
 |
 |
¶ End Notes
We hope the detailed guide provided has been helpful and informative.
If this guide does not solve your problem, please submit a technical ticket, we will answer your questions and provide assistance.
If you have any suggestions or feedback on this Wiki, please leave a message in the comment area. Thank you for your support and attention!