¶ Important Reminder
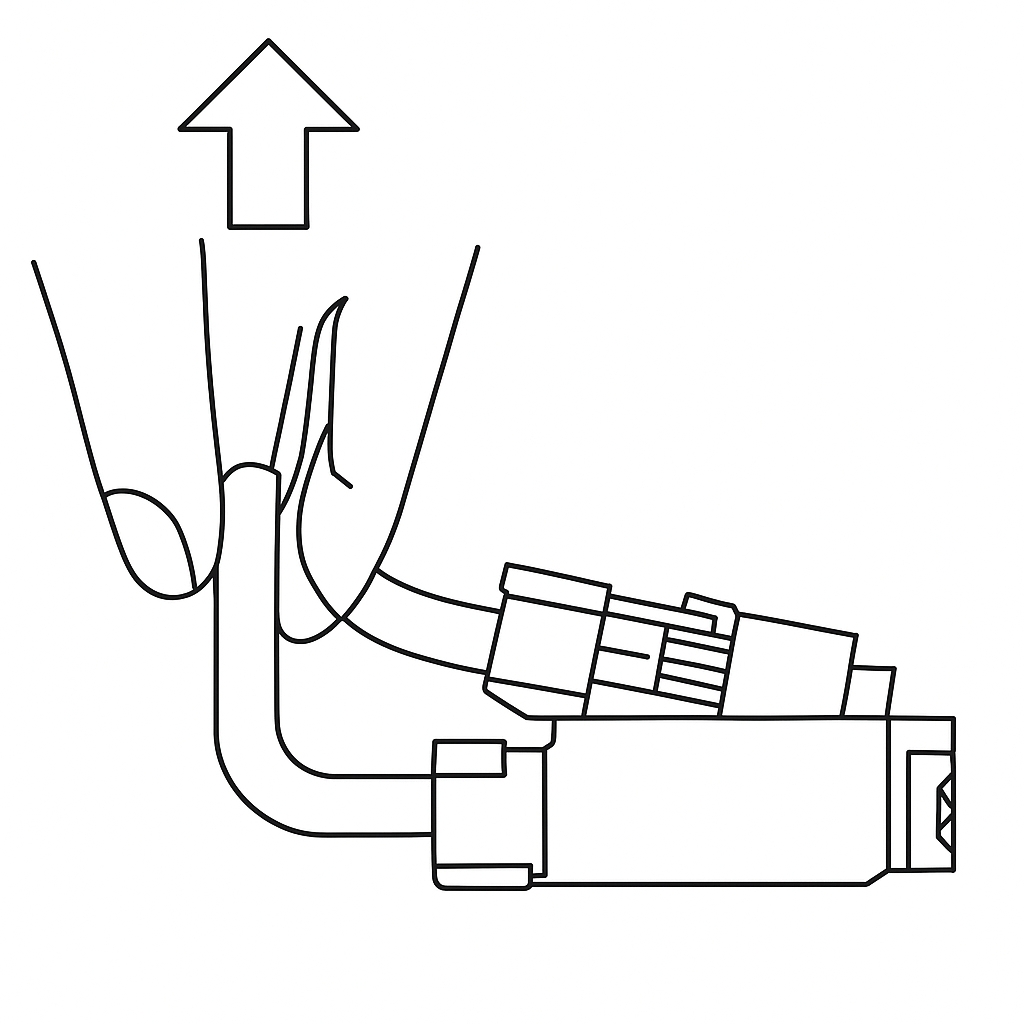
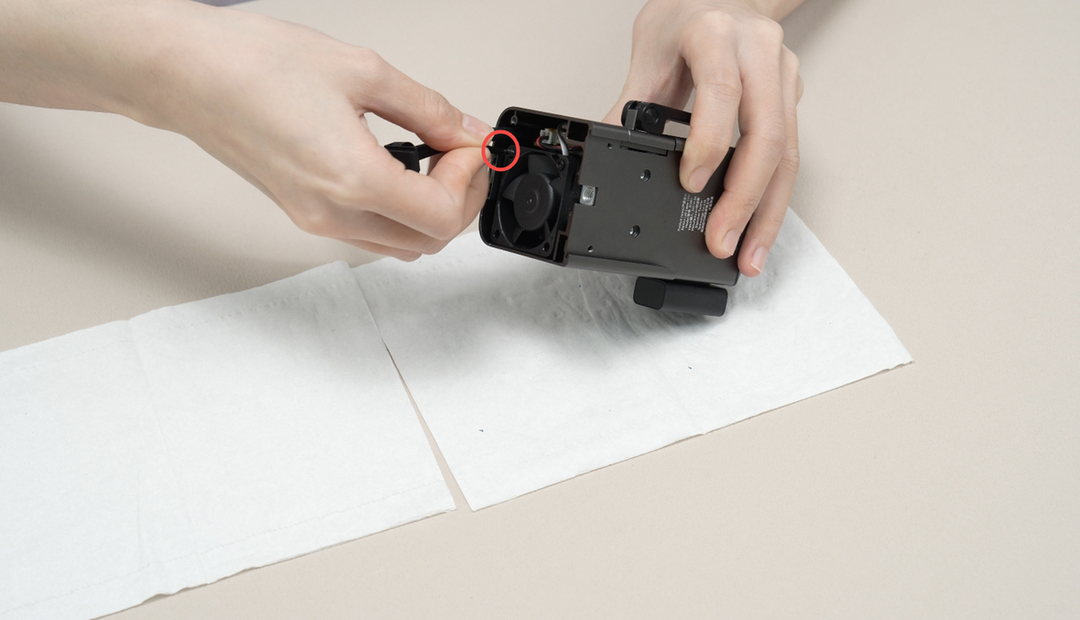
When removing the laser housing, the LED indicator plug must be unplugged. During removal, please hold the base of the plug and lift it vertically away from the PCB to unlock it, or use tools such as an H2.0 Allen key or flathead tweezers to assist in unlocking. Do not apply force in a horizontal direction to avoid damaging the plug.
¶ Maintenance Method
Regularly use a brush to clean the smoke and dust accumulated on the heat sink and fan. Additionally, clean the flame sensor at the front end of the laser module and the laser lens using alcohol and non-woven cloth. When cleaning the cameras, please note that only use a small amount of alcohol and slightly squeeze the non-woven cloth dry before wiping to prevent alcohol from seeping into the plastic housing.
¶ Maintenance Frequency
H2D can assess the level of contamination on the printer based on the type and duration of laser tasks, and provide corresponding cleaning and maintenance reminders (this feature is not supported in the factory firmware and the supported versions will be announced later). Please be sure to maintain and clean the laser module as required. Failure to do so may cause damage to the machine and create safety risks.
It is recommended to use a brush to simply clean the debris and dust on the outer surface after each laser task. When the printer pops up a window for cleaning and maintenance, you need to remove the upper cover of the laser module and clean the dust on the fan surface and the heatsink under the fan. Use a quick release tool to remove the air nozzle and wipe the laser lens.
If you find that the heatsink under the fan is particularly dirty, follow the cleaning steps to deep clean it, that is, disassemble the outer shell of the laser module and clean the dust on the heatsink.
¶ Maintenance Video
¶ Related Pages
- H2D Regular cleaning and maintenance recommendations
- Regular maintenance recommendations for 40w laser module
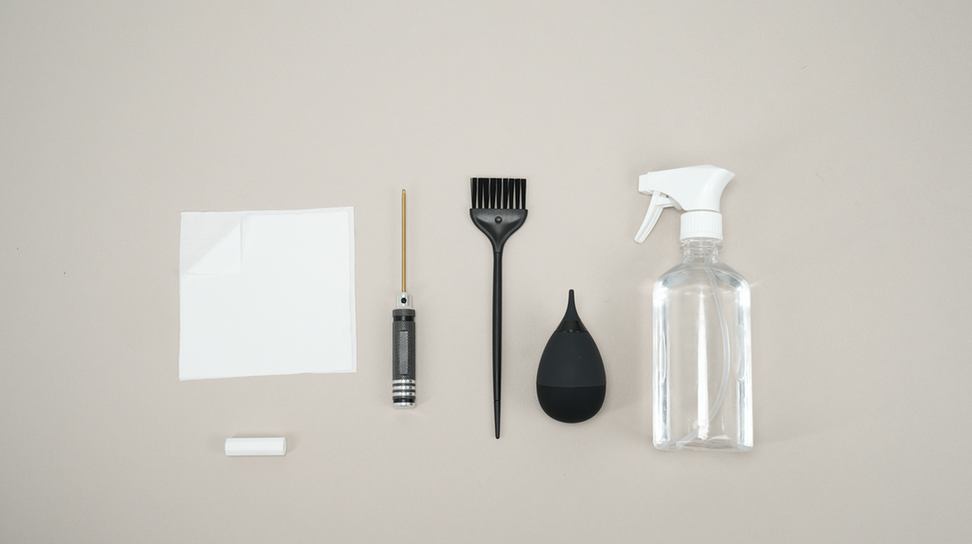
¶ Tools needed
-
H2.0 or H2.5 Allen key
-
Non-woven cloth
-
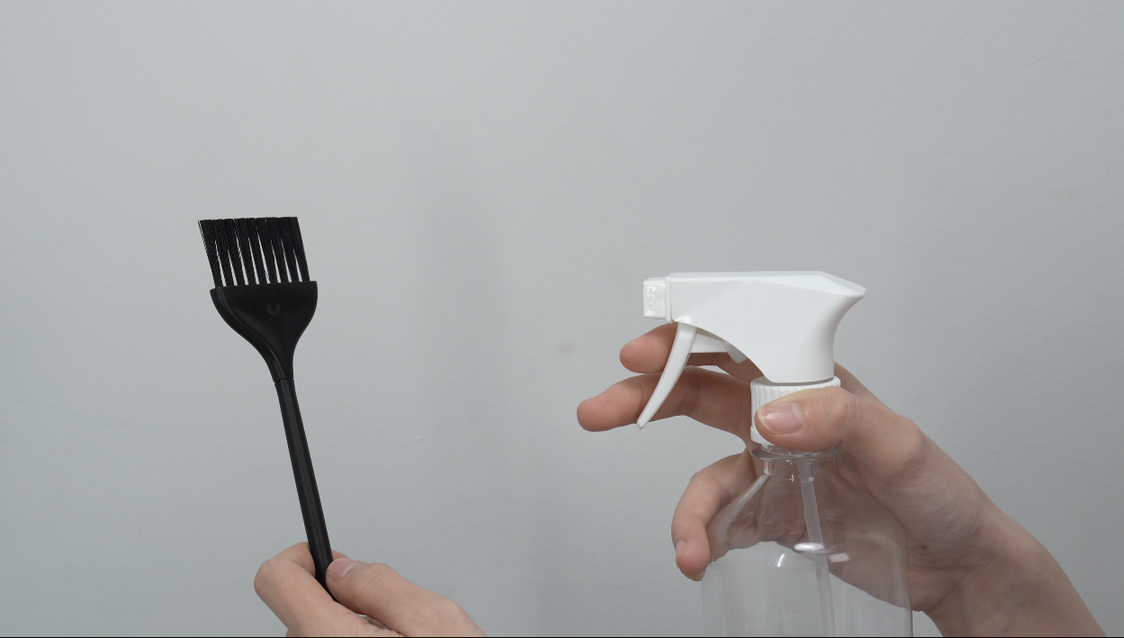
Brush
-
Blower
-
Cleaning Agents
-
The air assist nozzle removal tool (internal model file of the printer)
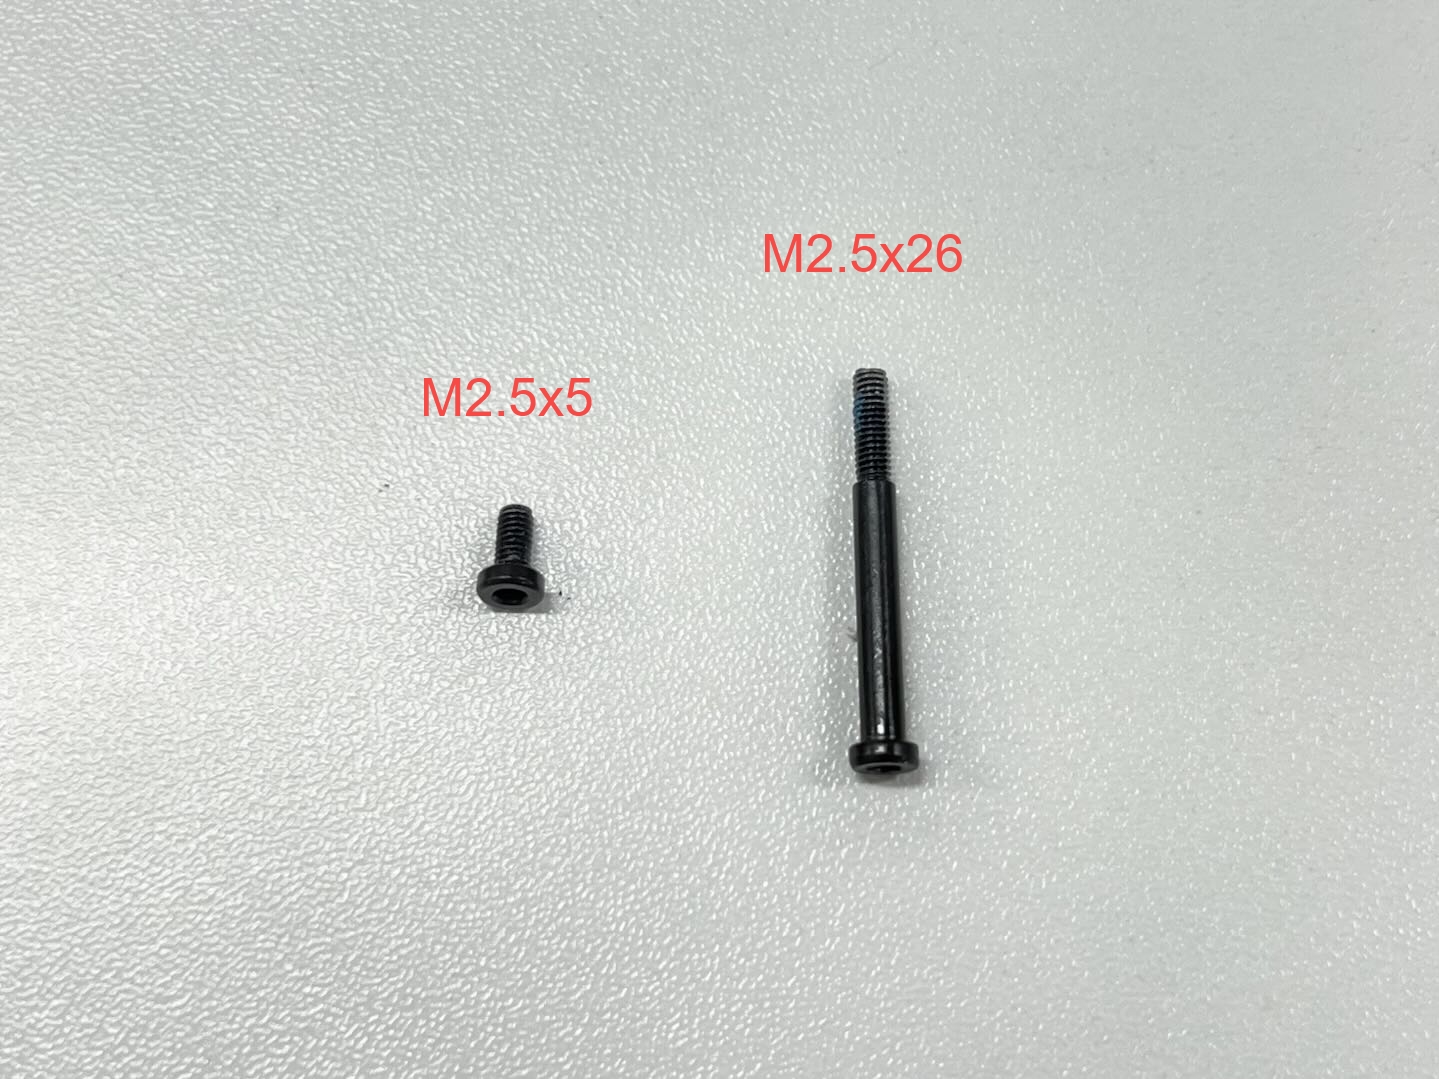
¶ Screw Specifications
- M2.5x5 * 10
- M2.5x26 * 4
¶ Maintenance Steps
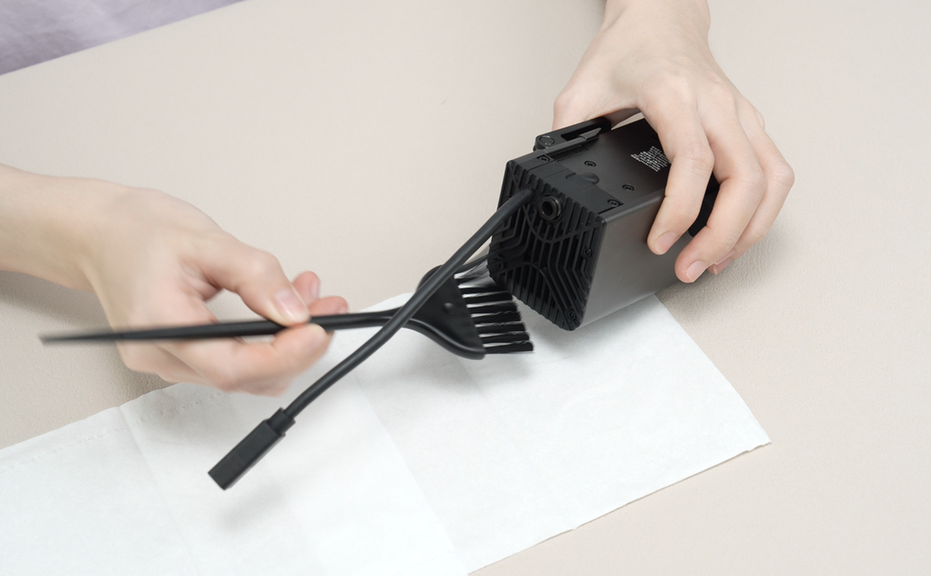
¶ Step1. Clean the outer side of the top cover
Use a brush to clean the dust on the cover from multiple angles to ensure thorough cleaning. If there is a significant amount of dust around the laser module, you can first wipe it with a non-woven cloth dampened with alcohol. This step will also be included in the subsequent cleaning process.
¶ Step2. Remove the top cover of the laser module
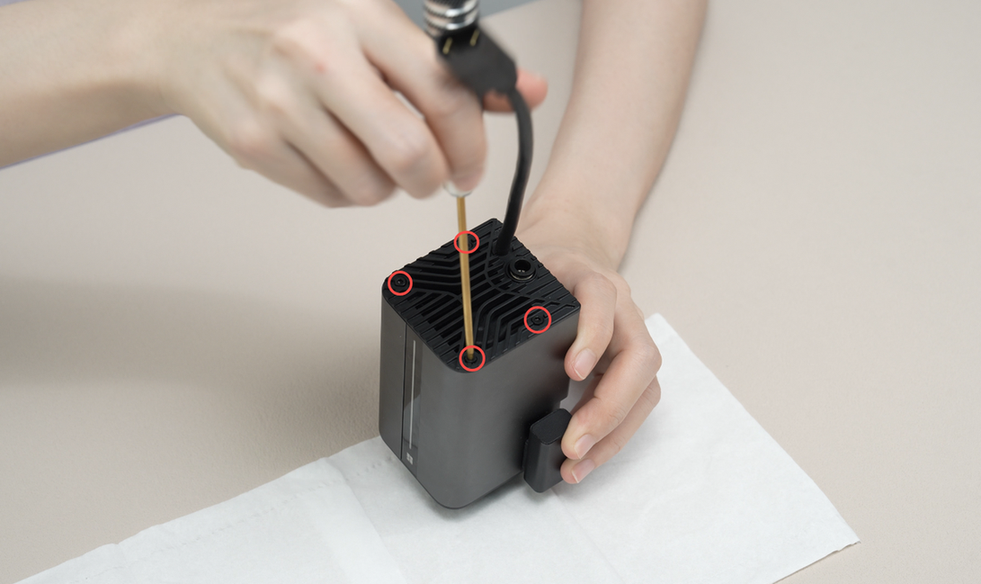
Remove a total of six screws (M2.5x26 * 2, M2.5x5 * 4) from the front and side of the cover, then take off the cover.
 |
 |
 |
¶ Step3. Clean the fan
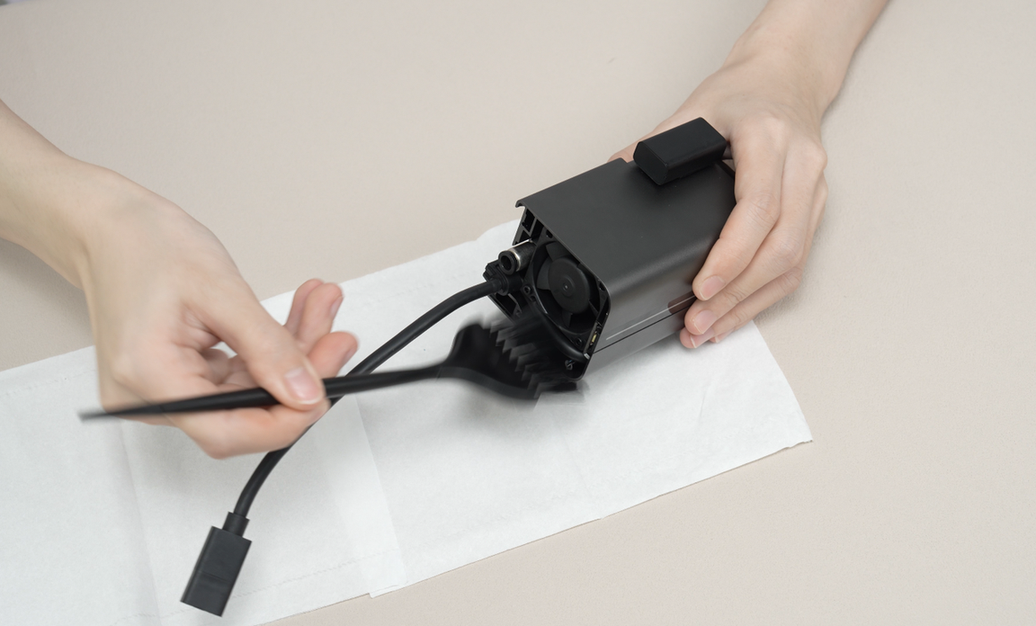
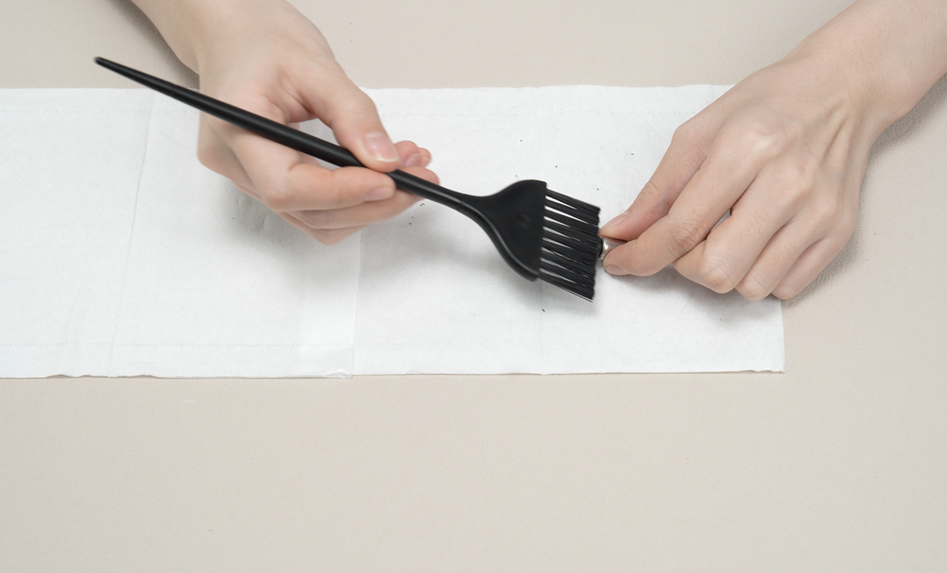
Unfasten the buckle of the connector cable and loosen the connector cable. Then use a brush to clean the dust on the fan and the connector cable. When cleaning the fan, rotate the fan while cleaning to ensure that all the dust on each fan blade is removed. After removing large dust particles, you can use alcohol to clean the brush, ensuring a good cleaning effect.
 |
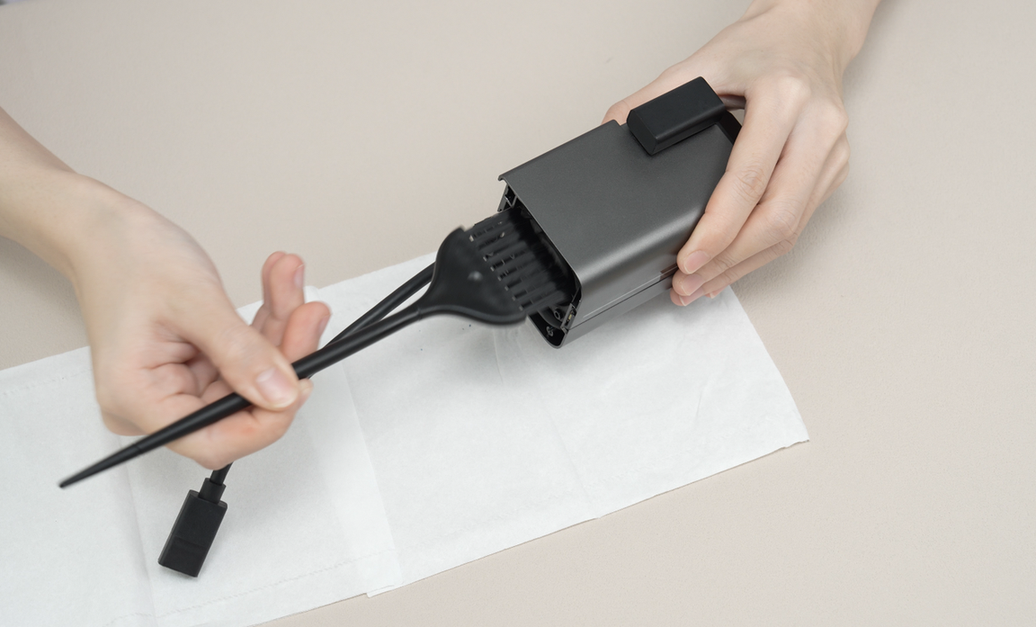 |
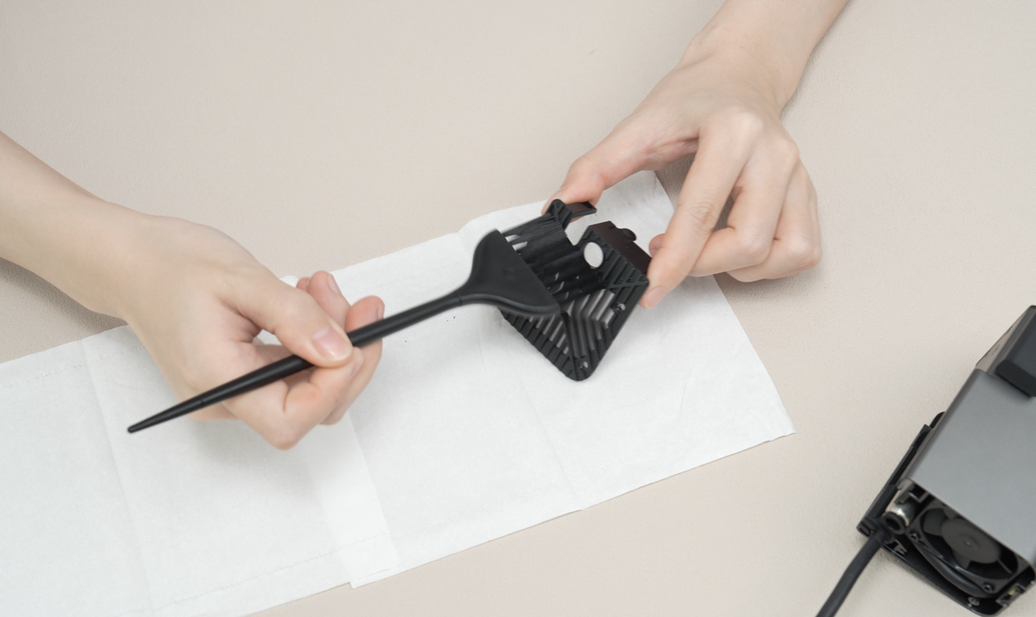
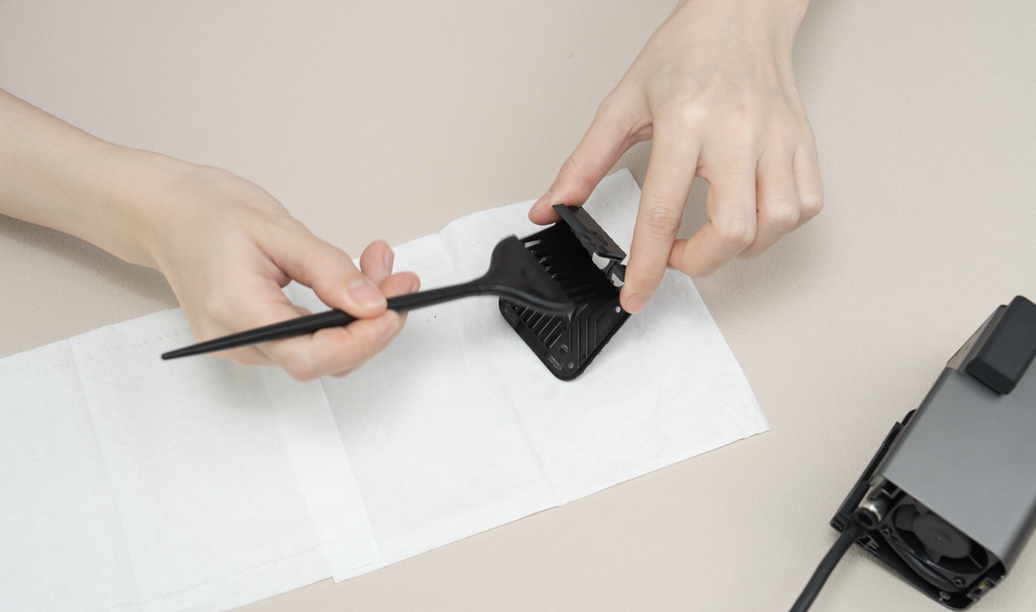
¶ Step4. Clean the top cover of the laser module
Clean the removed cover of the laser module again, removing any remaining dust in the crevices of the cover. Then, flip the cover over and clean the dust inside.
 |
 |
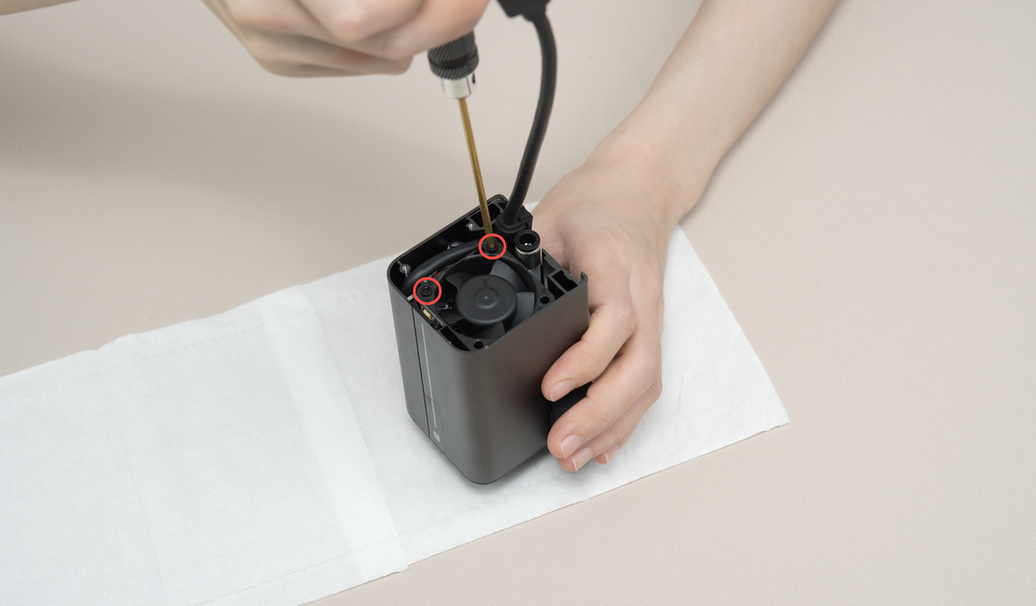
¶ Step5. Clean the back of the fan
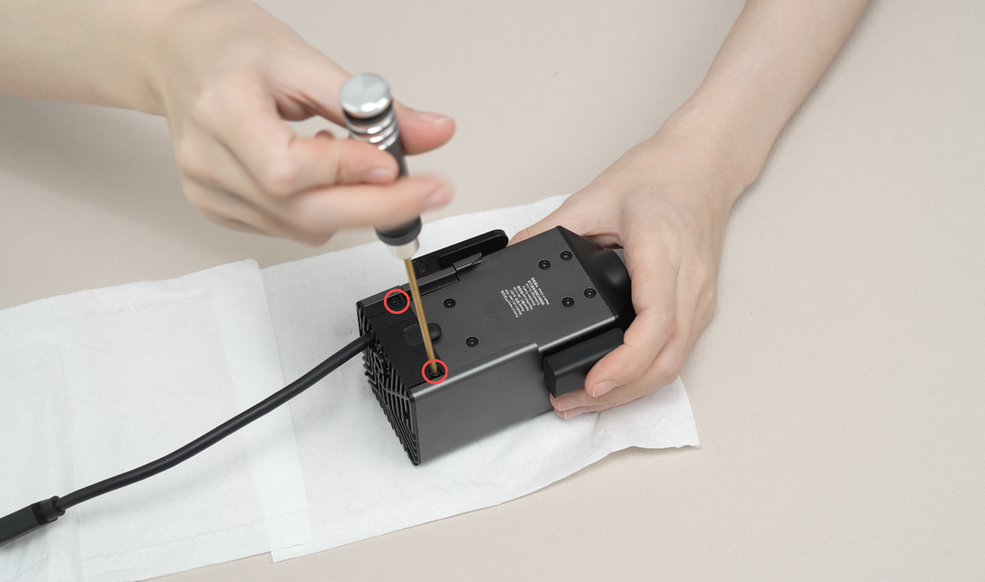
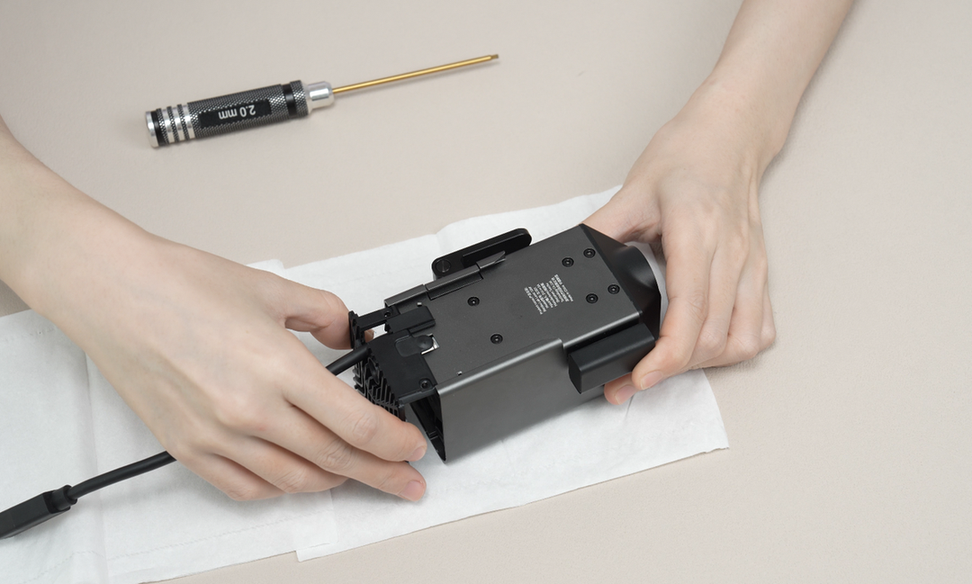
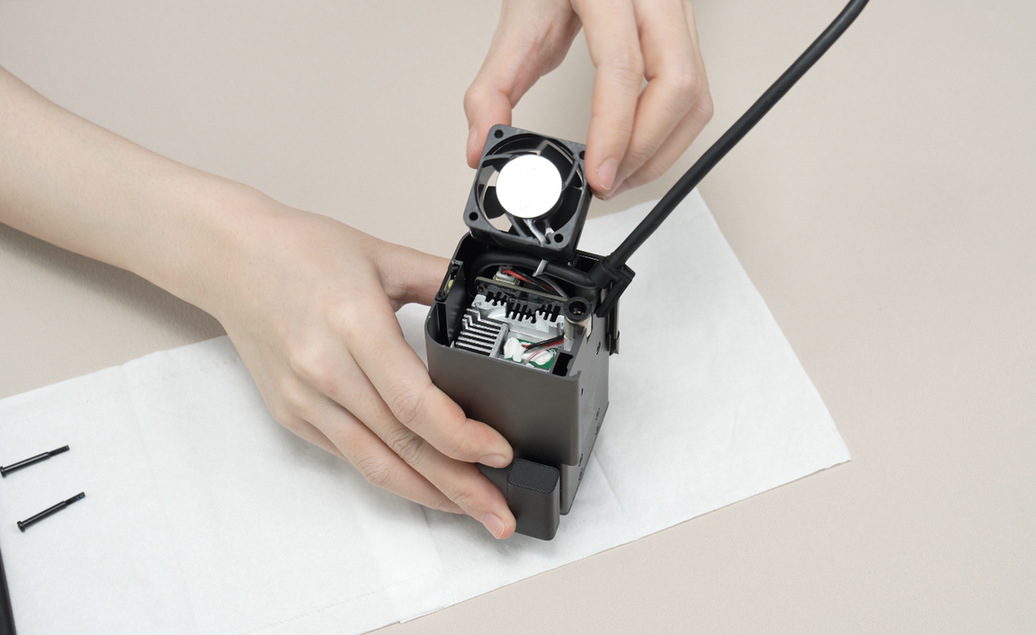
Unscrew the two fixed screws (M2.5x26) on the fan and flip the fan over. (If the surface of the heat sink fins appears clean after flipping the fan, you can skip the subsequent steps of disassembling the laser module housing and cleaning the heat sink fins, and proceed directly to cleaning the laser module housing.)
 |
 |
Clean the dust on the back of the fan with a brush, then clean the dust on the surface of the heat sink fins.
 |
 |
After cleaning, reinstall the fan back to its original position.
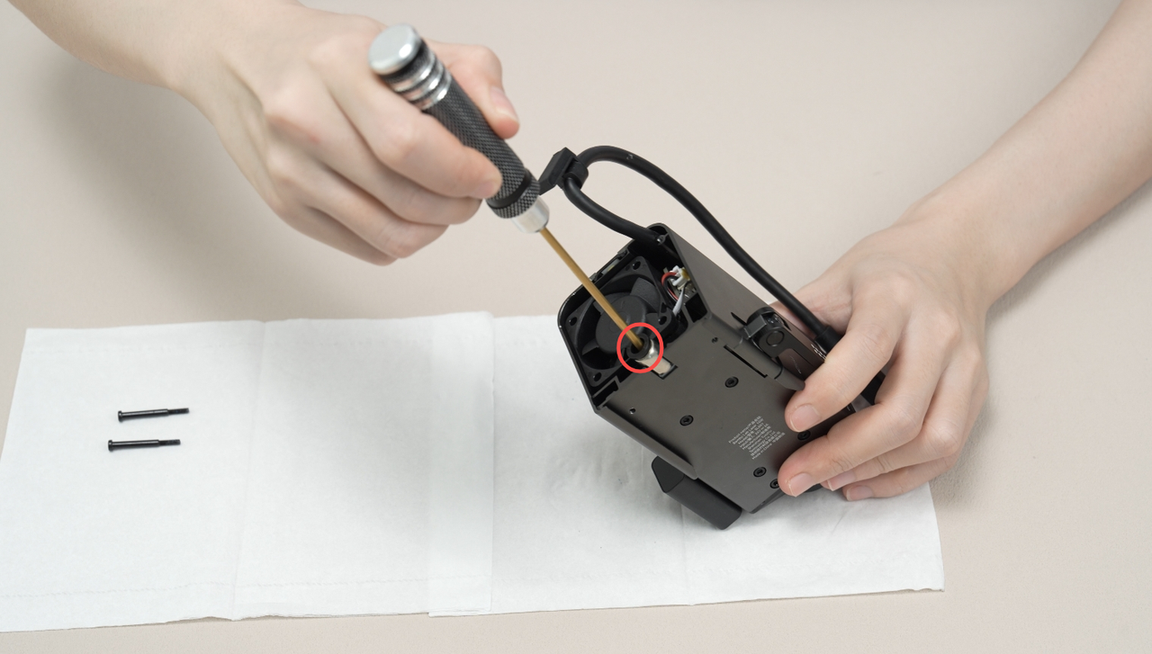
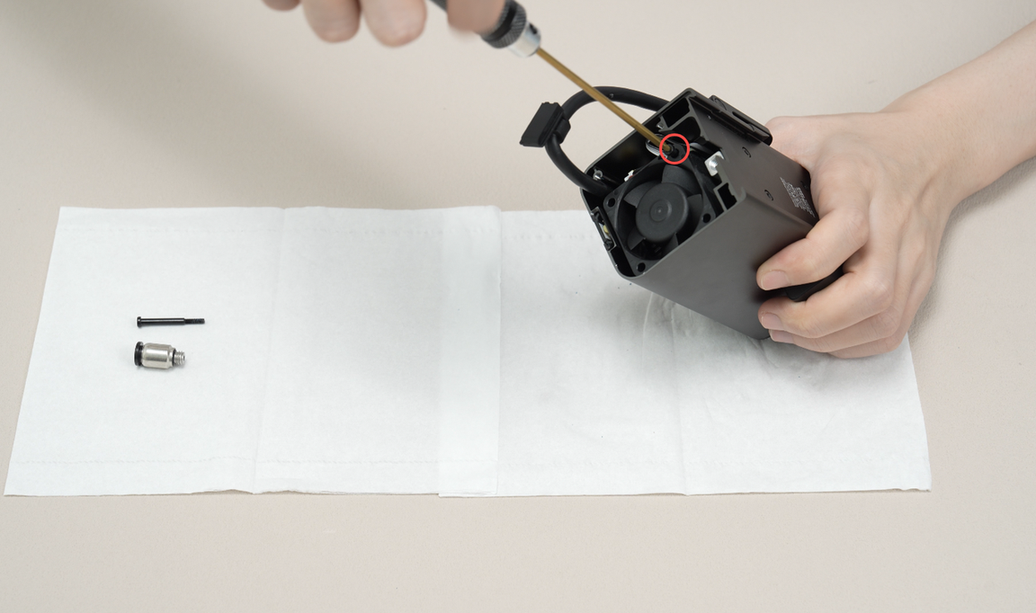
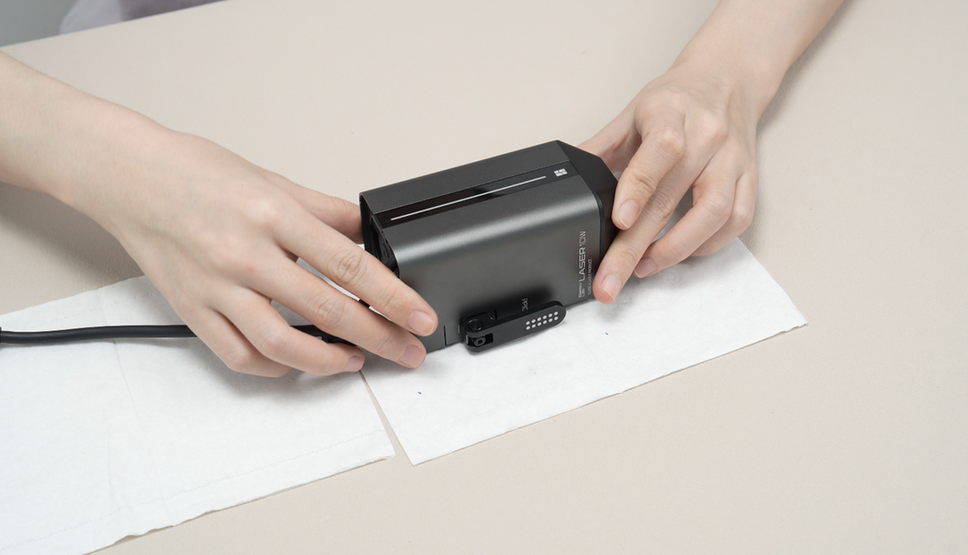
¶ Step6. Remove the laser module housing
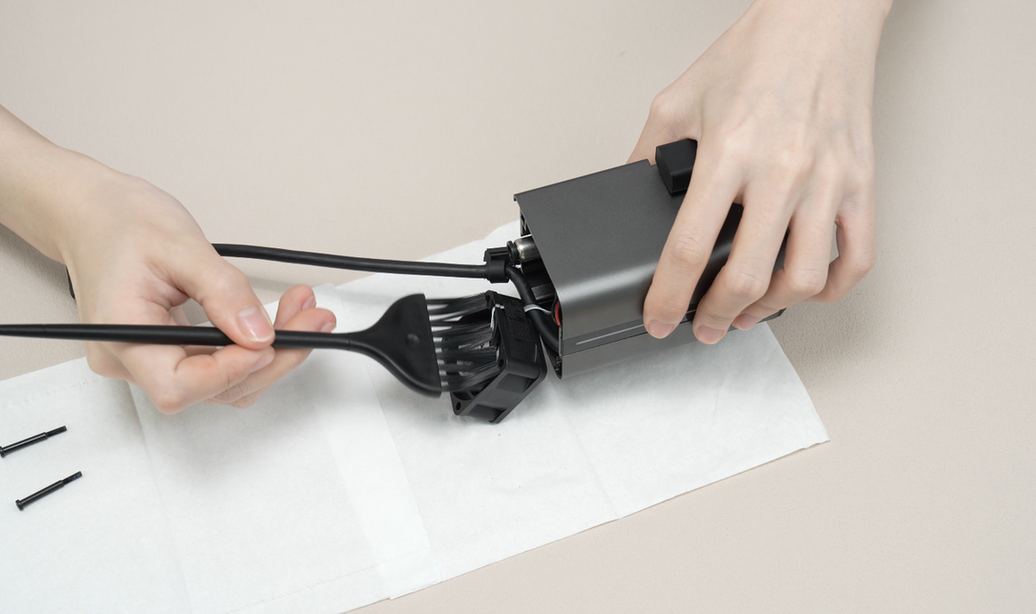
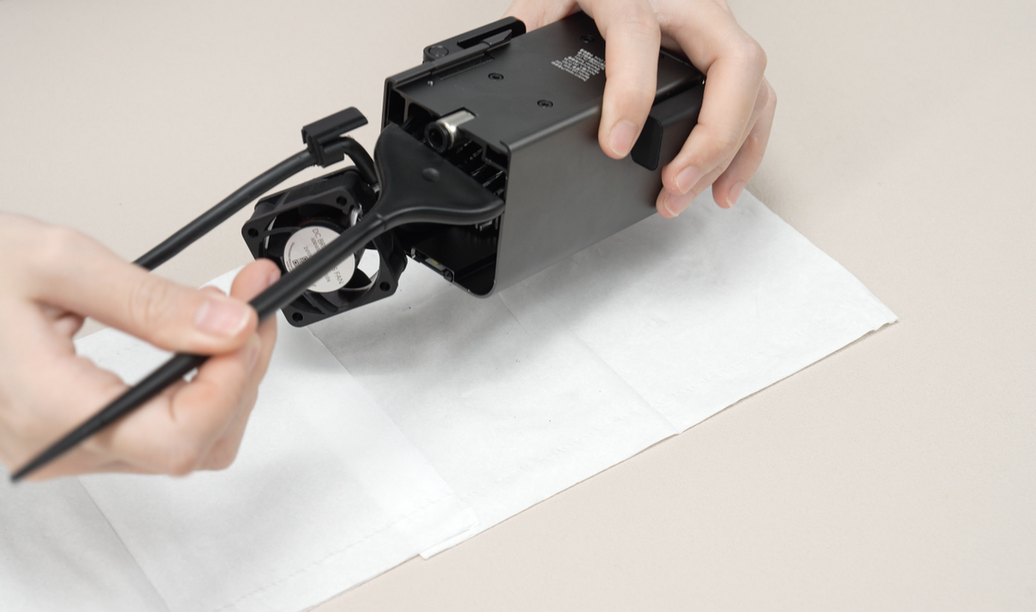
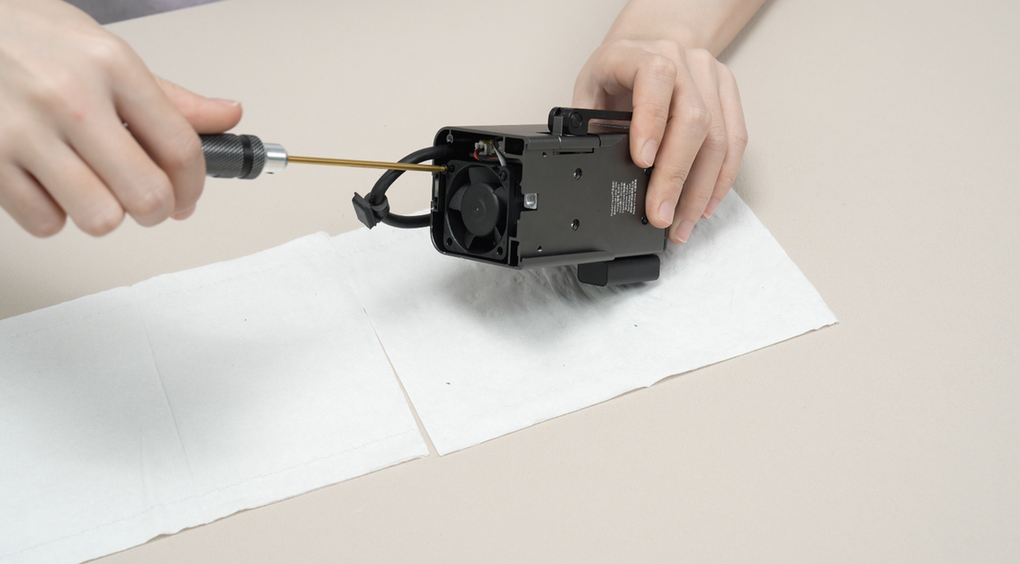
Use an H2.0 Allen key to remove the air assist tube coupler. (For some 10W laser modules, the air assist tube coupler requires an H2.5 Allen key for removal. Two versions are randomly shipped, please refer to the machine you receive for specific details)
Next, tighten one of the fixed screws of the fan. This step is to prevent the fan from coming loose and making the laser module housing difficult to be removed, so it is not necessary to tighten all the fixed screws.
 |
 |
 |
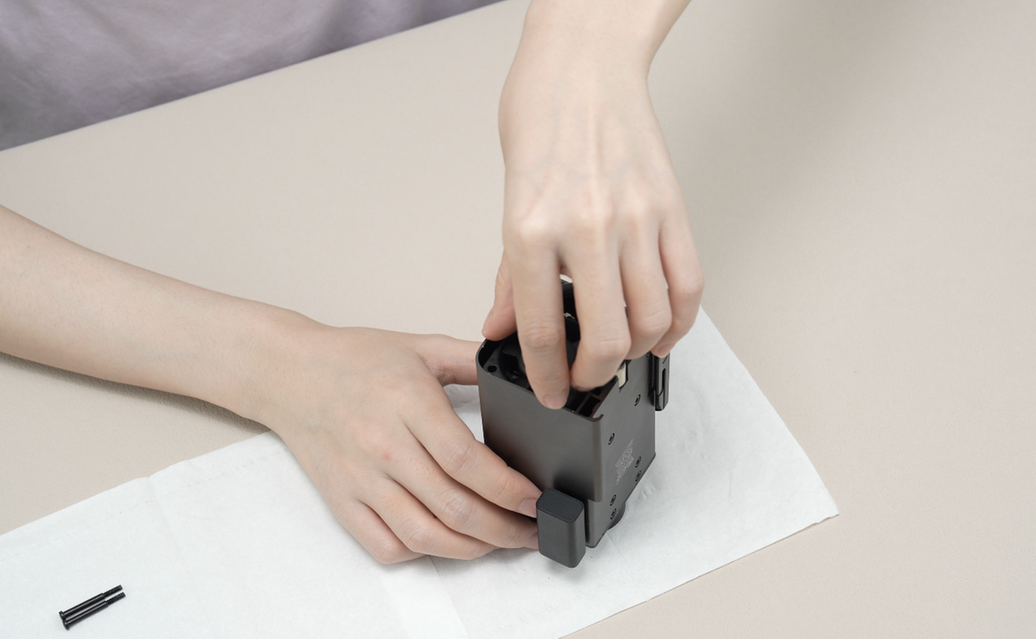
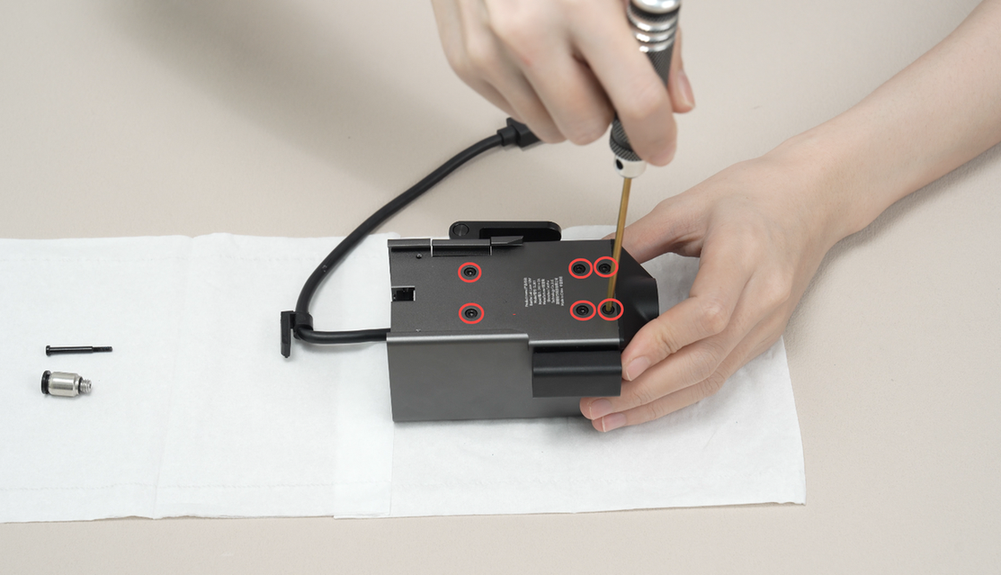
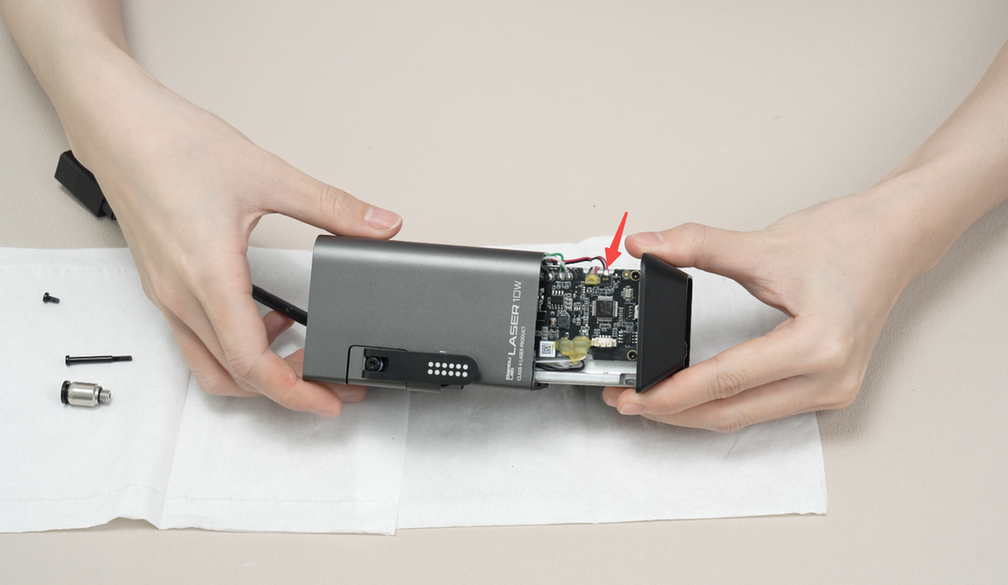
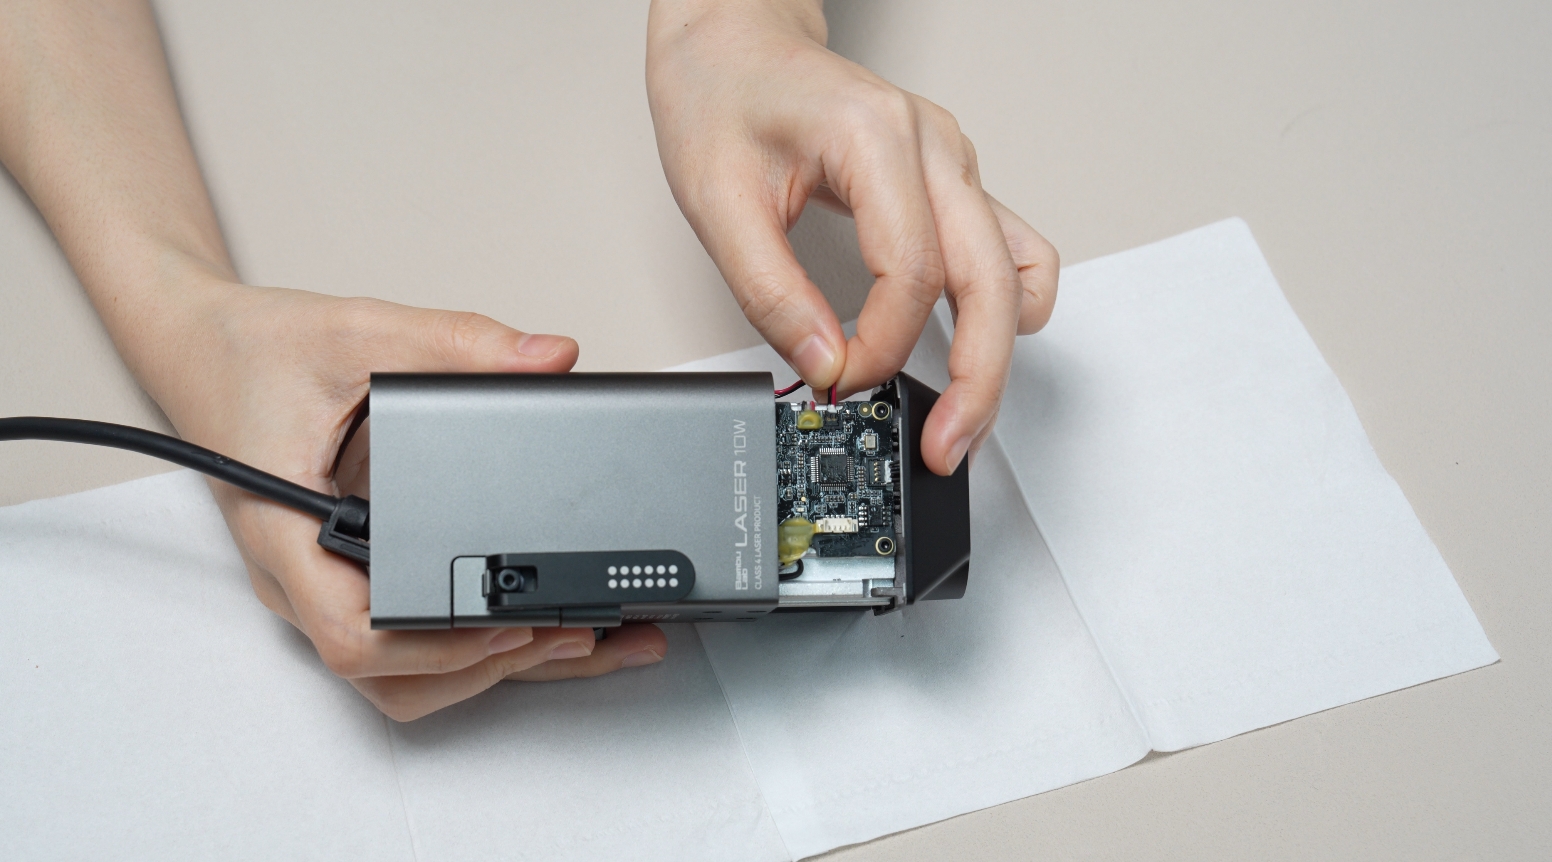
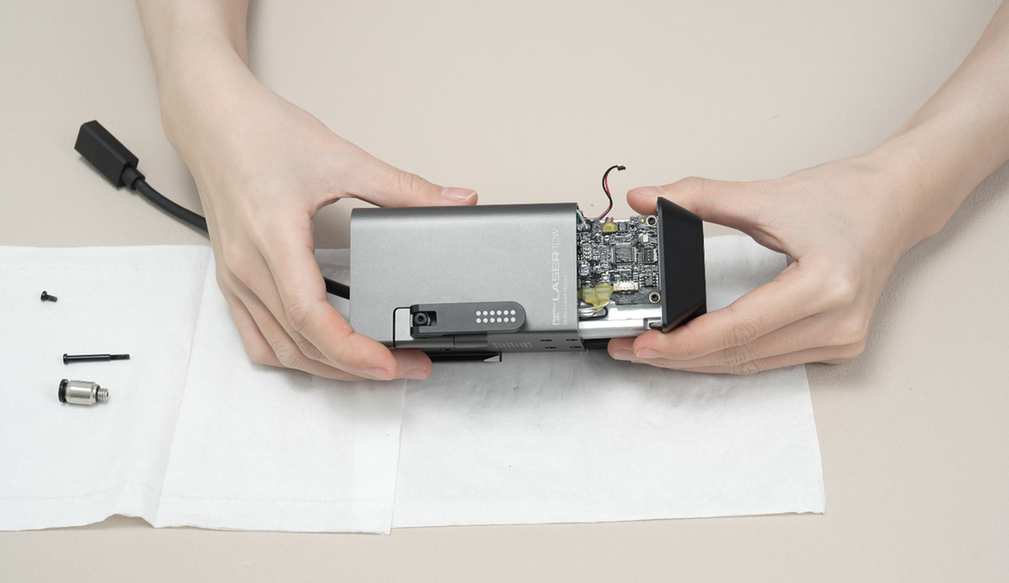
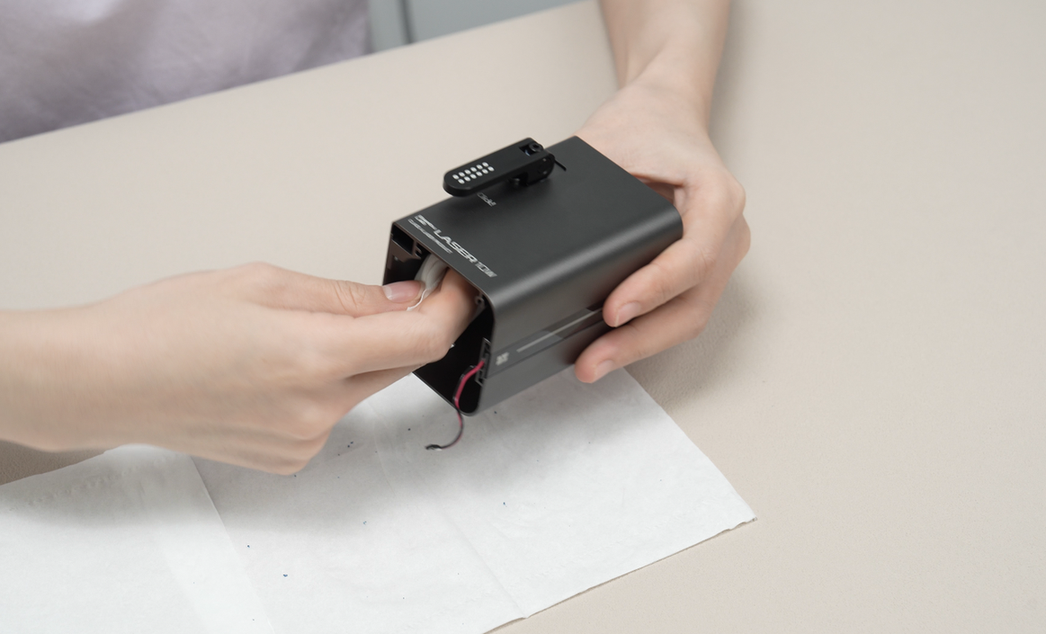
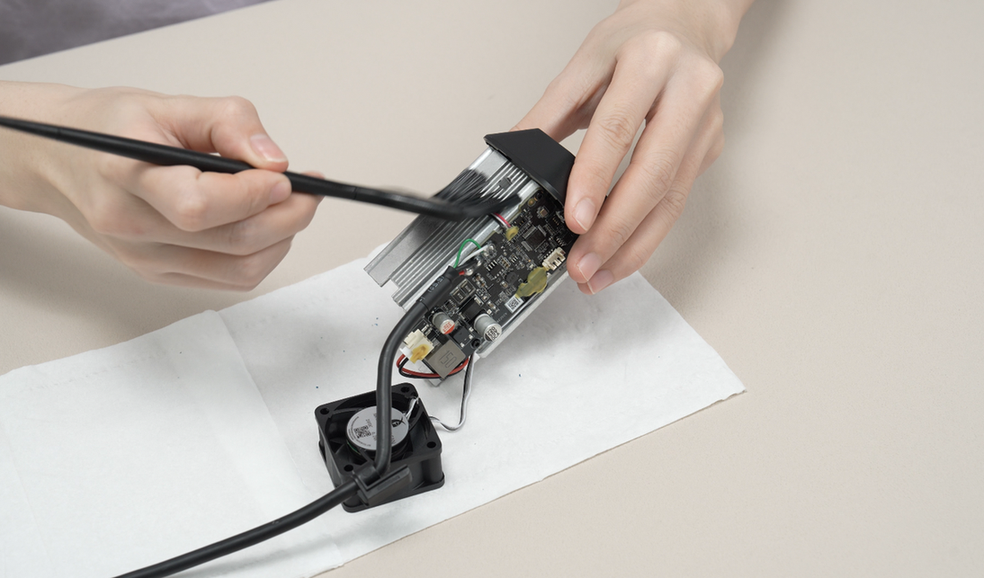
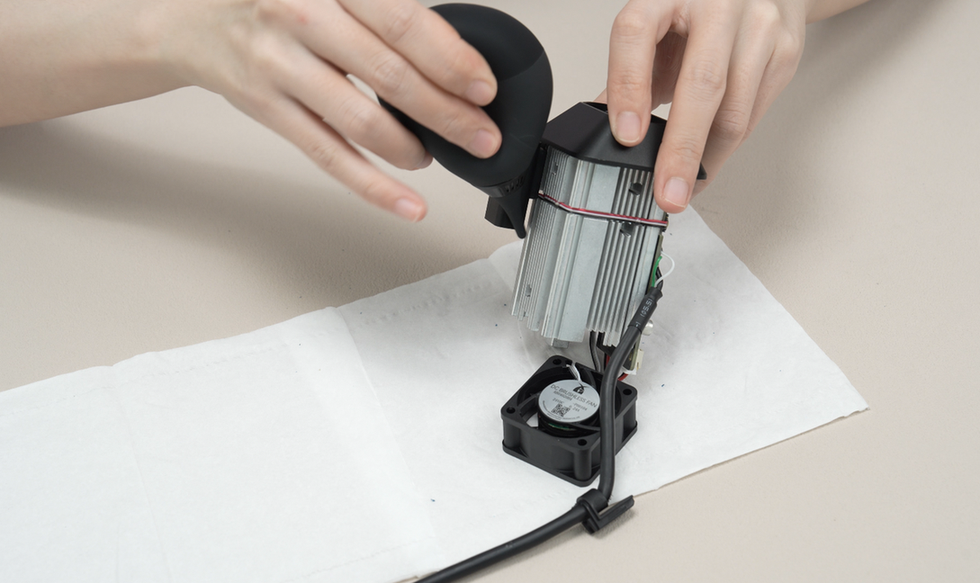
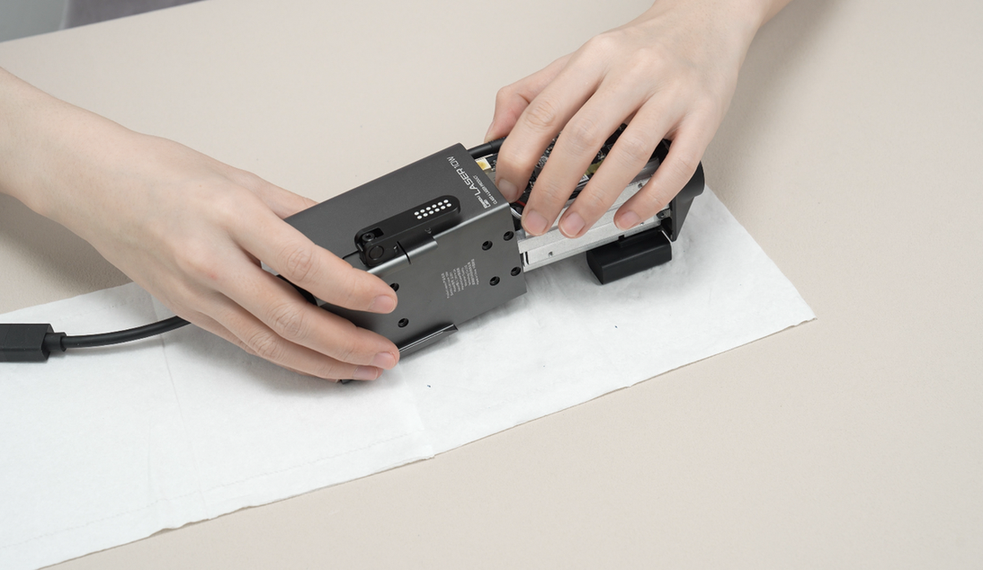
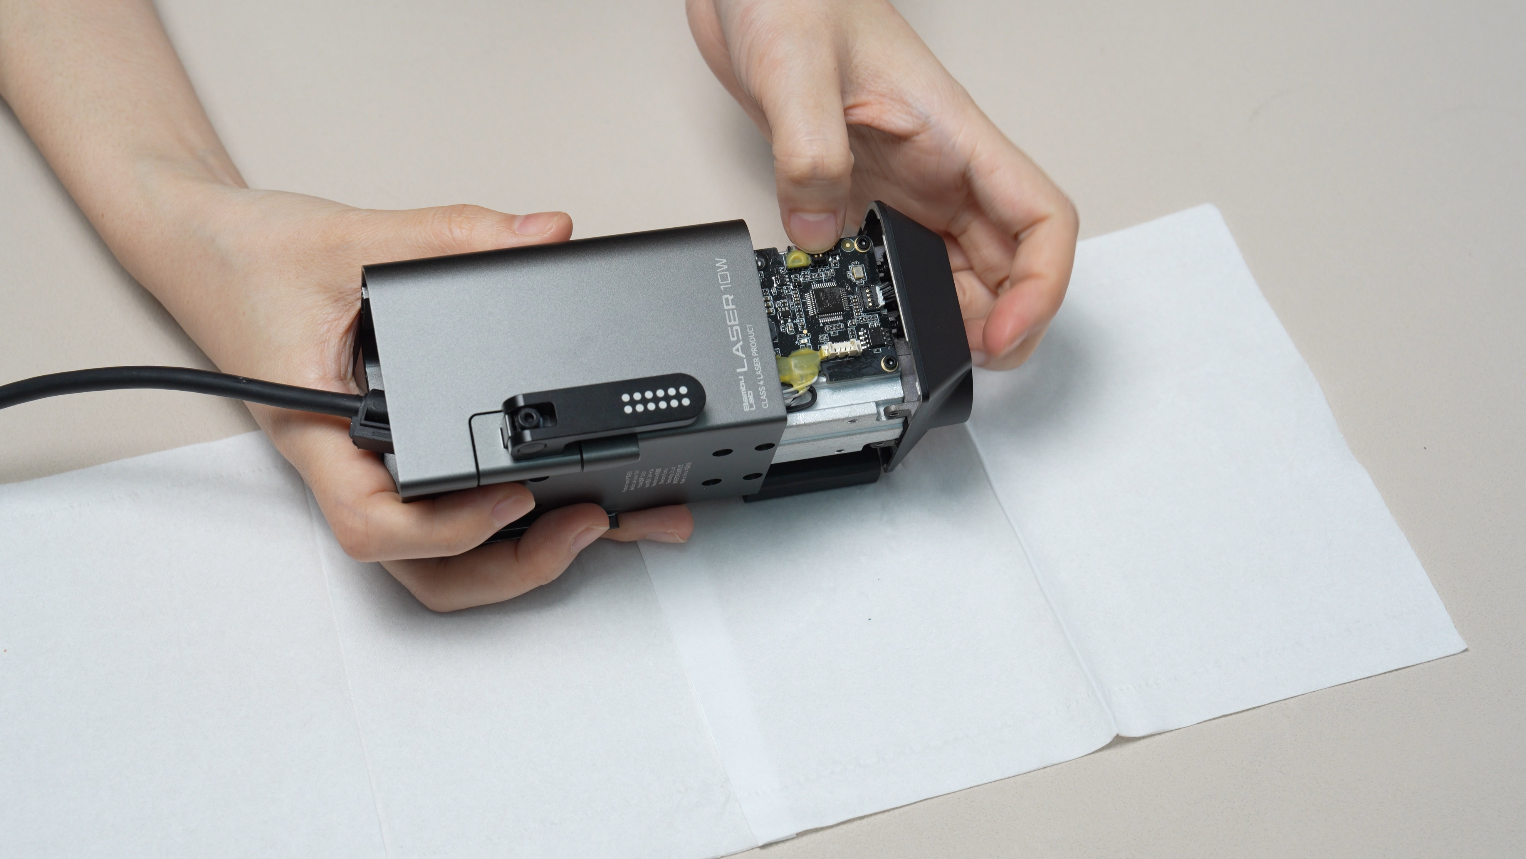
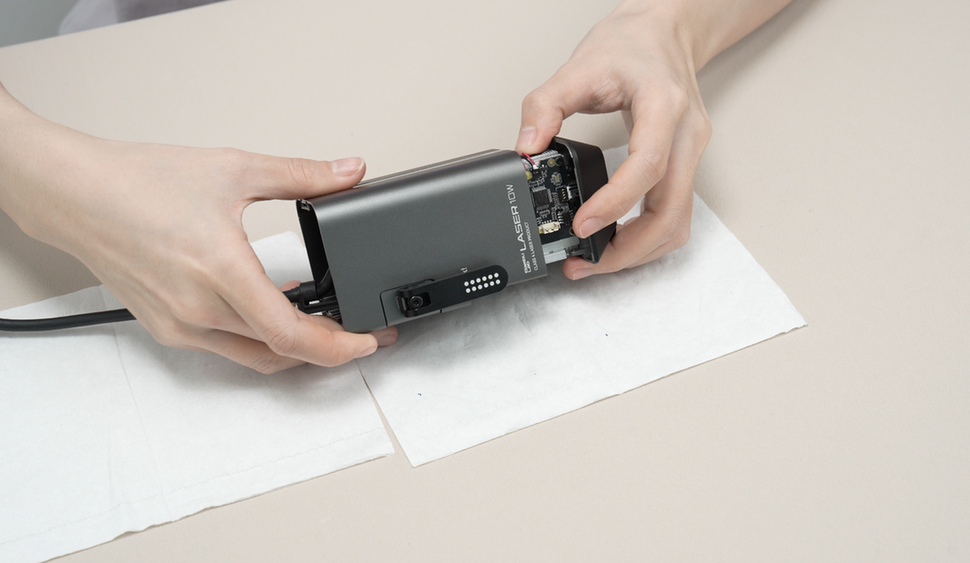
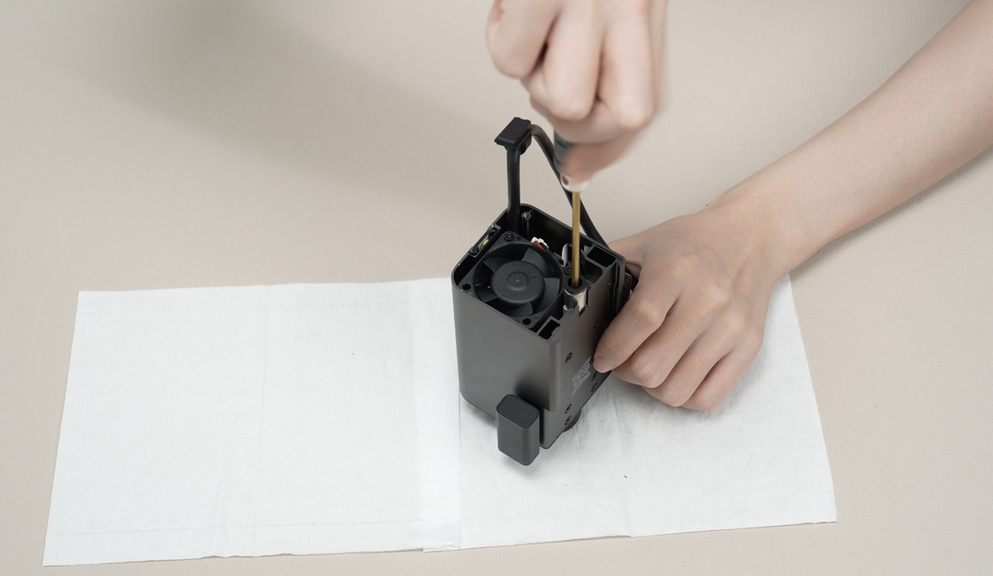
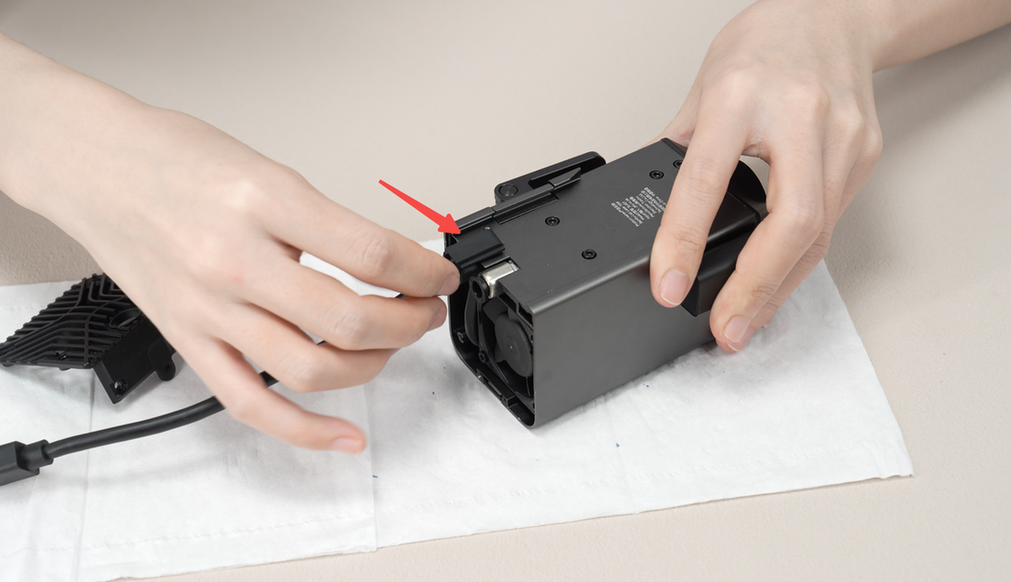
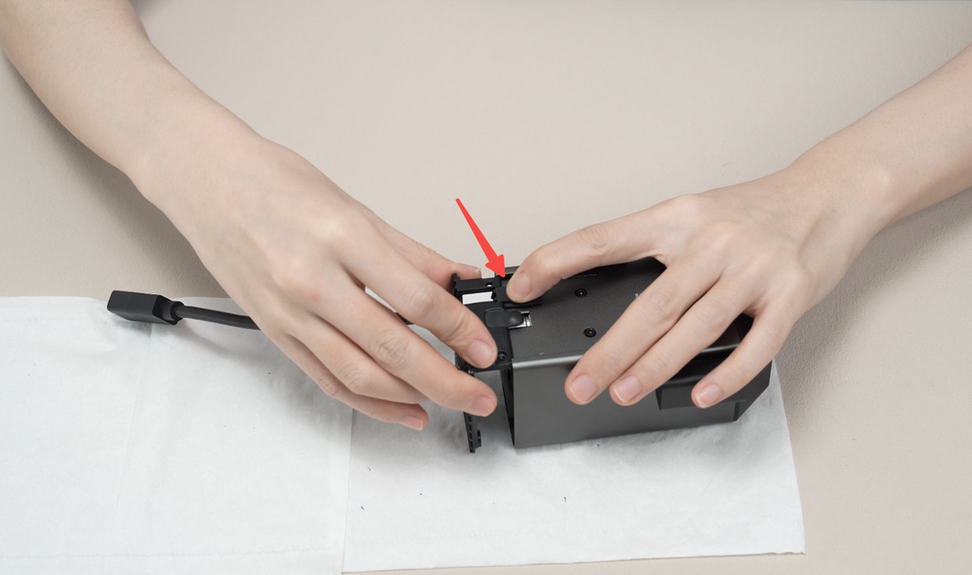
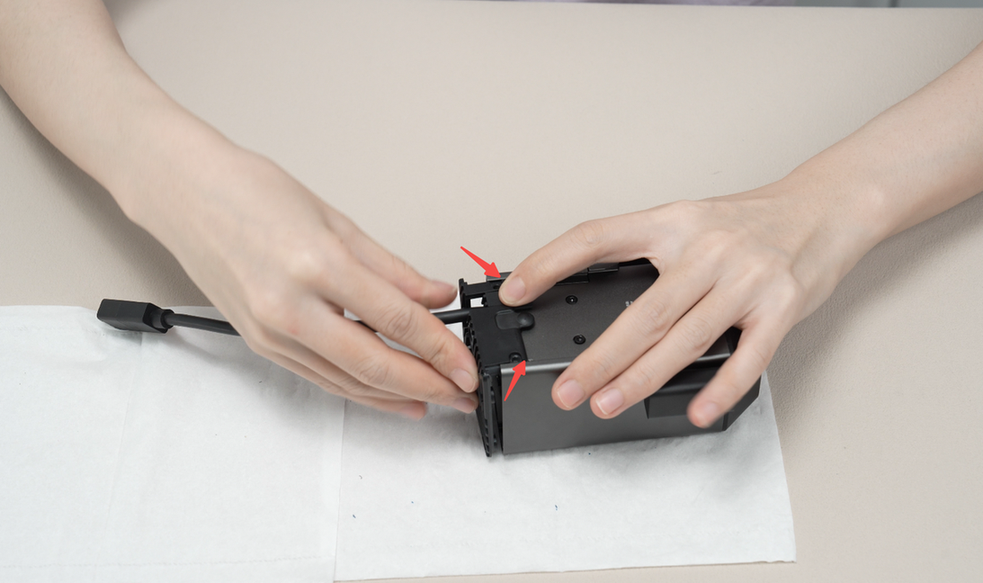
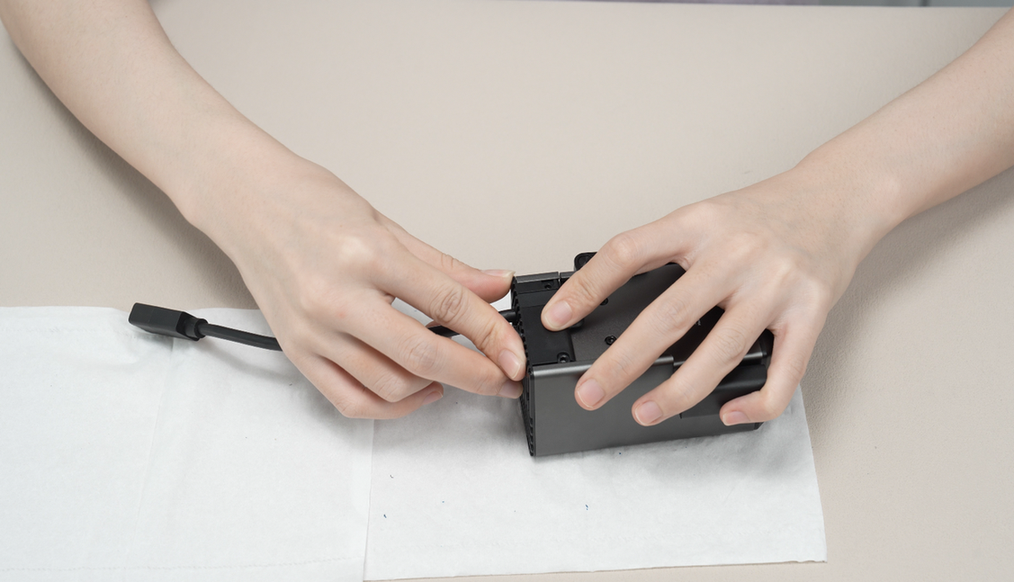
Unscrew the six screws (M2.5x5) on the side of the laser module, then gently push the housing of the laser module outward for a short distance to prevent damaging the cable connector. Once the first cable connector is exposed, disconnect this cable to smoothly remove the housing.
For some versions of the laser module, the cable connector at this point is fixed with glue. When removing it, grip the base of the connector with your hand and lift it upwards to unlock the connector. Avoid applying force horizontally to prevent damaging the connector. After removal, the glue on the connector can be cleaned off to facilitate future installations.
For another version of the laser module, the cable connector is not glued, the removal method is the same.
 |
 |
 |
 |
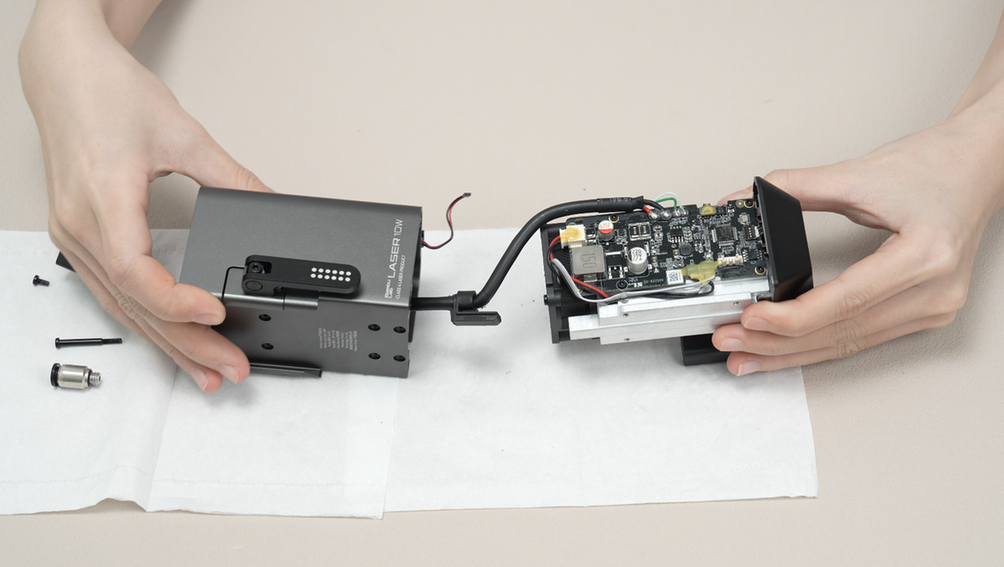 |
After successfully removing the housing, re-unscrew the screw (M2.5x26) on the fan.

¶ Step7. Clean the laser module housing
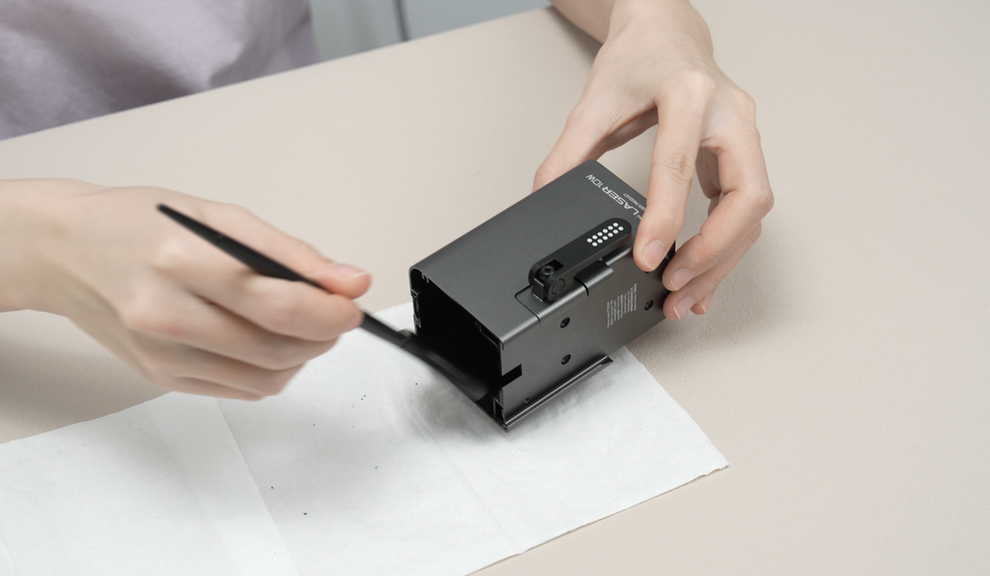
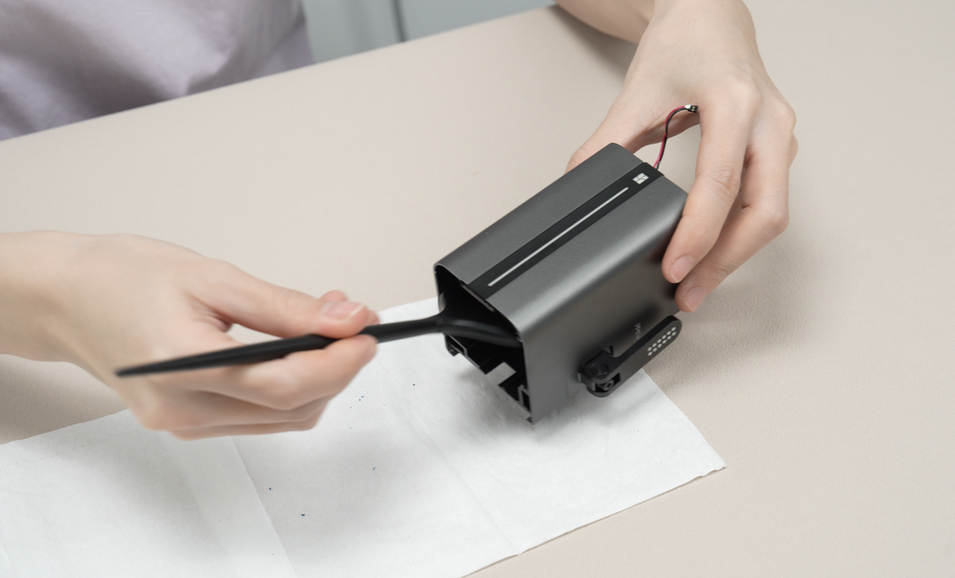
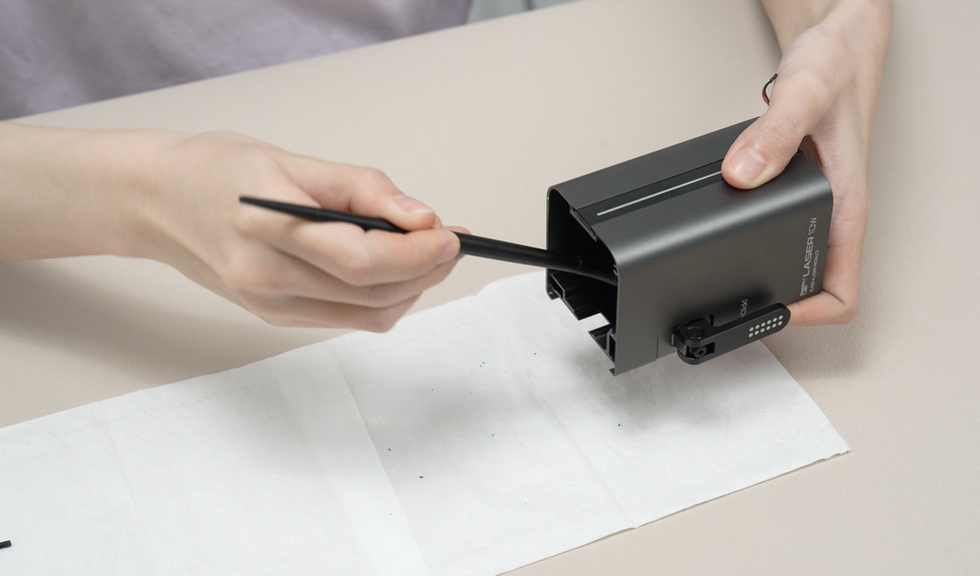
Use a brush to clean the inner walls of the housing on all four sides, removing any surface dust.
 |
 |
 |
 |
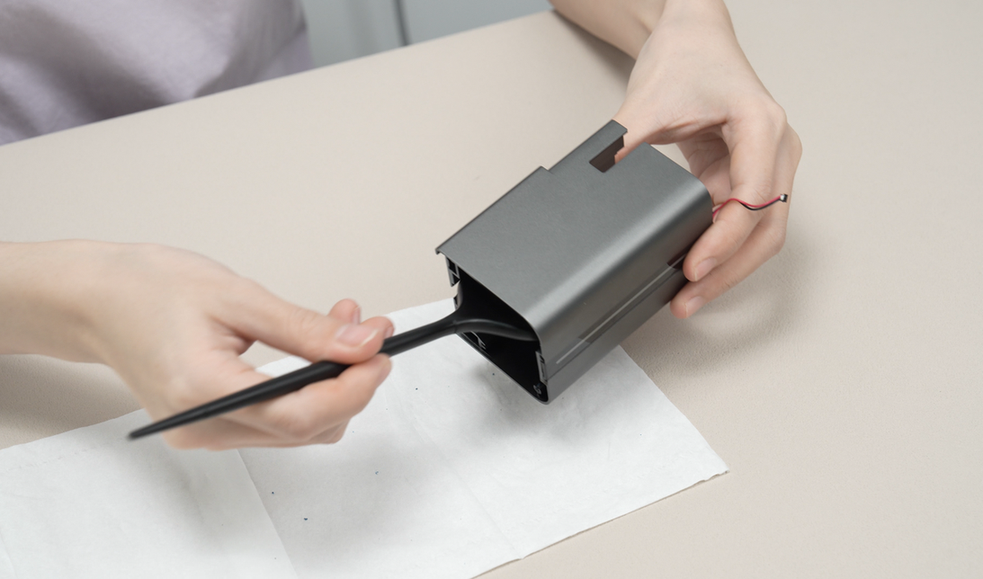
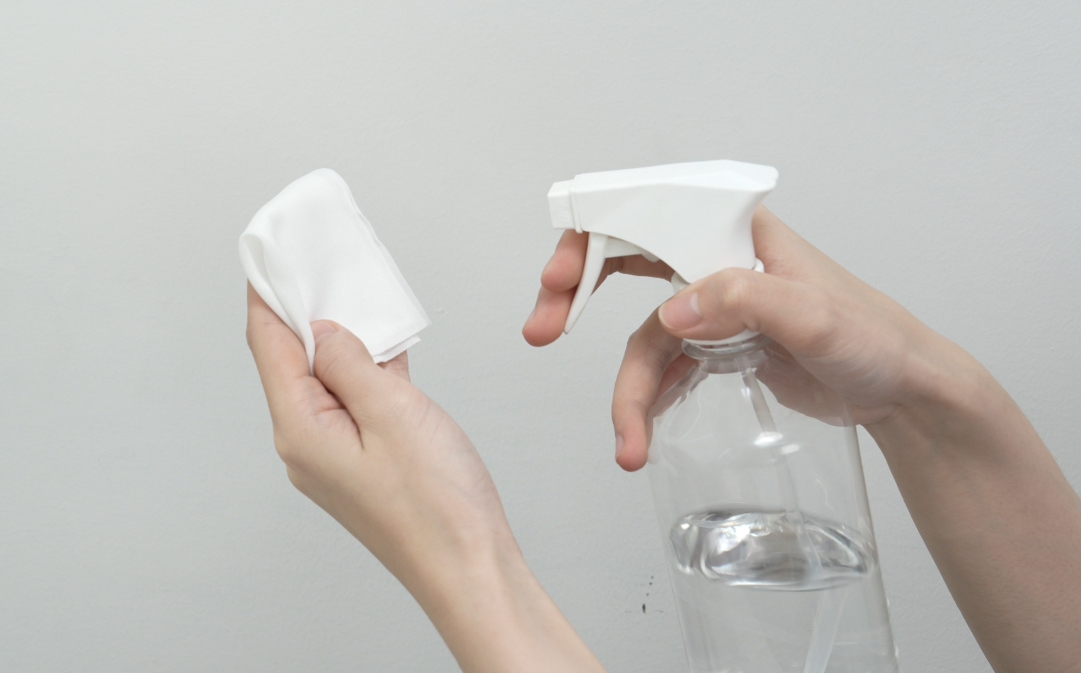
Spray alcohol on the brush, then use a non-woven cloth to wipe the brush clean. Use the cleaned brush to once again clean the inner walls of the housing on all four sides.
 |
 |
 |
 |
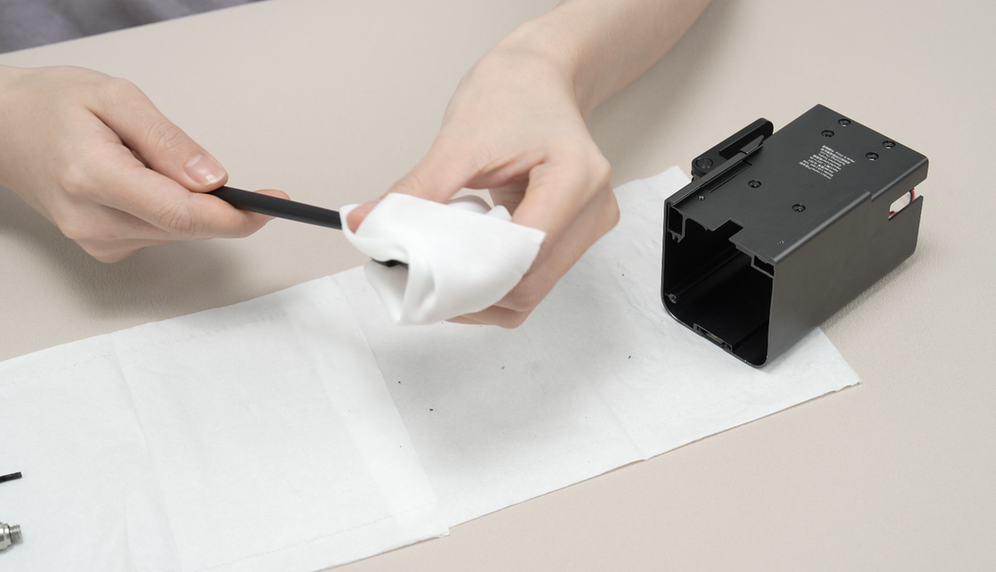
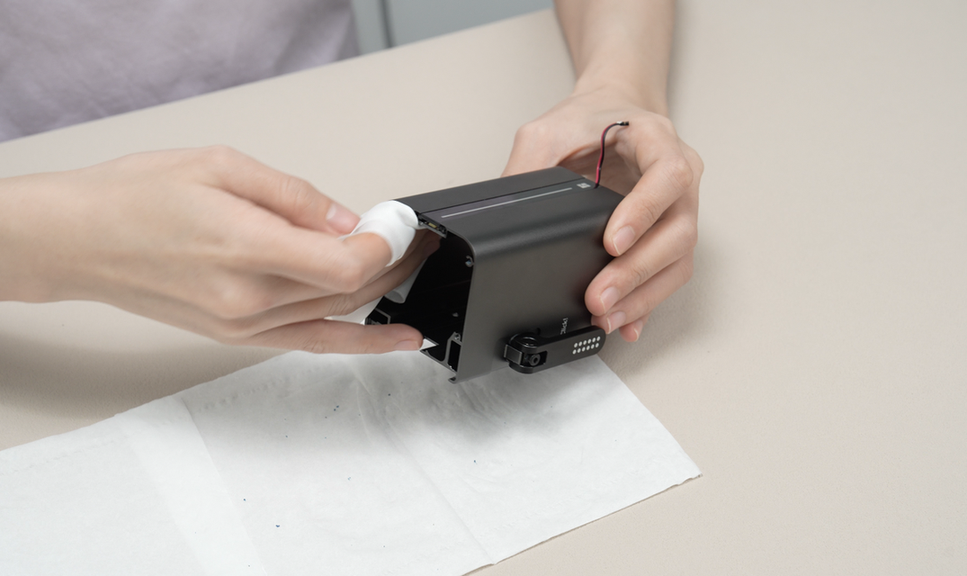
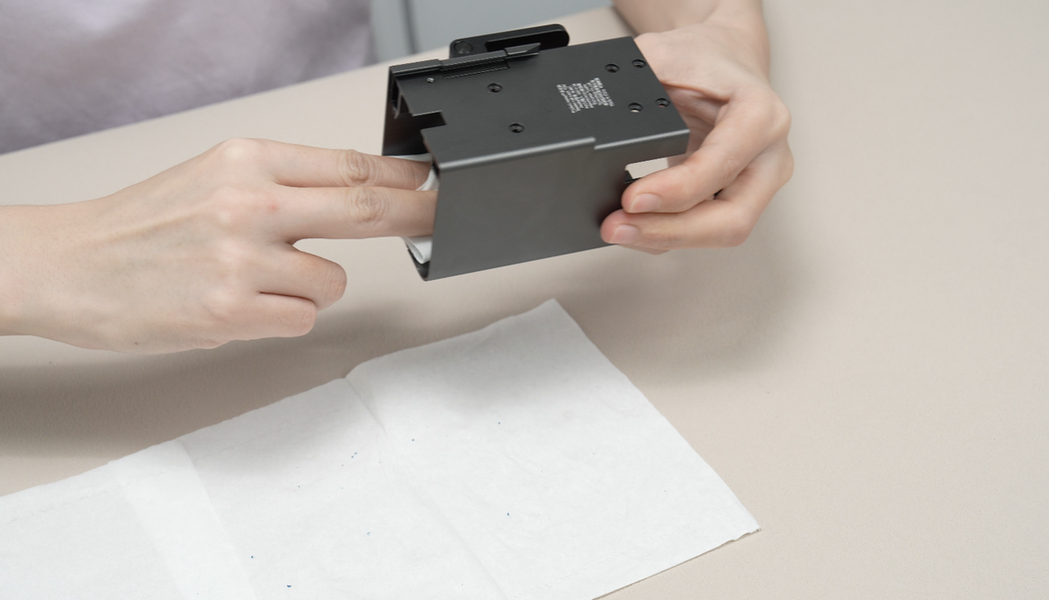
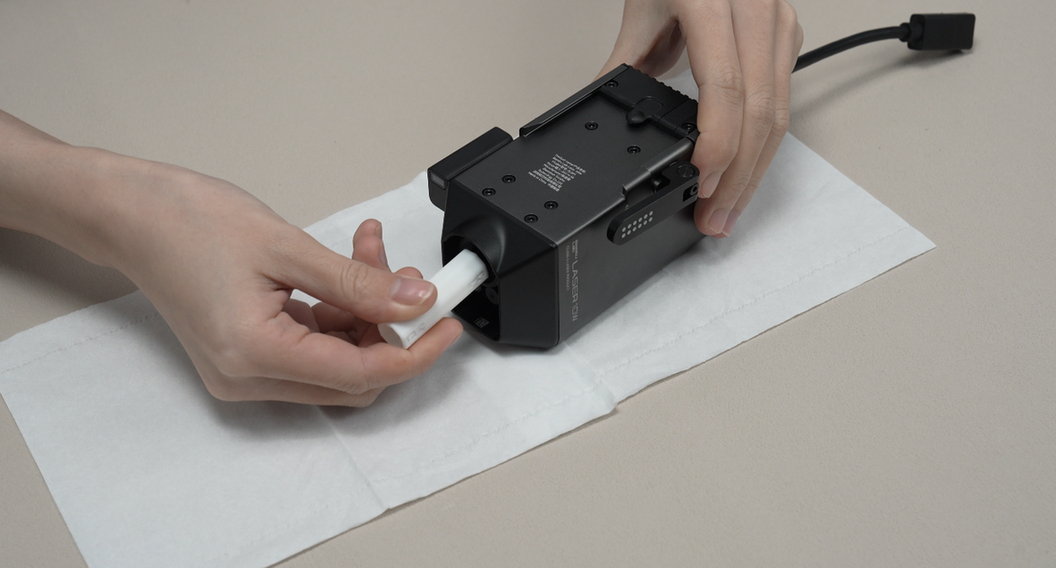
Finally, spray alcohol on the non-woven cloth, use tweezers to hold the cloth and insert it into the housing to wipe, thoroughly cleaning the inner walls of the housing on all four sides.
 |
 |
 |
 |
¶ Step8. Clean the heat sink fins of the laser module
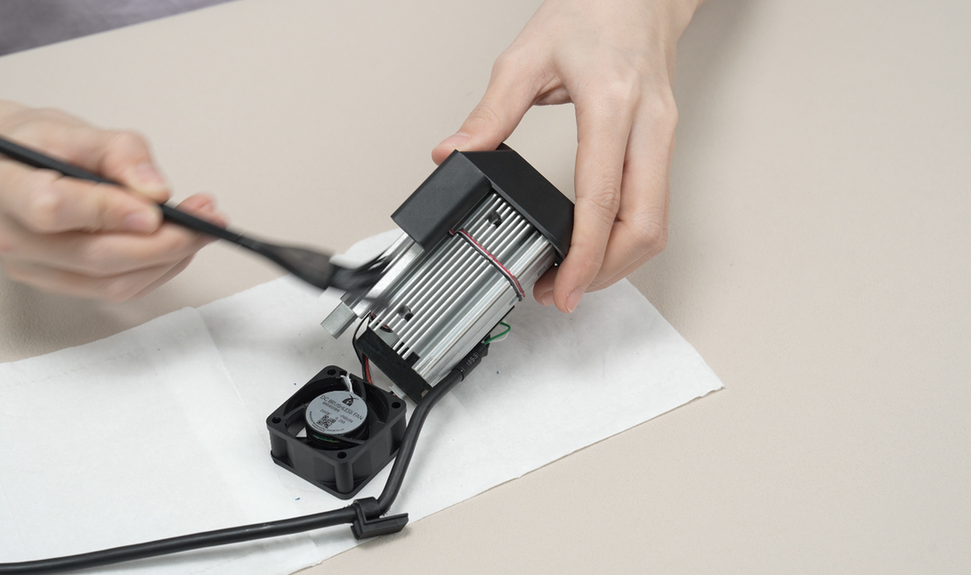
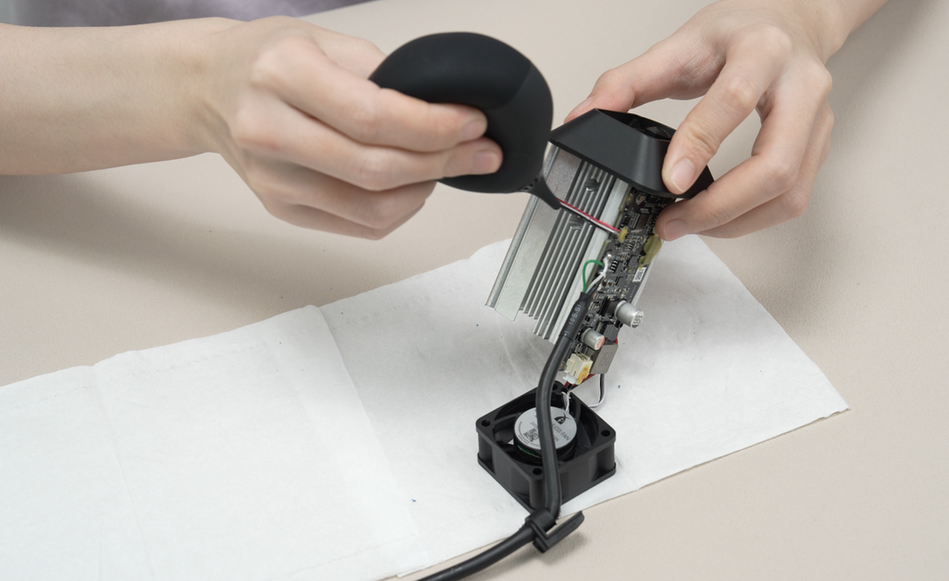
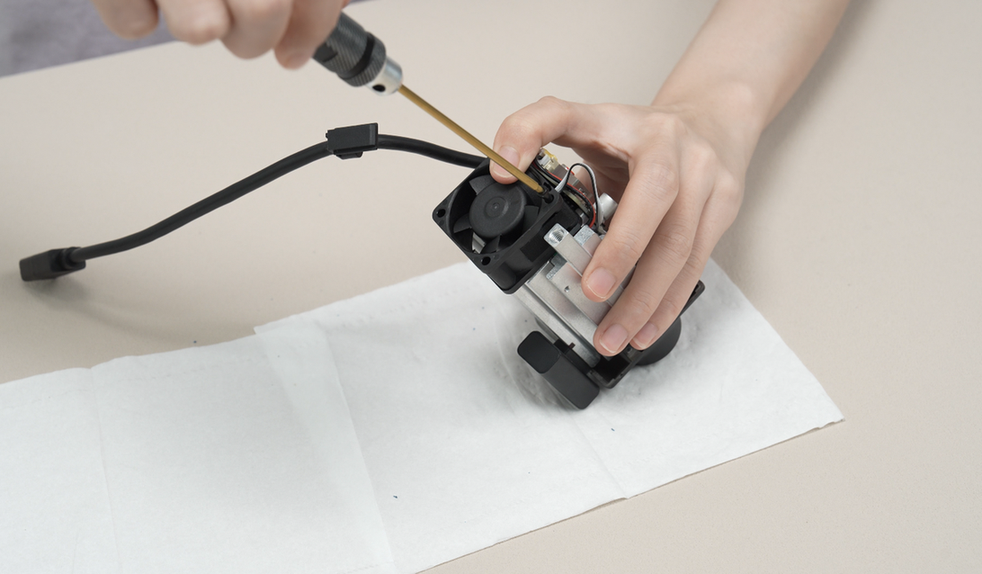
Use a brush to clean the dust on the surface of the heat sink fins, then use a blower to blow out the dust inside the heat sink.
 |
 |
 |
 |
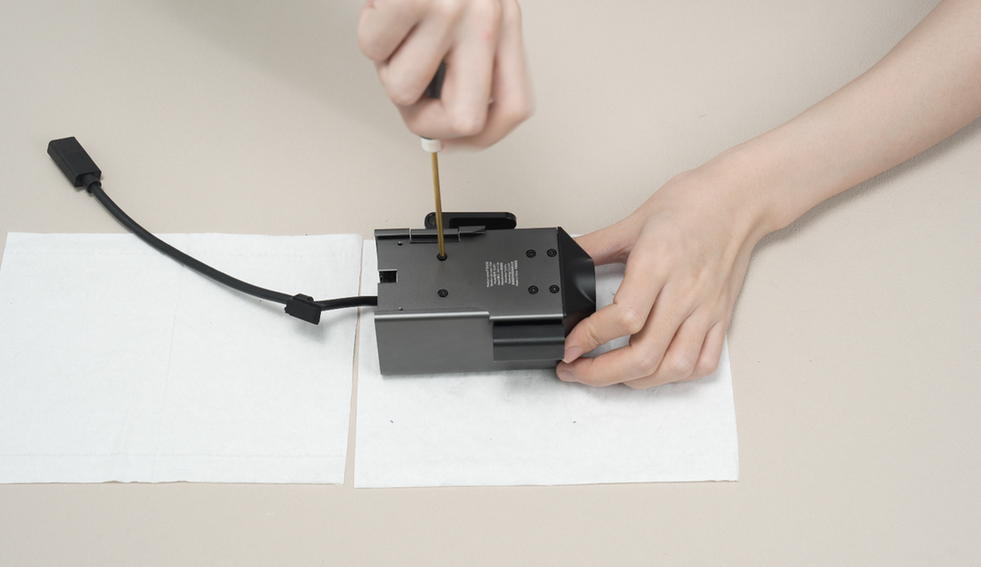
After cleaning is complete, reinstall one long screw (M2.5x26) into either of the two screw holes closest to the circuit board.
 |
 |
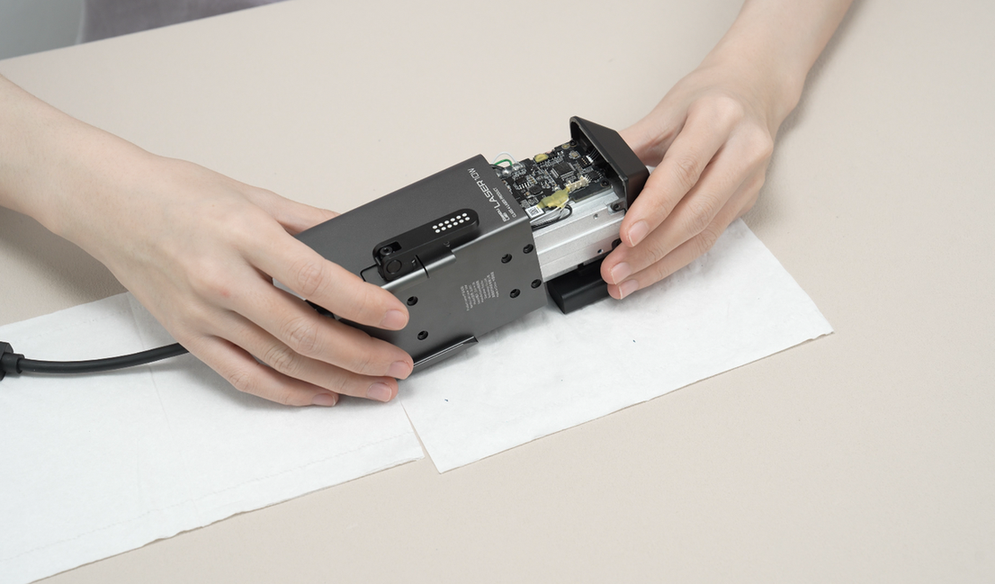
¶ Step9. Install the laser module housing
Before installing the housing, please pull the cable inside the housing outwards to prevent it from being pressed by the laser module. Thread the connector through the housing, flatten the cable on the laser module to prevent it from getting stuck during the installation process.
 |
 |
 |
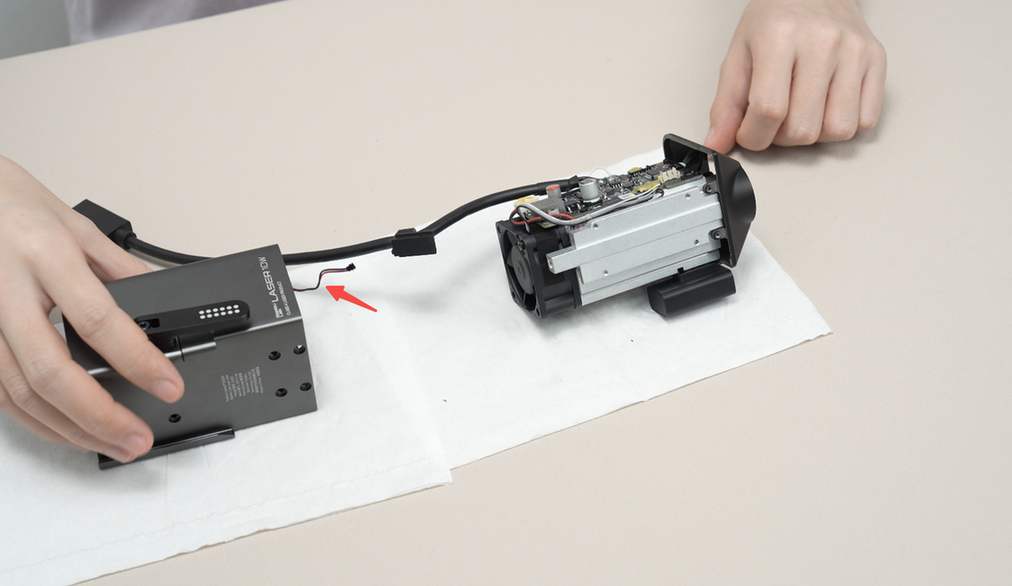
Next, push the housing along the guide rail for a distance until just before the first plug. Reinsert the cable into the plug, press it back in, and flatten it with your hand to fully fit the housing back in place.
 |
 |
 |
 |
Tighten the remaining long screw (M2.5x26) into the remaining hole closest to the circuit board, then tighten the six fixing screws (M2.5x5) on the side of the housing.
 |
 |
 |
 |
¶ Step10. Clean the air assist tube coupler
Spray alcohol on the brush or non-woven cloth, then wipe the air assist tube coupler clean.
 |
 |
Then reinstall the air assist tube coupler using an H2.5 or H2.0 Allen key.
¶ Step11. Install the top cover of the laser module
Reattach the snap buckle on the connector cable to the outer wall, press the buckle with your hand to prevent the connector cable from shaking. Next, slide the top cover along the grooves on both sides and finally press it firmly into place.
 |
 |
 |
 |
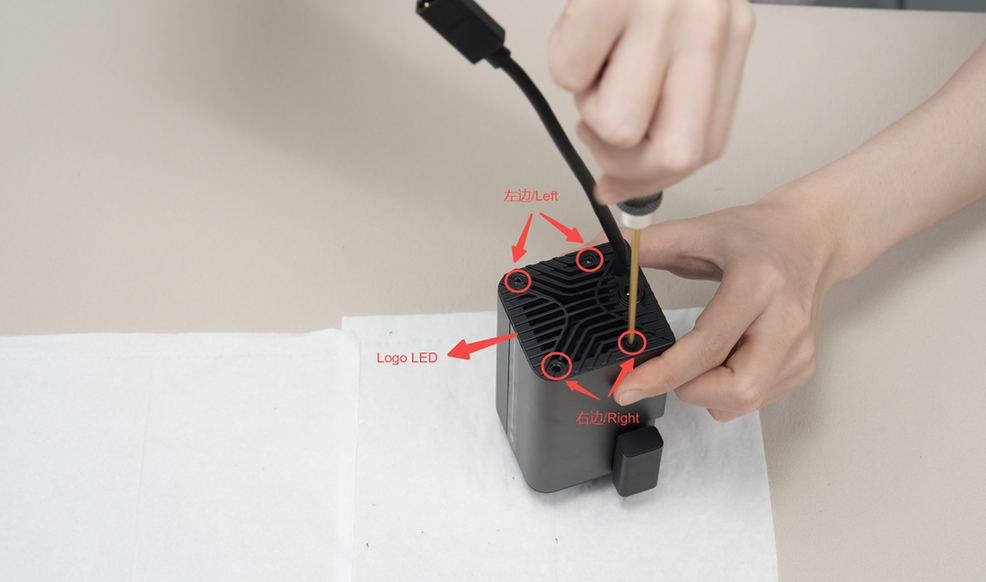
Tighten the two fixing screws (M2.5x5) on the side of the top cover. Then install two short screws (M2.5x5) into the top left screw holes and two long screws (M2.5x26) into the top right screw holes (when facing the LOGO LED, looking from front to back).
 |
 |
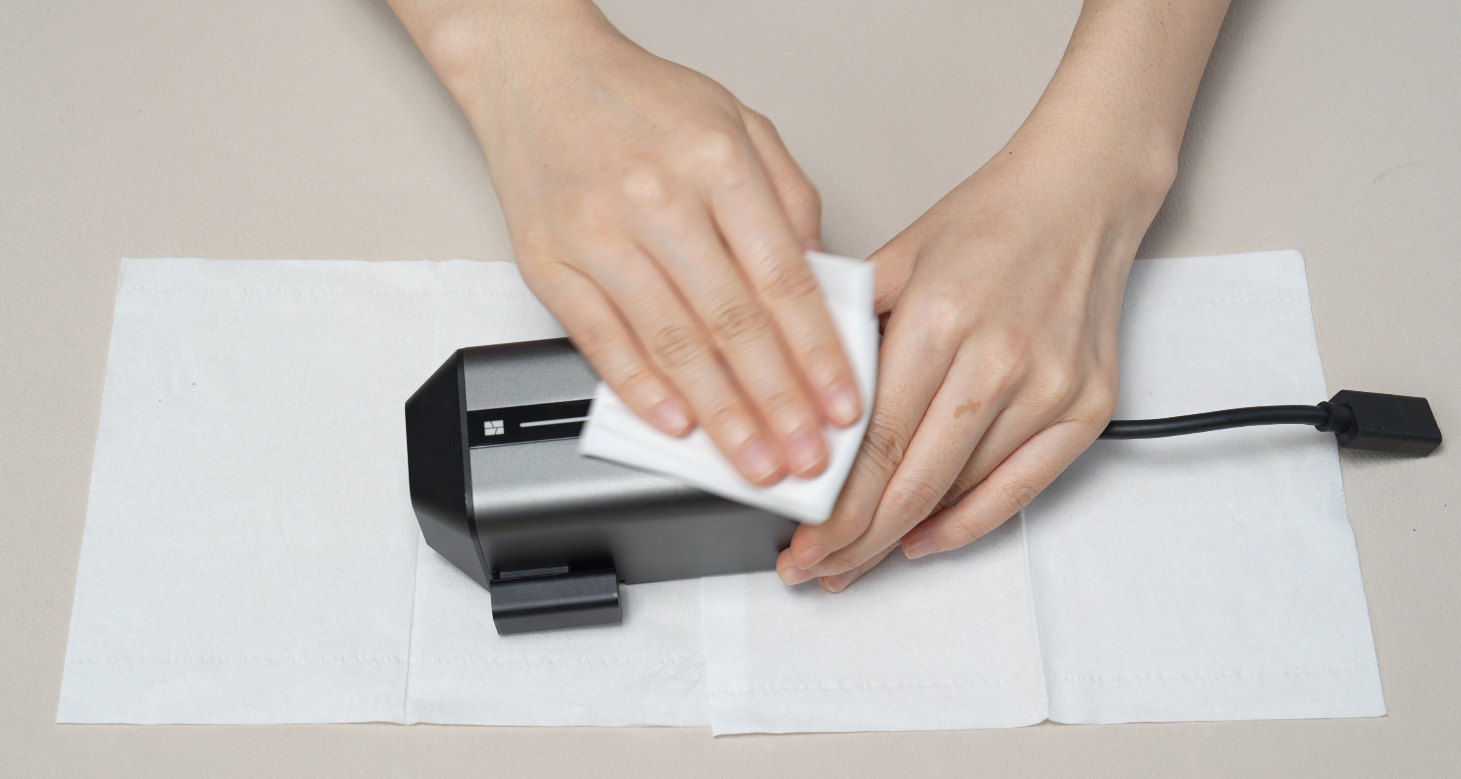
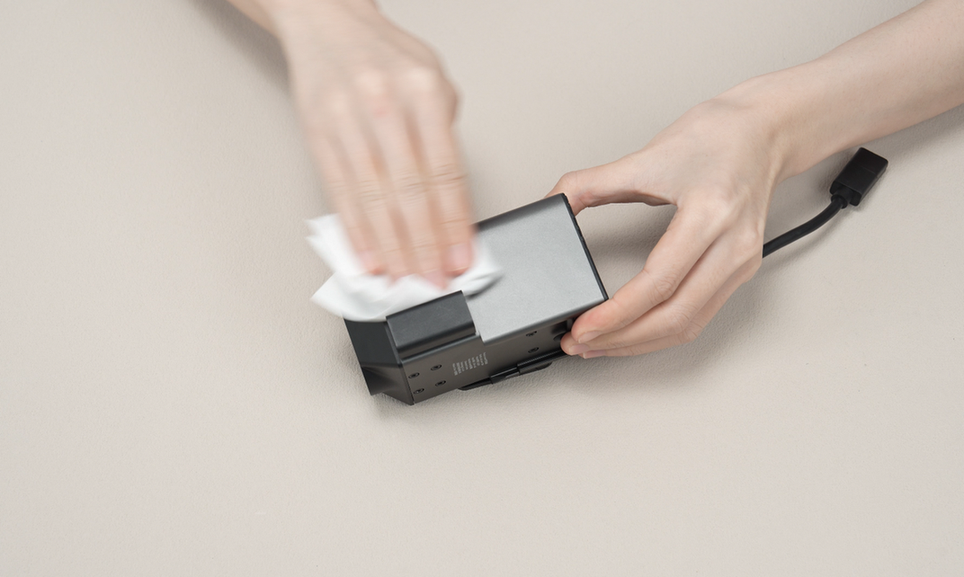
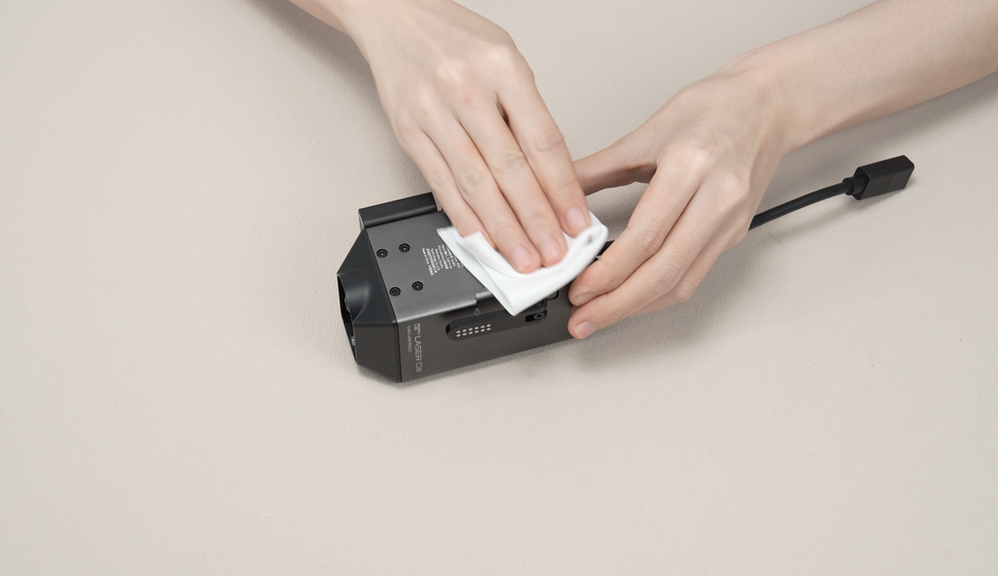
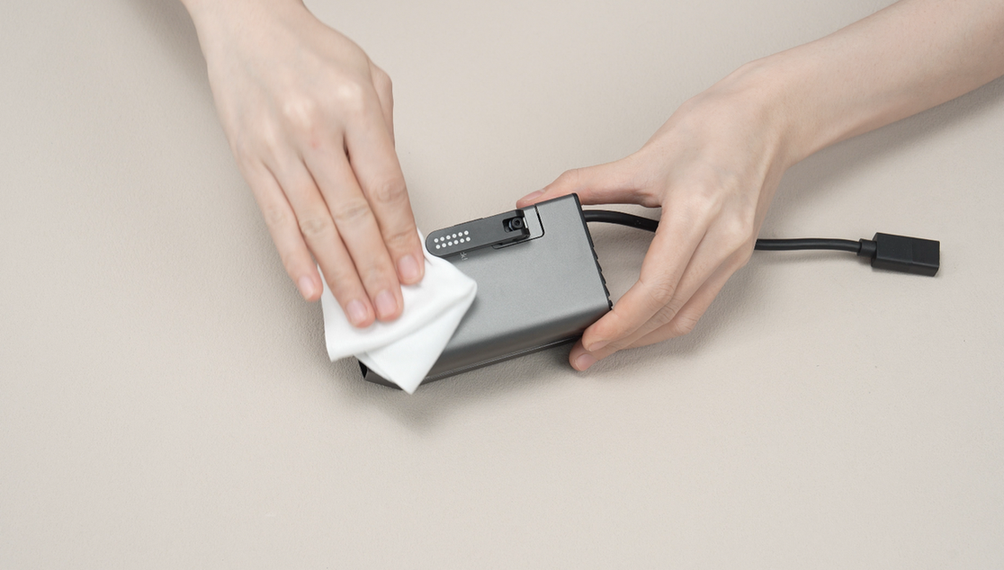
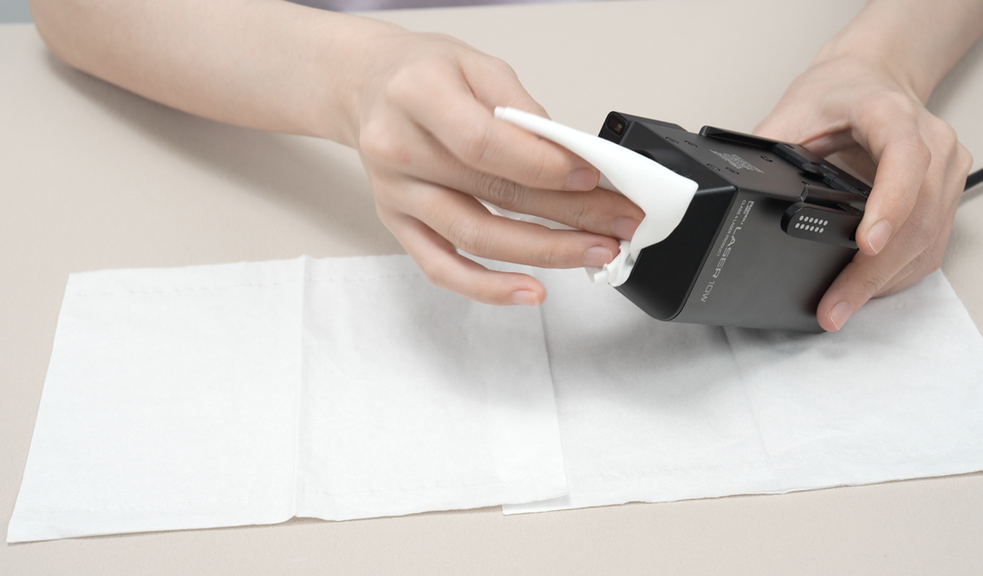
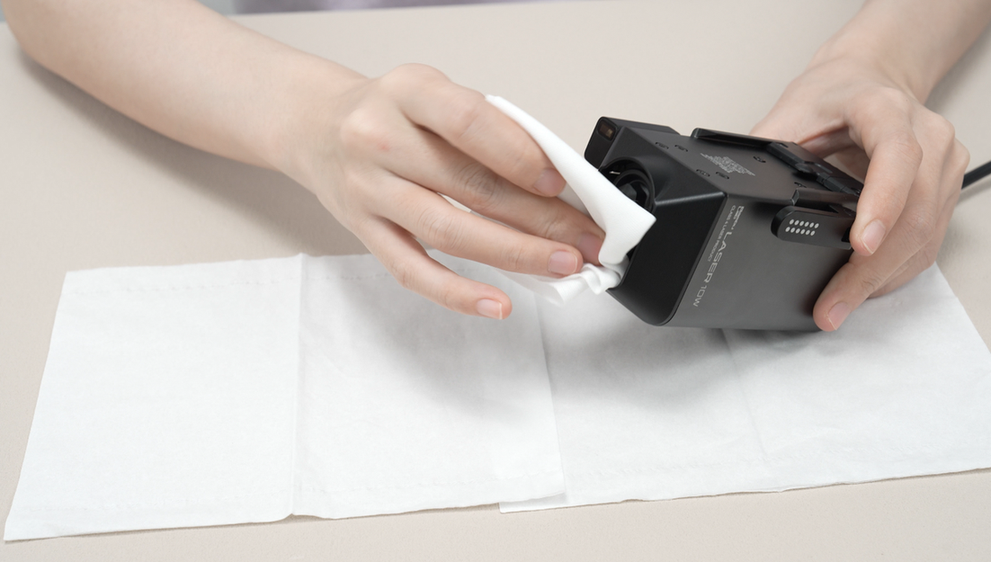
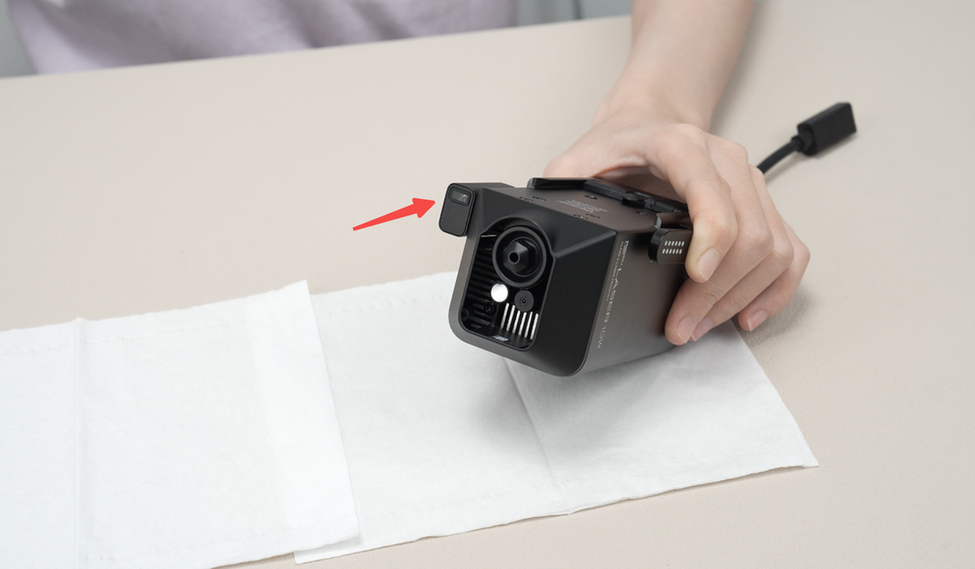
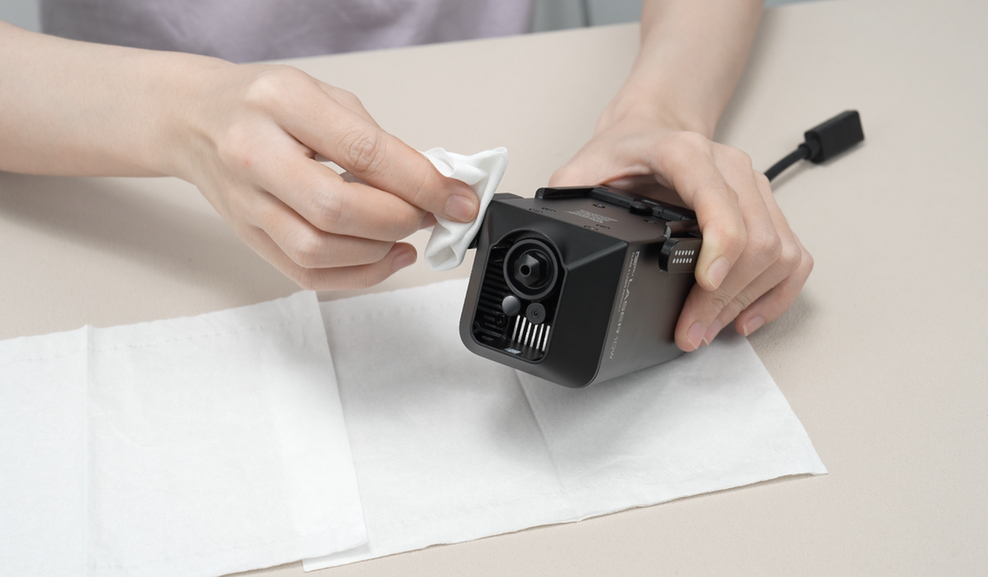
¶ Step12. Clean the surface of the laser module
After a series of cleaning and maintenance tasks, the surface of the laser module may get dusty again. Please use a non-woven cloth sprayed with alcohol to wipe the surface of the laser module.
 |
 |
 |
 |
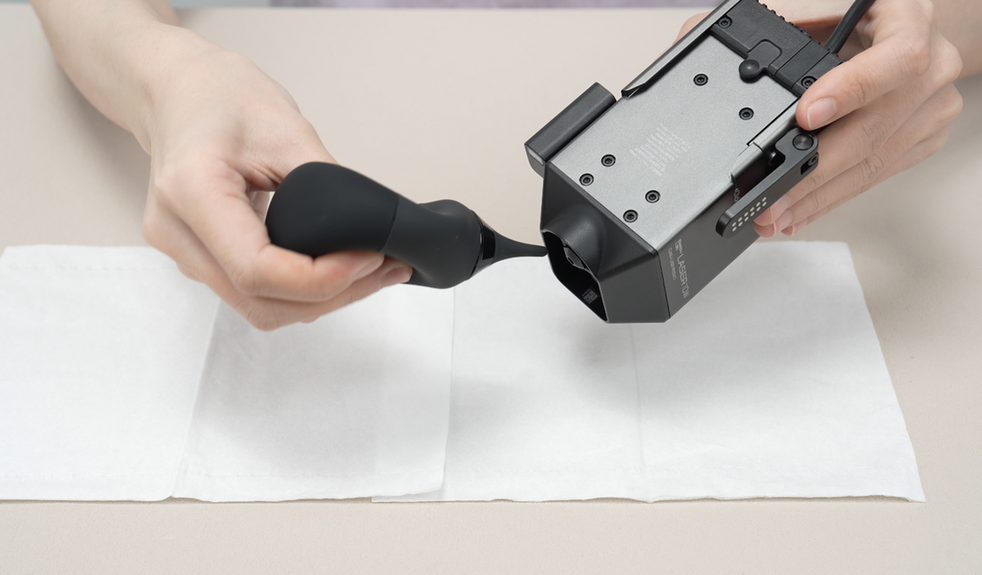
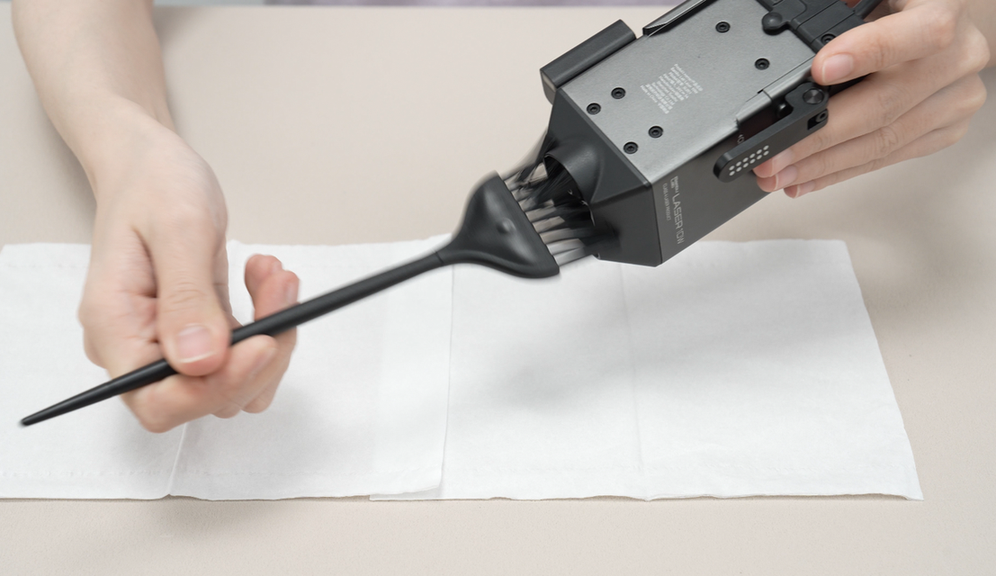
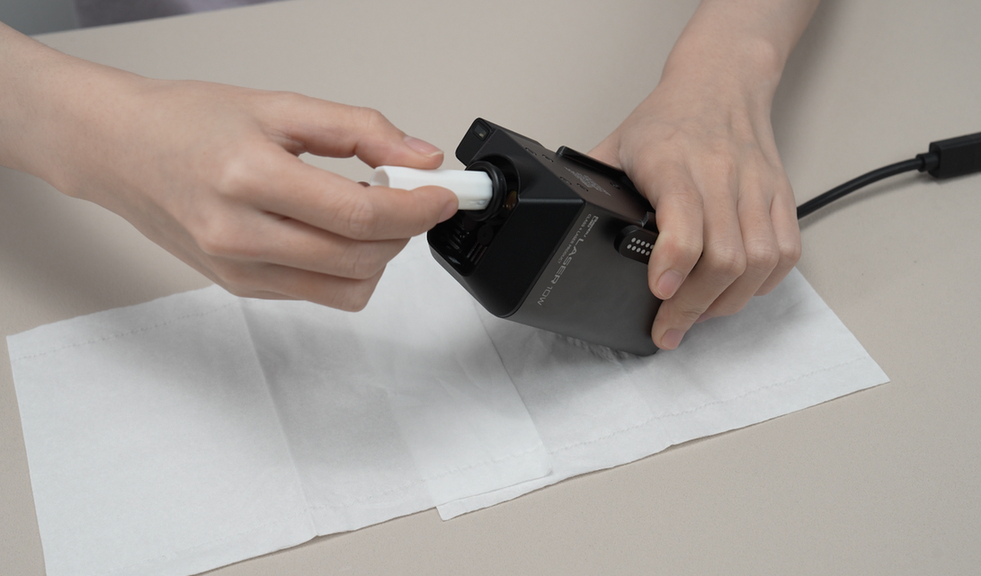
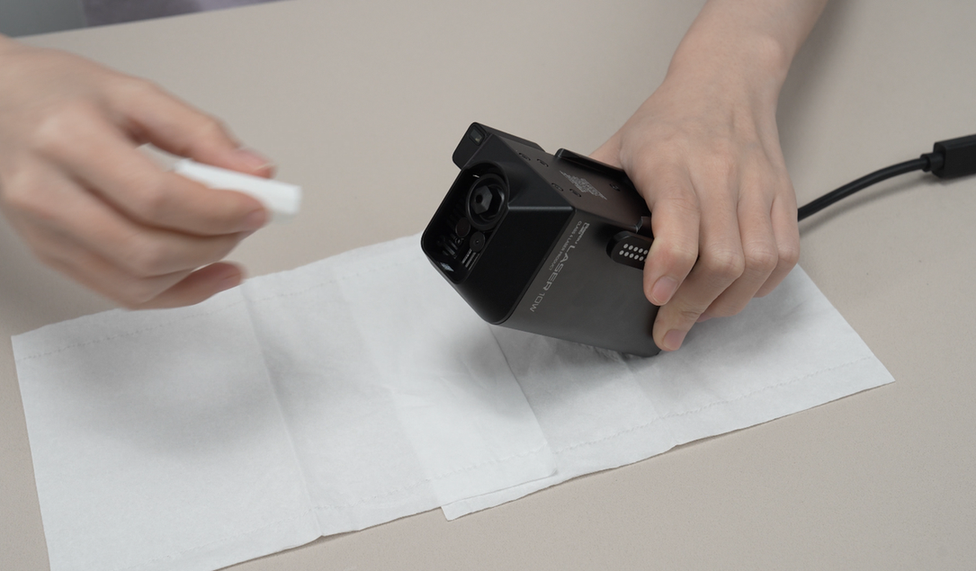
¶ Step13. Clean the flame, temperature sensor and air assist nozzle
First, use a blower to initially blow out the dust inside the air concentrator, then use a brush for further cleaning to sweep away the dust. Finally, carefully wipe the flame, temperature sensor and air assist nozzle with a non-woven cloth sprayed with alcohol to clean off the dust.
 |
 |
 |
 |
¶ Step14. Clean the laser lens
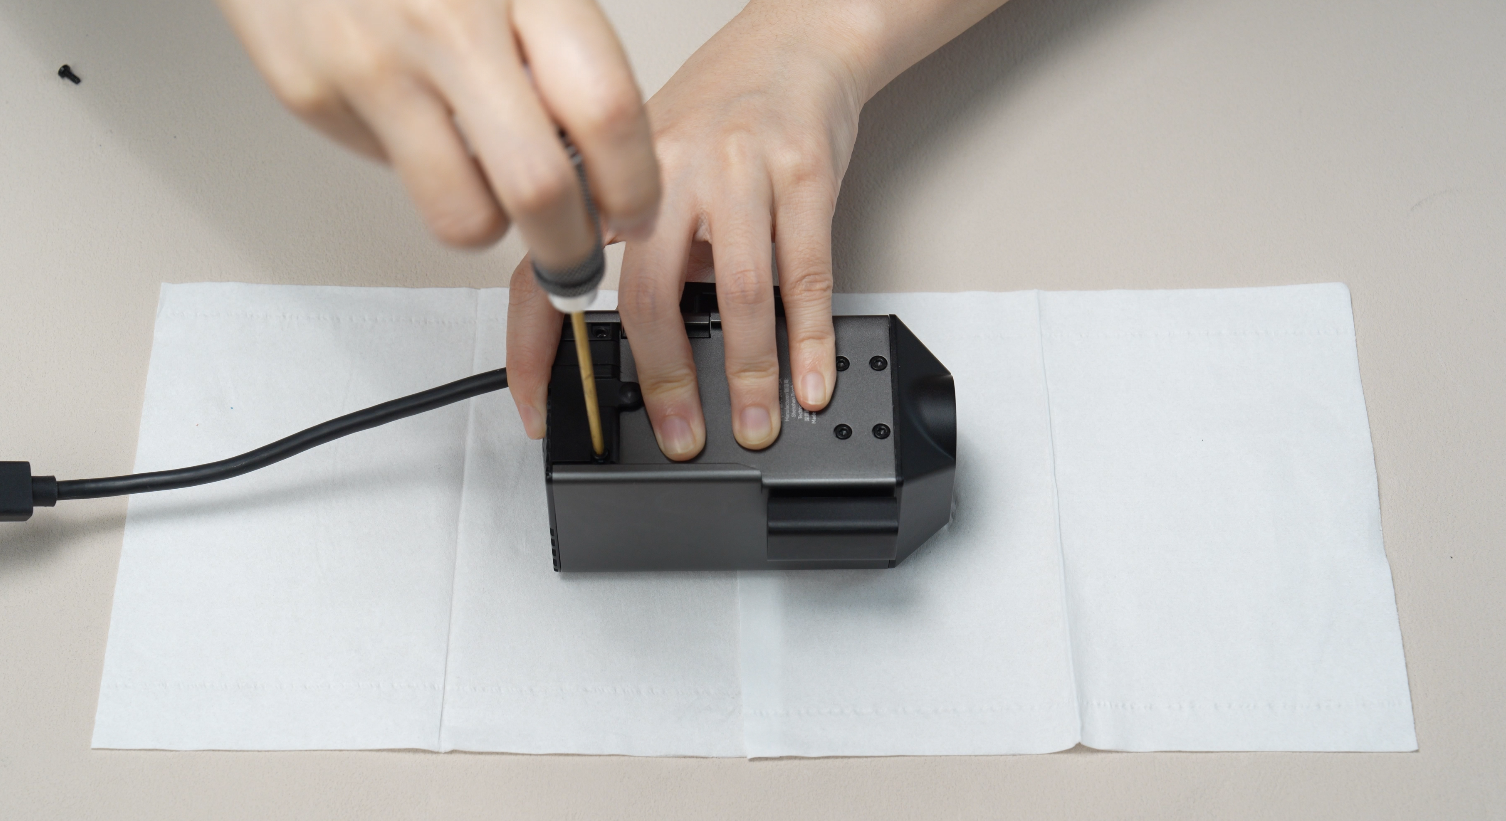
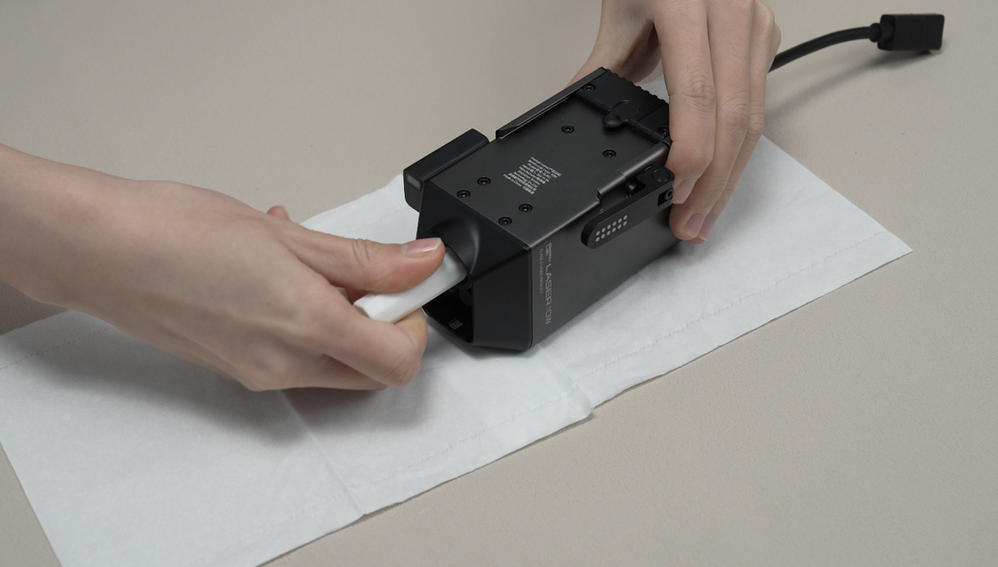
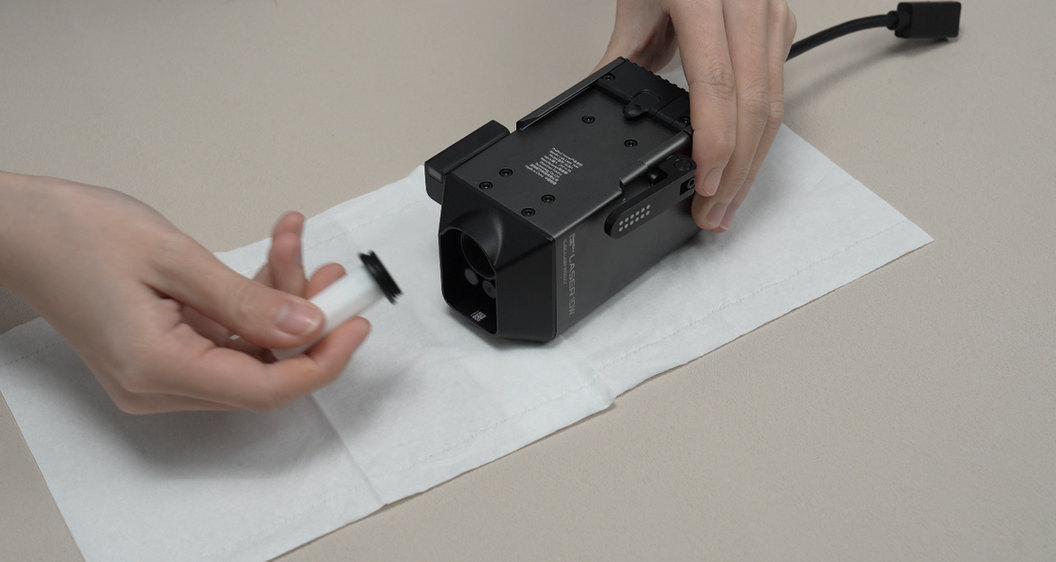
Use the air assist nozzle removal tool to unscrew the air assist nozzle counterclockwise and remove it, exposing the internal laser lens.
The air assist nozzle removal tool used in this step can be directly printed from the internal model files of the printer.
 |
 |
 |
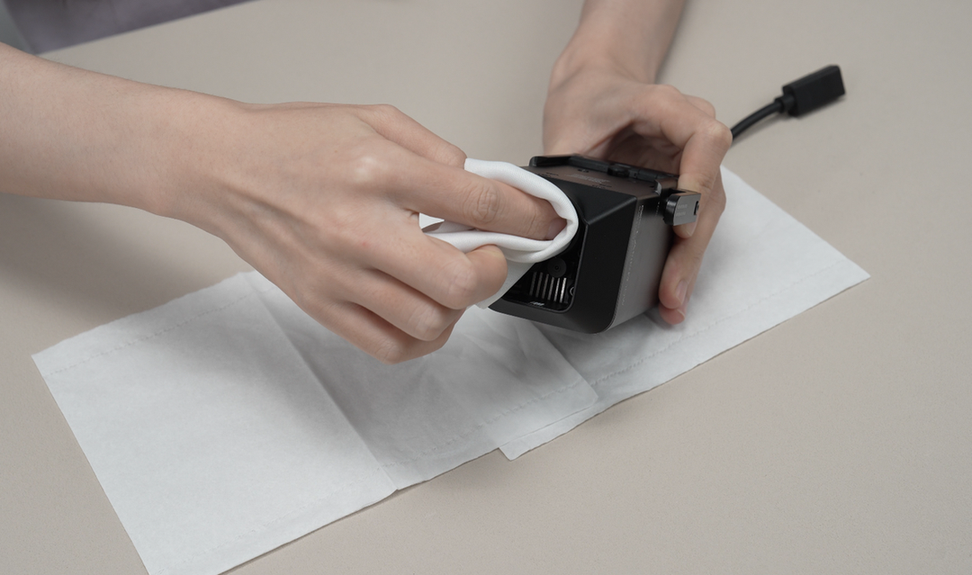
Wipe the laser lens with a non-woven cloth to ensure there is no dust on the lens. Once cleaning is complete, use the air assist nozzle removal tool to install the air assist nozzle in clockwise.
 |
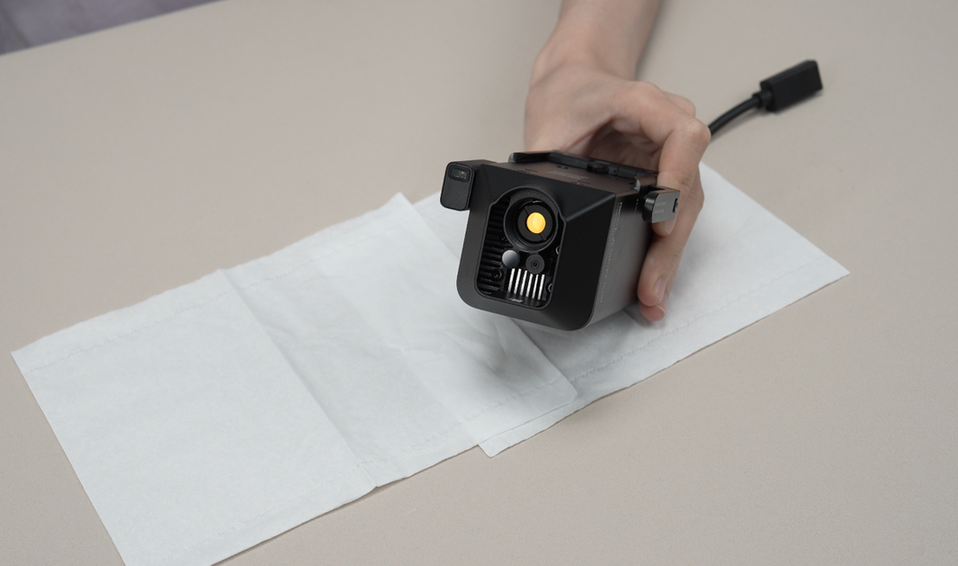 |
Once cleaning is complete, use the air assist nozzle removal tool to install the air assist nozzle in clockwise.
 |
 |
¶ Step15. Clean the laser height probe
Finally, clean the laser height probe with the non-woven cloth.
 |
 |
¶ Appendix
During the above maintenance process, it is recommended to use alcohol (75% ethanol or 70% isopropanol) and non-woven cloth to wipe the surfaces of components such as camera lenses, metal, and plastic. For specific areas like top cover, fan blades, and heat sinks, it is recommended to use a brush for cleaning.
After using liquid cleaning agents, please slightly wring the non-woven cloth dry before cleaning. Additionally, we strongly recommend increasing the cleaning frequency to prevent oil stains buildup that may become difficult to remove.
If the contamination is severe, a degreaser similar to Mr. Muscle should be used for deep cleaning.
¶ End Notes
We hope the detailed guide provided has been helpful and informative.
If this guide does not solve your problem, please submit a technical ticket, we will answer your questions and provide assistance.
If you have any suggestions or feedback on this Wiki, please leave a message in the comment area. Thank you for your support and attention!