¶ Hotend
As the toolhead module's core component, the hotend assembly heats the filament to a specified temperature, and the melted filament is deposited in the form of a thin layer to generate a model.
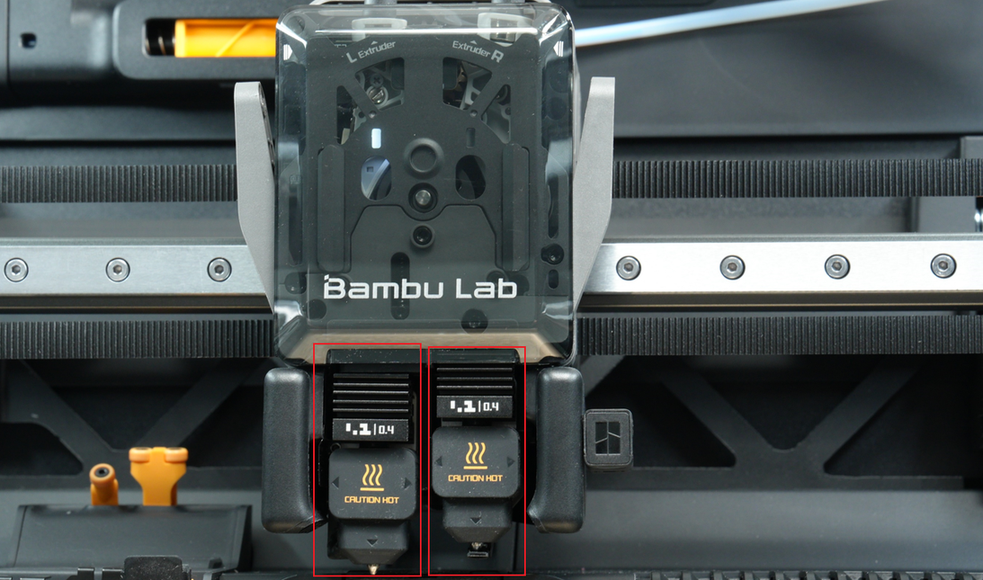
The H2D printer comes with a built-in 0.4mm nozzle, and you can also replace it with a 0.2mm, 0.6mm, or 0.8mm nozzle as needed. In addition, we offer a high-flow hotend for your selection.
📌 Note: If you have replaced the nozzle with one of a different specification, please remember to sync the nozzle information on the device.
¶ Bambu Studio Software Settings Notice
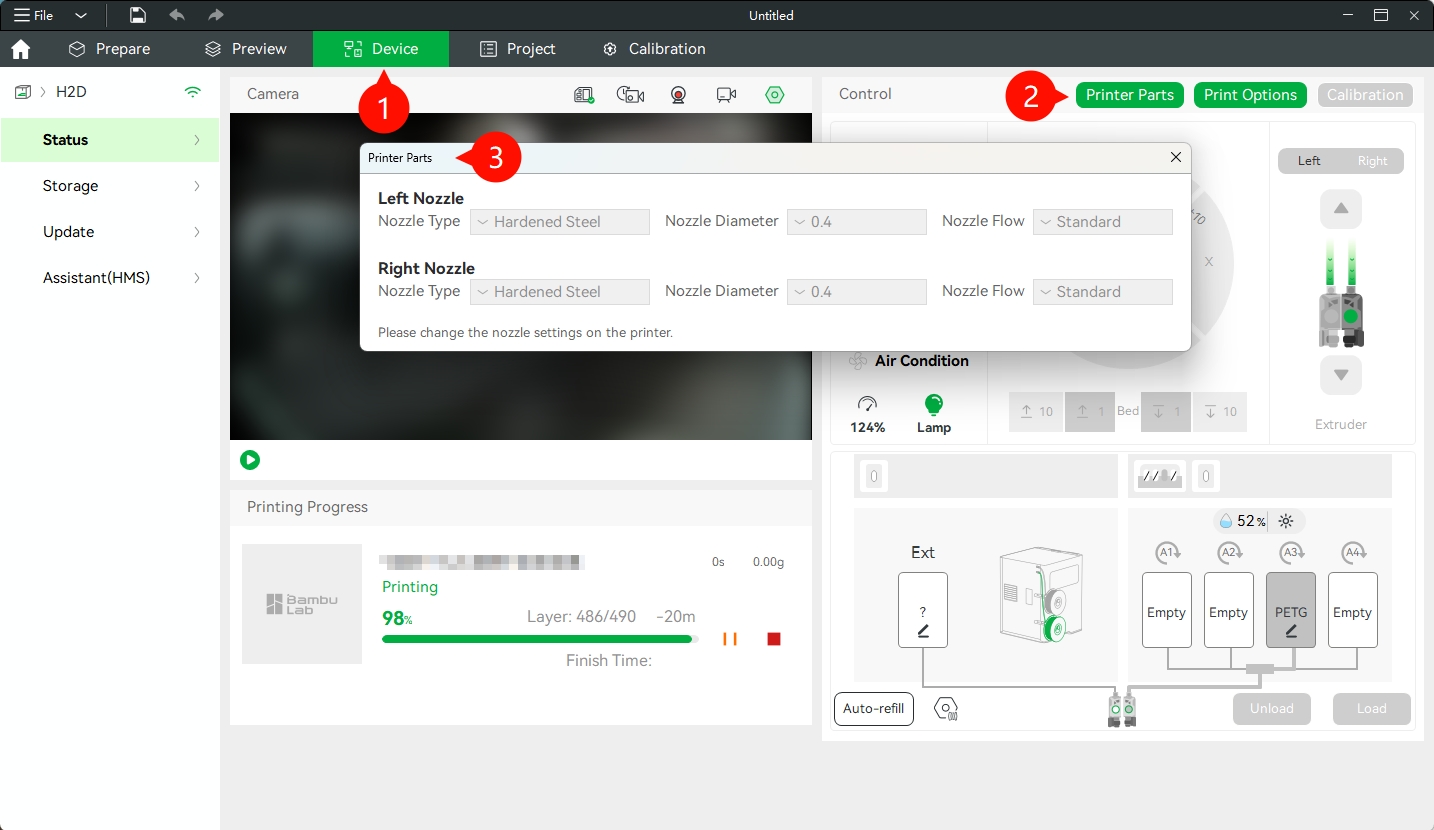
If you have updated to the latest version of Bambu Studio (You can refer to Bambu Studio Release Notes | Bambu Wiki to learn about the latest version), you may notice that the nozzle information on the “Printer Parts” page can no longer be modified (as shown in the figure below). Please note that this is not a software or hardware malfunction.
To improve operational consistency and ensure user safety, we have disabled the nozzle information editing function and kept it for display purposes only.
This is because nozzle replacement must be carried out directly on the printer. Allowing modifications via the software interface could mislead some users into thinking that a physical nozzle replacement is unnecessary before printing.
¶ When to use
-
Hotend clogging
-
Hotend damage
¶ Tools and materials needed
- New hotend
¶ Safety Warning
❗❗IMPORTANT
It's crucial to power off the printer before conducting any maintenance work, including work on the printer's electronics and tool head wires. Performing tasks with the printer on can result in a short circuit, leading to electronic damage and safety hazards.
During maintenance or troubleshooting, you may need to disassemble parts, including the hotend. This exposes wires and electrical components that could short circuit if they contact each other, other metal, or electronic components while the printer is still on. This can result in damage to the printer's electronics and additional issues.
Therefore, it's crucial to turn off the printer and disconnect it from the power source before conducting any maintenance. This prevents short circuits or damage to the printer's electronics, ensuring safe and effective maintenance. For any concerns or questions about following this guide, we recommend submitting a technical ticket regarding your issue and we will do our best to respond promptly and provide the assistance you need.
¶ Remove the Hotend
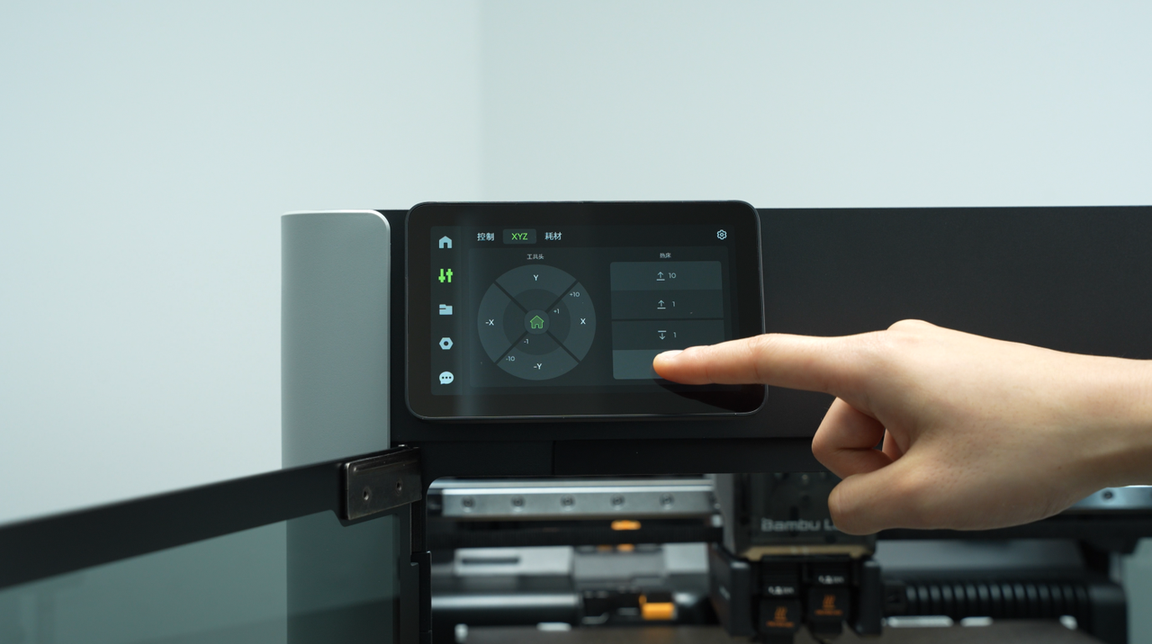
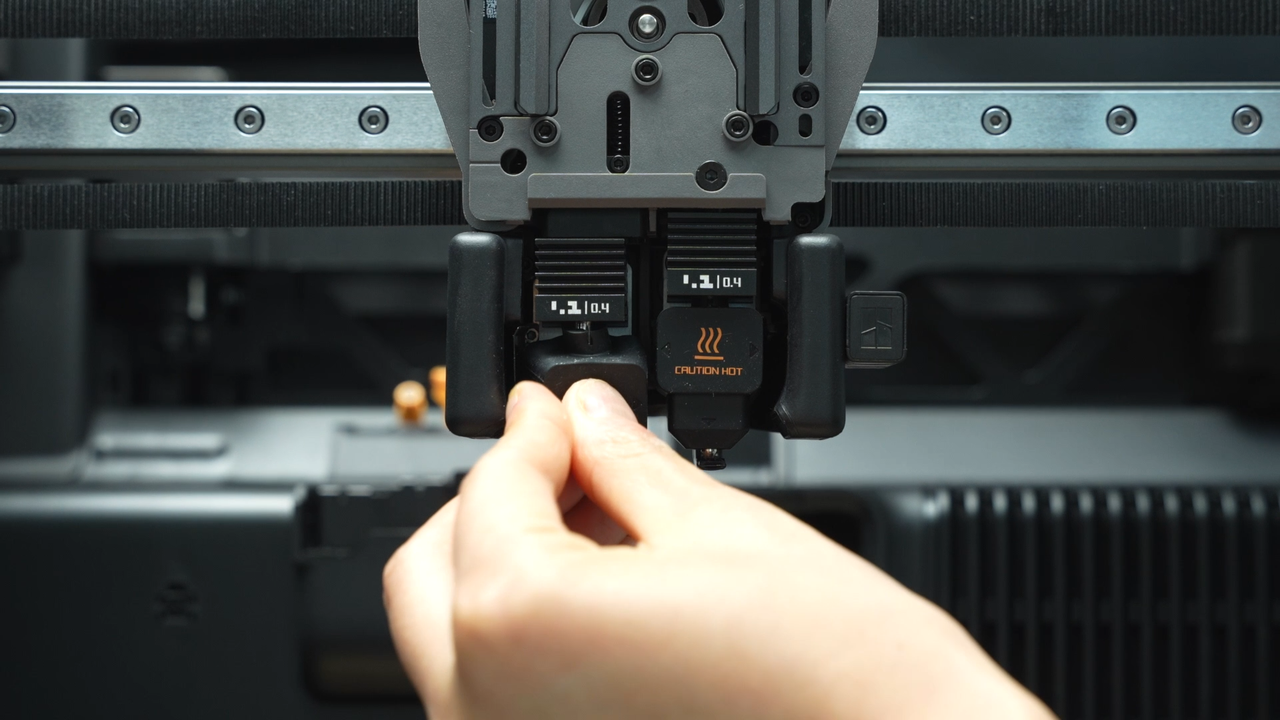
¶ Step 1:Lower the Heatbed
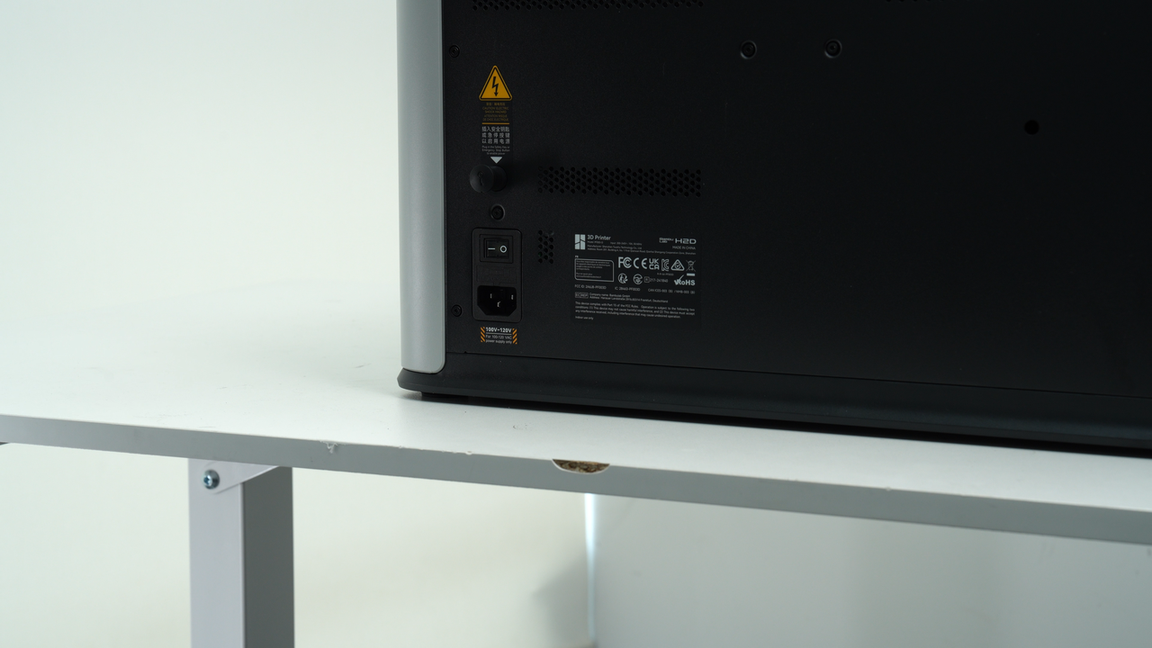
- On the screen, navigate to “Controls -> Motion”, then tap the position indicated by the finger in the figure below to lower the heatbed to the bottom.
- Power off the printer and make sure the hotend has cooled down to room temperature.
- Remove the top glass cover of the printer.
¶ Step 2: Remove the Toolhead Front Cover
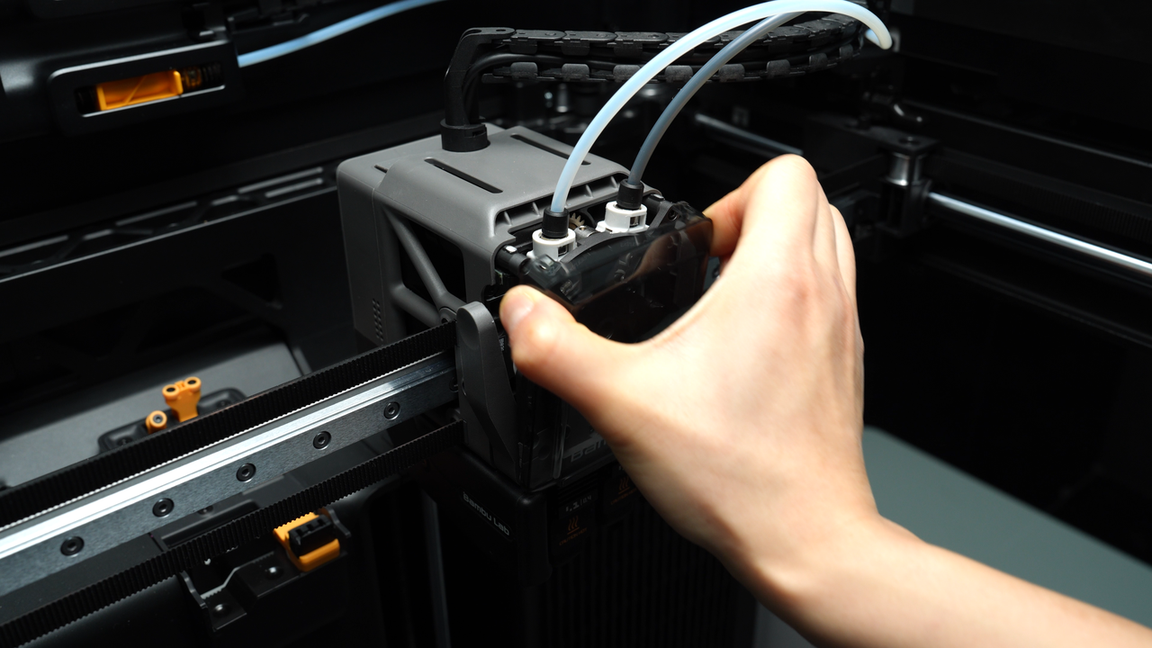
Pinch the two top corners of the toolhead front cover, lift it upward to release the rounded rectangular clips, and remove the front cover.
If filament is loaded into either of the nozzles which will be replaced, press one or both filament cutters to cut the filament to the corresponding nozzle and allow the hotend to release in a later step.
¶ Step 3: Remove the Hotends
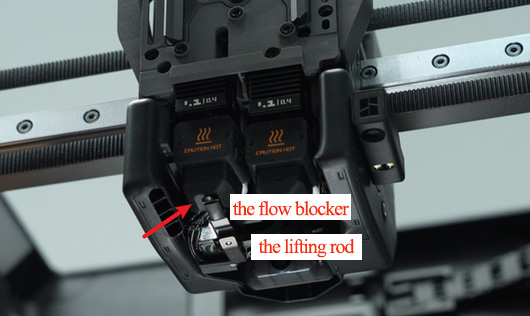
The H2D is equipped with two nozzles, but only one operates during printing. To prevent material leakage from the non-working nozzle, we designed a flow blocker that covers the nozzle not in use.
There is a linkage relationship between the left hotend and the flow blocker, which is located on the lifting rod. When the rod is pushed to the right, the left hotend lowers and the flow blocker covers the right hotend. When the rod is pushed to the left, the left hotend rises and the flower blocker covers the left hotend.
If you need to remove a hotend and the flow blocker is blocking the hotend, you must first move the flow blocker connecting rod to move the flow blocker away before removing it to prevent the flow blocker from being accidentally bent when removing the hotend.
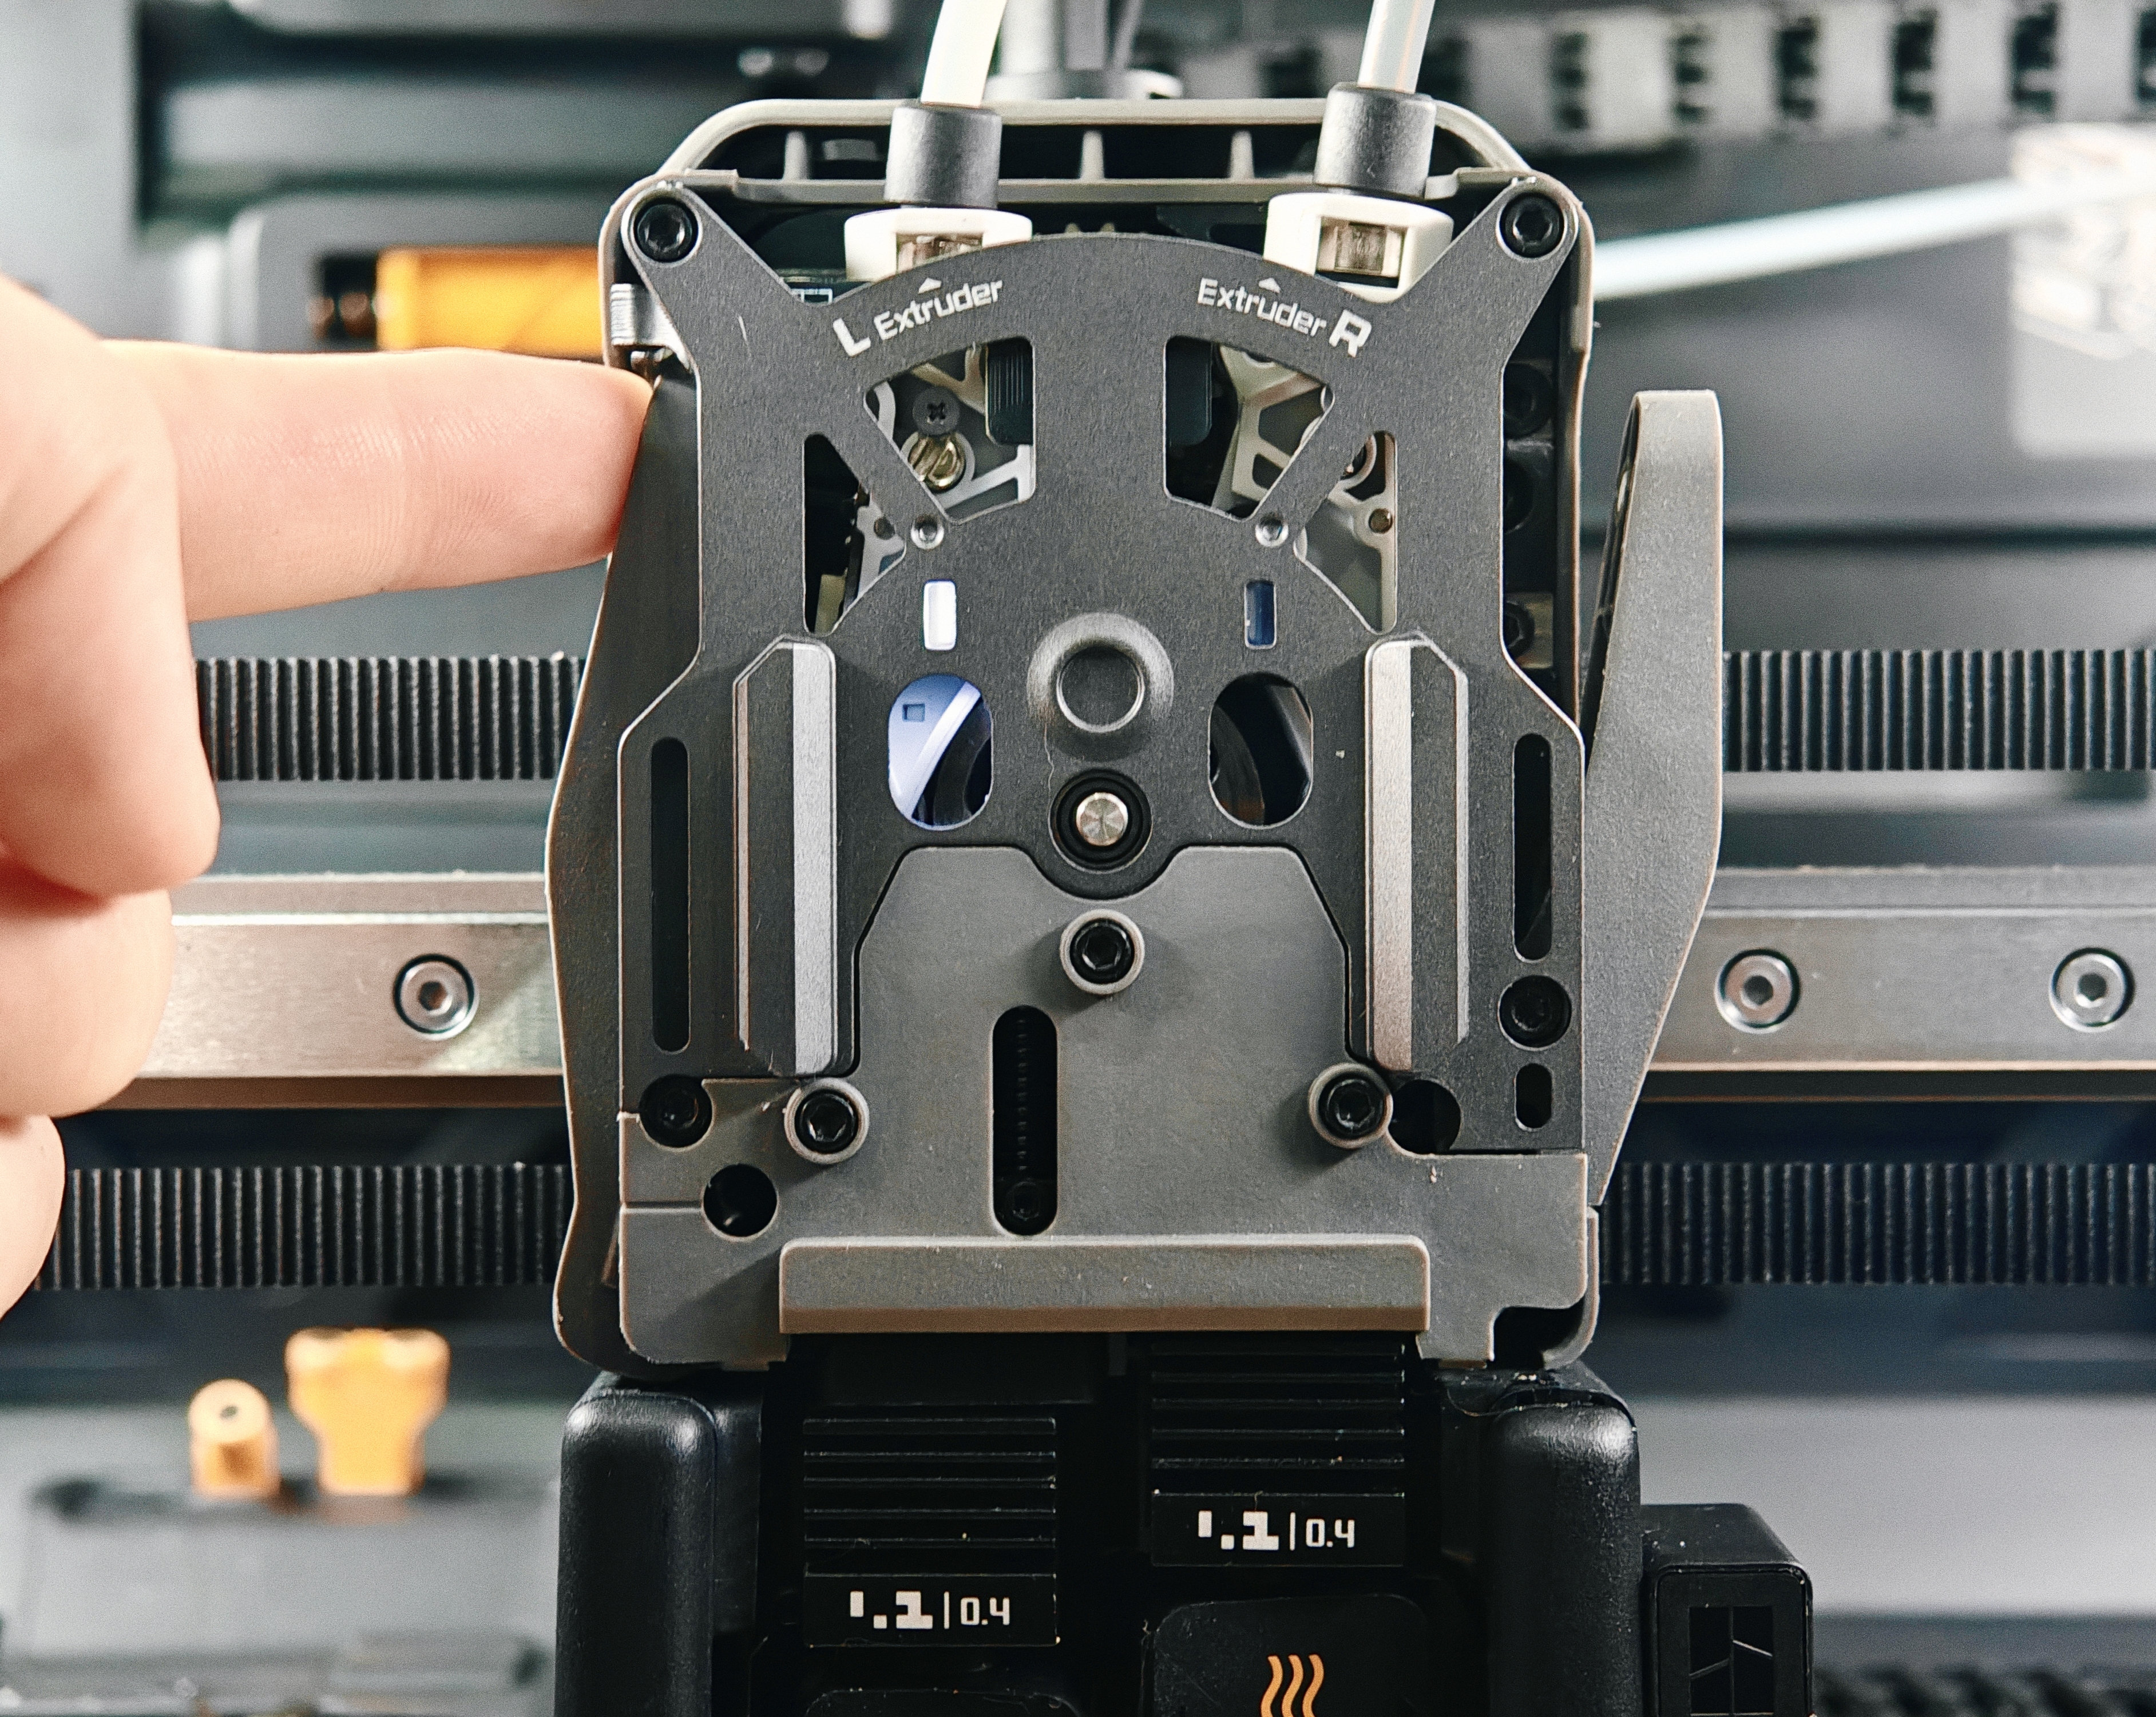
The H2D printer has two hotends, left and right, which you can replace as needed.
- Push the rod to the right so that the flow blocker covers the right hotend.
⚠️ Note:Do not push the flow blocker directly. The blocker is fragile, and applying force may cause it to break.
When moving the rod, the blocker may not reach its position in one motion due to the lod’s tilt limit. Continue pushing the rod until it reaches the far-right end and cannot move further.
At this point, the blocker may still not be exactly beneath the right nozzle. You will need to make fine adjustments to ensure that the flow blocker is completely in place.

- Remove the silicone sock for hotend that is not blocked by the flow blocker.
- Unlock the buckle to remove the hotend.
⚠️ Note: Always check the current temperature of the hotend before replacing it to avoid burns due to high temperatures!
📌 The nozzle may be difficult to remove due to residue. In this case, you can gently pry it with tweezers or a screwdriver after applying moderate heat, and then remove the hotend while wearing heat-resistant gloves.
- Pre-fasten the buckle of the heating assembly.
The removal of the right hotend follows the same procedure.
 |
 |
 |
¶ Install the Hotend
¶ Step 1: Move the Lifting Rod
As with the disassembly operation, if you need to install a hotend and the flow blocker is blocking the hotend, you need to move the lifting rod to remove the flow blocker before installing it.
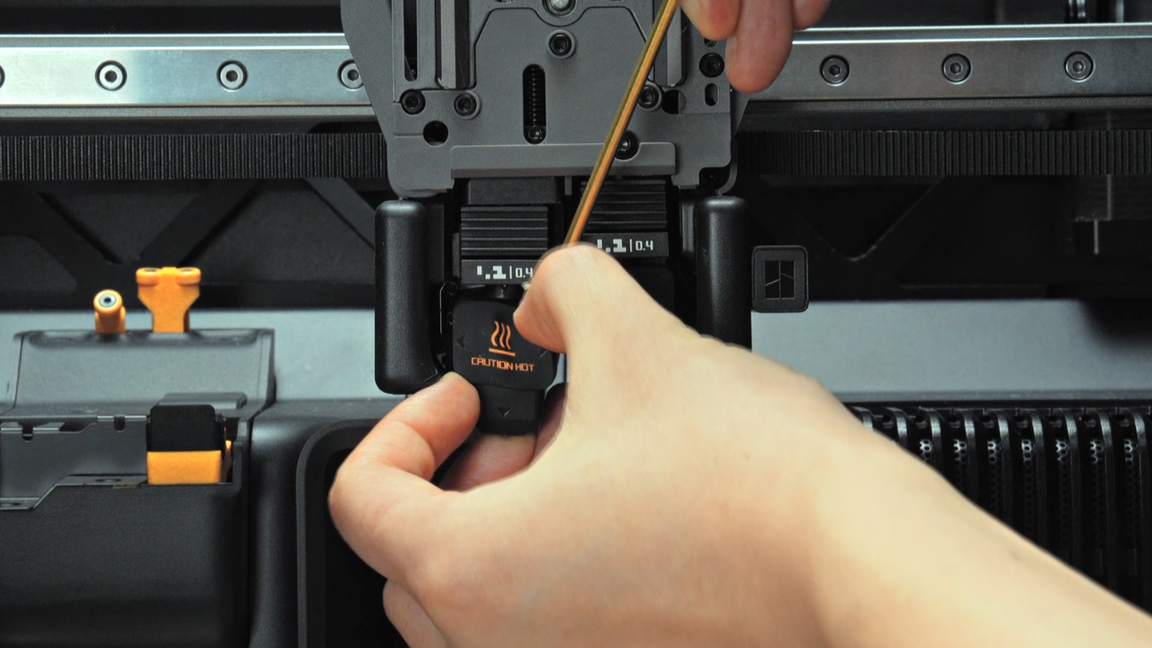
¶ Step 2: Reinstall the Hotend
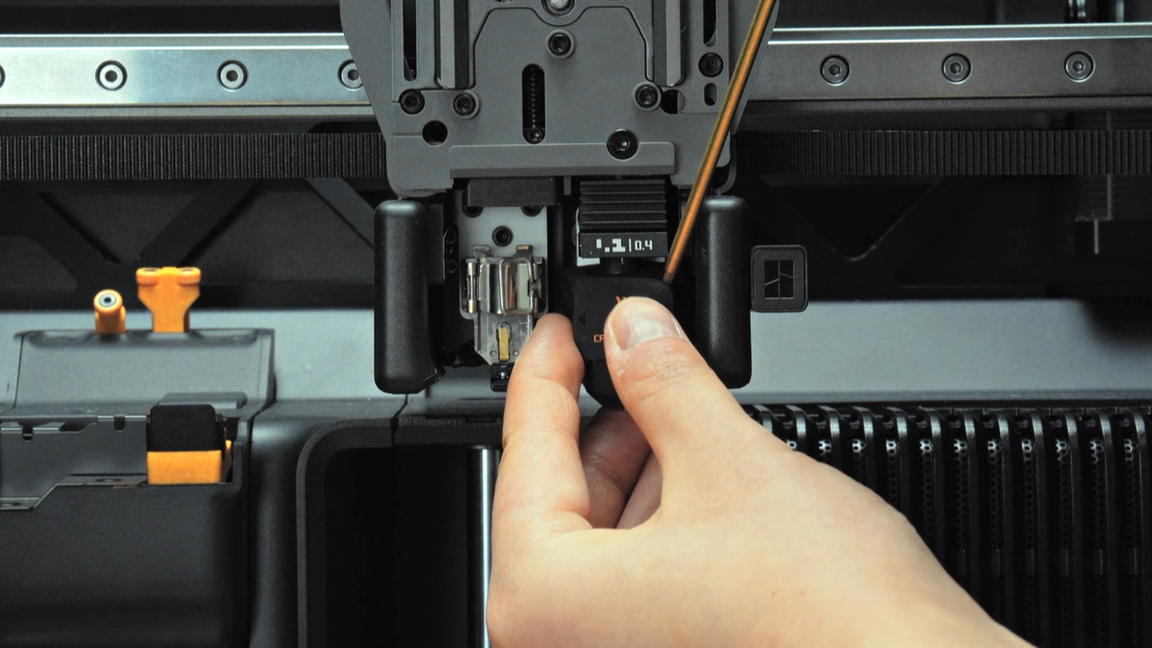
Pinch the nozzle and push the hotend upward from below. Once it reaches the top, press the hotend inward. The picture below takes the left hotend as an example.
Then gently pull the hotend outward. If it does not move, the installation is properly secured.
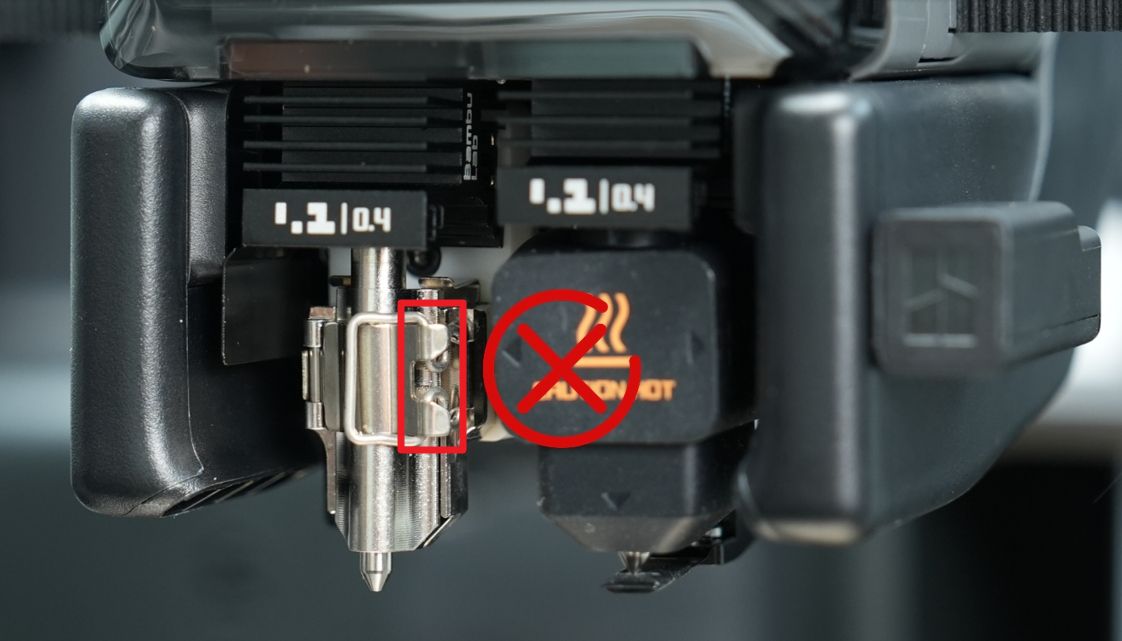
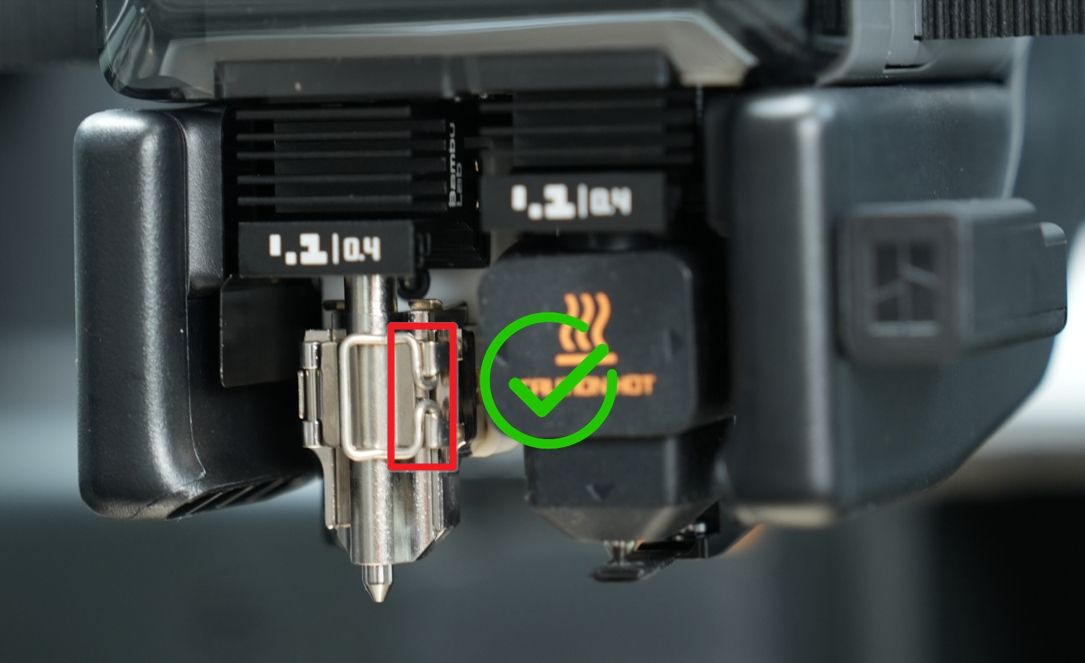
¶ Step 3: Tighten the Nozzle Clip
As shown in the figure, push the left latch downward until it is fully aligned with the nozzle, then fasten the right clip by pressing it down.
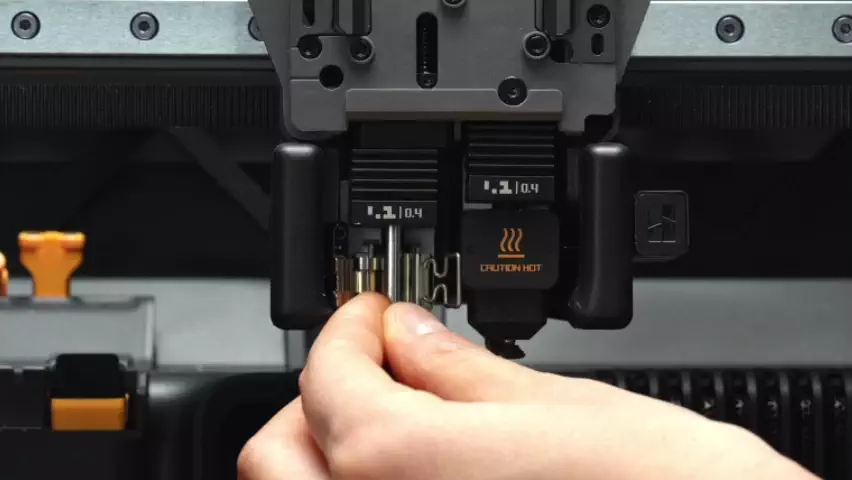
Note: In the figure on the left, the clip was locked incorrectly because the latch and the clip were pushed down at the same time, causing the latch to get stuck inside the clip. Therefore, make sure to fully align the left latch with the nozzle before engaging the right clip.
|
|
¶ Step 4: Put on the Silicone Sock for Hotend
¶ Step 5: Reinstall the Toolhead Front Cover
When reinstalling the toolhead front cover, first hook it into the position under the extruder, then push it forward until you hear a click, indicating it is properly installed.

¶ Sync Nozzle Information on the Device
If you have replaced the hotend with one of a different diameter or material, please refer to the animation below to update the nozzle information on the screen:
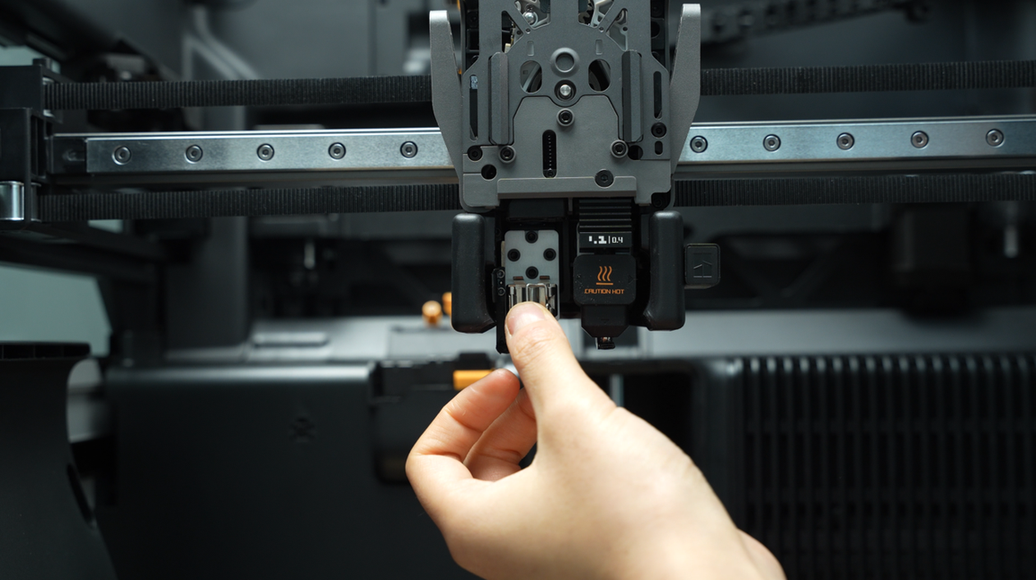
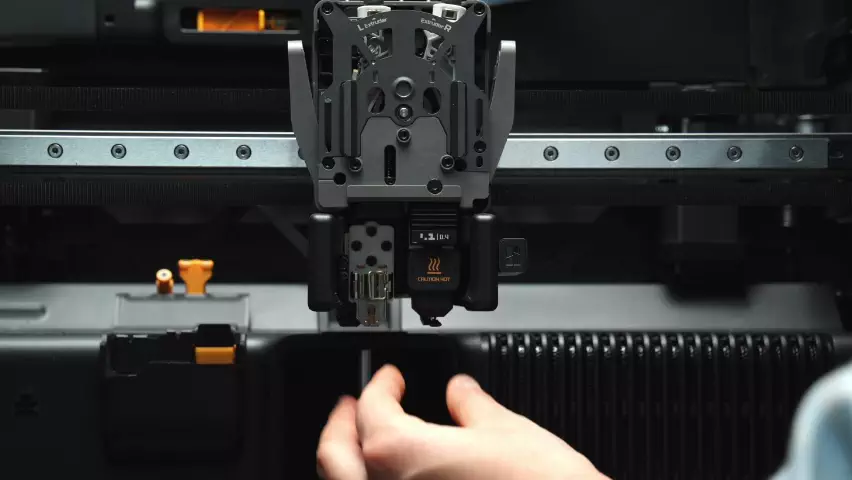
¶ Verify the Functionality
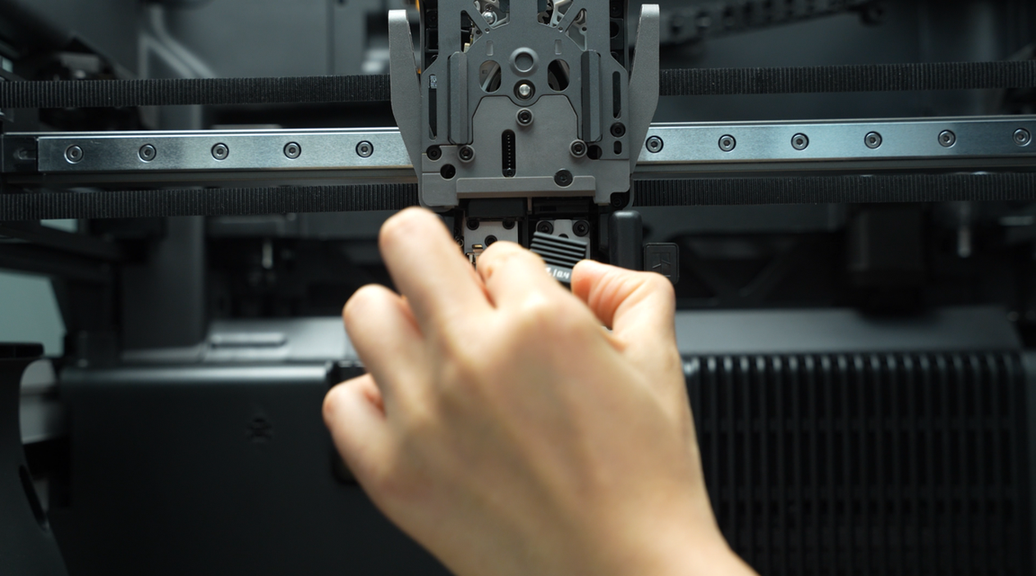
Ensure the hotend is securely installed and can extrude filament normally. Gently hold and try to move it to confirm that it doesn't wiggle as shown below.
¶ End Notes
We hope the detailed guide provided has been helpful and informative.
If this guide does not solve your problem, please submit a technical ticket, we will answer your questions and provide assistance.
If you have any suggestions or feedback on this Wiki, please leave a message in the comment area. Thank you for your support and attention!