¶ Laser Platform
The laser platform is composed of a laser base and a slat.
¶ Function
The laser platform is a working carrier during laser engraving/cutting. It is used with the platform support bar to carry the materials for laser engraving/cutting, limit the flame and smoke generated during the engraving/cutting process, and at the same time take on the debris generated during the work process.
When switching between different printer modules, the laser platform can be quickly replaced as an independent module.
¶ How to use
¶ Install the slat pack
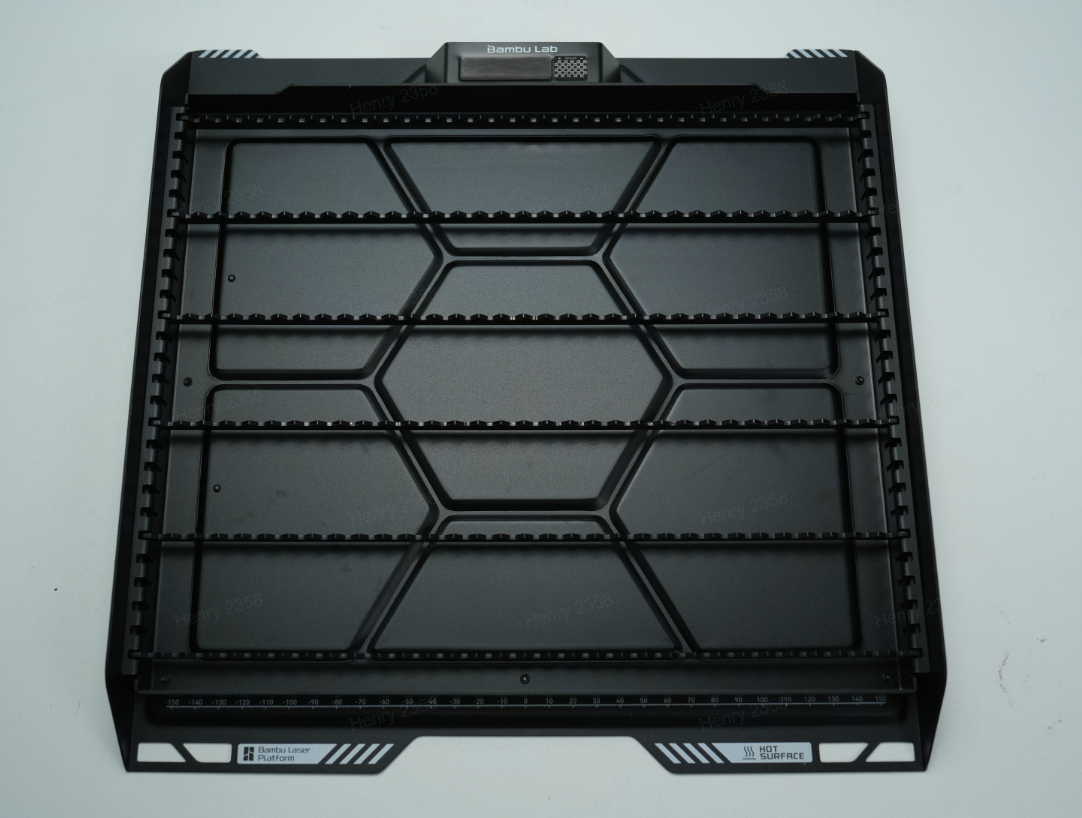
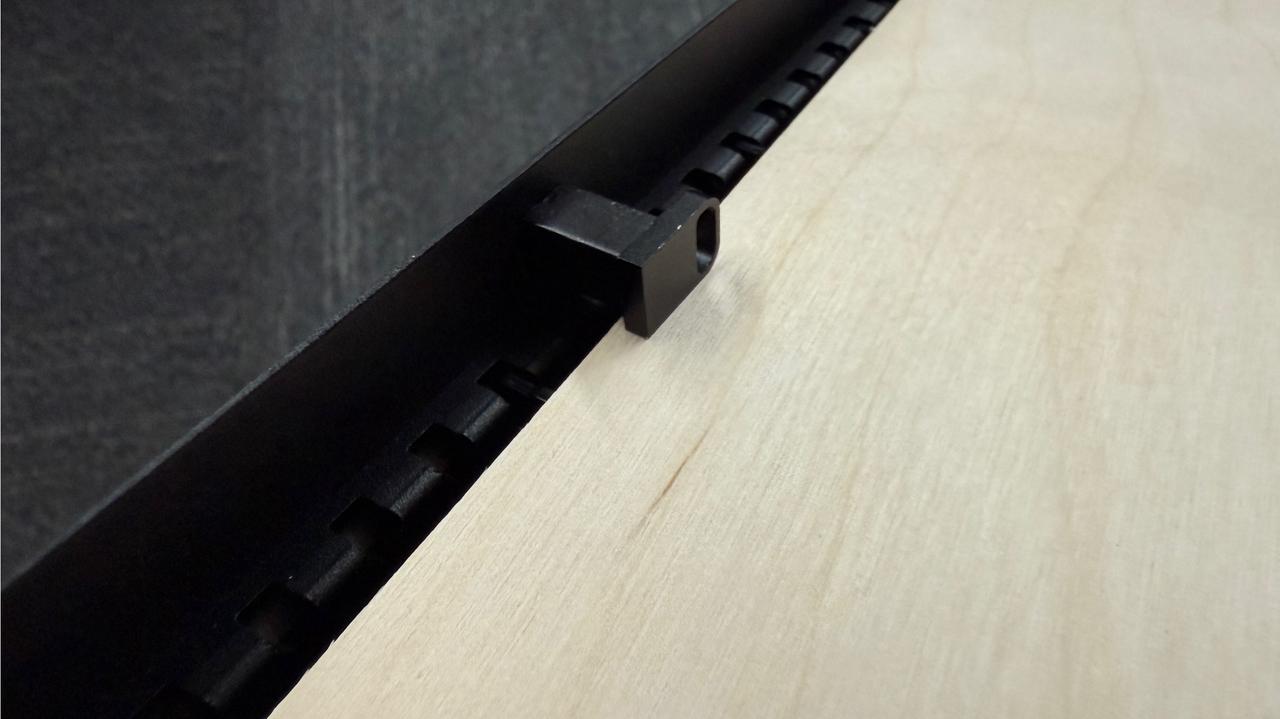
Place the slat into the laser platform slot (6 slats are included with the package. In normal use, place a slat every 4 slots with the tip of the support bar facing upwards), as shown in the figure below.
When processing small materials (such as dog tags, etc.), the slats can be removed and installed on the laser platform in reverse (large surface facing up), and the slats are arranged closely, as shown in the following figure:
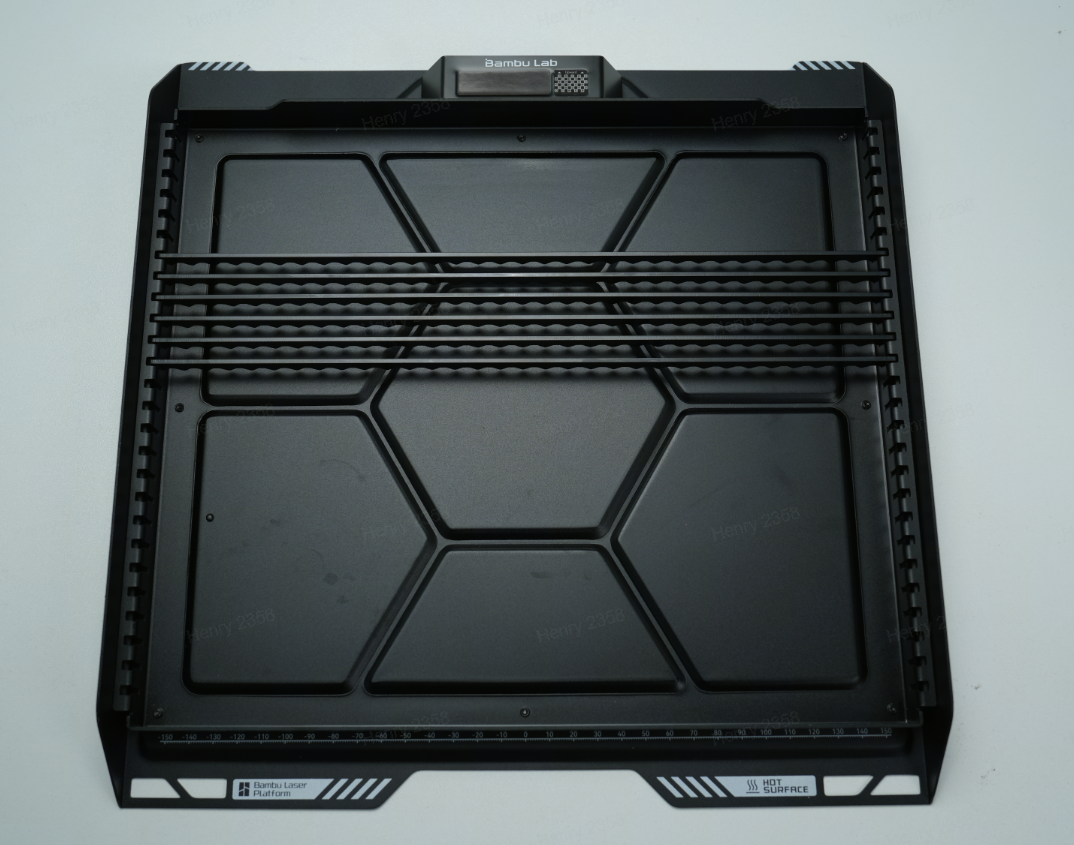
When inserting the slat, put one end into the slot first, and then insert the other end downwards. When you hear a click, it means that the single platform slat is assembled in place. After all 6 slats are assembled, you need to check again whether all the slats have been pressed into place.
¶ Install the grid panel
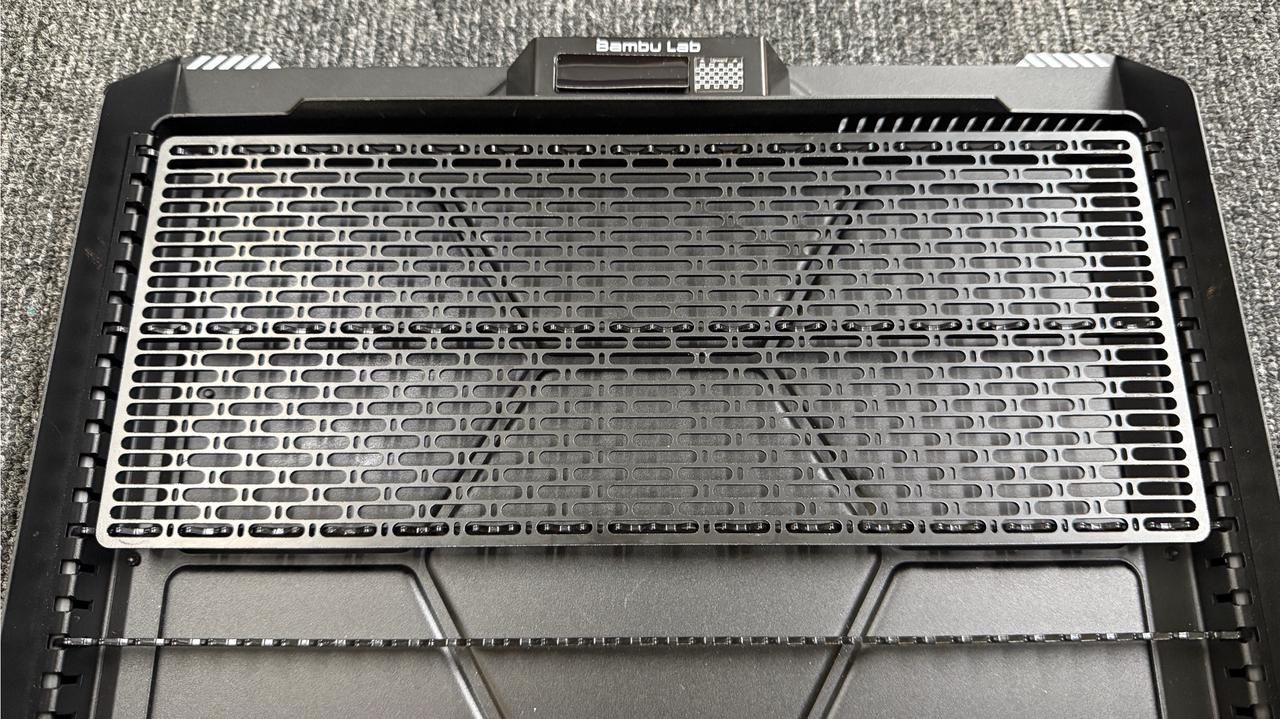
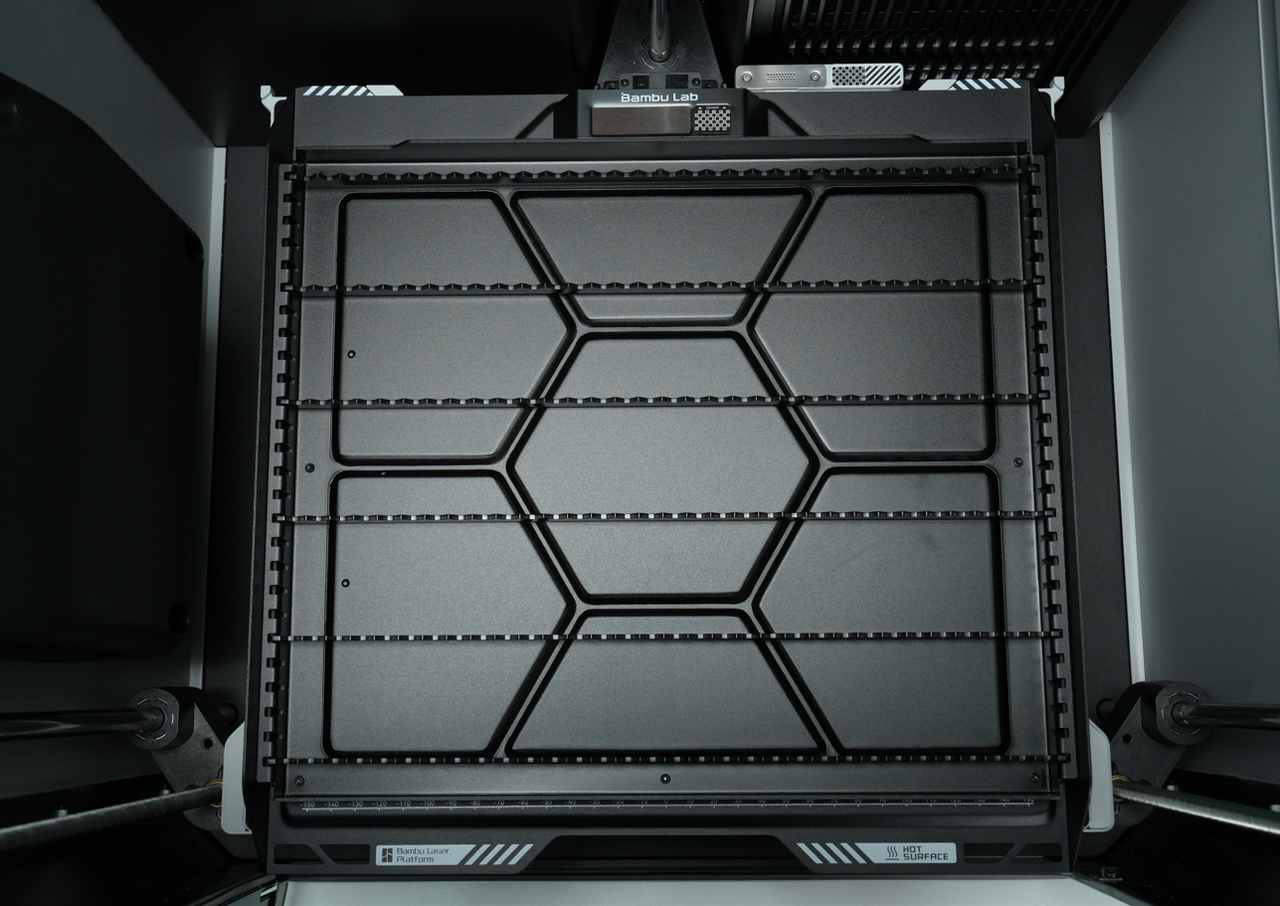
In addition to the slats, you can also add a grid panel (optional) to the slats pack to further meet the support needs of flexible materials (such as paper, leather), small materials, etc., as well as batch placement and engraving of multiple materials.
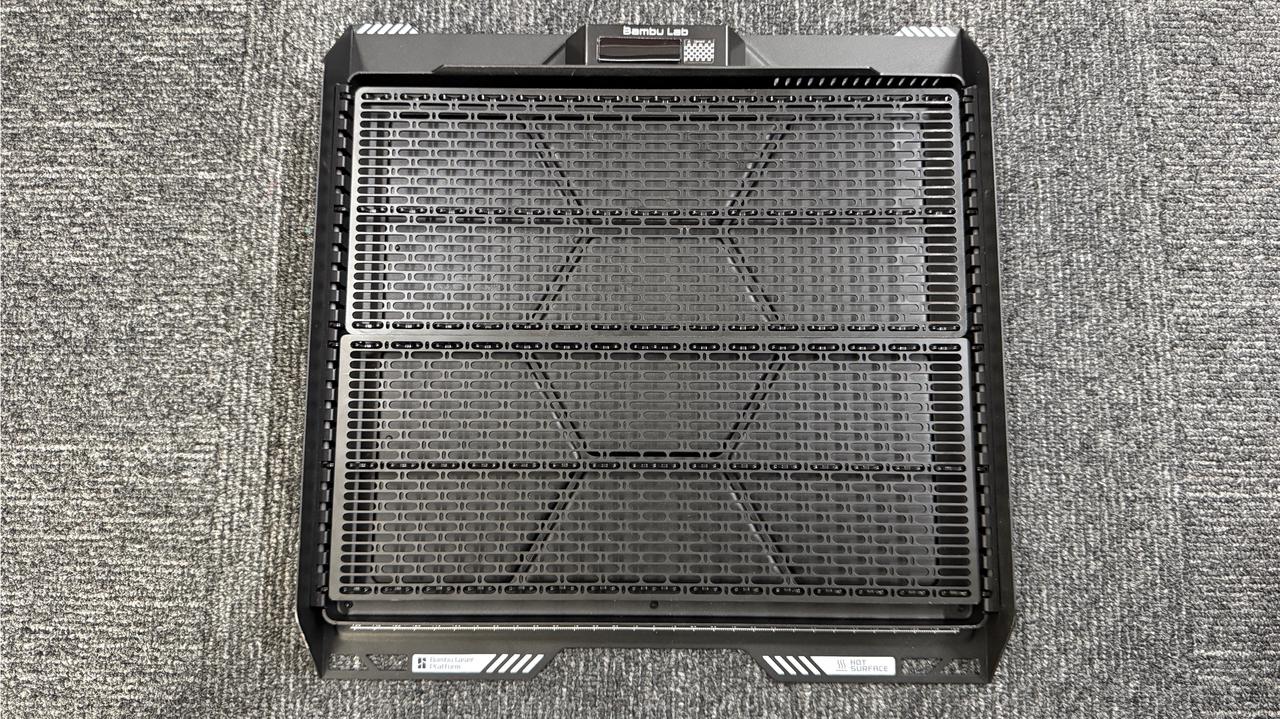
With the tip of the slats facing upward, align the holes of the grid panel with the tip of the slats and embed it to make the grid panel horizontal (it is recommended to use 3 slats for each grid panel, and adjust it to place a slat every 5 slots, which can just support the upper/middle/lower end of the grid panel to make it more stable), as shown in the figure below.
You can also use material pins to crimp the materials, which can make the materials flat and not easy to move. Material pins are divided into two types: large pins (4 pieces are randomly included) and small pins (optional).
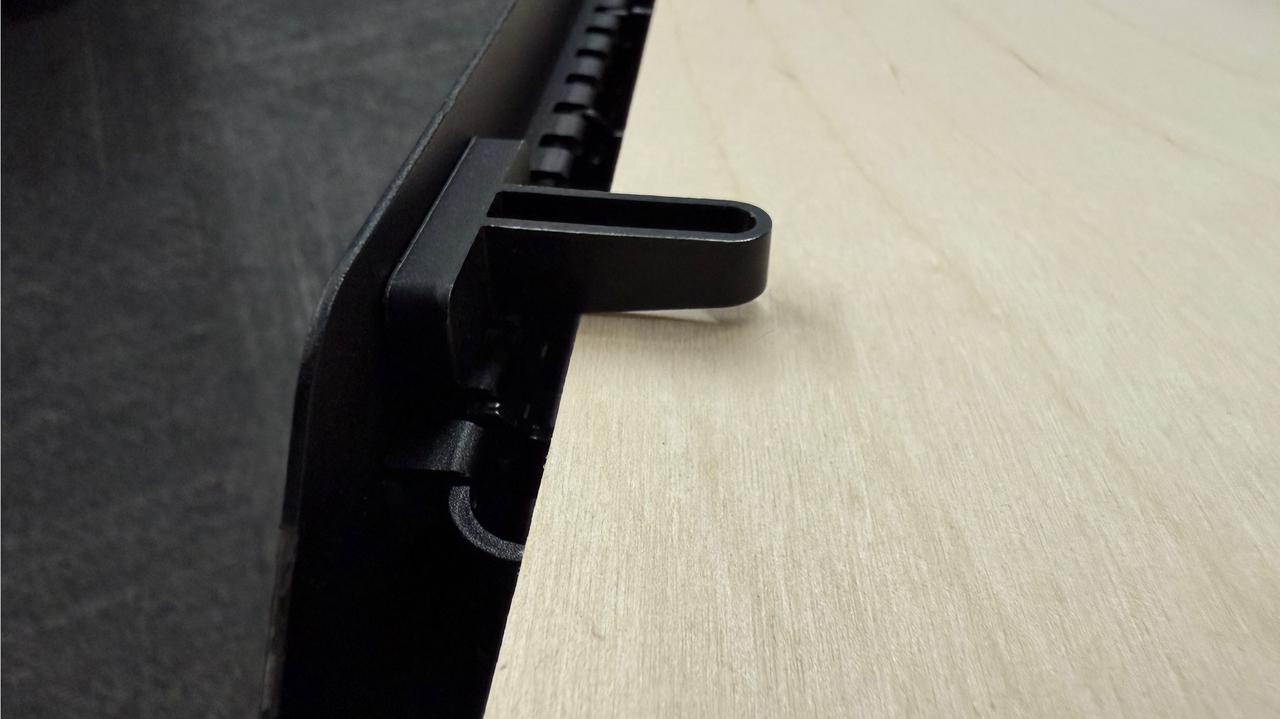
The big pins are suitable for official 300*300mm materials and can provide greater clamping force. The method of use is to magnetically absorb it into the vertical edges on both sides of the laser platform, and crimp it to the edge of the materials with the inclined surface facing down, as shown in the figure below.

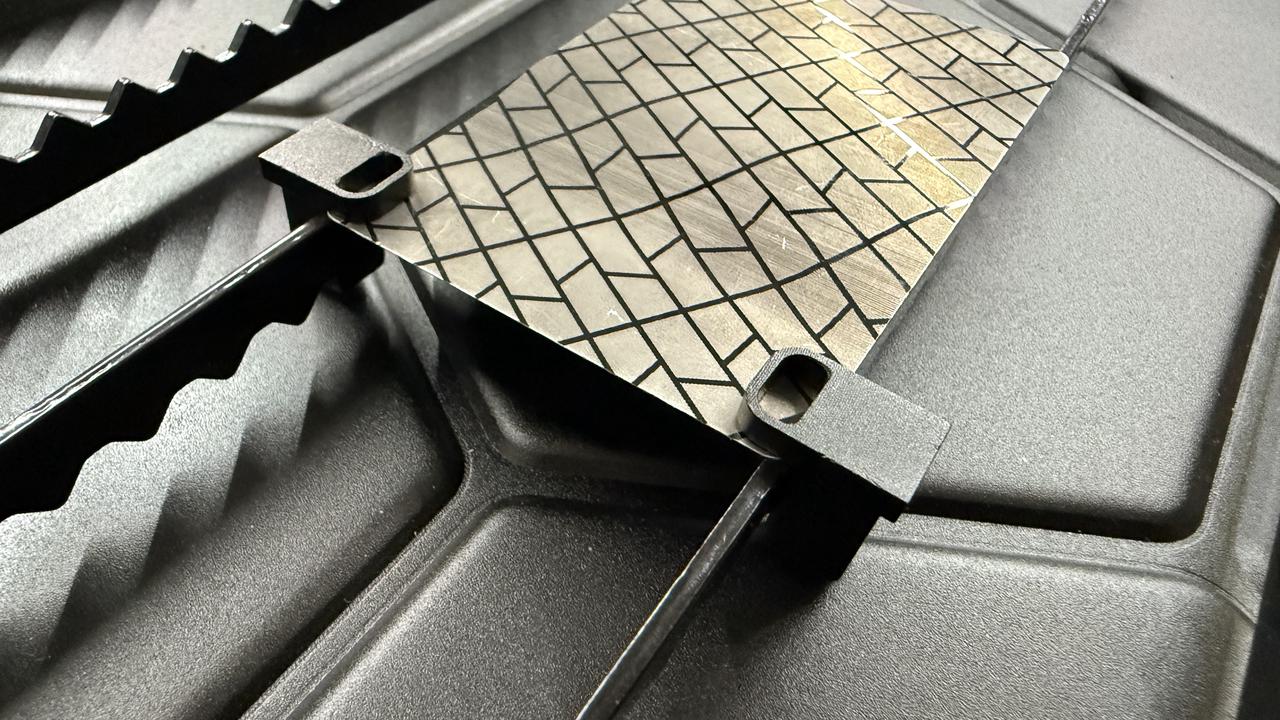
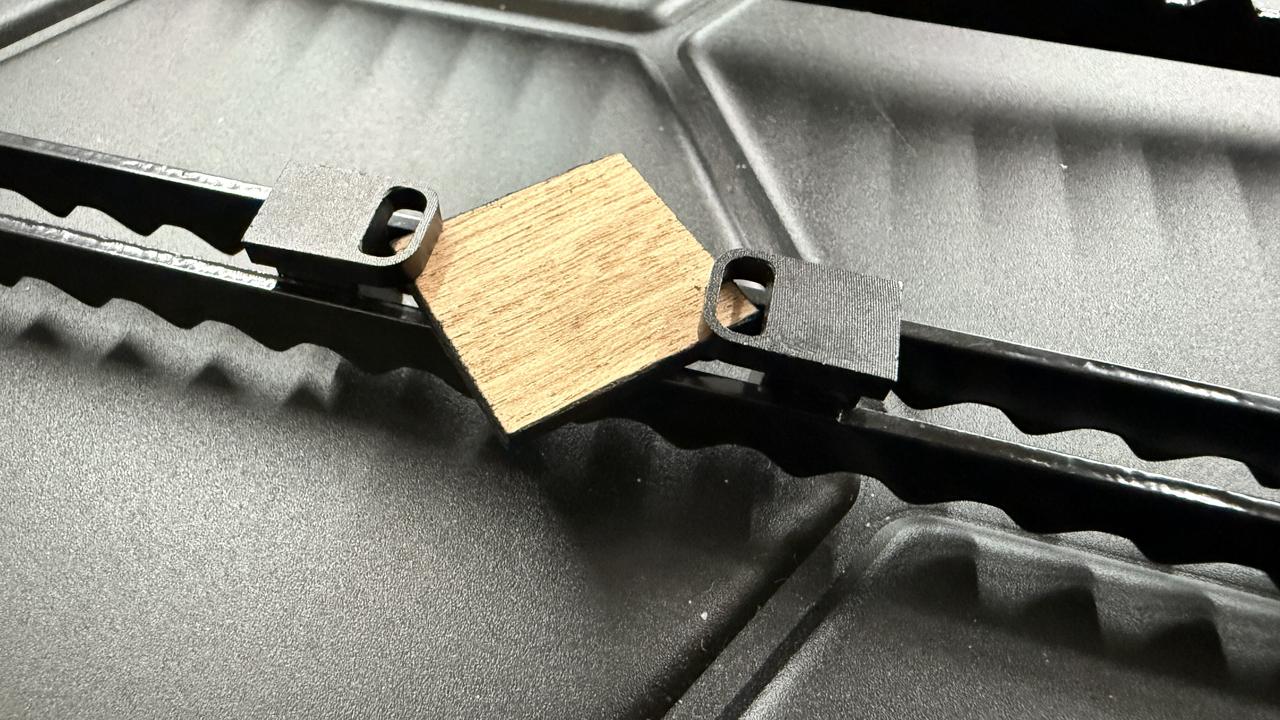
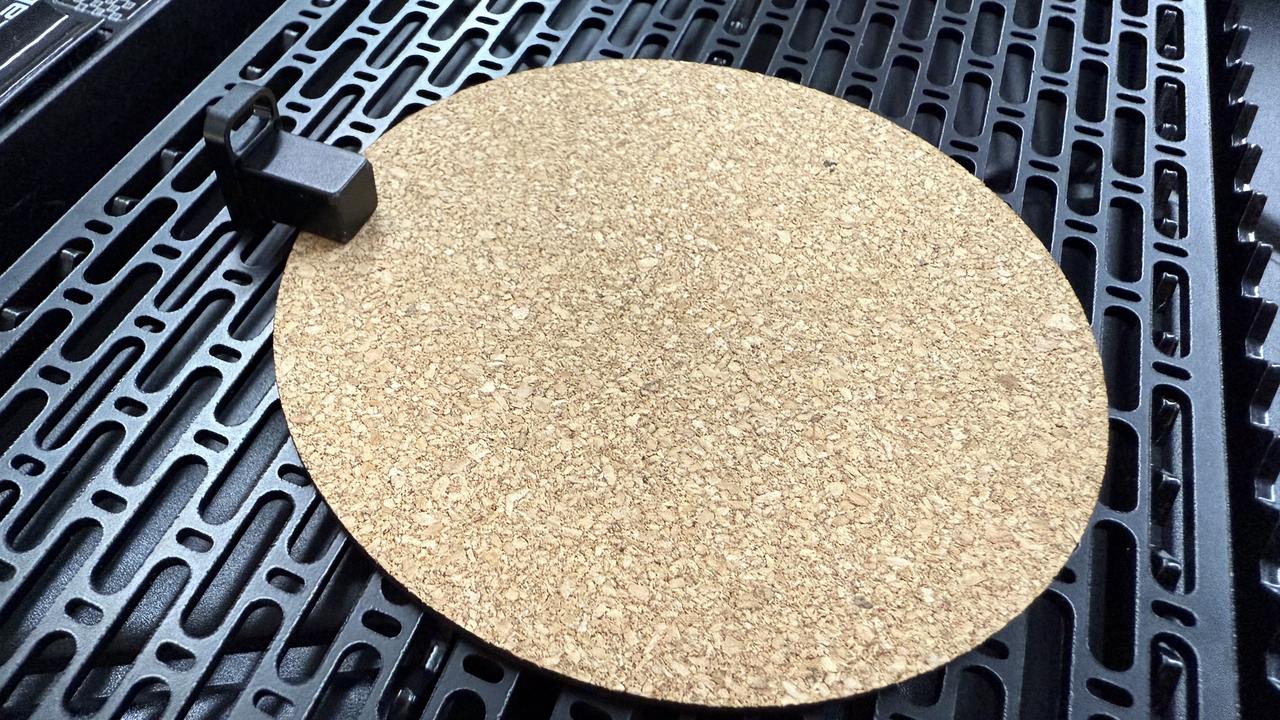
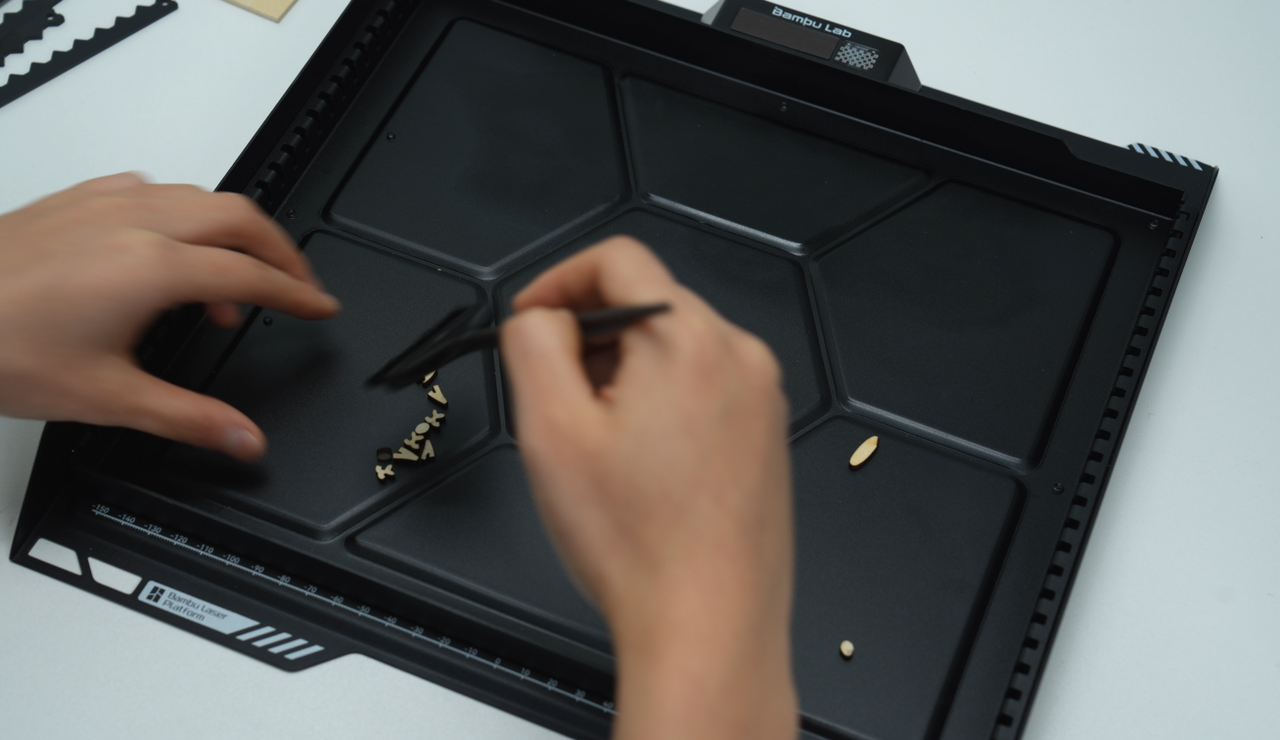
The small material pins are suitable for small-sized materials. When using it, the user can flexibly magnetically attach it to the laser base, slats pack, grid panel, etc. to hold the materials. The following figure shows several recommended uses.
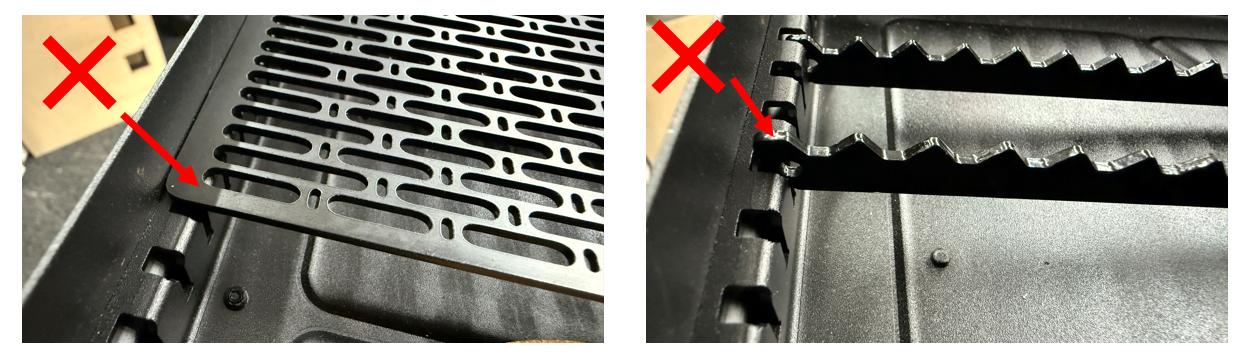
After preparation, install the laser platform on the heat bed horizontally or at a slightly smaller angle. Before installation, the top cover of the printer can be removed to obtain a better observation field of view. Make sure that the laser platform is just supported by the two heat bed parallel limit blocks, and that two sides of the platform are relatively parallel to the heat bed, indicating that the laser platform is installed in place.
The laser platform needs to be cleaned regularly. You can first remove the entire platform, pour the large debris into the recycling position, and then use the provided brush to clean the platform surface; when there is a lot of grease on the surface, you can remove the platform slats, rinse the laser platform and the platform slats with tap water respectively, and use WD-40 or similar products to clean if necessary.
¶ Summary
-
In normal use, use 6 platform slats, evenly distributed on the laser platform;
-
The number of platform slats can be reduced or increased for special use. Additional slats need to be purchased separately.
-
When using dog tags and other small components, the platform slat can be installed on the laser platform in reverse.
¶ Notes
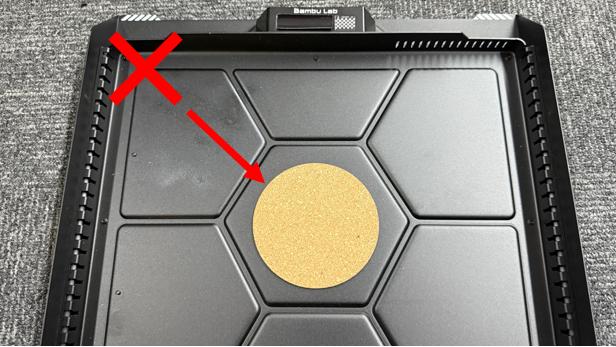
- The workpiece must be placed on the platform slats or grid panel, and cannot be placed directly on the bottom surface of the laser platform, otherwise it will cause the material thickness measurement to fail or hit the toolhead.
- Be sure to check that the laser platform, platform slats pack, grid panel, and materials are all flat and not warped or bent, otherwise, it will cause the laser to be out of focus or cause uneven cutting.
-
The grid panel is only suitable for engraving because of its large contact surface. Cutting on it may cause the back of the material to be severely blackened. It is recommended to remove the grid panel when cutting and restore the state of using the slats pack.
-
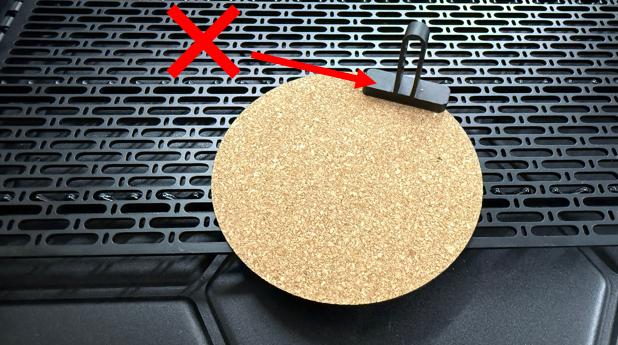
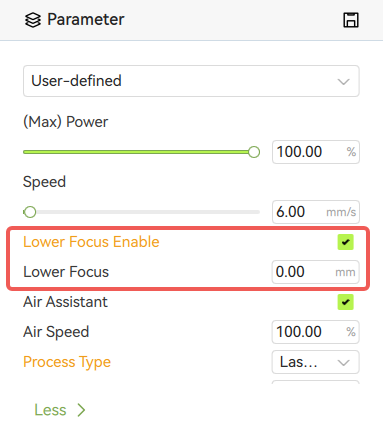
The big material pins can only be installed on both sides of the laser platform, and cannot be vertically magnetically attracted on the grid panel, otherwise, the toolhead will be hit; the small material pins can be vertically magnetically attracted, but the operation requires extra attention, shen manually entering the material thickness in the software, it cannot be set to a thickness more than 2mm lower than the surface of the workpiece, and cannot turn on the focus sinking (see developer mode for details), otherwise, it will also cause the toolhead collision.
¶ End Notes
We hope the detailed guide provided has been helpful and informative.
If this guide does not solve your problem, please submit a technical ticket, we will answer your questions and provide assistance.
If you have any suggestions or feedback on this Wiki, please leave a message in the comment area. Thank you for your support and attention!