¶ Rear panel
The rear panel is installed on the back of the printer.
The spare parts for the rear panel include the following:
-
rear panel * 1
-
BT3×8 Self-tapping screw * 12
-
ST3×6 bolt screw * 11 (A machine screw refers to a screw with fine threads and a close pitch designed for locking into metal)
¶ When to replace
The rear panel has significant deformation due to transportation or maintenance, affecting its use or installation.
¶ Tools and materials needed
-
New rear panel
-
H2.0 key
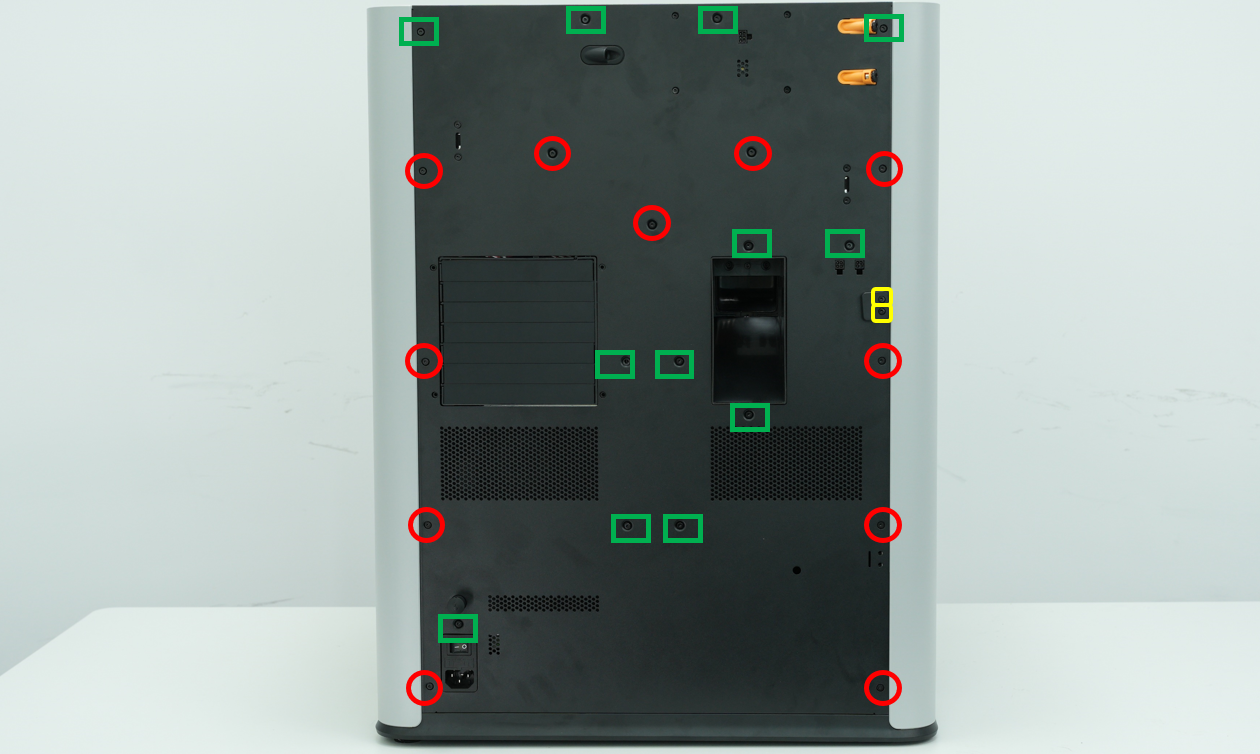
Screw specifications and quantities involved in the disassembly and assembly process (it is recommended to keep the removed screws properly to avoid loss):
-
BT3×8 self-tapping screws - used to fix the back panel * 12 pieces (green rectangle)
-
ST3×6 bolt screws - used to fix the back panel * 11 pieces (red circle)
-
ST3x12 bolt screws - used to fix the external spool bracket base * 2 pieces (yellow rounded rectangle)

¶ Video Guide
You can refer to some steps in this video to complete the disassembly and assembly.
¶ Safety Warning
IMPORTANT!
It's crucial to power off the printer before conducting any maintenance work, including work on the printer's electronics and tool head wires. Performing tasks with the printer on can result in a short circuit, leading to electronic damage and safety hazards.
During maintenance or troubleshooting, you may need to disassemble parts, including the hotend. This exposes wires and electrical components that could short circuit if they contact each other, other metal, or electronic components while the printer is still on. This can result in damage to the printer's electronics and additional issues.
Therefore, it's crucial to turn off the printer and disconnect it from the power source before conducting any maintenance. This prevents short circuits or damage to the printer's electronics, ensuring safe and effective maintenance. For any concerns or questions about following this guide, open a new ticket in our Support Page and we will do our best to respond promptly and provide the assistance you need.
¶ Remove the rear panel
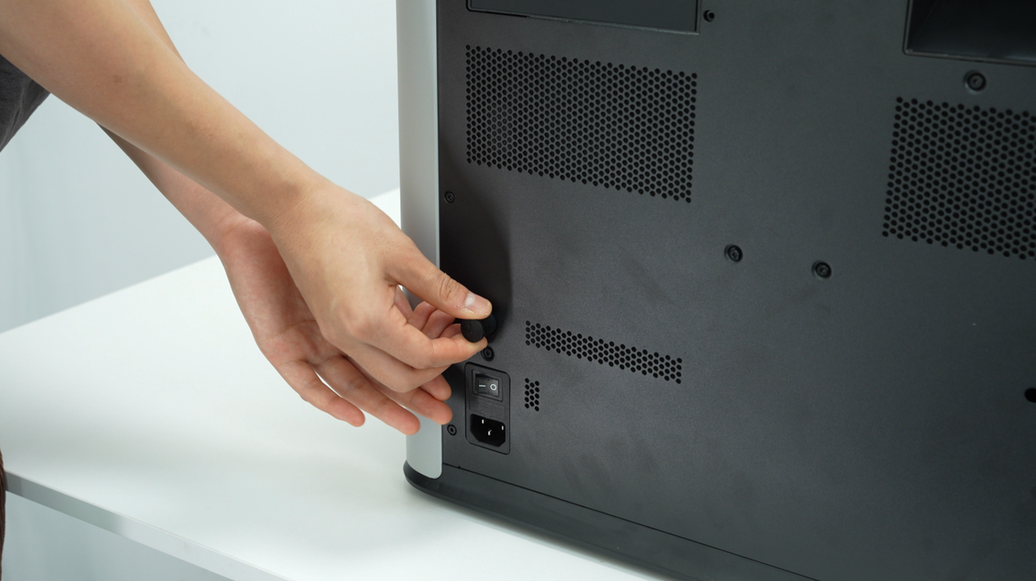
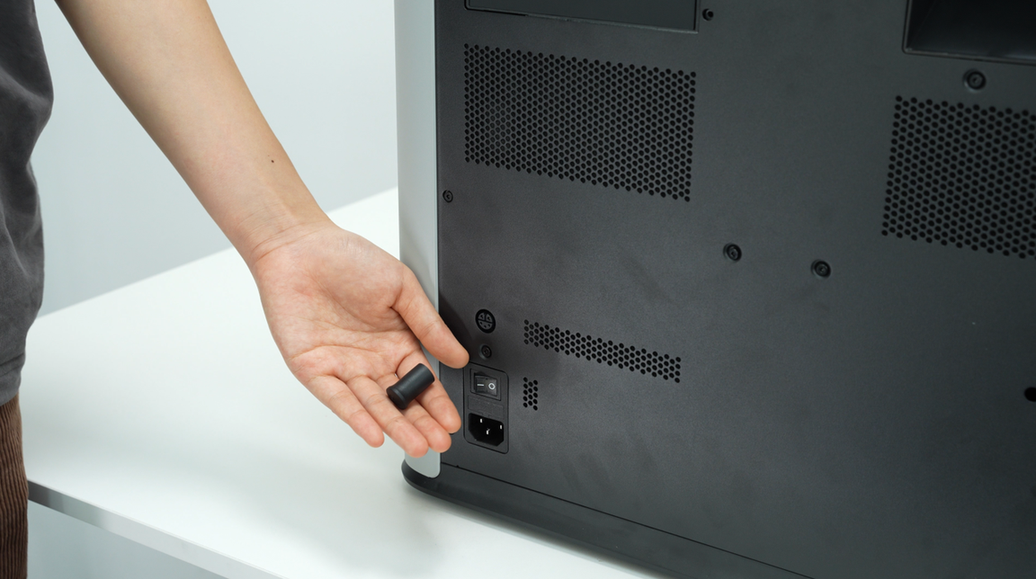
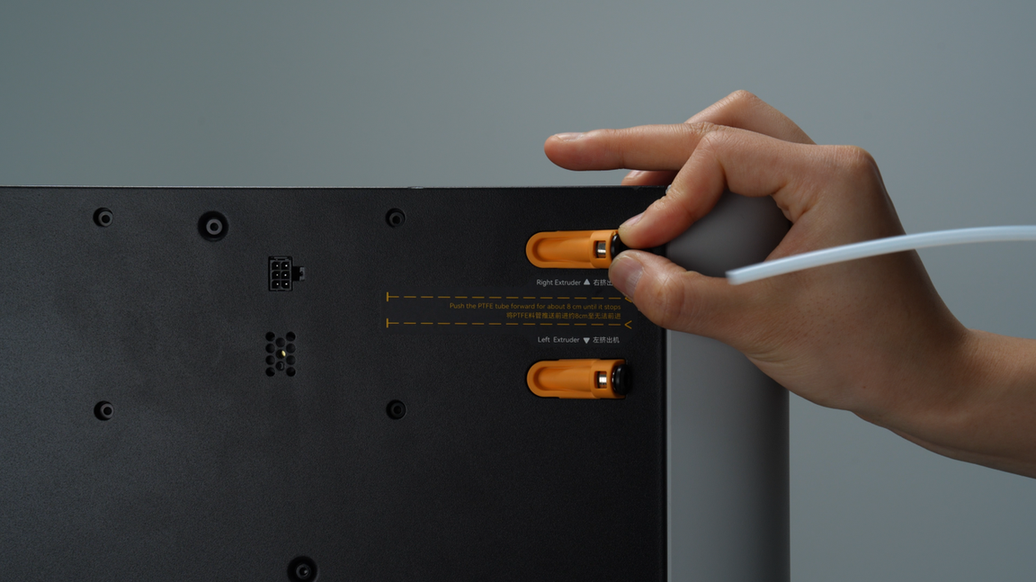
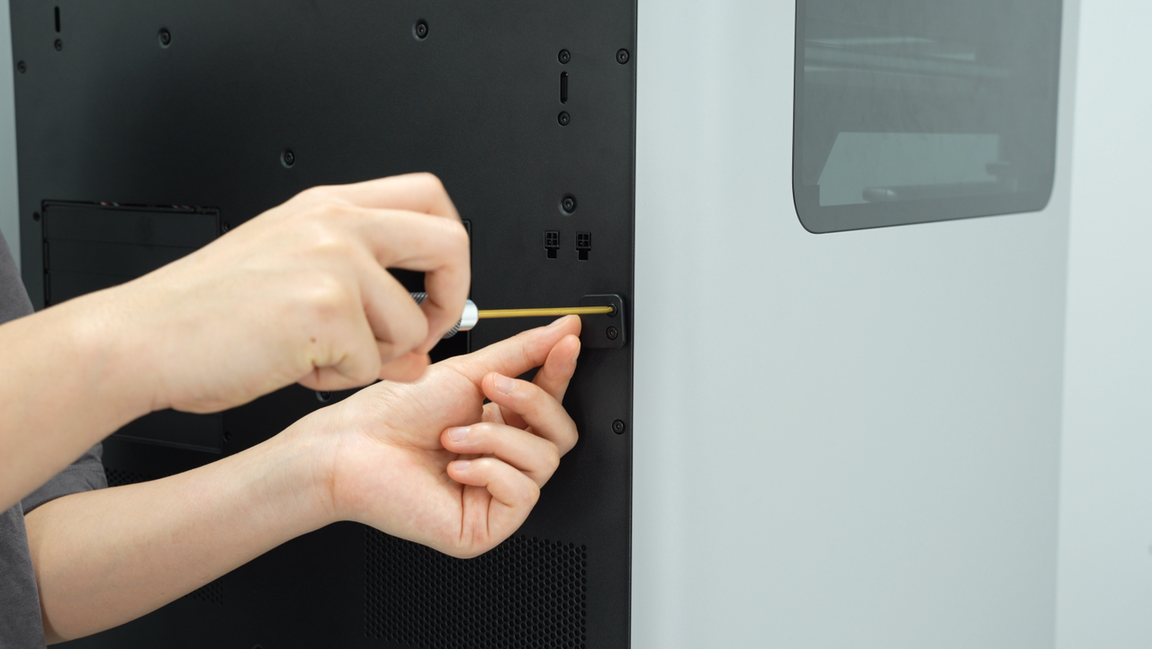
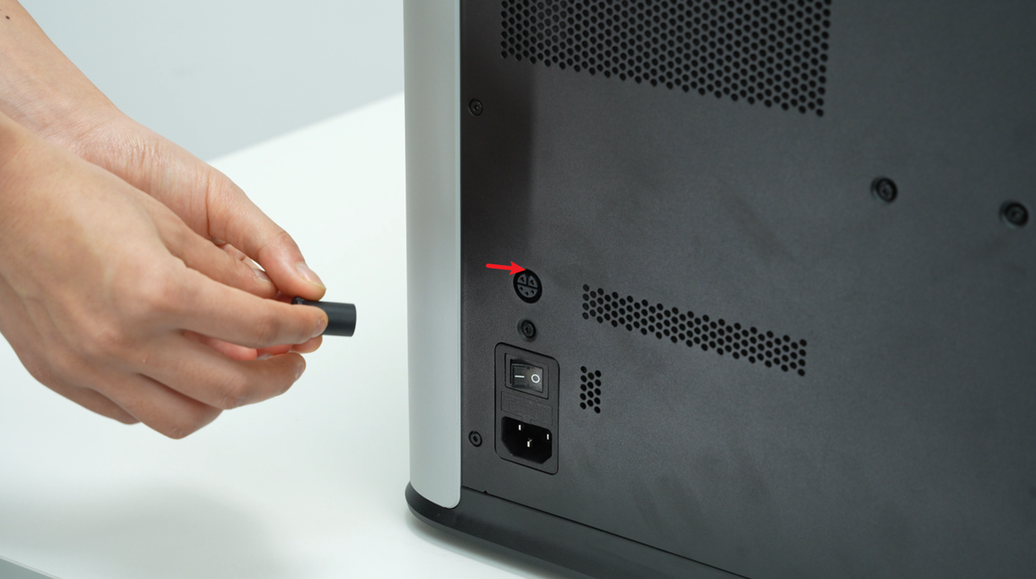
¶ Step 1: Turn off the power, unplug the power cable and the power safety key, and disconnect the PTFE tube from the back.
After removing the power key, please keep it in a safe place, as the subsequent steps require inserting the safety key for the printer to power on properly.
To facilitate the removal of the rear panel, press the pneumatic connector to detach the PTFE tube from the pneumatic connector.
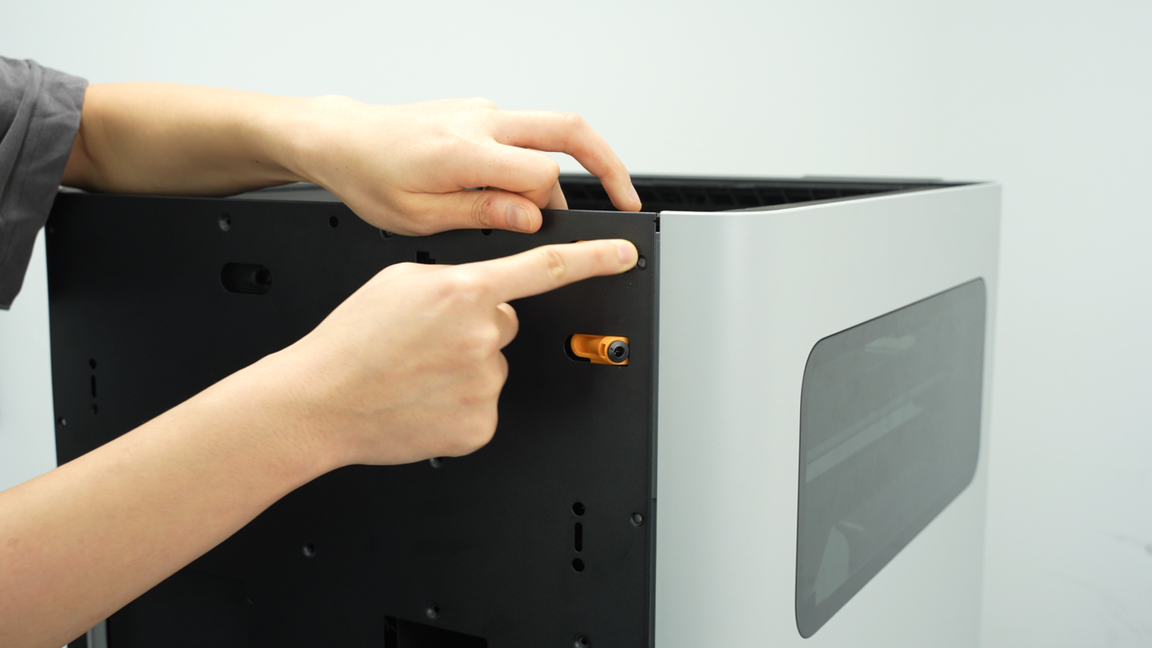
¶ Step 2: Remove the external spool bracket base
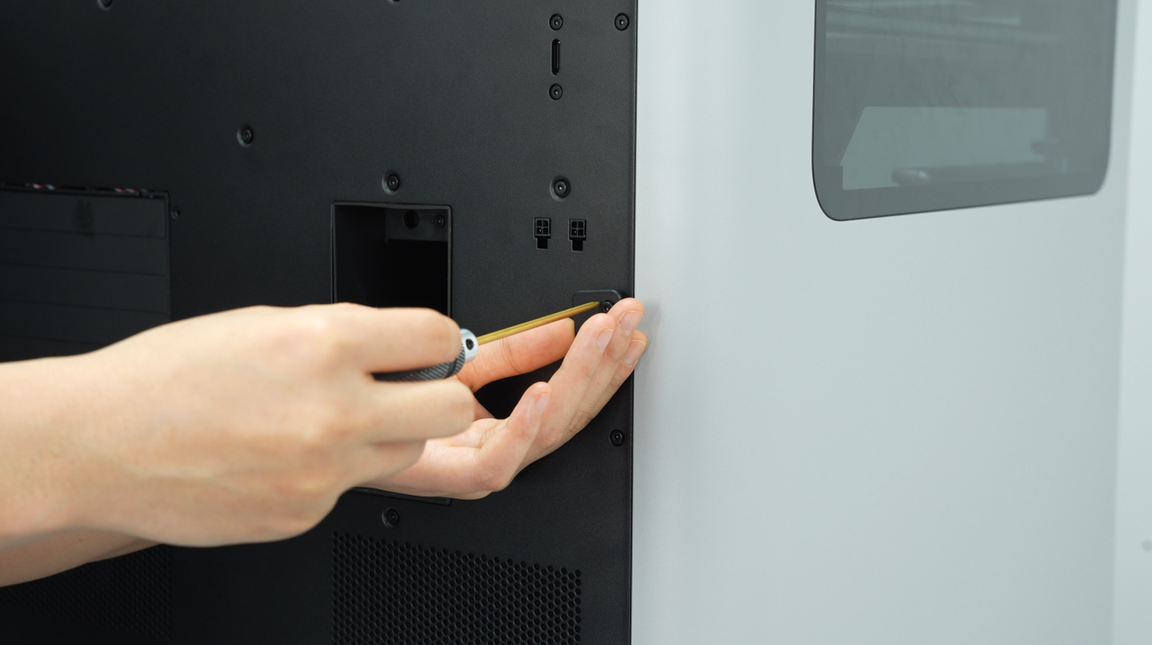
Use an H2.0 hex key to remove the two screws securing the external spool bracket base( yellow rounded rectangle), and then take off the external spool bracket base.

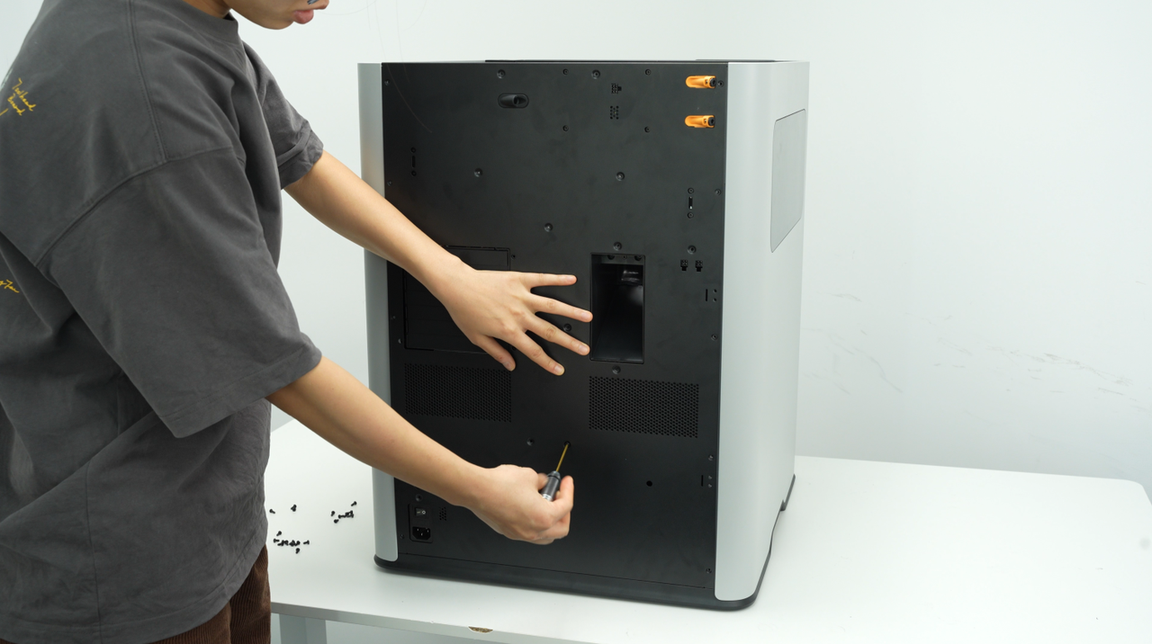
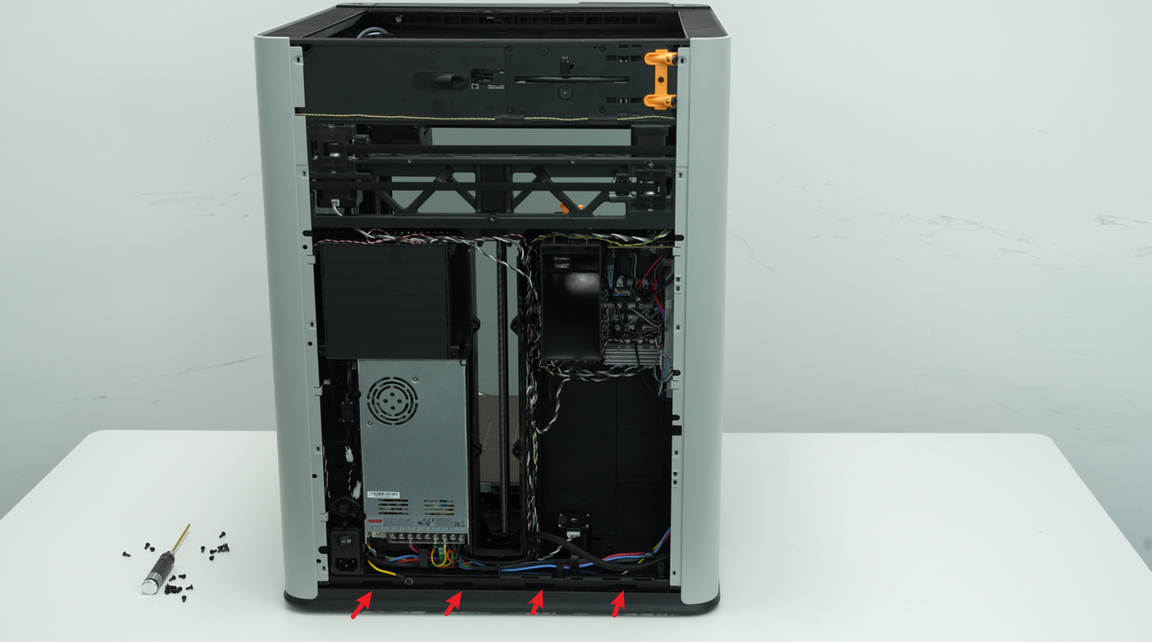
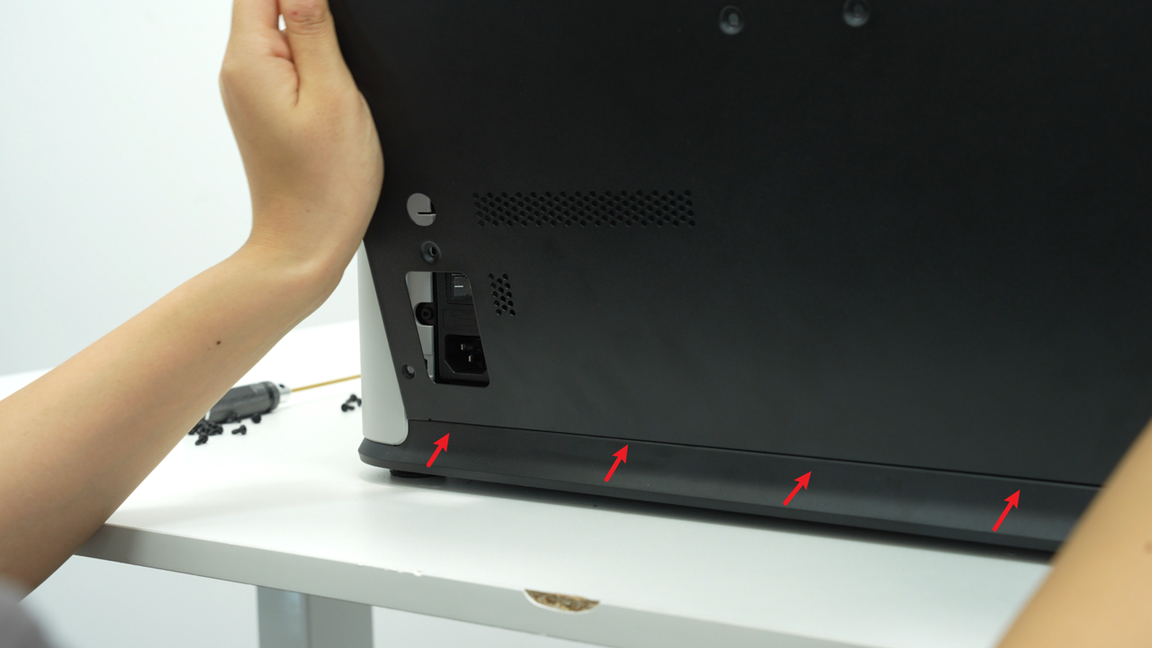
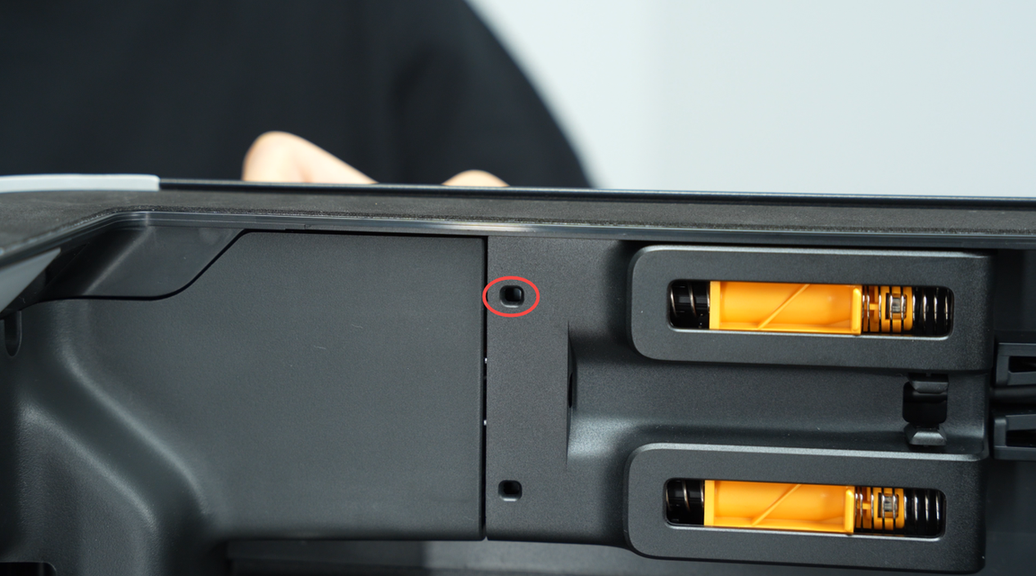
¶ Step 3: Remove the screws of the rear panel.
Besides the bracket base screw, the H2D rear panel is secured by two types of screws: 11 ST3×6 screws and 12 BT3×8 screws, for a total of 23 screws. In the diagram below, machine screws are marked with circles, while self-tapping screws are marked with squares.
Due to the large number of screws, please prepare two small boxes to hold the two different types of screws before removing them.
-
Use an H2.0 hex key to remove 11 screws (marked with a red circle, ST3×6).
-
Use an H2.0 hex key to remove 12 screws (marked with a green rectangle, BT3×8).
-
The yellow marking indicates the spool holder fixing screw (M3x12).
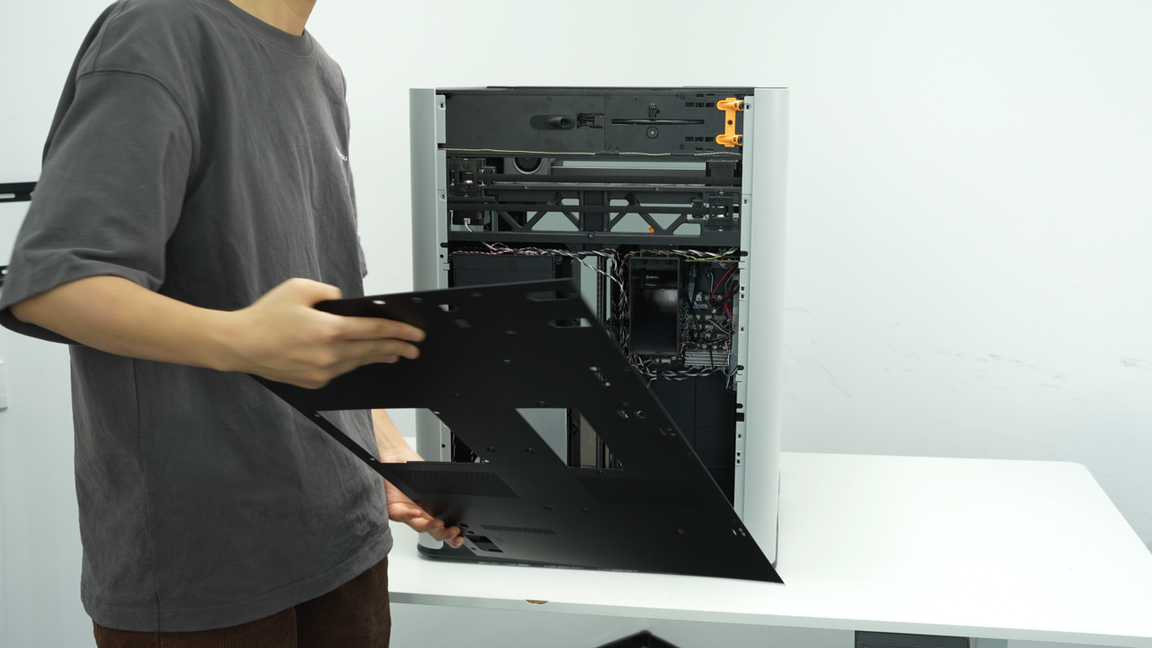
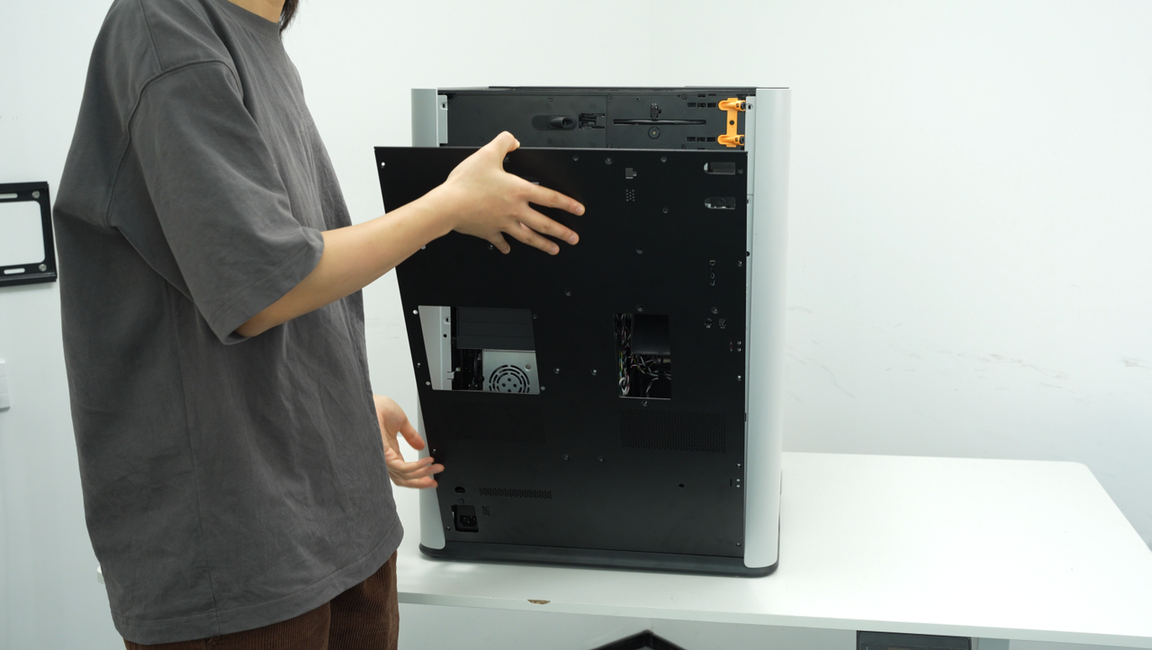
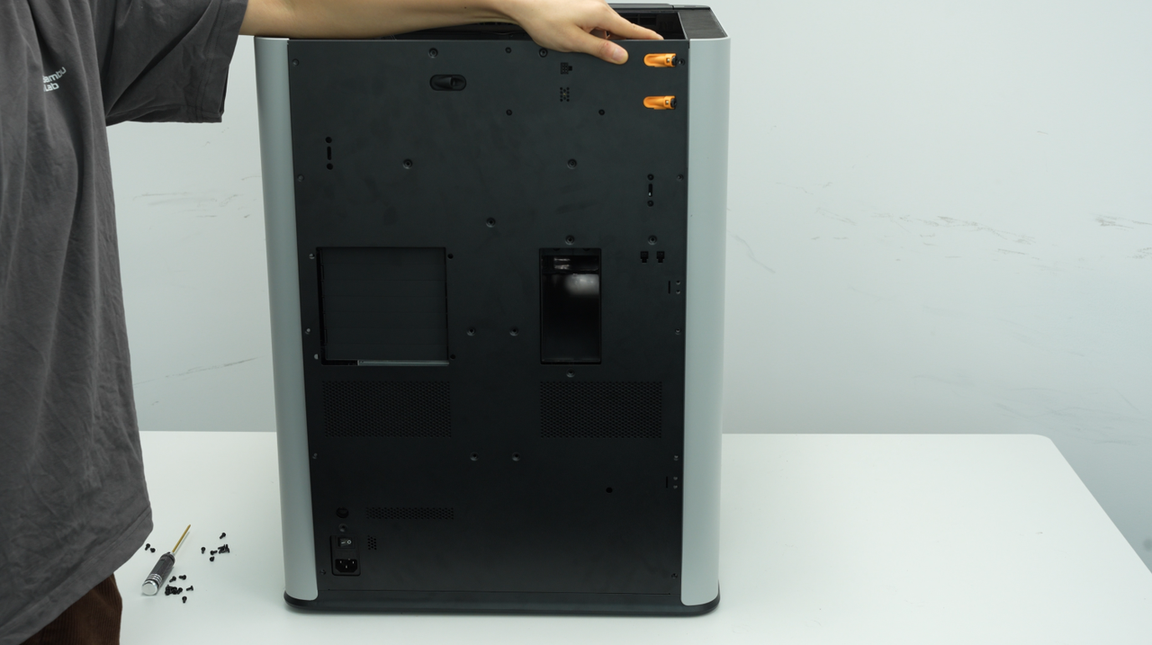
¶ Step 4: Remove the rear panel
Press the pneumatic connector to avoid interference, then tilt the rear panel and remove it.
¶ Install the rear panel
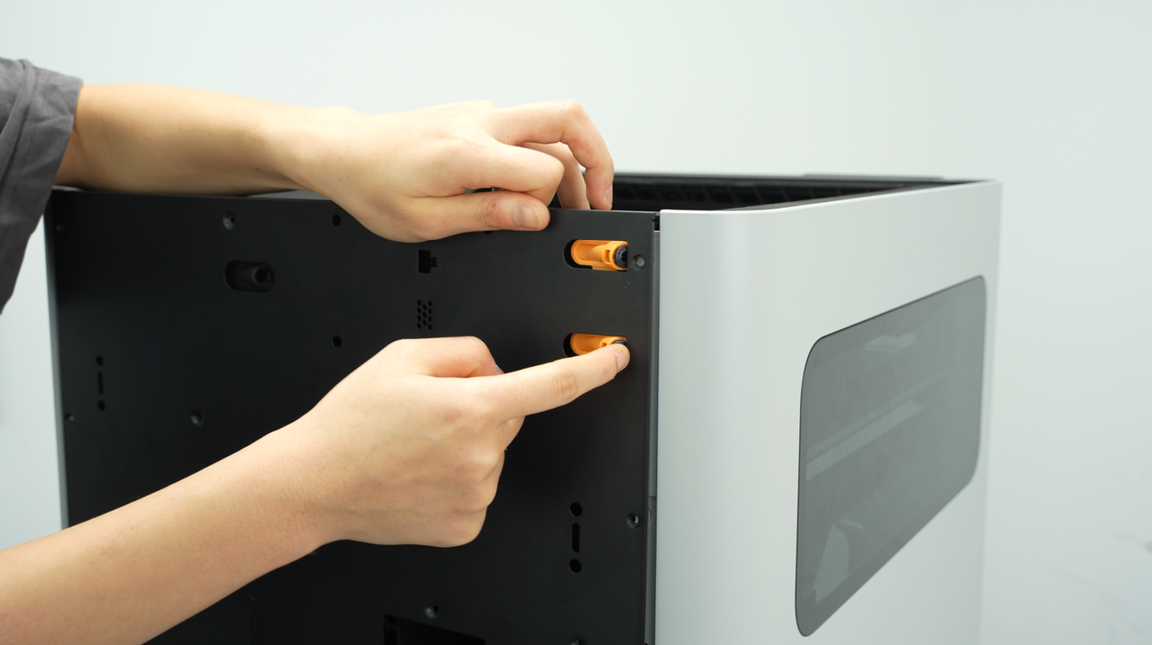
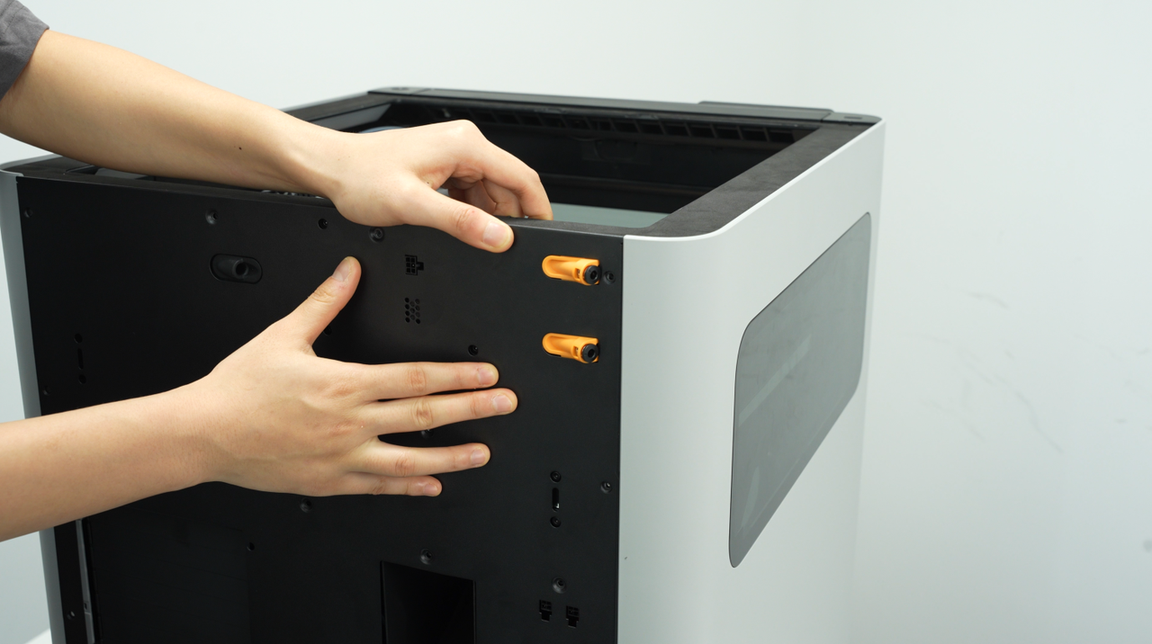
¶ Step 1: Reinstall the rear panel
First, insert the back panel at an angle into the bottom of the printer. Make sure to align it with the four holes; once the edges are flush, push it forward to secure the back panel in place.
Tip: After roughly aligning the clips, you can shake the back panel up and down to ensure all four clips are perfectly aligned.
¶ Step 2: Tighten the fixing screws
-
Use an H2.0 hex key to tighten 11 screws (marked with a red circle, ST3×6).
-
Use an H2.0 hex key to tighten 12 screws (marked with a green rectangle, BT3×8).

¶ Step 3: Install the external spool bracket base.
Align the external spool bracket base with the holes on the back of the printer, then use an H2.0 hex key to tighten the two fixing screws;
After installation, the external spool bracket base may appear slightly tilted; this is intentional, so there’s no need to worry

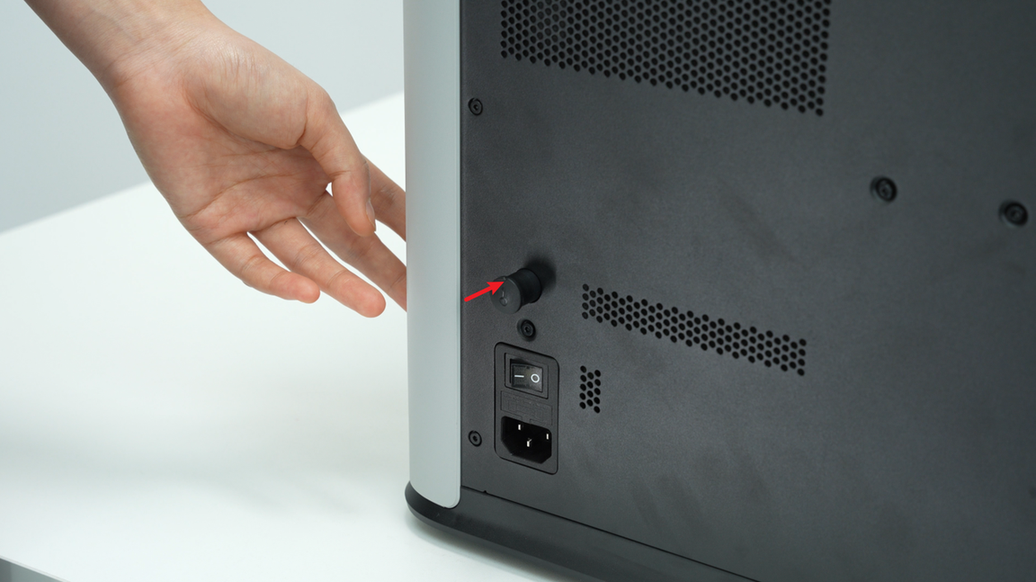
¶ Step 4: Reinsert the power safety key
Reconnect the PTFE tube to the pneumatic connector.
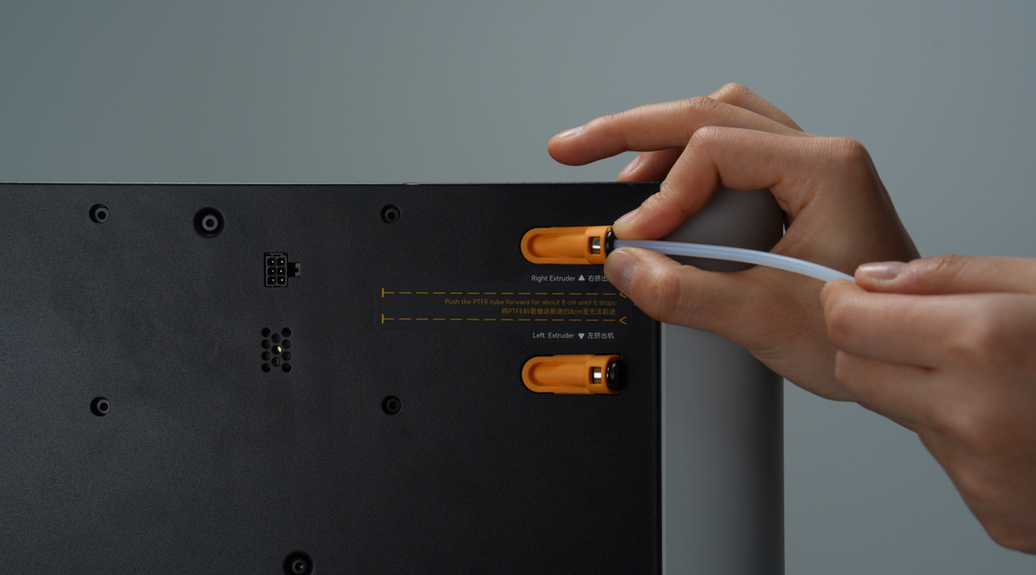
Please note that the safety key and socket are directional and must be aligned with the notch direction.
¶ To verify completion/success
Check that the screws are not raised and that there is no obvious deformation.
¶ End Notes
We hope the detailed guide provided has been helpful and informative. To ensure a safe and effective execution, if you have any concerns or questions about the process described in this article, we recommend submitting a Technical ticket regarding your issue. Please include a picture or video illustrating the problem, as well as any additional information related to your inquiry.