¶ Tool Head Sensor FPC Cable
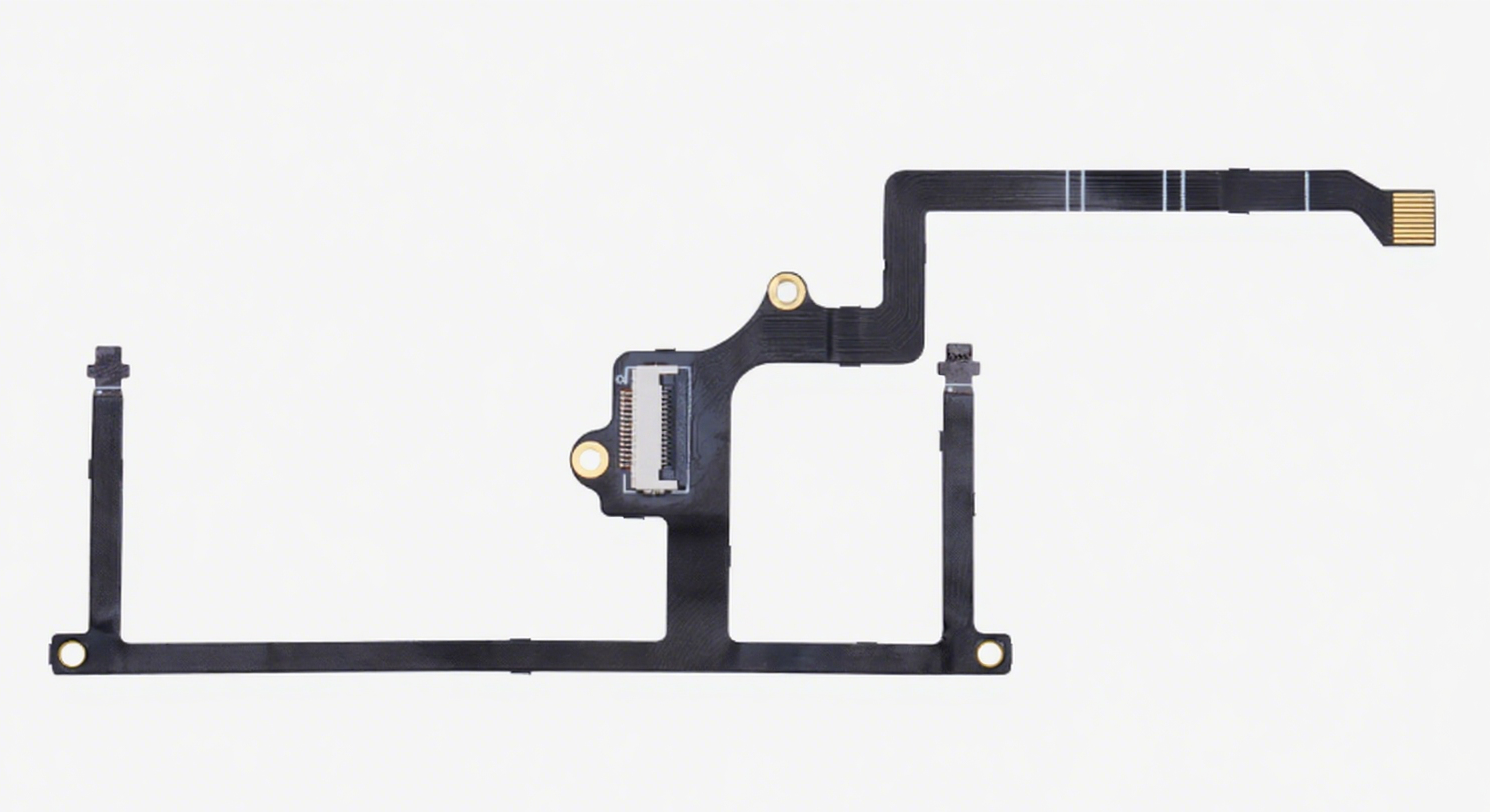
The Toolhead Sensor FPC Cable for the H2D extruder is a flexible printed circuit cable that connects the Hall Effect sensors on both sides of the extruder idlers and the front cover Hall board to the TH board. This cable plays a crucial role in detecting filament presence and ensuring proper operation of the filament cutter mechanism.
The Tool Head Sensor FPC Cable is attached to the back of the extruder as a flexible cable with a connector.
¶ Required Tools & Preparation
- H2.0 and H1.5 hex wrenches
- Small screw tray (to prevent losing screws)
- New Tool Head Sensor FPC Cable
¶ Safety Tips
Important!
Always turn off and unplug the printer before performing any maintenance on the printer or its electronics (including tool head cables) to prevent short circuits and avoid damaging electronic components.
Check the temperature of the hotend and heated bed before maintenance. If working at high temperatures is necessary, wear heat-resistant gloves to ensure safety.
If you have any questions about this guide, contact online technical support (available 9:00–21:00) for assistance.
¶ Disassembly Steps
¶ Step 1: Remove the Extruder Assembly
 |
 |
Refer to this H2D Extruder Replacement Wiki or video for guidance.
¶ Video Guide
¶ Step 2: Remove Left & Right Cutters
Place the extruder on a table. Using an H2.0 hex wrench, remove the screw holding the right cutter arm, then take out the right cutter and torsion spring together.
 |
 |
Repeat the same for the left cutter.
¶ Step 3: Remove Extruder Front Cover Guide
Use an H2.0 hex wrench to remove three screws (M2.5x7 × 3, marked by the box), then slide the front cover guide forward to remove it.
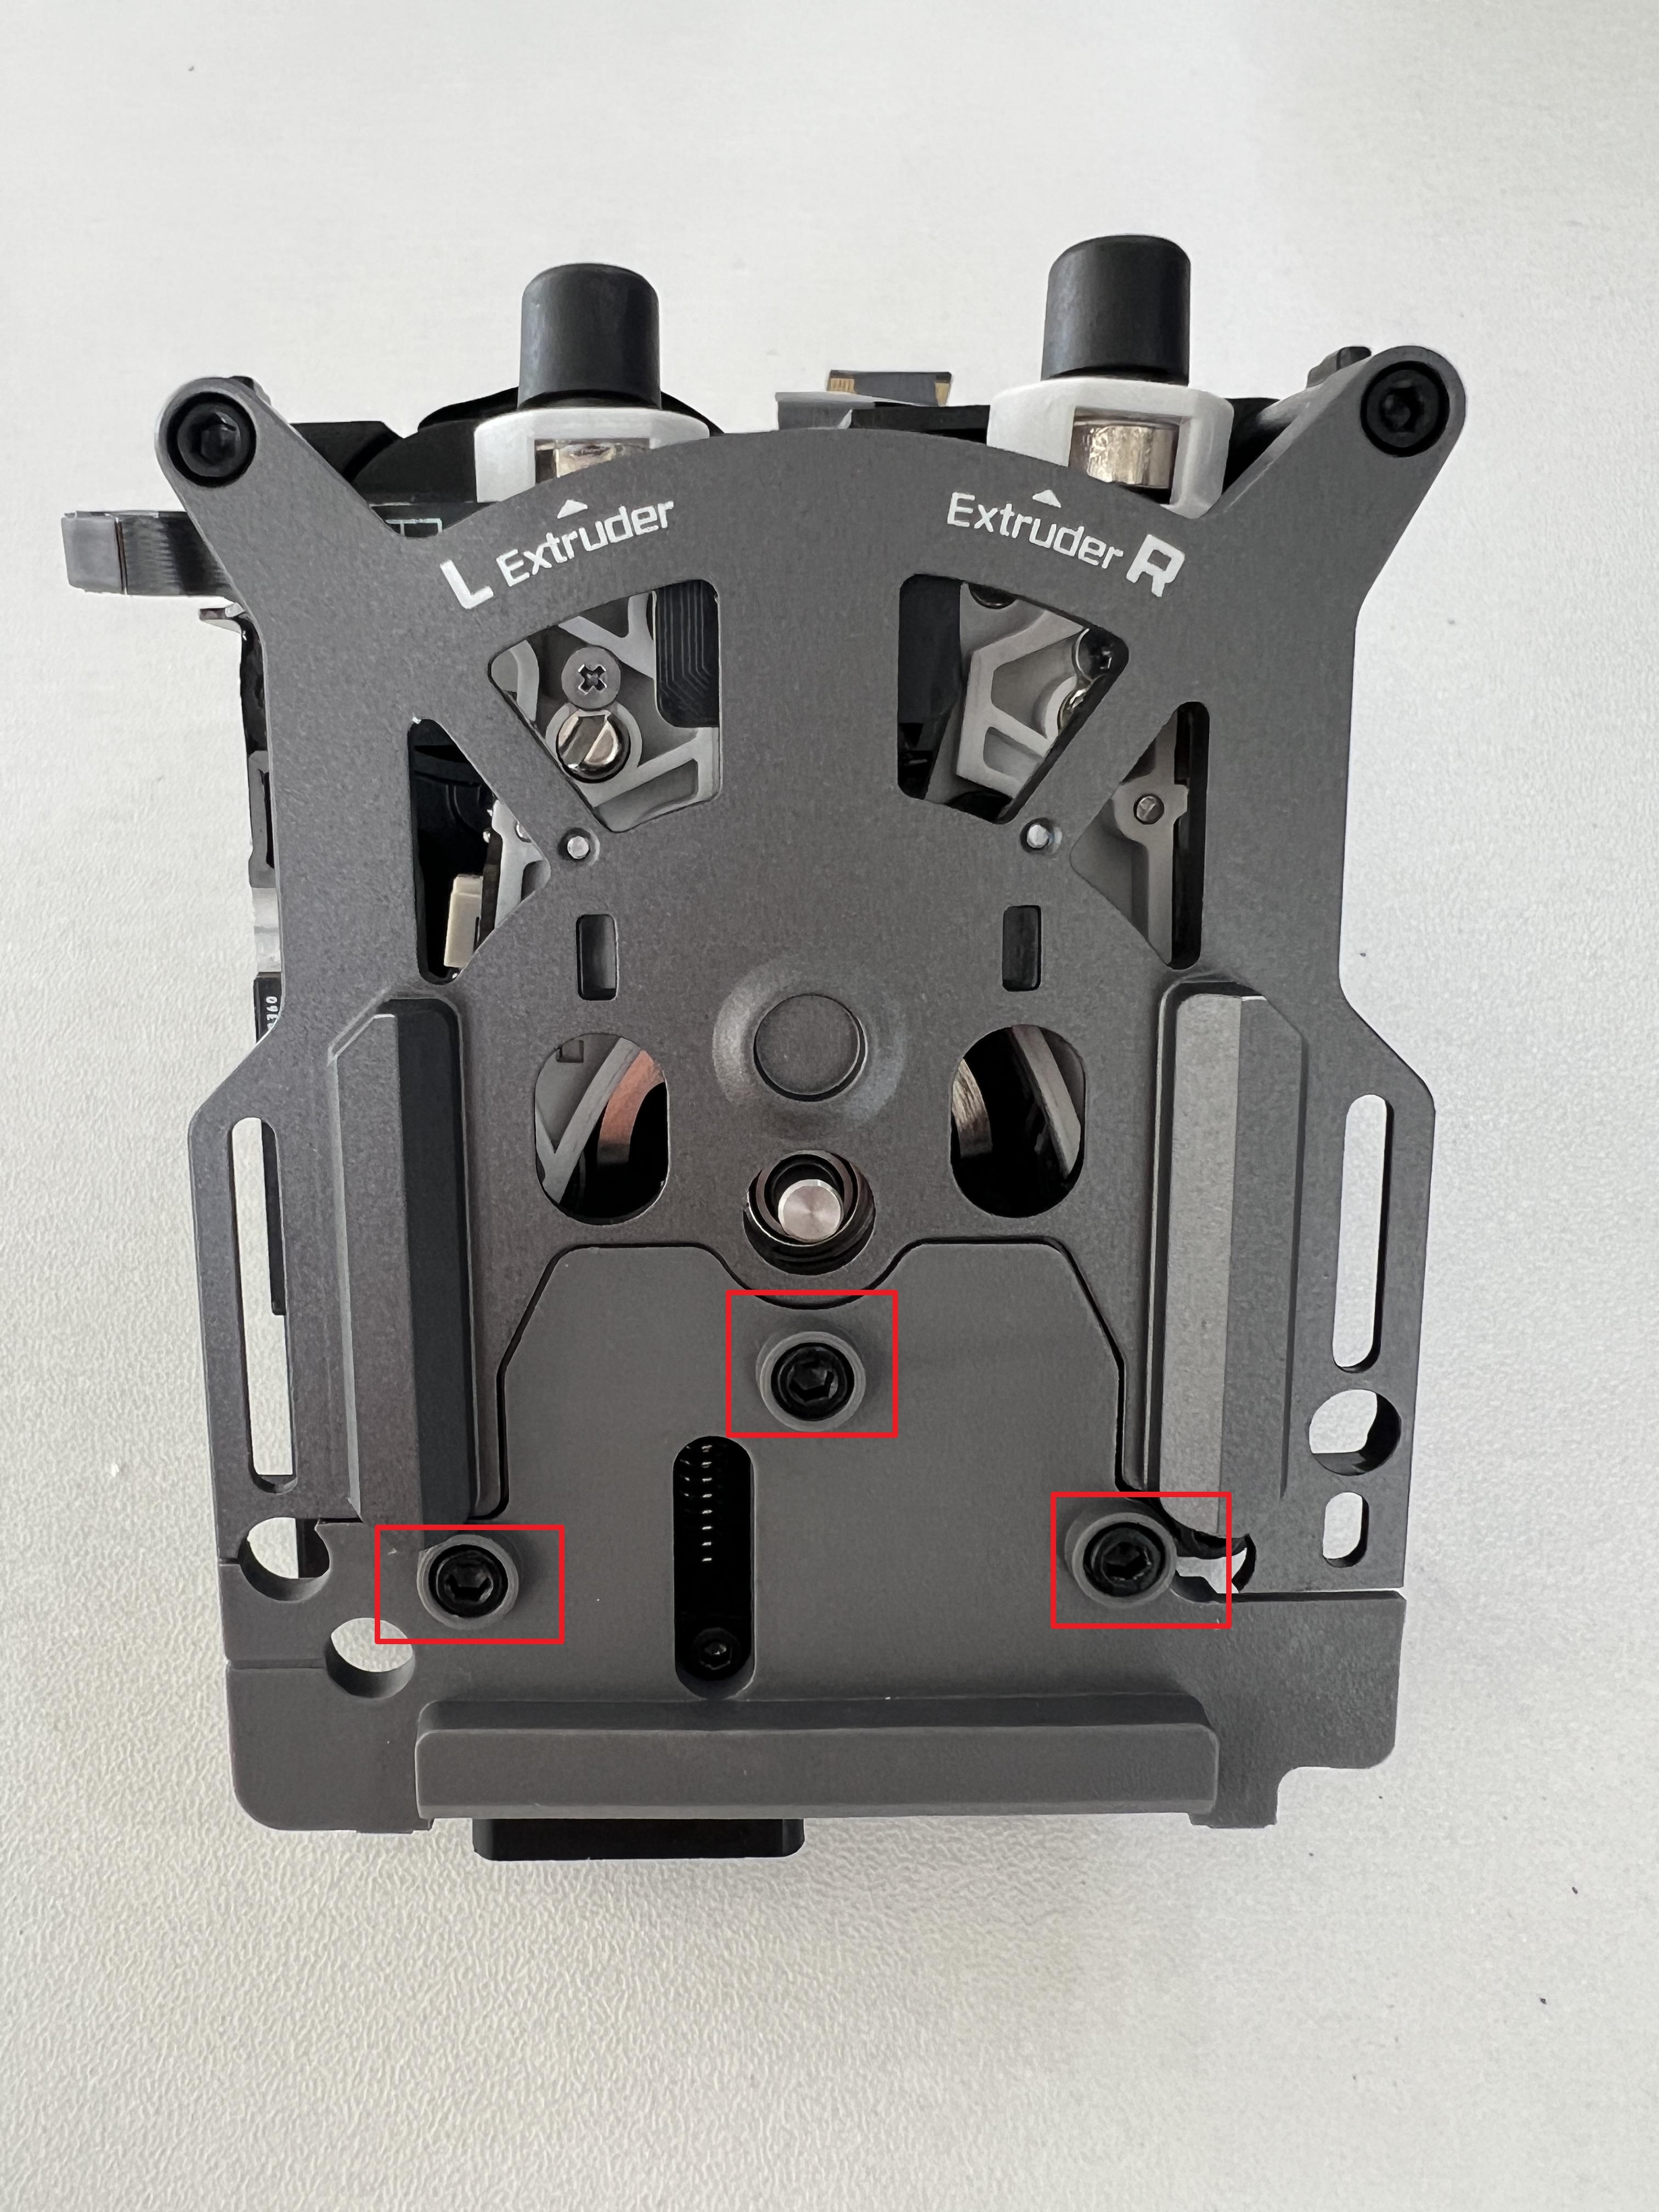
Slide it out as shown below:

¶ Step 4: Remove Extruder Front Cover
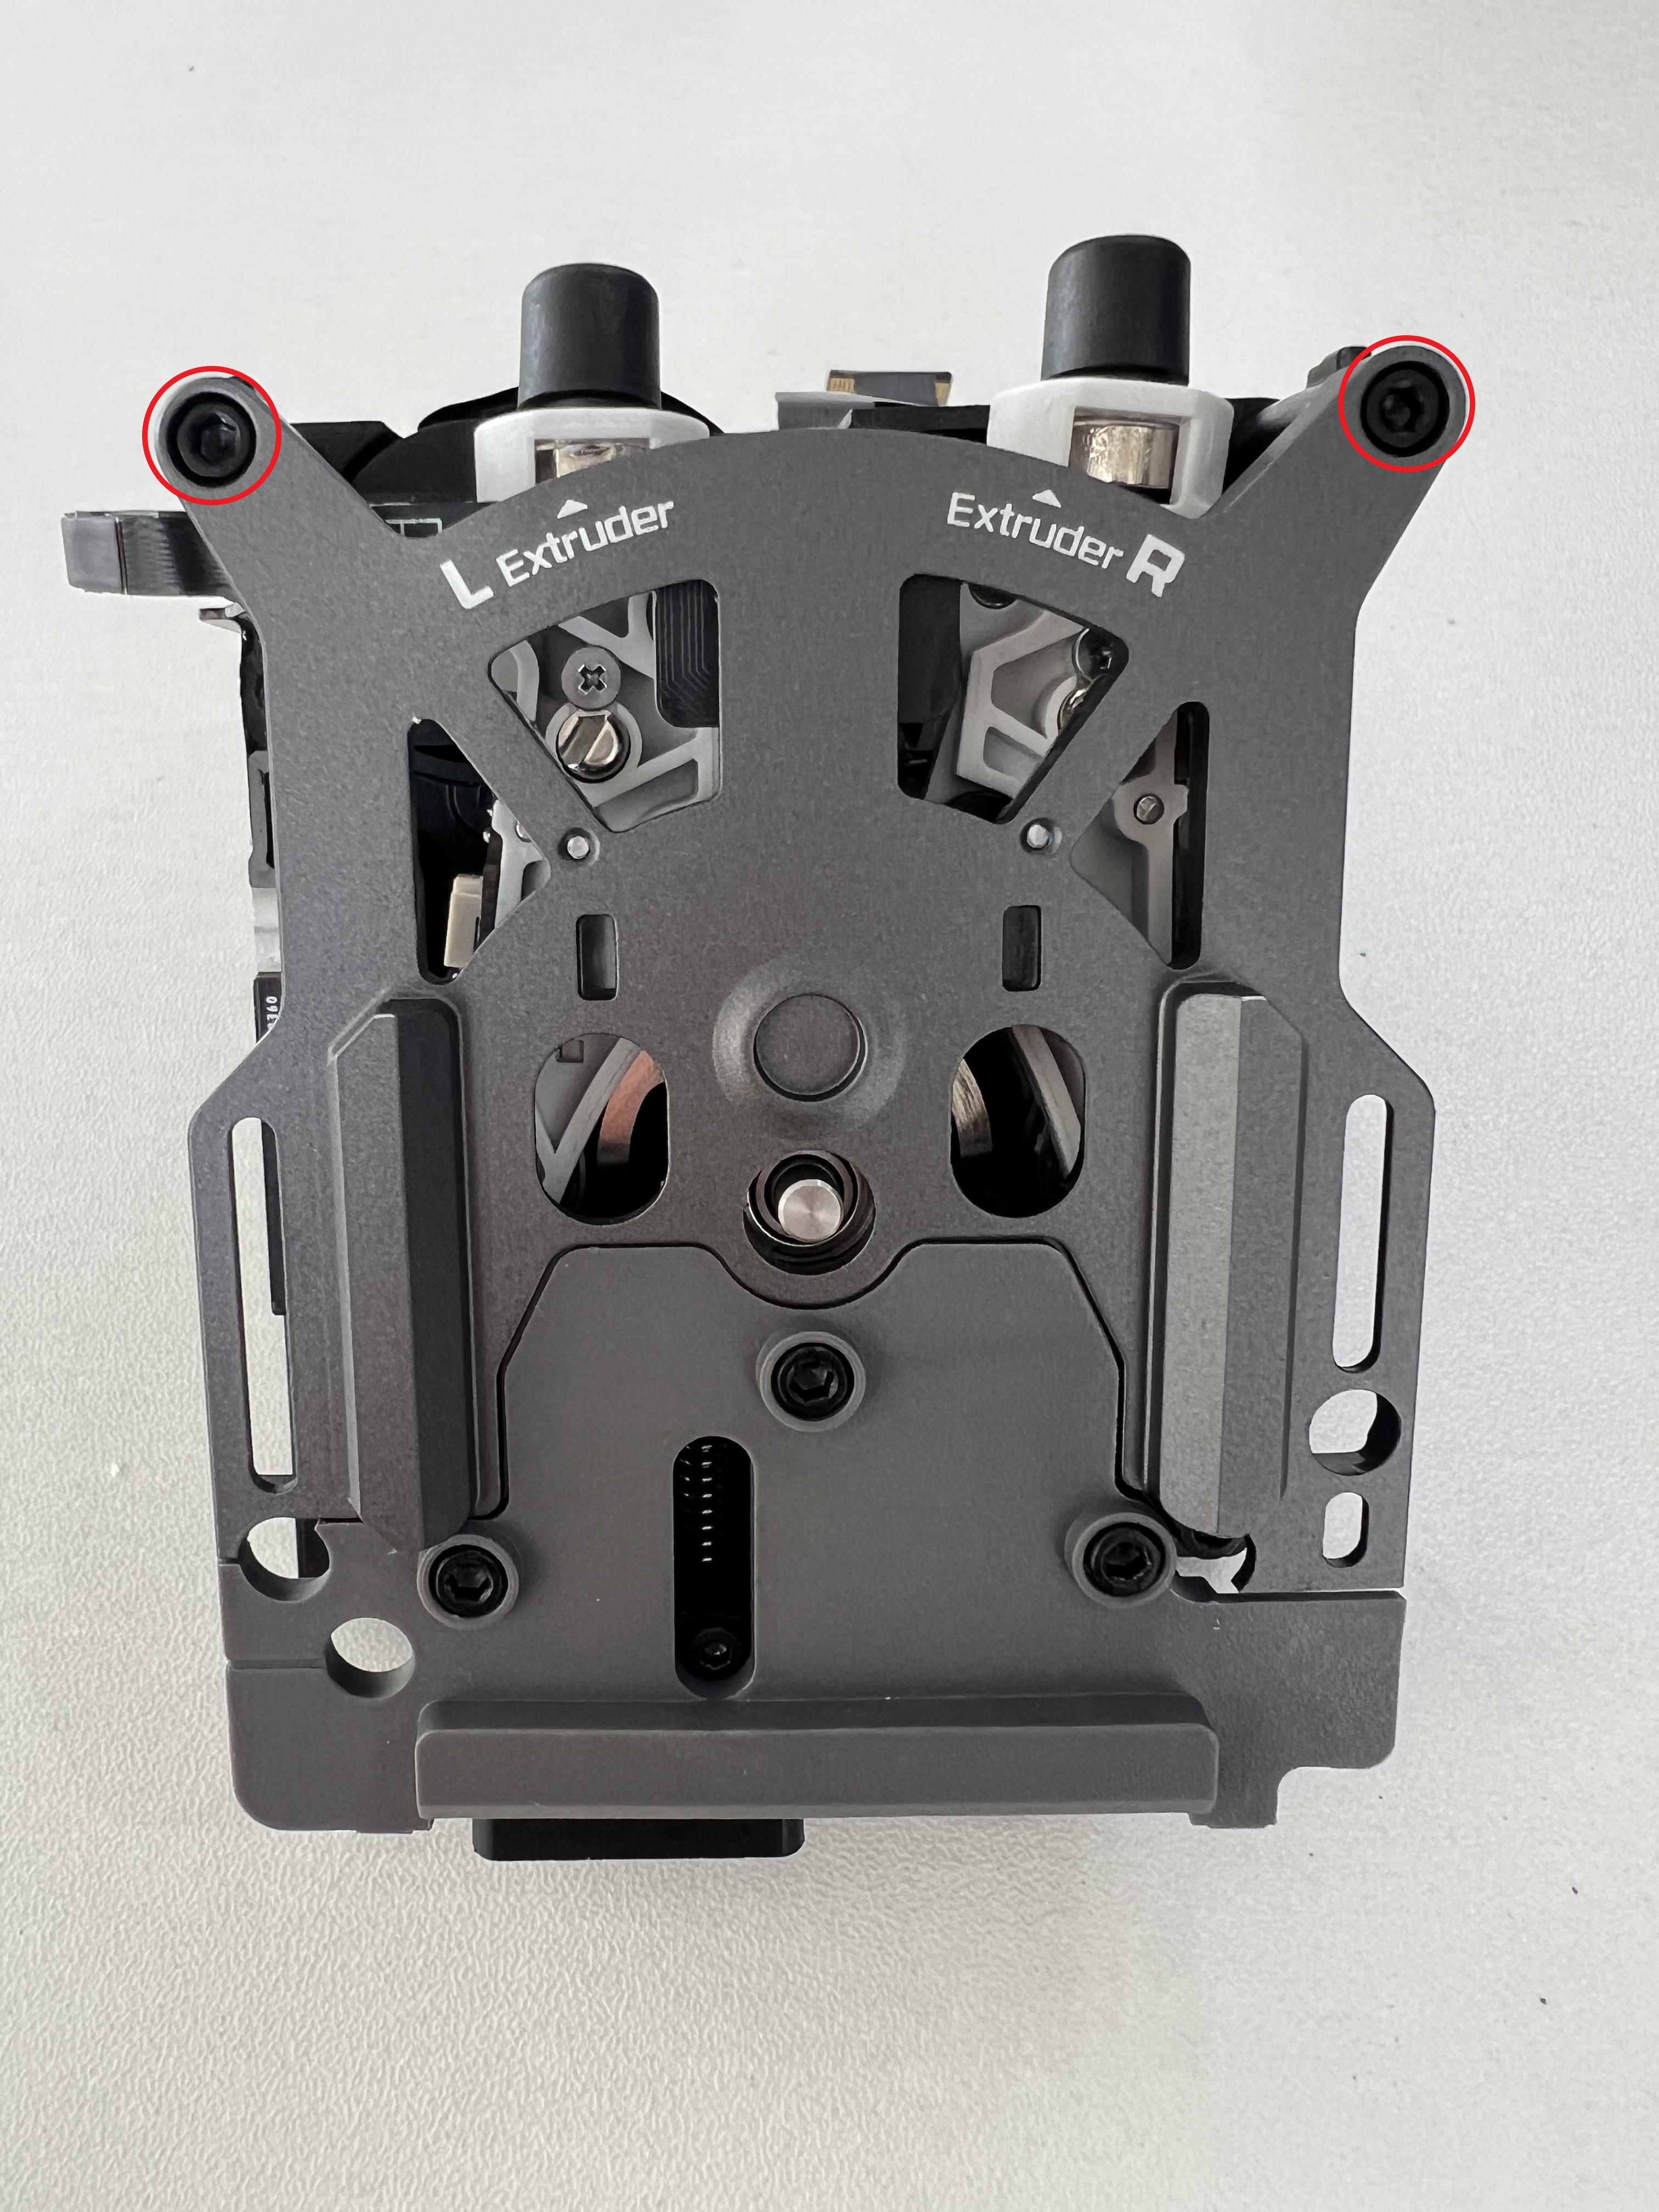
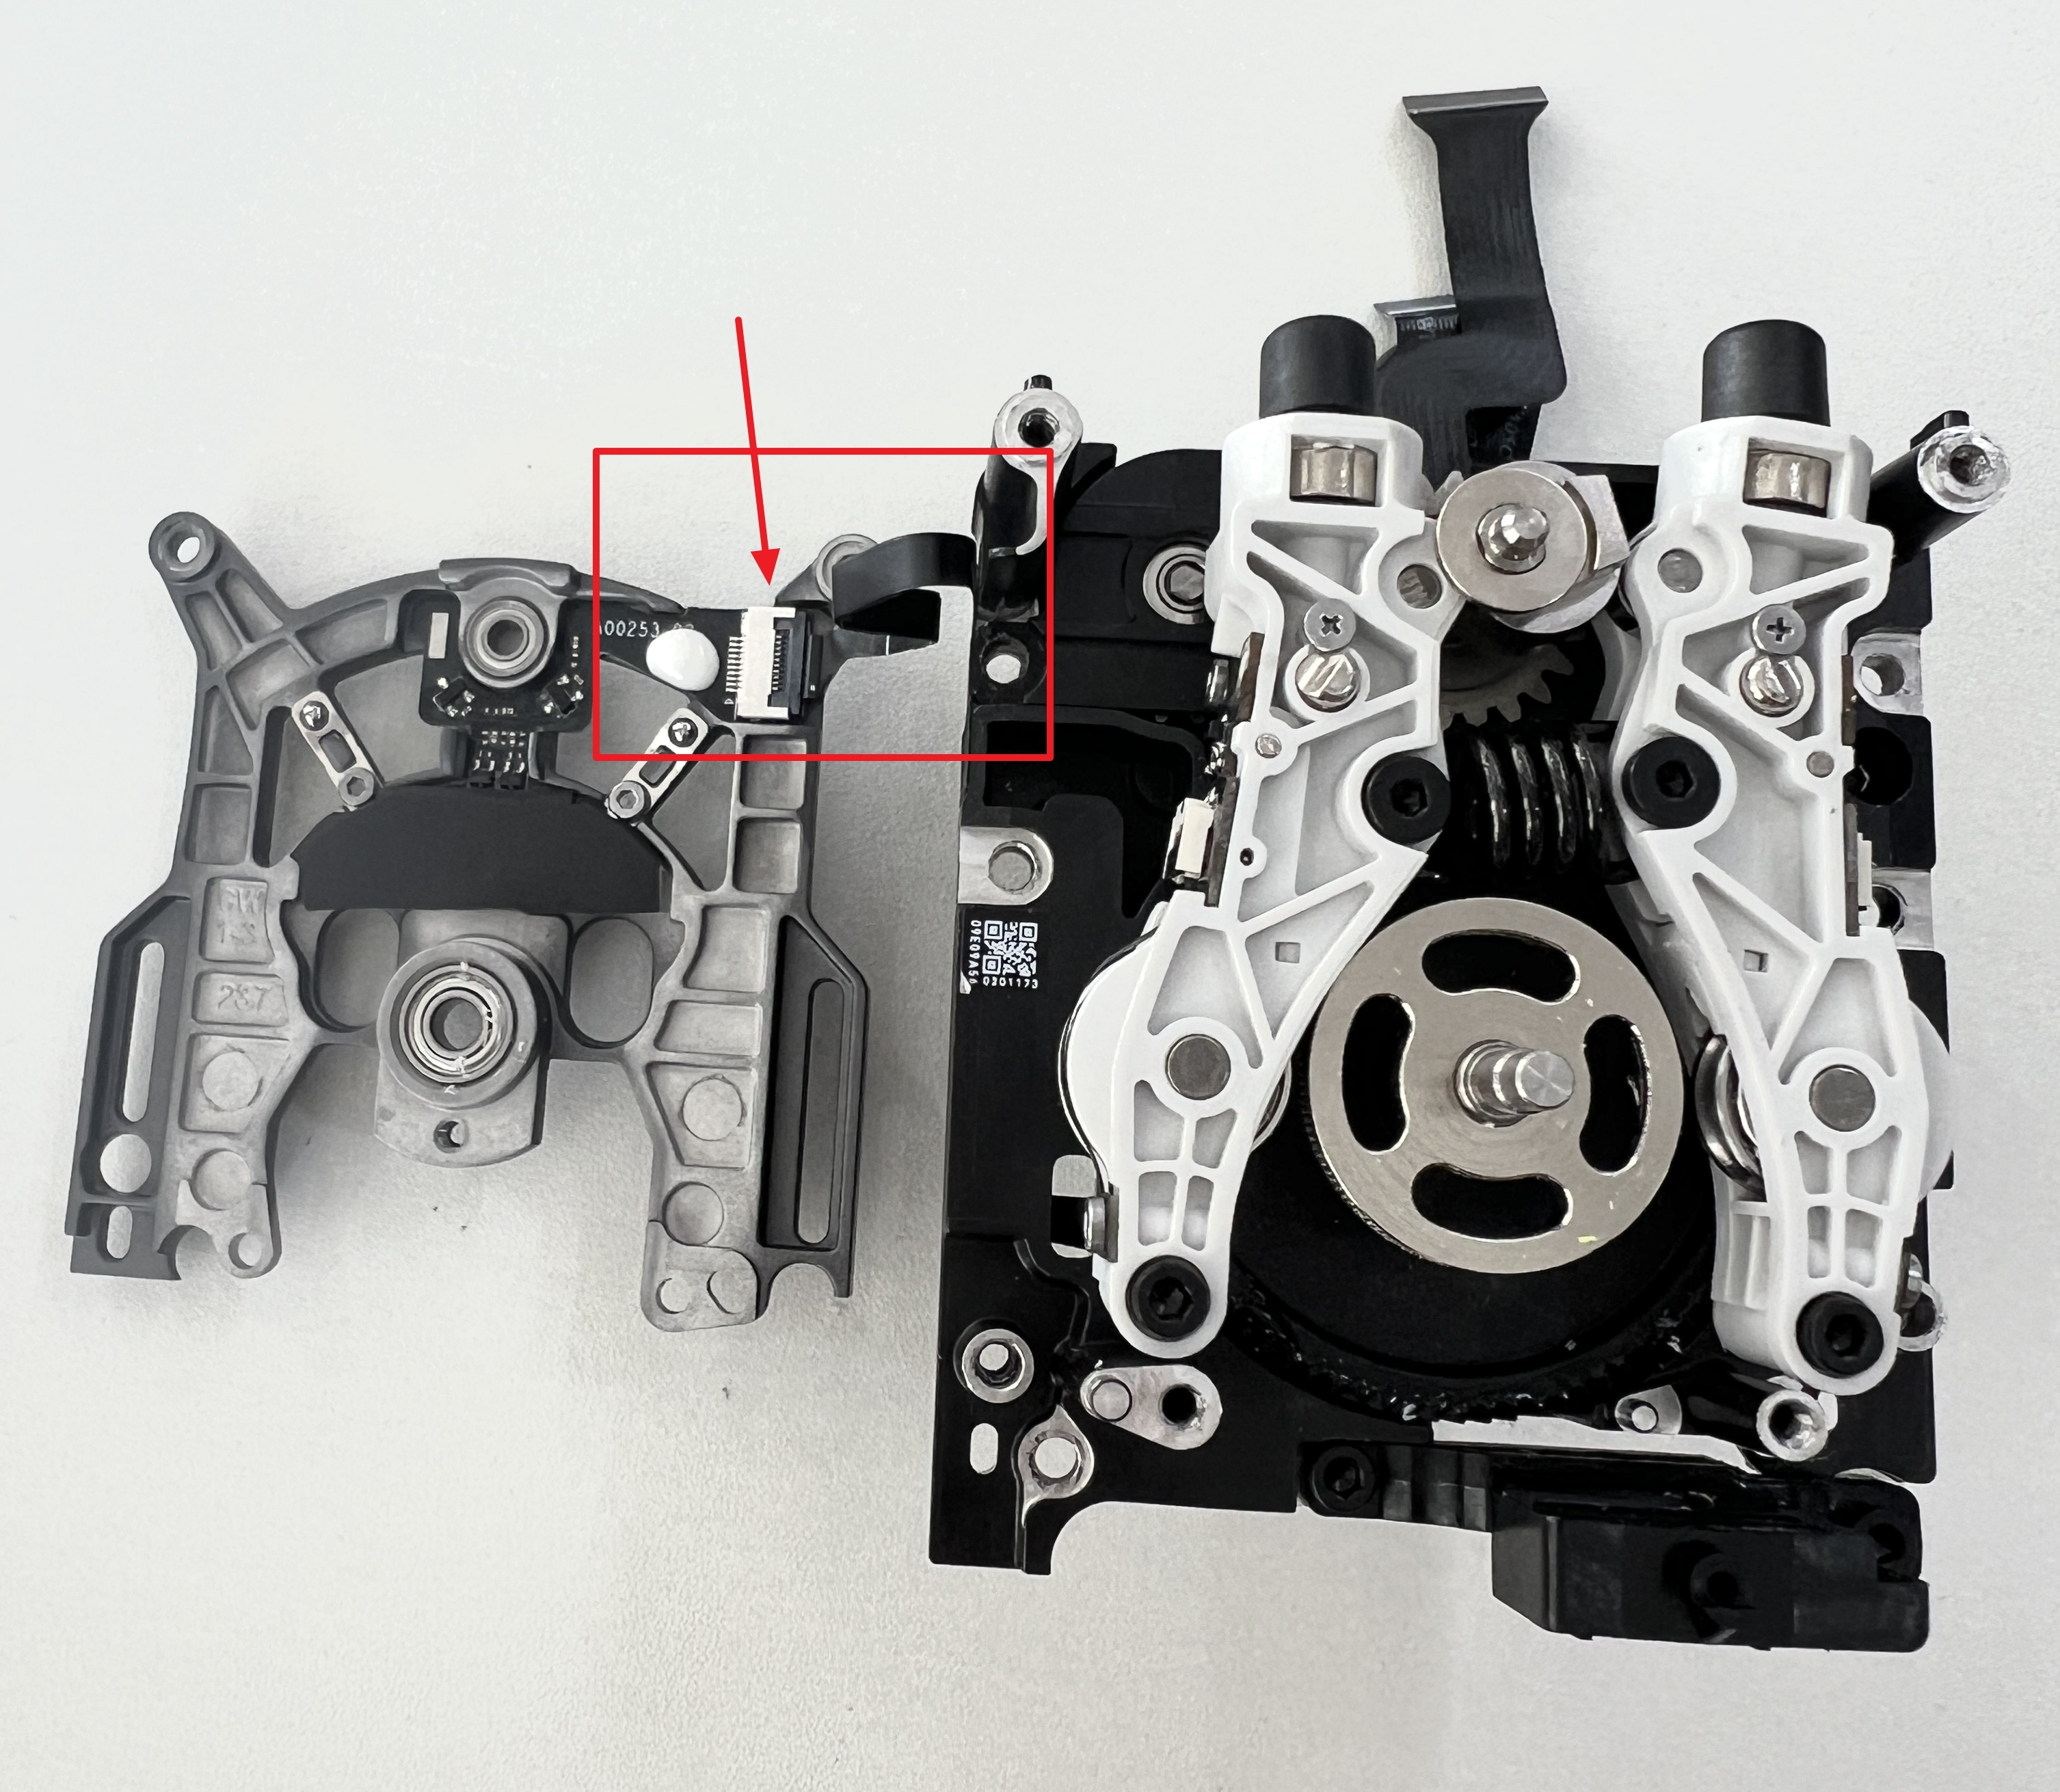
Remove two screws (M2.5x7 × 2) using the H2.0 hex wrench, gently wiggle and remove the front cover, then disconnect the front cover Hall Cable.
⚠️ Be careful when unplugging the front cover to avoid damaging the cable.
 |
 |
¶ Step 5: Remove Tool Head Sensor FPC Cable
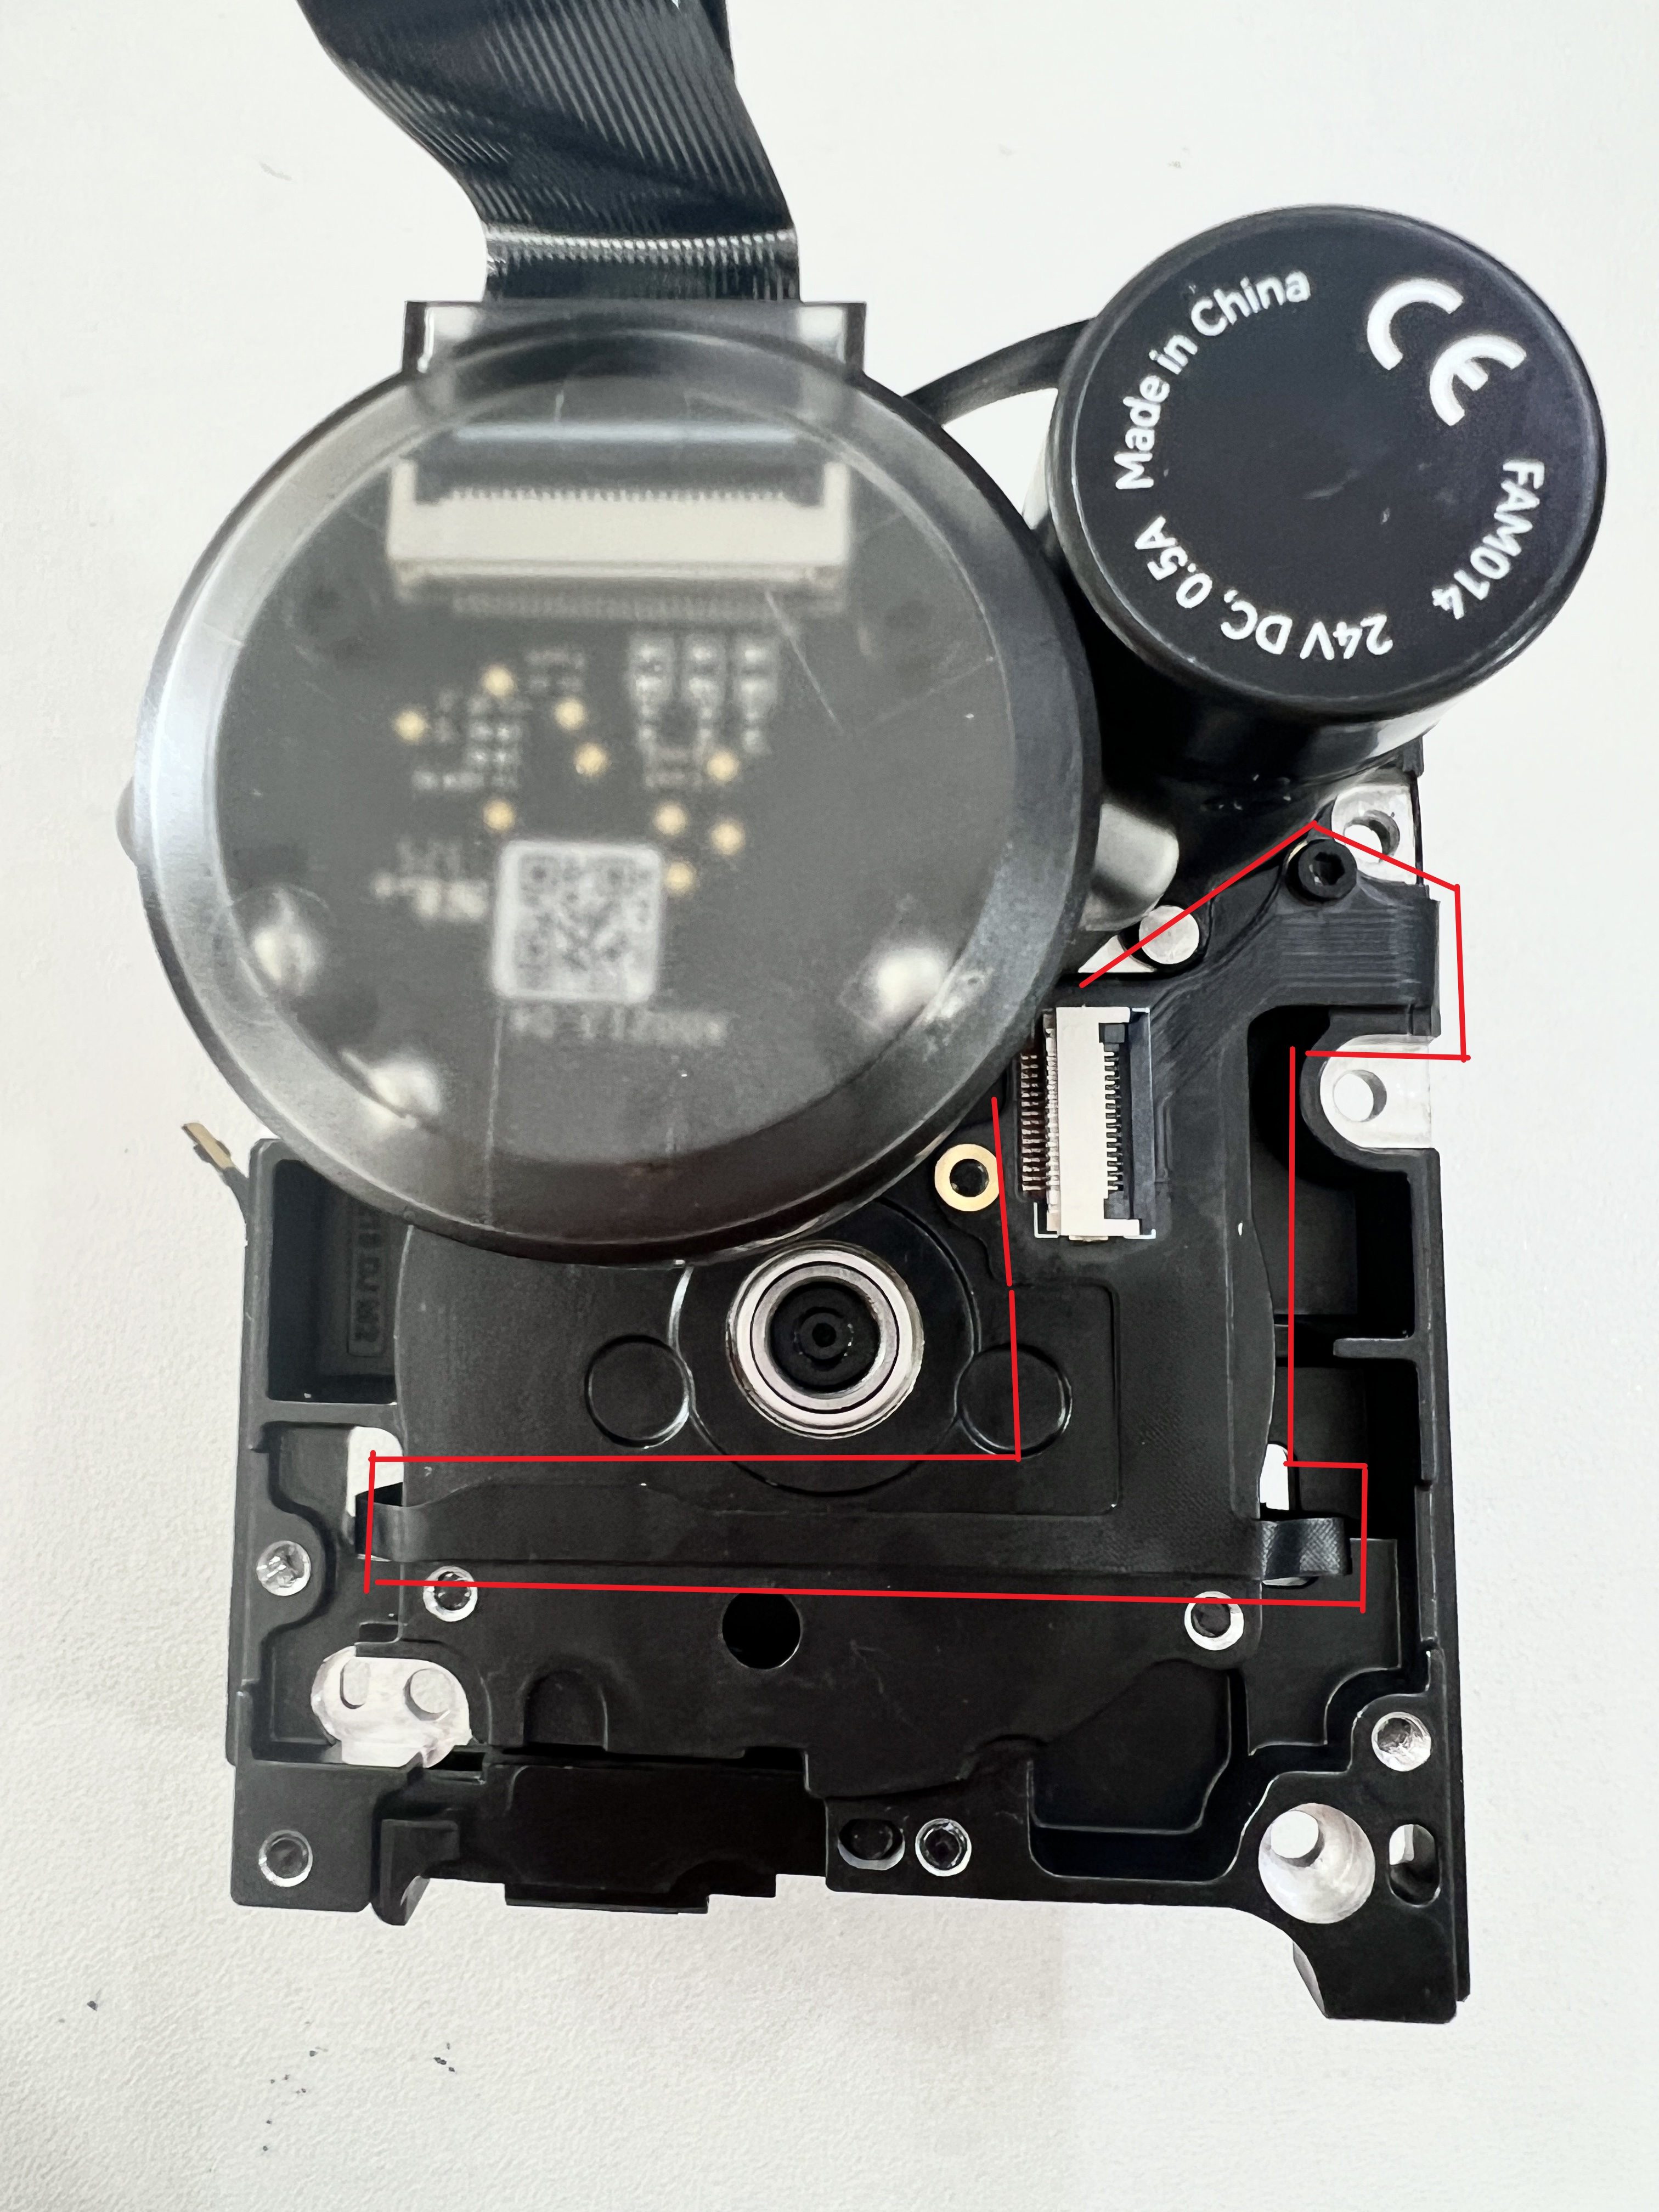
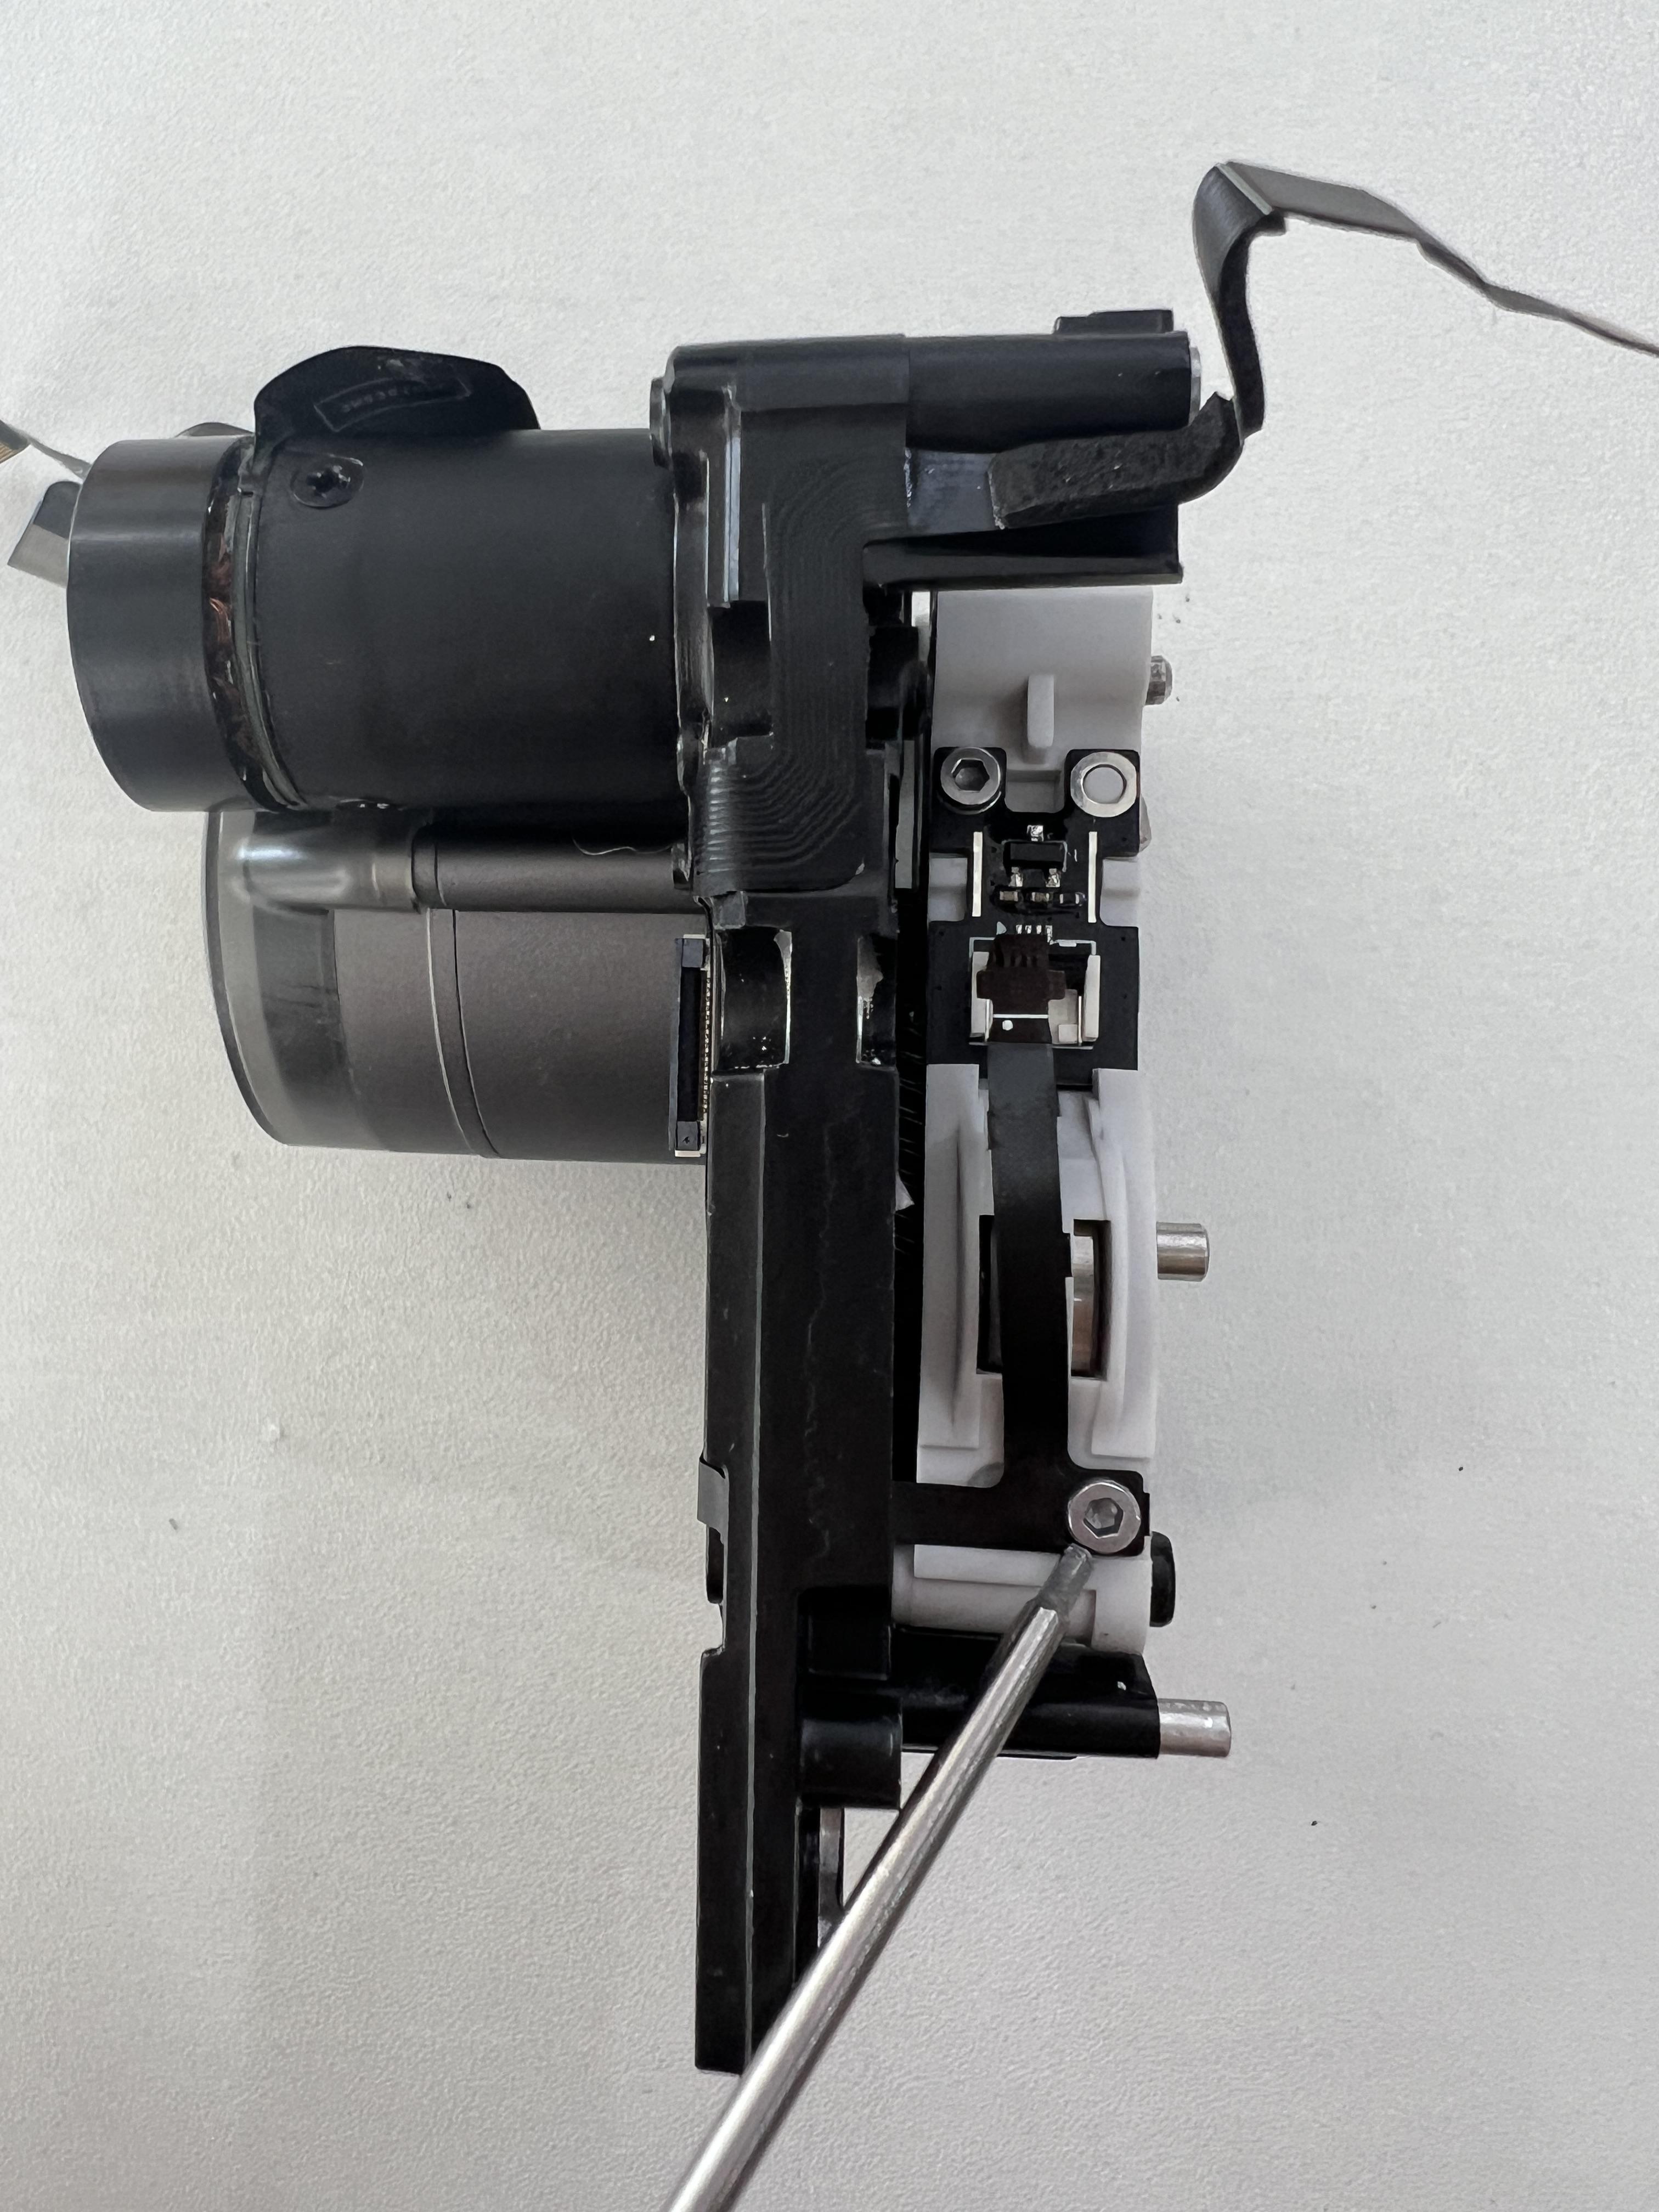
Use an H1.5 hex wrench to remove the right side FPC Cable fixing screw on the extruder idler wheel assembly (BT2x5 × 1), then disconnect the right side cable. Repeat for the left side.
 |
 |
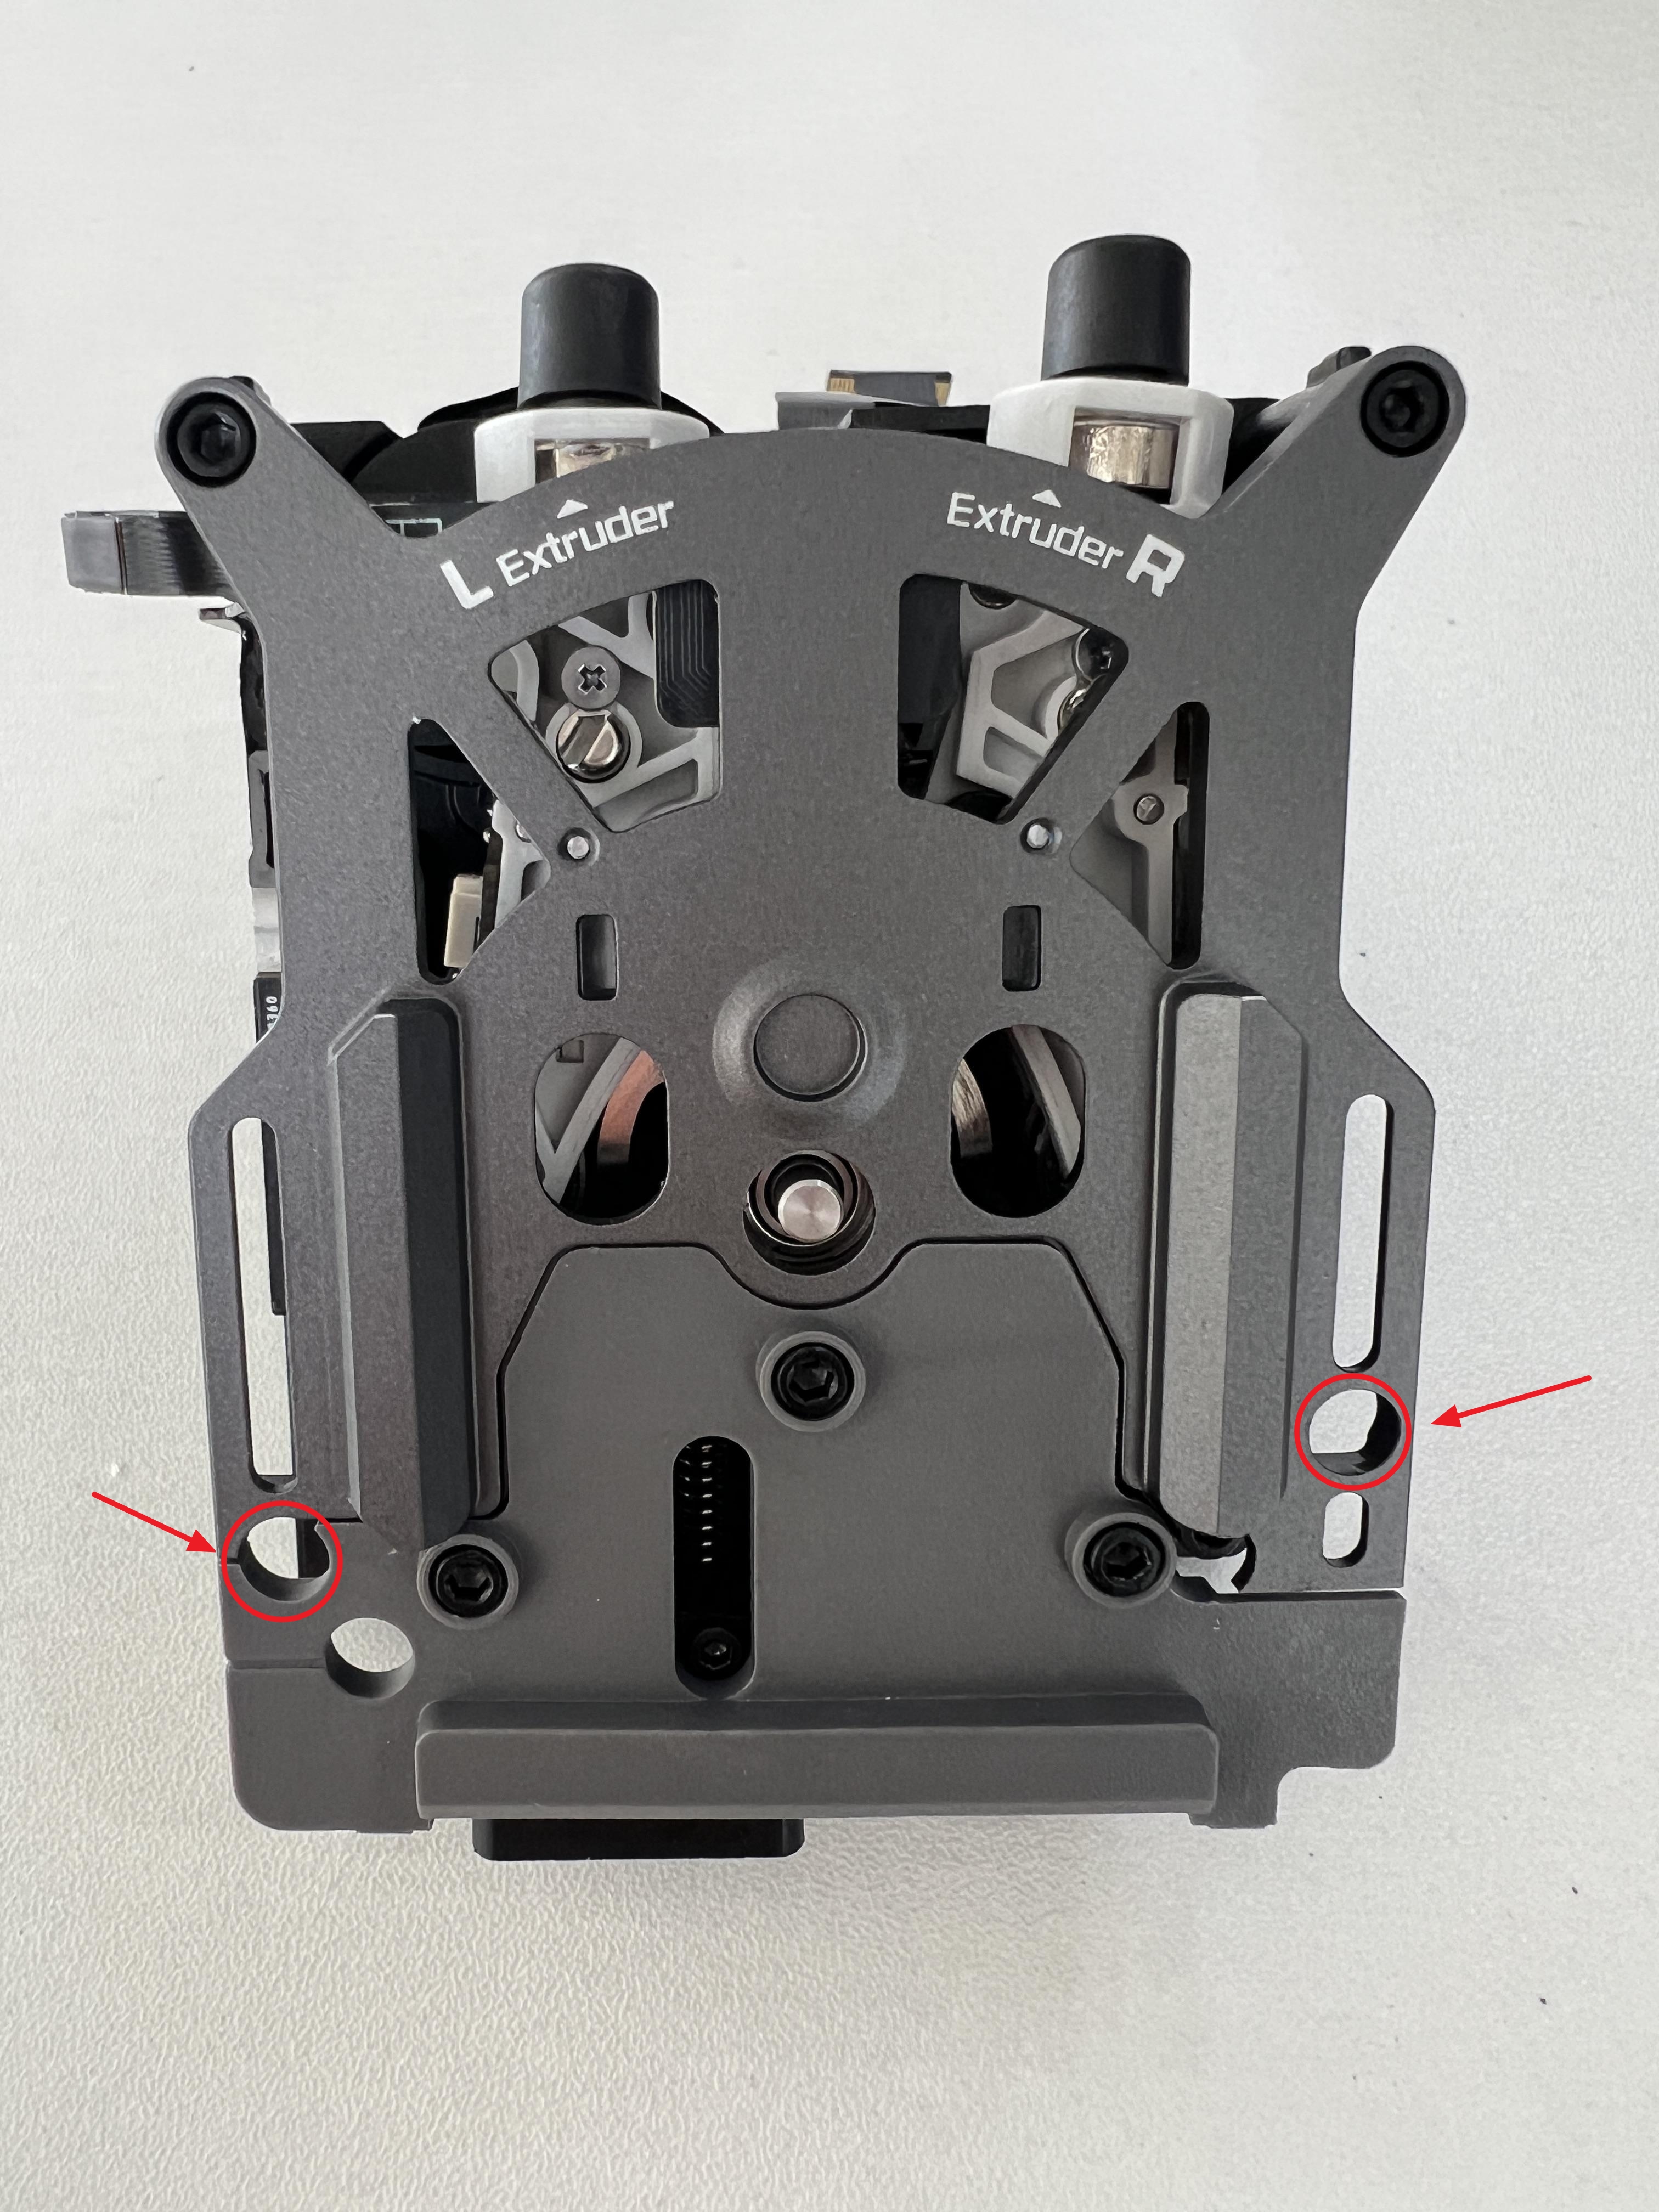
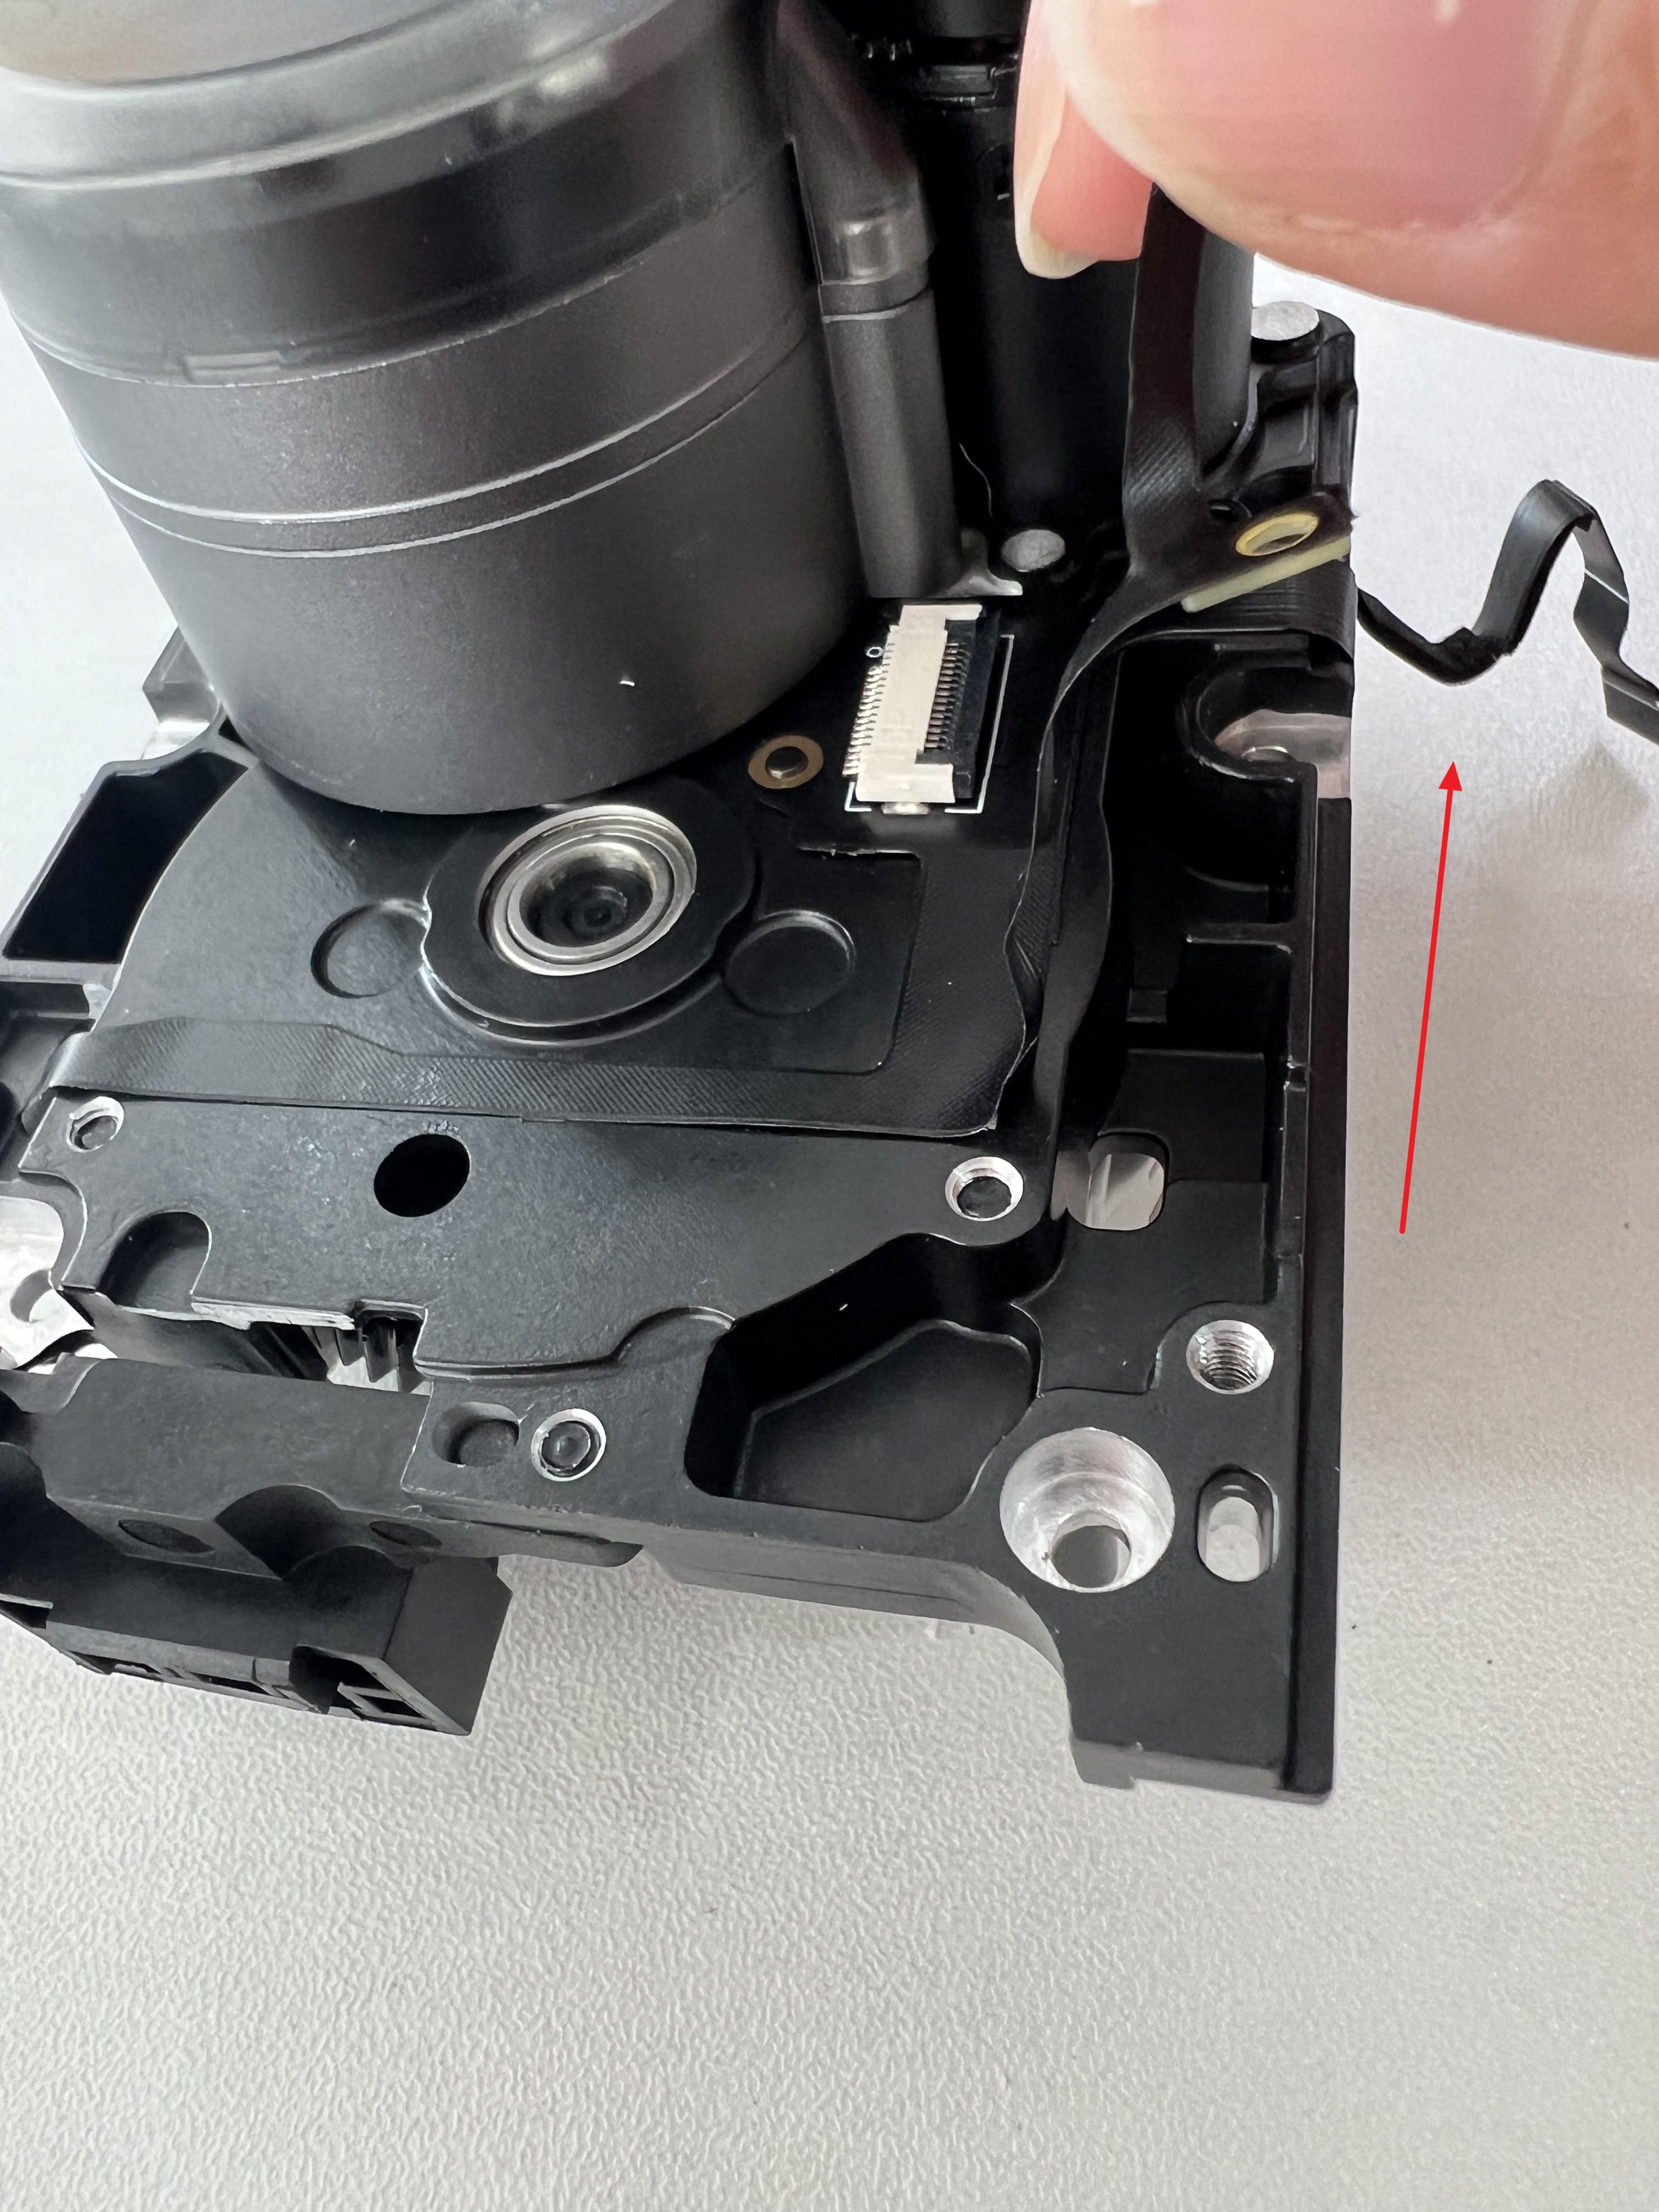
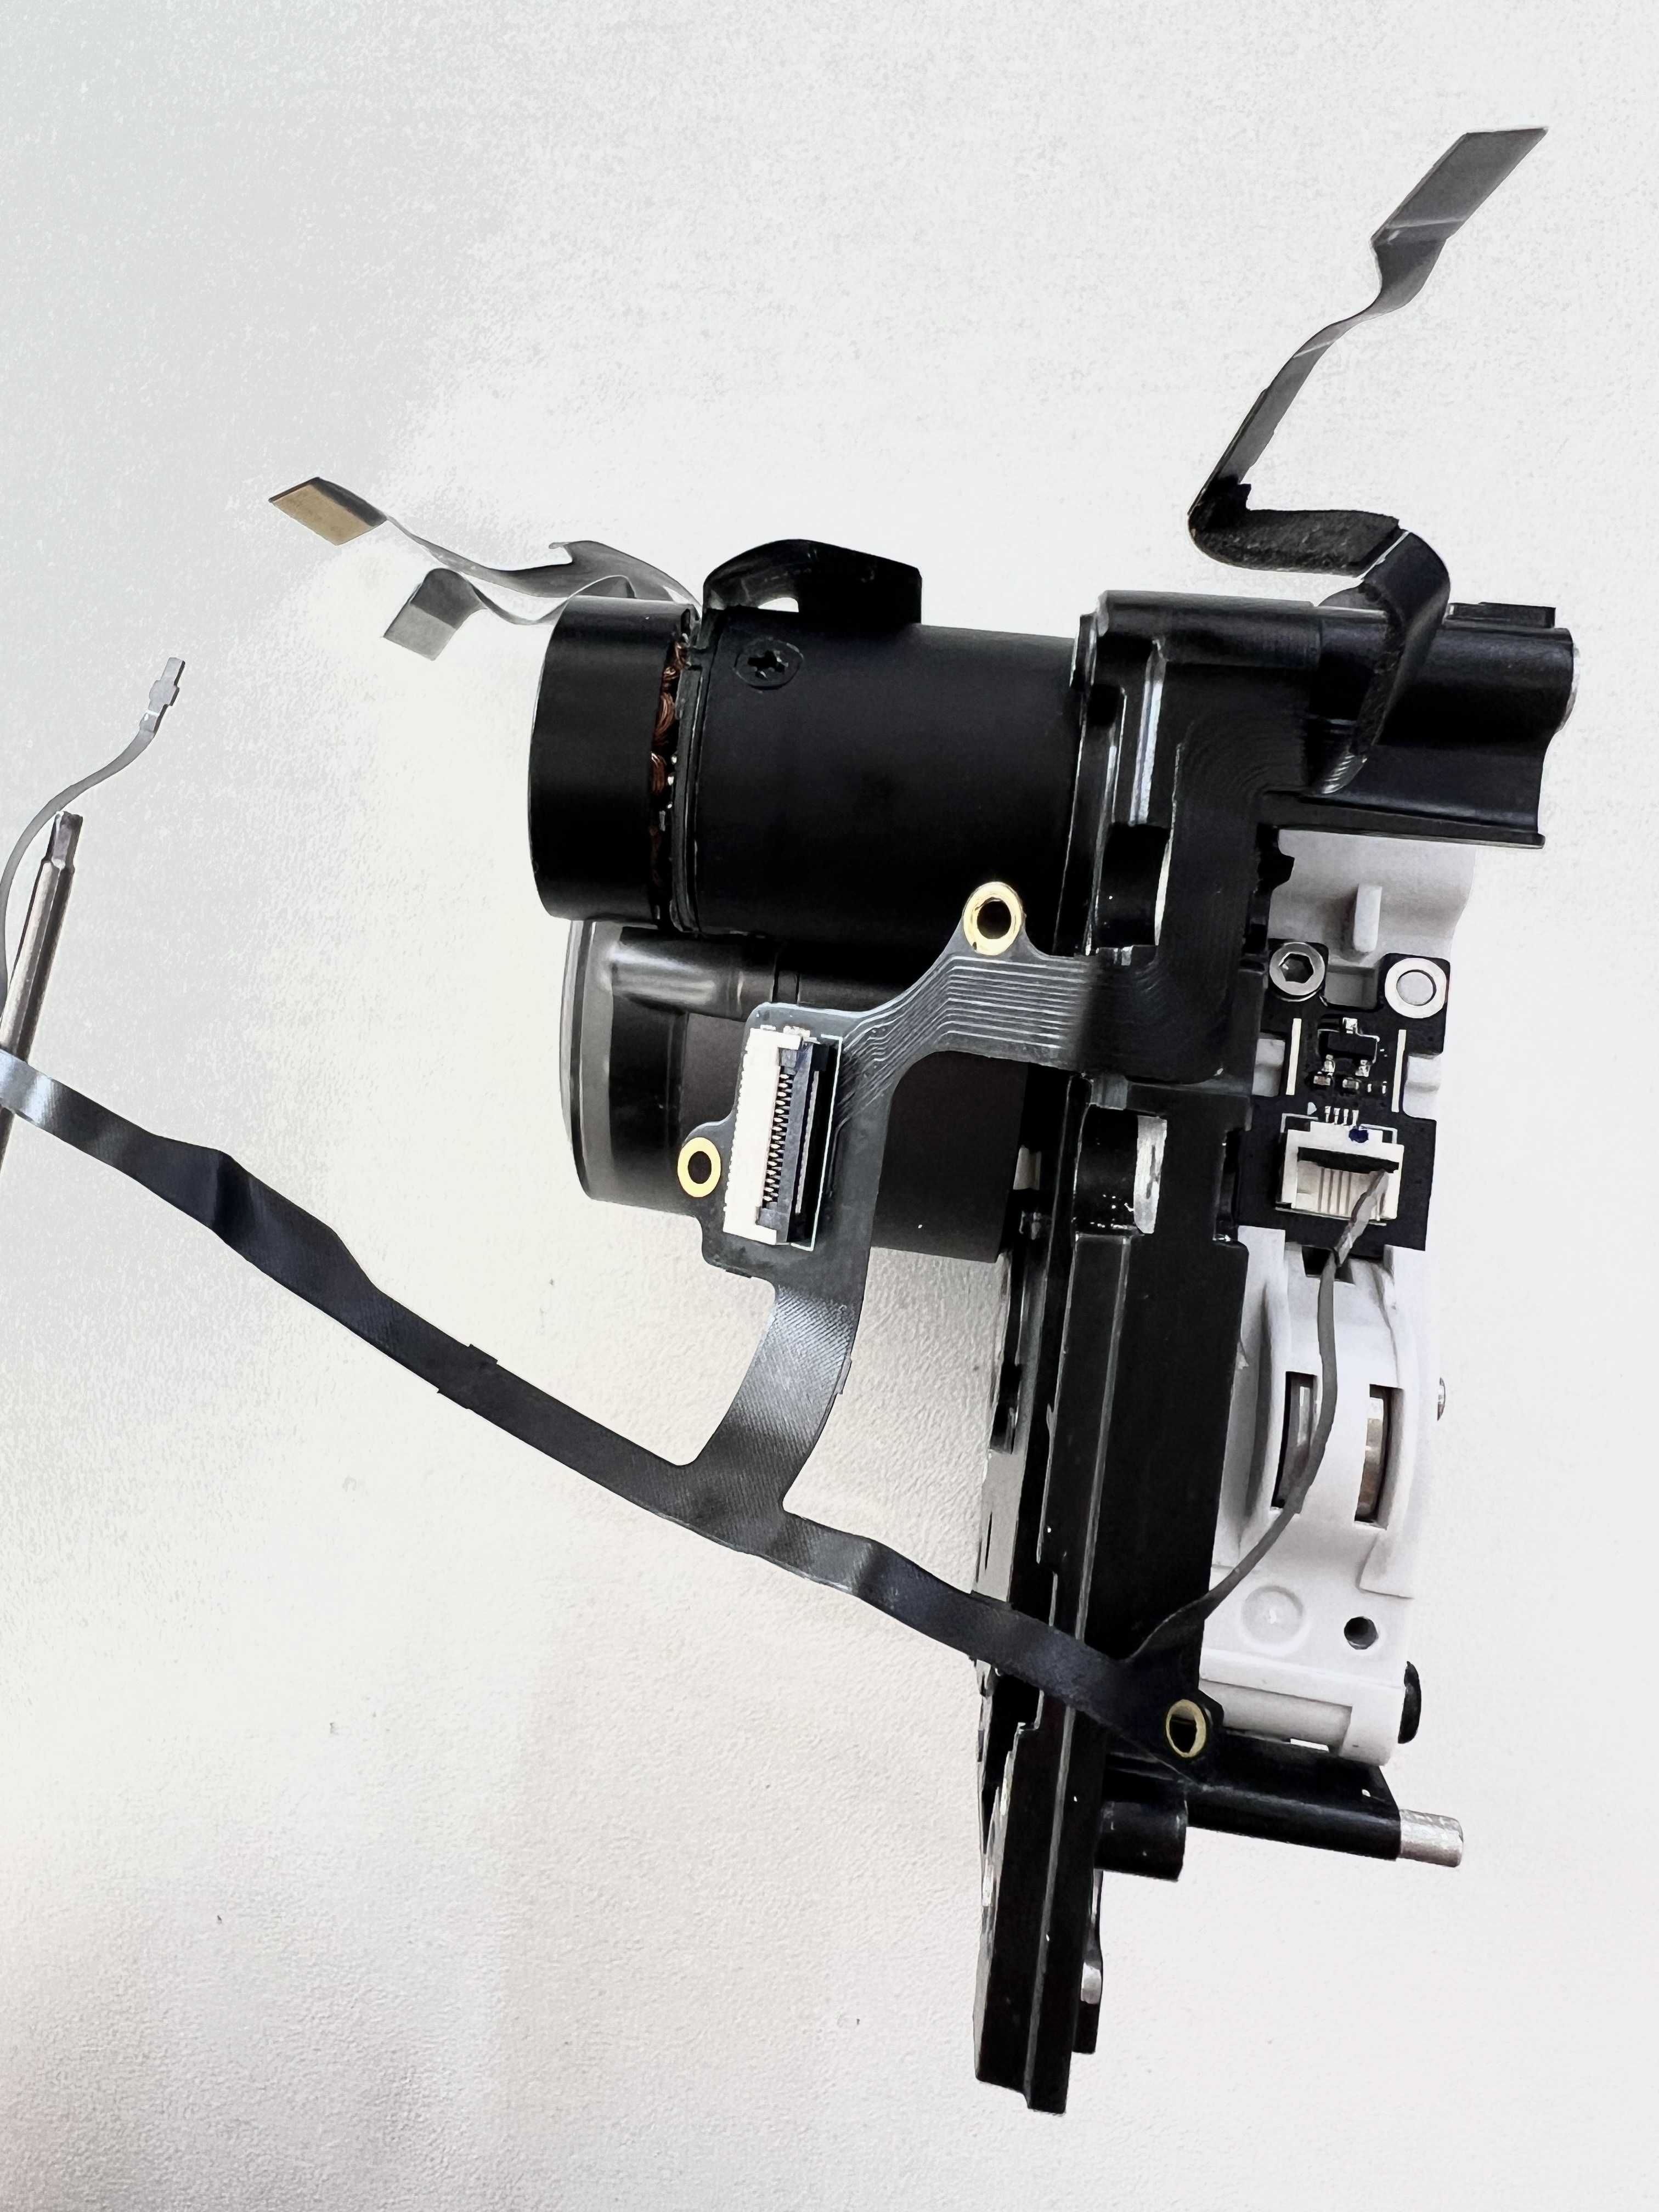
Next, remove the screws securing the cable on the backplate.
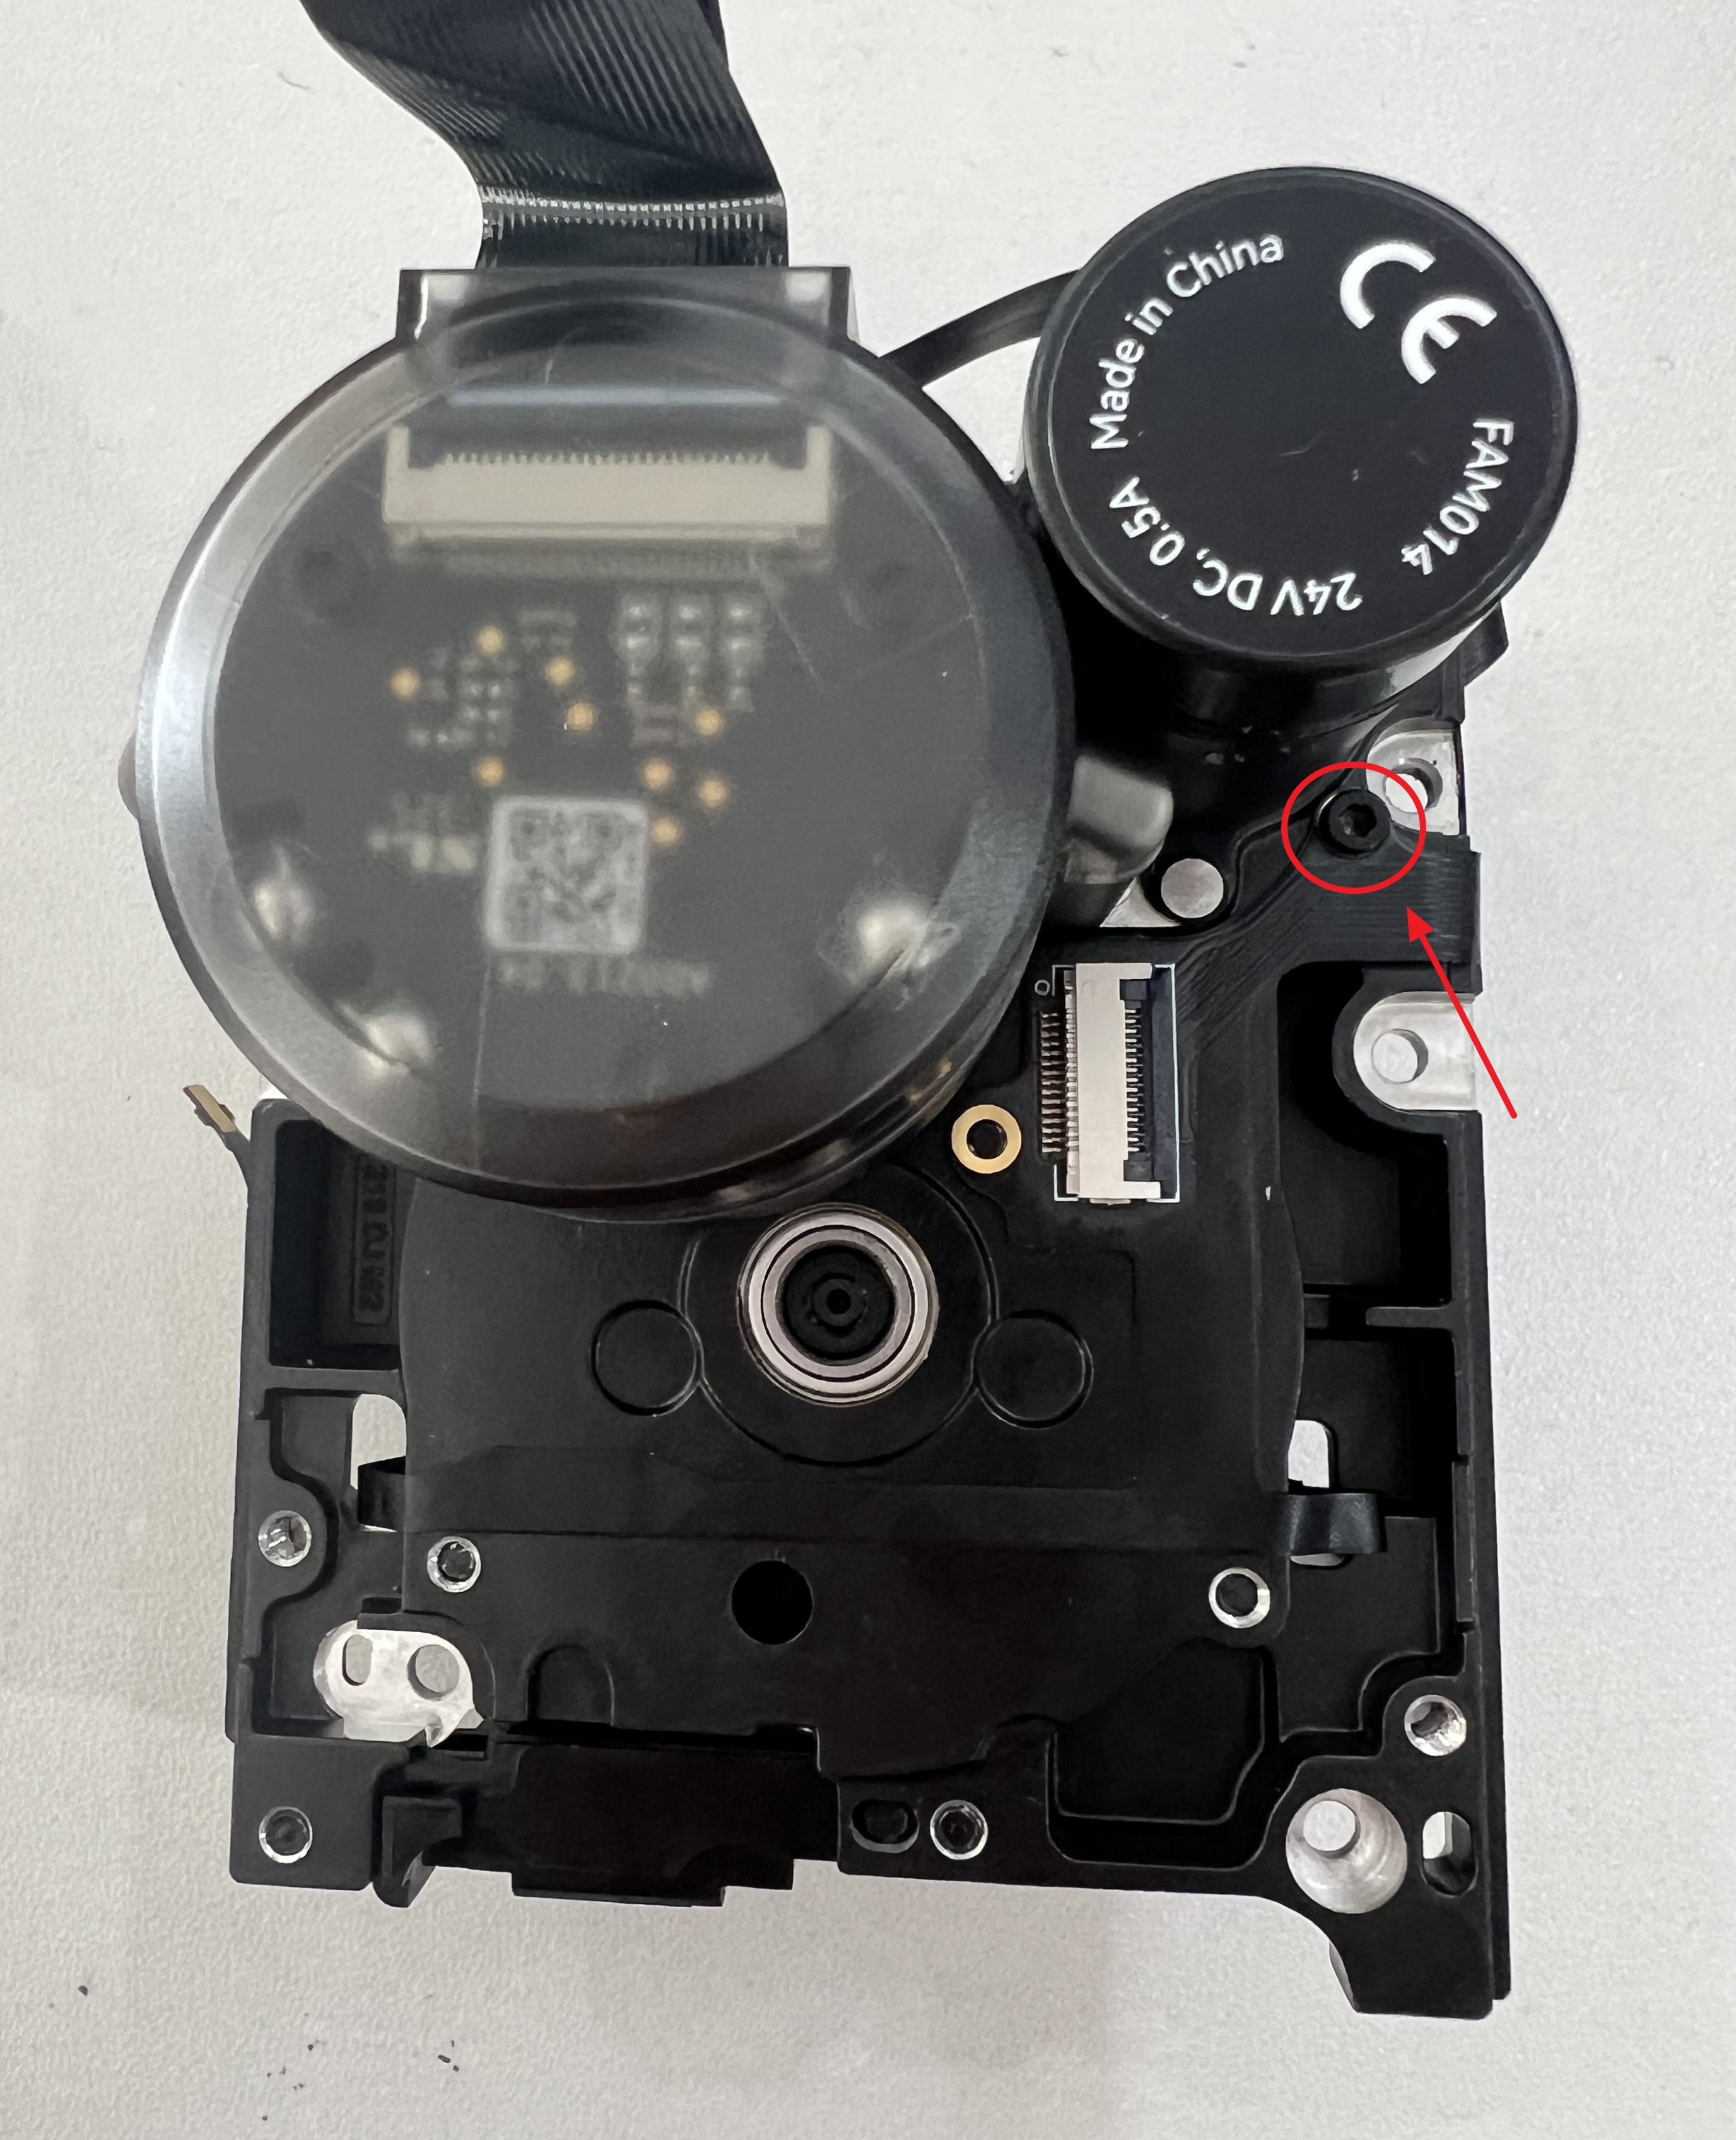
Pass both cables through the small holes and gently pull them to the back, then peel off the cable. Handle carefully to avoid breaking or damaging the cable.
 |
 |
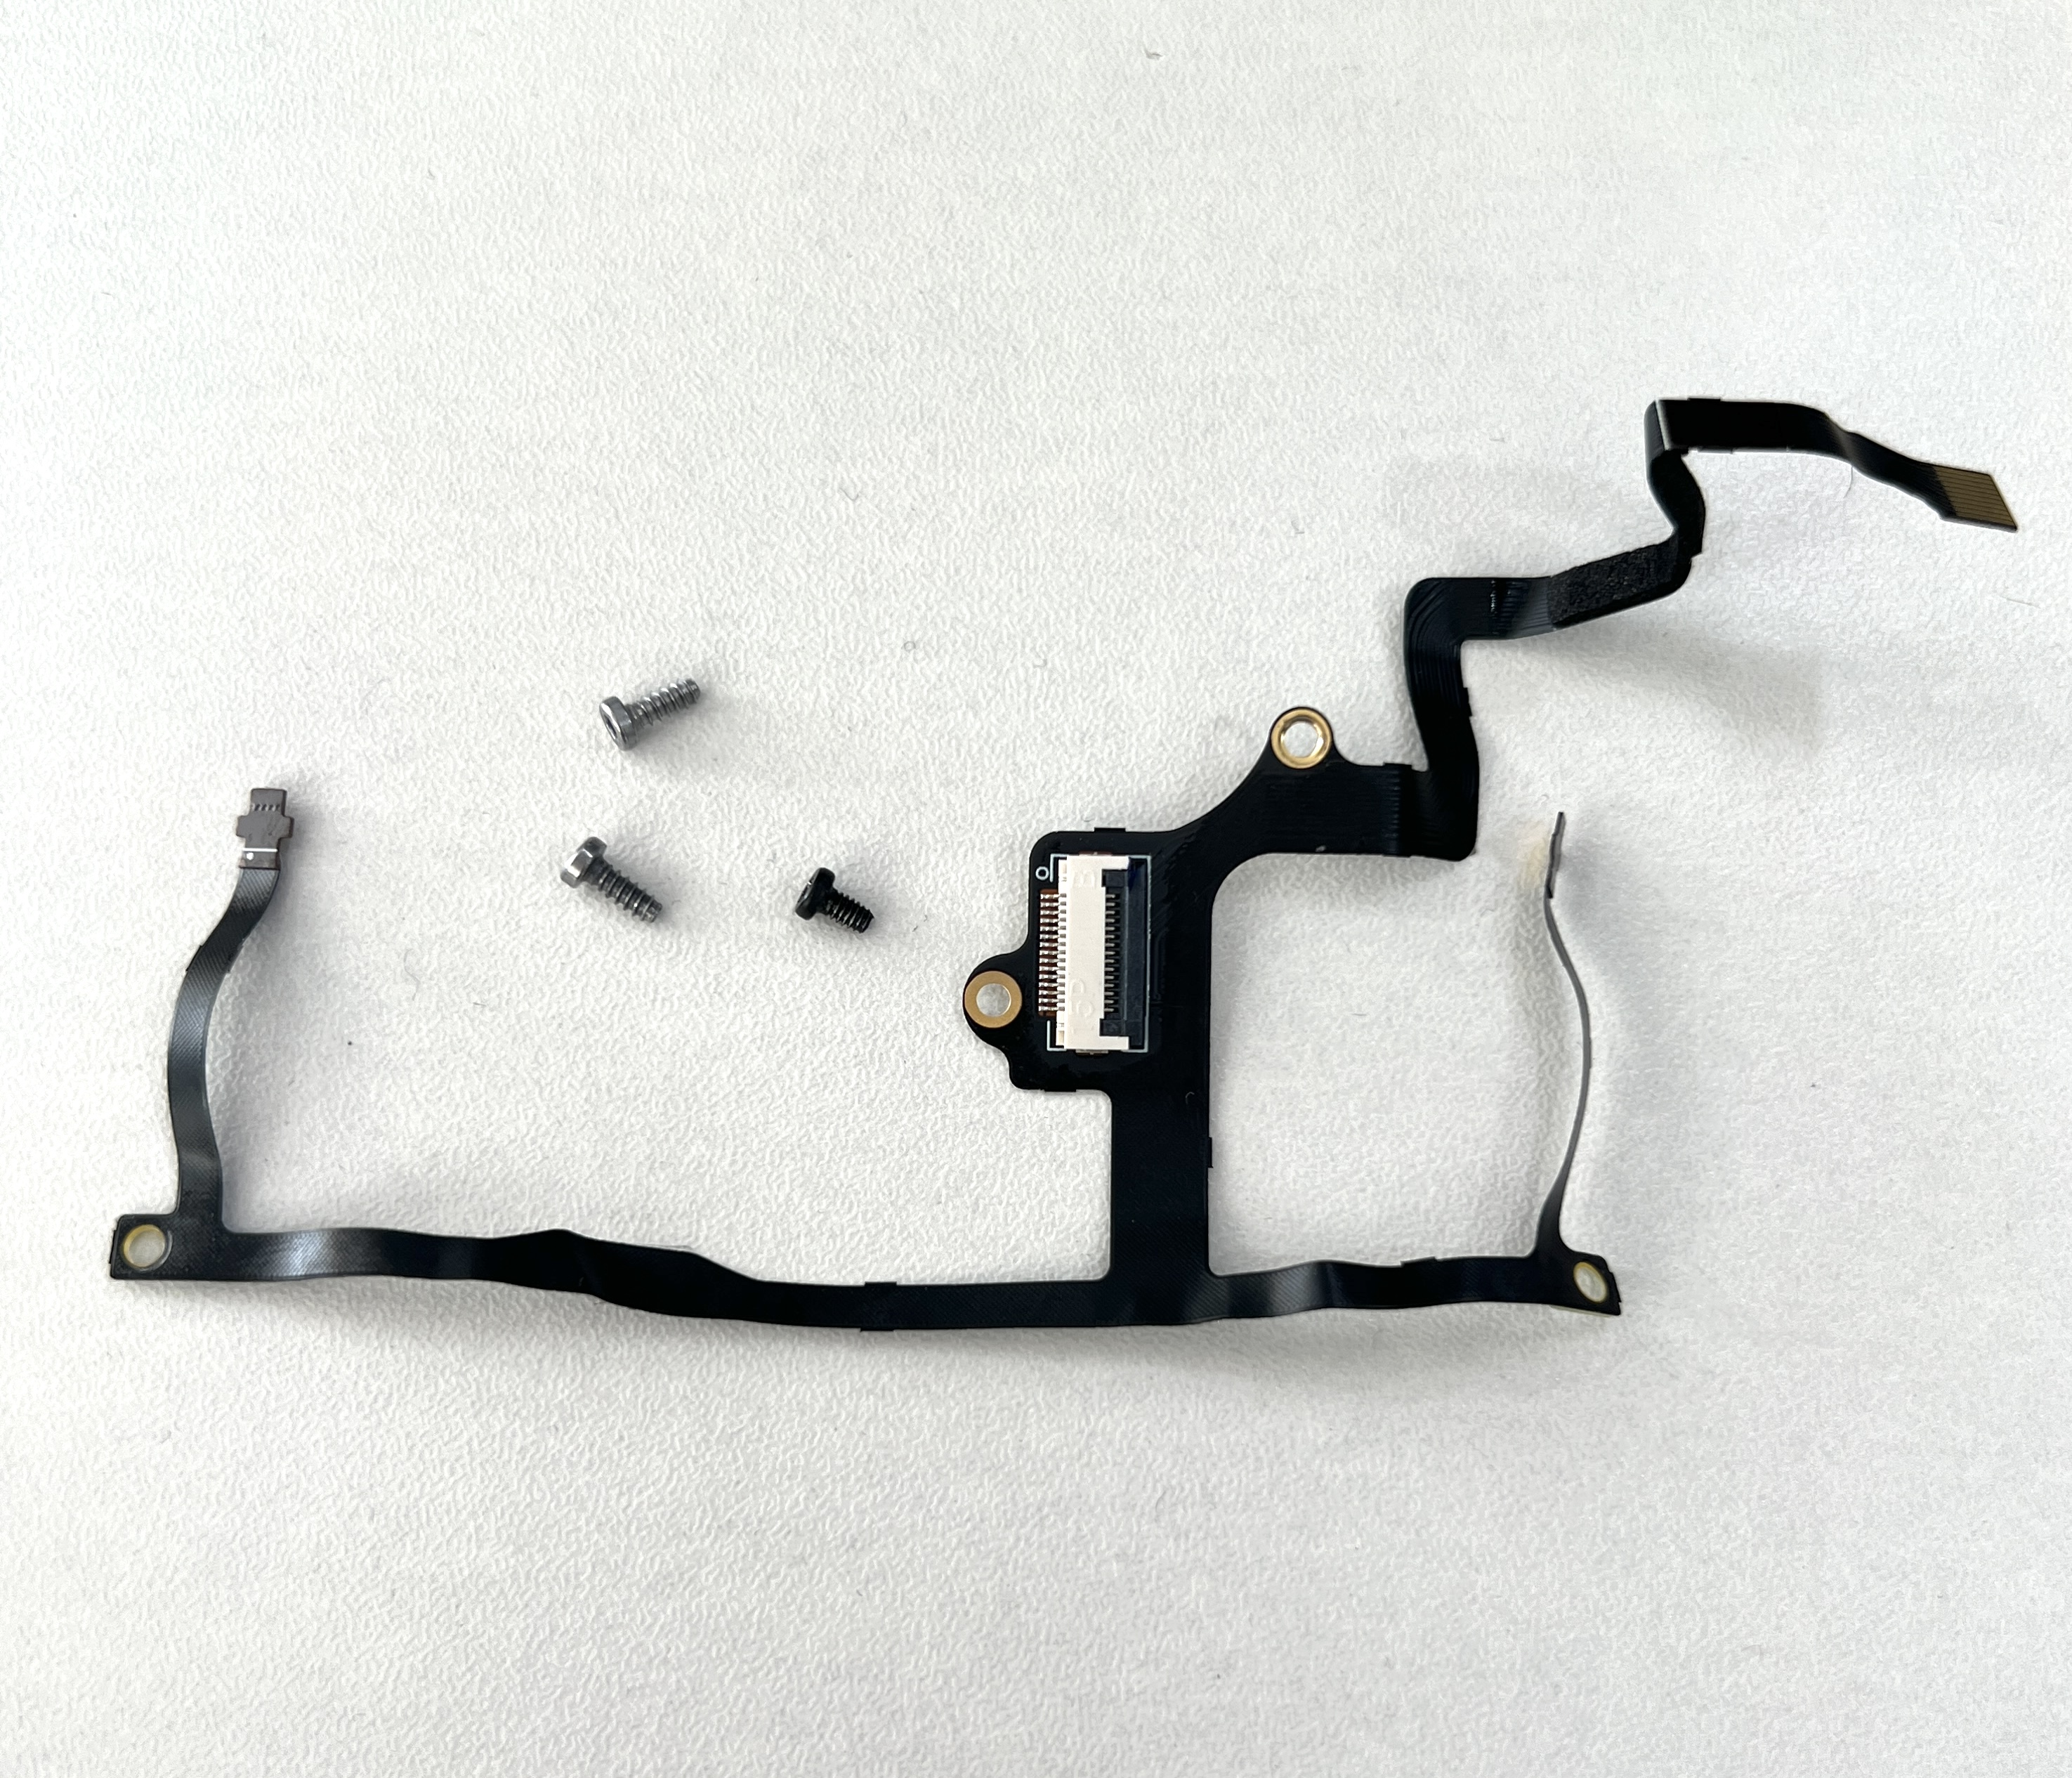
The removed Tool Head Sensor FPC Cable:
¶ Installation Steps
¶ Step 1: Install New Tool Head Sensor FPC Cable
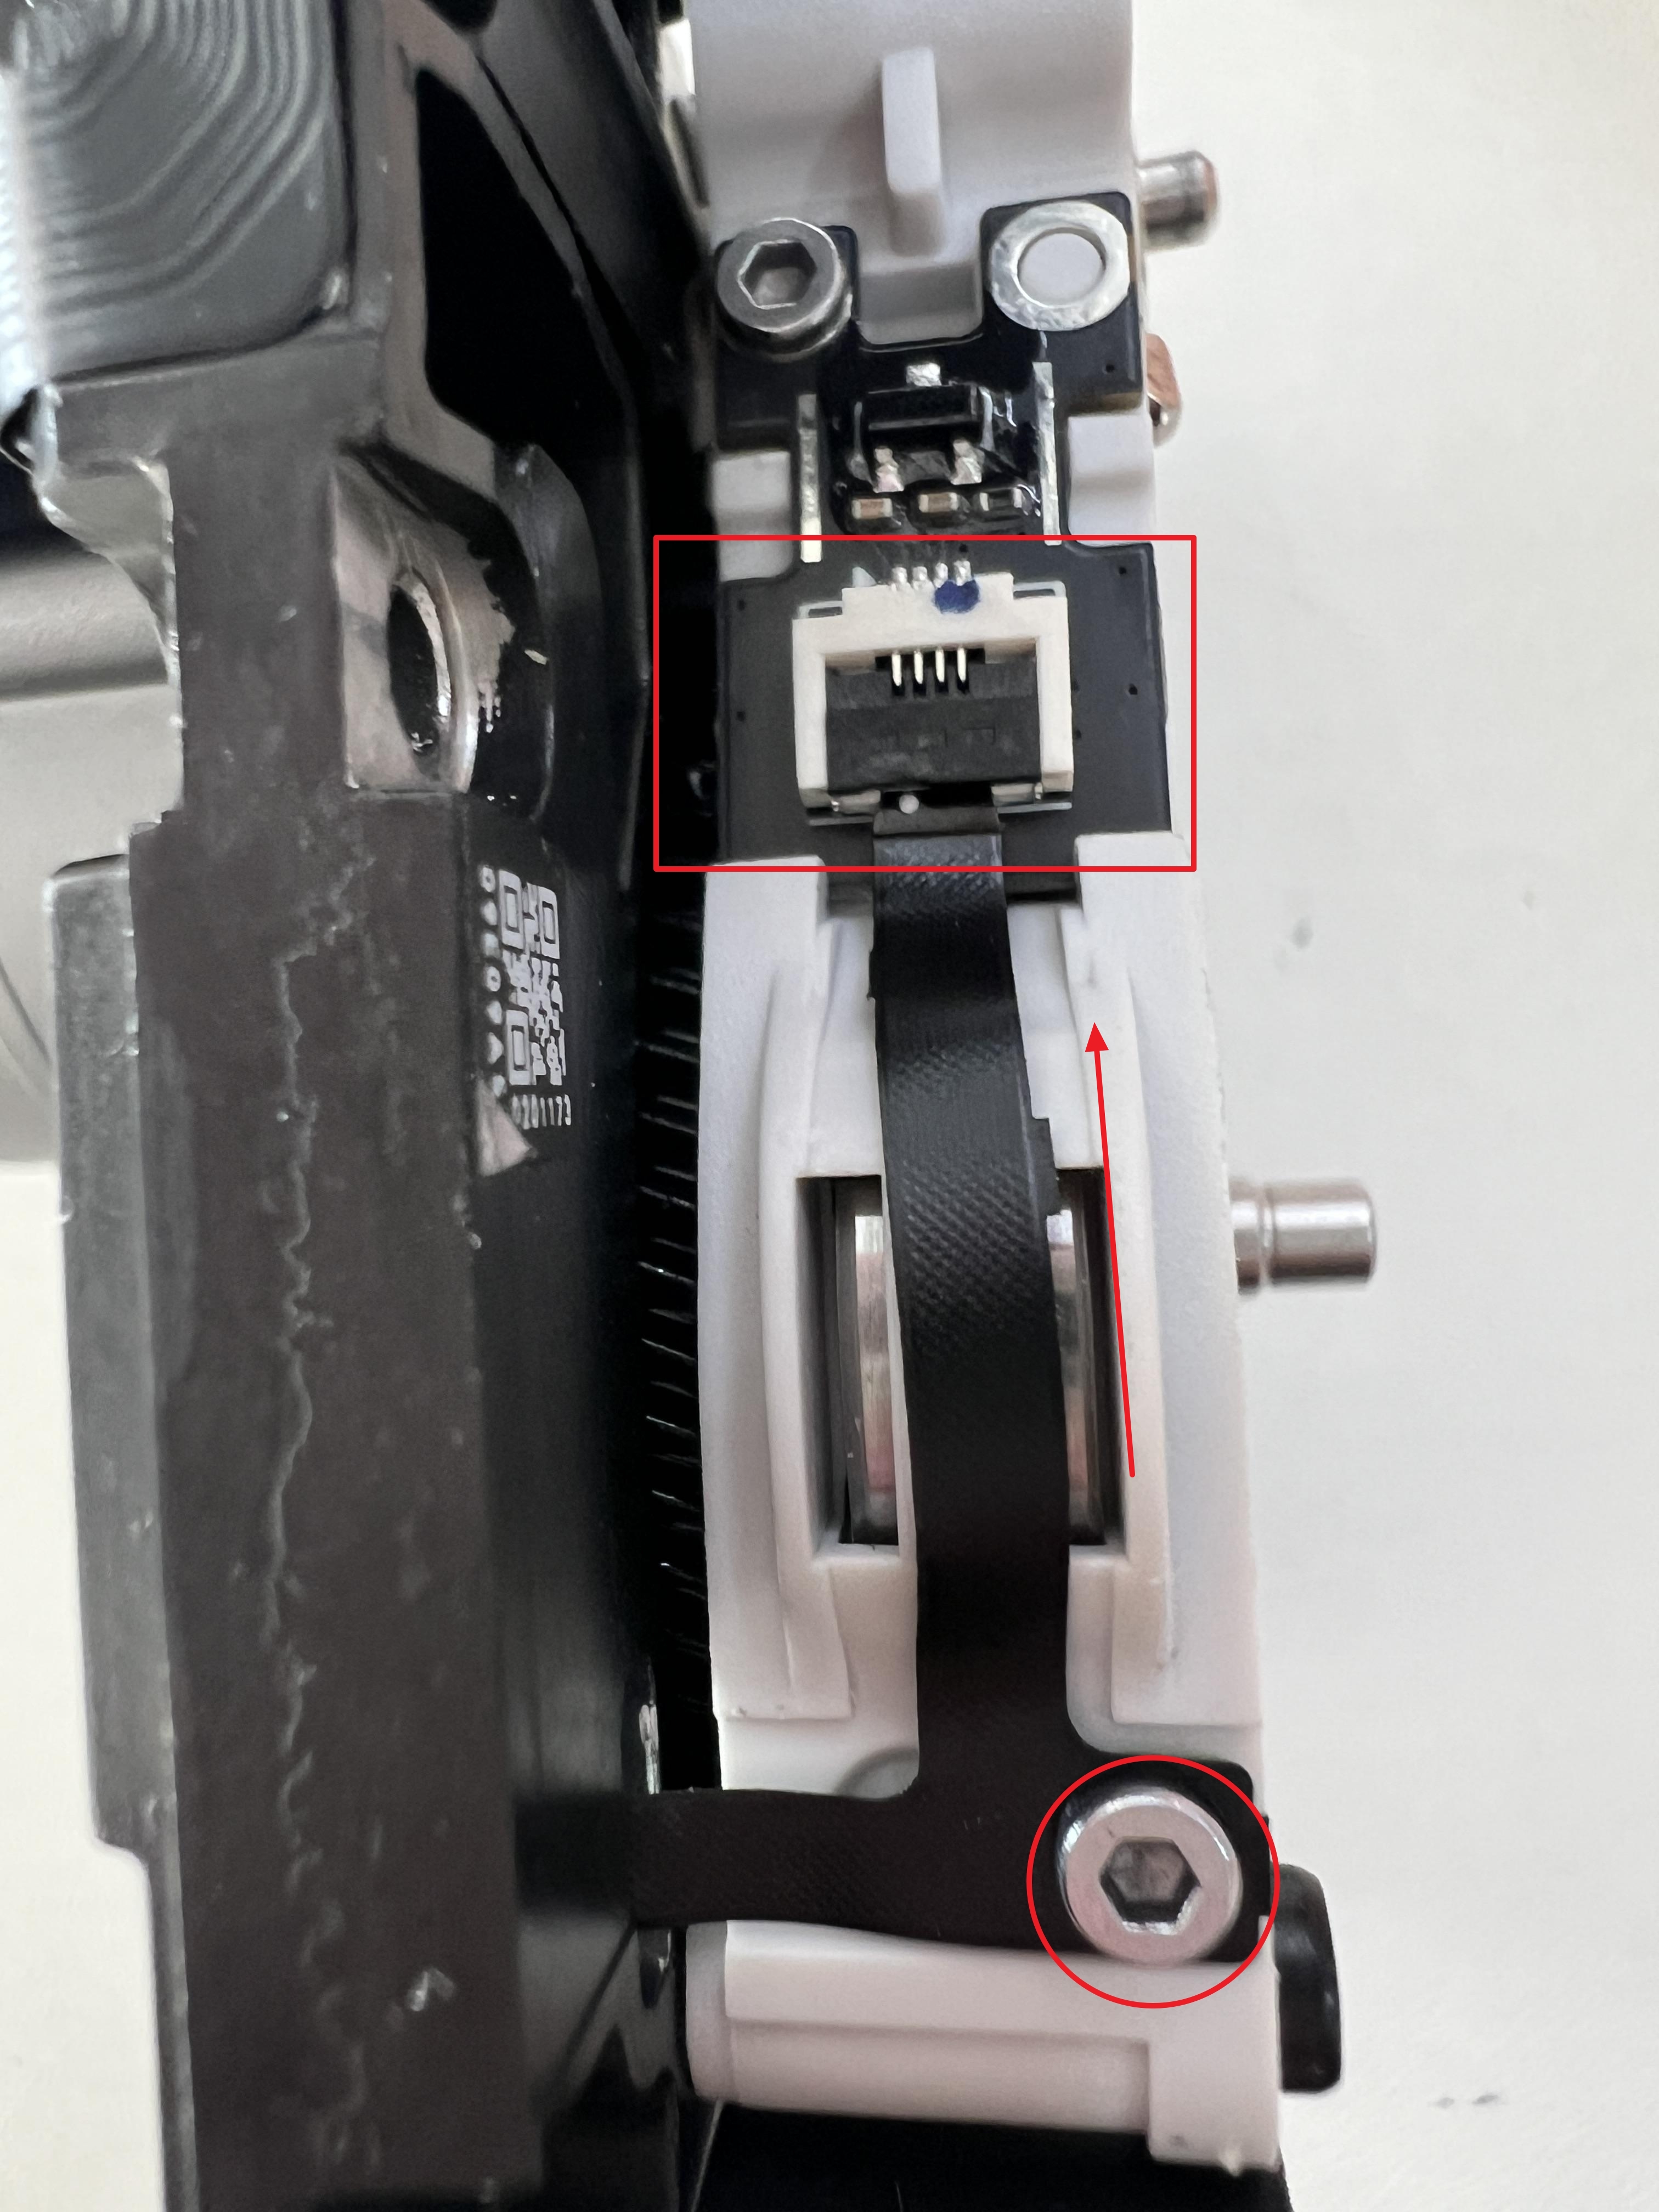
Align and attach the new Tool Head Sensor FPC Cable in the same position and order as removed. Align the cable with the small holes on the back plate and secure the back screws (black).
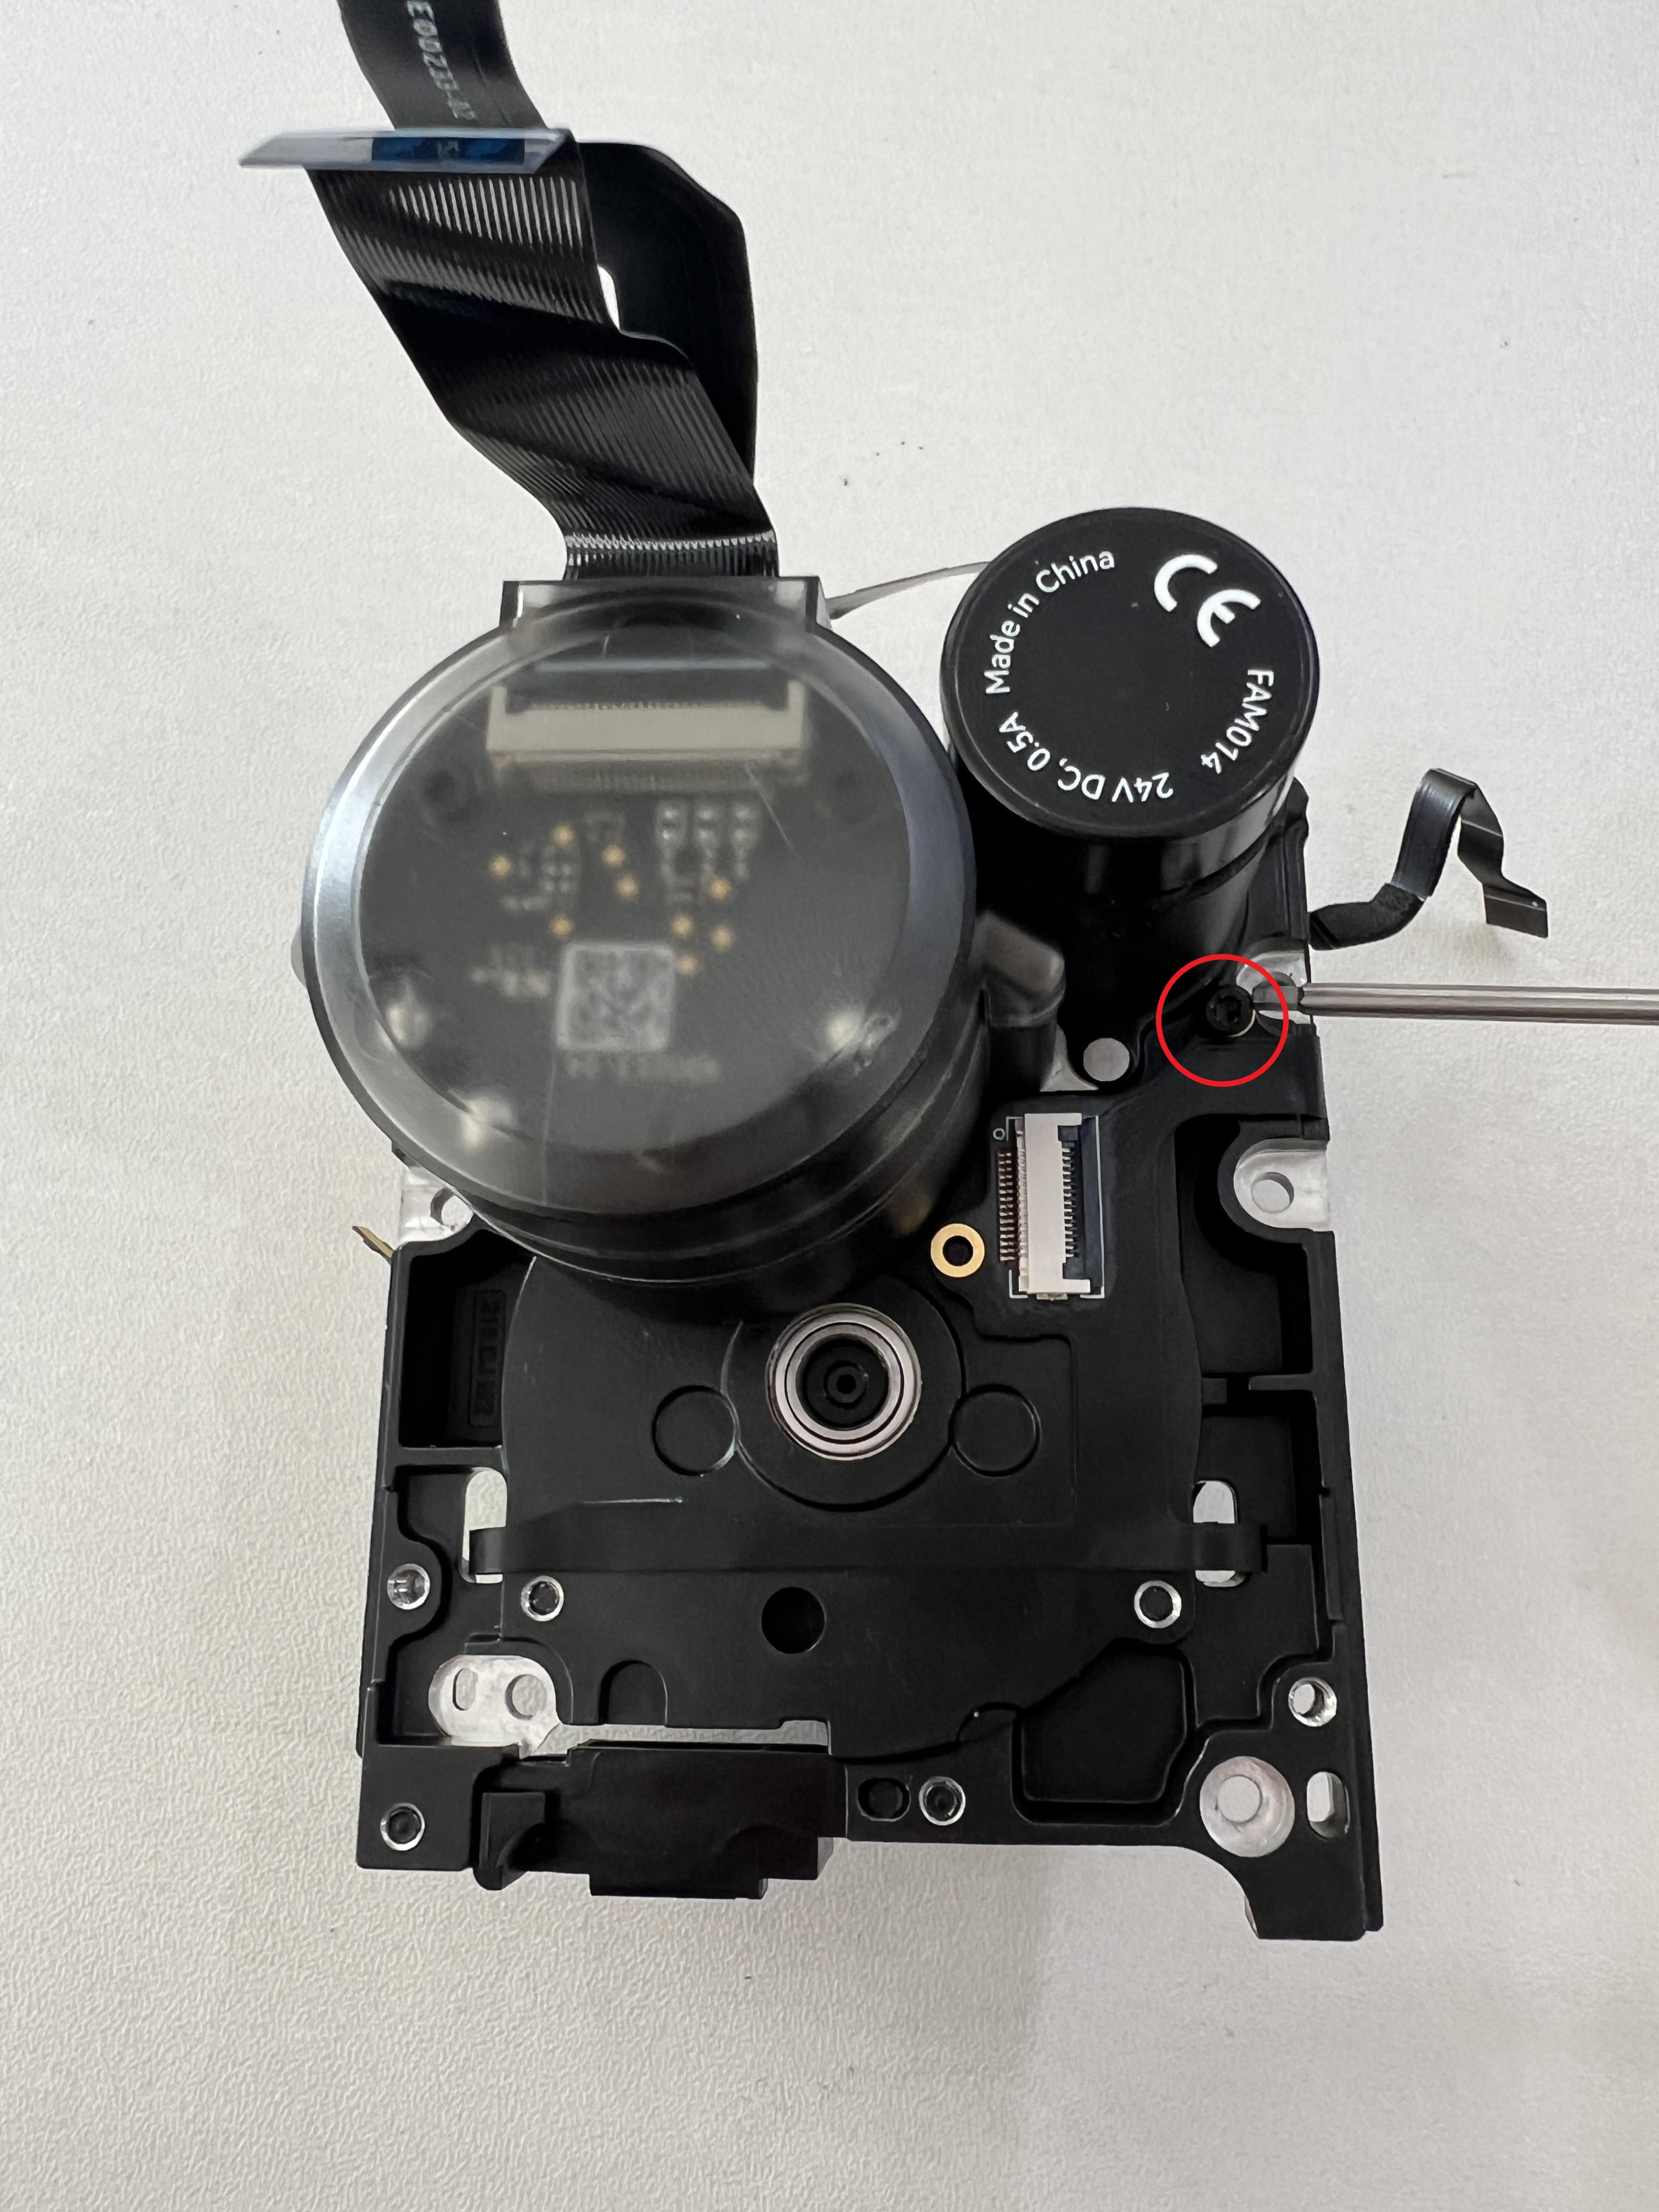
Flip to the front and secure the left and right FPC Cable screws (silver), pressing the cable closely to the idler wheel assembly and locking the connectors.
¶ Step 2: Install Extruder Front Cover
Connect the FPC Cable to the extruder front cover, snap the front cover back in, and tighten the two screws (M2.5x7 × 2) with an H2.0 hex wrench.


¶ Step 3: Install Front Cover Guide
Insert the front cover guide back into the extruder and tighten three screws with an H2.0 hex wrench.

¶ Step 4: Install Left & Right Cutters
Place the torsion spring in the extruder, then insert the cutter and cutter arm together, tightening one screw with an H2.0 hex wrench.


¶ Step 5: Install the Extruder
Refer to this H2D Extruder Replacement Wiki to reinstall the extruder onto the tool head.
¶ How to Verify Successful Installation
Power on the printer, start a print, and verify that the printer can complete the job.
¶ Appendix
Screw specifications and quantities involved in replacing the H2D extruder motor (keep the screws safe to avoid loss):
| Screw Type | Image | Purpose | Position Reference | Quantity | |
|---|---|---|---|---|---|
| M2.5x7 | To secure the extruder front cover (red circle) |  |
3 | ||
| To secure the extruder front cover |  |
2 | |||
| BT2x6 | To secure the extruder front cover (green square) |  |
1 | ||
| BT2x5 | To secure the extruder idler wheel Tool Head Sensor FPC Cable |   |
2 | ||
| BT3x8 | To secure the part cooling fan duct |    |
4 | ||
| BT3x20 | To secure the part cooling fan |  |
2 | ||
| BT2.6x8 | To secure the part cooling fan |   |
2 | ||
| To secure the extruder (red circle) |  |
2 | |||
| M2.5x8 | To secure the extruder (green square) |  |
4 |
¶ End Notes
We hope the detailed guide provided has been helpful and informative.
If this guide does not solve your problem, please submit a technical ticket, we will answer your questions and provide assistance.
If you have any suggestions or feedback on this Wiki, please leave a message in the comment area. Thank you for your support and attention!