The heatbed of the Bambu Lab H2D is calibrated before leaving the factory. Once you have followed the instructions in the Quick Start guide, you can start printing directly. However, in cases where the heatbed is affected during transportation, resulting in auto-leveling failure, or if the heatbed needs to be disassembled or replaced for maintenance purposes, it is important to ensure that the heatbed is flat using the bed tramming method.
¶ Prepare for Bed Tramming
¶ Required tools:
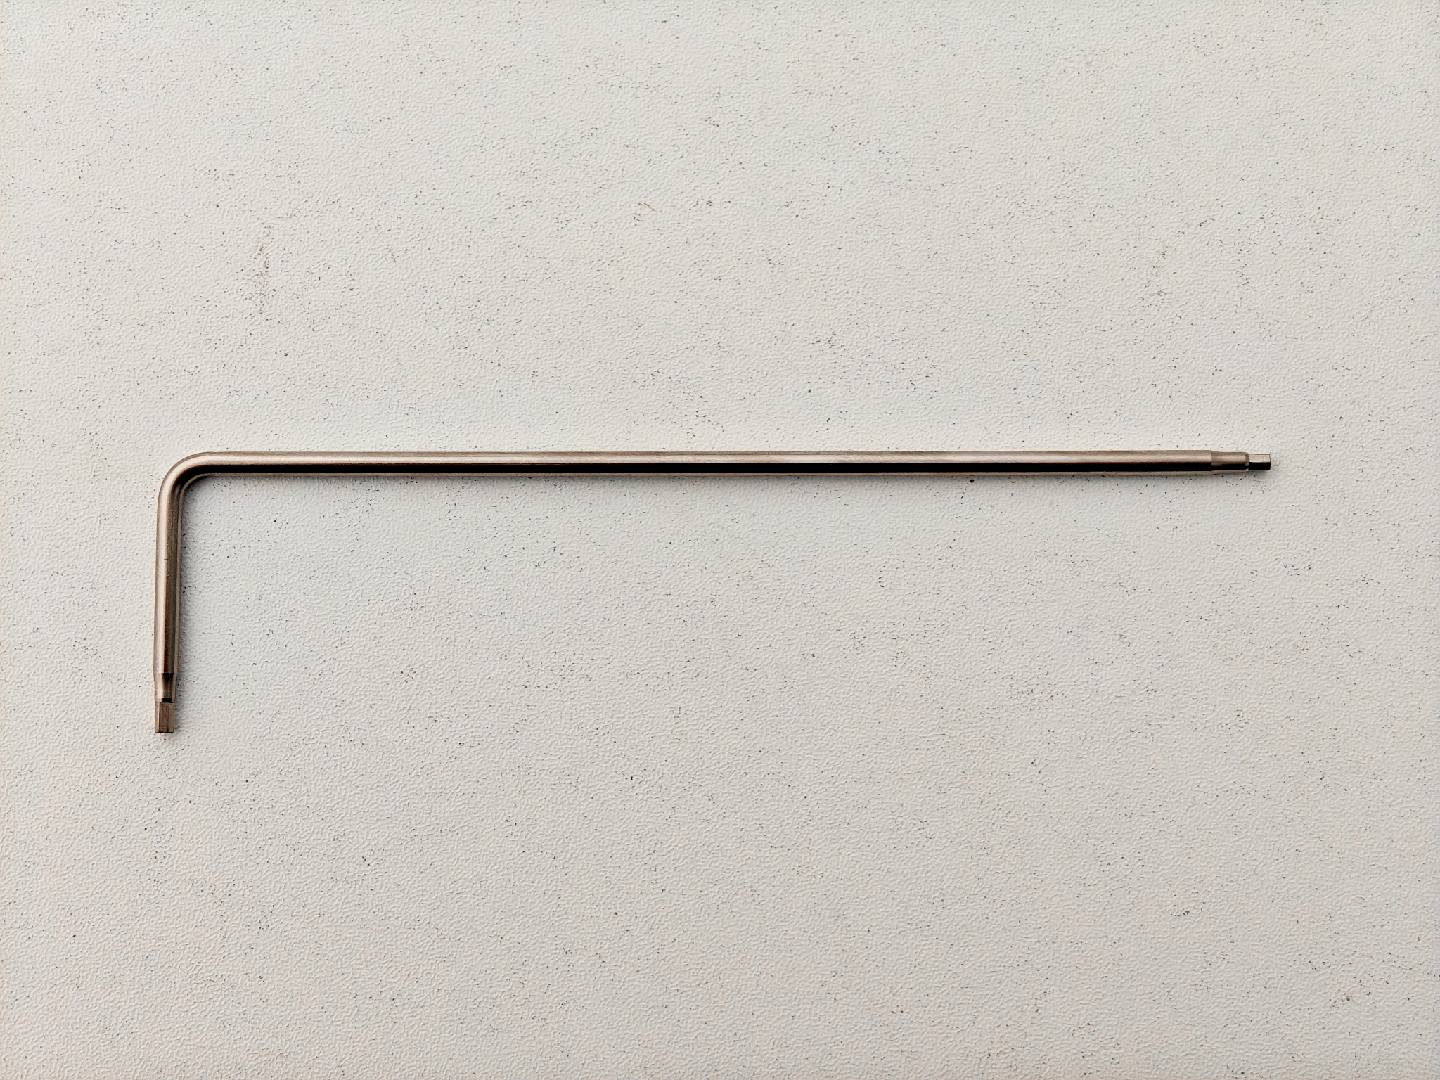
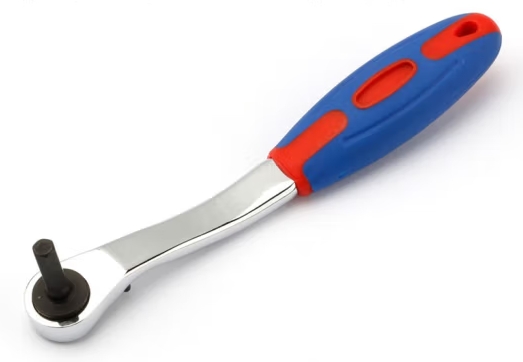
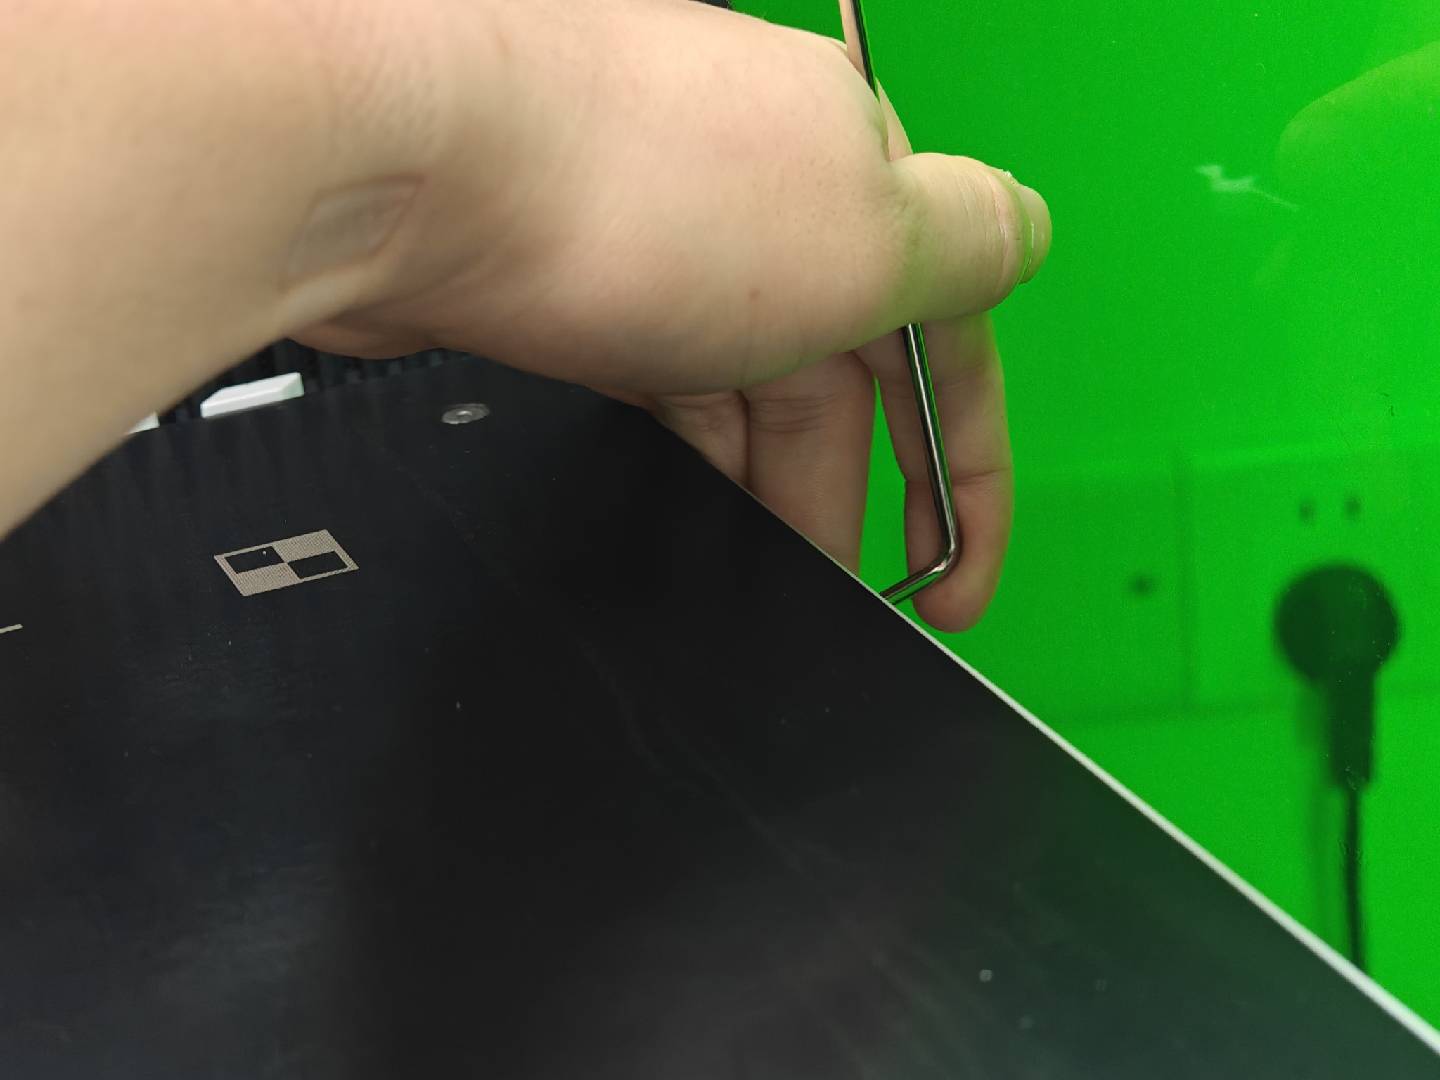
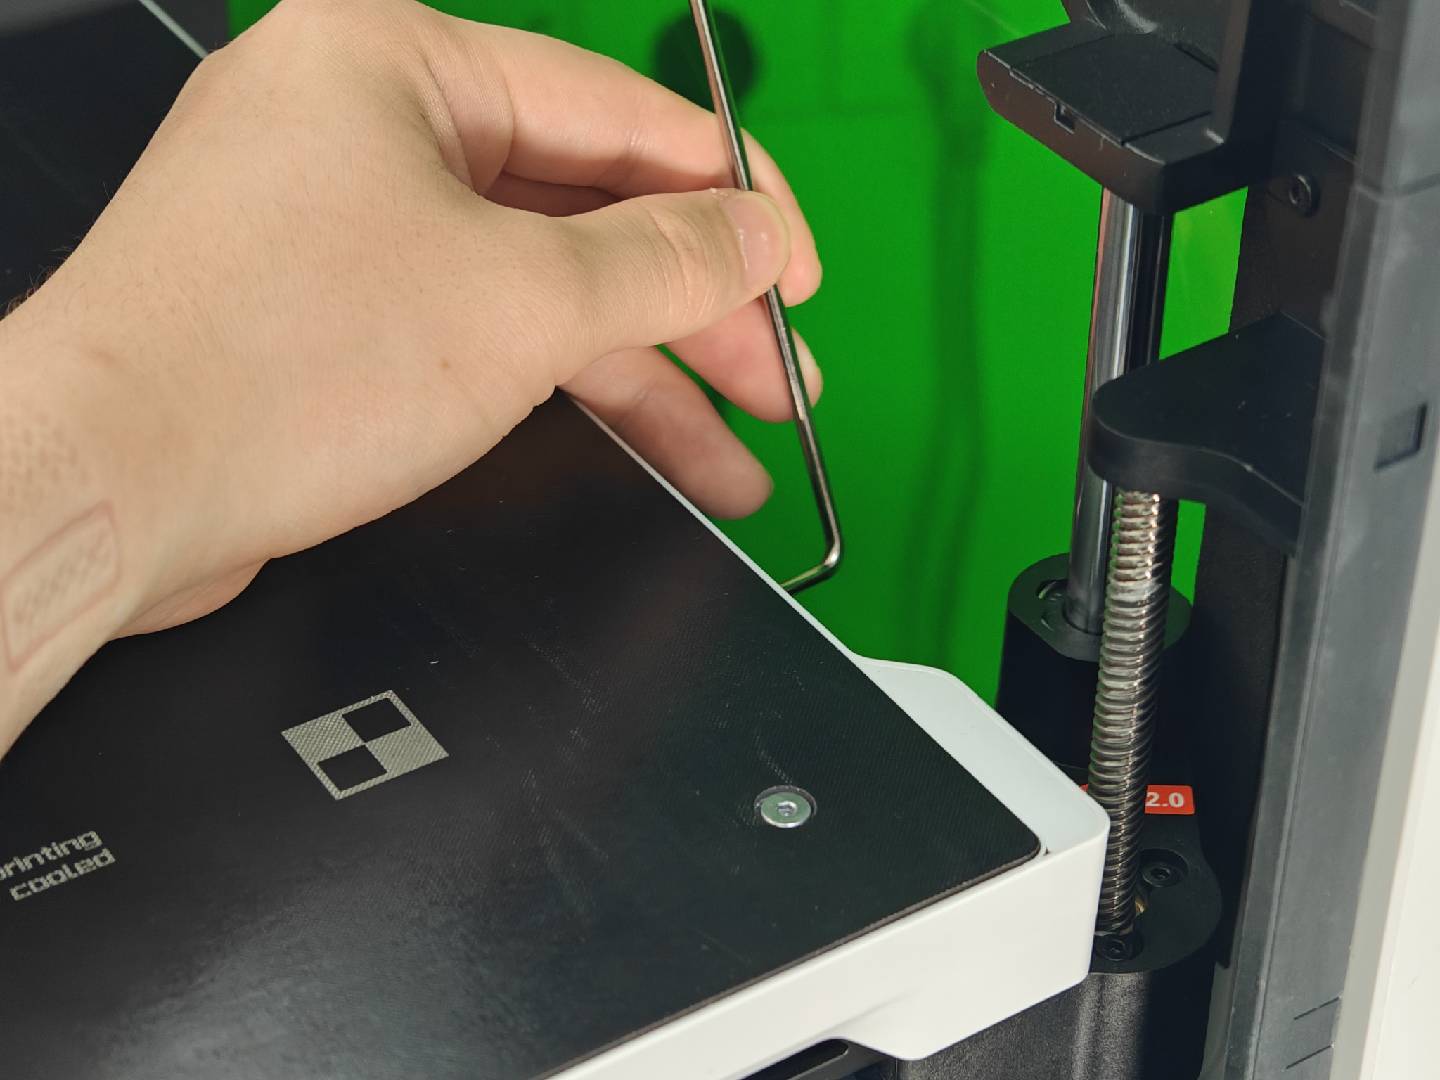
- Required tool: you need to find a 90-degree bent H2.0 hex wrench (It would be more convenient if a ratchet wrench could be used.).
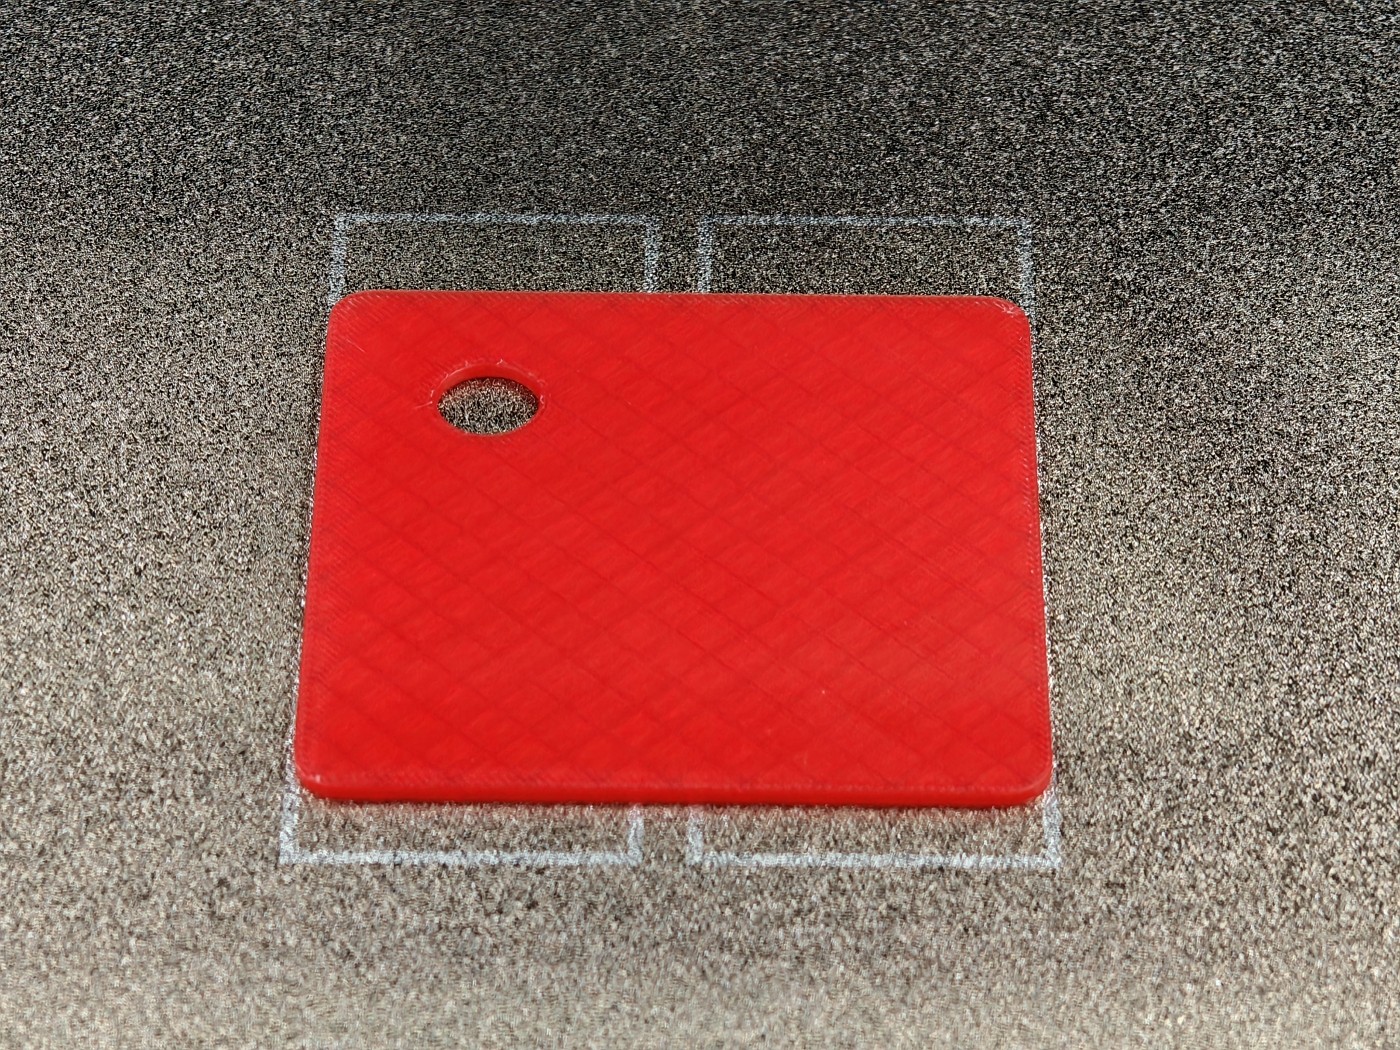
Print the manual leveling assistant block. This tool helps maintain a safe distance between the nozzle and the build plate during manual leveling, preventing the nozzle from scratching the surface. If you have a metallic leveling feeler, you can use that instead of printing the model.
Manual Leveling Assistant Block.3mf
¶ Download the leveling G-code
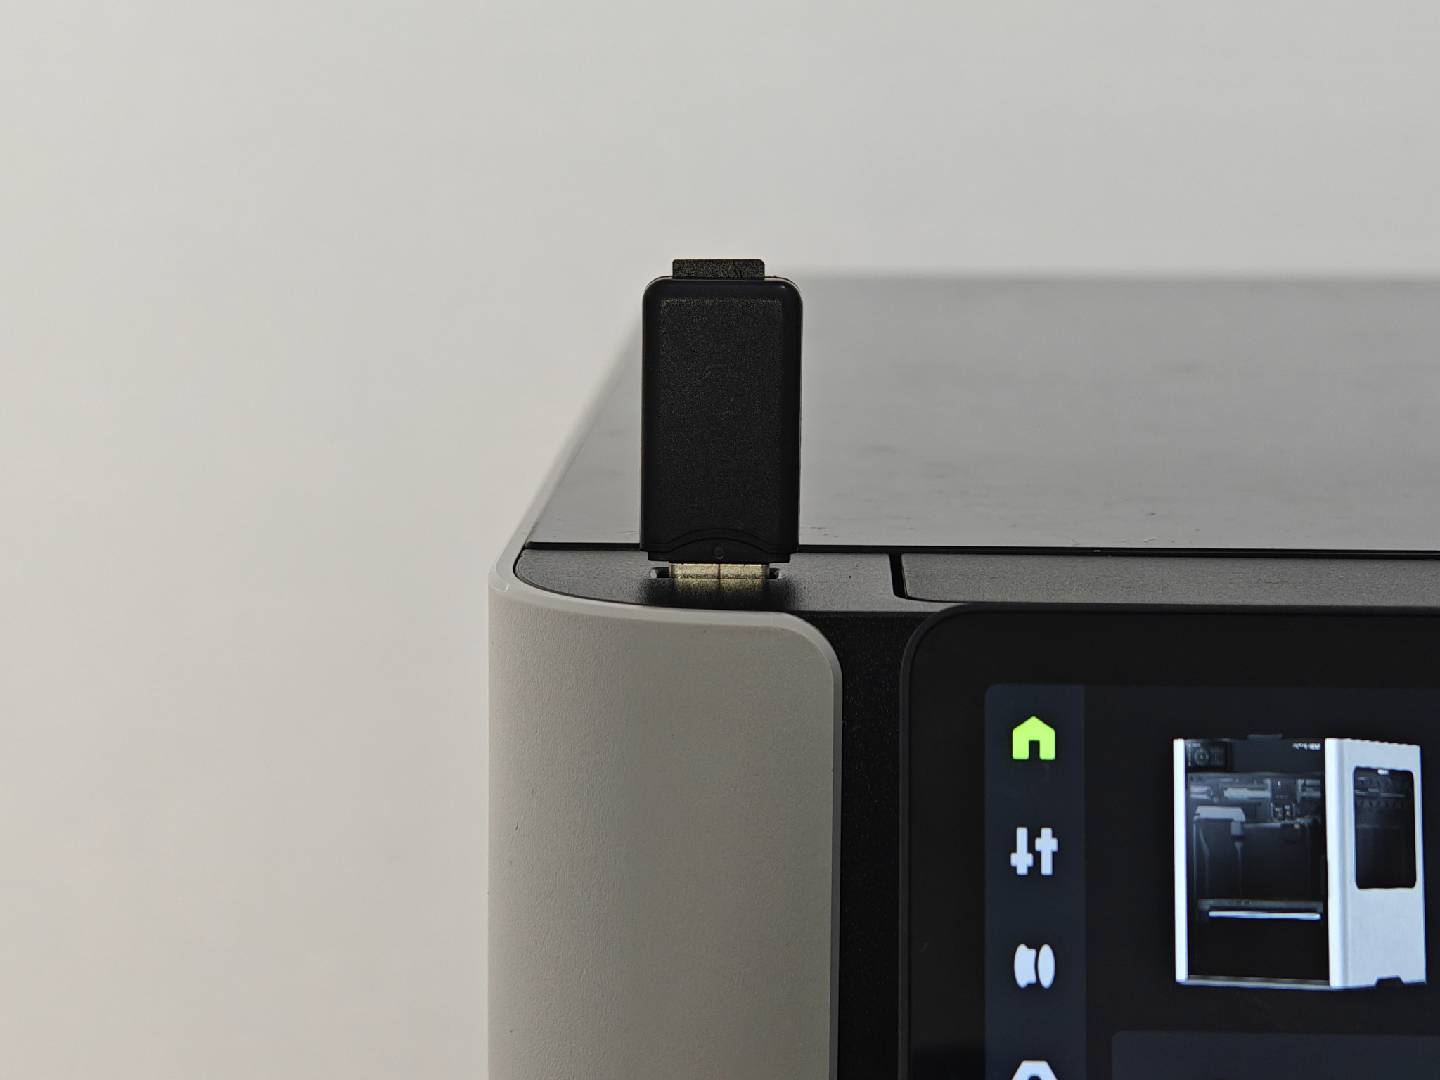
- Download the included G code file and copy it onto the USB flash drive.
h2d_manual_bed_screws_adjust_assistv2.gcode;
After the download is completed, you need to copy the Gcode file to the root directory of the USB flash drive.
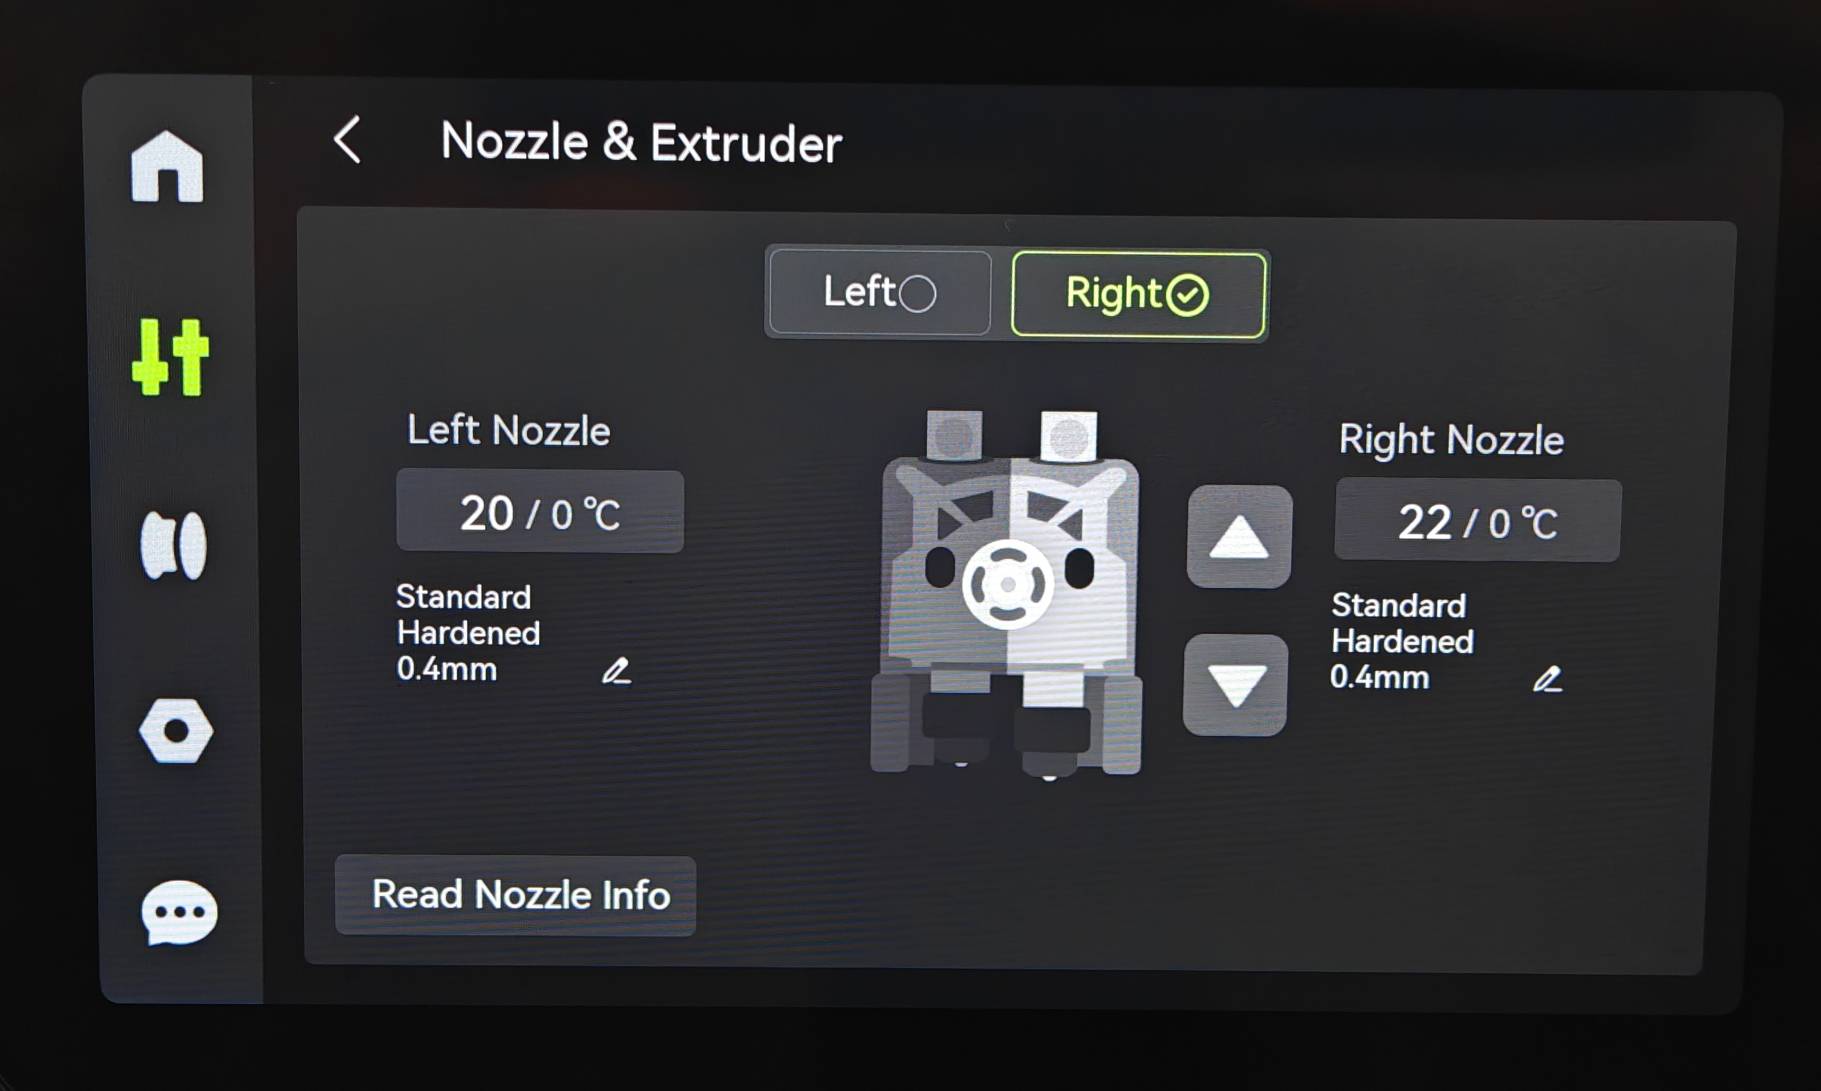
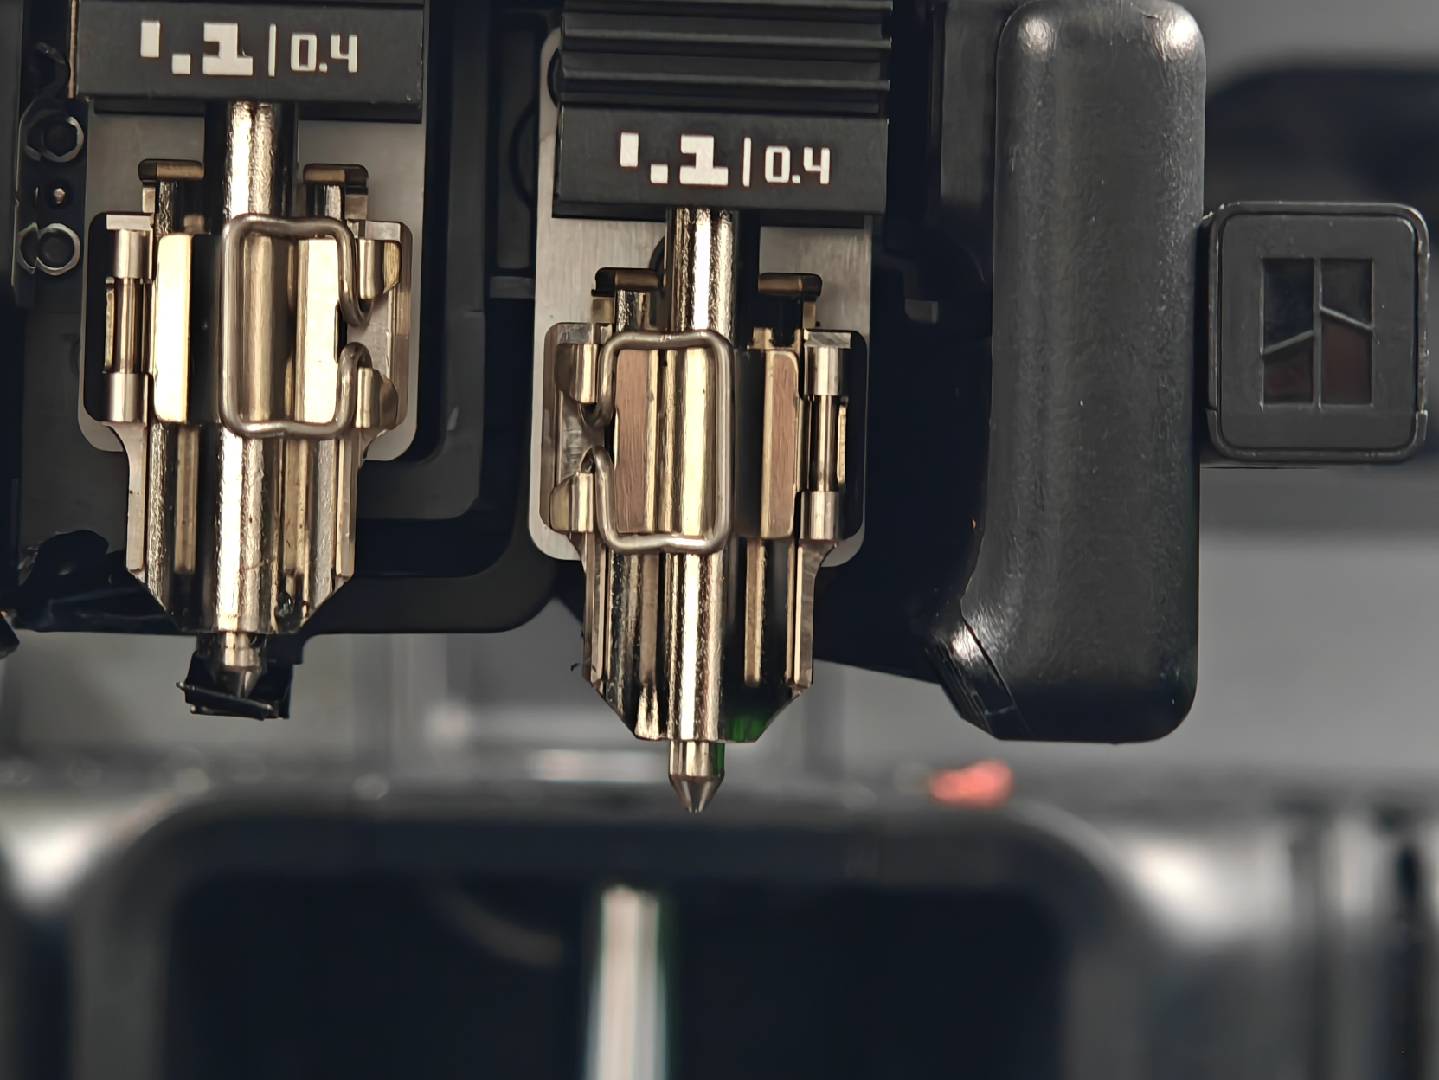
¶ Switch the nozzle to the right nozzle.
- You need to switch the nozzle assembly to the right nozzle otherwise there will be interference when adjusting the heatbed screws.
¶ Clean the heatbed and nozzles
- You need to remove the print plate and ensure that the surface of the heatbed is clean.
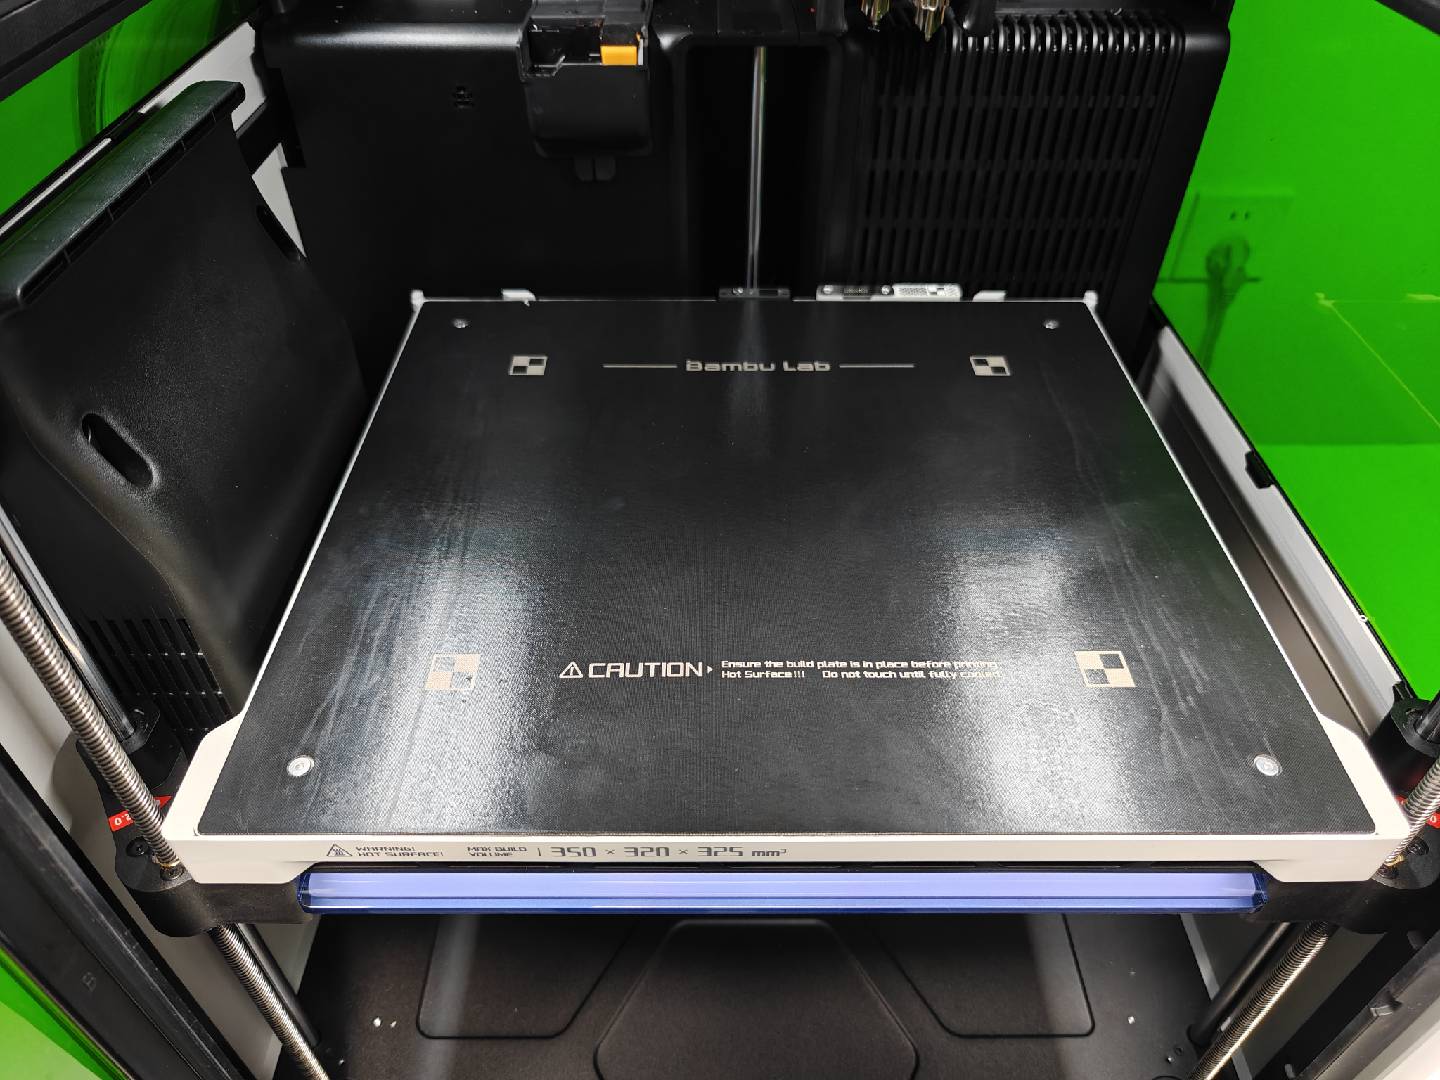
- Make sure that the nozzle is clean and there is no material on it. If necessary, heat the nozzle and wipe it to ensure its cleanliness.
¶ Loosen the fixing screws of the heatbed
- You need to loosen 7 fixing screws in advance; 4 screws on both sides of the heatbed (loosen each side by one full turn), and 3 screws at the bottom.
Note: For the heatbed, loosen the 7 fixing screws only. Do not remove them completely as it would make it difficult to install the screws later.
Display of the positions of 4 screws on both sides of the heatbed
The figure below shows the positions of the screws on the side of the heatbed. The left and right glass panels have been removed for this view; however, during normal manual leveling, it is not necessary to remove the glass panels on the left and right sides.
 right side |
 left side |
Before loosening the screws, you can appropriately raise the heatbed to prevent interference with the auxiliary part cooling fan on the left side.
 Left front |
 Left rear |
 Right rear |
 Right front |
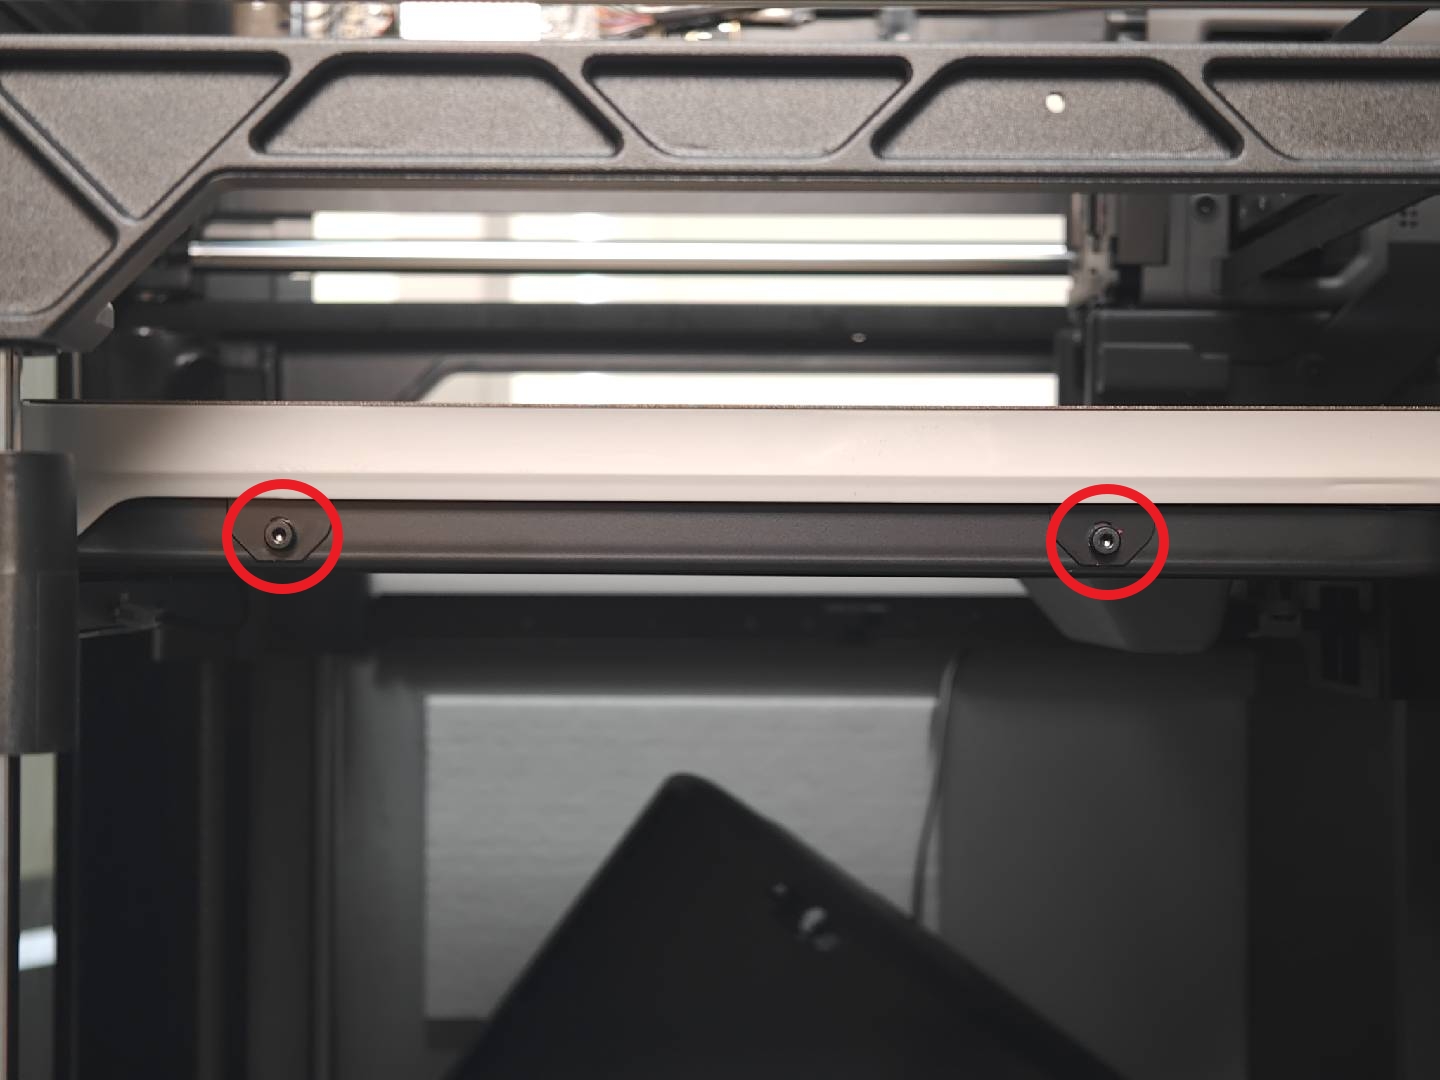
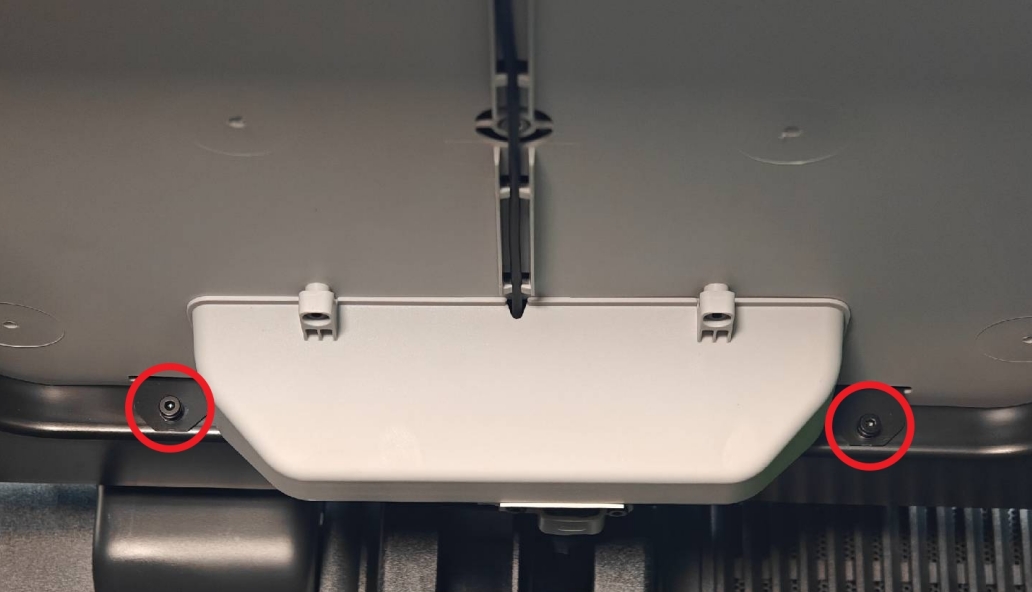
Next, you need to loosen the bottom screws and the three fixing screws.
 rear part |
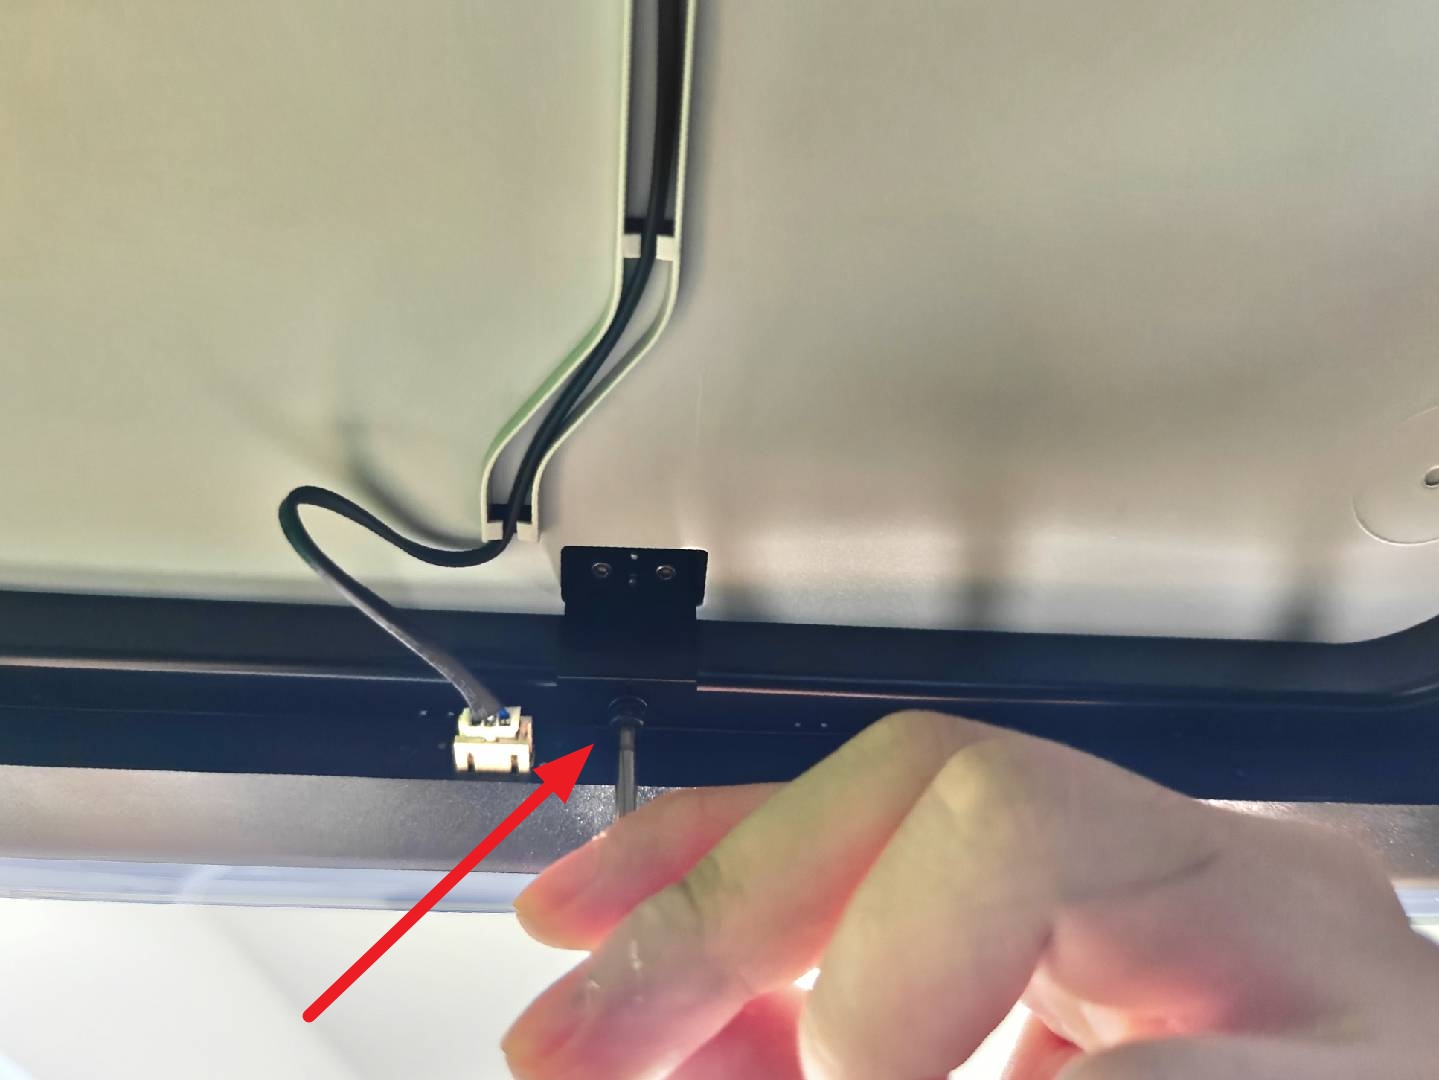 front part |
¶ Tighten the Bed Leveling Screws
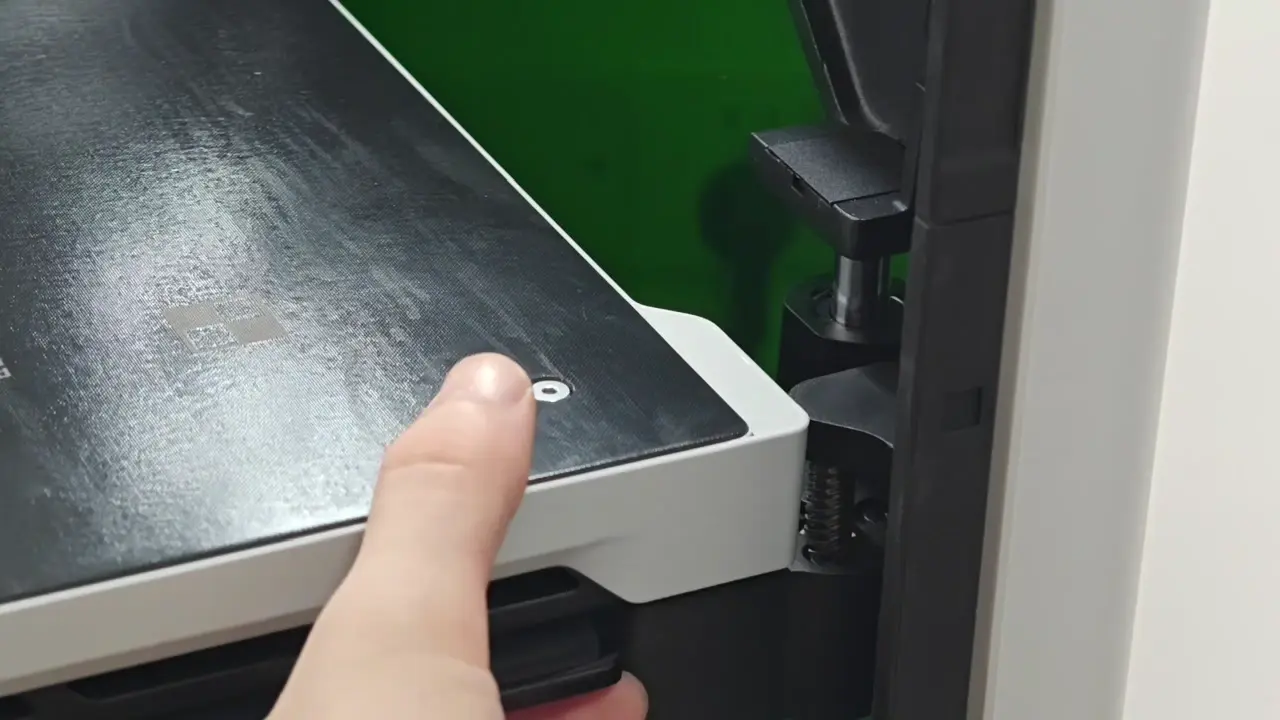
After loosening the bed fixing screws, you can press each of the four corners of the bed to check if there's a rebound when pressed. If the corners bounce back normally, it indicates that the fixing screws have been successfully loosened.
Why is tightening necessary?
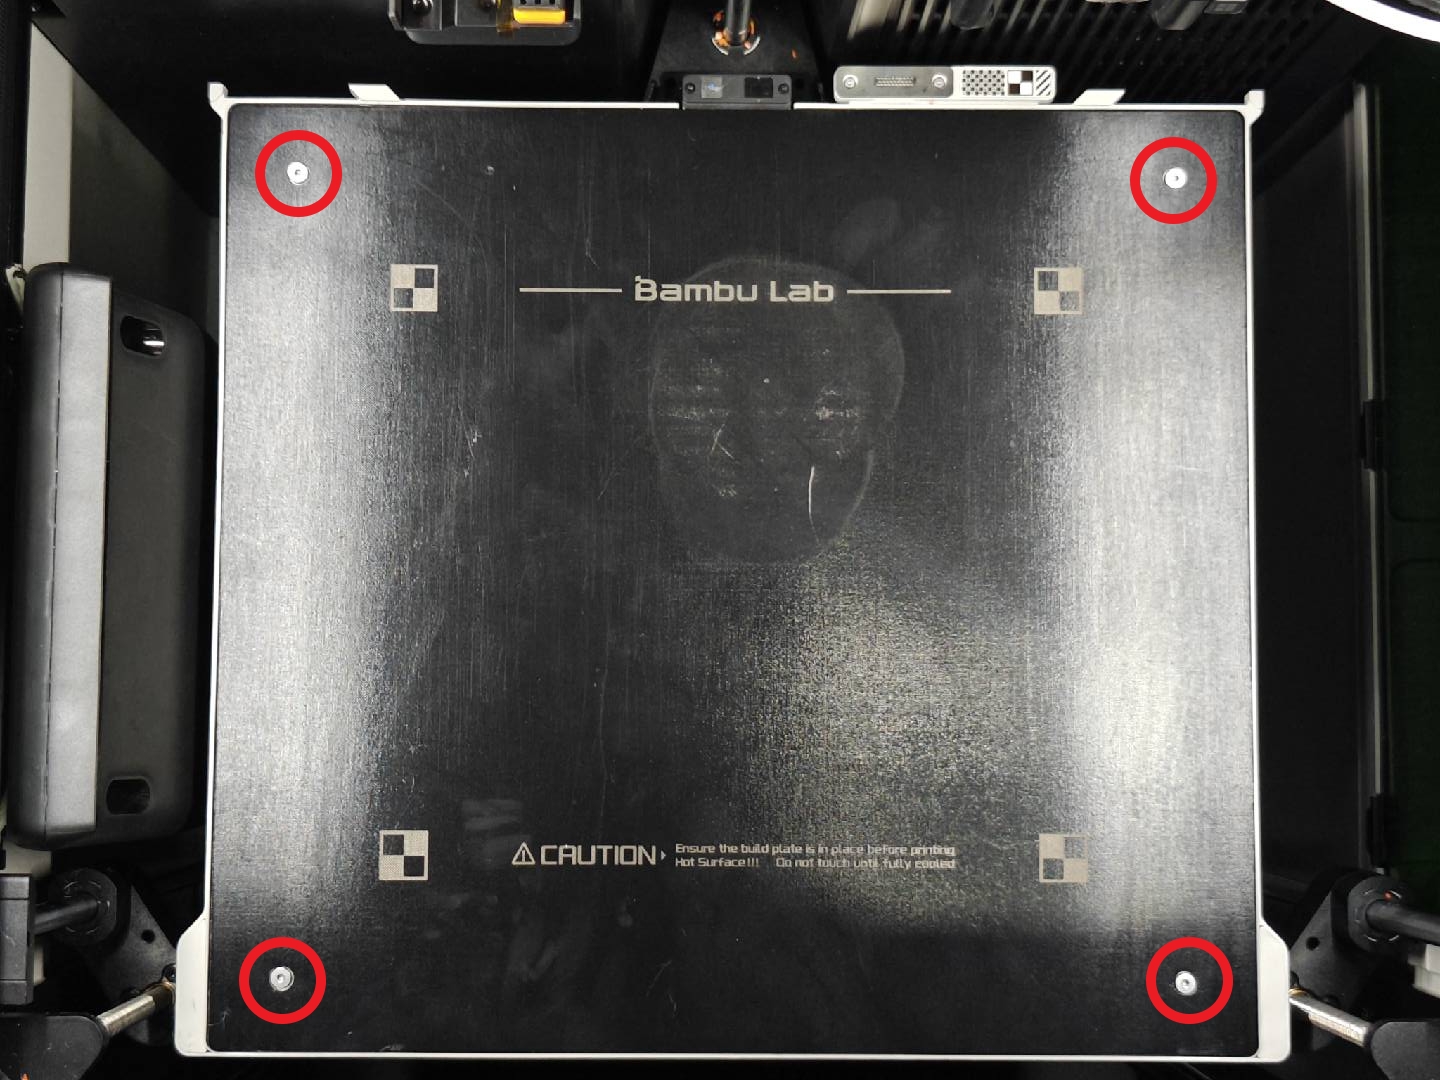
During manual bed leveling, each corner screw is adjusted manually. To ensure a consistent starting point, all four leveling screws must be fully tightened first (turned all the way down). This sets the nozzle-to-bed distance to its maximum, helping standardize the initial state.
Tighten all four leveling screws completely until they cannot be turned any further.
While tightening, it’s recommended to gently hold the bed and feel whether the screw has been fully secured.
After tightening, all four corners of the bed should no longer be pressable — there should be no springiness or rebound.

¶ Start Leveling
Copy the leveling G-code file to a USB drive and insert it into the printer’s USB port. Once detected, the printer screen will display the file list. Select the leveling G-code file and tap “Start Print.”
After running the G-code file, the printer will home all axes and move the toolhead to probe each of the four corners of the bed. The toolhead will pause at each corner for 30 seconds and repeat the process for three full rounds to ensure accurate leveling.
.jpg)
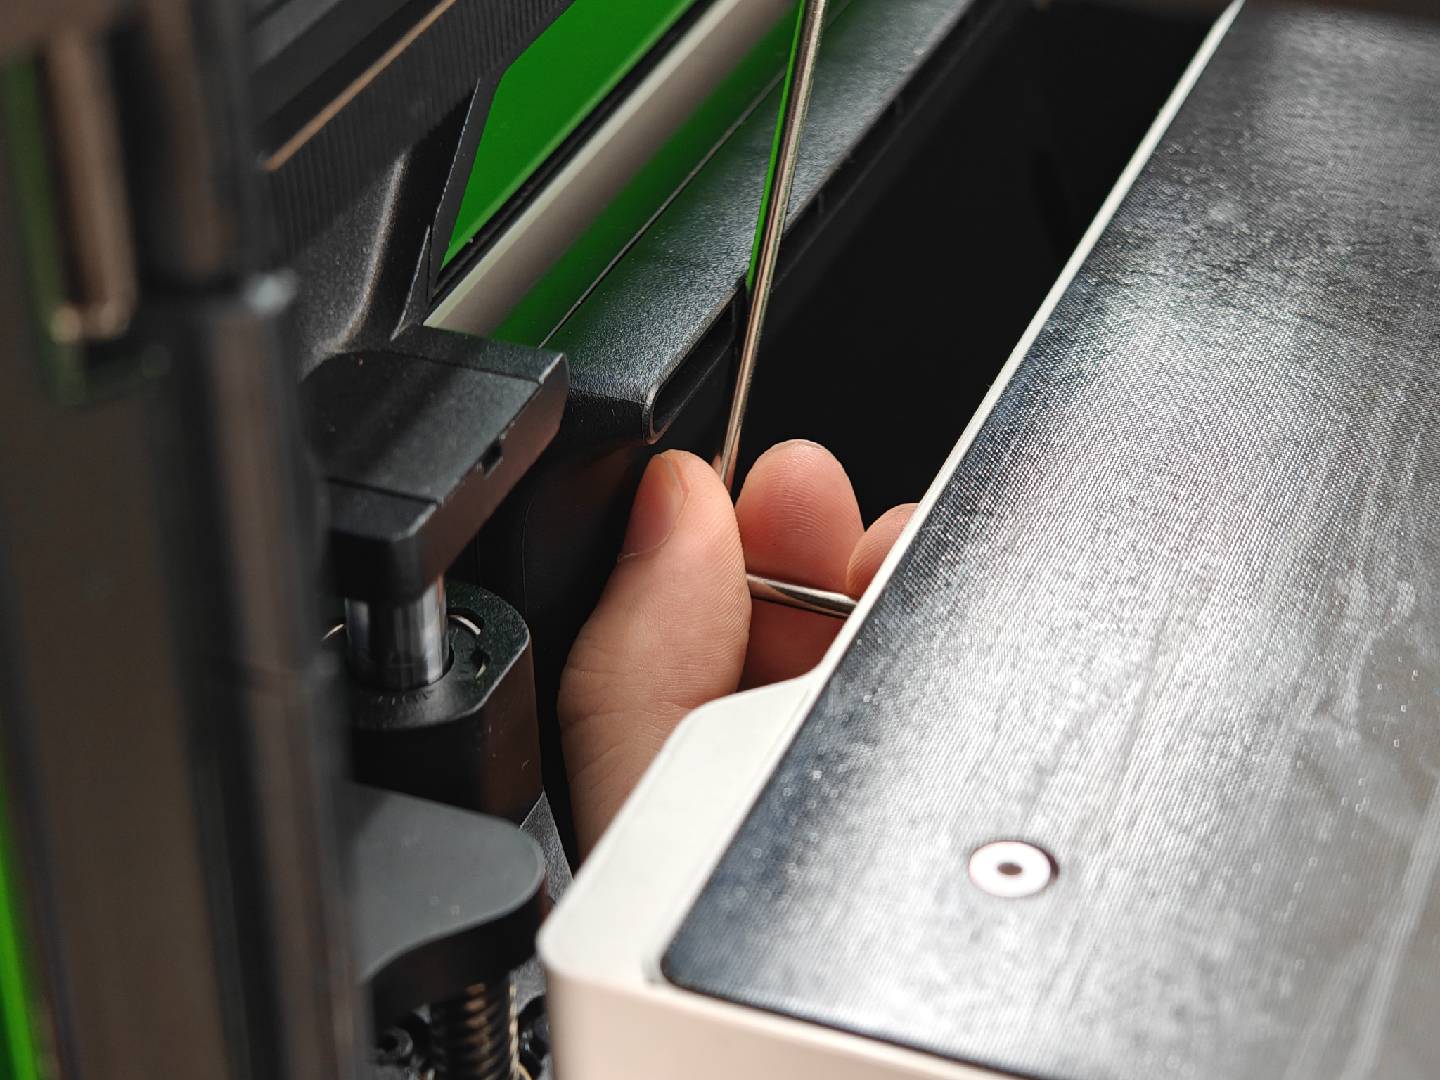
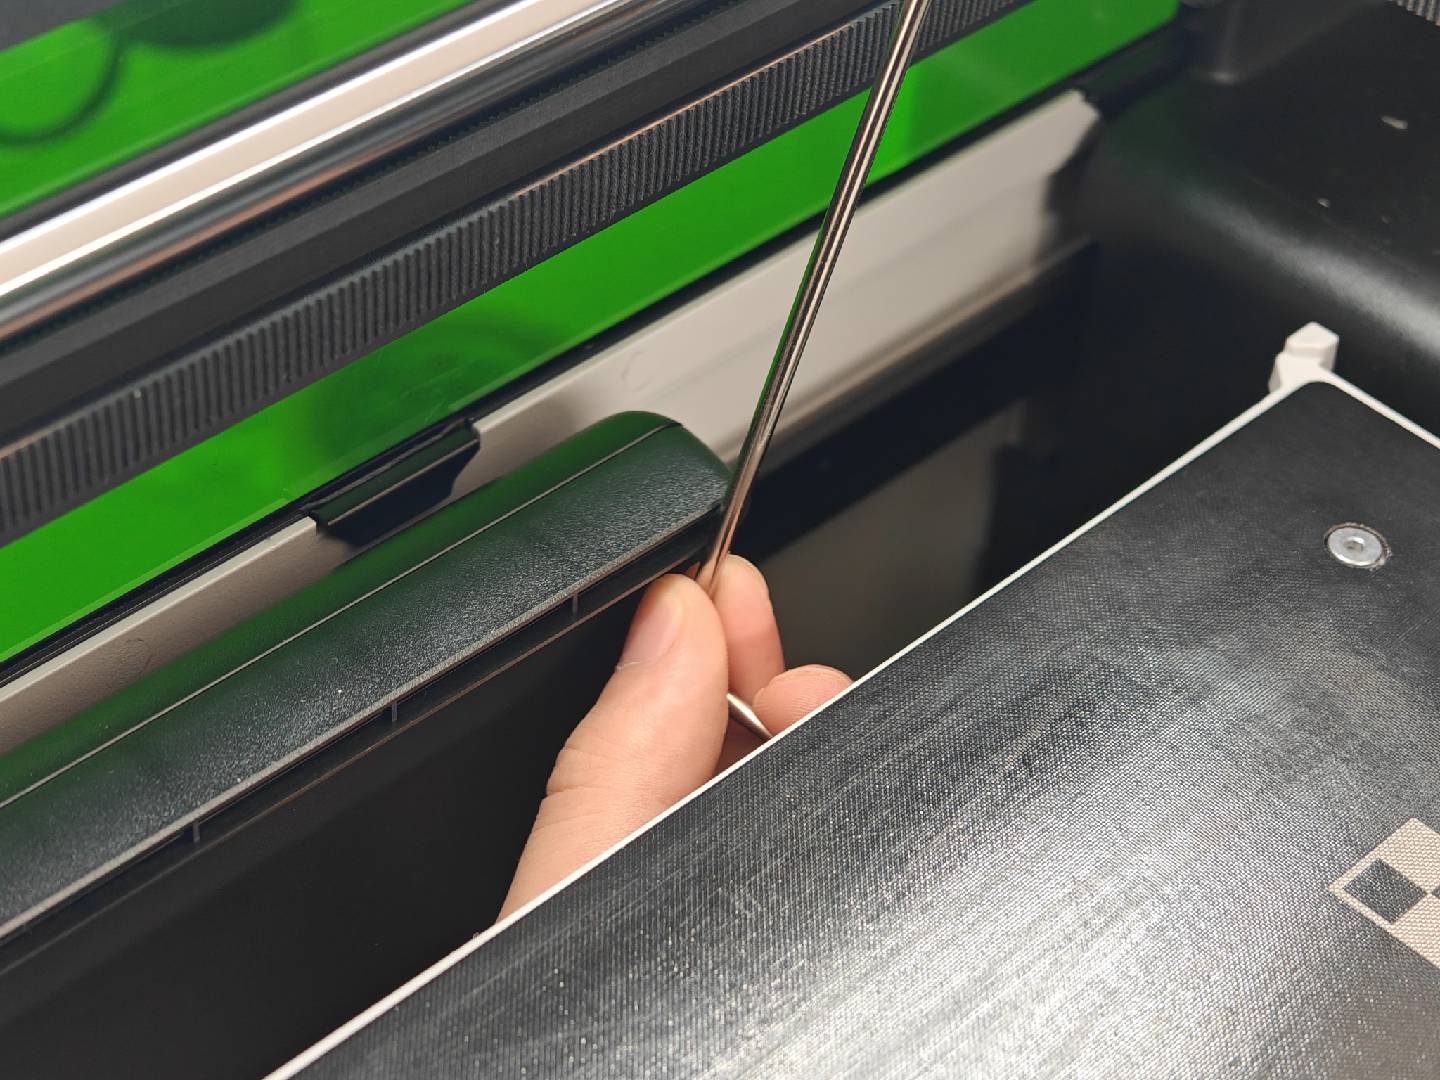
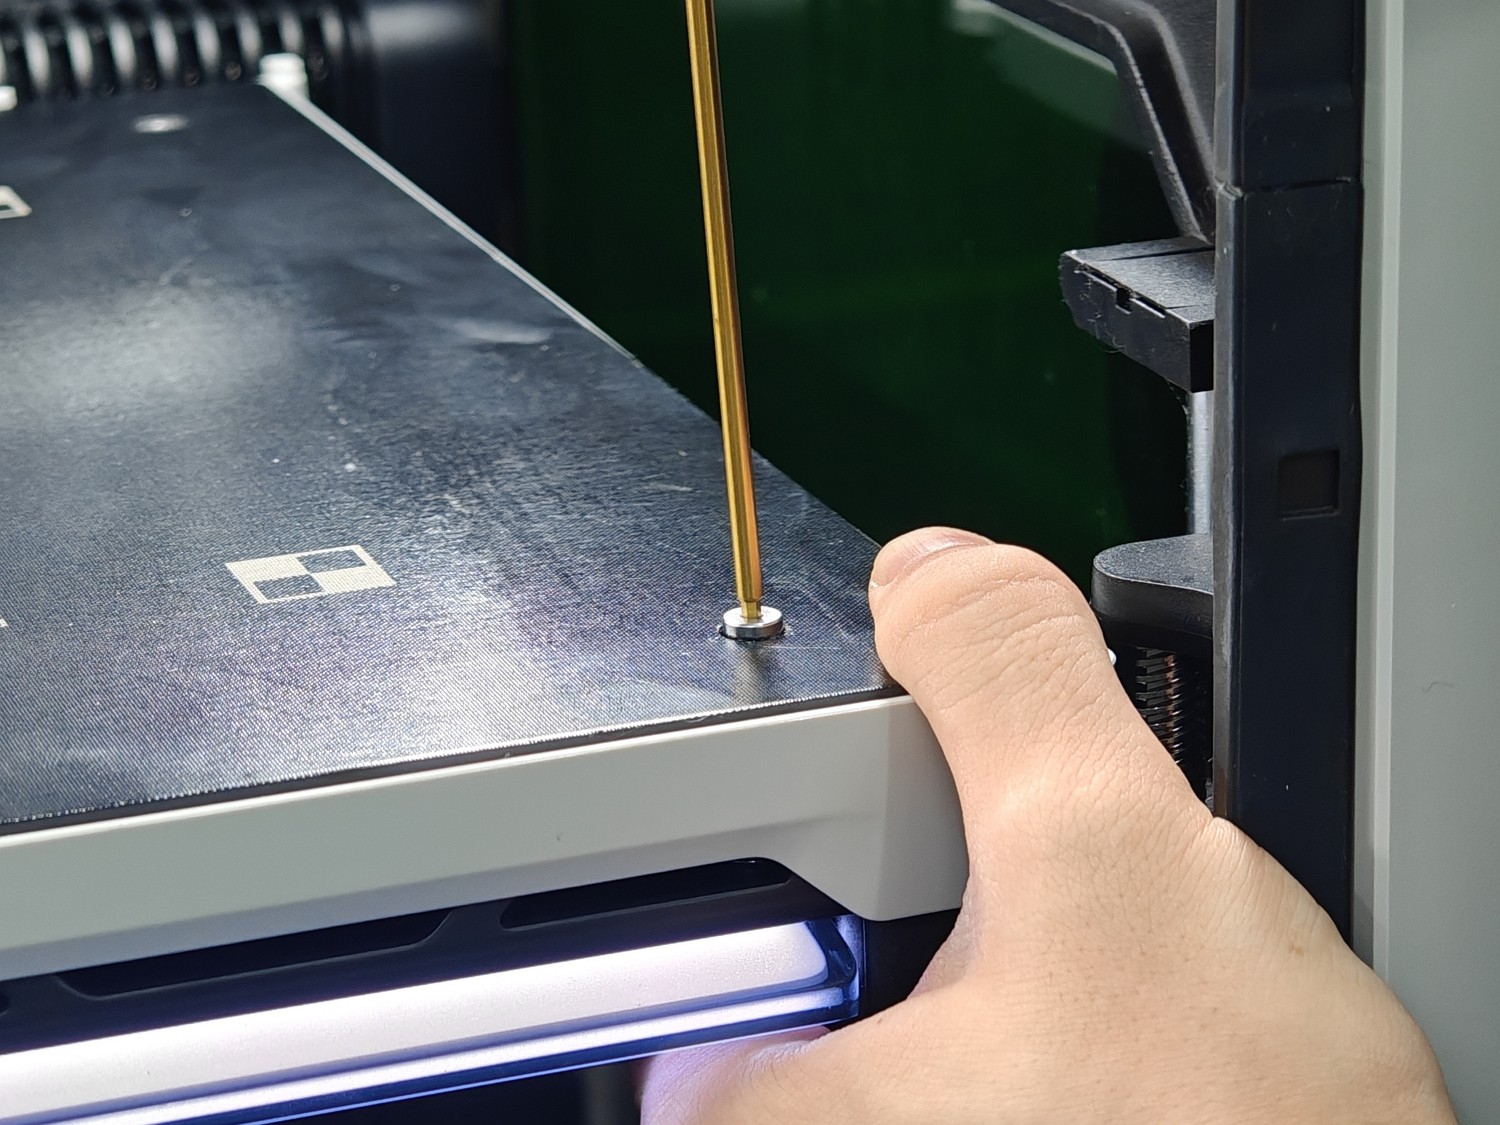
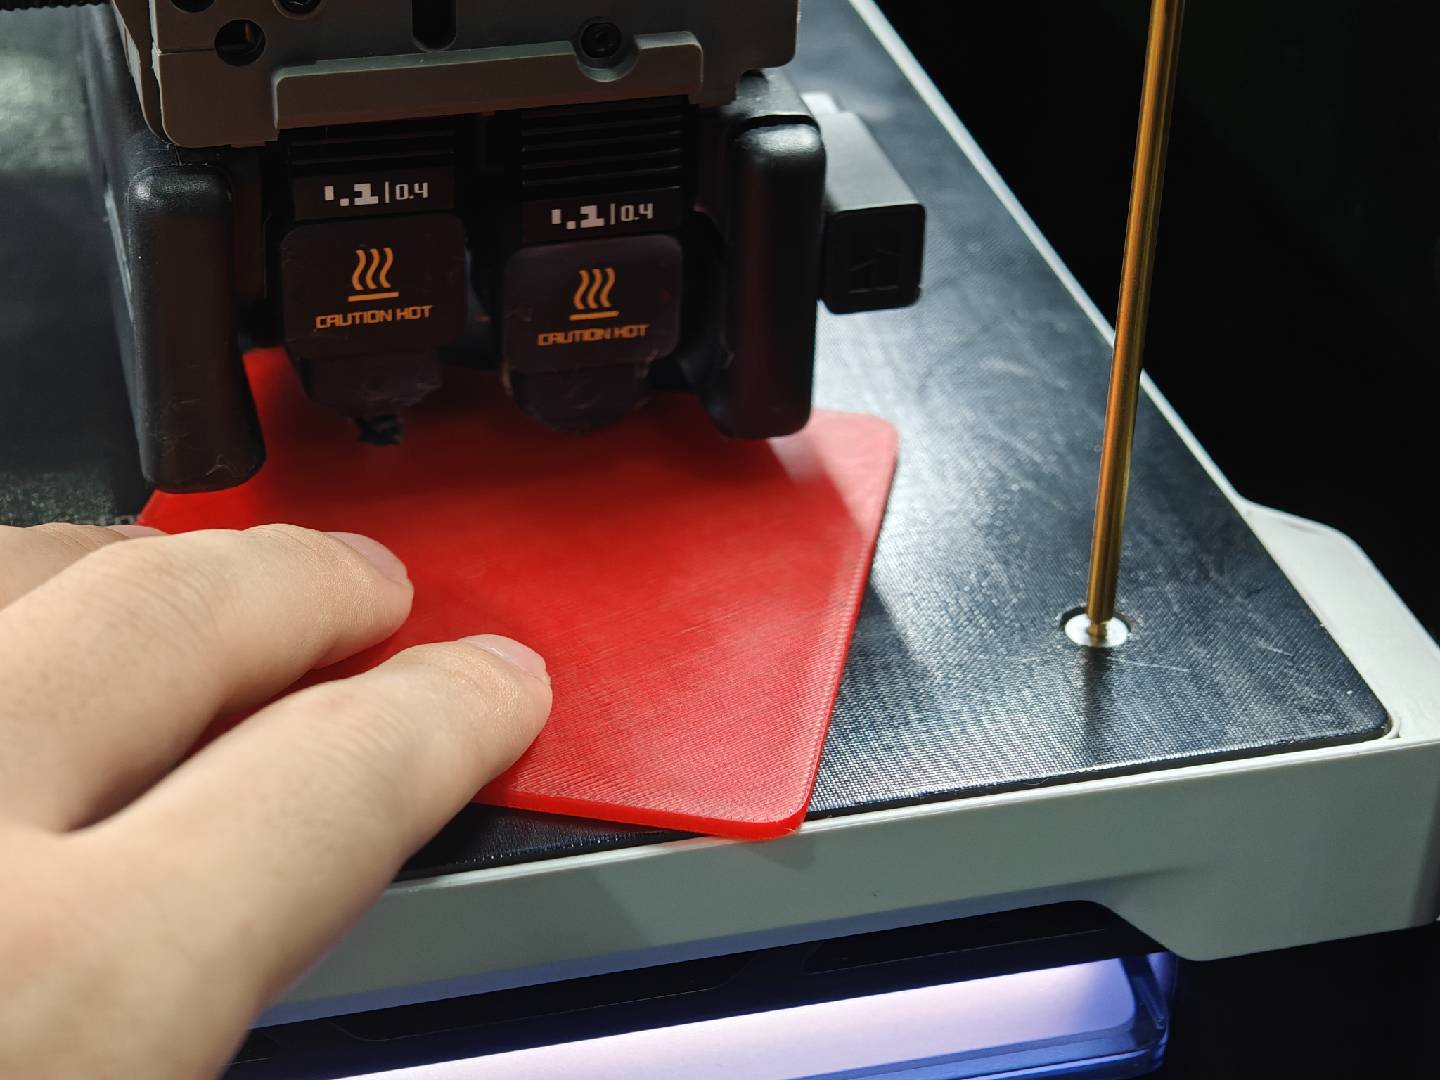
First, the toolhead will automatically move to the front-left leveling point. Insert a leveling feeler (such as a 2 mm metal shim or paper, or the printed model) between the nozzle and the bed. Gently turn the leveling screw until the nozzle just touches the feeler — you should feel slight resistance when sliding it.
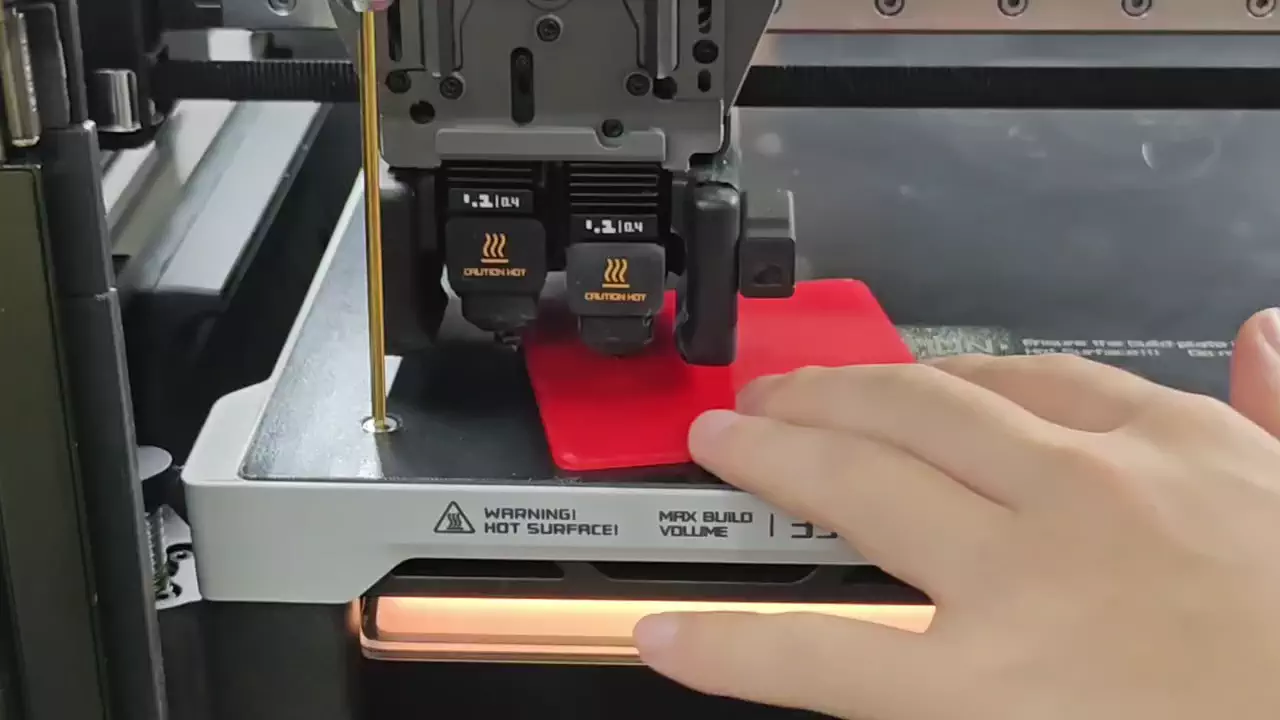
Tip: Turning the leveling screw clockwise will lower the bed, increasing the distance between the nozzle and bed. Turning counterclockwise raises the bed, decreasing the gap.
Then proceed to fine-tune the other three corners in the same way, ensuring that the resistance you feel when sliding the feeler is consistent at all four points to achieve a flat and even bed.
The G-code performs 3 leveling rounds, meaning each point is revisited 3 times. You’ll have multiple chances to adjust the screws precisely. We recommend completing all three rounds for the most accurate result.
Warning:
When the bed starts to move down automatically, immediately stop turning the screw and remove the hex wrench and leveling feeler to avoid any collision with the moving toolhead.
If after completing all three rounds the bed is still uneven:
Retighten all four leveling screws and rerun the leveling G-code from the beginning.
¶ Tighten the Bed Fixing Screws
After completing the leveling adjustments, please tighten the 4 screws on the left and right sides of the bed, as well as the 2 screws underneath to prevent any changes in bed height during future prints.
Note: The screw near the front door does not need to be tightened after leveling is completed.
Tighten Four Screws on the Left and Right Sides of the Bed:
Right Side |
Left Side |
Tighten Two Screws Underneath the Bed(rear):
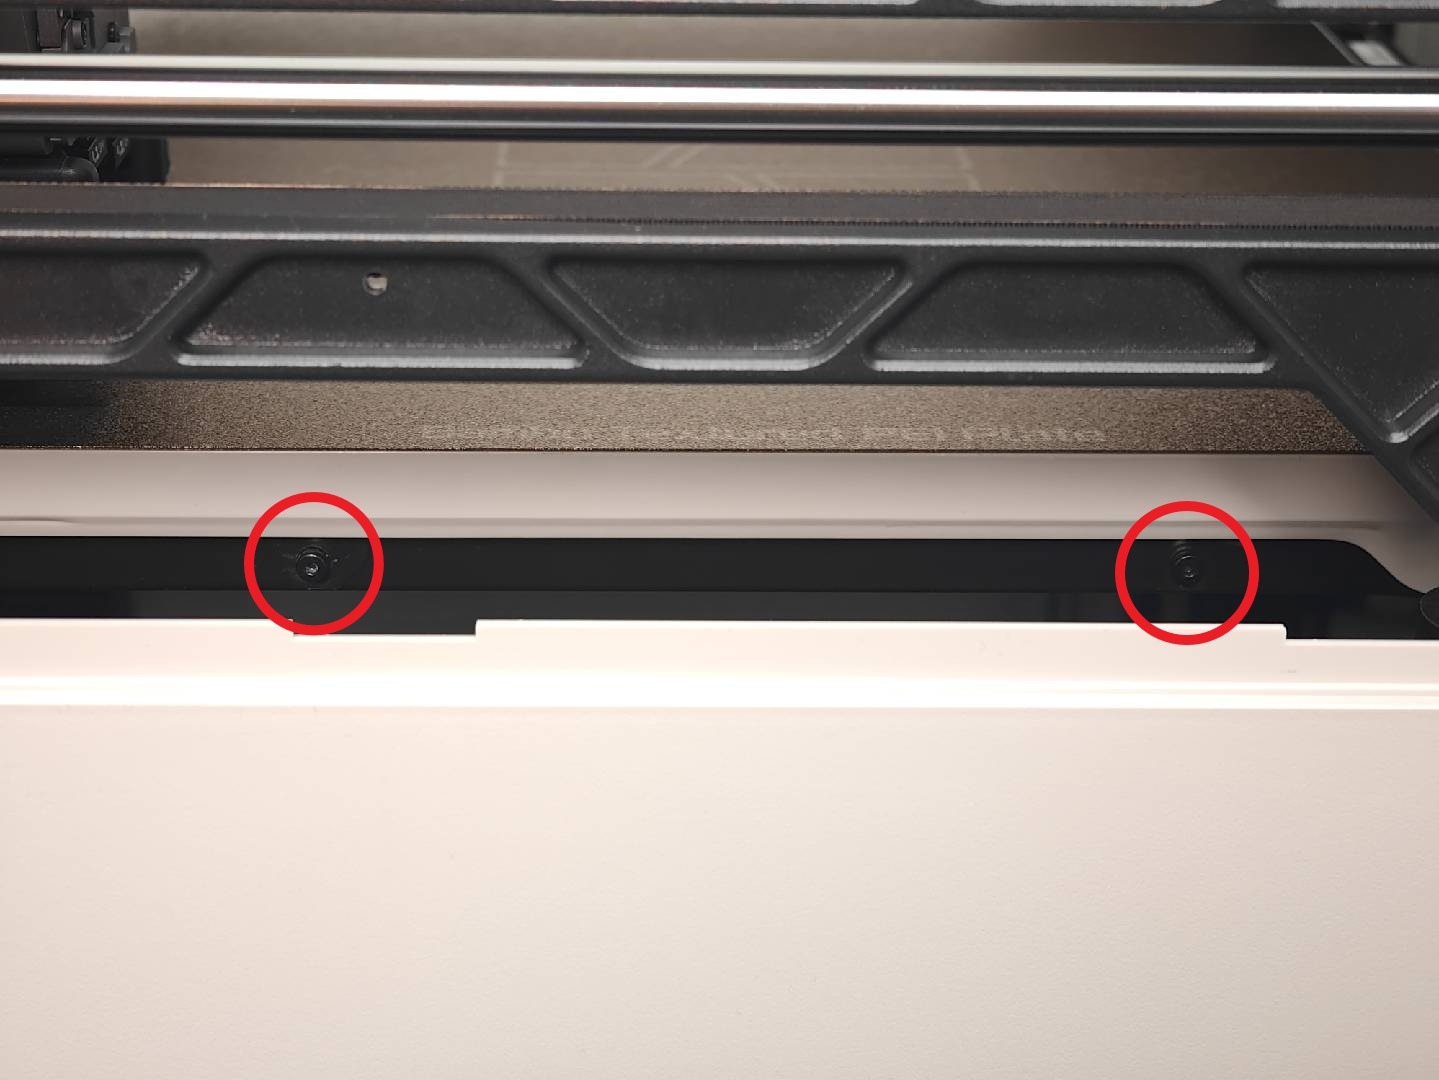
The following screw(front) does not need to be tightened after leveling(tighten and then loosen 1/2 to 1 turn.) — it is designed for transportation protection. Keeping it loose helps prevent the bed from lifting too high in that area. Over-tightening may cause an uneven bed surface.

¶ Calibration
From the printer screen, touch Settings > Calibration > Print Calibration >Auto Bed Leveling to start the calibration. If everything looks good and no errors or warnings appear during the calibration, the leveling was successful. If there are still problems, contact the service team for further assistance.
.jpg)
.jpg)
¶ End Notes
We hope the detailed guide provided has been helpful and informative.
To ensure a safe and effective execution, if you have any concerns or questions about the process described in this article, we recommend submitting a technical ticket regarding your issue.
Please include a picture or video illustrating the problem, as well as any additional information related to your inquiry.