¶ What is motion accuracy
The mechanical transmission system precisely controls the motion trajectory of the printer nozzle, and its motion accuracy is crucial for the high-precision 3D printing process. Like most mechanical motion systems, the positioning accuracy of motion is affected by a series of motion deviations, such as motion lag, motion distortion, etc.
Motion lag - the gap between bidirectional transmission of mechanical motion, mainly caused by assembly clearance, wear, component elastic deformation, etc.
Motion distortion - distortion of the motion coordinate system caused by non-orthogonality of screw components and uniformity of gear pitch.
Motion accuracy calibration aims to solve the absolute positioning problem in the 3D printing process, to achieve better printing accuracy, especially for large-sized objects. This is an advanced additional feature specifically designed for users who require high-precision printing. Through this calibration, motion hysteresis and motion distortion can be significantly suppressed. As long as there are no assembly changes or damages to the printer, the reliability of calibration results can be maintained for several weeks, unrelated to the filaments and nozzles used. Therefore, this feature will not take up too much usage time and can help the printer maintain high print quality for a long time.
¶ When to calibrate motion accuracy
-
When Using Motion Accuracy Enhancement for the First Time on a New Printer Although every printer undergoes strict motion accuracy control before leaving the factory, experiments have shown that transportation may reduce the effectiveness of this feature or even cause adverse effects. Therefore, if you plan to enable motion accuracy enhancement after receiving a new machine, it is necessary to perform a Motion Accuracy Calibration to ensure optimal performance.
-
After Significant Impacts, Relocation, or Disassembly/Reassembly
If the printer experiences a significant impact, is moved, or has been disassembled and reassembled, we recommend recalibrating its motion accuracy. -
After Adjusting Belt Tensioners
If you have adjusted the belt tensioners, recalibration is also recommended. -
Regular Calibration: Every Two Weeks
We recommend performing a motion accuracy calibration every two weeks to maintain the validity of calibration data. This helps the printer consistently deliver high-precision printing quality.
¶ The benefits of motion accuracy calibration
-
Improve the dimensional accuracy of printed objects, especially for objects with larger sizes and more regular shapes, the dimensional accuracy will be higher;
-
For objects that require splicing and assembly, there is a better assembly experience and more compact splicing.
-
Maintain consistency in the printing status of the printer;
-
Improve the assembly compatibility of printed parts between different printers;
-
More convenient to assemble with standard physical objects;
-
Provide more accurate laser engraving and cutting.
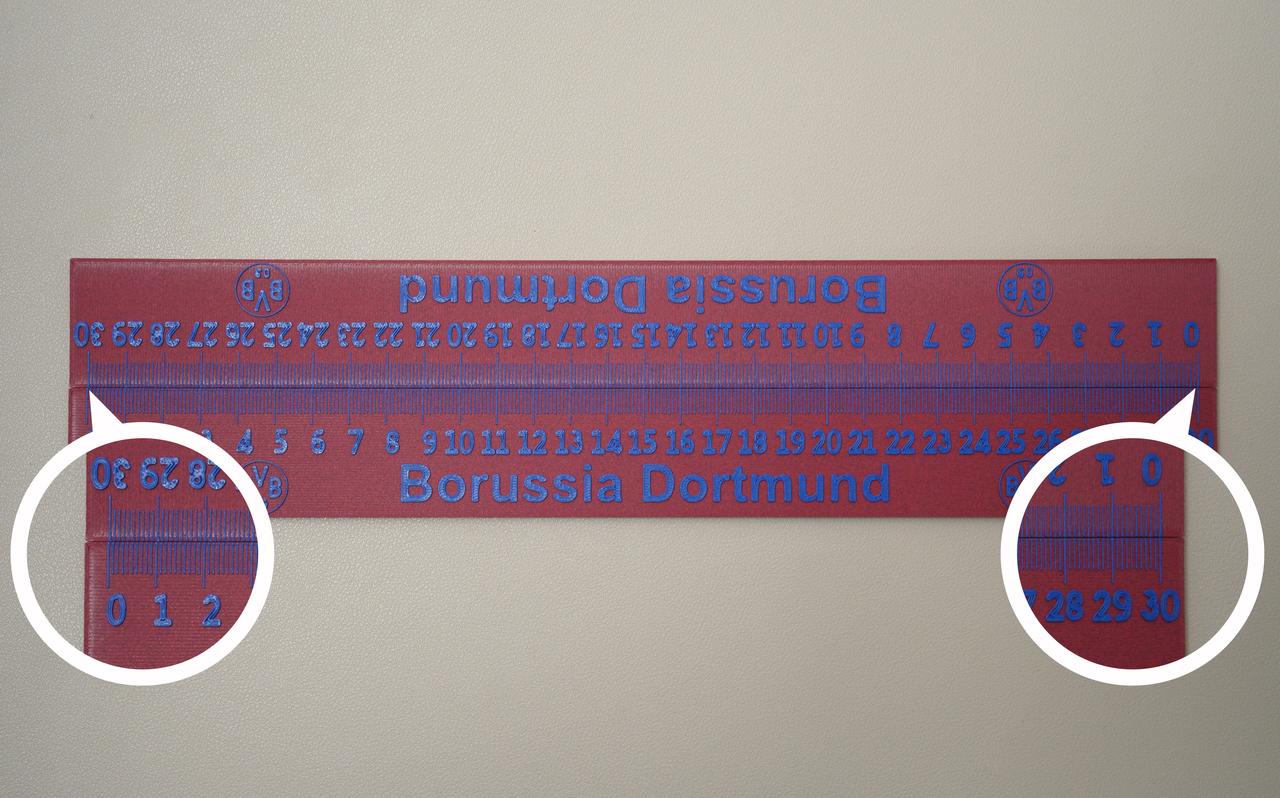
The image below shows an example of prints before and after calibration. The ruler model printed after calibration exhibits more precise scale markings. Please note that if your printer is in good condition, there may be no visible difference in precision between prints before and after calibration, which is normal.
¶ Calibration preparation
Before performing this calibration, you should check the following:
-
Ensure that the toolhead camera is working properly and there are no HMS errors such as lens dirt;
-
Remove debris from the heatbed;
-
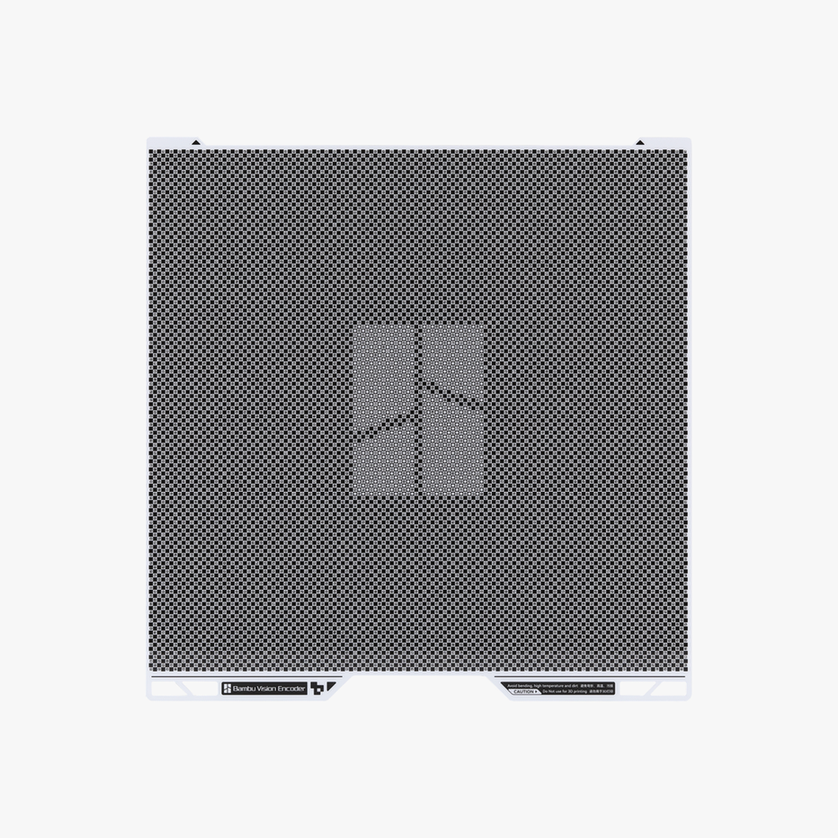
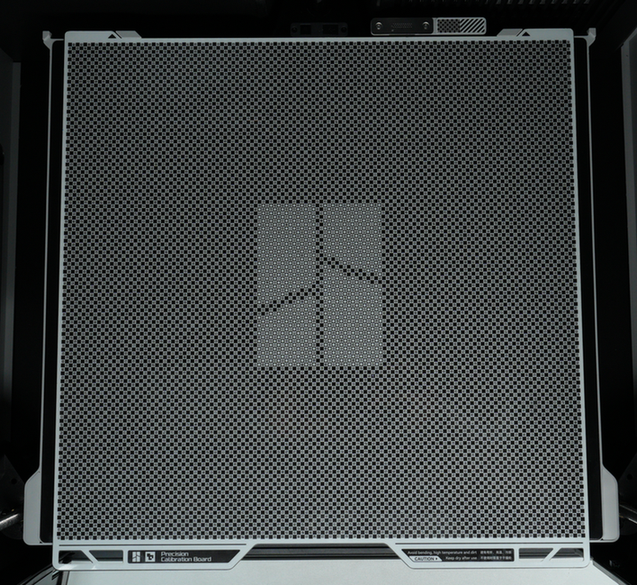
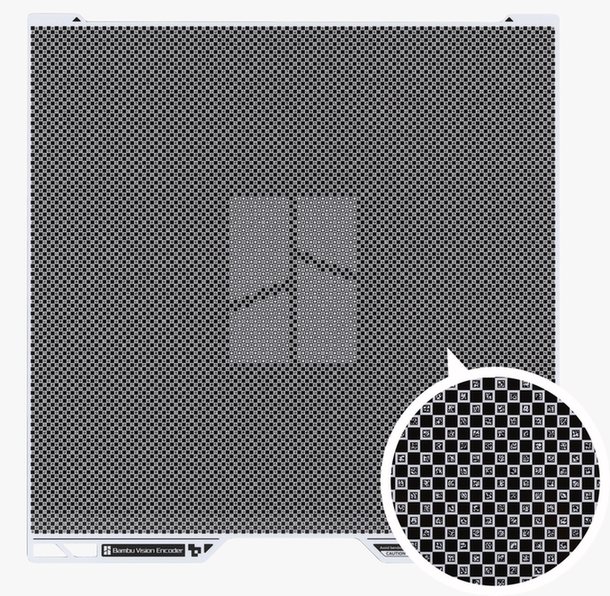
Prepare a Vision Encoder and make sure it is clean and the pattern of each small square is clearly visible;
Ensure the protective transparent film is removed from the plate.
- Before calibration, ensure that the heatbed is at room temperature. Do not place the visual encoder on the heatbed when it is in a high-temperature state, as this can avoid errors caused by the board's thermal expansion.
¶ Operation steps and working principle
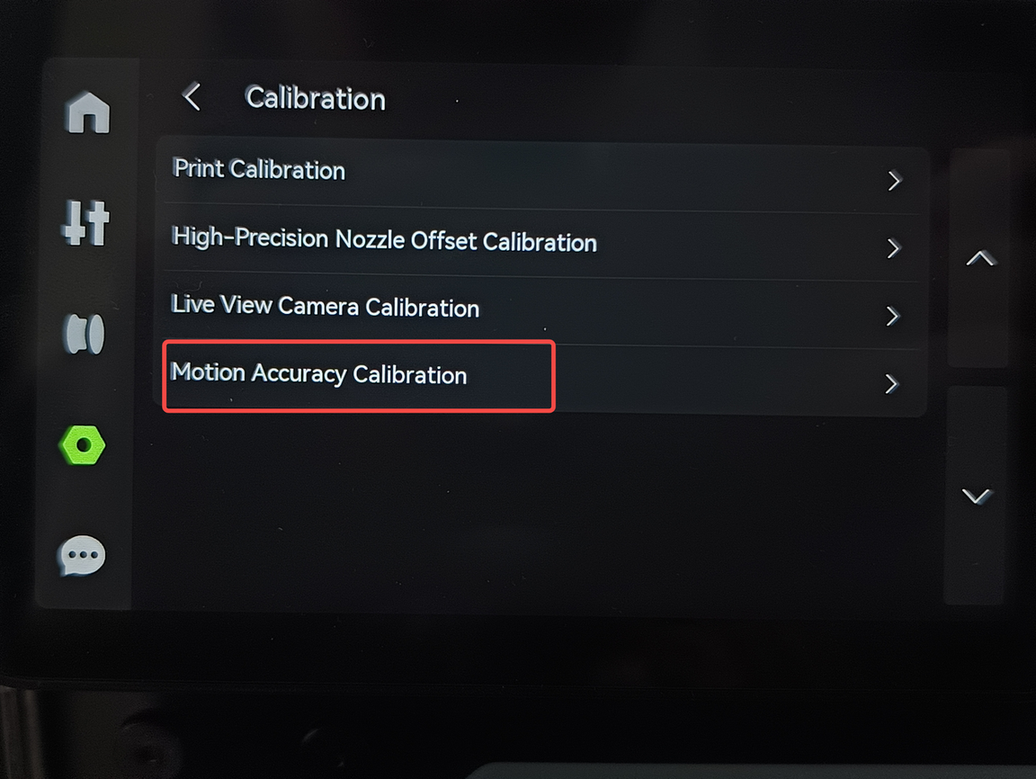
- Click on "Calibration" - "Motion Accuracy Calibration" on the screen.
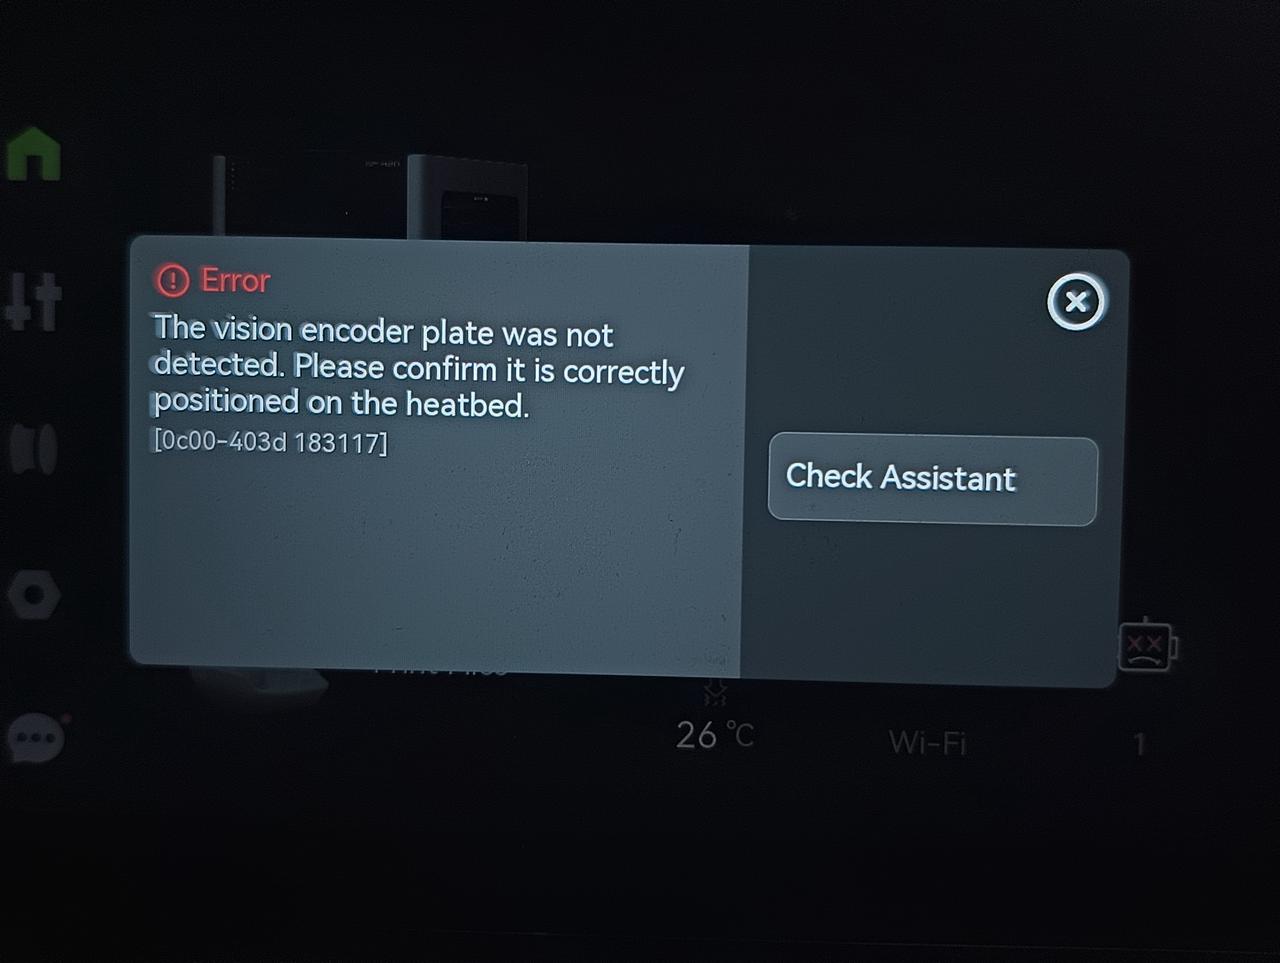
According to the prompts on the screen, remove the build plate from the heatbed, place the vision encoder, and ensure that there are no foreign objects on the board. Note: The vision encoder is only used for motion accuracy calibration. Please remove the plate after calibration is complete, as it cannot be used for printing. After use, be sure to properly store the board and ensure that the patterns in each small square are clear and visible, without dirt or damage, otherwise, it will cause calibration failure.
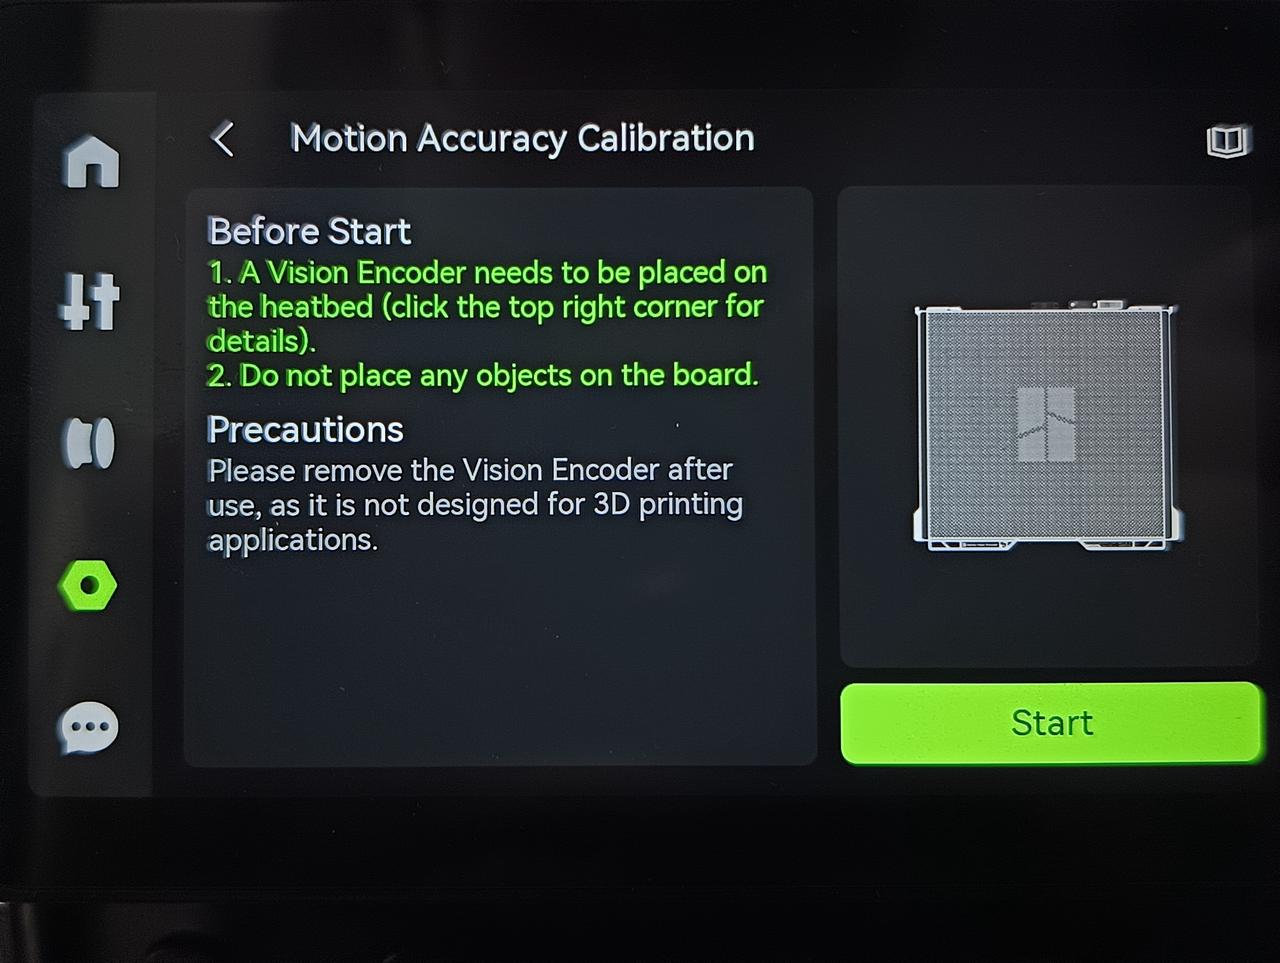
- Click "Start" to calibrate the printer.
At the beginning of calibration, the toolhead will first homing, and the printer will turn off the chamber LED light and turn on the toolhead fill light. During the calibration process, the toolhead will move to different positions and use the toolhead camera to scan the unique small square pattern on the visual encoder. Each small square pattern is different, so the actual coordinate position of the toolhead is obtained by scanning. The principle of motion accuracy calibration is that the toolhead has a theoretical motion coordinate every time it moves. By combining the actual measured motion coordinates, errors can be obtained, and the coordinates of each point can be calculated and compensated to obtain corrected motion coordinates.
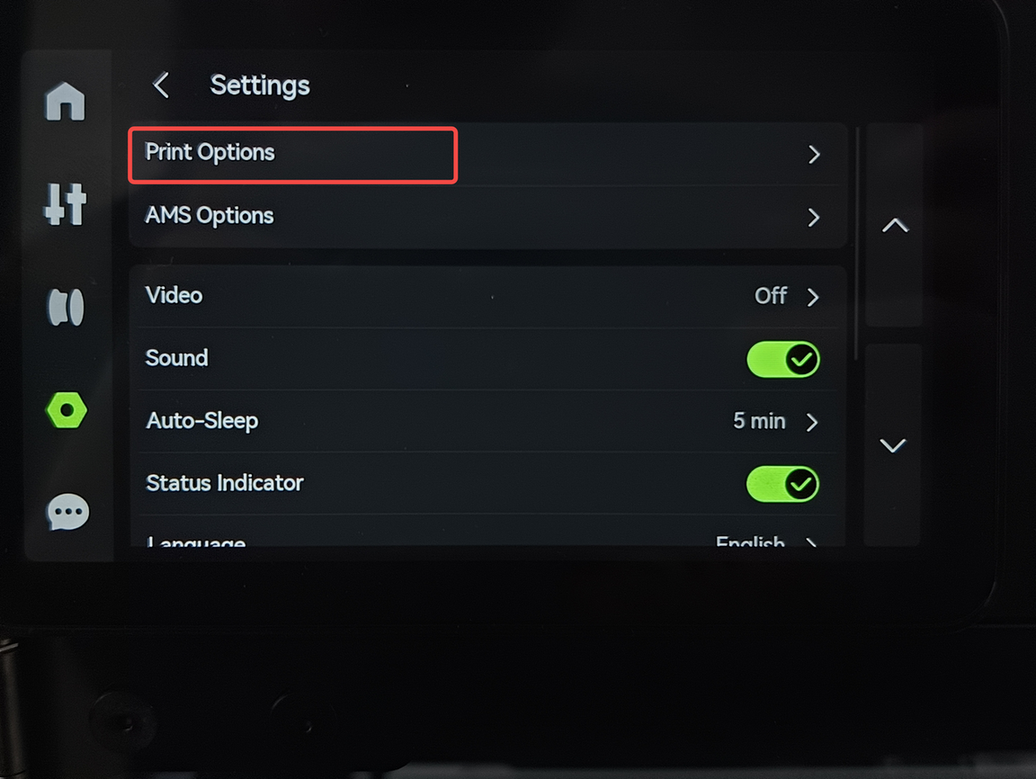
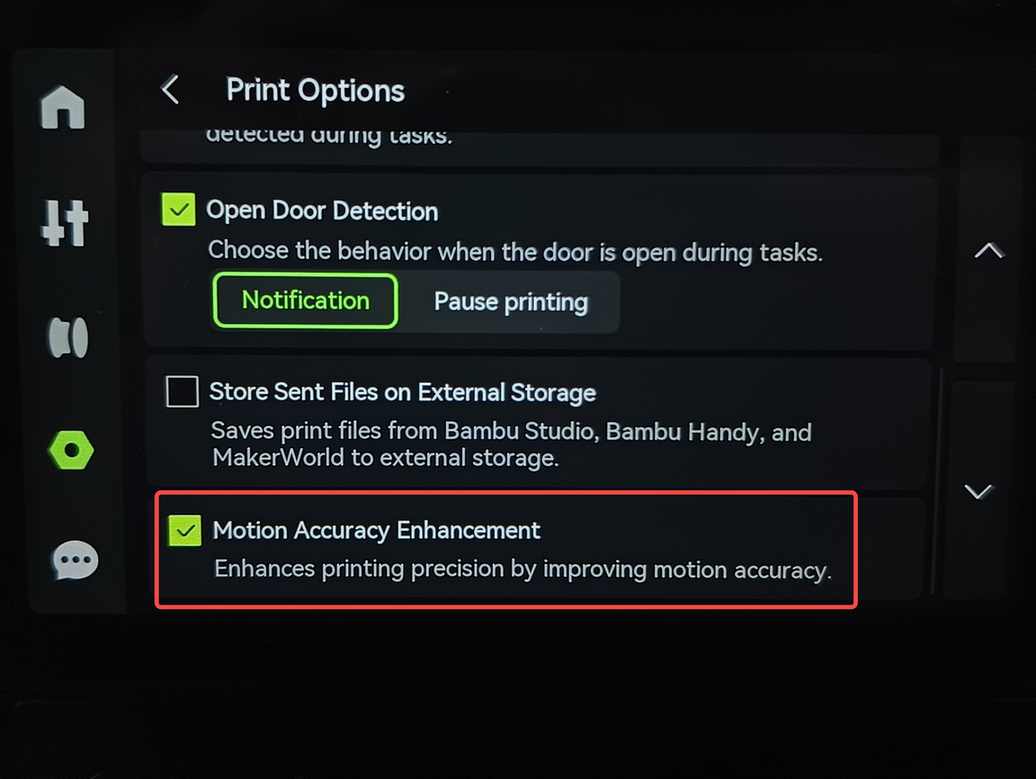
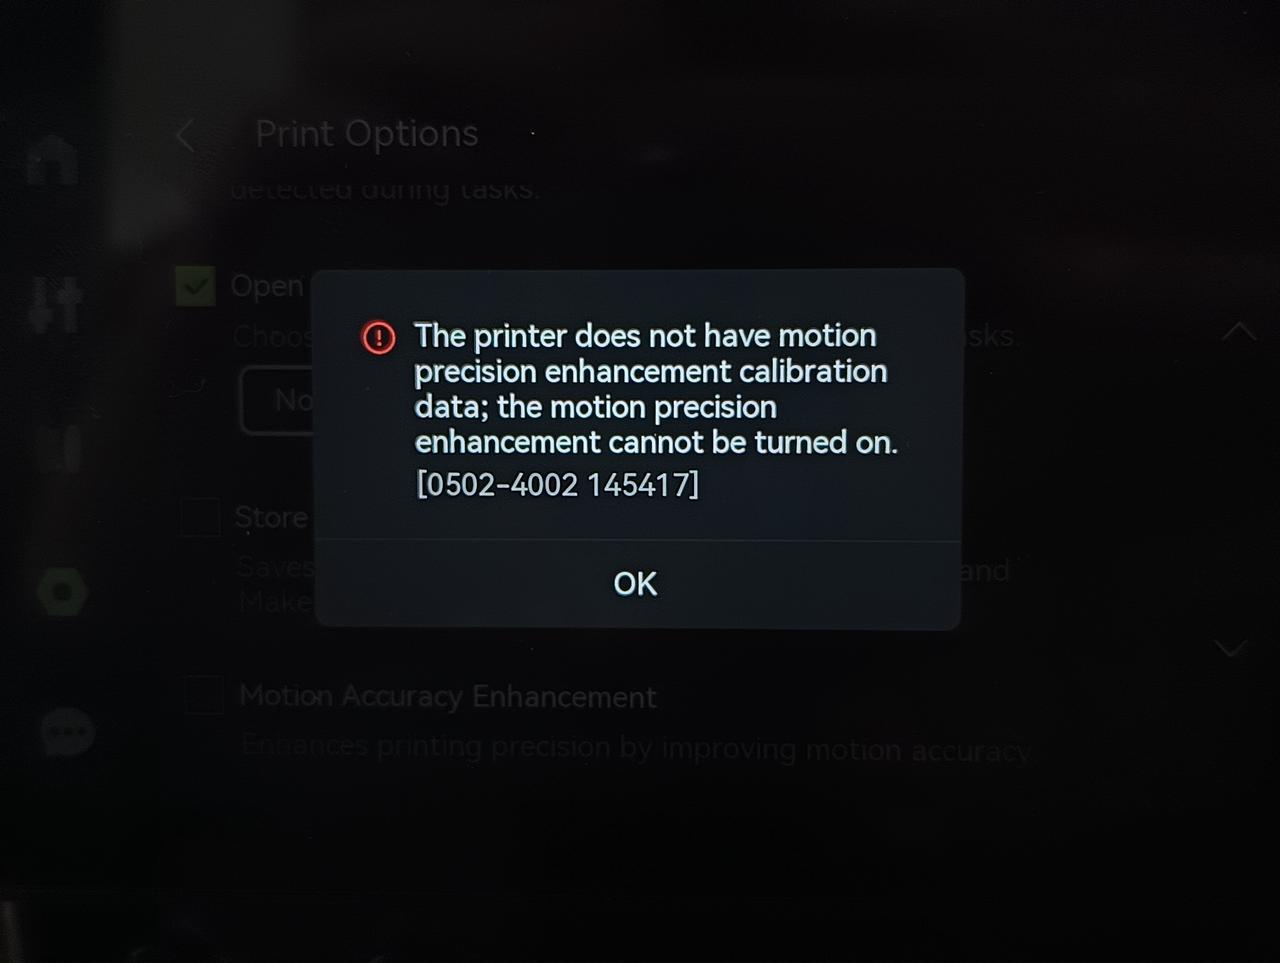
- After successful calibration, relevant prompts will appear on the screen. Then, in "Settings" - "Print Options," the printer will automatically check "Motion Accuracy Enhancement," and it can apply the data from the calibration for printing, cutting, and engraving. If it is not calibrated in advance, the "Motion Accuracy Enhancement" cannot be enabled, and corresponding prompts will appear on the screen.
¶ Possible reasons for calibration failure
When the calibration result shows 'failed', the printer will turn off the 'Motion Accuracy Enhancement' function. Possible reasons include:
1. The toolhead camera cannot capture images, which may be due to dirty lens or malfunctioning camera. Please check if the toolhead camera lens is clean and if the printer has HMS errors related to the toolhead camera;
2. Placing the wrong type of plate on the heatbed or misplacement of the visual encoder can cause the printer to fail to recognize the visual encoder, and the corresponding error window will pop up;
4. Some small square patterns on the visual encoder are covered or damaged by stains, causing the toolhead camera to not recognize them correctly;
5. If the calibration procedure is complete and the result shows "Calibration failed", it means that the accuracy of the calibrated motion is not as expected, and you can try again.
Note: After the motion accuracy calibration is completed, you may encounter a situation where the "Motion Accuracy Enhancement" button cannot be clicked. Typically, restarting the printer will restore normal functionality. We recommend upgrading to the latest firmware version to fully resolve this issue.
¶ End Notes
We hope the detailed guide provided has been helpful and informative.
If this guide does not solve your problem, please submit a technical ticket, we will answer your questions and provide assistance.
If you have any suggestions or feedback on this Wiki, please leave a message in the comment area. Thank you for your support and attention!