¶ Why do we need nozzle offset calibration?
When printing with the H2D printer, if two nozzles are used in the printing task, it is necessary to ensure that the positioning of the two nozzles is completely consistent to ensure good print quality. When the positioning of the two nozzles is offset, the printed model may be misaligned and layer-shifted. When you find that the model has a significant layer shift after switching nozzle printing, we recommend performing a nozzle offset calibration. The printer offers two calibration methods: nozzle offset calibration and high-precision nozzle offset calibration, described in detail below.
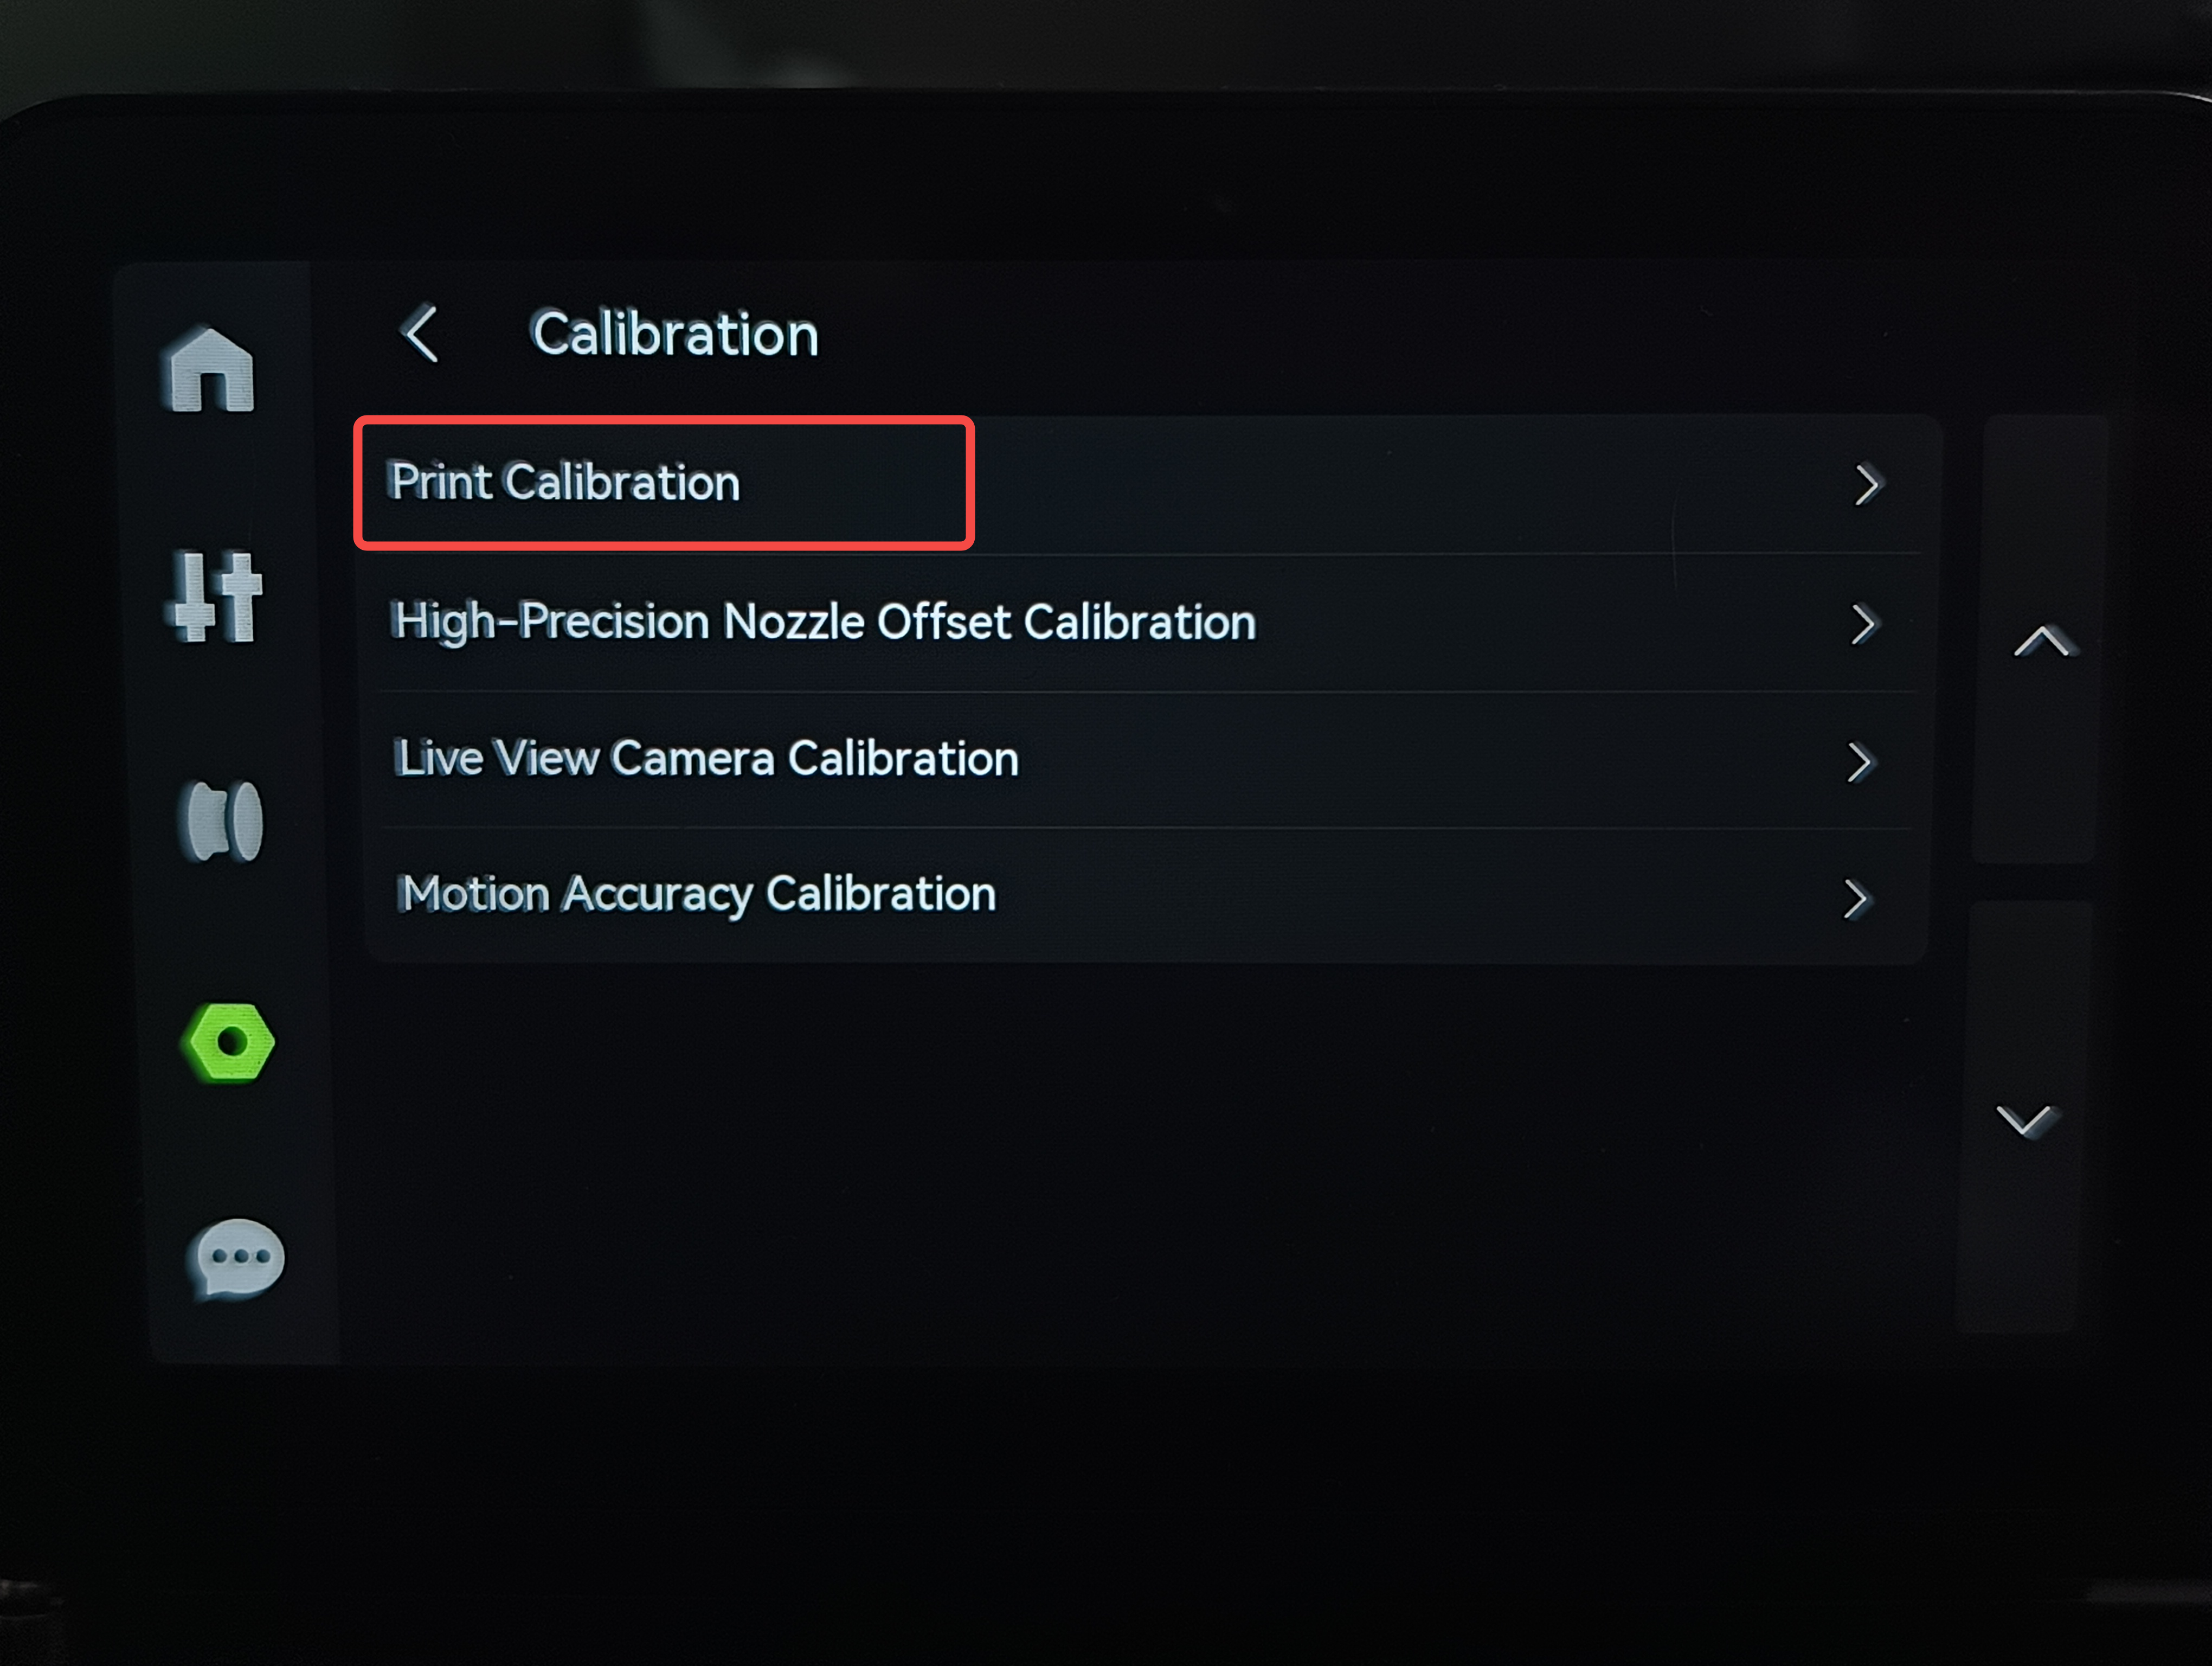
¶ Nozzle Offset Calibration
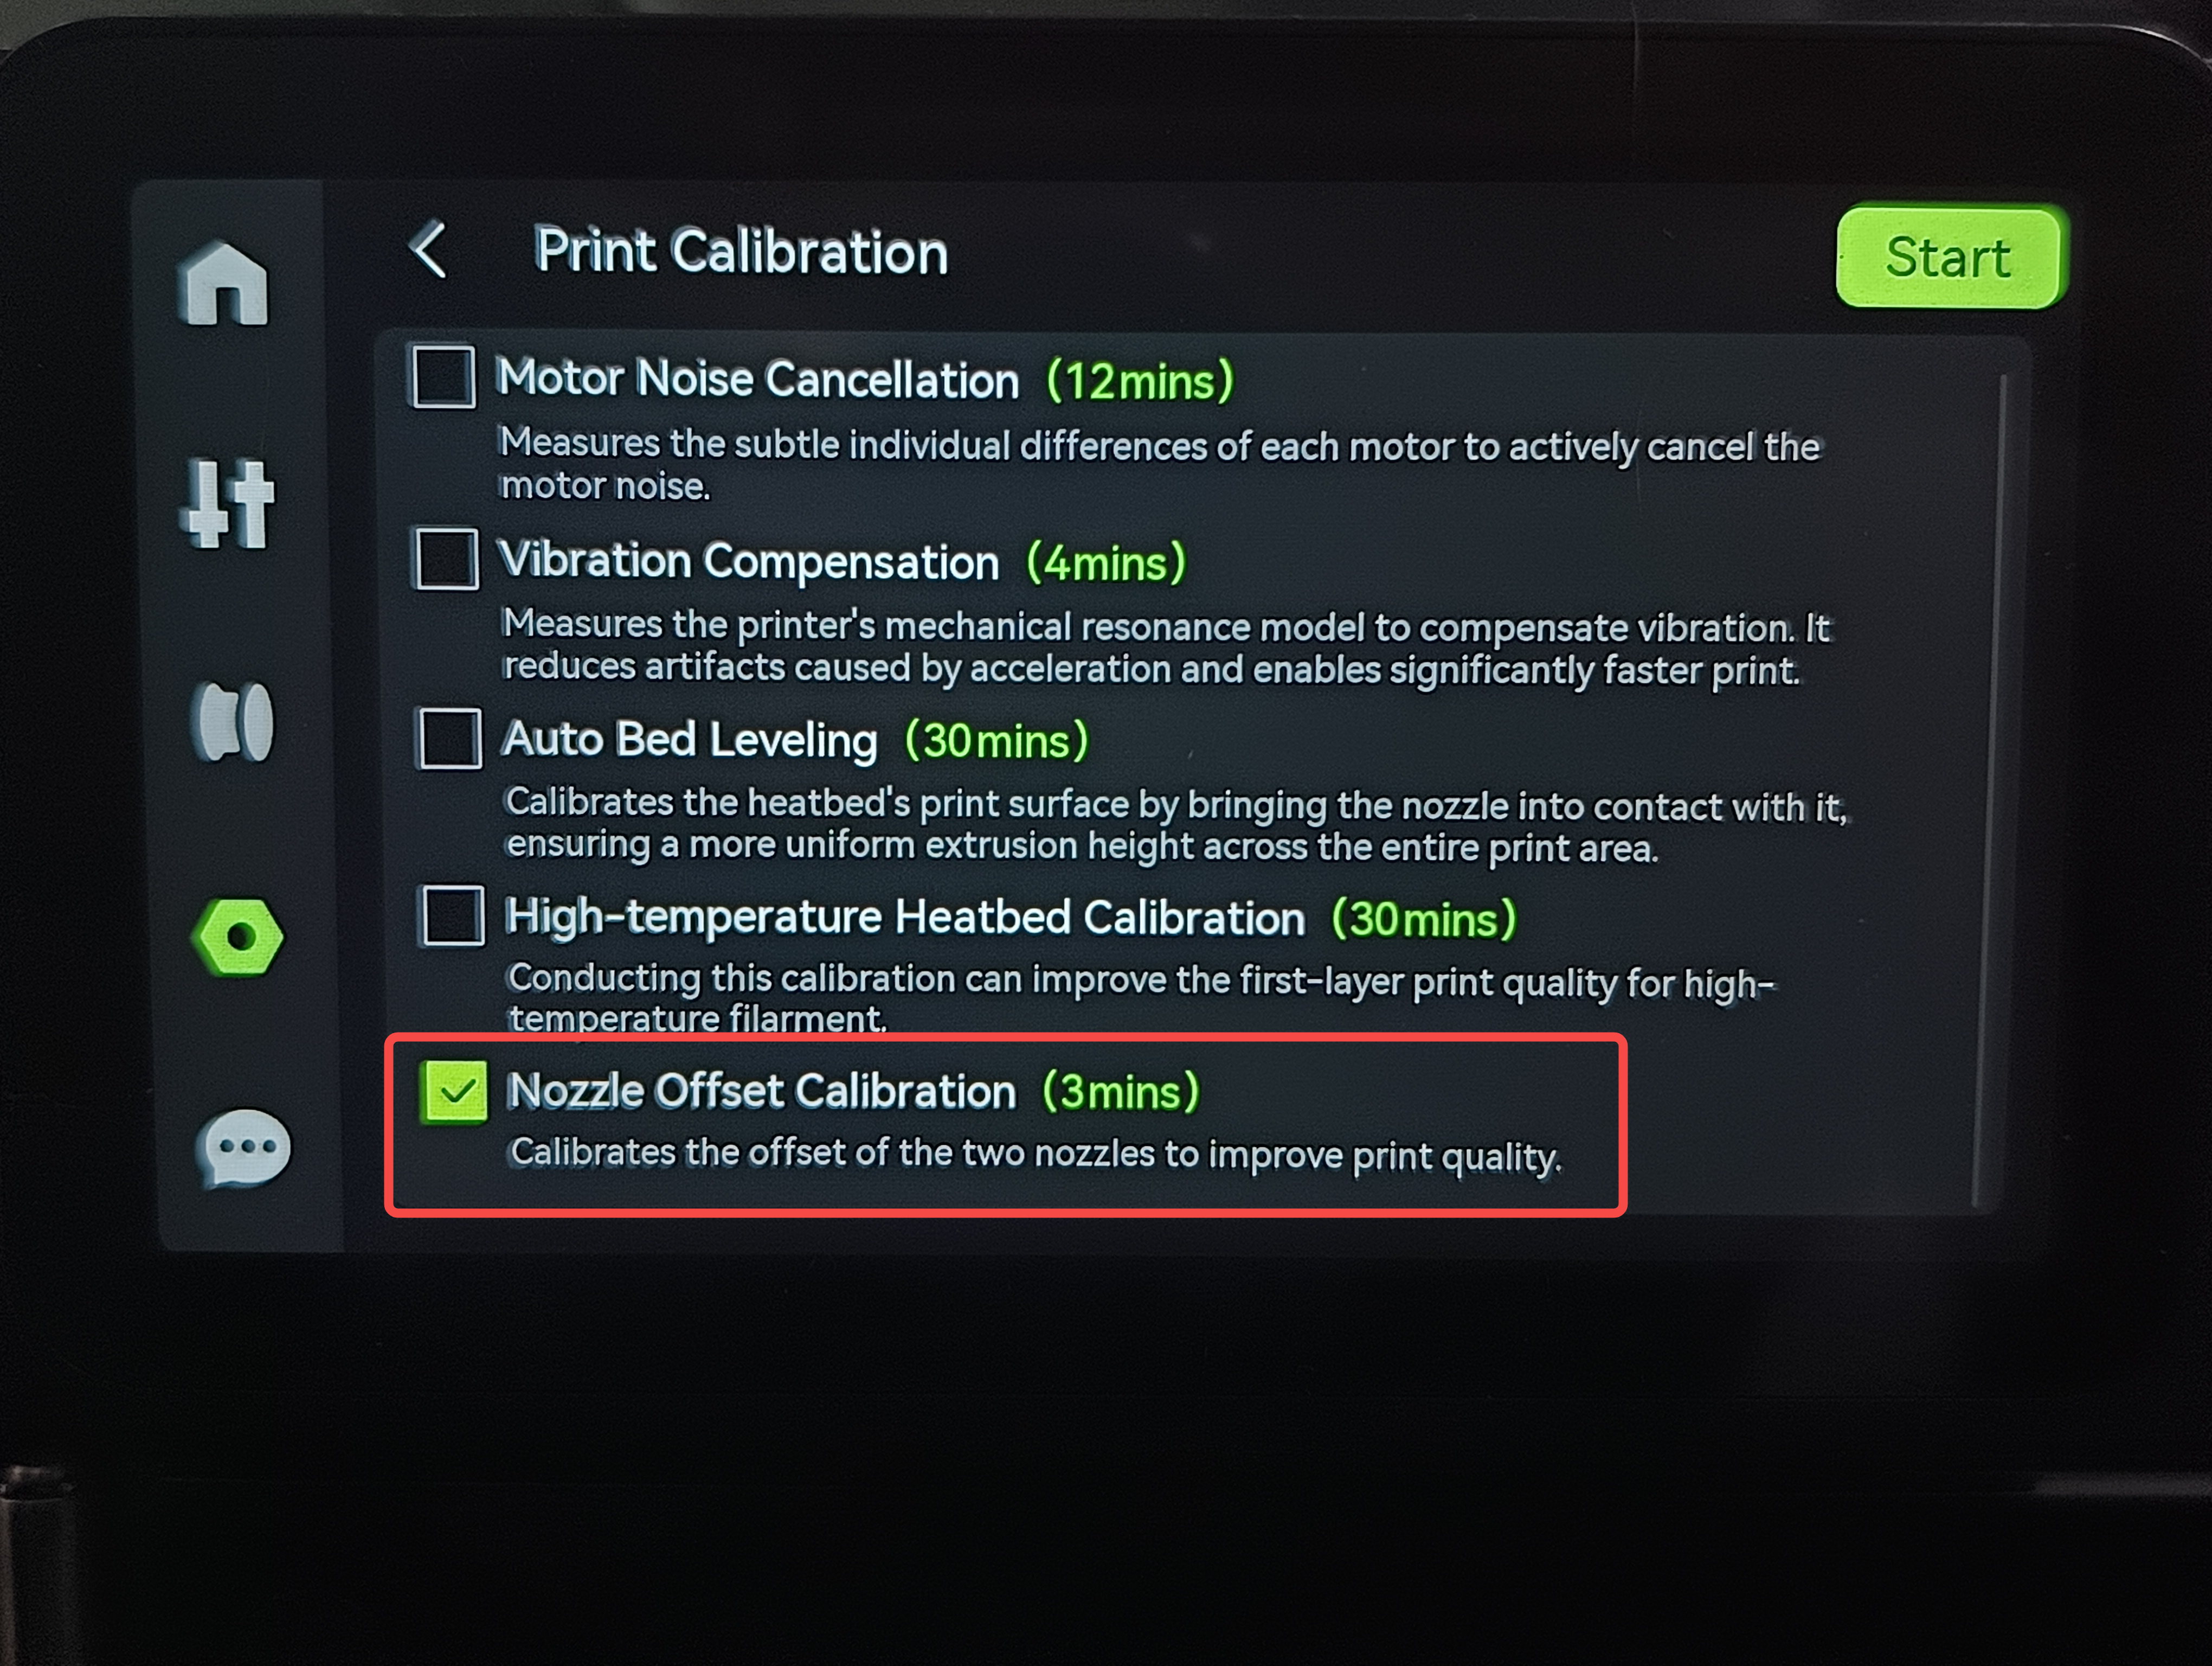
Click on "Settings" - "Print Calibration" on the screen, and select "Nozzle Offset Calibration" in the calibration options to start nozzle offset calibration. This calibration is mainly based on calibrating the offset of two nozzles using nozzle offset calibration sensor.
¶ Z-direction offset calibration
Calibration principle: The ideal height difference between the left and right nozzles is 5mm, so when switching nozzles, the heatbed will rise/fall 5mm, as shown in the following GIF. Due to actual assembly errors or nozzle size tolerances, the height difference between the two nozzles may not accurately reach 5mm. During Z-direction offset calibration, two nozzles touch the heatbed in turn, so that the heatbed height difference between the two nozzles when Z=0 can be obtained. In actual printing, the height of the heatbed is compensated based on the calibrated values.
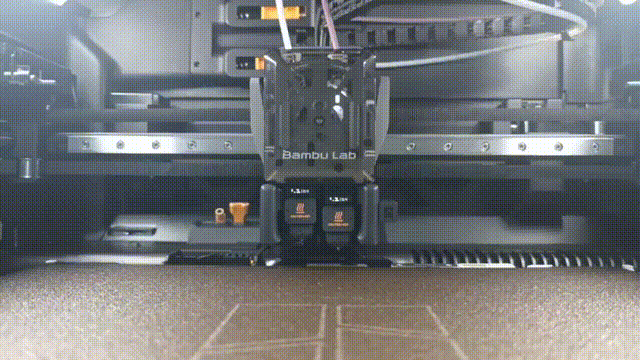
Calibration action: Two nozzles touch the surface of the heatbed separately, like homing. When the two nozzles touch, the printer obtains the Z coordinate of the heatbed, and the difference in coordinates is the Z offset value.
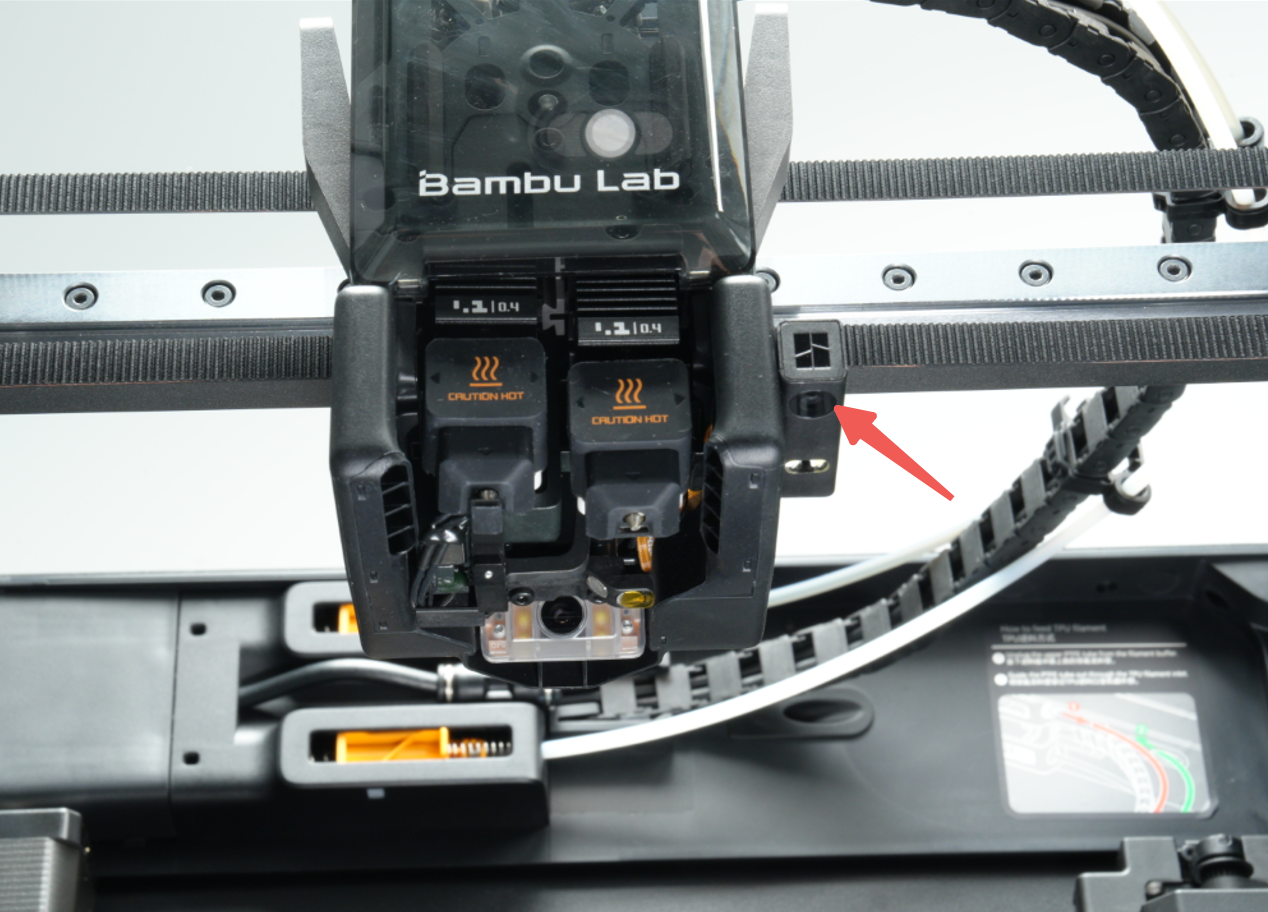
¶ XY-direction offset calibration
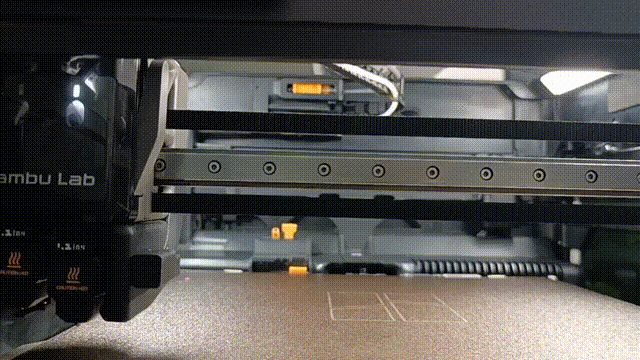
The XY-direction offset calibration is carried out by using the nozzles and the nozzle offset calibration sensor behind the heatbed. The protruding part behind the heatbed, the small black piece on the right, is the XY offset calibration sensor (as shown in the red box below).
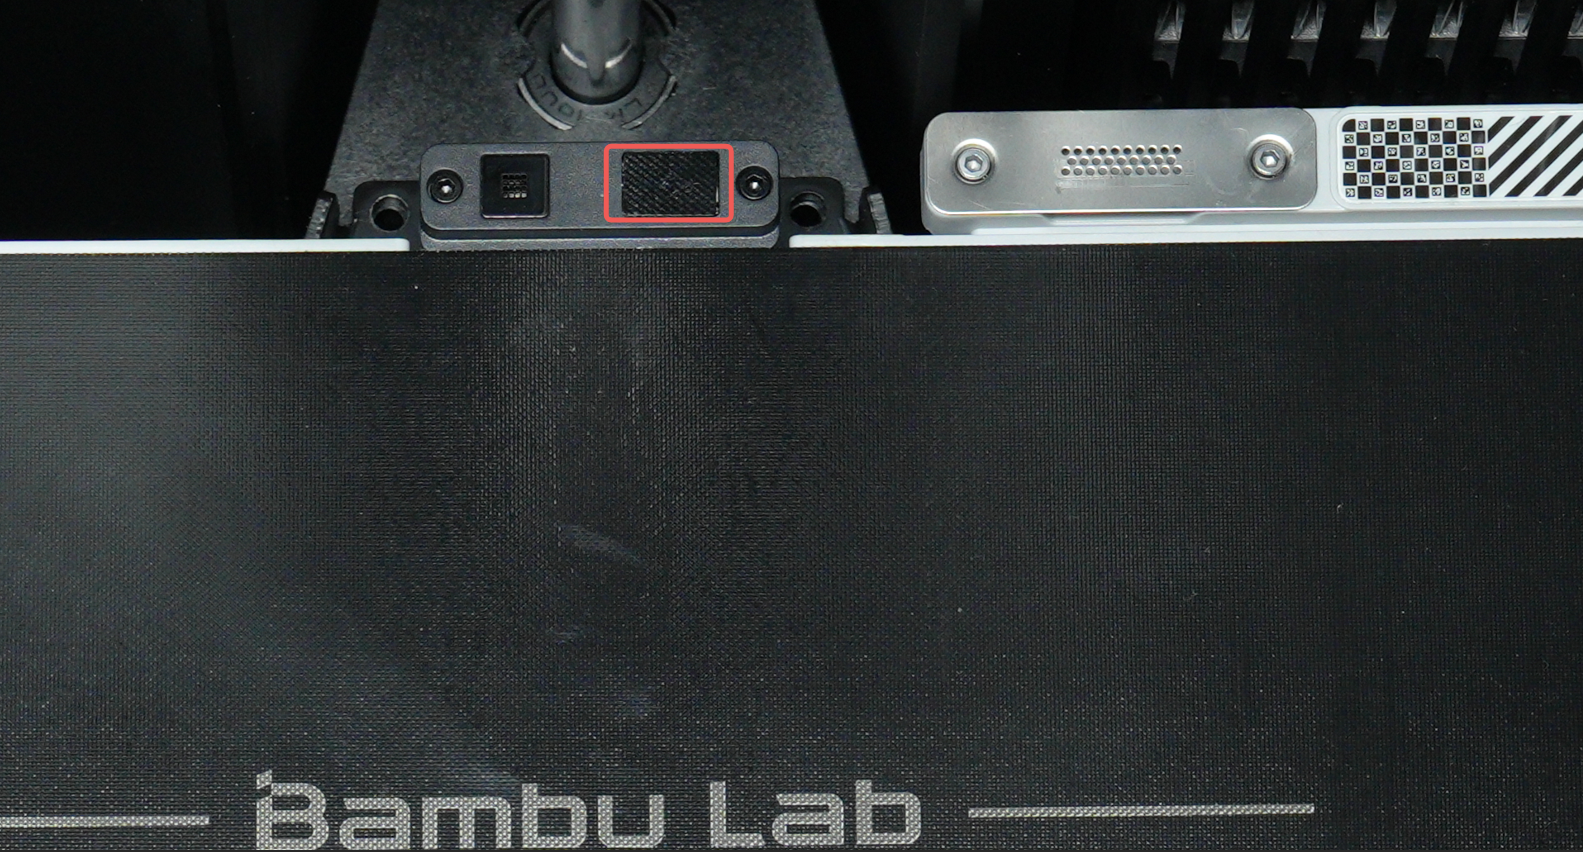
Calibration principle: By inducing the positions of two nozzles through the nozzle offset calibration sensor, it helps the nozzles find the center coordinates of the calibration sensor (the closer the nozzle is to the center position, the stronger the signal). The coordinate offset of the two nozzles at the center position is the offset value of the nozzles in the XY direction.
-
"Complete calibration" before printing: This process will be triggered when the "Nozzle Offset Calibration" option is checked "On" before starting the print, which takes about 70s.
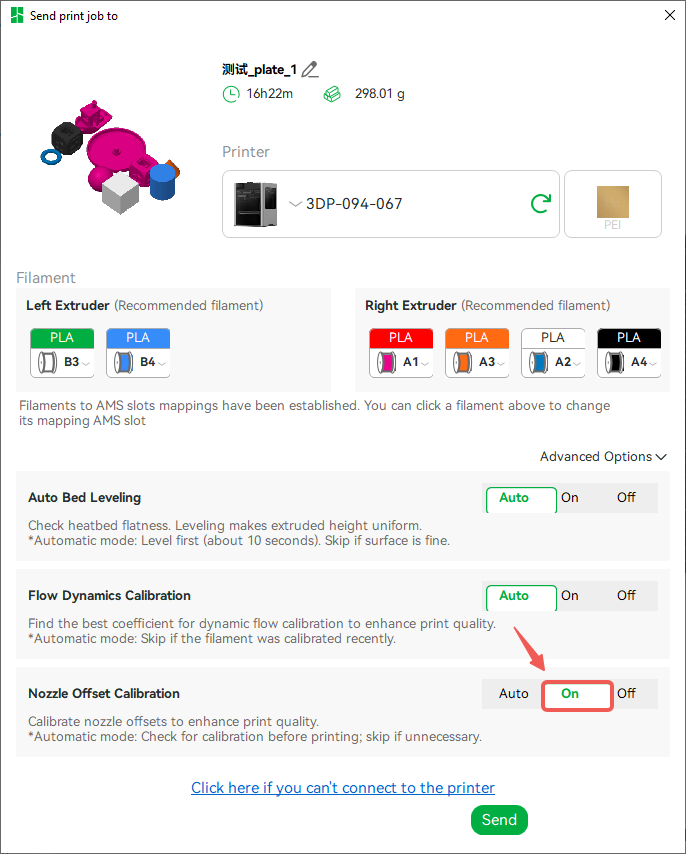
If the sensor cannot be found or the sensor signal is weak, the "Complete” Nozzle Offset Calibration process in the calibration page will be triggered automatically. If the sensor signal still remains weak, the printer will report an error.
- "Quick calibration" before printing: If the "Nozzle offset calibration" option is checked "Auto" before starting printing, this process will be triggered, which takes 20-25s.
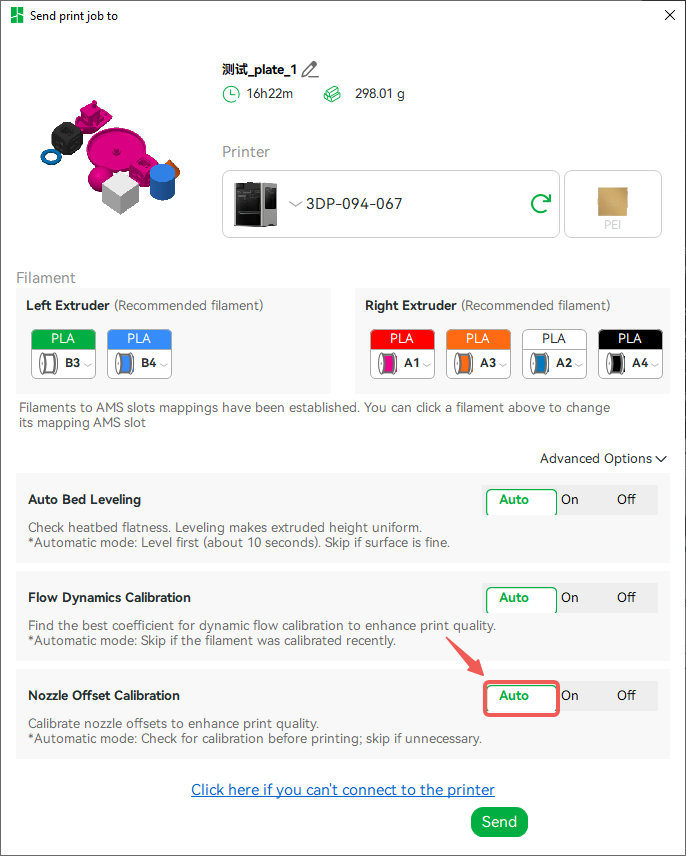
If the process fails or the offset value between the two nozzles is measured to be too large, the "Complete calibration before printing" process in 2 will be automatically triggered.
Positioning accuracy of XY direction offset calibration: about 15-20um.
¶ Possible causes of calibration failure:
¶ 1. The hardware inside the calibration sensor is damaged, no signal, and the relevant HMS will be reported.
Solution: Troubleshoot according to the corresponding HMS
¶ 2. If the calibration sensor is not installed or the cable is not connected, no signal, and the relevant HMS will be reported.
Solution: Troubleshoot according to the corresponding HMS
¶ 3. The position deviation of the calibration sensor is too large. It may be that the heatbed is installed incorrectly, or other magnetic conductive materials or magnetic materials are nearby to cause interference.
Solution: Troubleshoot according to the corresponding HMS
¶ 4. Third-party nozzles are used, such as silicon carbide nozzles, which are not magnetic conductive. A1 series hotend is not recommended either.
Solution: Use the H2D official hotend.
¶ 5. When installing the hotend, the buckle is not properly fastened, resulting in the hotend is not fully secured.
Solution: Fasten the hotend clip (click here to jump to the hotend installation tutorial).
¶ 6. Firmware bug
Solution: Please update the firmware to version 01.01.02.08 or later.
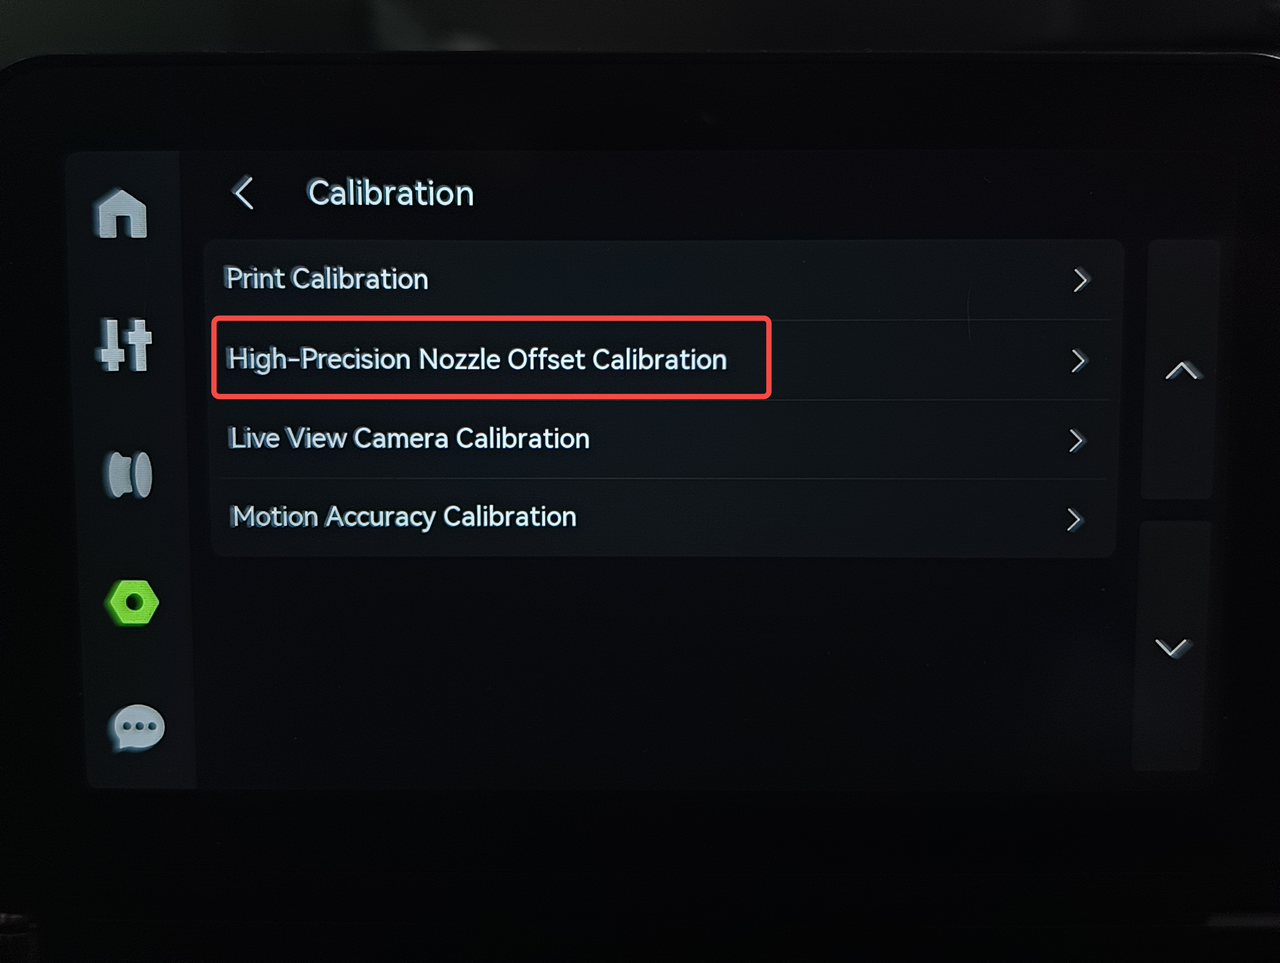
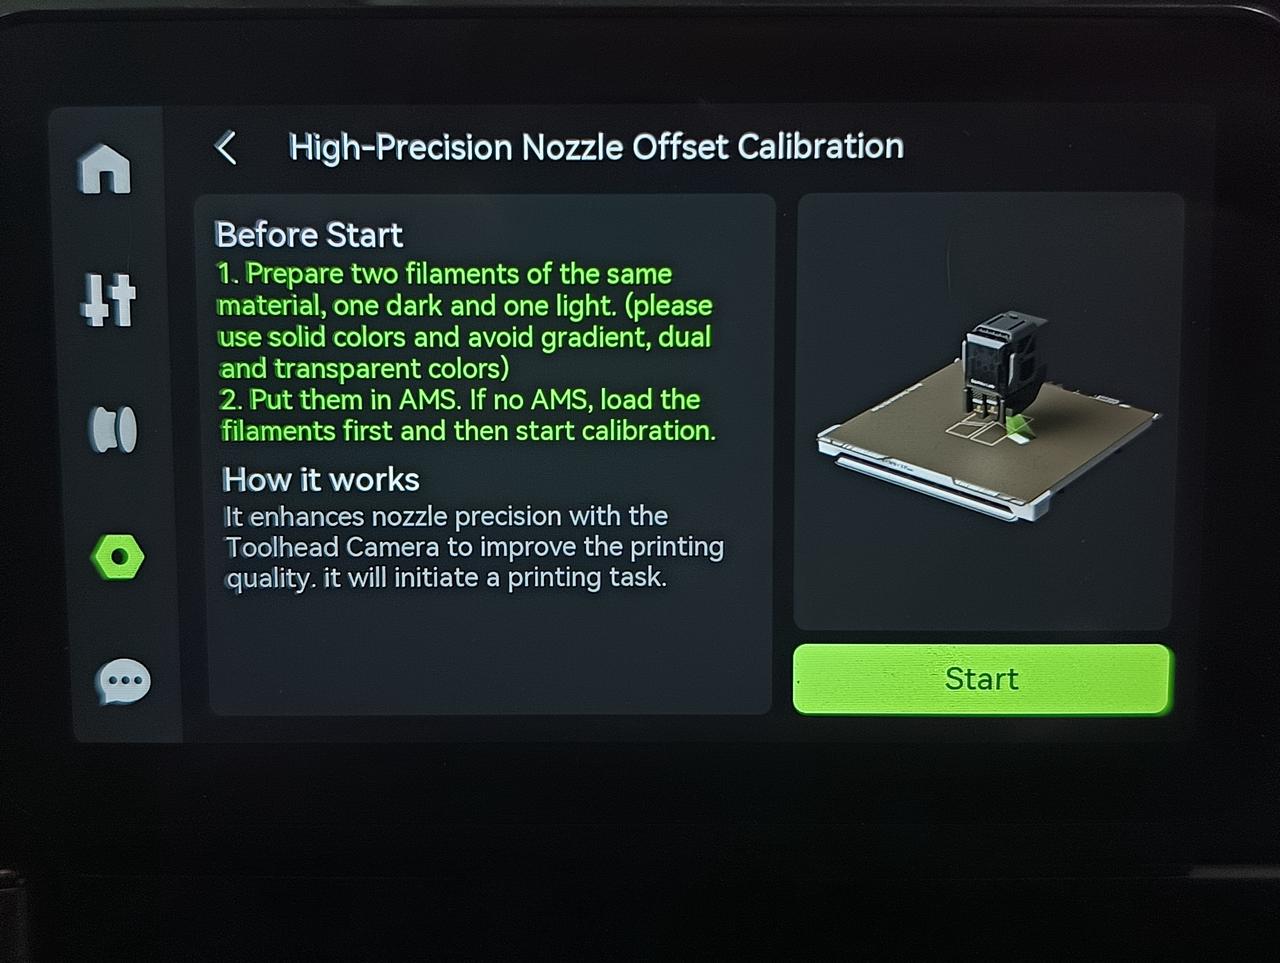
¶ High-Precision Nozzle Offset Calibration
On the printer settings page, you can also select "High-Precision Nozzle Offset Calibration" and use a visual solution to calibrate the nozzle offset.
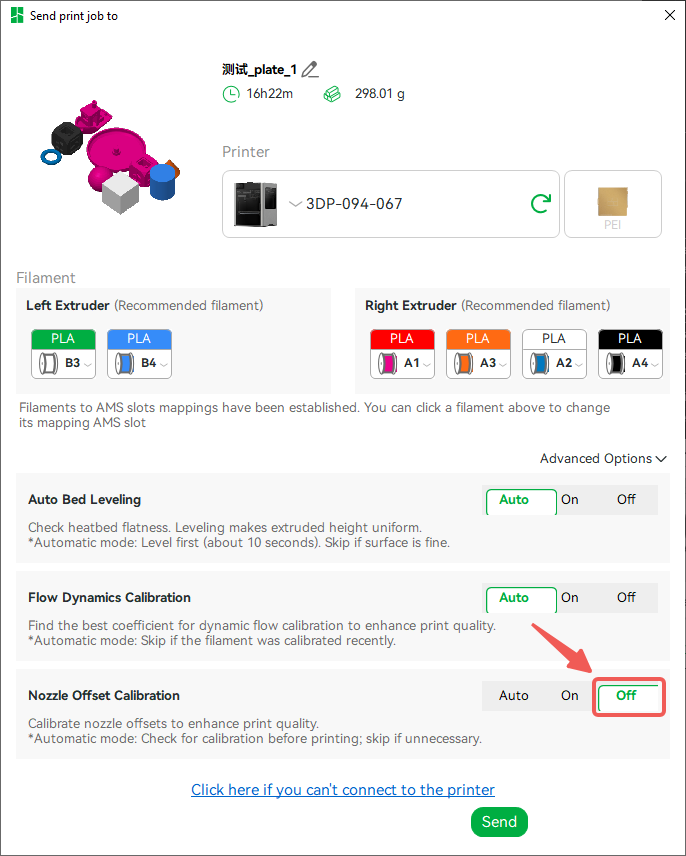
In the current firmware version, if you want to use high-precision nozzle offset calibration data, you need to select "off" in the "nozzle offset calibration" option before sending the print task.
¶ Calibration steps and principles
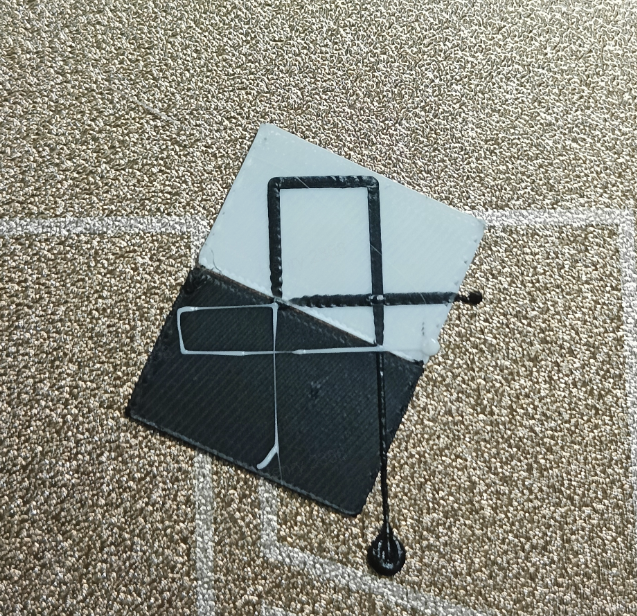
The high-precision nozzle offset calibration process prints a test model and calibrates the offset of two nozzles in the XY direction through AI visual detection.
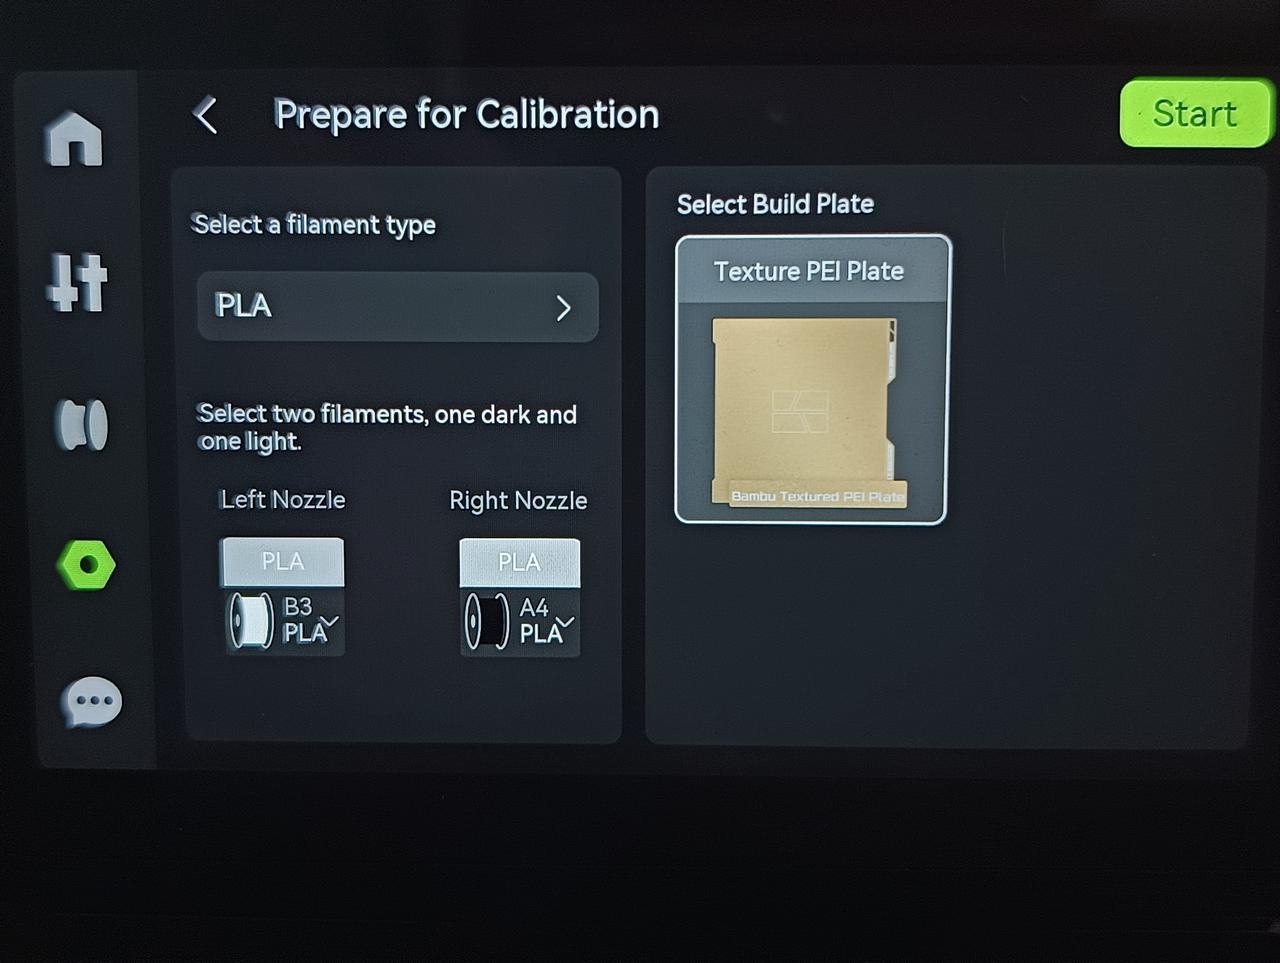
First, prepare two filaments, one dark and one light, and then place these two filaments into the AMS connected to each extruder (any slot is ok). If you do not have AMS, use the external spool, load the two filaments into the two nozzles in advance, then select "High-Precision Nozzle Offset Calibration" on the calibration page, and follow the steps prompted on the screen to calibrate.
The calibration process will print the test model on the build plate using the selected two materials and then use the toolhead camera on the right side to acquire images. Then, the center positions of the horizontal and vertical lines extruded by the two nozzles will be identified separately. The theoretical offset in the XY direction should be 7mm. The deviation between the measured value and the theoretical value is the XY offset between the two nozzles.
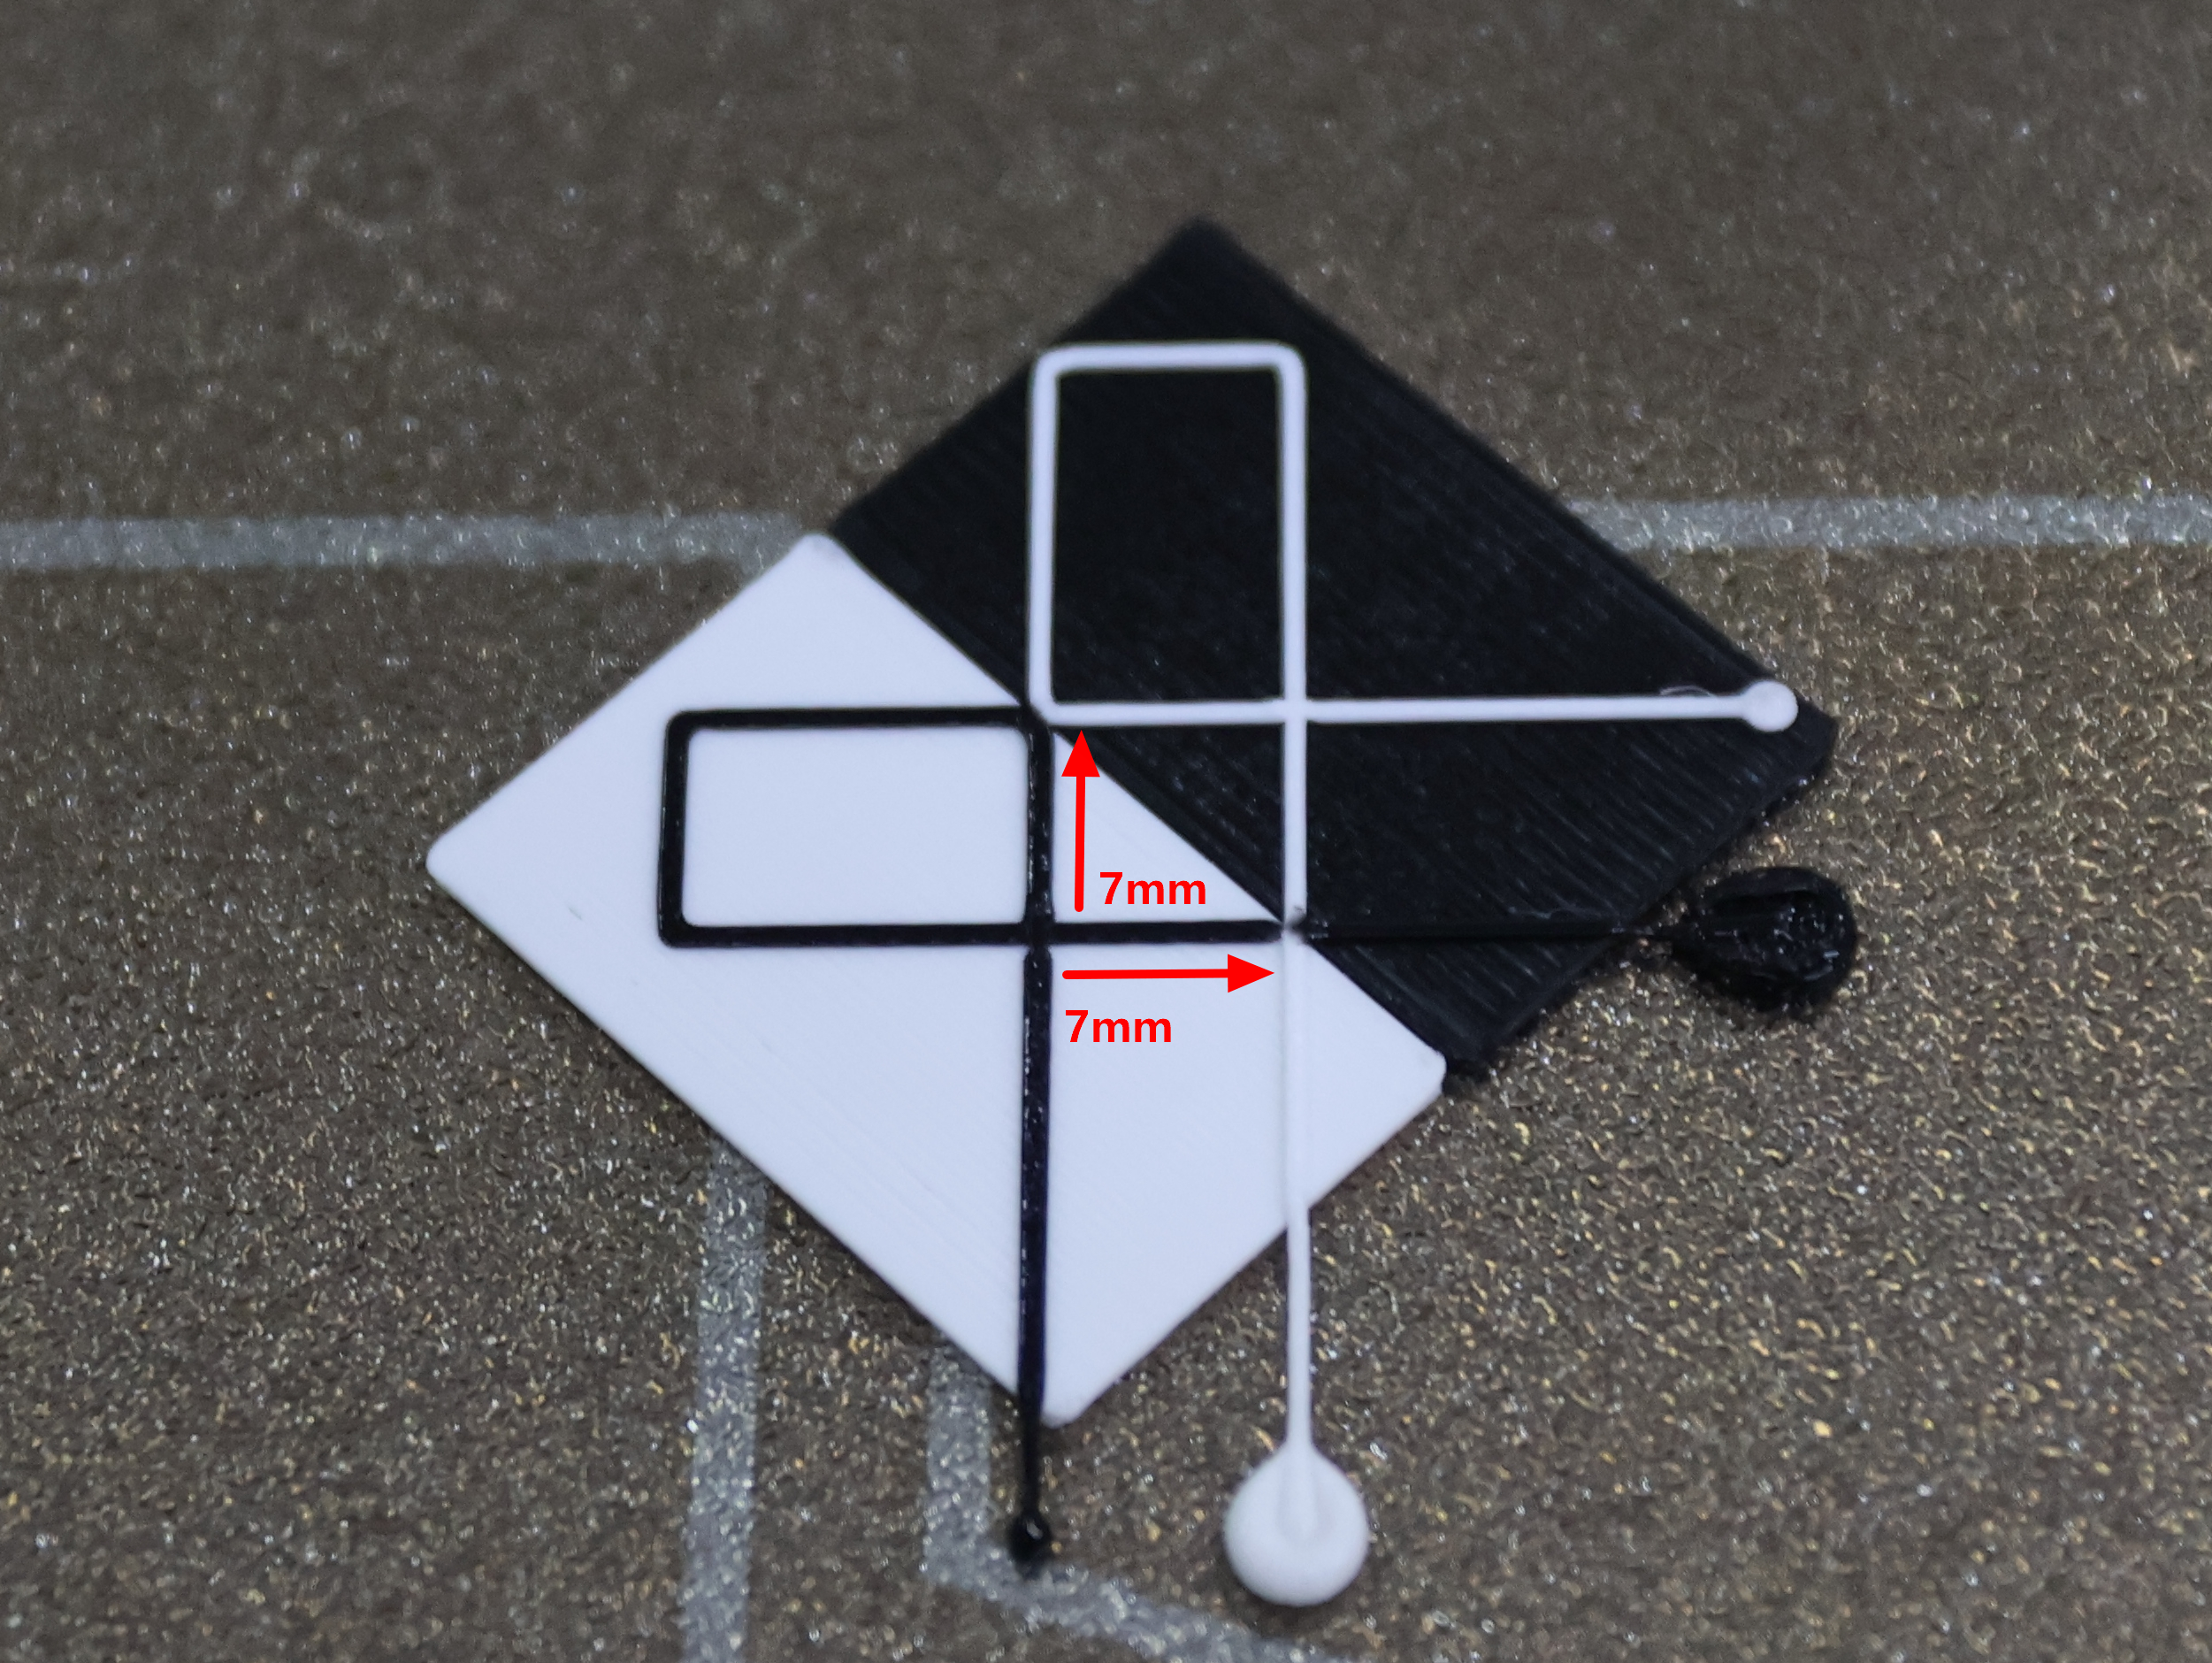
High-precision nozzle offset calibration theoretically has higher positioning accuracy compared to ordinary nozzle offset calibration because it calculates the offset directly from the lines printed from the nozzle. Compared to using the eddy current sensor to calibrate the offset, it can eliminate error interference caused by other factors.
¶ Possible causes of calibration failure
-
The color depth of the two filaments used in calibration is too similar, and the contrast is not enough, which makes it difficult for AI to identify and leads to calibration failure. Try to use the filament with obvious color contrast for calibration;
-
There are printing quality issues with the calibration model, especially if the calibration line on the top layer is not printed or printed not straight enough, which may cause recognition failure. It is necessary to combine the actual printing model status to check whether the build plate has poor adhesion or if the nozzle is clogged.
-
The fill light on both sides of the chamber should be kept on, and some images will rely on the fill light when capturing. Manually turning off the fill light may also cause recognition failure;
-
The offset of the toolhead camera relative to the nozzle is too large, confirm whether the nozzle is installed skew, and whether the toolhead camera is installed in place;
-
The toolhead camera does not work, or the lens is dirty, which will also lead to calibration failure. Make sure that the lens of the toolhead camera is not blocked, and there is no HMS alarm such as dirty lens;
¶ End Notes
We hope the detailed guide provided has been helpful and informative.
If this guide does not solve your problem, please submit a support ticket. We will answer your questions and provide assistance.
If you have any suggestions or feedback on this Wiki, please leave a message in the comment area. Thank you for your support and attention!