In laser image engraving, the combination of laser power and speed affects how the final engraving looks. Generally, using higher power or slower speeds creates more noticeable engravings. For example, on wood, higher power or slower speeds usually result in darker engravings.
Most laser power adjustments are set up using a simple linear scale, but this often doesn’t produce the best visual results. To fix this, we’ve developed special algorithms that create a power mapping curve based on how engravings actually look at different power and speed settings. This makes the results more visually appealing.
¶ How to use
Note: This feature only works in image engraving and when image mode "gray scale" is selected.
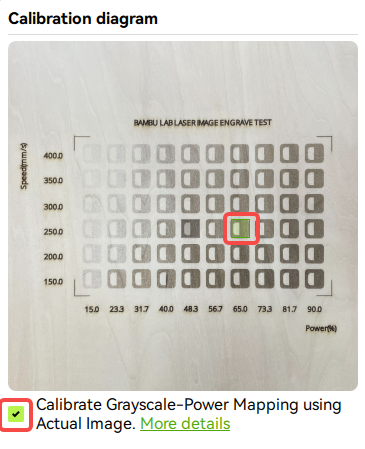
To enable grayscale calibration, simply choose an engraving effect from the pop-up dialog, just like you would when selecting other materials. The chosen effect represents the darkest color in the image. You can also use the recommended speed and power settings directly.
¶ Effect
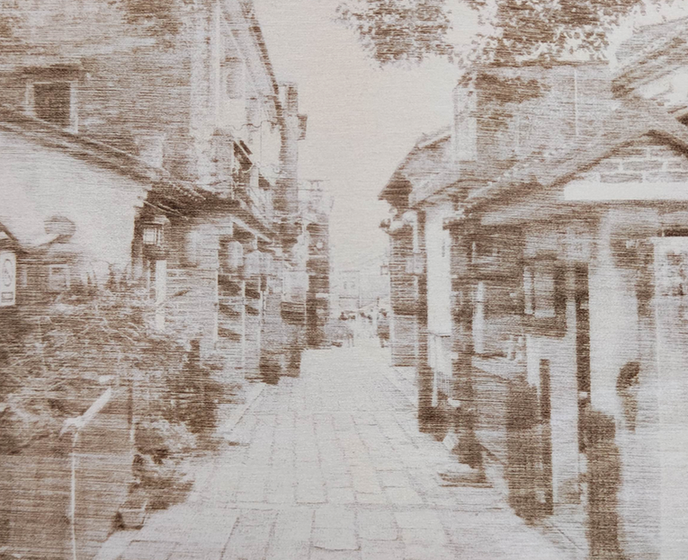
With grayscale calibration, users can achieve more precise engraving results. When enabled, landscapes retain more detailed features.
 Disable Calibrated Grayscale Power Mapping Disable Calibrated Grayscale Power Mapping |
 Enable Calibrated Grayscale Power Mapping Enable Calibrated Grayscale Power Mapping |
|---|
Note: This feature is currently experimental and only supports certain materials. We will continue to improve the stability and performance of the algorithm in the future—stay tuned!
¶ End Notes
We hope the detailed guide provided has been helpful and informative.
If this guide does not solve your problem, please submit a technical ticket, we will answer your questions and provide assistance.
If you have any suggestions or feedback on this Wiki, please leave a message in the comment area. Thank you for your support and attention!