¶ When to use?
You can follow this article if you have problems like:
- The silicone pad on the nozzle wiper is too high, hitting the nozzle
- There are scratches present on the outer surface of the purge wiper
- The purge wiper is incorrectly installed
Important
Before following the troubleshooting steps below, ensure that you are running the latest firmware update on your H2D.
This contains important patches that fix some bugs that might be related to the wiping process.
¶ 1. The silicone pad on the nozzle wiper is too high, hitting the nozzle
¶ Problem Description
In certain situations, the nozzle wiper silicone pad might be incorrectly installed, interfering with the nozzle wiping process, as shown in the gif below:
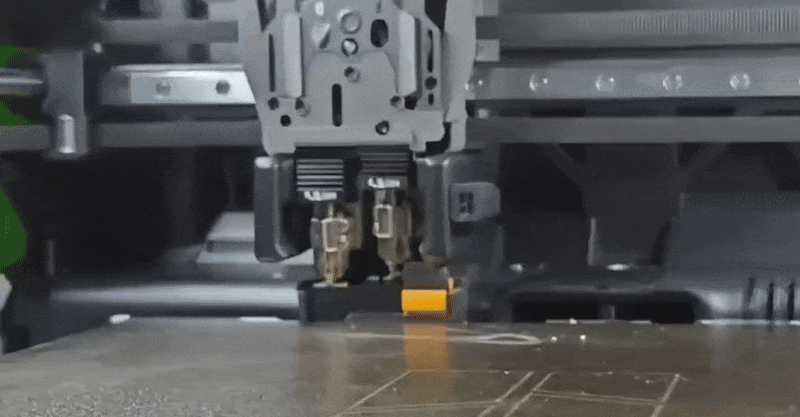
When such a problem occurs, the nozzle and other print head components can be damaged.
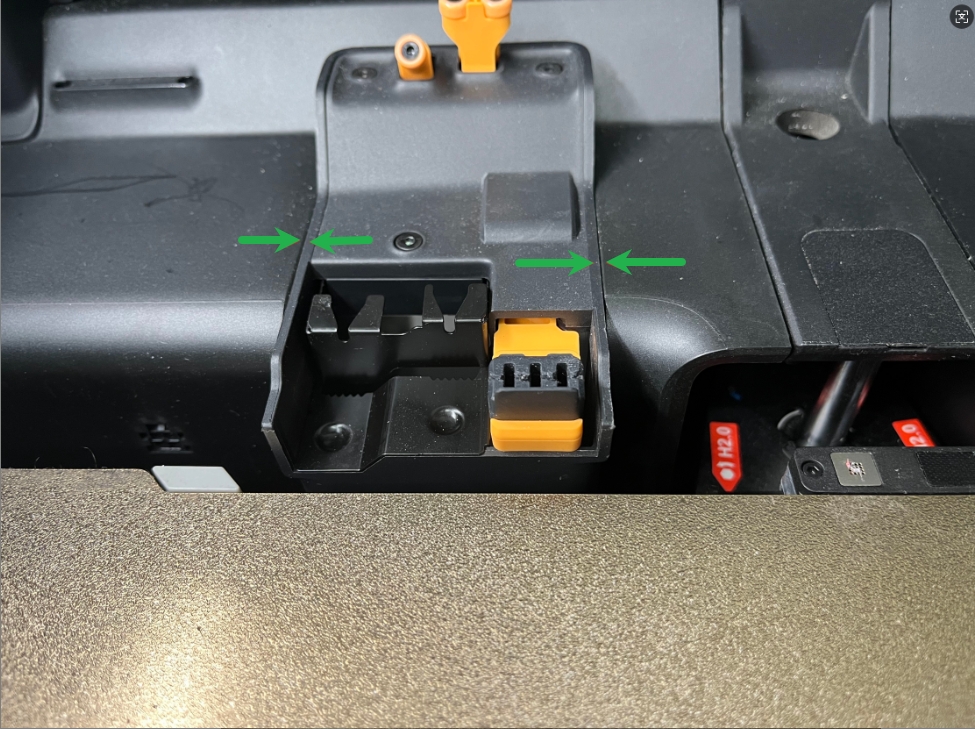
¶ Problem Solution
To solve this problem, visually inspect the silicone wiper and the purge wiper, to confirm it is correctly installed.
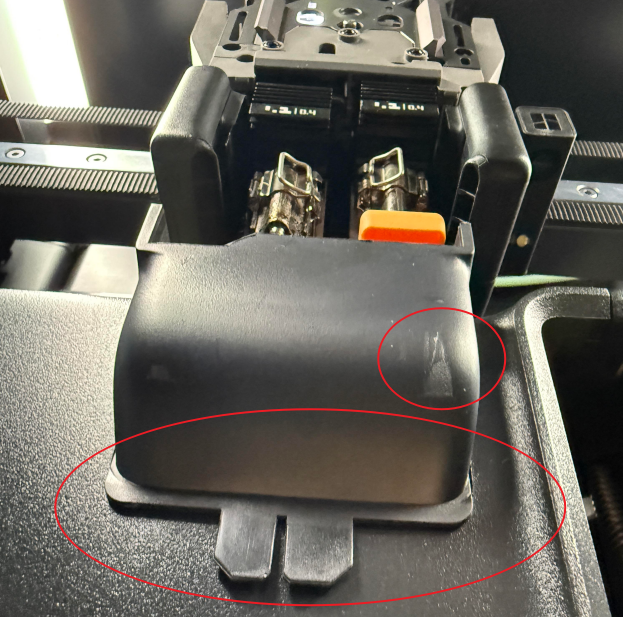
The plastic sides of the purge wiper should be flush with the plastic back cover of the printer, and the silicone nozzle wiper is fully pressed in the orange holder.
¶ 2. Scratches are present on the purge wiper outer surface
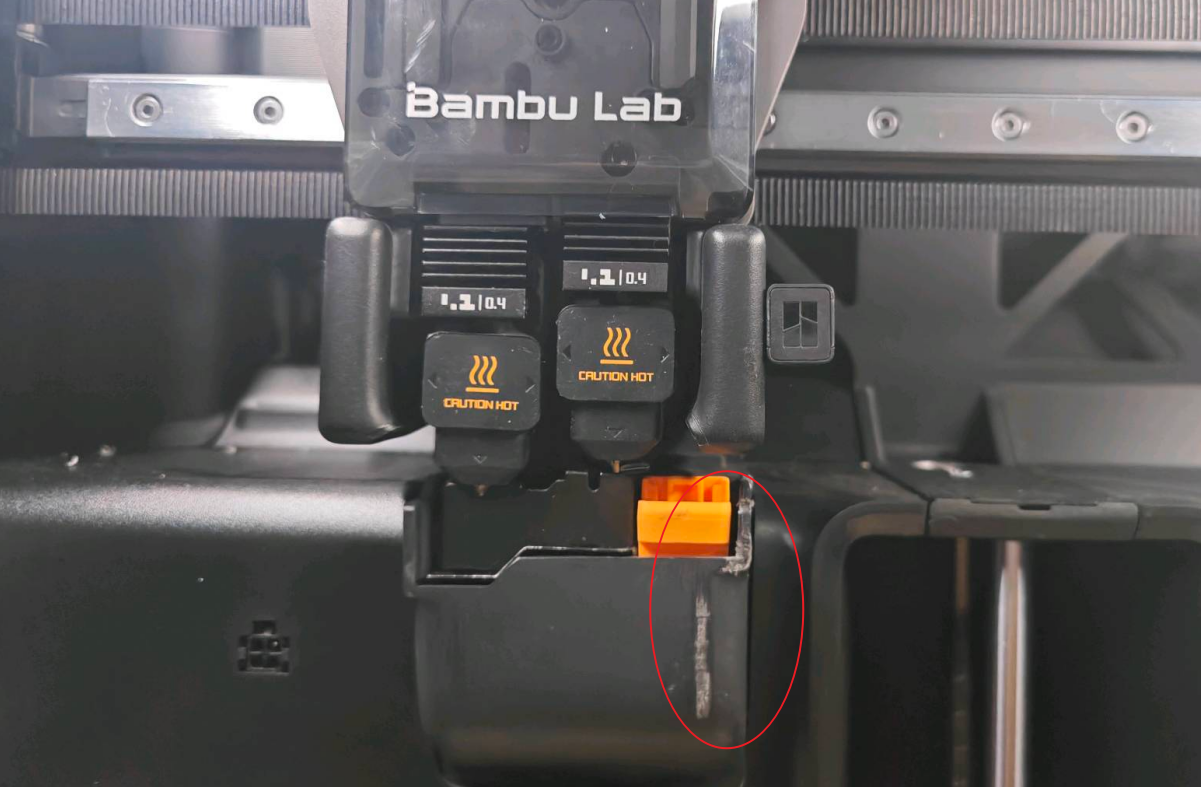
¶ Problem Description
After visual inspection, certain scratches can be determined on the purge wiper, as seen in the image below.
¶ Problem Solution
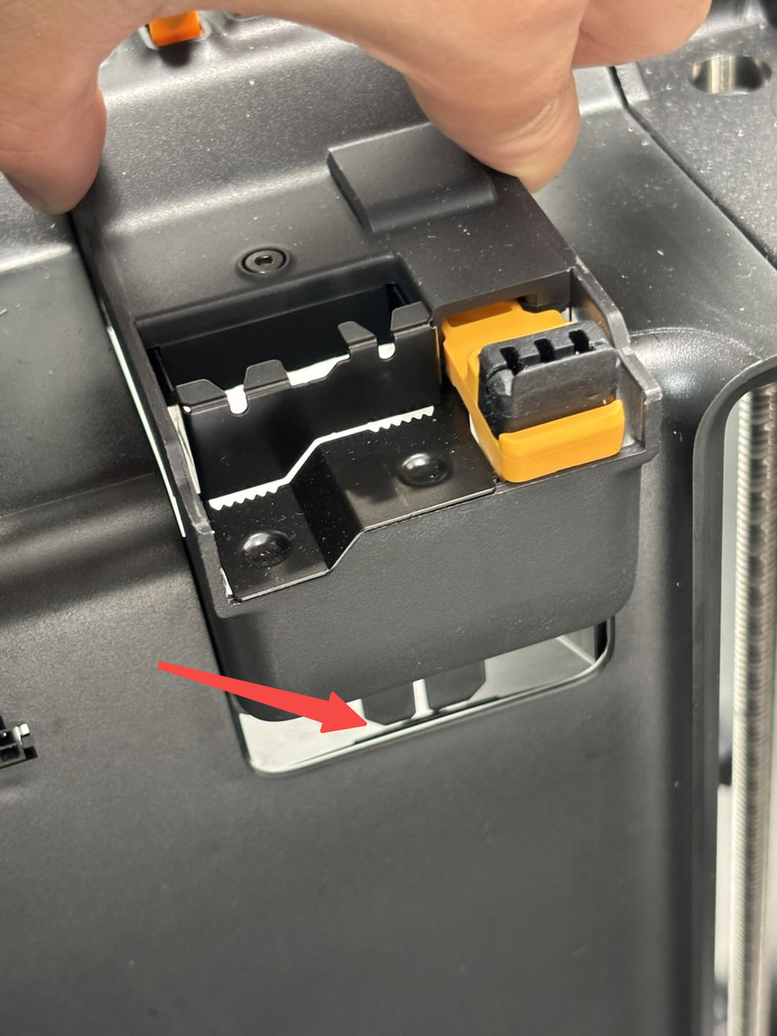
One of the most common issue that leads to such damage is incorrectly installing the build plate on the heatbed. If the build plate is not aligned with the tabs in the back of the heatbed, when the printer is homing on the Z axis, it will hid the purge wiper, as shown in the image below:
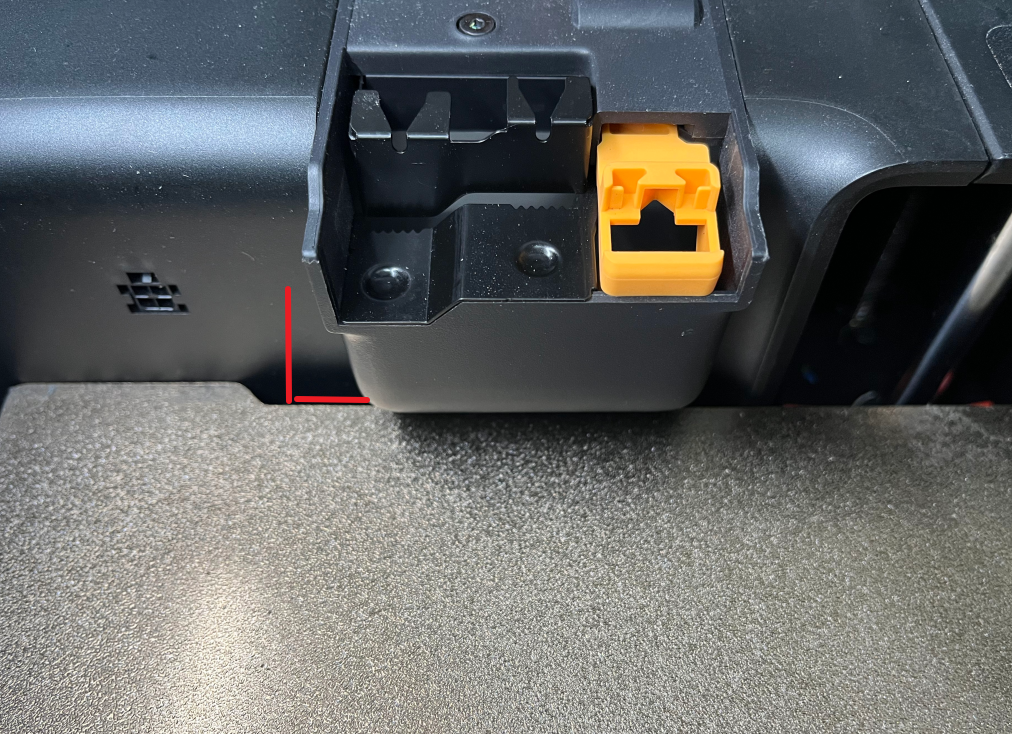
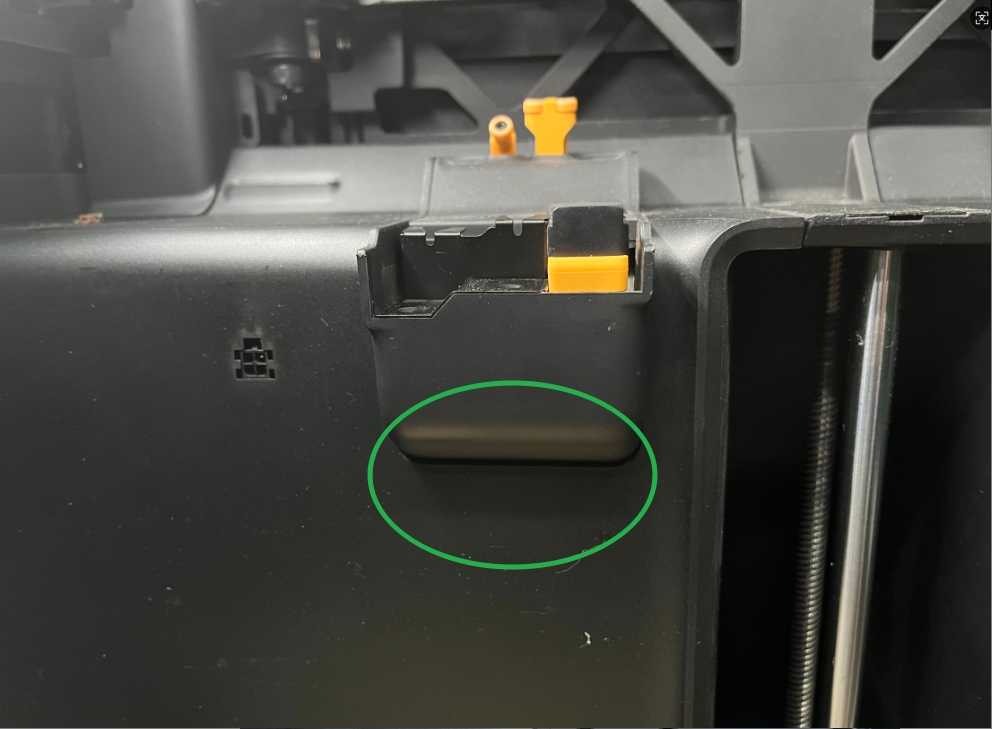
To avoid this problem, ensure the build plate is always installed carefully aligning it with the plastic alignment tabs, as shown below.
This will provide enough clearance between the heatbed and the chute to avoid any scratches.

¶ 3. The purge wiper is incorrectly installed
¶ Problem Description
In rare cases, the purge wiper might be incorrectly installed. This can happen after an operation is done to the printer.
The plastic alignment tab is exposed externally, which makes the wiper sit in an angled position and get scratched, as shown in the image below:
¶ Problem Solution
To solve this problem, the purge chute needs to be re-installed in the correct position. Follow this Bambu Lab Wiki article for step by step guidance on how to remove the wiper, and install it in the correct way.
In short, the wiper needs to be removed and when it is installed again, the plastic alignment tab will need to be correctly aligned towards the inside of the printer's back panel.
After the operation is complete, the wiper will look like this and the problem will be resolved.
¶ End Notes
We hope the detailed guide provided has been helpful and informative.
If this guide does not solve your problem, please submit a technical ticket, we will answer your questions and provide assistance.
If you have any suggestions or feedback on this Wiki, please leave a message in the comment area. Thank you for your support and attention!