¶ Why am I doing it?
Even slight looseness in the power, switch, or motor wiring can cause smoke purifier malfunctions, such as failure to start or abnormal airflow. This procedure aims to:
-
Verify connection reliability: Inspect and ensure that critical connectors are fully seated.
-
Minimize repair costs: Rule out high-probability issues first with a low-risk, low-effort approach before deciding whether to proceed to deeper disassembly.
¶ Required Tools and Materials
- H2.5 screwdriver
It's crucial to power off the printer before conducting any maintenance work, including work on the printer's electronics and tool head wires. Performing tasks with the printer on can result in a short circuit, leading to electronic damage and safety hazards.
During maintenance or troubleshooting, you may need to disassemble parts, including the hotend. This exposes wires and electrical components that could short circuit if they contact each other, other metal, or electronic components while the printer is still on. This can result in damage to the printer's electronics and additional issues.
Therefore, it's crucial to turn off the printer and disconnect it from the power source before conducting any maintenance. This prevents short circuits or damage to the printer's electronics, ensuring safe and effective maintenance. For any concerns or questions about following this guide, open a new ticket in our Support Page and we will do our best to respond promptly and provide the assistance you need.
¶ Troubleshooting Steps
¶ Step 1. Check the power rating label
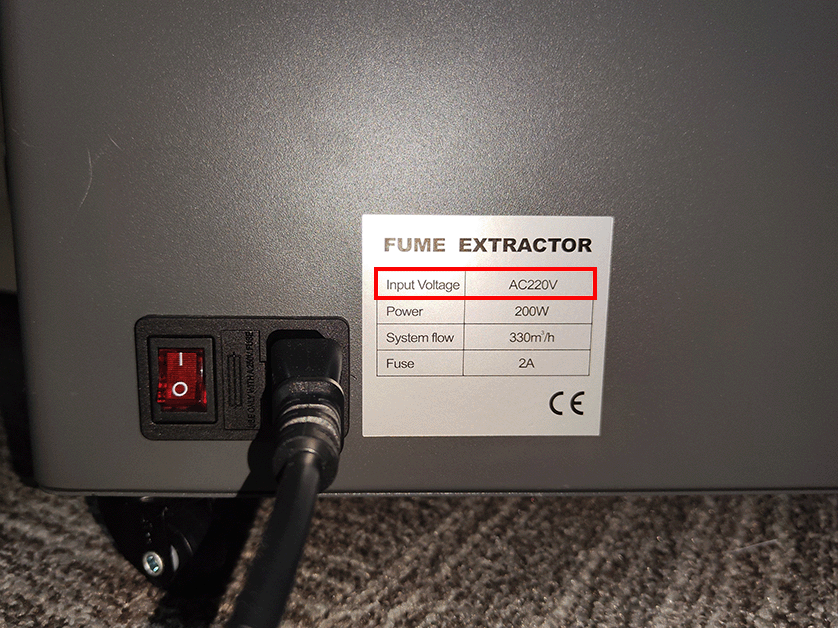
If the device is powered but the power indicator does not light, a voltage version mismatch may be the cause. Please check the label near the AC inlet and confirm that the Input Voltage rating matches your local mains.
¶ Step 2. Power off
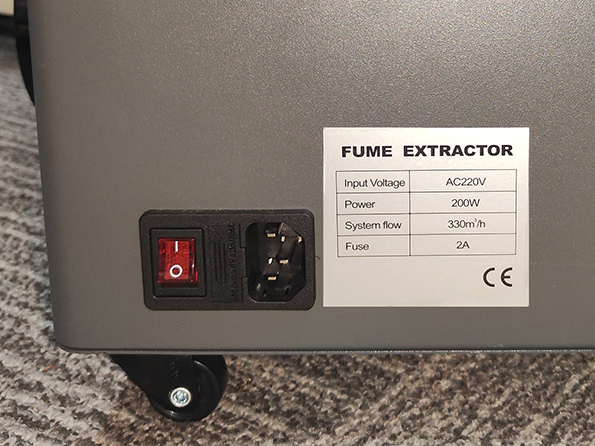
Turn off the smoke purifier and unplug the power cord. Confirm the device is completely powered down to avoid electric shock.
¶ Step 3. Invert the device
Carefully flip the smoke purifier over so the bottom plate faces up, fully exposing the bottom structure.
¶ Step 4. Remove bottom plate screws
Using the H2.5 screwdriver, remove the 16 bottom plate screws at the positions shown in the image.
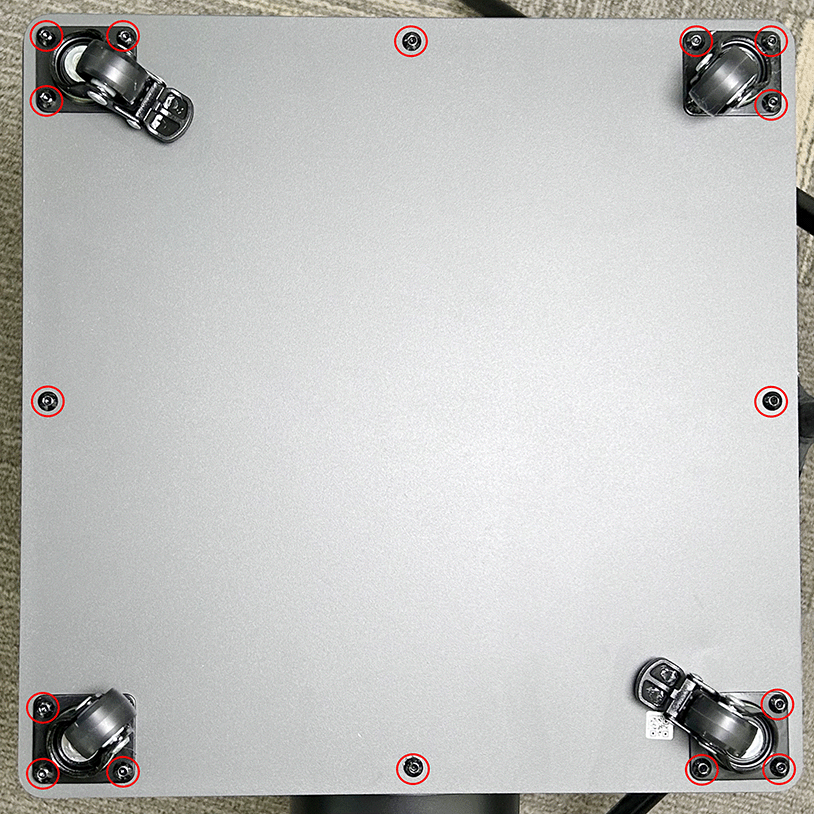
Note: Keep the removed screws properly organized to prevent loss.
¶ Step 5. Lift the bottom plate and expose the interior
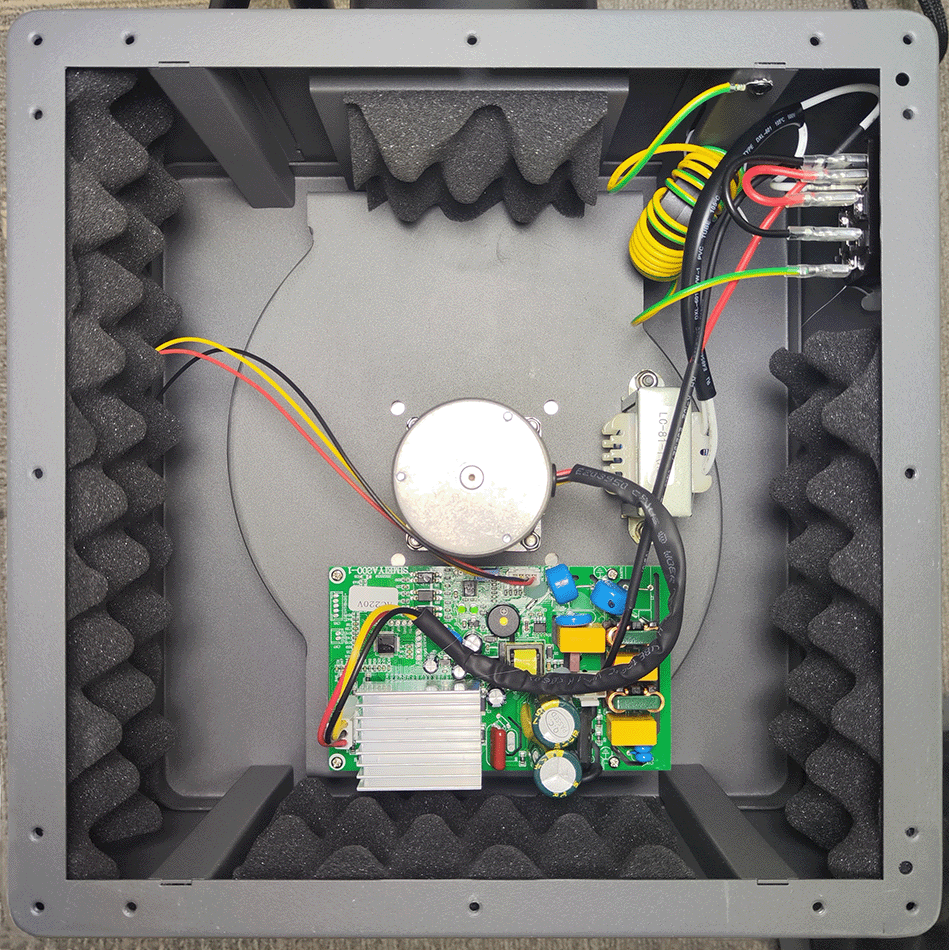
After removing the screws, support the edges of the bottom plate with both hands and gently lift it upward; the device’s internal PCB will now be fully exposed.
¶ Step 6. Inspect connectors and wiring harnesses
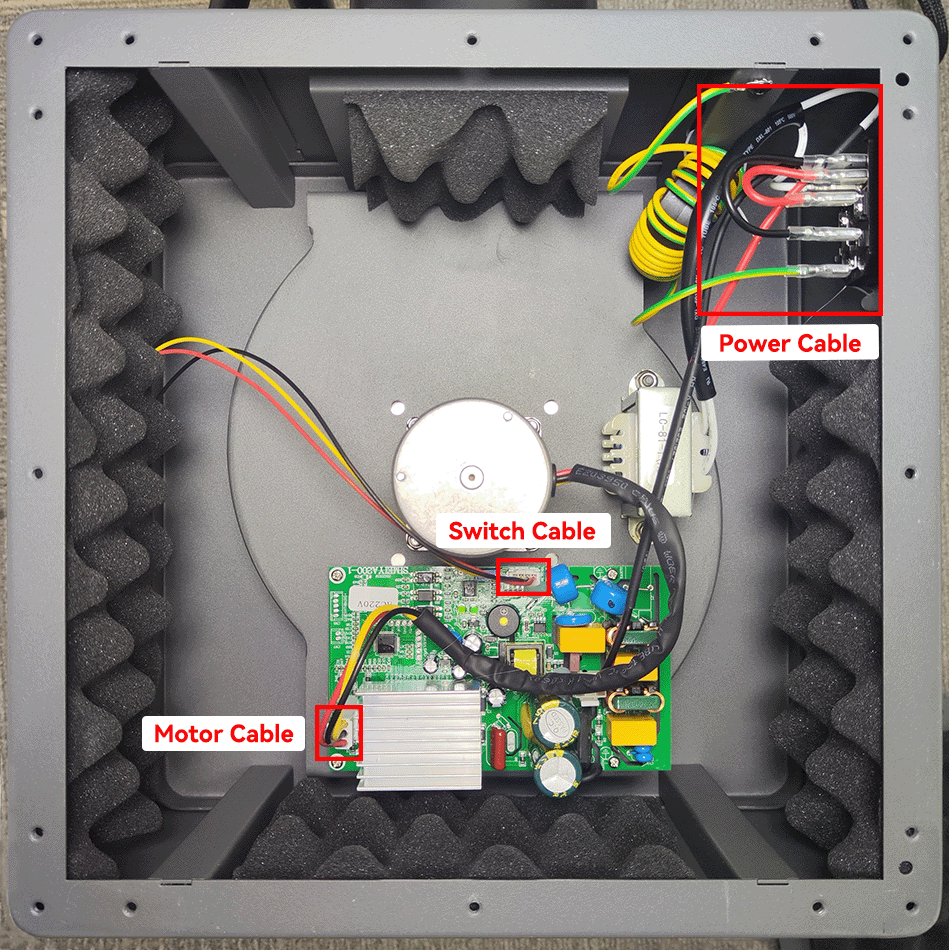
Check in sequence that the power, switch, and motor cables are fully inserted with no looseness. Look for damaged insulation/discoloration/exposed strands. If no issues are found, tidy the harnesses and ensure no cables are pinched.
¶ Step 7. Reinstall the bottom plate
Gently place the bottom plate back onto the device. While doing so, carefully confirm that no cables are being pressed or snagged to avoid introducing new faults due to pinched wiring.
¶ Step 8. Install screws
For reassembly, first insert four screws at diagonal positions to lightly “locate” the plate (do not fully tighten yet) and ensure the bottom plate sits flush with the main chassis. Then, following a diagonal sequence, gradually tighten the remaining 12 screws as well as the initial 4 locating screws to prevent warping from uneven force.
¶ Verify the functionality
Return the device to its normal orientation and reconnect power. Check whether the smoke purifier starts and runs normally (e.g., airflow/noise levels). If abnormalities persist, reconfirm that all connectors are fully seated and that no cables are pinched or loose.
¶ End Notes
We hope the detailed guide provided has been helpful and informative.
If this guide does not solve your problem, please submit a technical ticket, we will answer your questions and provide assistance.
If you have any suggestions or feedback on this Wiki, please leave a message in the comment area. Thank you for your support and attention!