¶ Belt Tensioning
Keeping the belts on the H2S tight and correctly adjusted is very important for accurate printing. If the belts are too loose or have different tensions, shapes like circles may come out looking stretched or distorted.
The printer can monitor belt tension automatically. During calibration, the printer moves the tool head and checks how the belts respond. If it detects the belts are too loose, it will inform you via an HMS message that they need to be re-tensioned.
Tightening the belts is simple, and we will cover the steps below.
¶ Belt Tensioning Steps
¶ Step 1: Turn off the printer
This step is important, as the motors need to be disengaged in the next steps.
¶ Step 2: Loosen Belt Tensioner Screws
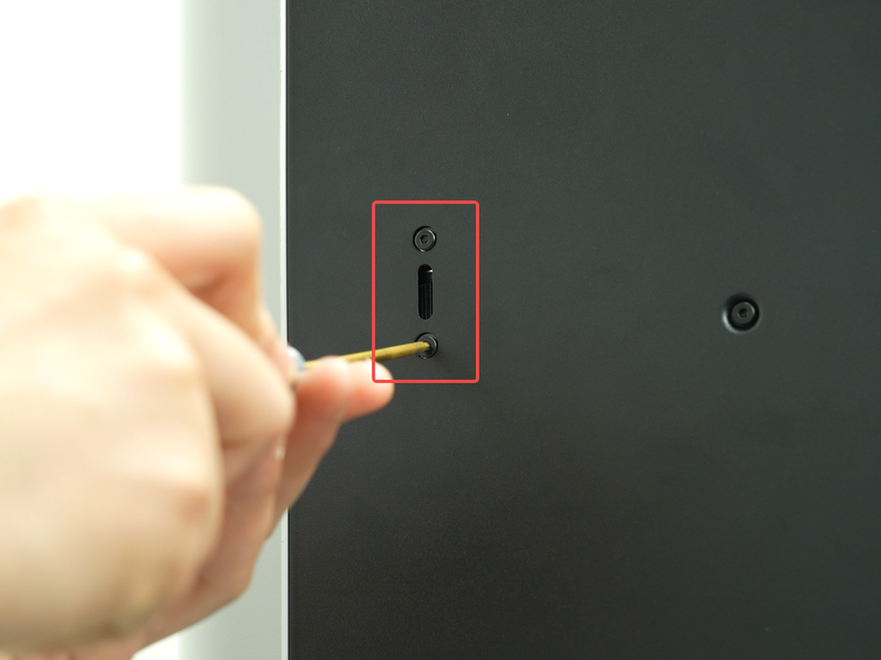
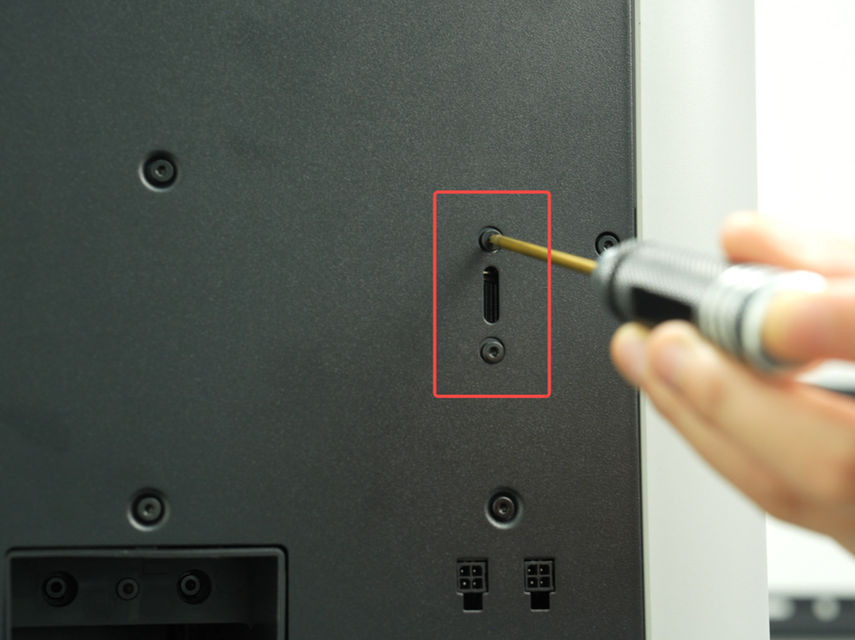
Loosen four screws on the left and right sides of the belt tensioner by 1–2 turns. Do not fully remove the screws.
 |
 |
|---|
¶ Step 3: Move the Tool Head
Gently slide the tool head back and forth several times, then move it all the way to the rear of the printer. This process helps the belt-tensioners reach the correct position.

After moving the tool head, make sure it is at the rearmost position, aligned with the linear guide as shown in the figure, before moving on to the next step.

¶ Step 4: Tighten the Screws
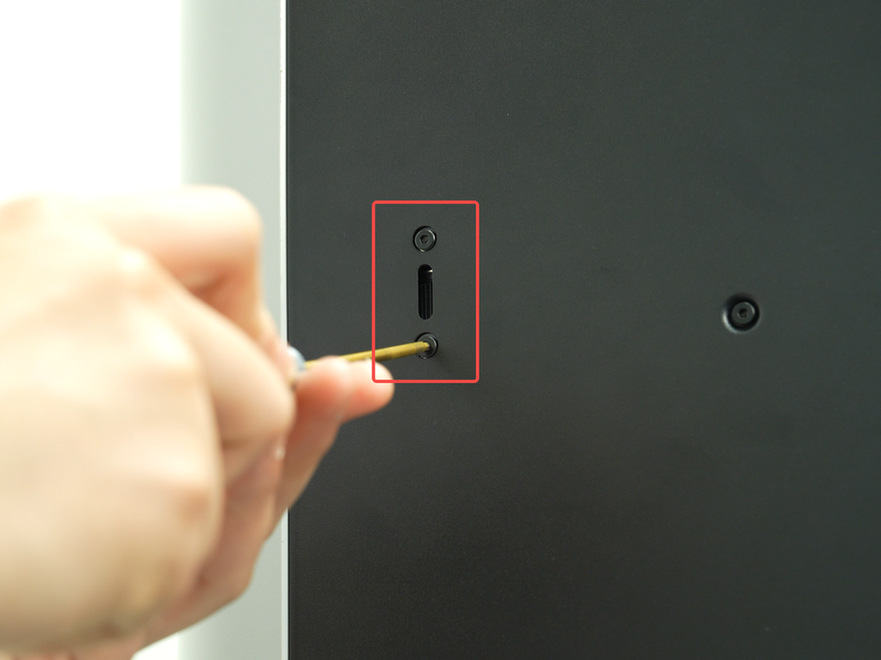
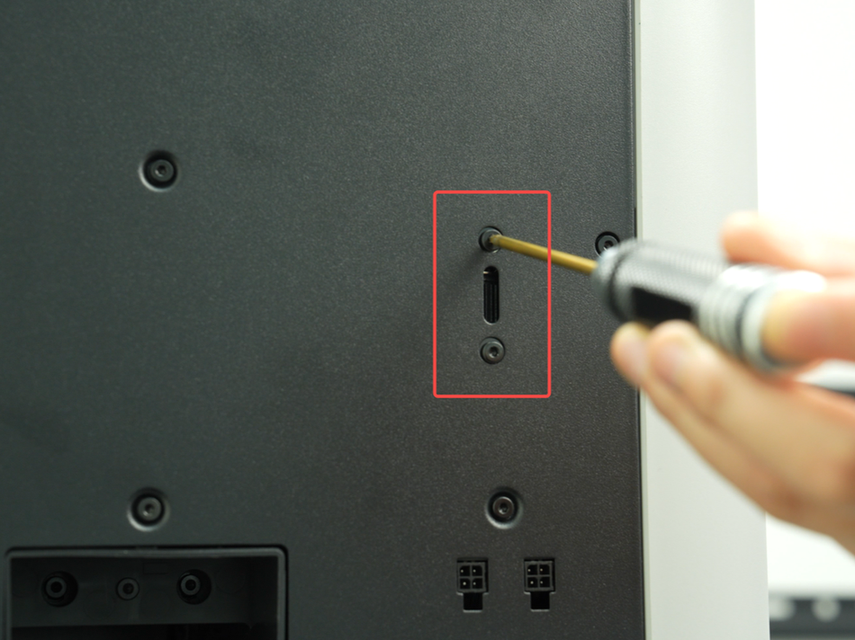
Tighten the four screws on the belt tensioner. The spring mechanism will automatically set the belt to the correct tension.
Caution: Do not overtighten the screws—just tighten them evenly until secure to avoid damaging the threads.
 |
 |
|---|
¶ Calibration
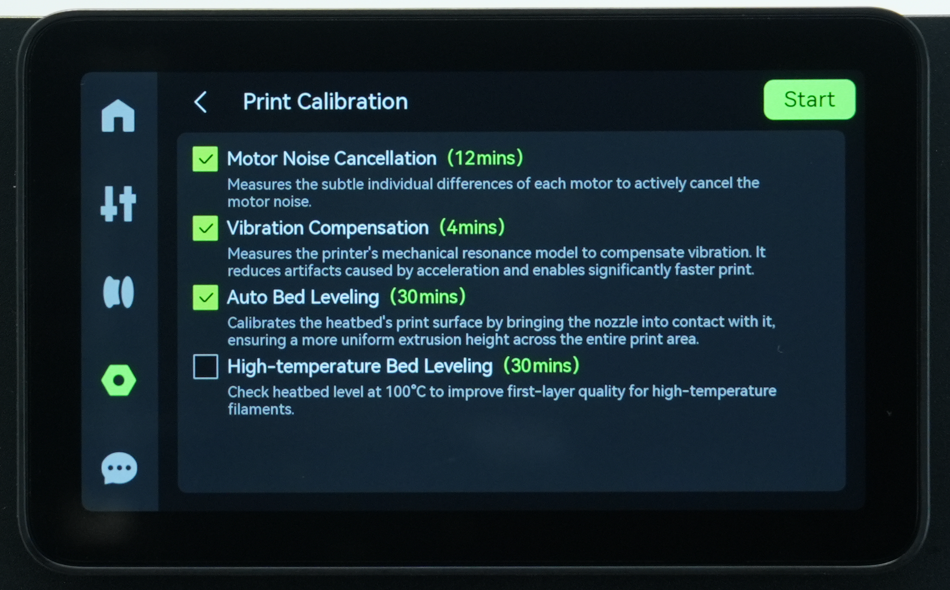
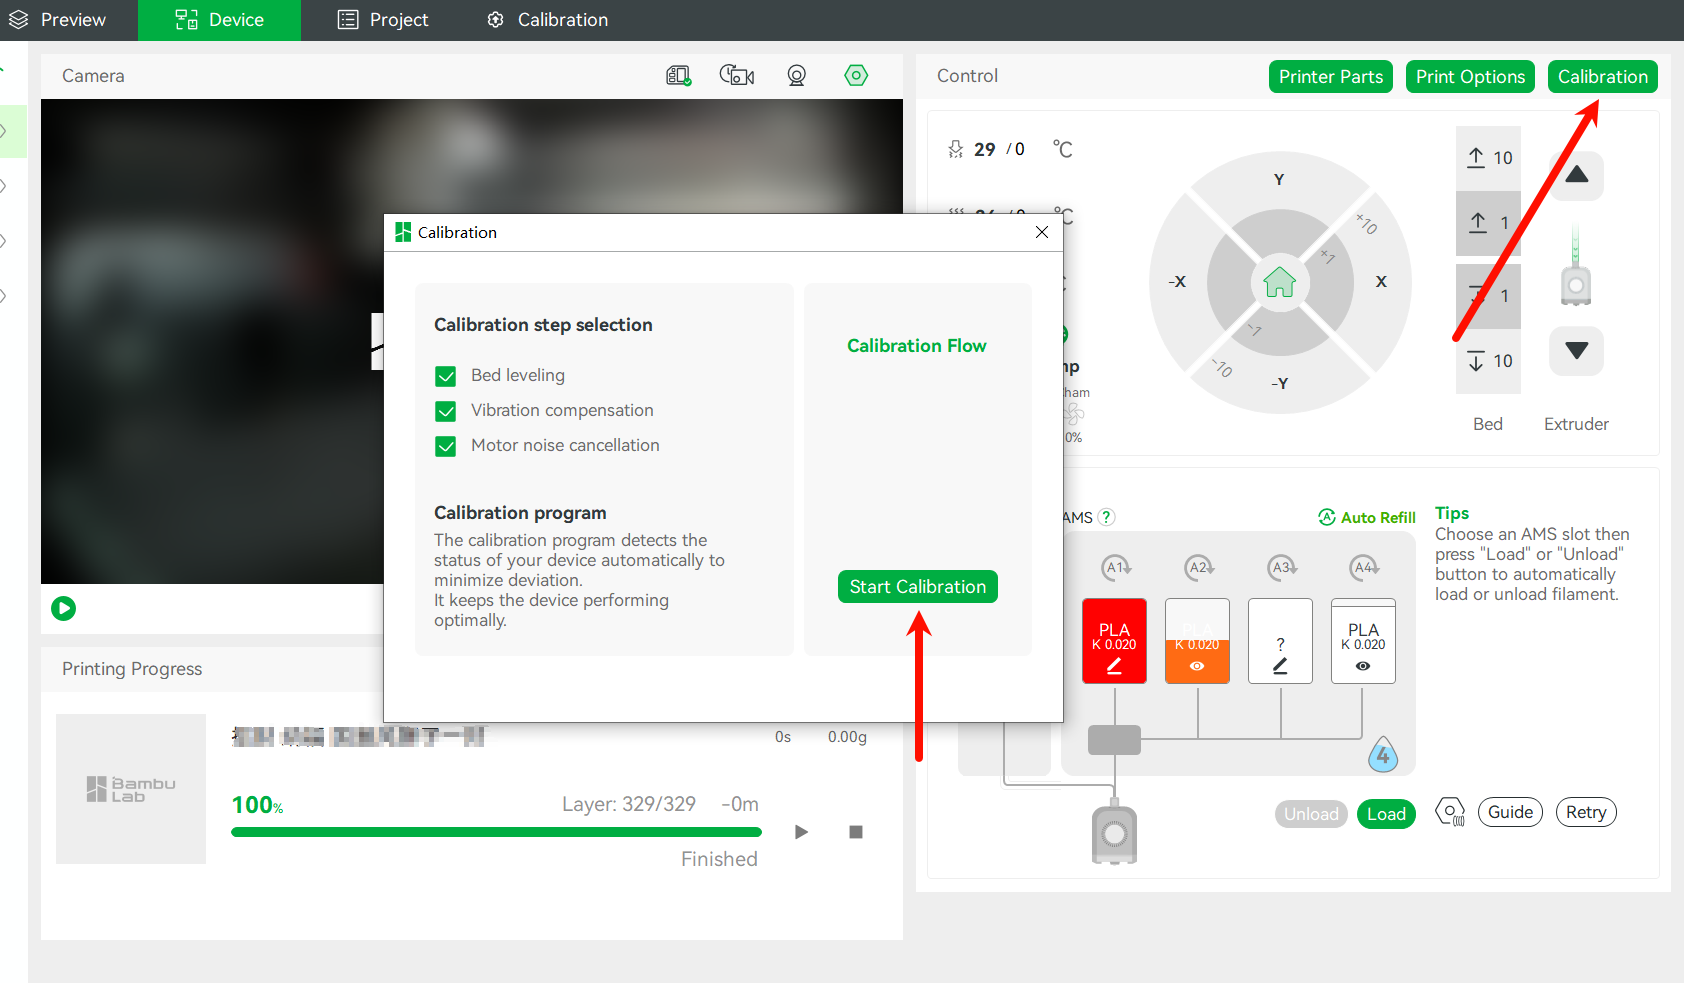
After tightening the belts, the printer needs to recalibrate to record the new belt tension and resonance characteristics. You can perform this calibration either directly on the printer’s touchscreen or through Bambu Studio on your computer.
To do so, navigate to Settings -> Print Calibration and start the Vibration Compensation procedure.
¶ End Notes
We hope this guide will provide you with useful information to help you solve problems.
If this guide does not solve your problem, please contact online technical support (service hours 9:00-21:00) , we are ready to answer your questions and provide assistance.
If you have any suggestions or feedback on this Wiki, please leave a comment in the comment section. Thank you for your support and attention!