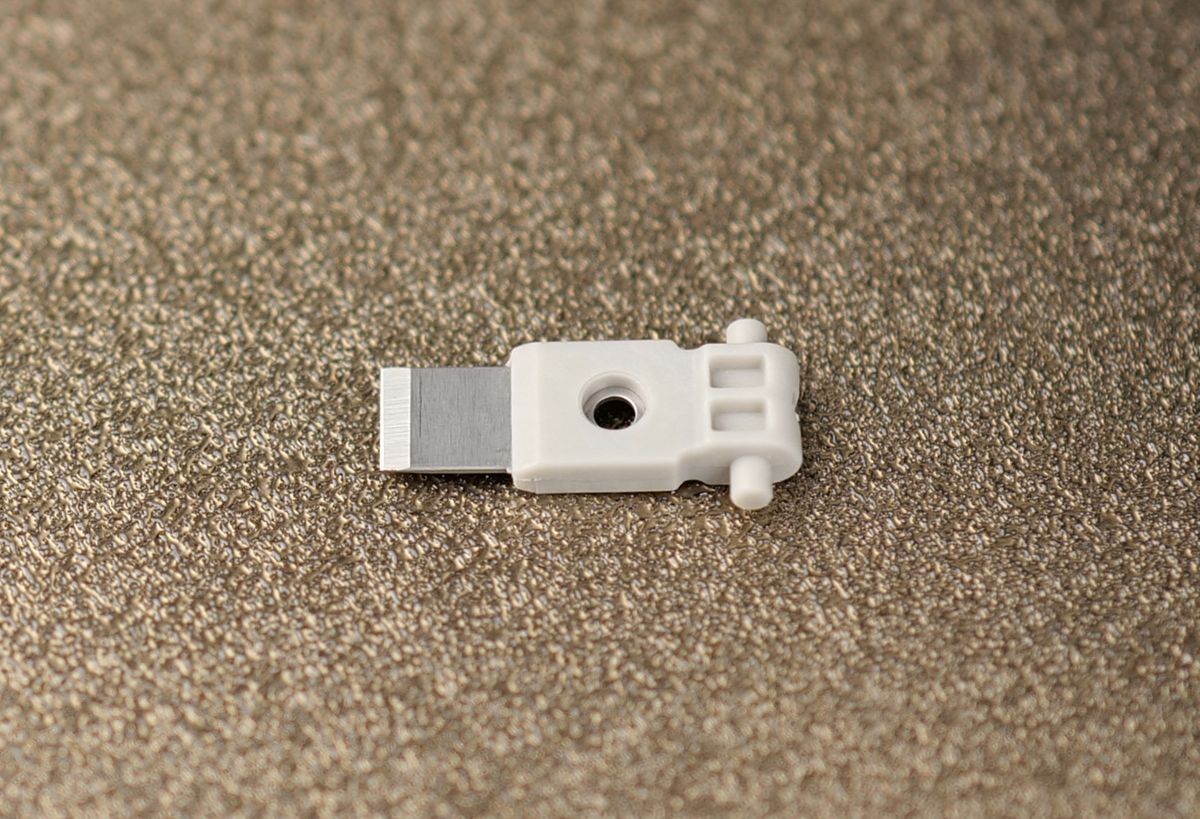
¶ Cutter - H2S

Purchase link: Replacement Filament Cutter
¶ When to use
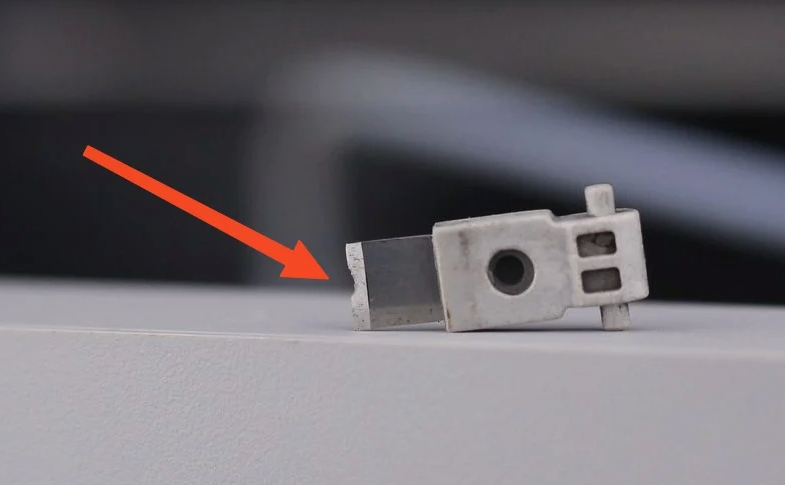
- After using 10-15 rolls of filaments (or earlier), and cutting about 5000-7000 times, the blade may become blunt (as shown below). In this case, it is recommended to replace the cutter.

-
If the filaments are not cut cleanly during the filament unloading, it is recommended to replace the cutter
-
Bambu Lab's after-sales service recommends the replacement
¶ Tools and materials needed
-
New cutter
-
H2.0 Allen key
- Tweezers (you can omit them if you are careful)
- 5 minutes
¶ Safety Warning
IMPORTANT!
It's crucial to power off the printer before conducting any maintenance work, including work on the printer's electronics and tool head wires. Performing tasks with the printer on can result in a short circuit, leading to electronic damage and safety hazards.
During maintenance or troubleshooting, you may need to disassemble parts, including the hotend. This exposes wires and electrical components that could short circuit if they contact each other, other metal, or electronic components while the printer is still on. This can result in damage to the printer's electronics and additional issues.
Therefore, it's crucial to turn off the printer and disconnect it from the power source before conducting any maintenance. This prevents short circuits or damage to the printer's electronics, ensuring safe and effective maintenance. For any concerns or questions about following this guide, open a new ticket in our Support Page and we will do our best to respond promptly and provide the assistance you need.
¶ Remove the Cutter and Cutter Lever
¶ Step 1: Remove the toolhead front cover
Grasp the bottom of the front cover and gently pull forward to release the buckle that fixes the front cover, and the front cover can be easily removed.
.png)
.png)
Note: The pictures below don't include the hot end and the rotating wheel. Actually, when only removing the cutter blade, it is not necessary to remove the rotating wheel and the hot end. Please remove and install as needed.
.png)
¶ Step 2: Loosen the cutter lever
Press the cutter lever and remove the screw with an Akken key. After the screw is completely removed, gently release the cutter lever and let it fall naturally.
.png)
.png)
¶ Step 3: Remove the cutter
Use an tweezer or Allen key to gently push the blade to the lower right as shown in the figure below, so that the blade flips out from the inside of the extruder, and then remove the blade along the notch to the upper right.
.png)
.png)
Important reminder! The blade has sharp edges and corners. There is a risk of cuts during the operation. Please be careful!
¶ Optional - Clean the extruder gears
Before you proceed with installing the new cutter, it is recommended that you clean the extruder gears and the yellow gear. After long-term use, some filament residue may accumulate on the extruder gears, and cleaning will ensure smooth operation in the future. You can use a blower or light attachment to blow out the debris inside the extruder and around the gears.
.png)
¶ Install the Cutter and Cutter Lever
¶ Step 1: Install the cutter
- Align the cutter with the installation slot, insert it into place, and then gently push it in the direction shown in the figure below to lock the cutter into place.
.png)
- After installing the blade into its secure position on the cutter lever, flip the cutter blade with the help of an Allen key or tweezers. Make sure to align the blade with the hole in the extruder.
.png)
.png)
¶ Step 2: Fix the position of the cutter lever
Before re-fixing the screw, hold the cutter lever tightly and keep it in place. When tightening the screw, be careful not to use excessive force to prevent the thread from slipping.
.png)
¶ Step 3: Install the toolhead front cover
Align the top buckle of the toolhead front cover and gently press it down. Make sure it is installed in place and you will hear a crisp sound.
.png)
.png)
¶ Verify the Functionality
To ensure the cutter is functioning properly, press the lever several times to test whether it moves smoothly and automatically rebounds to its original position. This will ensure smooth operation of the cutter during use.
¶ End Notes
We hope the detailed guide provided has been helpful and informative.
If this guide does not solve your problem, please submit a technical ticket, we will answer your questions and provide assistance.
If you have any suggestions or feedback on this Wiki, please leave a message in the comment area. Thank you for your support and attention!