
¶ When to Use
Malfunction of the extruder filament sensor.
¶ Tools and Materials Needed
-
New extruder filament sensor
-
Allen key H2.0 and H1.5
-
20 minutes
¶ Safety Warning
IMPORTANT!
It's crucial to power off the printer before conducting any maintenance work, including work on the printer's electronics and tool head wires. Performing tasks with the printer on can result in a short circuit, leading to electronic damage and safety hazards.
During maintenance or troubleshooting, you may need to disassemble parts, including the hotend. This exposes wires and electrical components that could short circuit if they contact each other, other metal, or electronic components while the printer is still on. This can result in damage to the printer's electronics and additional issues.
Therefore, it's crucial to turn off the printer and disconnect it from the power source before conducting any maintenance. This prevents short circuits or damage to the printer's electronics, ensuring safe and effective maintenance. For any concerns or questions about following this guide, open a new ticket in our Support Page and we will do our best to respond promptly and provide the assistance you need.
Note: The images below do not include the hotend and rotating wheel. In fact, when only disassembling and assembling the extruder filament sensor, there is no need to remove the rotating wheel and hotend. Disassemble and assemble as needed.

¶ Disassembly Guide
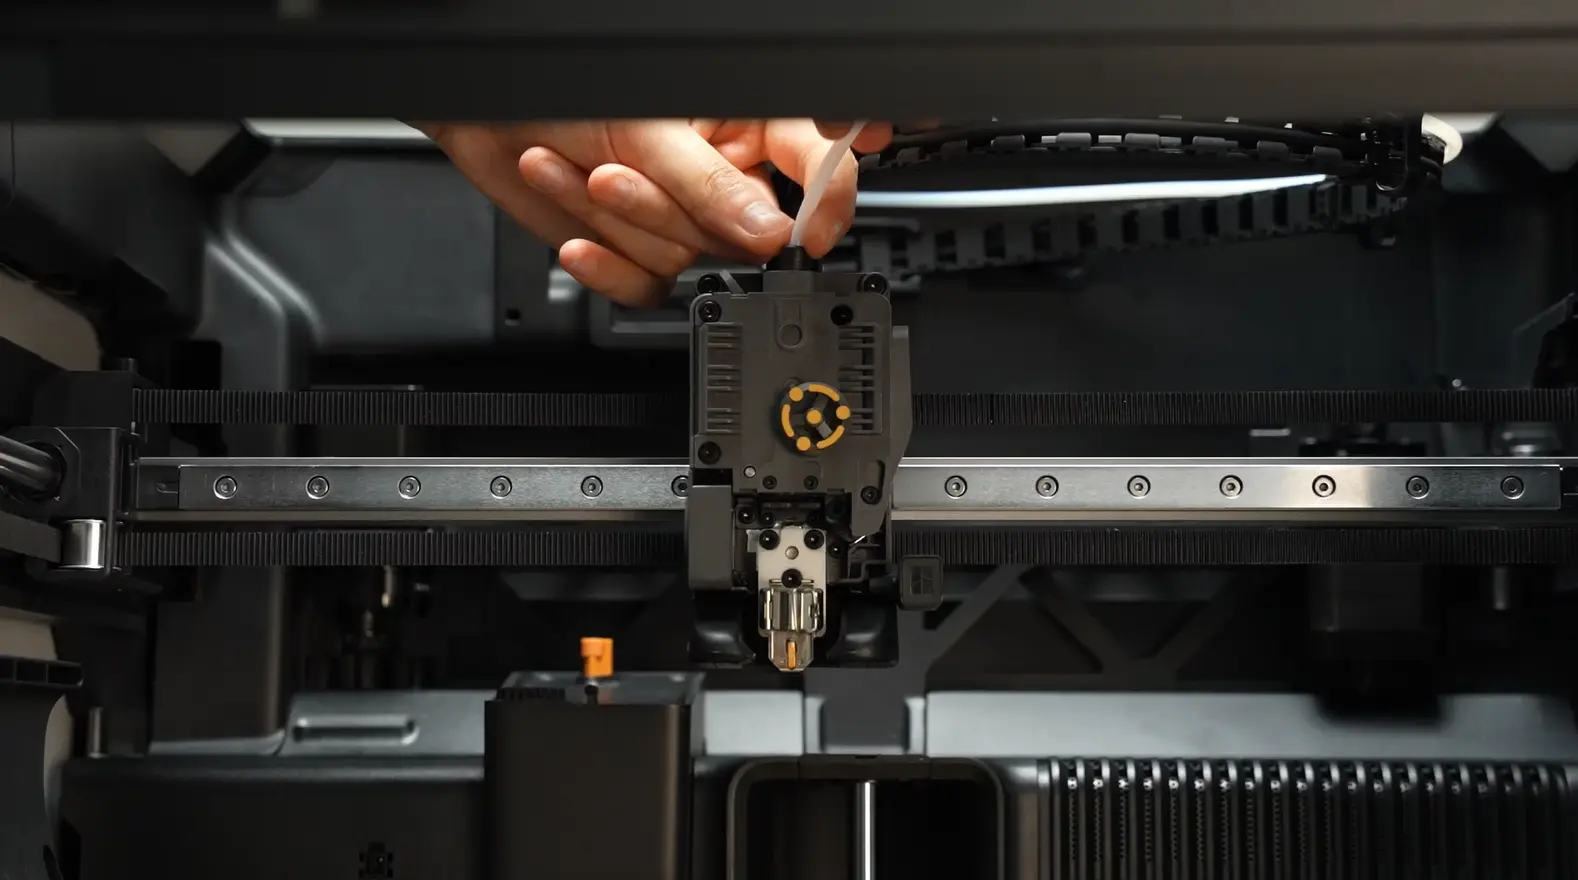
¶ Step 1: Disconnect the PTFE tube
Press the pneumatic connector to disconnect the PTFE tube.
¶ Step 2: Remove the extruder filament sensor
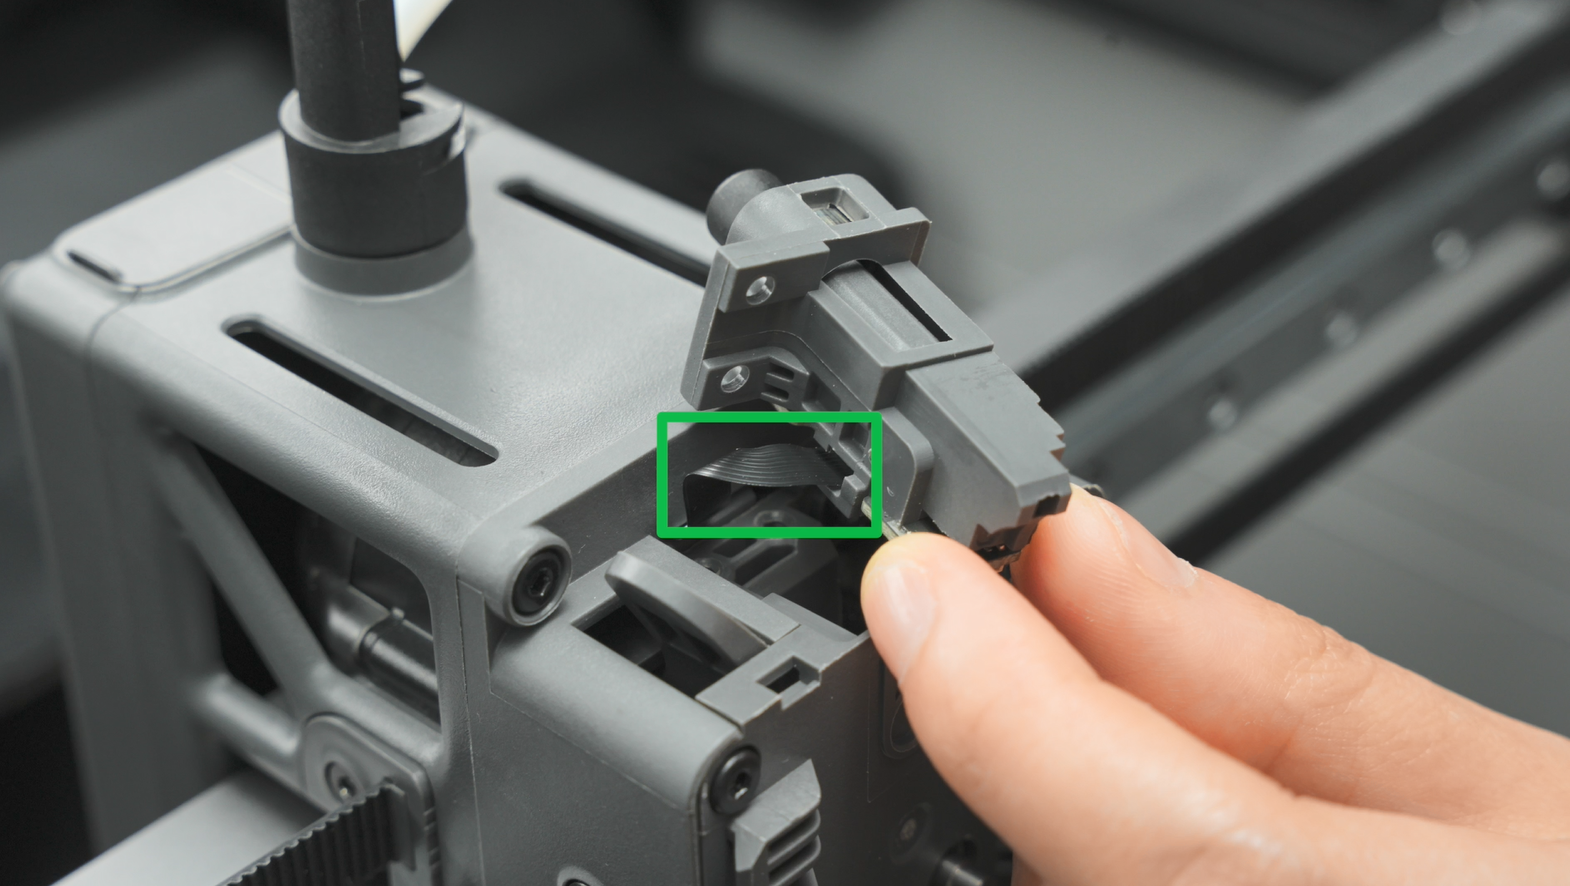
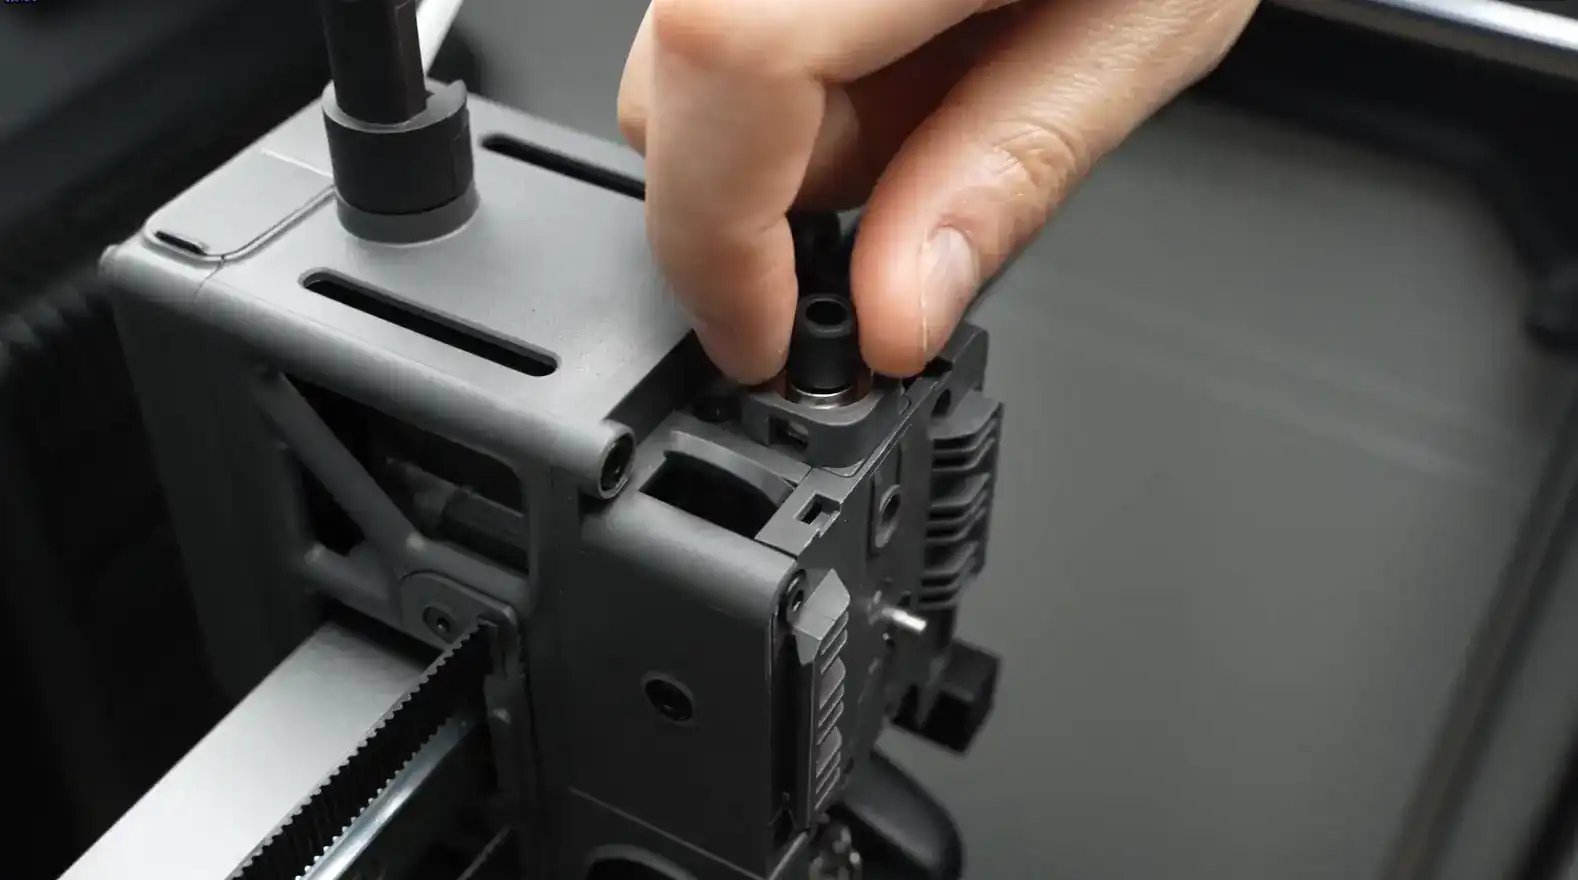
Use an H2.0 allen key to remove 2 screws. It should be noted that do not pull hard when taking out the extruder filament sensor, and handle it carefully when placing it to avoid damaging the black FPC cable.

¶ Step 3: Disconnect the extruder filament sensor plug
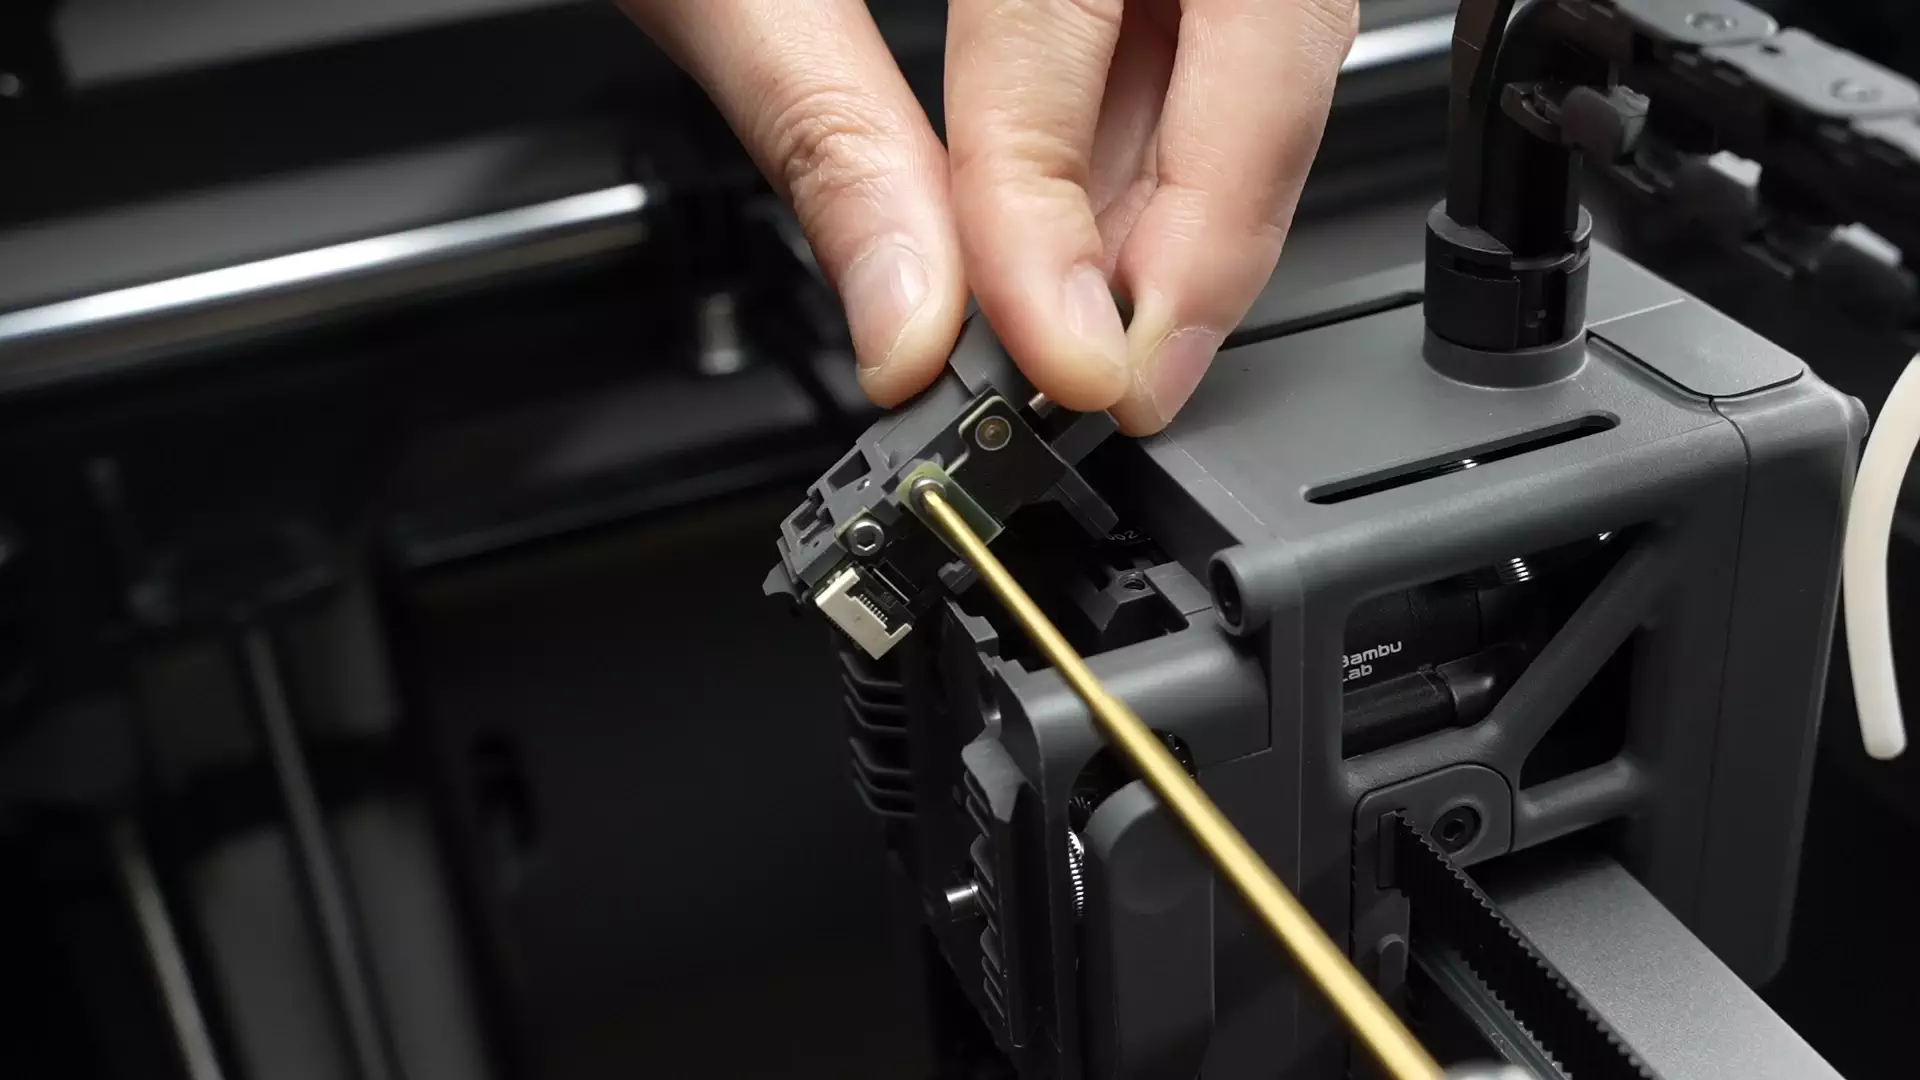
Use an H1.5 allen key to unscrew the fixing screw of the extruder filament sensor cable, open the clip, and disconnect the plug.
¶ Assembly Guide
¶ Step 1: Connect the extruder filament sensor plug
The extruder extruder filament sensor you receive has a connected cable, but usually the cable will not fail. Therefore, you need to repeat the previous step: unscrew the screw and disconnect the plug on the new spare part.

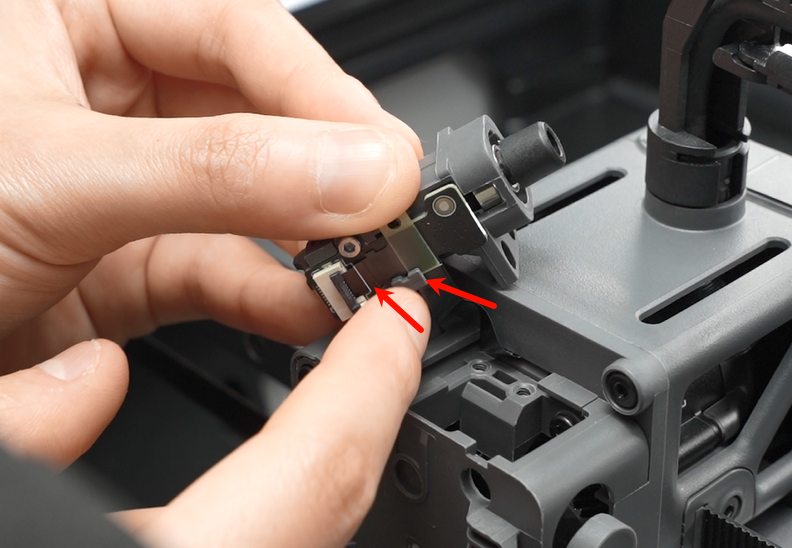
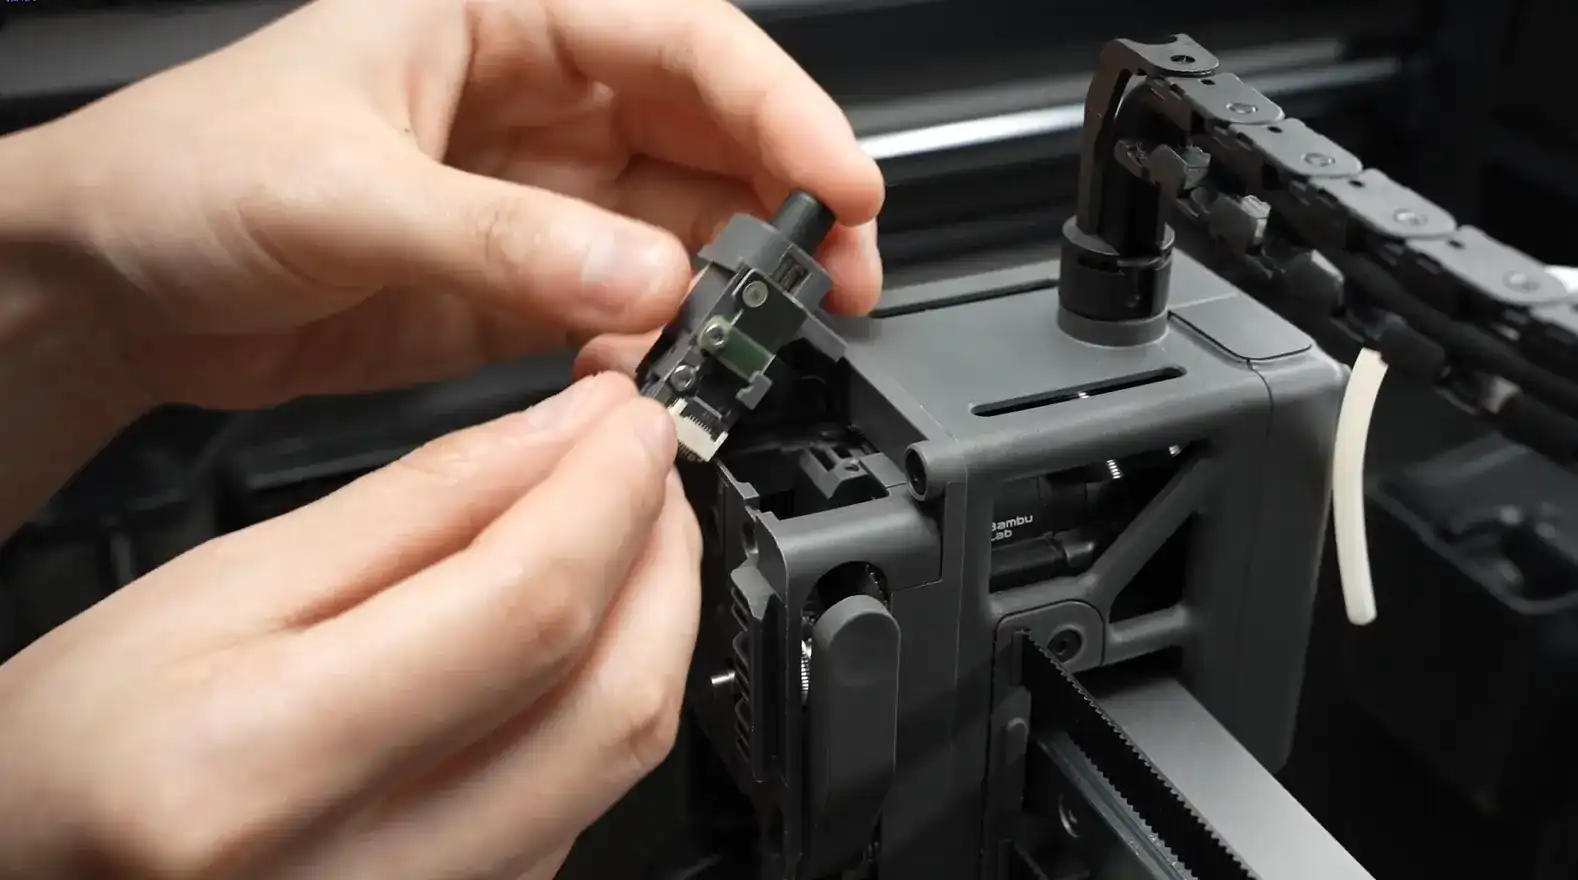
Insert the old extruder filament sensor FPC cable and secure it with a screw. Please note that the FPC connector board needs to be inserted into the clip, and the white wire of the FPC connector should be aligned with the white wire on the PCB. This step requires patience, as it is usually not easy to insert it correctly on the first try.
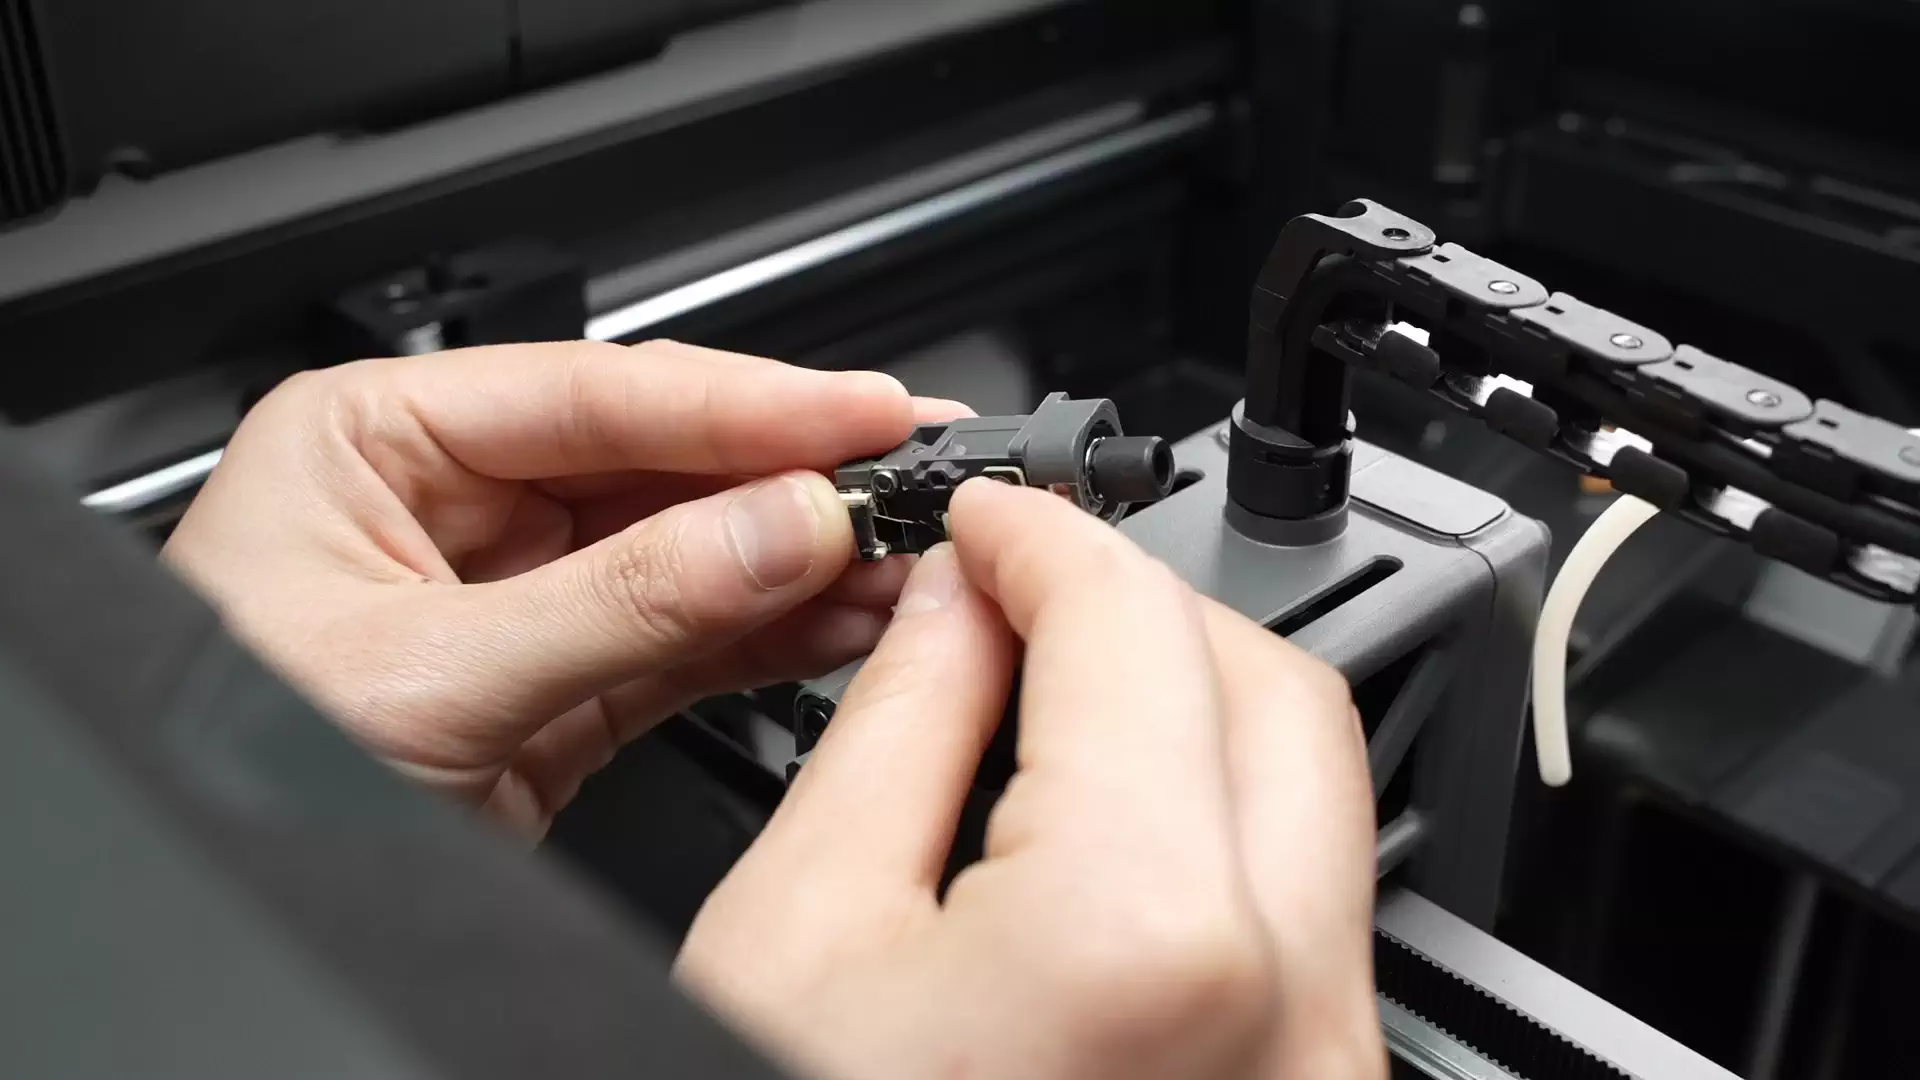
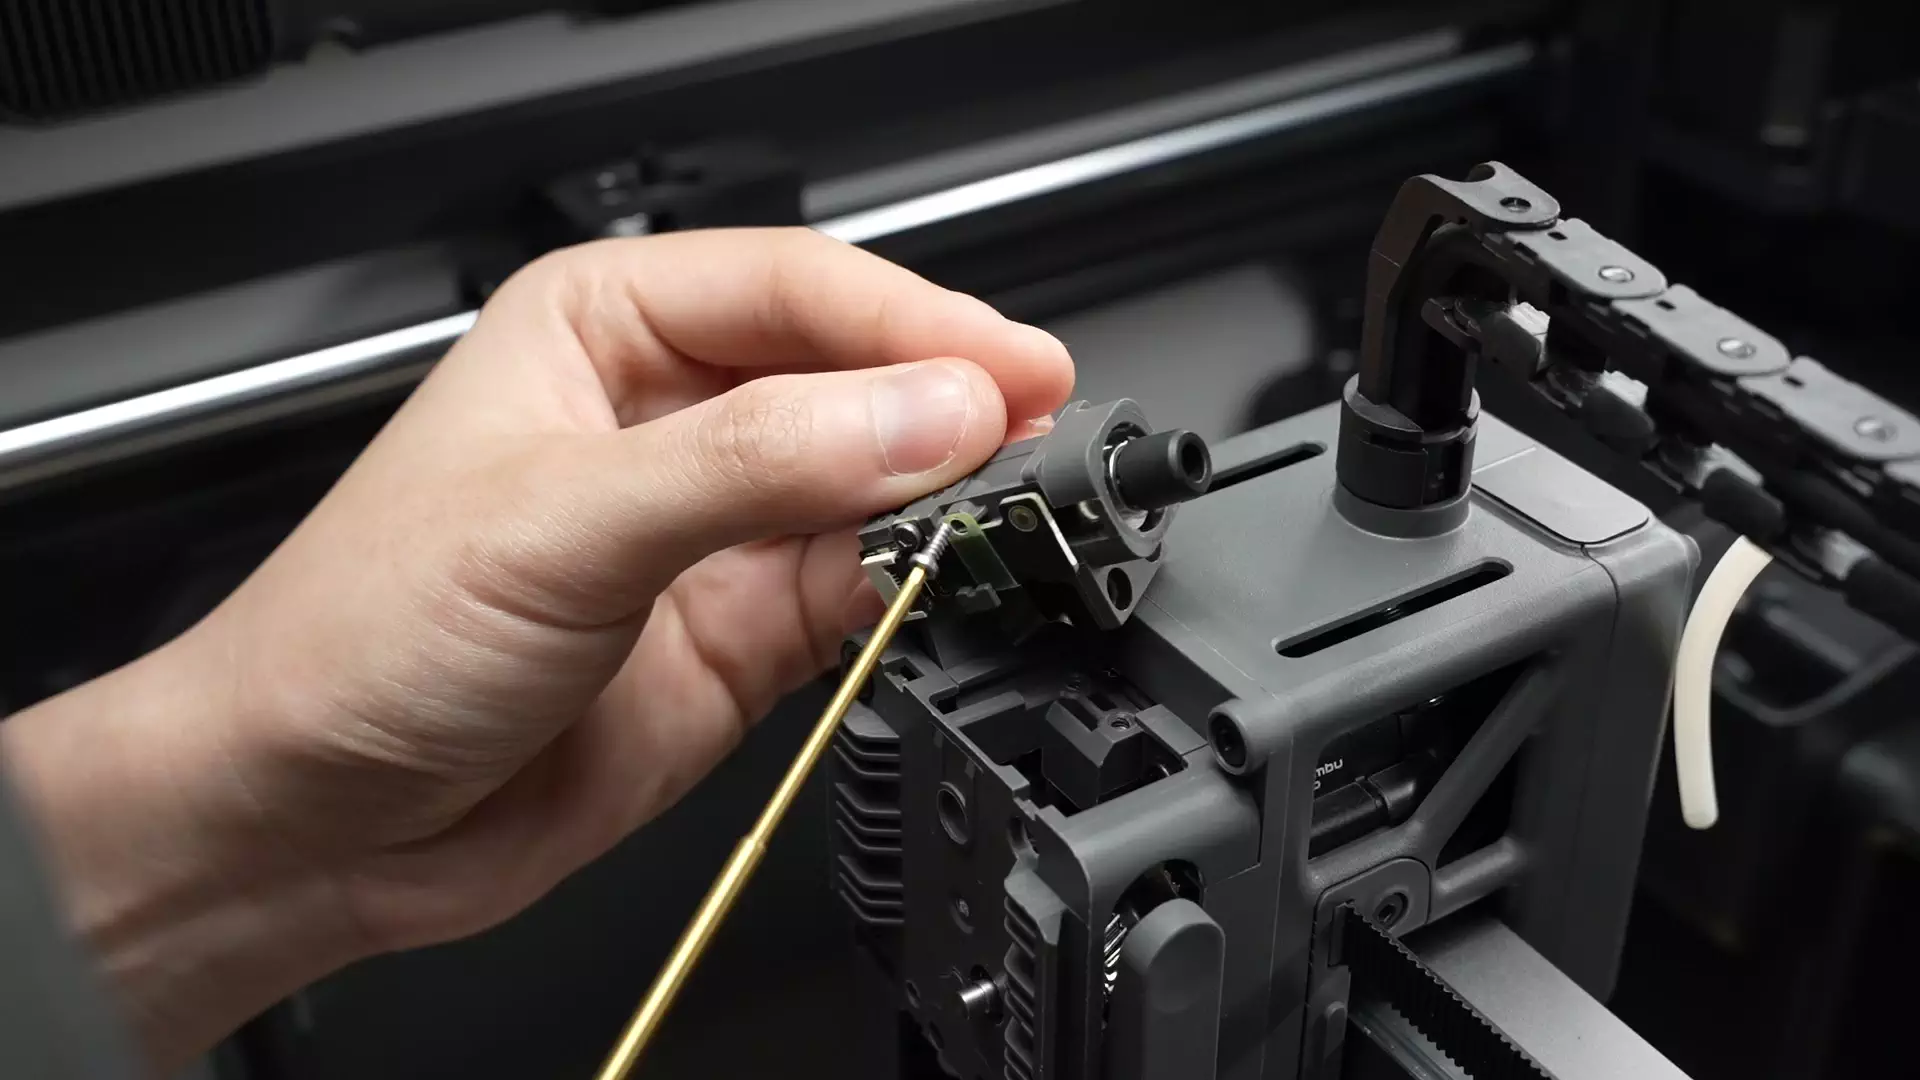
Note: If you do need to replace the cable, you need to refer to the disassembly and assembly of the extruder assembly. First remove the entire extruder assembly, then replace the filament sensor cable.
¶ Step 2: Install the extruder filament sensor
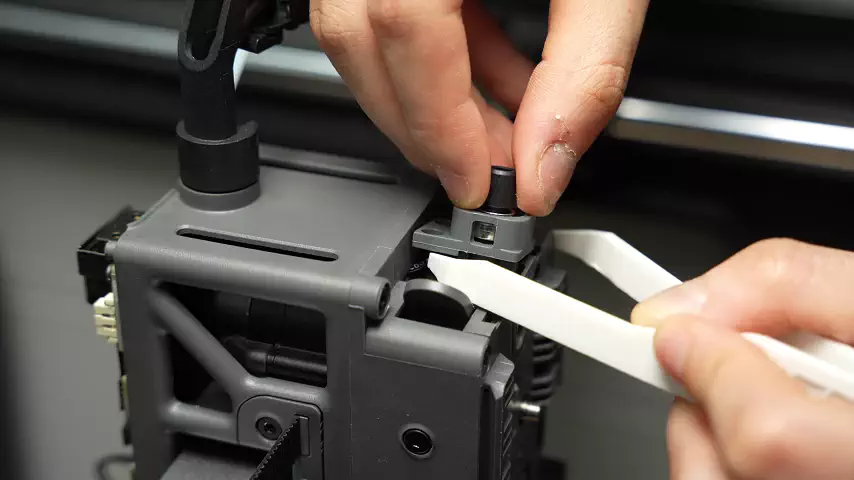
Install the filament hub. Ensure that the black FPC cable is not folded and is smoothly placed in the vacant position. Then screw in 2 screws to fix the extruder extruder filament sensor.
When assembling, be careful not to pinch the hall cable. Use your fingers or a plastic tool to move the hall cable away from the screw hole. Before securing the screw, check from the top to ensure the cable is not blocking the screw hole.


¶ Step 3: Connect the PTFE tube
Insert the PTFE tube.

¶ How to Verify Completion/Success
Turn the printer back on and control loading and unloading on the screen to verify that everything is working properly.
¶ End Notes
We hope the detailed guide provided has been helpful and informative.
If this guide does not solve your problem, please submit a technical ticket, we will answer your questions and provide assistance.
If you have any suggestions or filamentback on this Wiki, please leave a message in the comment area. Thank you for your support and attention!