¶ H2S Part Cooling Fan
¶ When to ues?
Common issues that may require replacement of the H2S part cooling fan include:
-
The hotend clogging caused by the printing failure caused the part cooling fan to be damaged
-
The part cooling fan makes noise during operation
-
Bambu Lab technical support recommends replacement
¶ Tools and materials needed
-
New Part Cooling Fan
-
H1.5 Allen key
-
20 min
¶ Screws List
-
Screw A: The back of the cooling fan (locked with the rear housing) and the toolhead rear housing screws, a total of 3 pieces: BT2x8
-
Screw B: The left and right sides of the part cooling fan screws, a total of 2 pieces: BT2x5

¶ Safety Warning
IMPORTANT!
It's crucial to power off the printer before conducting any maintenance work, including work on the printer's electronics and tool head wires. Performing tasks with the printer on can result in a short circuit, leading to electronic damage and safety hazards.
During maintenance or troubleshooting, you may need to disassemble parts, including the hotend. This exposes wires and electrical components that could short circuit if they contact each other, other metal, or electronic components while the printer is still on. This can result in damage to the printer's electronics and additional issues.
Therefore, it's crucial to turn off the printer and disconnect it from the power source before conducting any maintenance. This prevents short circuits or damage to the printer's electronics, ensuring safe and effective maintenance. For any concerns or questions about following this guide, open a new ticket in our Support Page and we will do our best to respond promptly and provide the assistance you need.
¶ Remove Part Cooling Fan
¶ Step 1: Loosen the part cooling fan
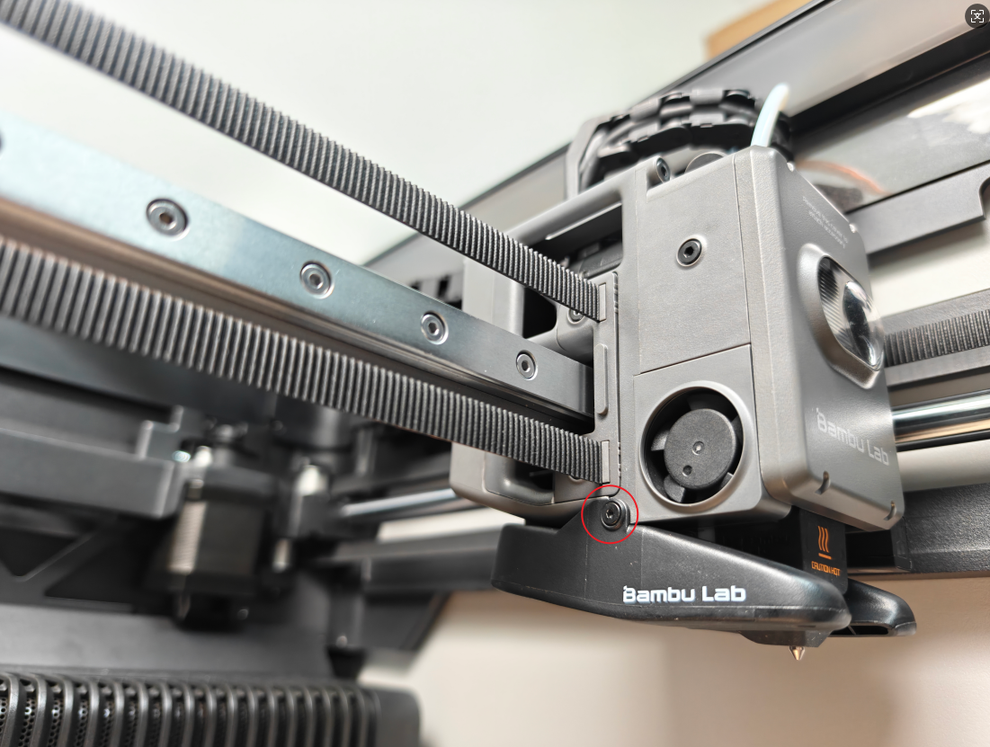
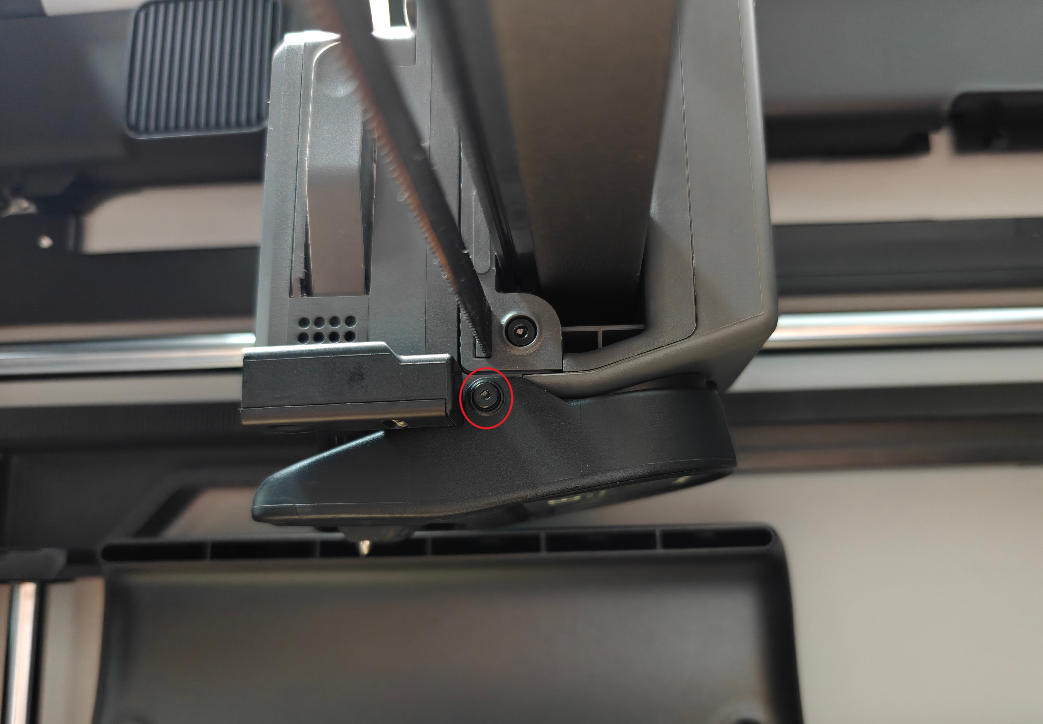
Remove the 3 screws of the part cooling fan, of which the 1 screw on the back is locked with the toolhead rear housing.


After loosening the screws, do not pull the fan, just let the fan droop naturally to avoid damaging the connector.

¶ Step 2: Loosen the toolhead rear housing
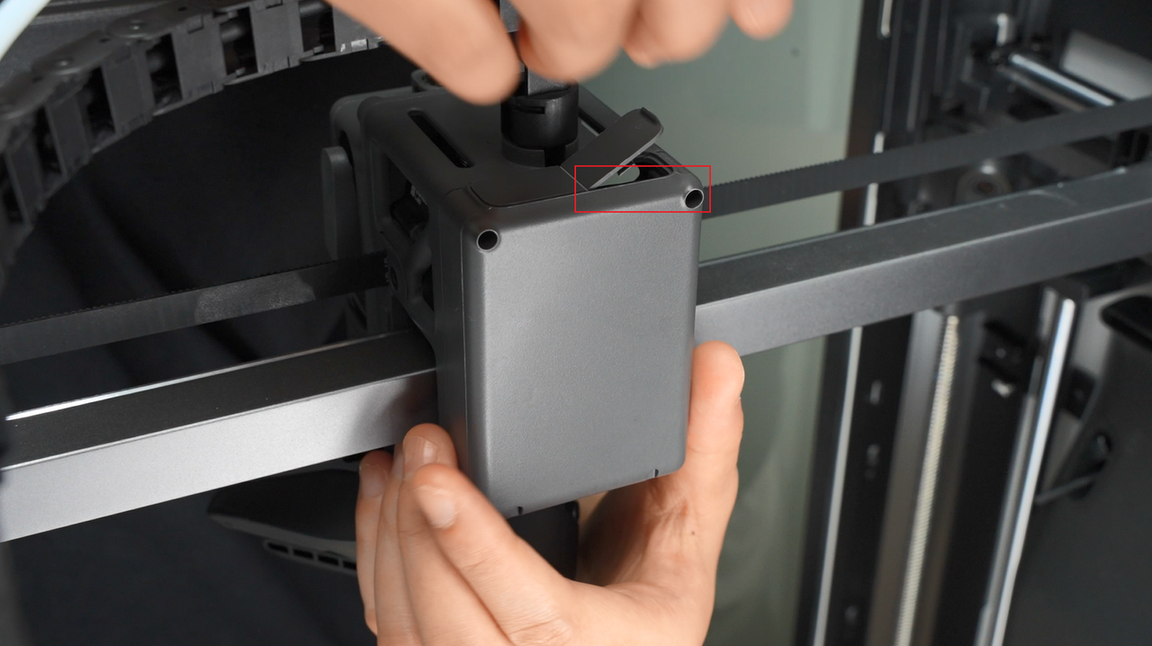
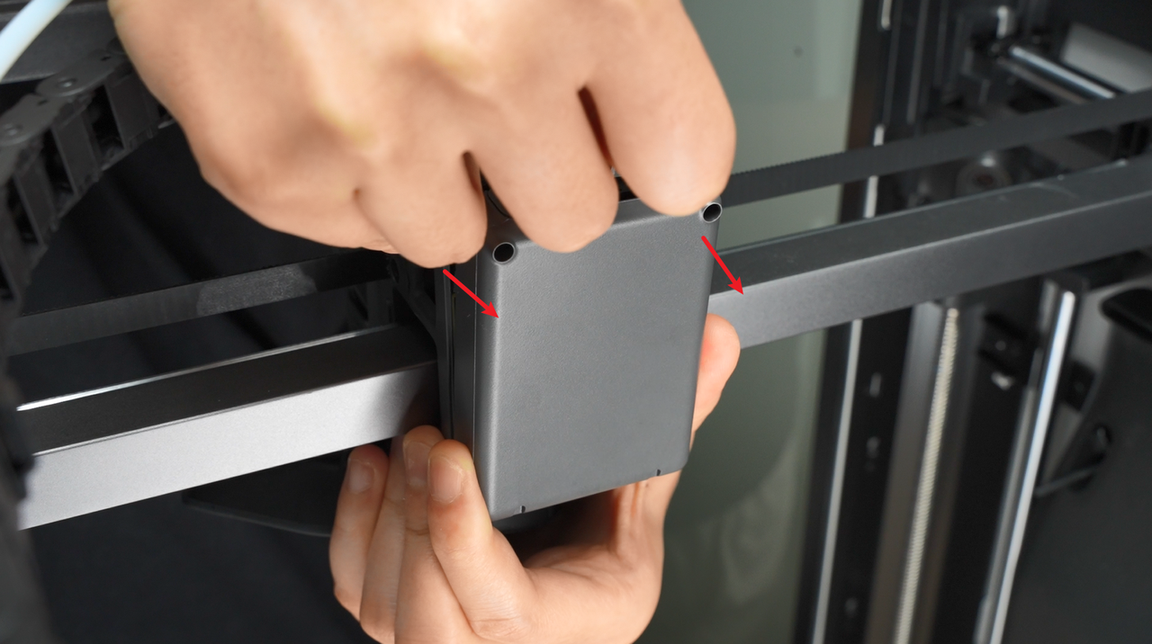
Remove the 2 screws on the toolhead rear housing and open the interface cover;


After opening the interface cover, use your fingers to gently push the toolhead back from the inner wall.
¶ Step 3: Remove the part cooling fan
Disconnect the hotend heating assembly plug;
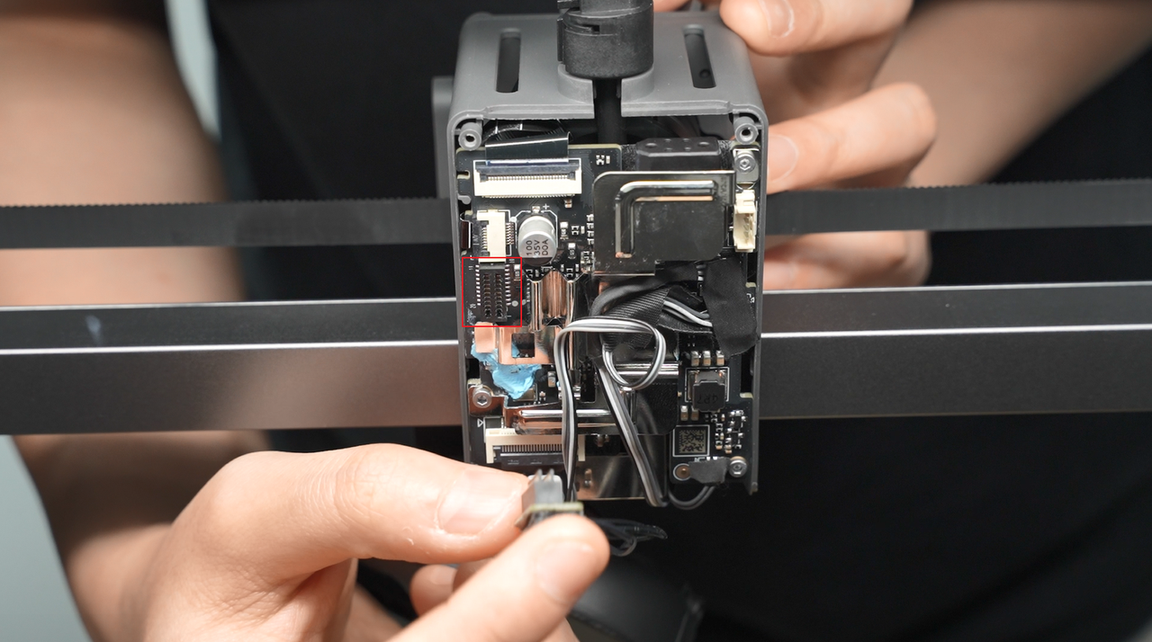
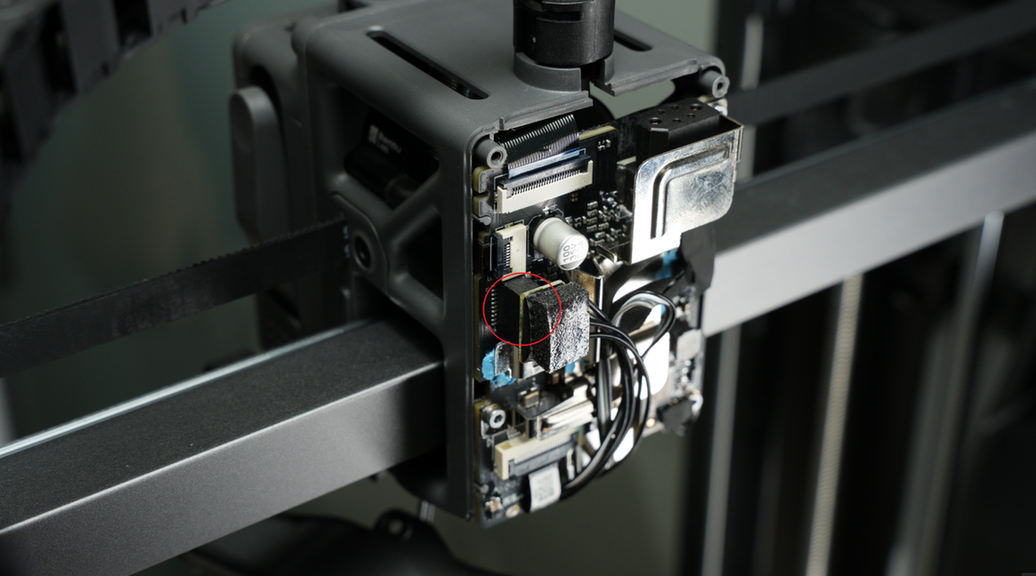
Tear off the acetate tape on the part cooling fan plug;
Please save the tape, you need to re-attach it during installation.
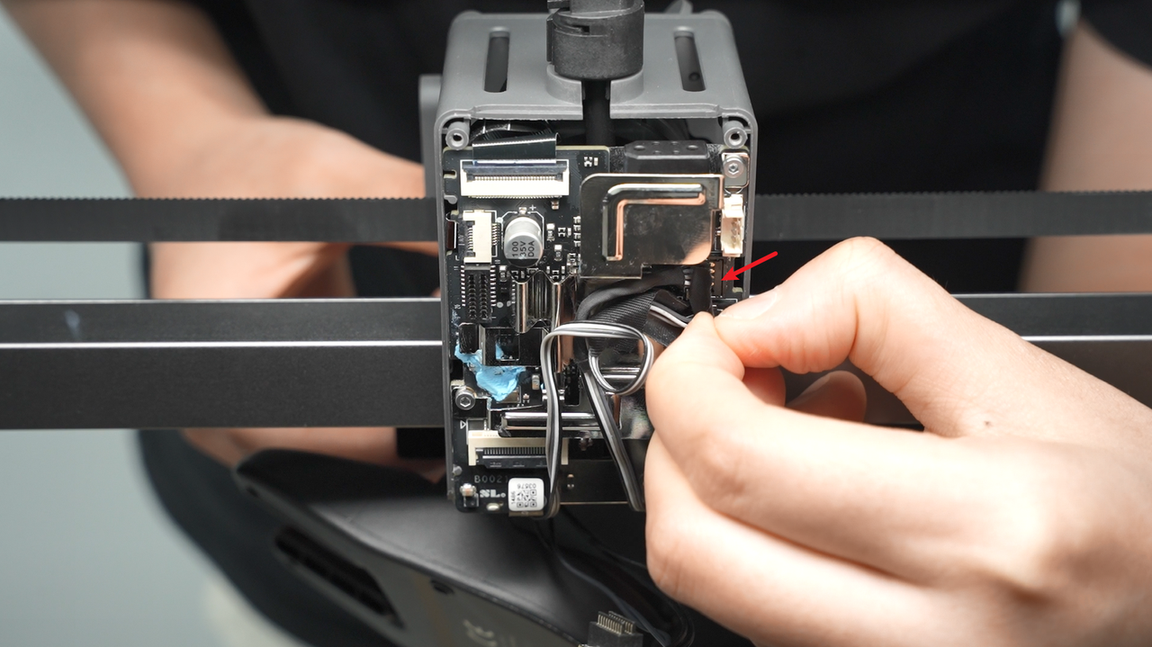
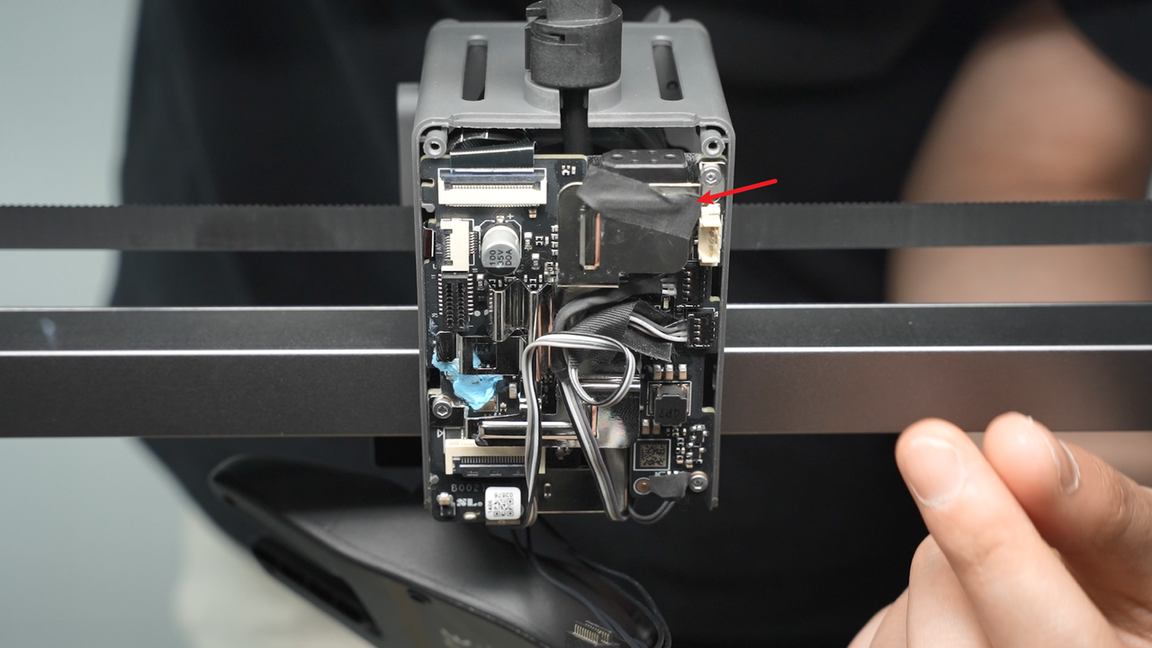
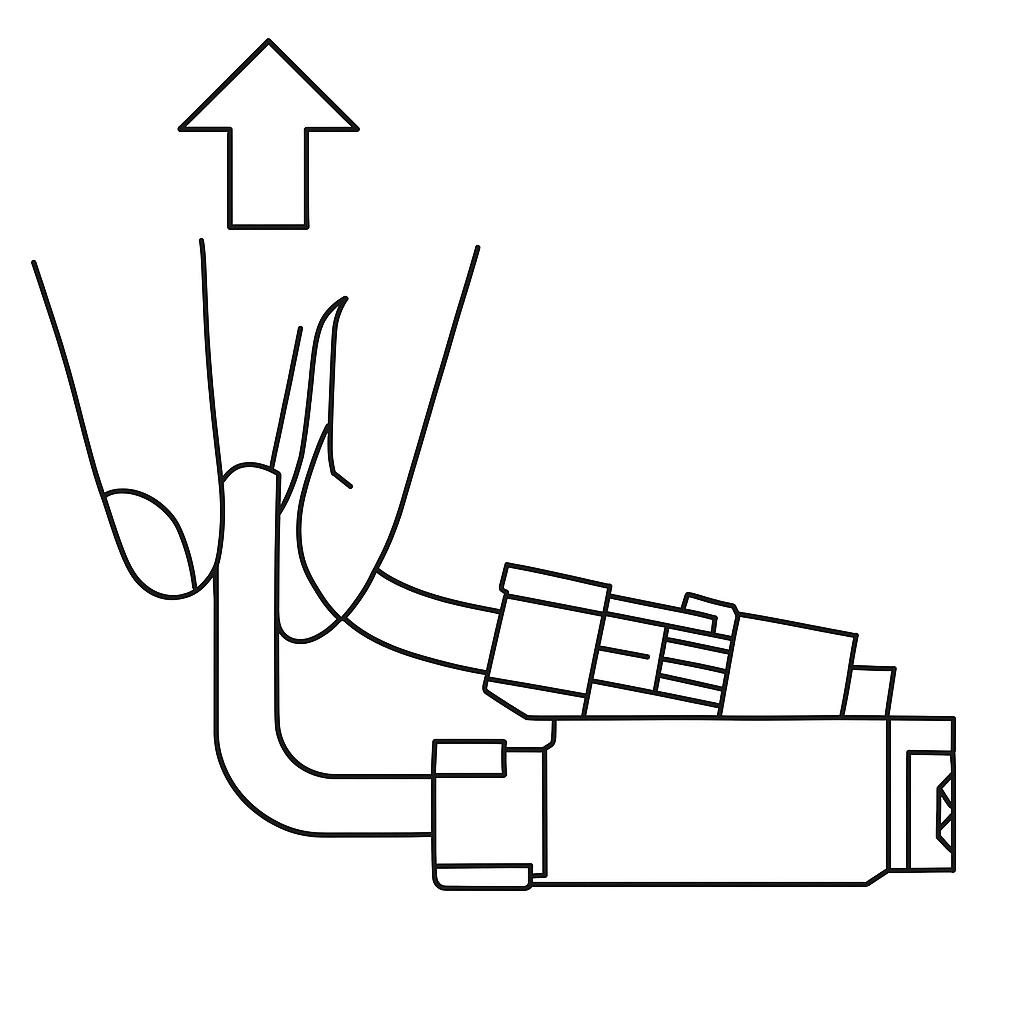
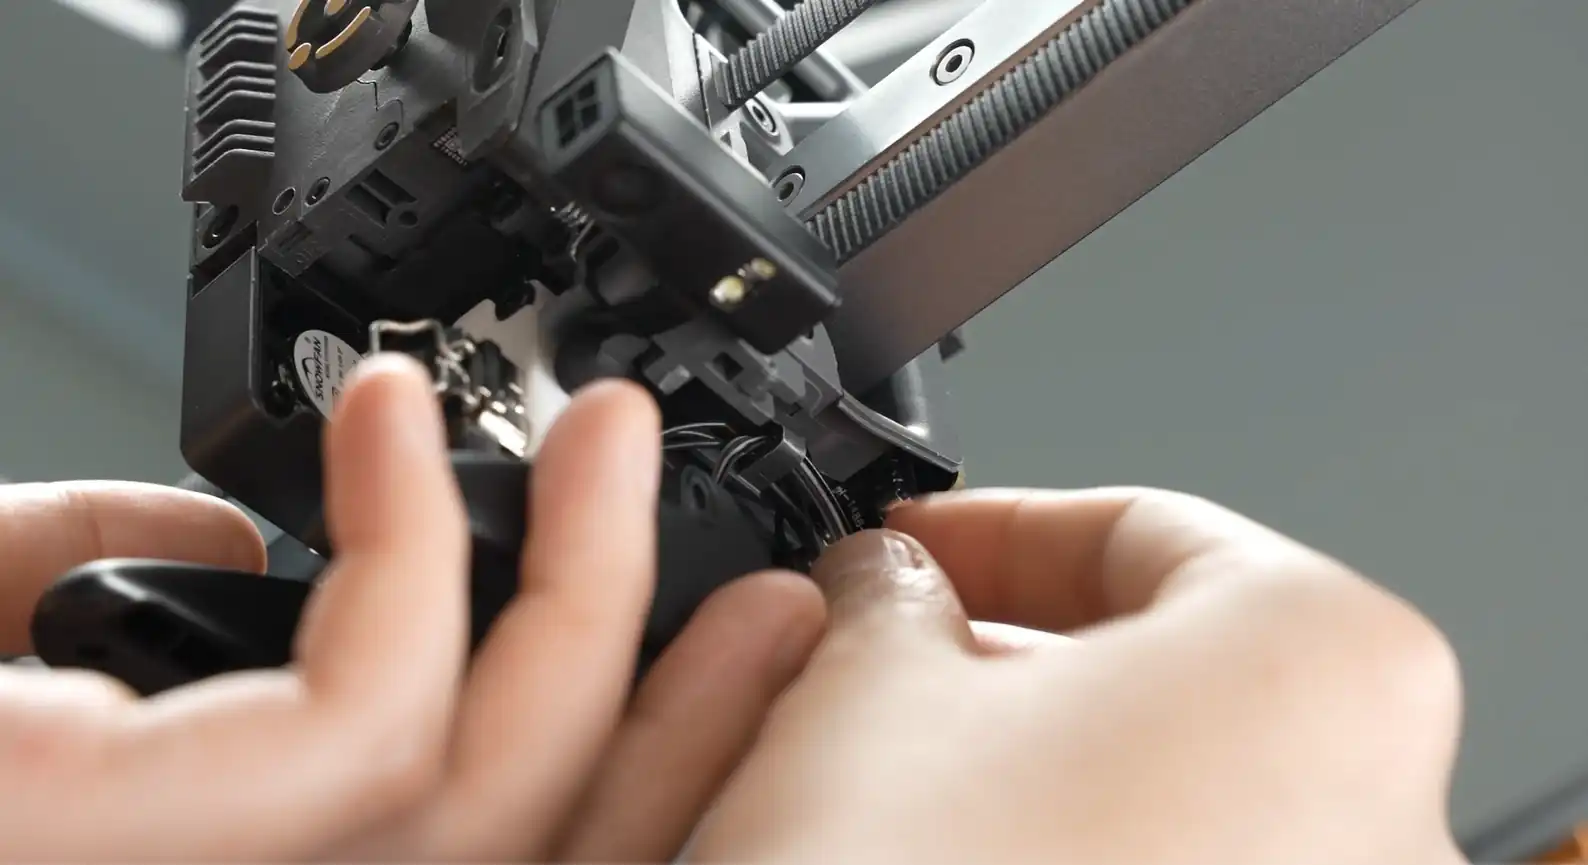
Pinch the base of the connector and apply force in the direction perpendicular to the PBC board to disconnect the part cooling fan plug.
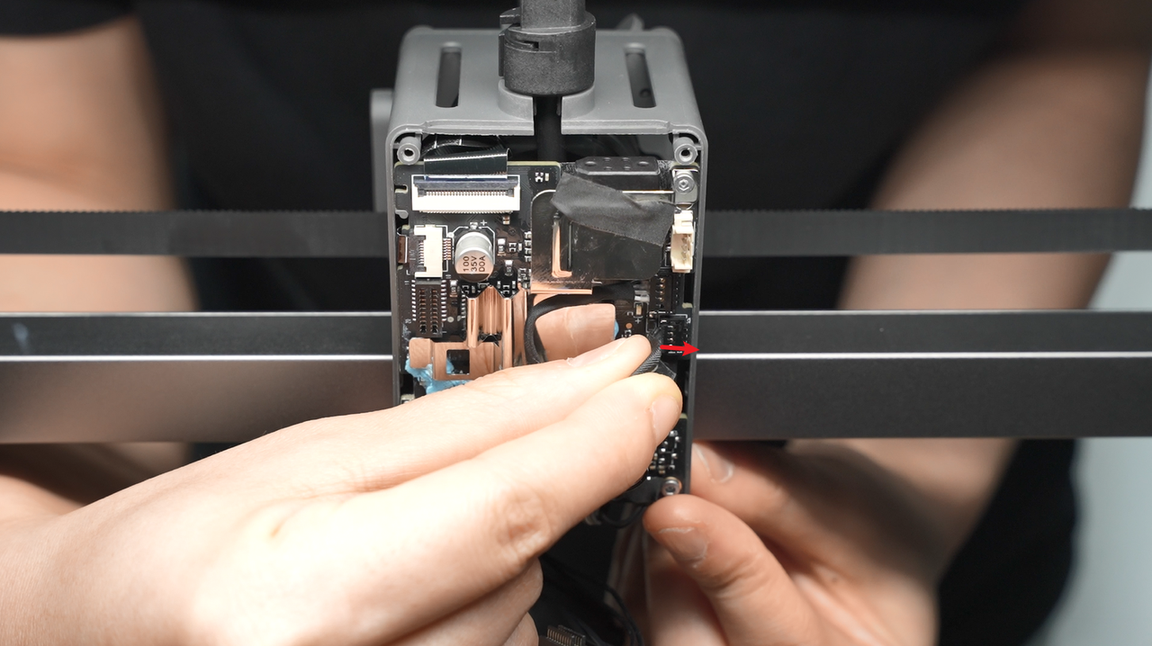
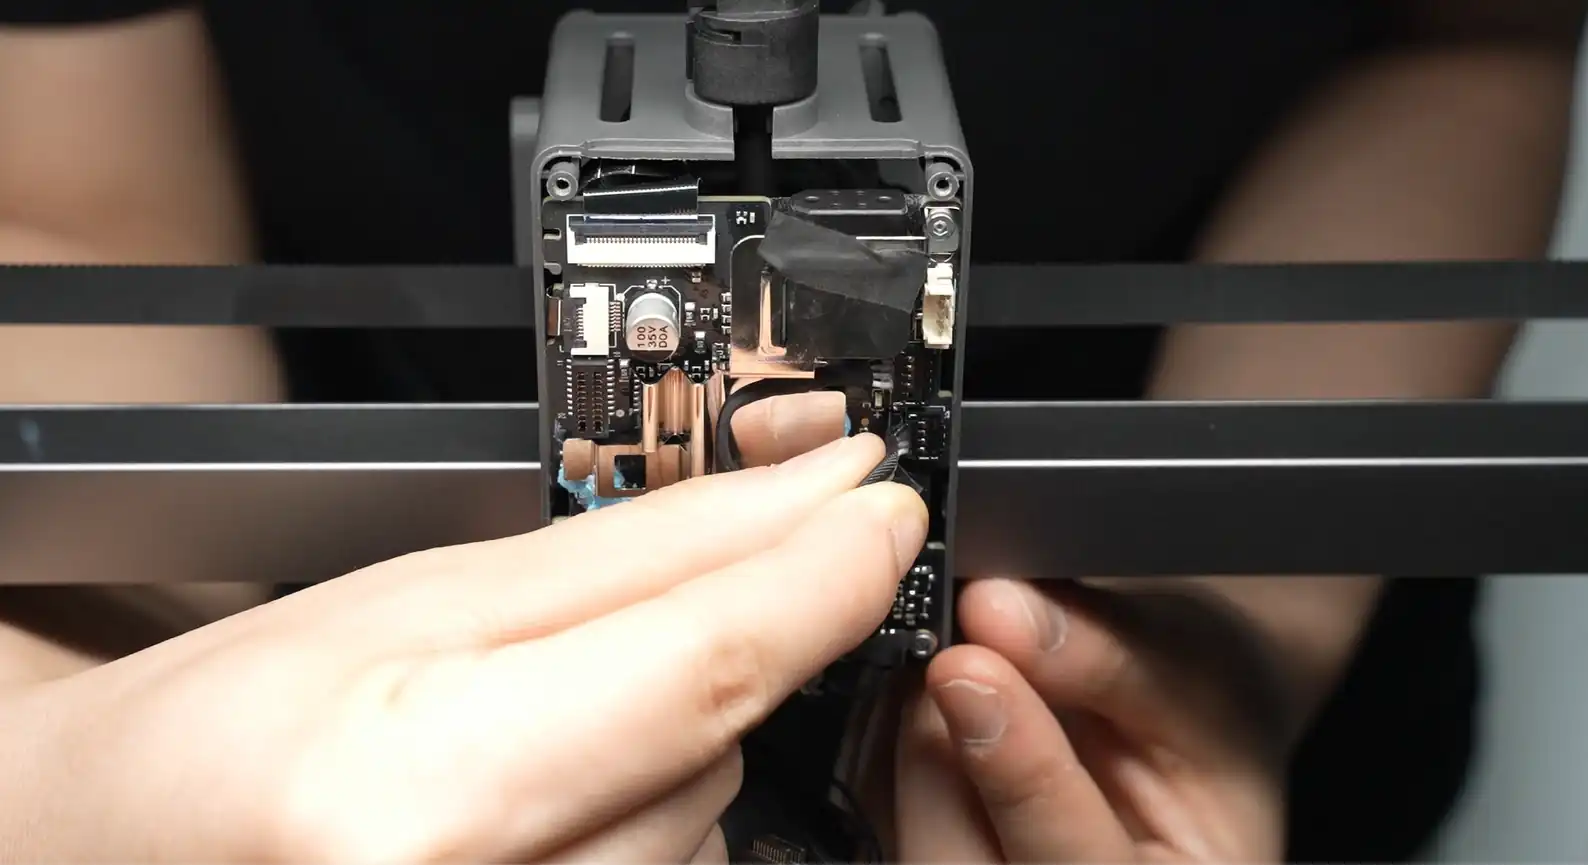
Unthread the cables from the cable clips and remove the part cooling fan.
¶ Install Part Cooling Fan
¶ Step 1: Connect the part cooling fan plug and the hotend heating assembly plug
Insert the part cooling fan cable into the cable clip;
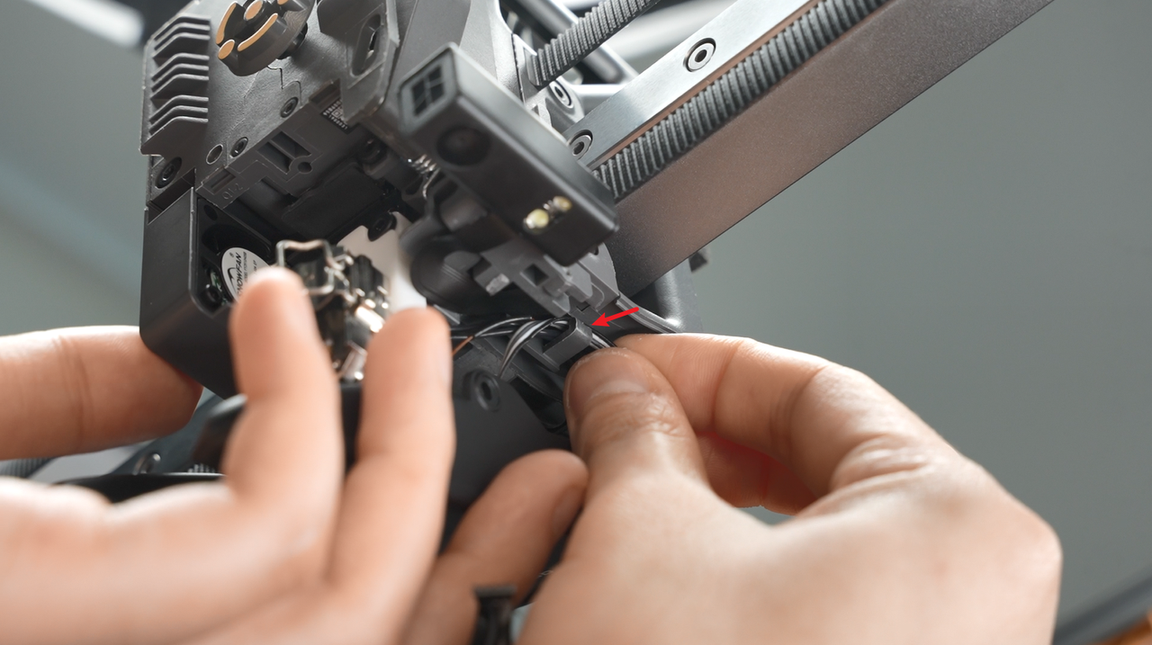
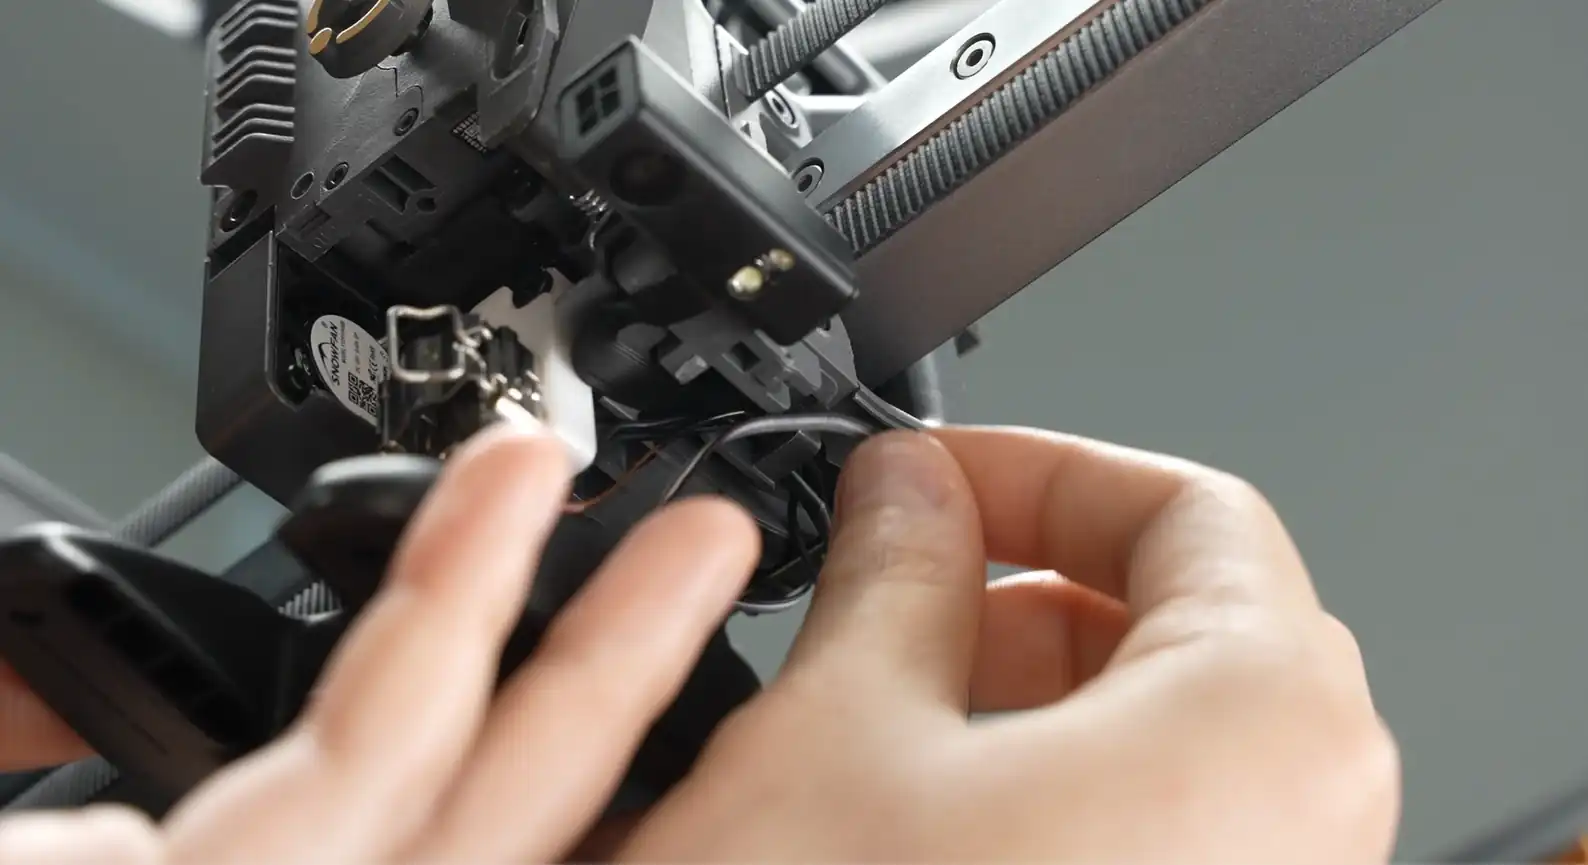
Place the plug's jack facing the socket on the TH board, align it, press down the plug, and connect the fan cable;
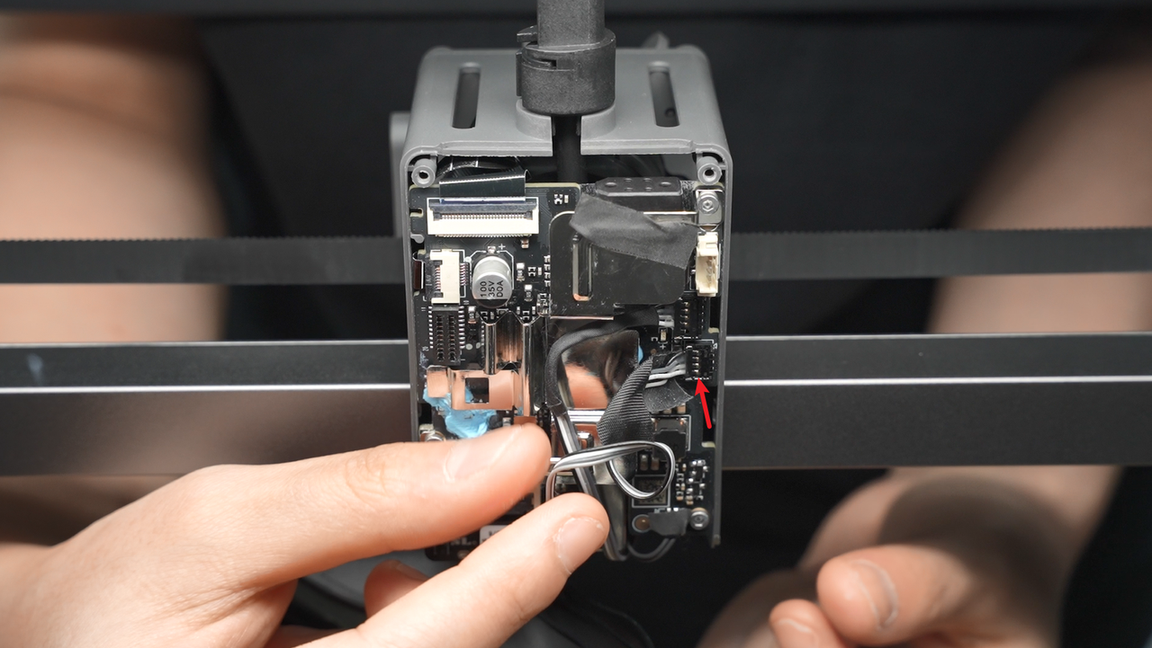
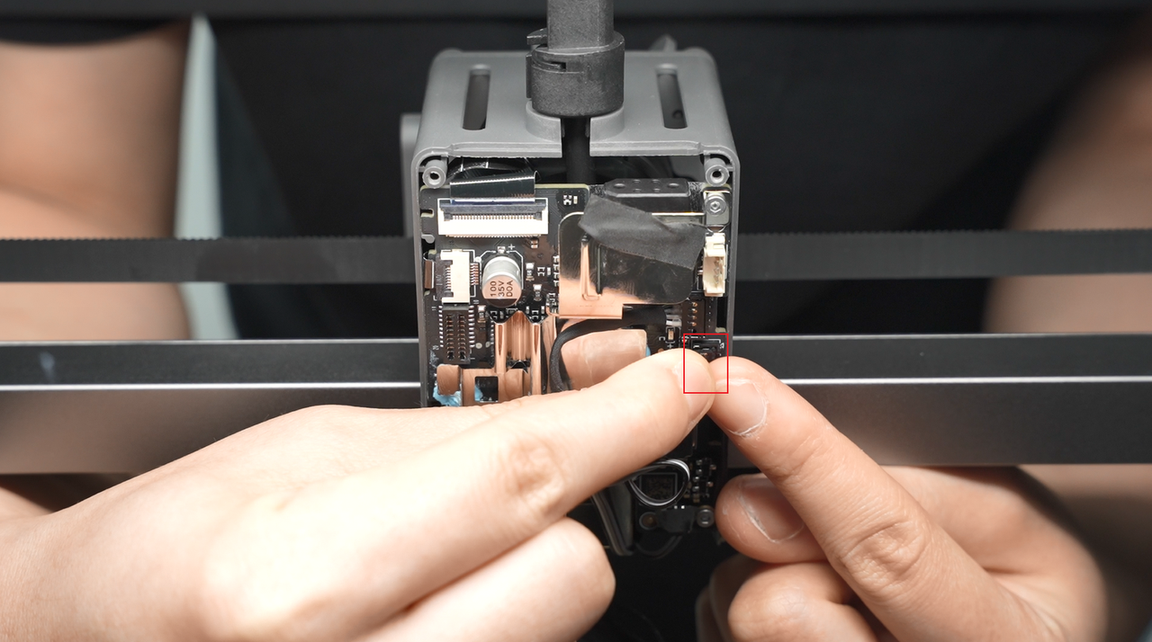
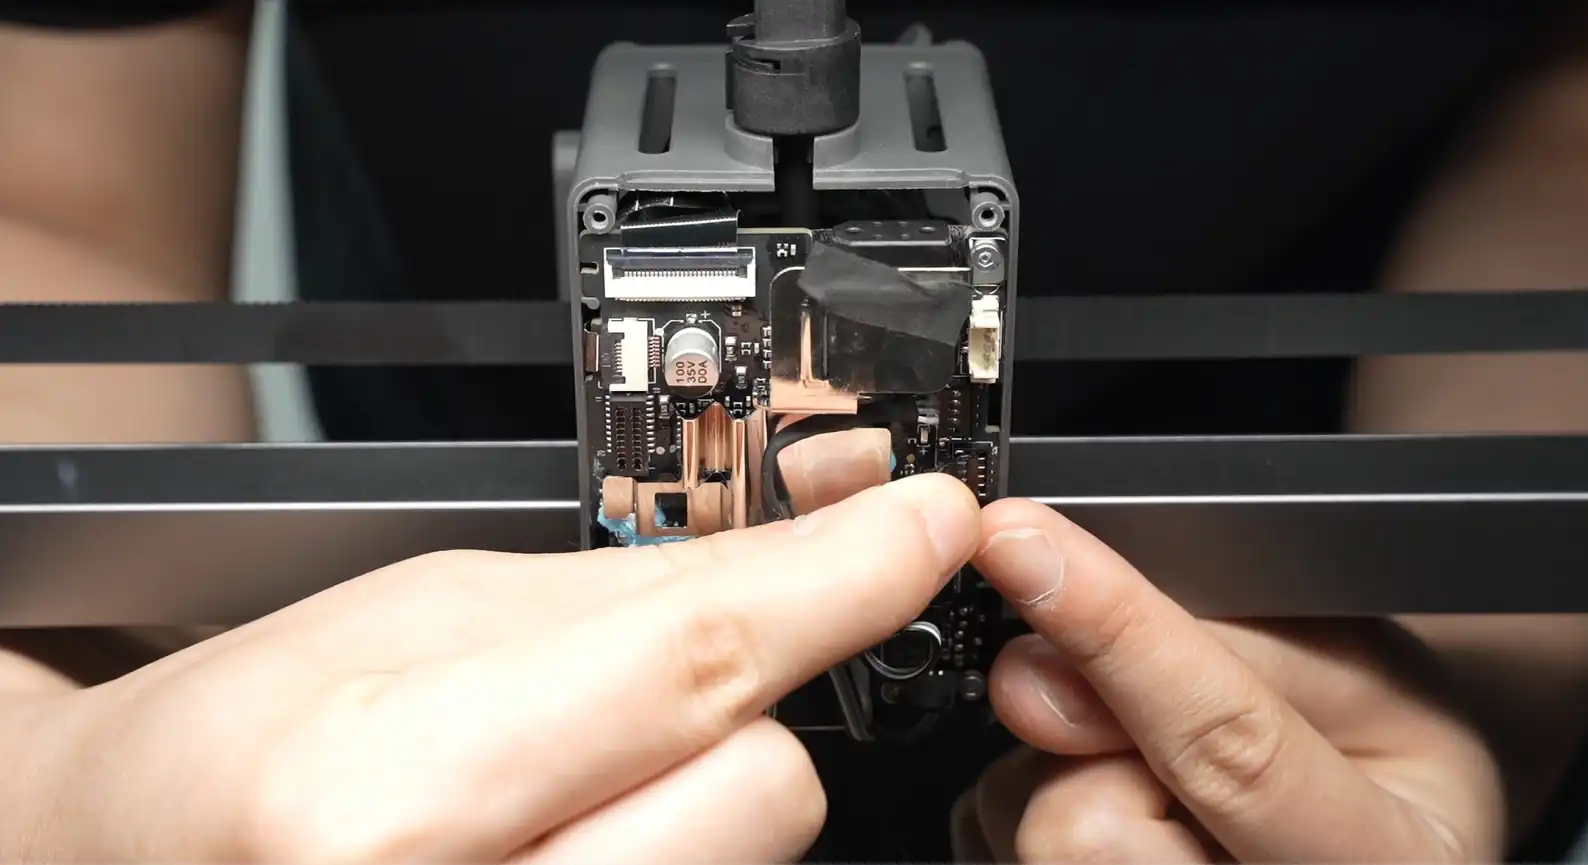
Re-attach the acetate tape;


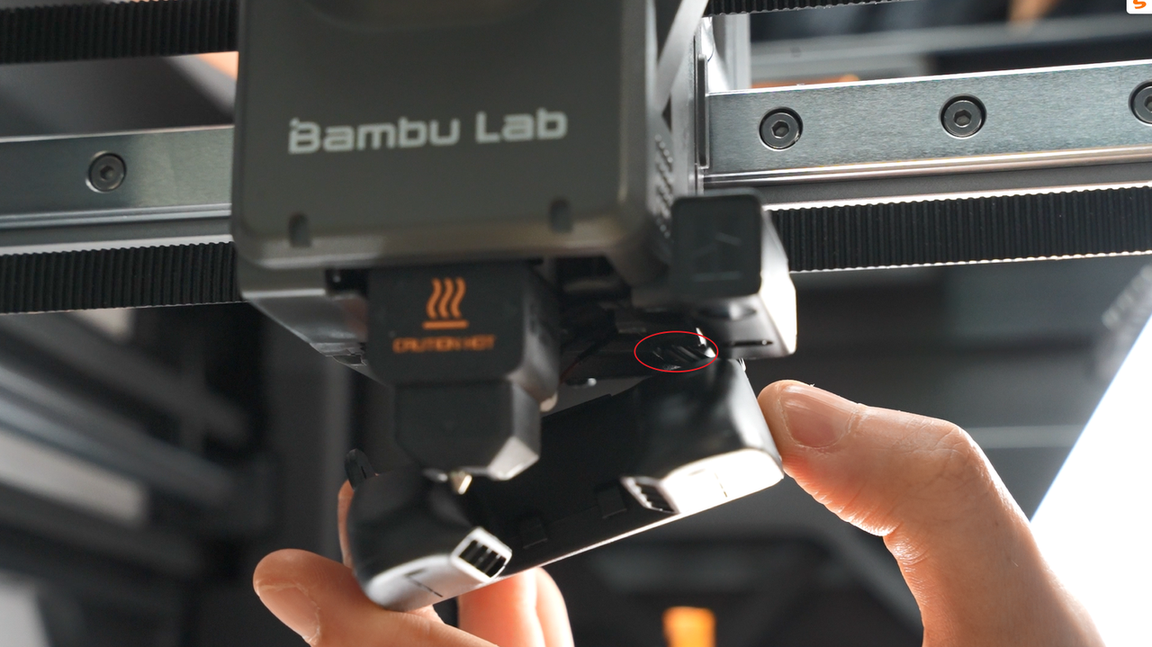
Pre-align the screw holes of the fan, arrange the fan cable on the TH board, and pull it upwards, fold the cable to prevent it from being crushed by the fan housing or the toolhead rear housing of the toolhead and causing fan abnormality.
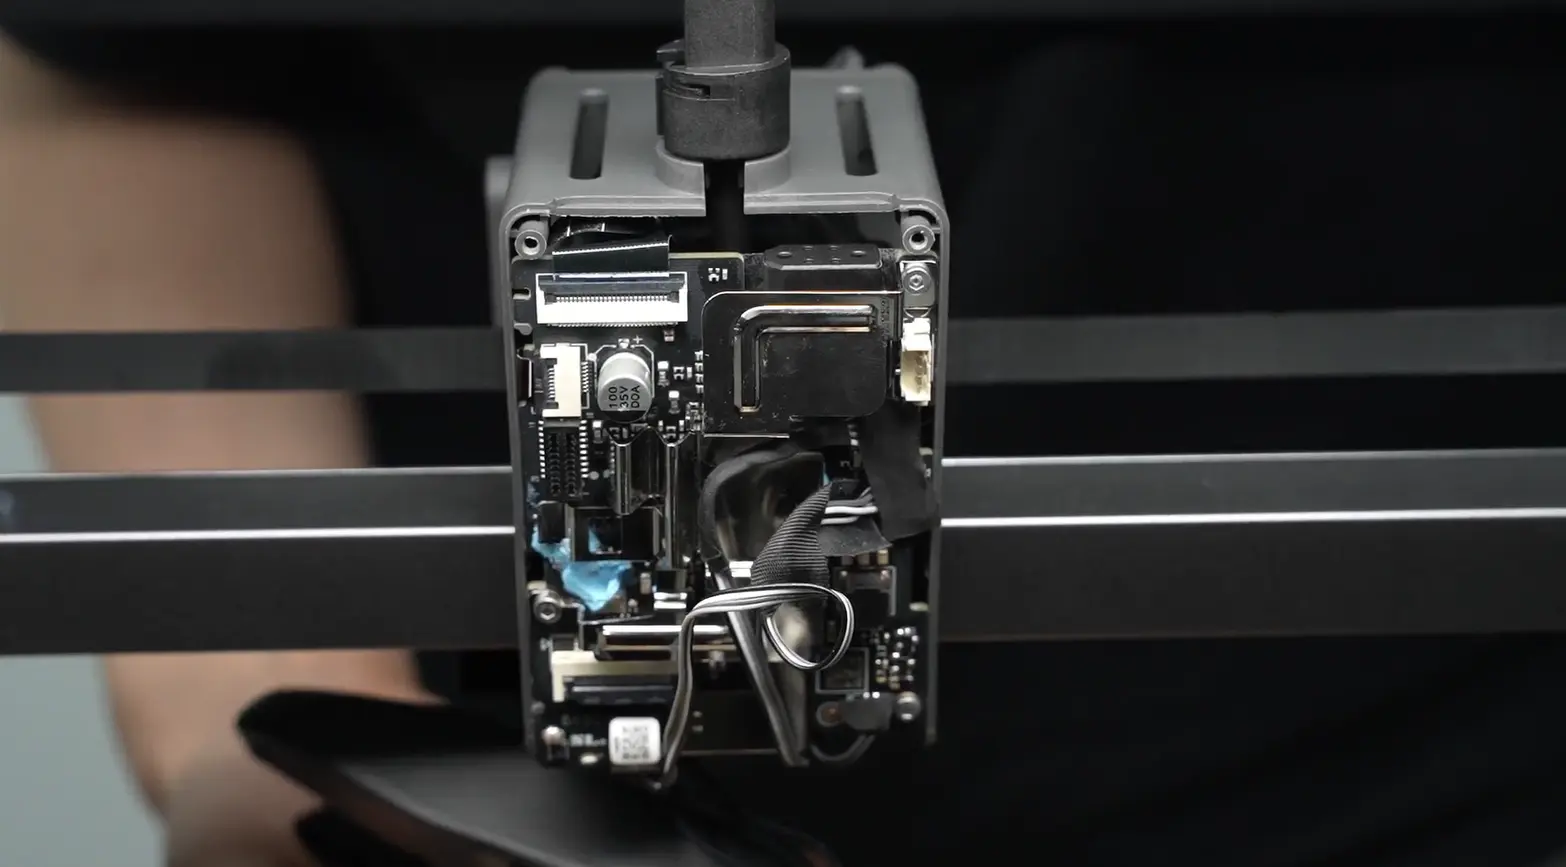
After arranging the cables, insert the hotend heating assembly plug, and use the hotend heating assembly plug and cable to press the part cooling fan cable.
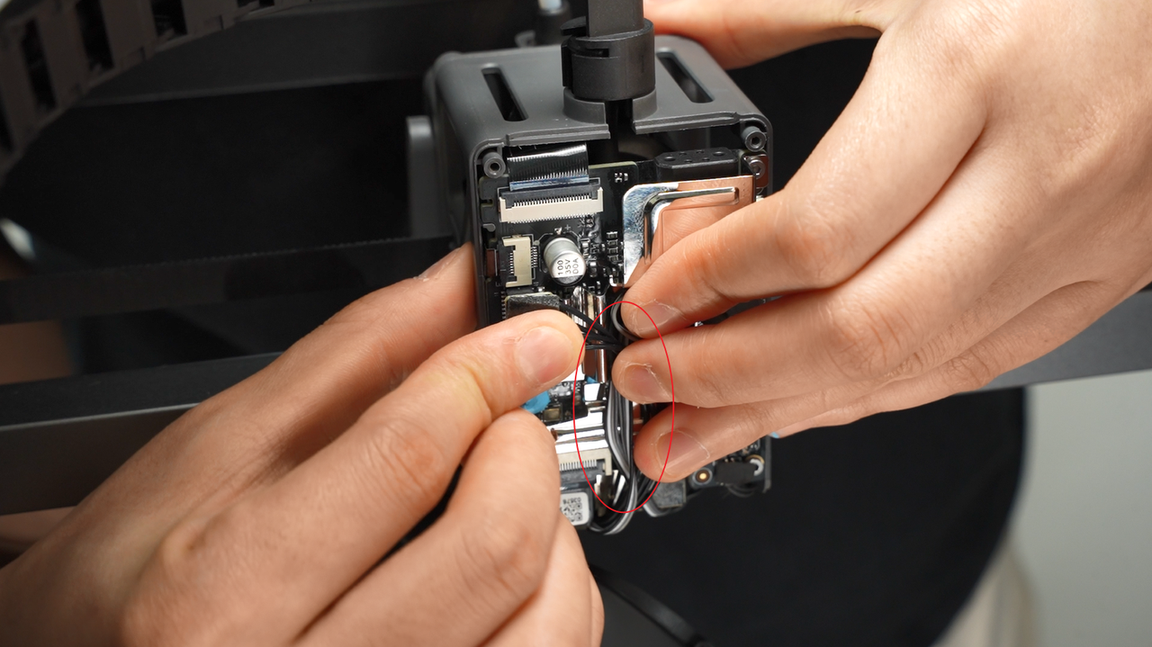
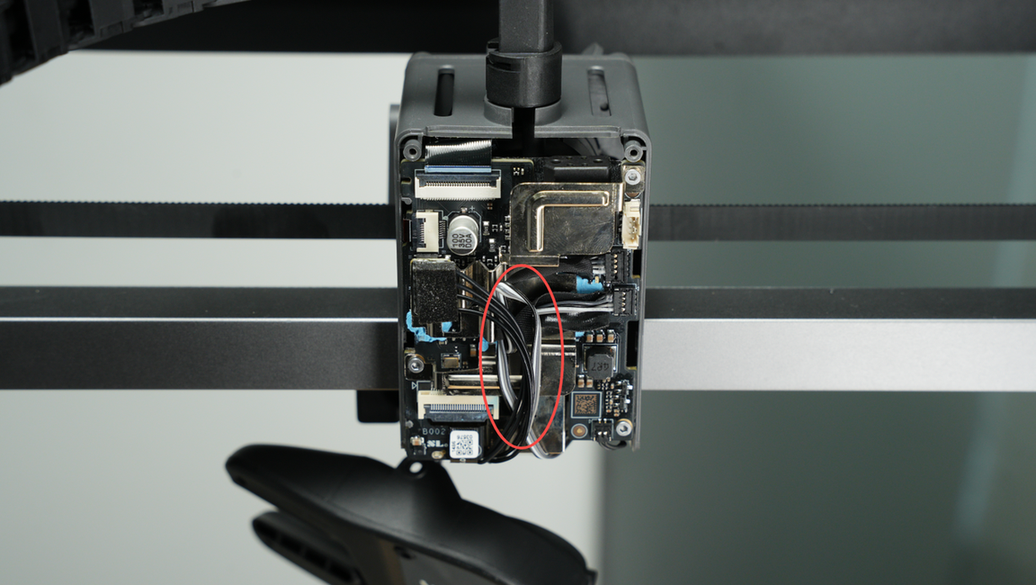
When inserting the hotend heating assembly, make sure to align the holes and do not arrange them wrongly.
¶ Step 2: Install the toolhead rear housing
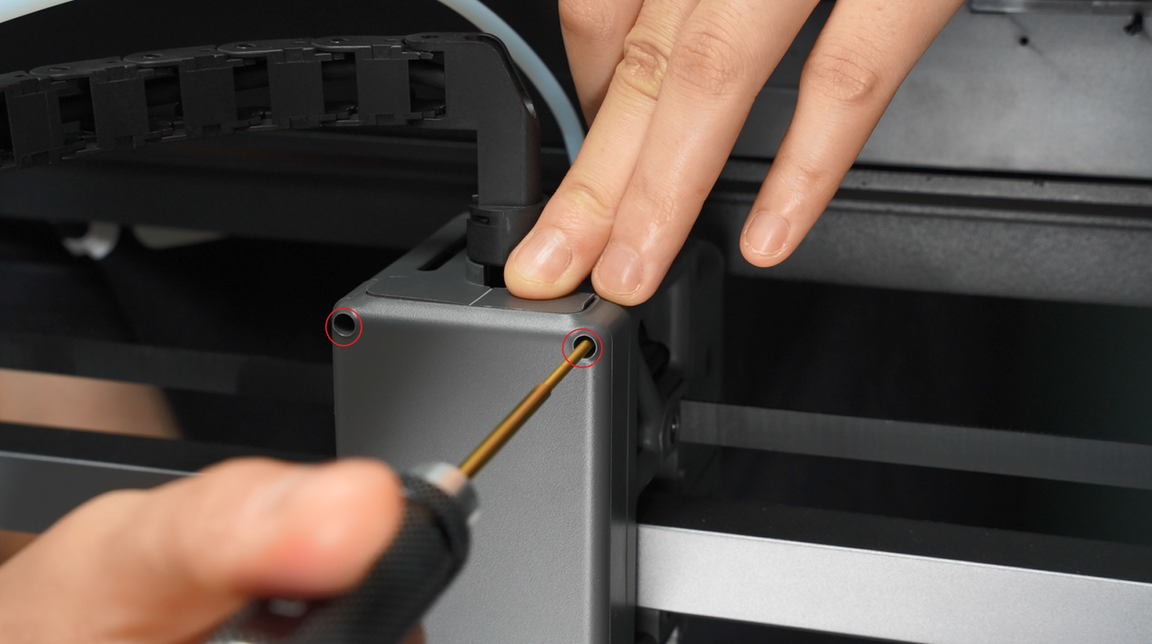
Install the toolhead rear housing;
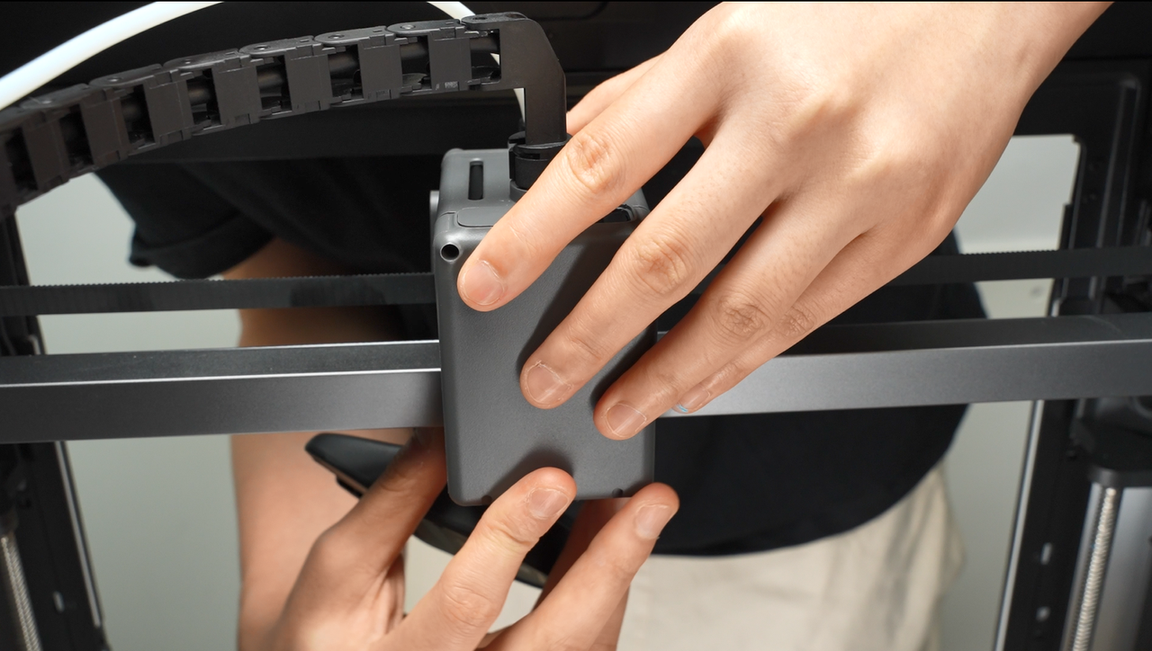
After installation, make sure the part cooling fan cable is in the dedicated notch to avoid being squeezed by the rear housing frame.
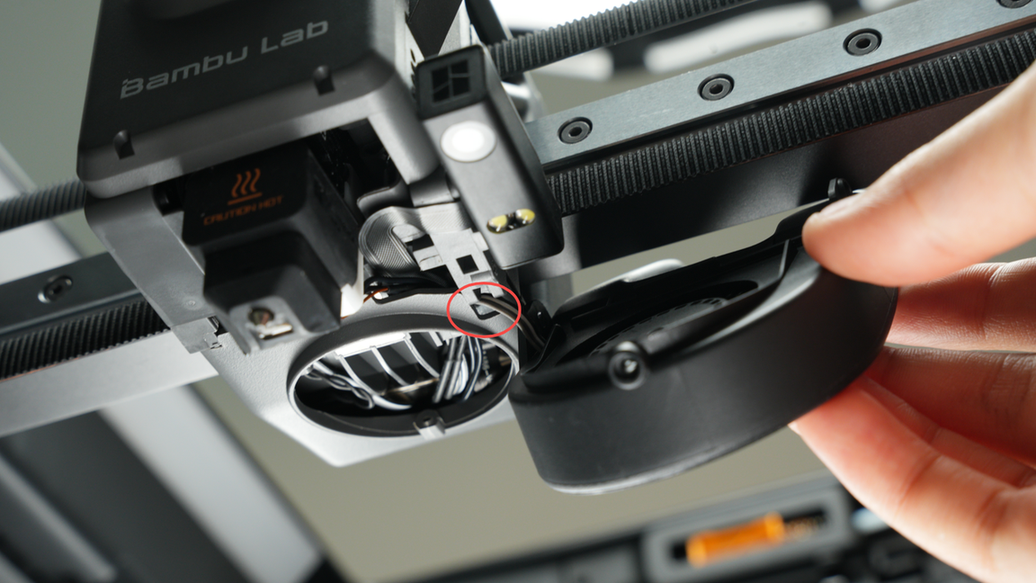
Tighten the 2 rear cover fixing screws.
¶ Step 3: Install the part cooling fan
Align the screw holes and install the part cooling fan; when inserting the fan, be careful not to press the fan cable.
If the cable is too long, return to step 1 of the installation guide and fold the excess cable first.
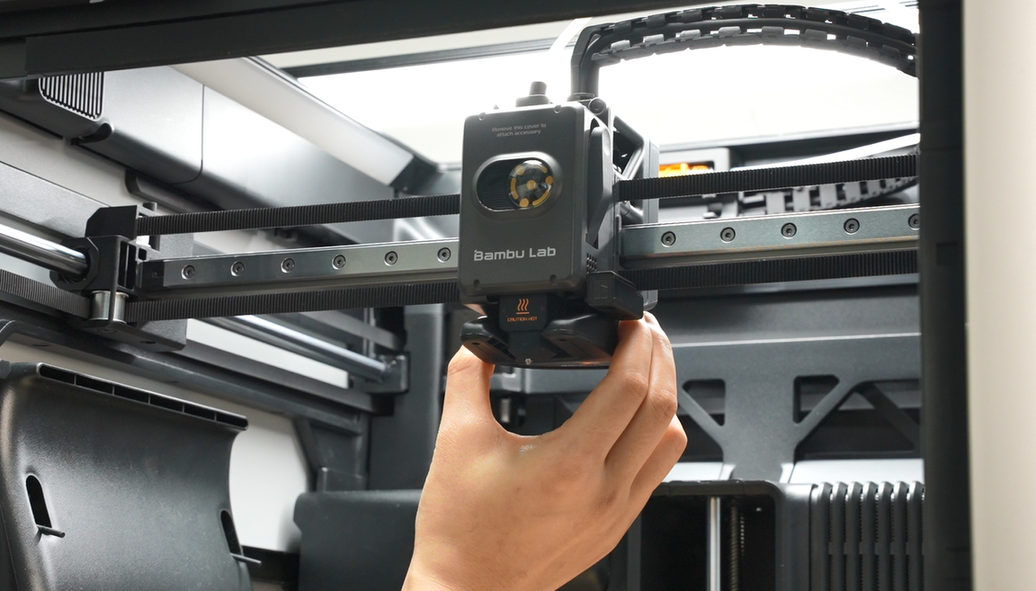
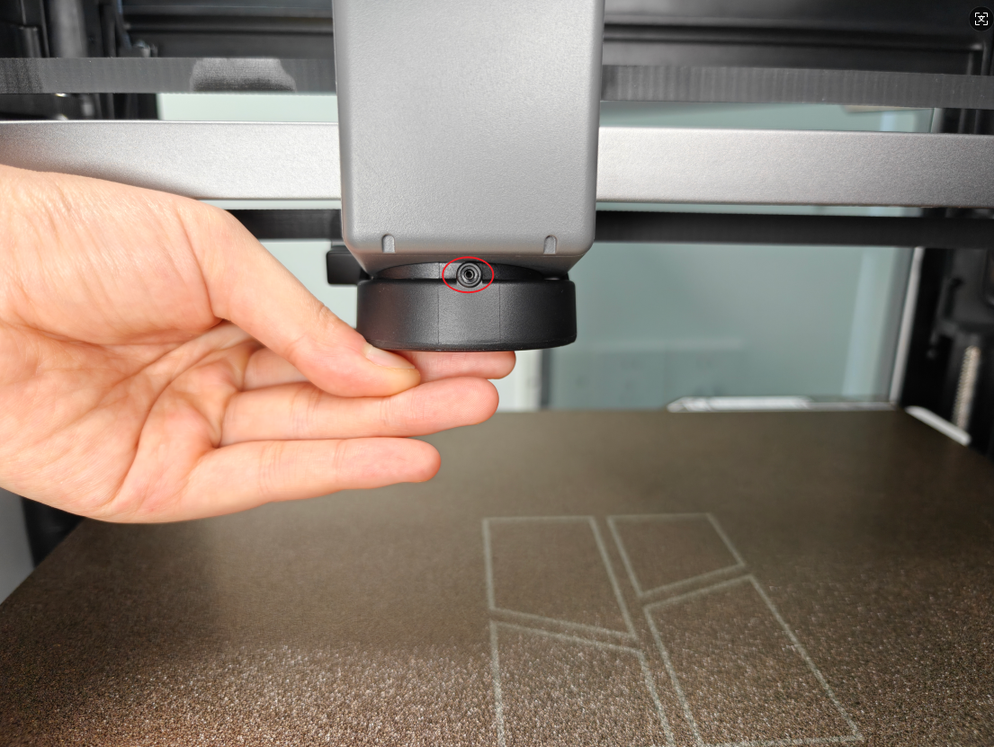
Tighten the three screws to secure the cooling fan.
¶ Verify the Functionality
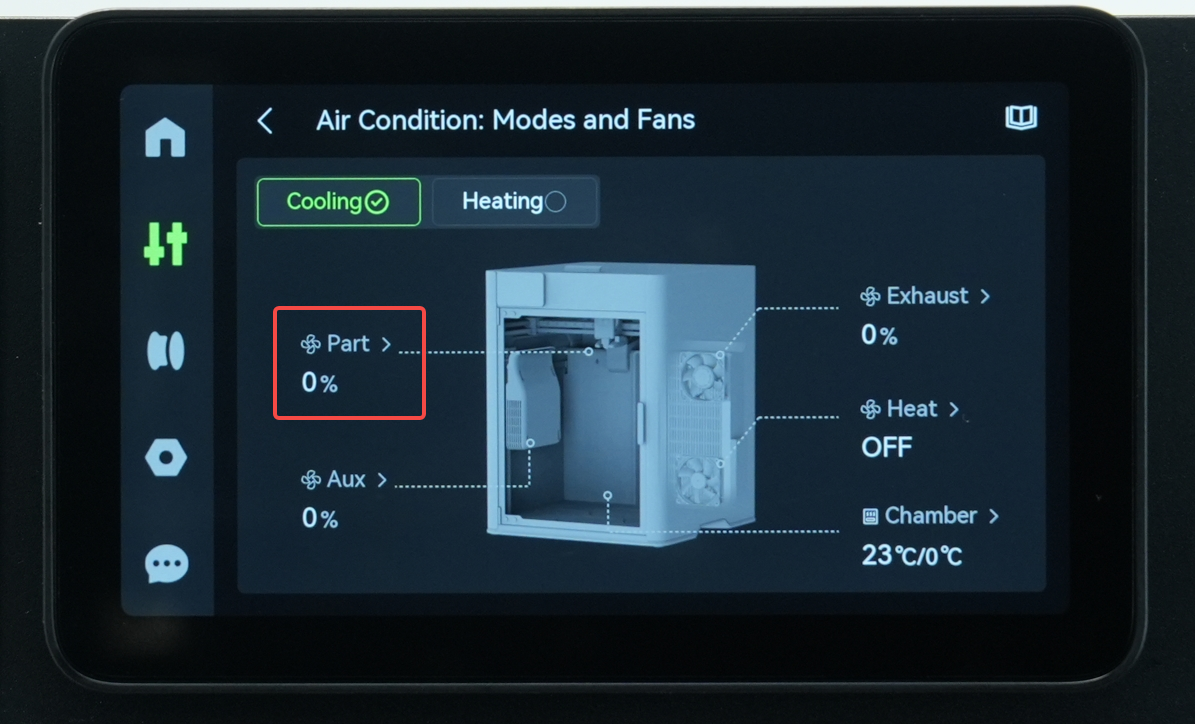
To make sure everything is working properly, turn on the printer and then turn on the part cooling fan, if the new fan starts spinning, the installation is complete.
¶ Calibration after operation
It is recommended to calibrate the printer after completing the replacement.
¶ End Notes
We hope the detailed guide provided has been helpful and informative.
If this guide does not solve your problem, please submit a technical ticket, we will answer your questions and provide assistance.
If you have any suggestions or feedback on this Wiki, please leave a message in the comment area. Thank you for your support and attention!