¶ Chamber Camera and LED

¶ Video Guide
¶ Tools
- H2.0 Allen key
- Tweezers
- 3M glue
¶ Preparation
- Turn off the power, and open the front door.
- Eject the microSD card.
¶ Replace the camera
¶ Disassembly Guide
¶ Step 1 - Remove the Left Panel
Refer to the Replace the Left Plastic Panel to remove the left panel.
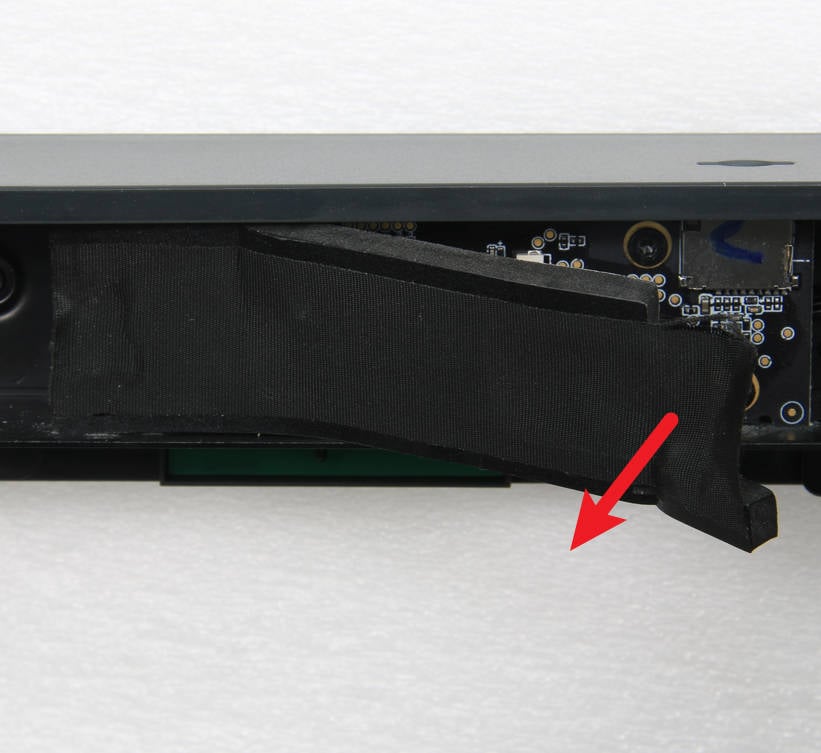
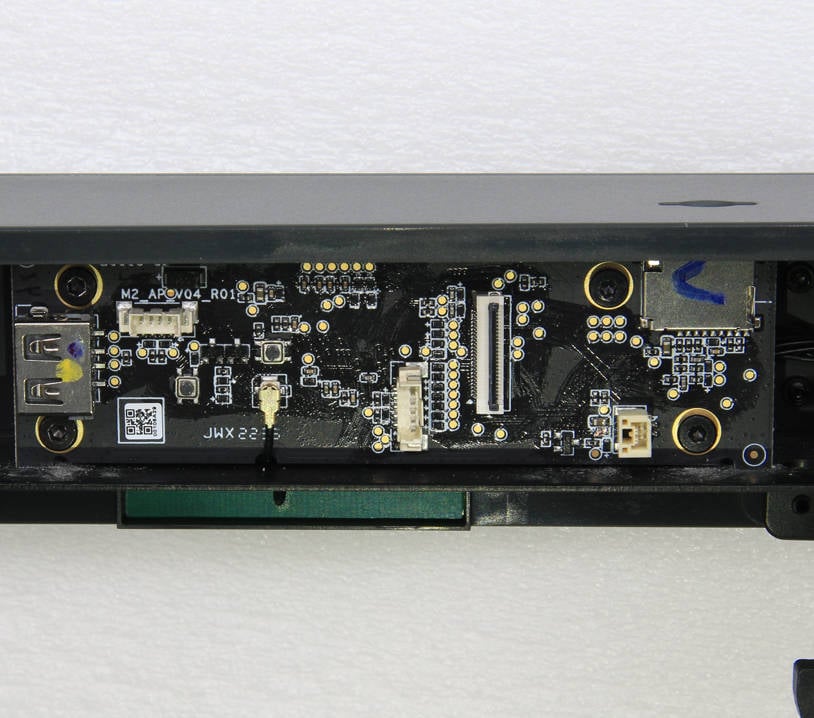
¶ Step 2 - Remove the AP board sealing foam
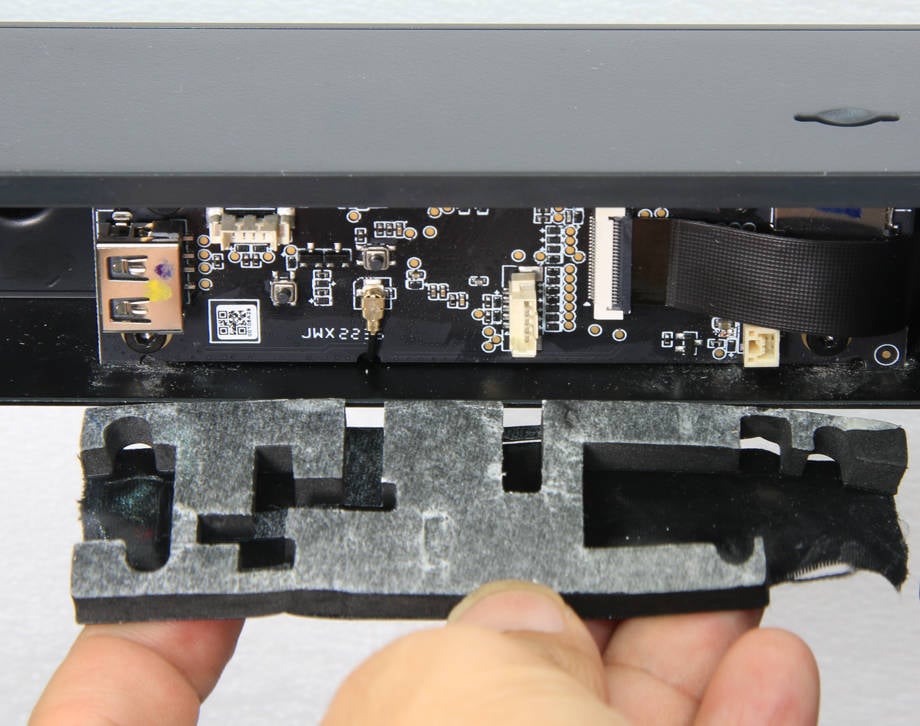
Gently pry off the ‘sealing foam’ from the AP board in order to gain access to the camera's connector slot located on the AP board.
 |
 |
¶ Assembly Guide
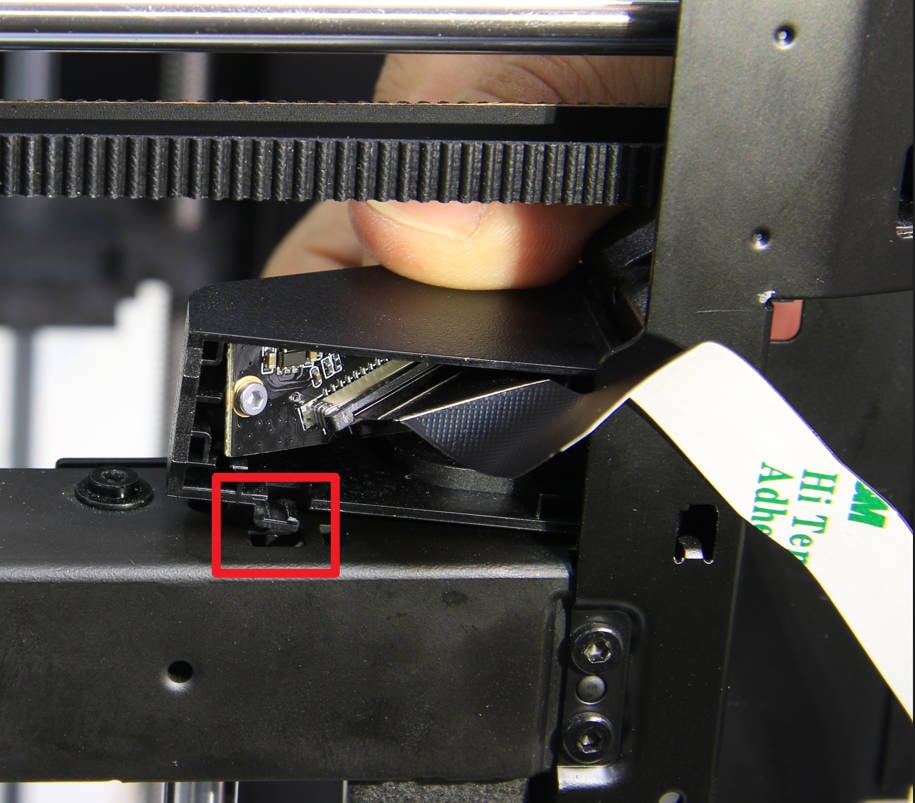
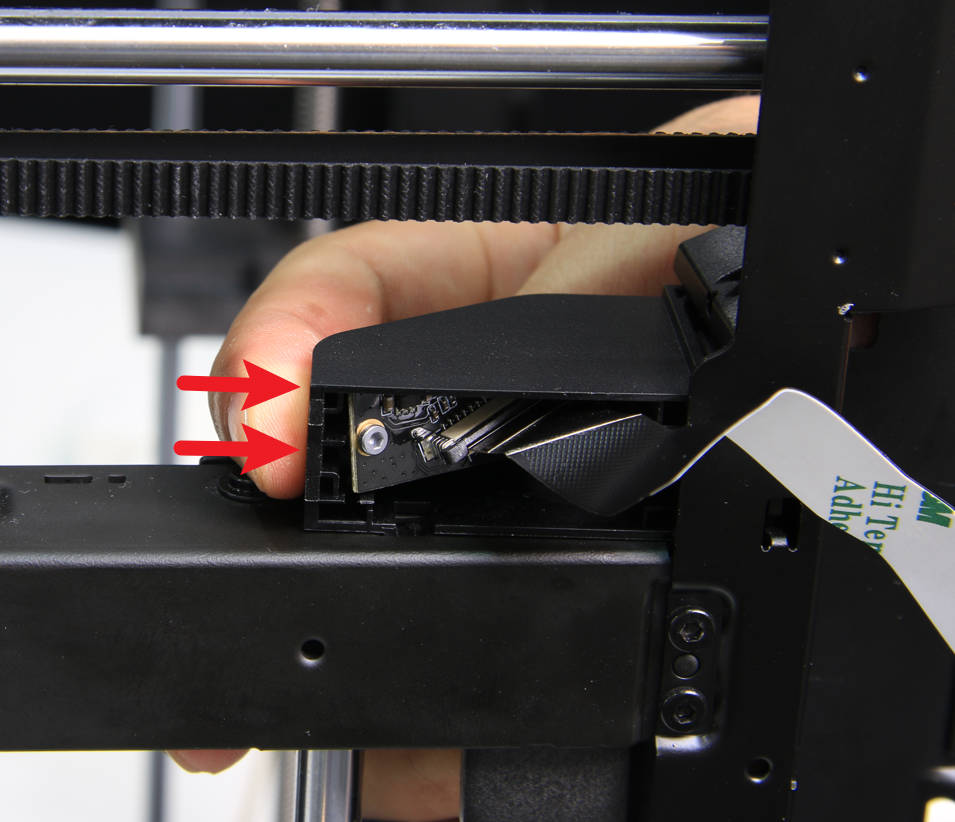
¶ Step 1 - Install the camera
Align the camera's housing with the mounting notch located on the frame, and ensure it is fully seated before locking it into place.
 |
 |
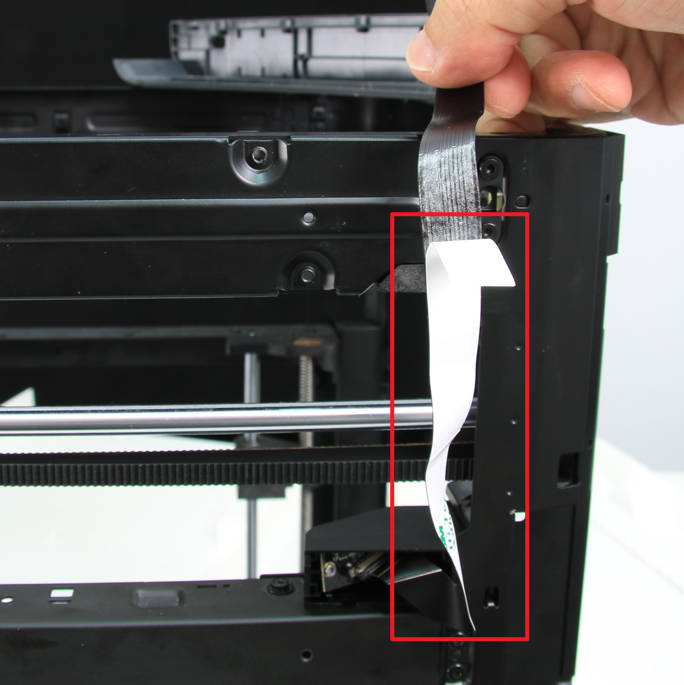
¶ Step 2 - Remove the protective paper
Proceed to remove the adhesive's protective paper from the flex cable of the camera as shown in the image below
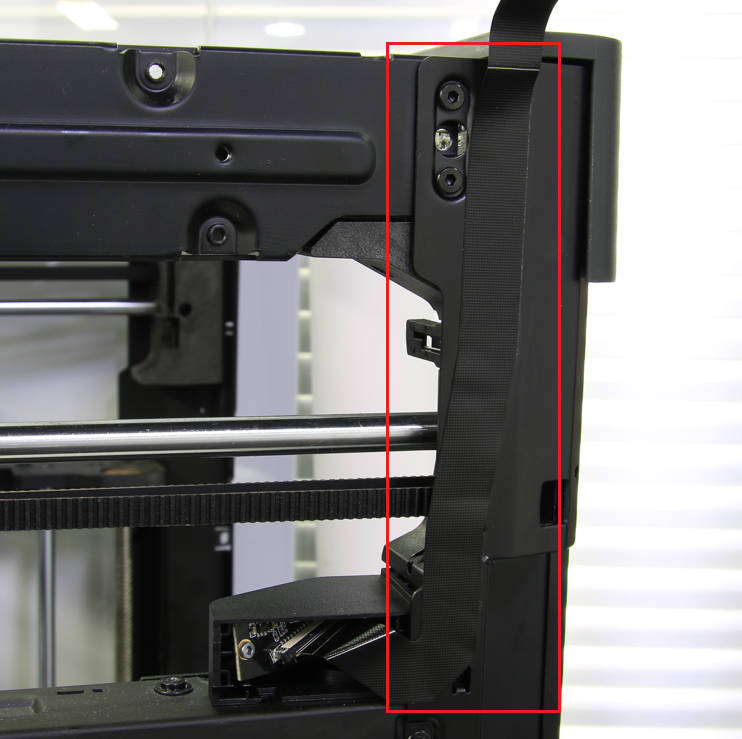
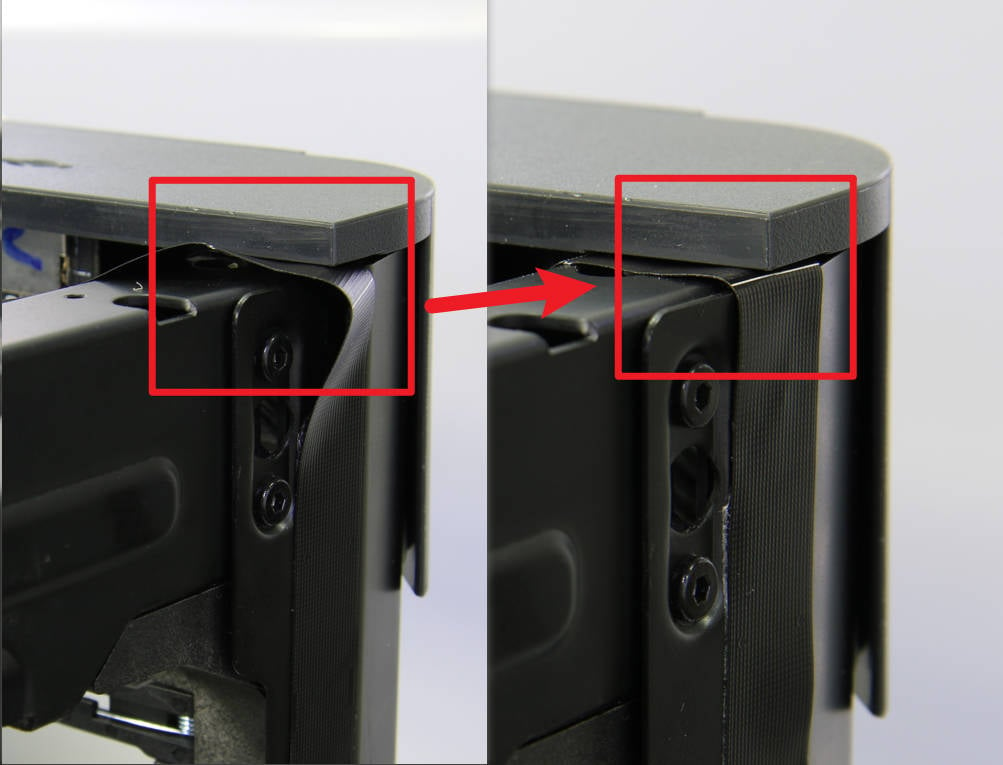
¶ Step 3 - Attach the flex cable
Carefully align the flex cable along the column, and tuck the cable between the gap of the front housing cover and the frame.
 |
 |
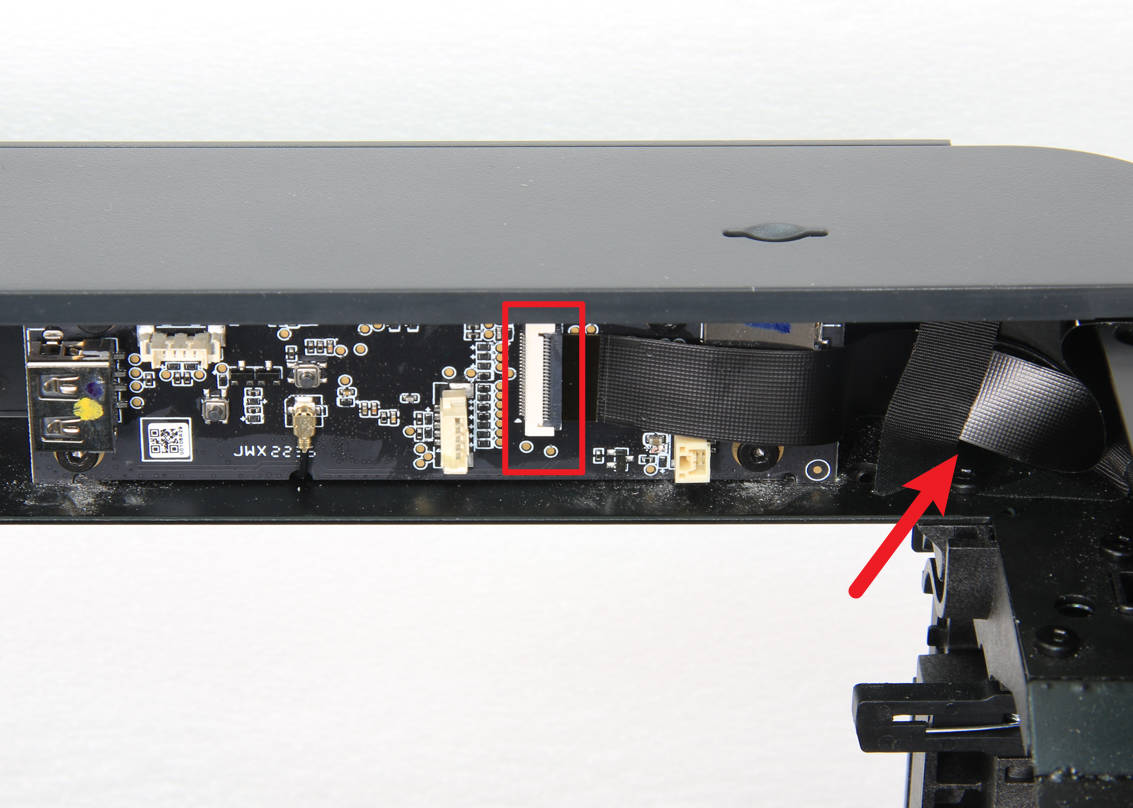
¶ Step 4 - Connect the camera cable
Connect the camera cable to the connector on the AP board, and ensure that it is properly organized so as to prevent any unwanted bends. Proceed to place the protective foam back onto the surface of the AP board.
¶ Step 5 - Attach the sealing foam
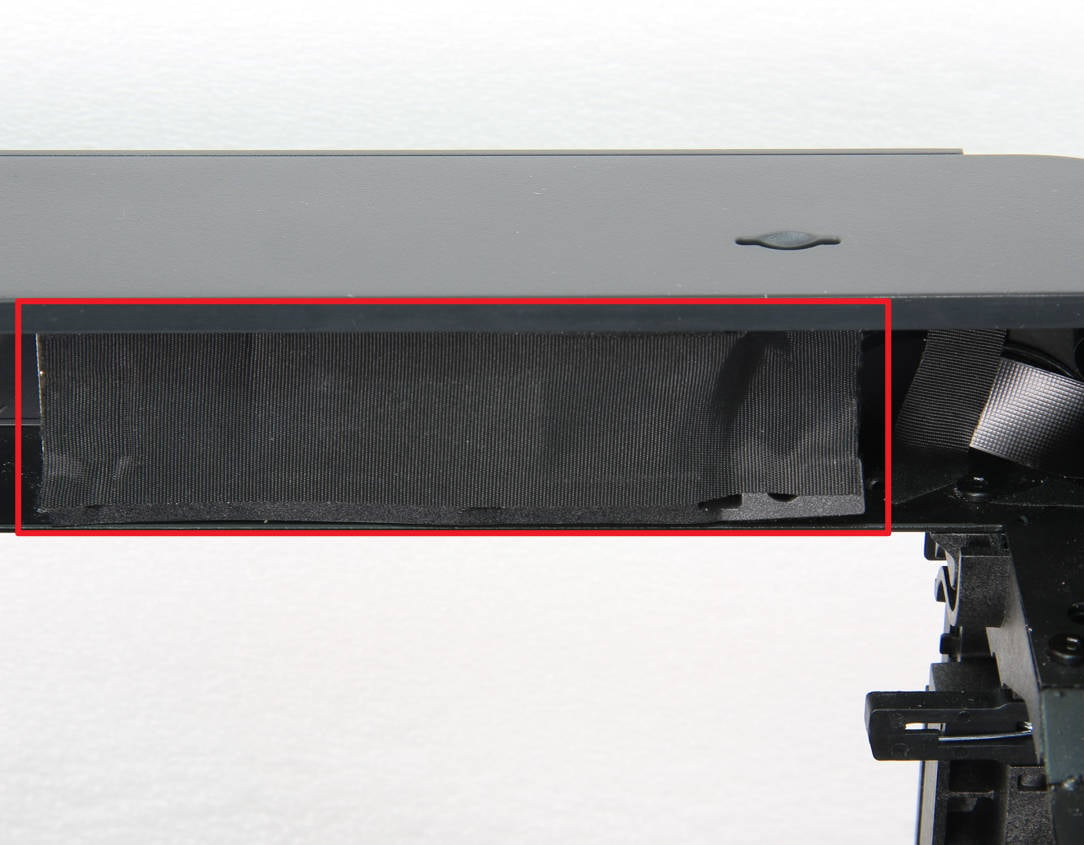
Stick the sealing foam back to the surface of the AP board.
 |
 |
¶ Step 6 - Install the Left Panel
Refer to the Replace the Left Plastic Panel to install the left panel.
¶ How to verify
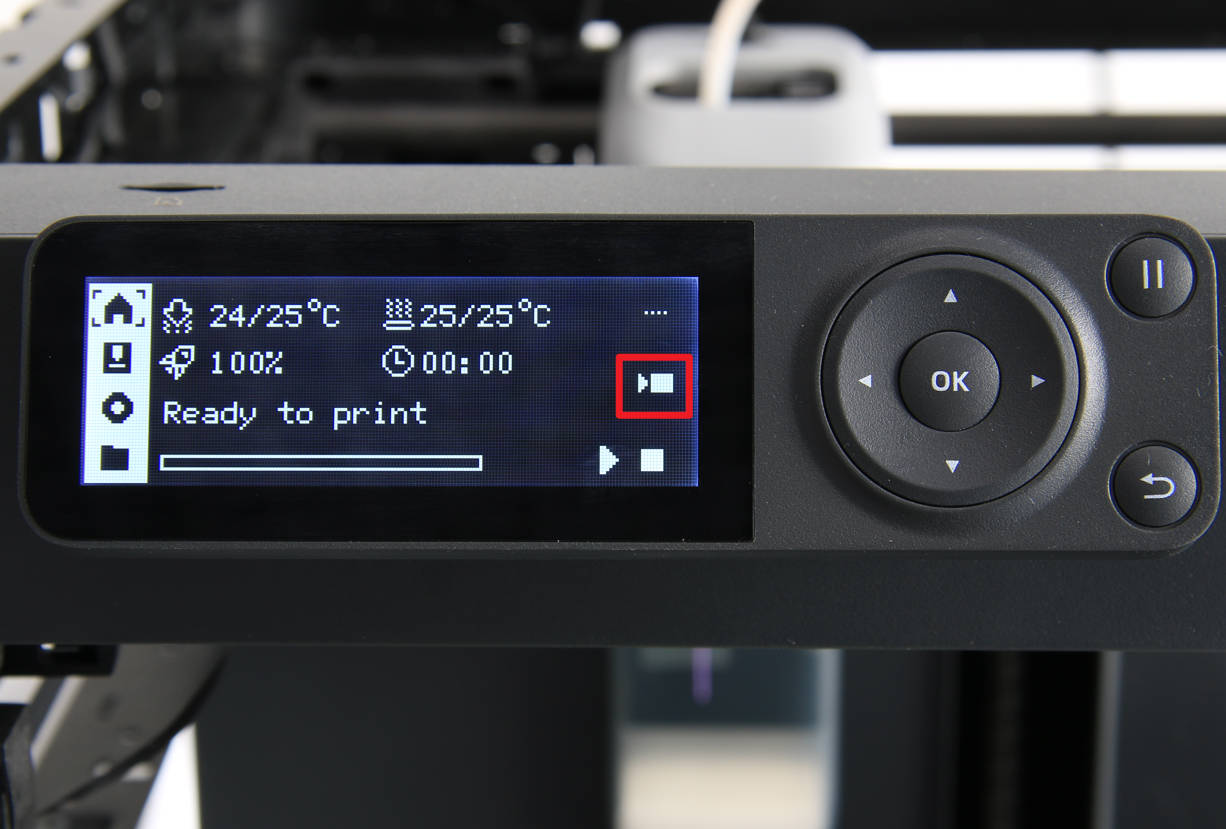
Power on the printer, and confirm that the screen works normally, if done correctly a camera Icon should now be visible on the home tab of the screen.
¶ Replace the LED Light 5V 0.3A
¶ Disassembly Guide
¶ Step 1 - Disconnect the cable
Gently pry off the foam from the AP board in order to disconnect the LED cable.
 |
 |
¶ Step 2 - Push out the LED light
Push the LED light toward the back panel, carefully checking if it will get caught by the camera. If you need to replace the LED cable, you can cut the old LED cable.

¶ Step 3 - Remove the clips
Flip the LED light over and use a scraper to remove the clips.

¶ Step 4 - Remove the LED light
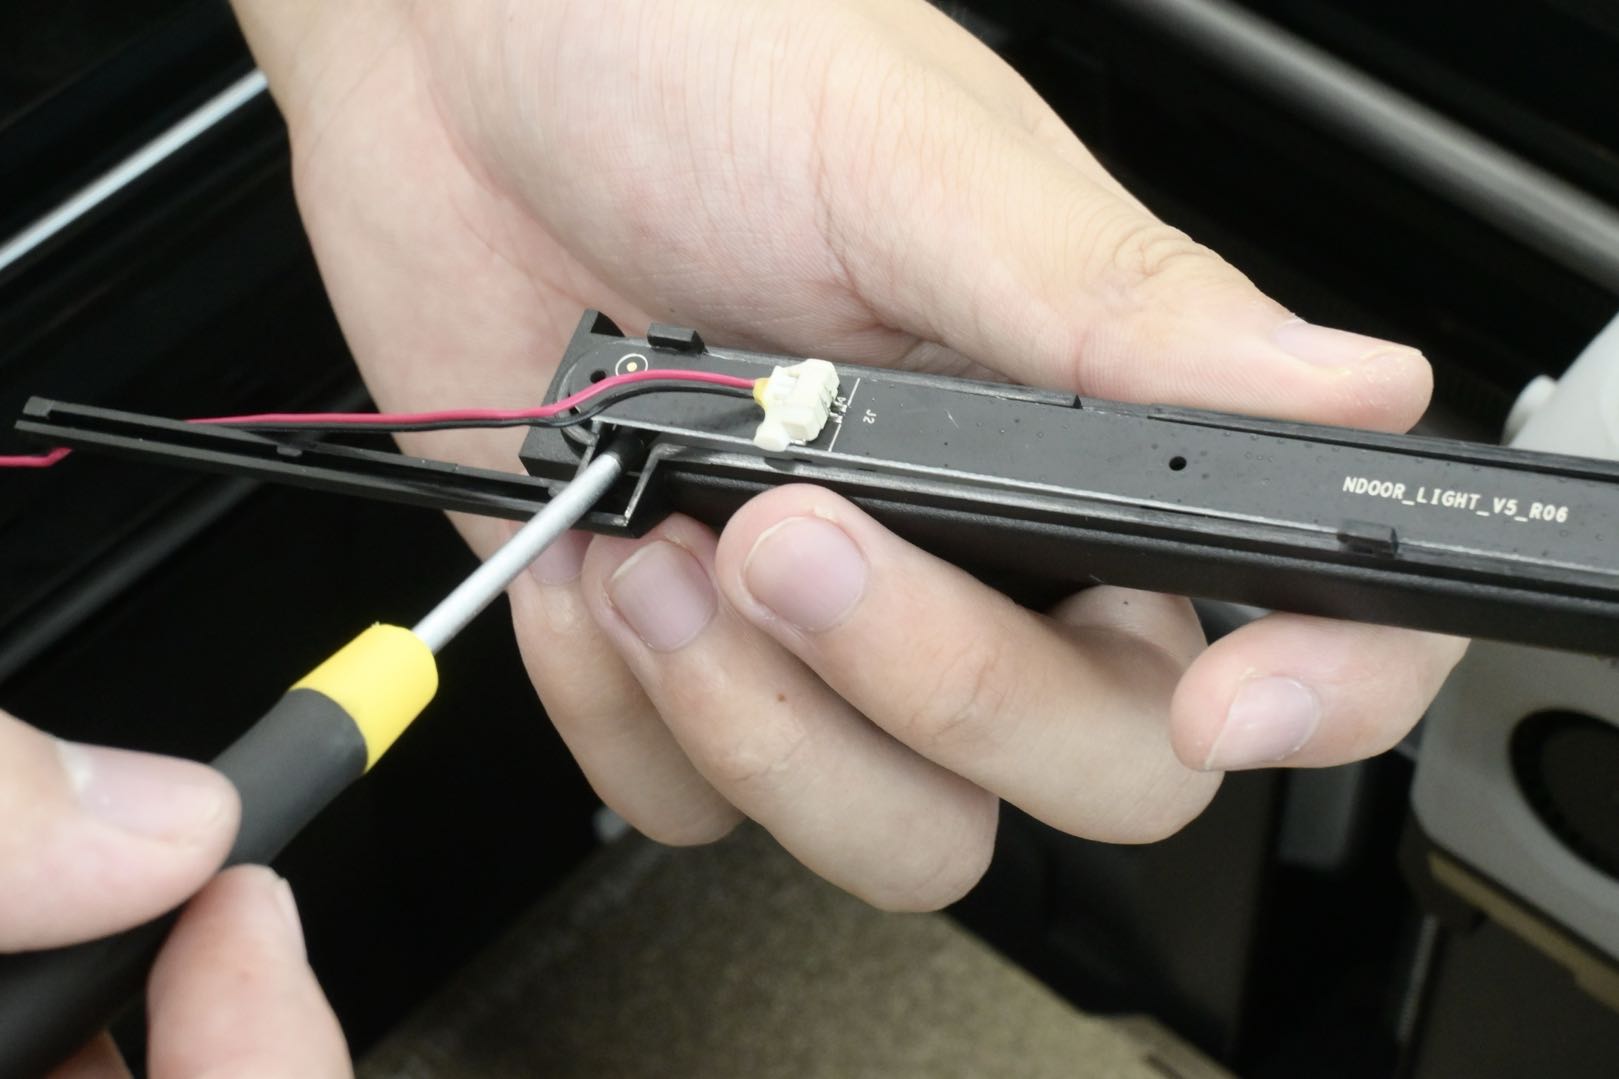
Use a screwdriver to carefully pry off the back cover of the LED light shell and remove the LED.
 |
 |
¶ Assembly Guide
¶ Step 1 - Install the LED light
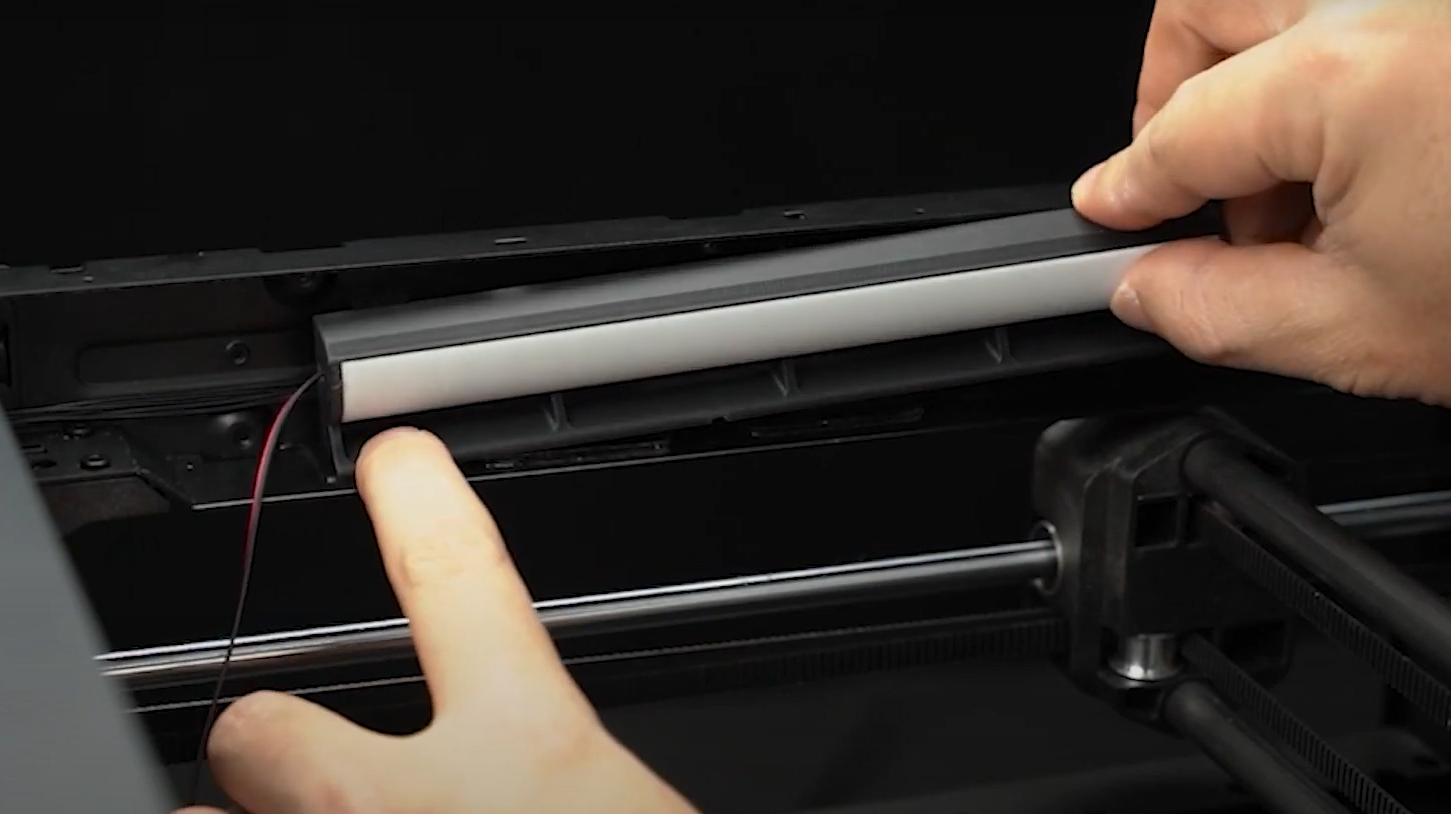
Mount the new LED light onto the LED light shell, connect the cables, and route the cables into the cable channel (Some batches do not have cable channel).

¶ Step 2 - Install the LED light
Use 3M glue to attach the LED light to the printer.
 |
 |
 |
¶ Step 3 - Connect the cables
Connect the LED cables to the AP board and organize the cables.
 |
 |
¶ Step 4 - Install foam
Reinstall the foam.

¶ How to verify
Connect the power supply, select the light icon in the control menu on the printer screen, and select Turn on LED; if the LED light in the chamber is on, it means the installation is successful.
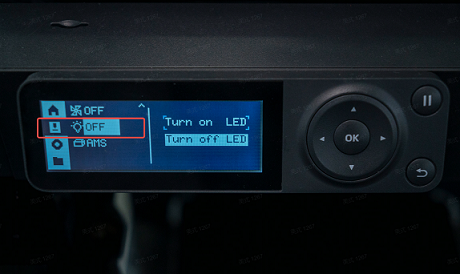
Bambu Studio: Click Device > Device Status > Light icon. If it is green, it is on.
Bambu Handy: Click Printer button > Light icon at the bottom. If it is green, it is on.
¶ End Notes
We hope the detailed guide provided has been helpful and informative.
If this guide does not solve your problem, please submit a technical ticket, we will answer your questions and provide assistance.
If you have any suggestions or feedback on this Wiki, please leave a message in the comment area. Thank you for your support and attention!