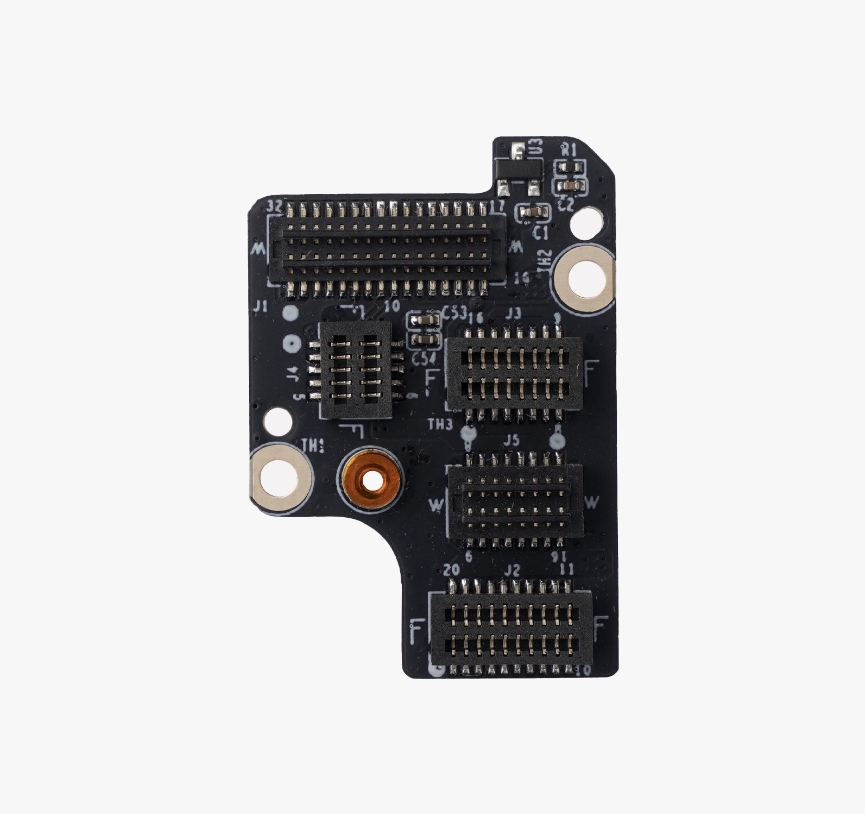
¶ Extruder Connection Board-P1P/P1S
¶ Safety Warning
IMPORTANT!
It's crucial to power off the printer before conducting any maintenance work, including work on the printer's electronics and tool head wires. Performing tasks with the printer on can result in a short circuit, leading to electronic damage and safety hazards.
During maintenance or troubleshooting, you may need to disassemble parts, including the hotend. This exposes wires and electrical components that could short circuit if they contact each other, other metal, or electronic components while the printer is still on. This can result in damage to the printer's electronics and additional issues.
Therefore, it's crucial to turn off the printer and disconnect it from the power source before conducting any maintenance. This prevents short circuits or damage to the printer's electronics, ensuring safe and effective maintenance. For any concerns or questions about following this guide, open a new ticket in our Support Page and we will do our best to respond promptly and provide the assistance you need.
¶ Tools
- New Extruder Connection Board
- H1.5 hex key
¶ Preparation
Unload the filament and power OFF the printer.
WARNING! Ensure that ALL hotend/toolhead changes are performed with the power OFF. Unplugging or reconnecting any of these connectors while the power is ON may result in a short circuit and cause permanent damage to the toolhead boards.
¶ Disassembly
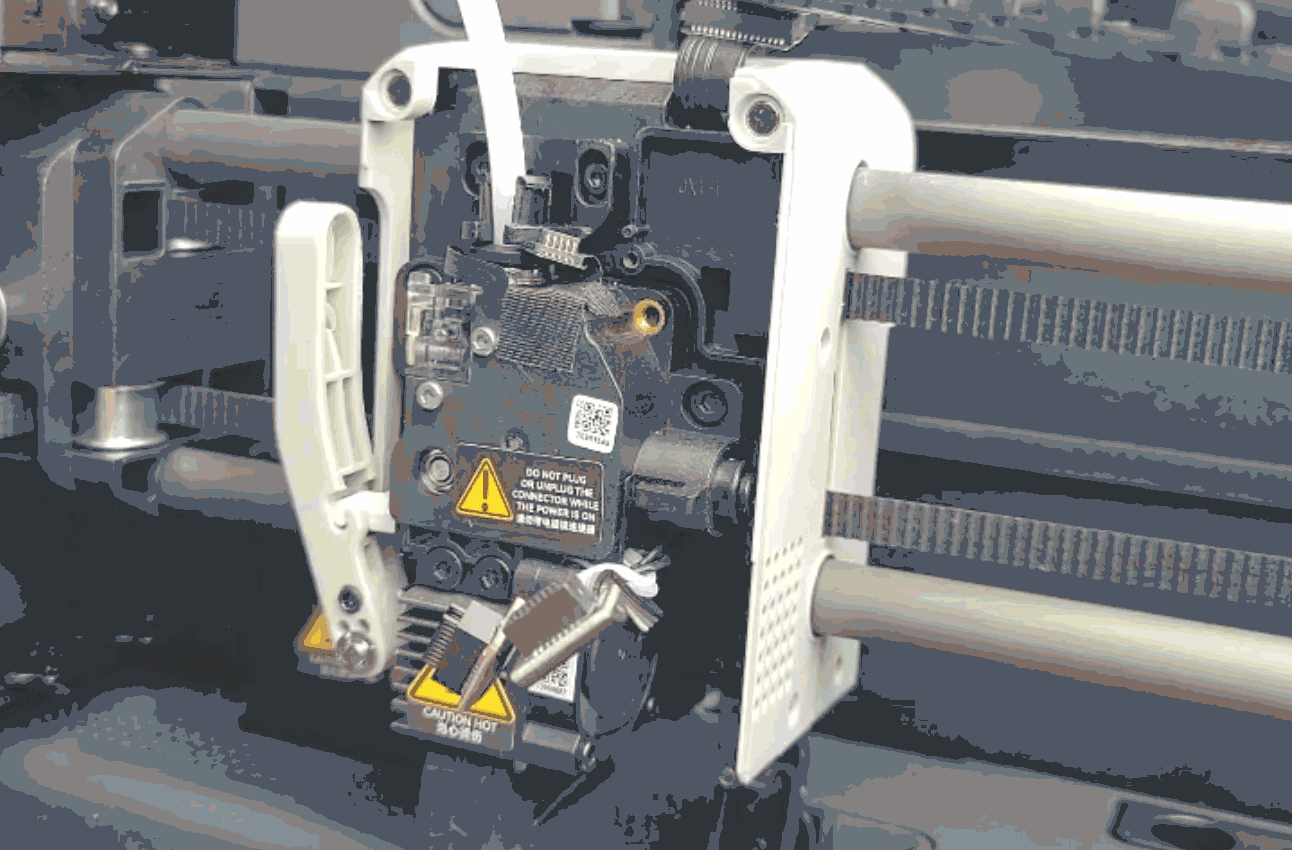
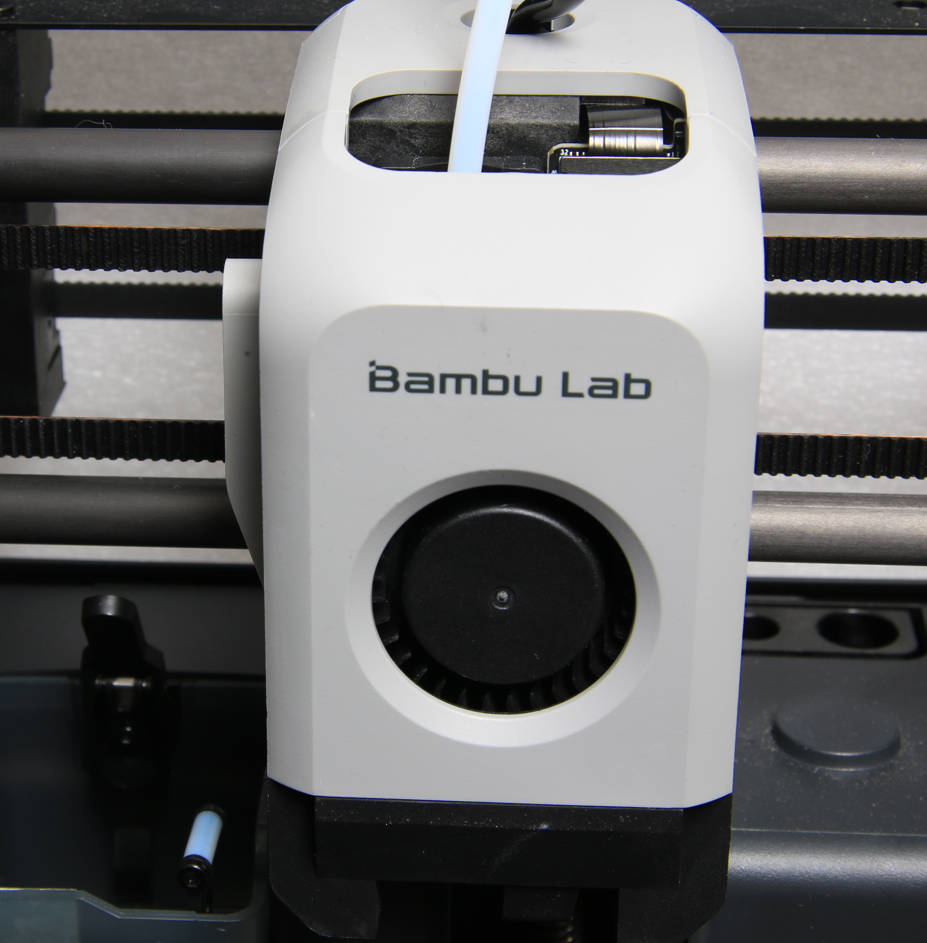
¶ Step 1 - Remove the Front Housing Assembly
Remove the toolhead front cover by gripping on the lower sides as shown, then gently pull. The cover should still be attached by the part cooling fan wire.
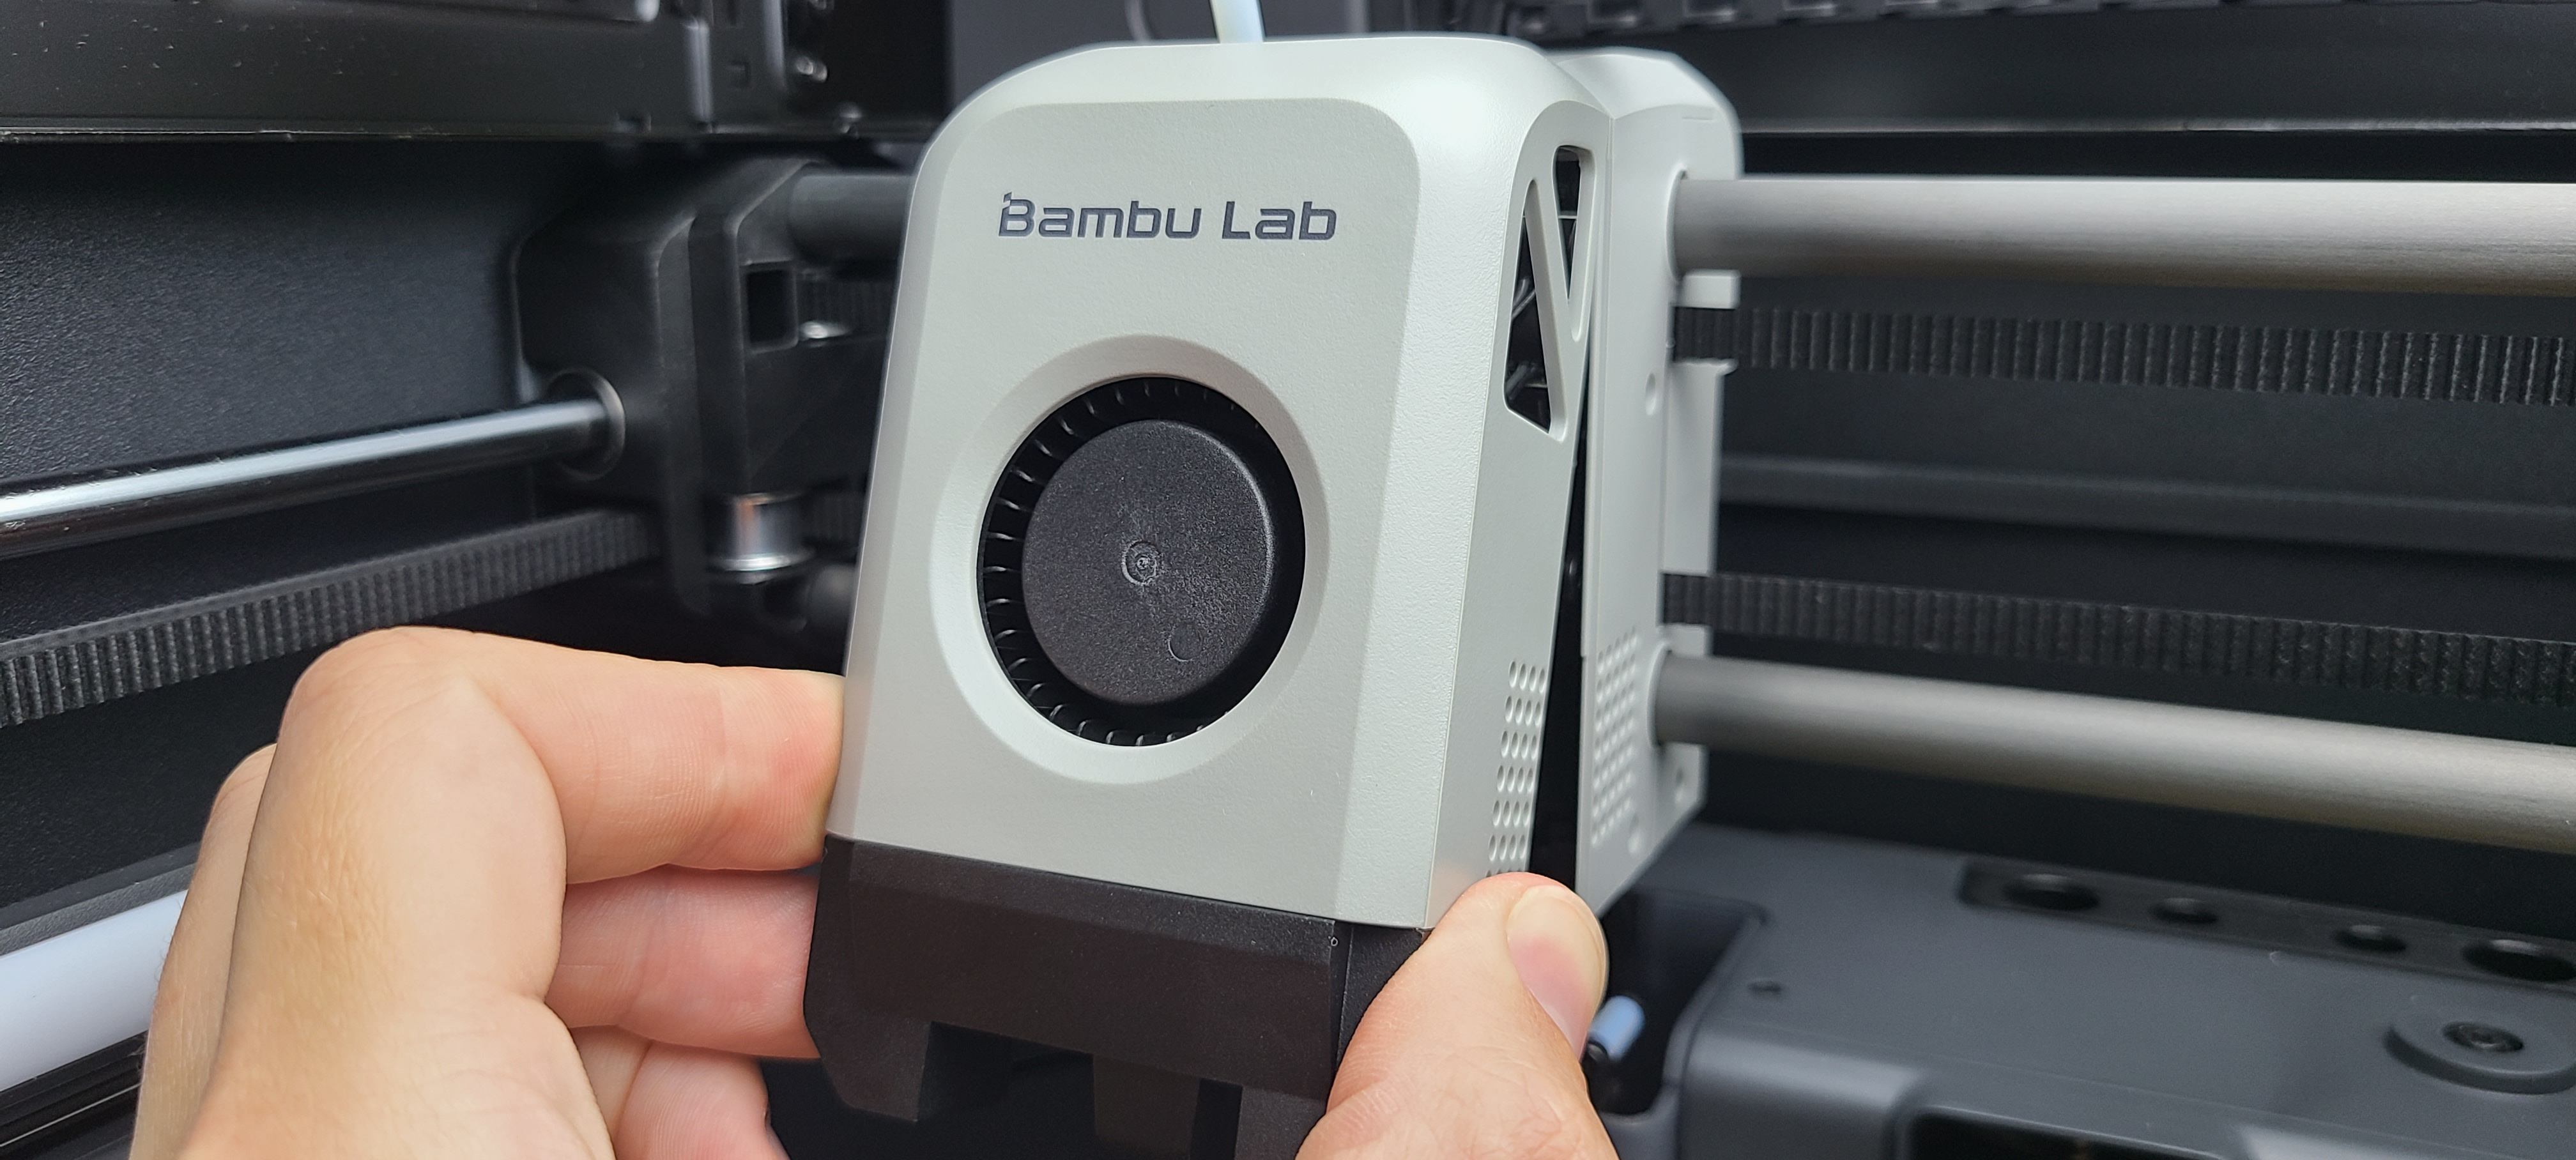
Detach the part cooling fan connector by pinching the black connector itself and pulling. Set the front cover to the side.
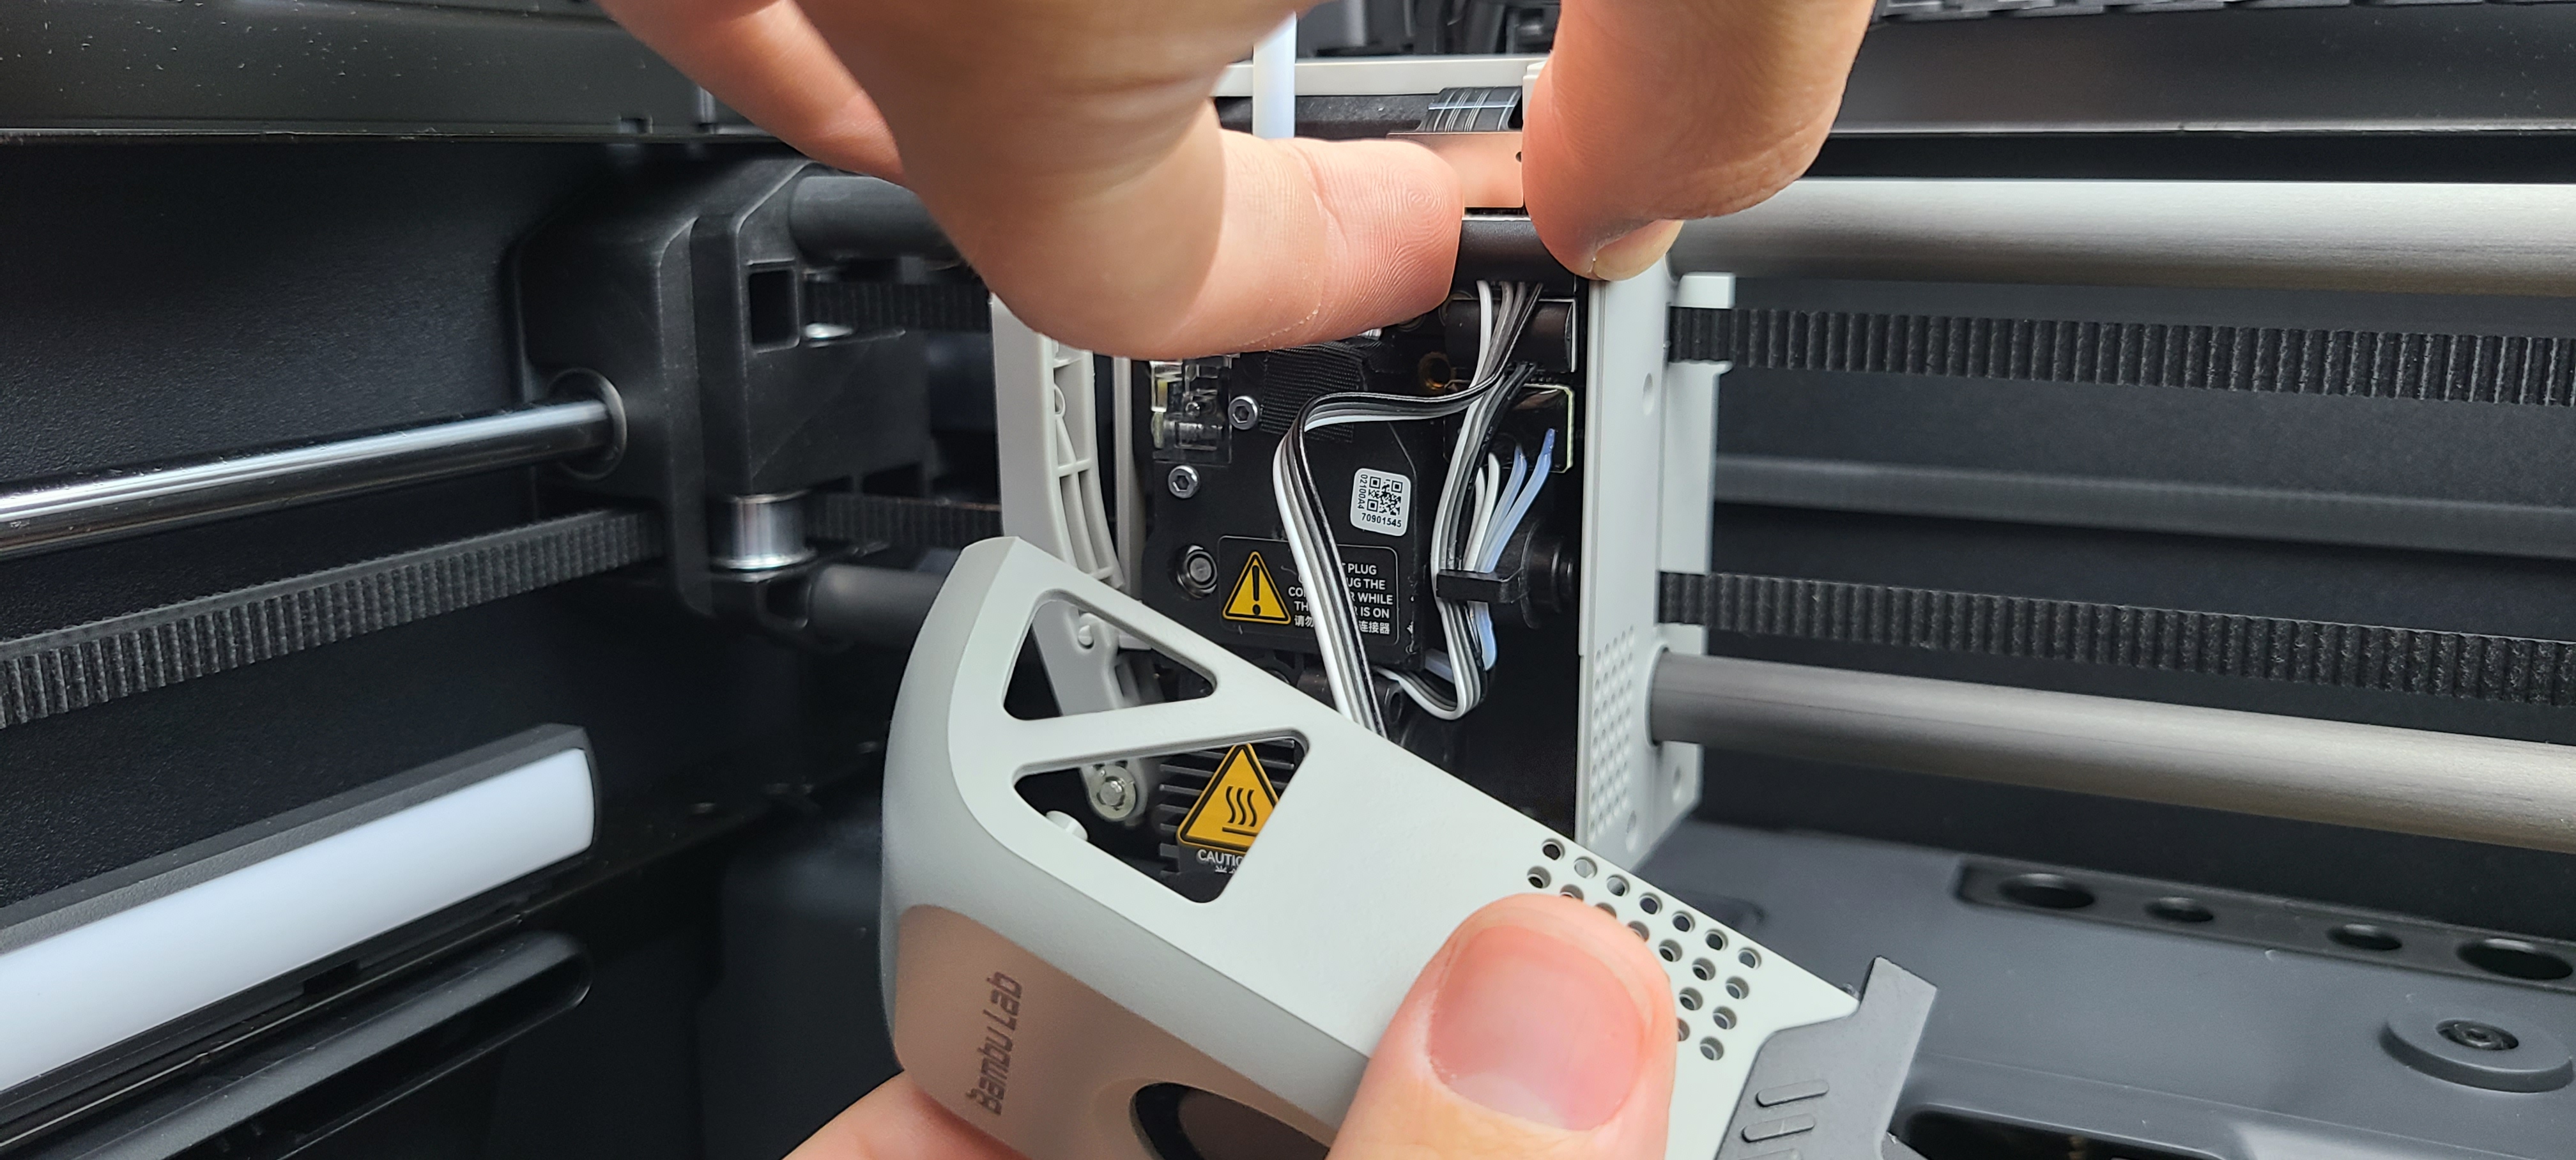
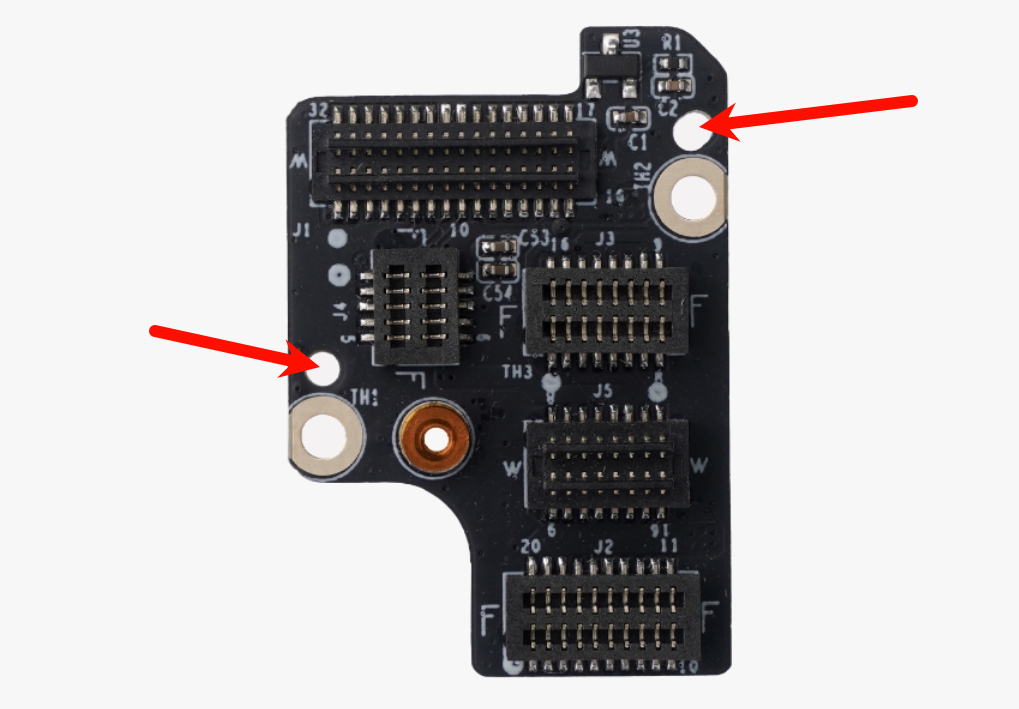
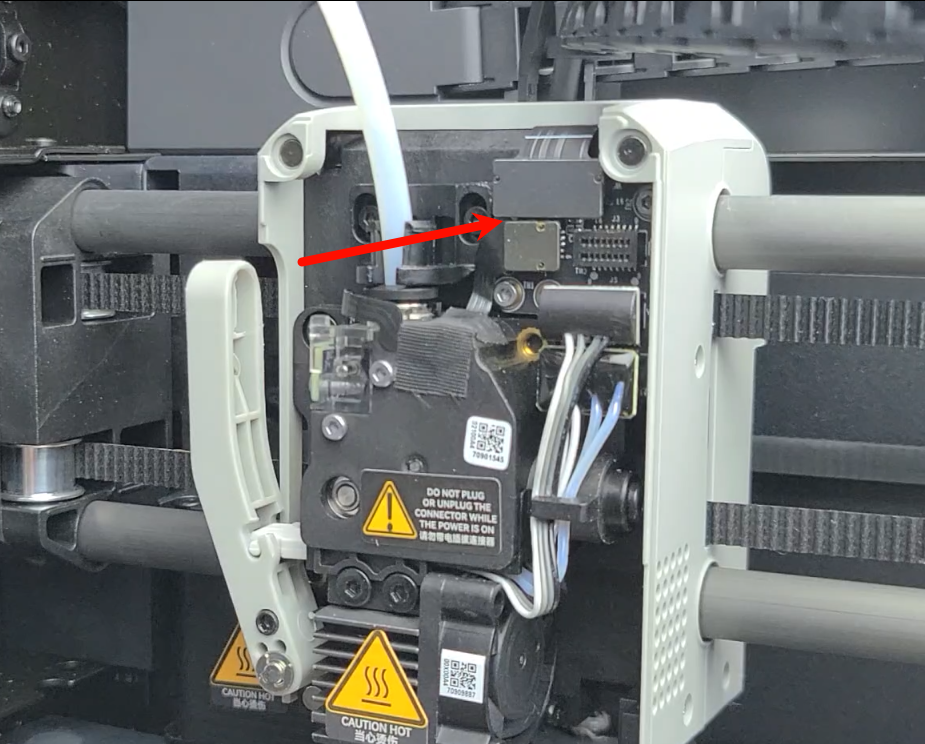
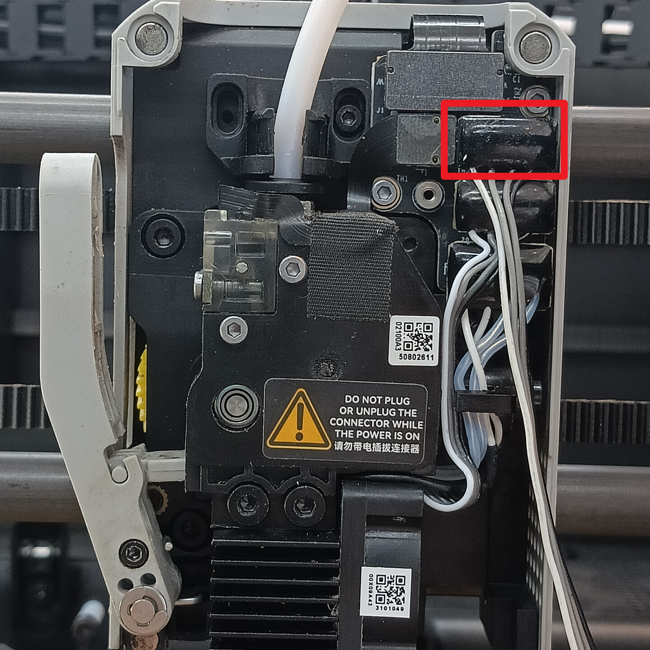
¶ Step 2 - Remove the connection board
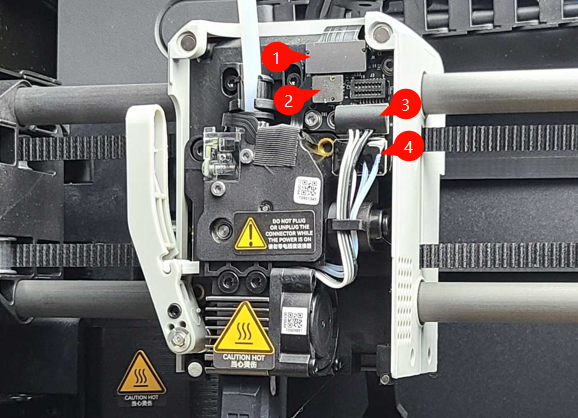
- FPC ribbon cable (connects Extruder Connection board to the TH board)
- Hall Switch ribbon cable
- Hotend Fan wire
- Hotend Heater Thermistor wire
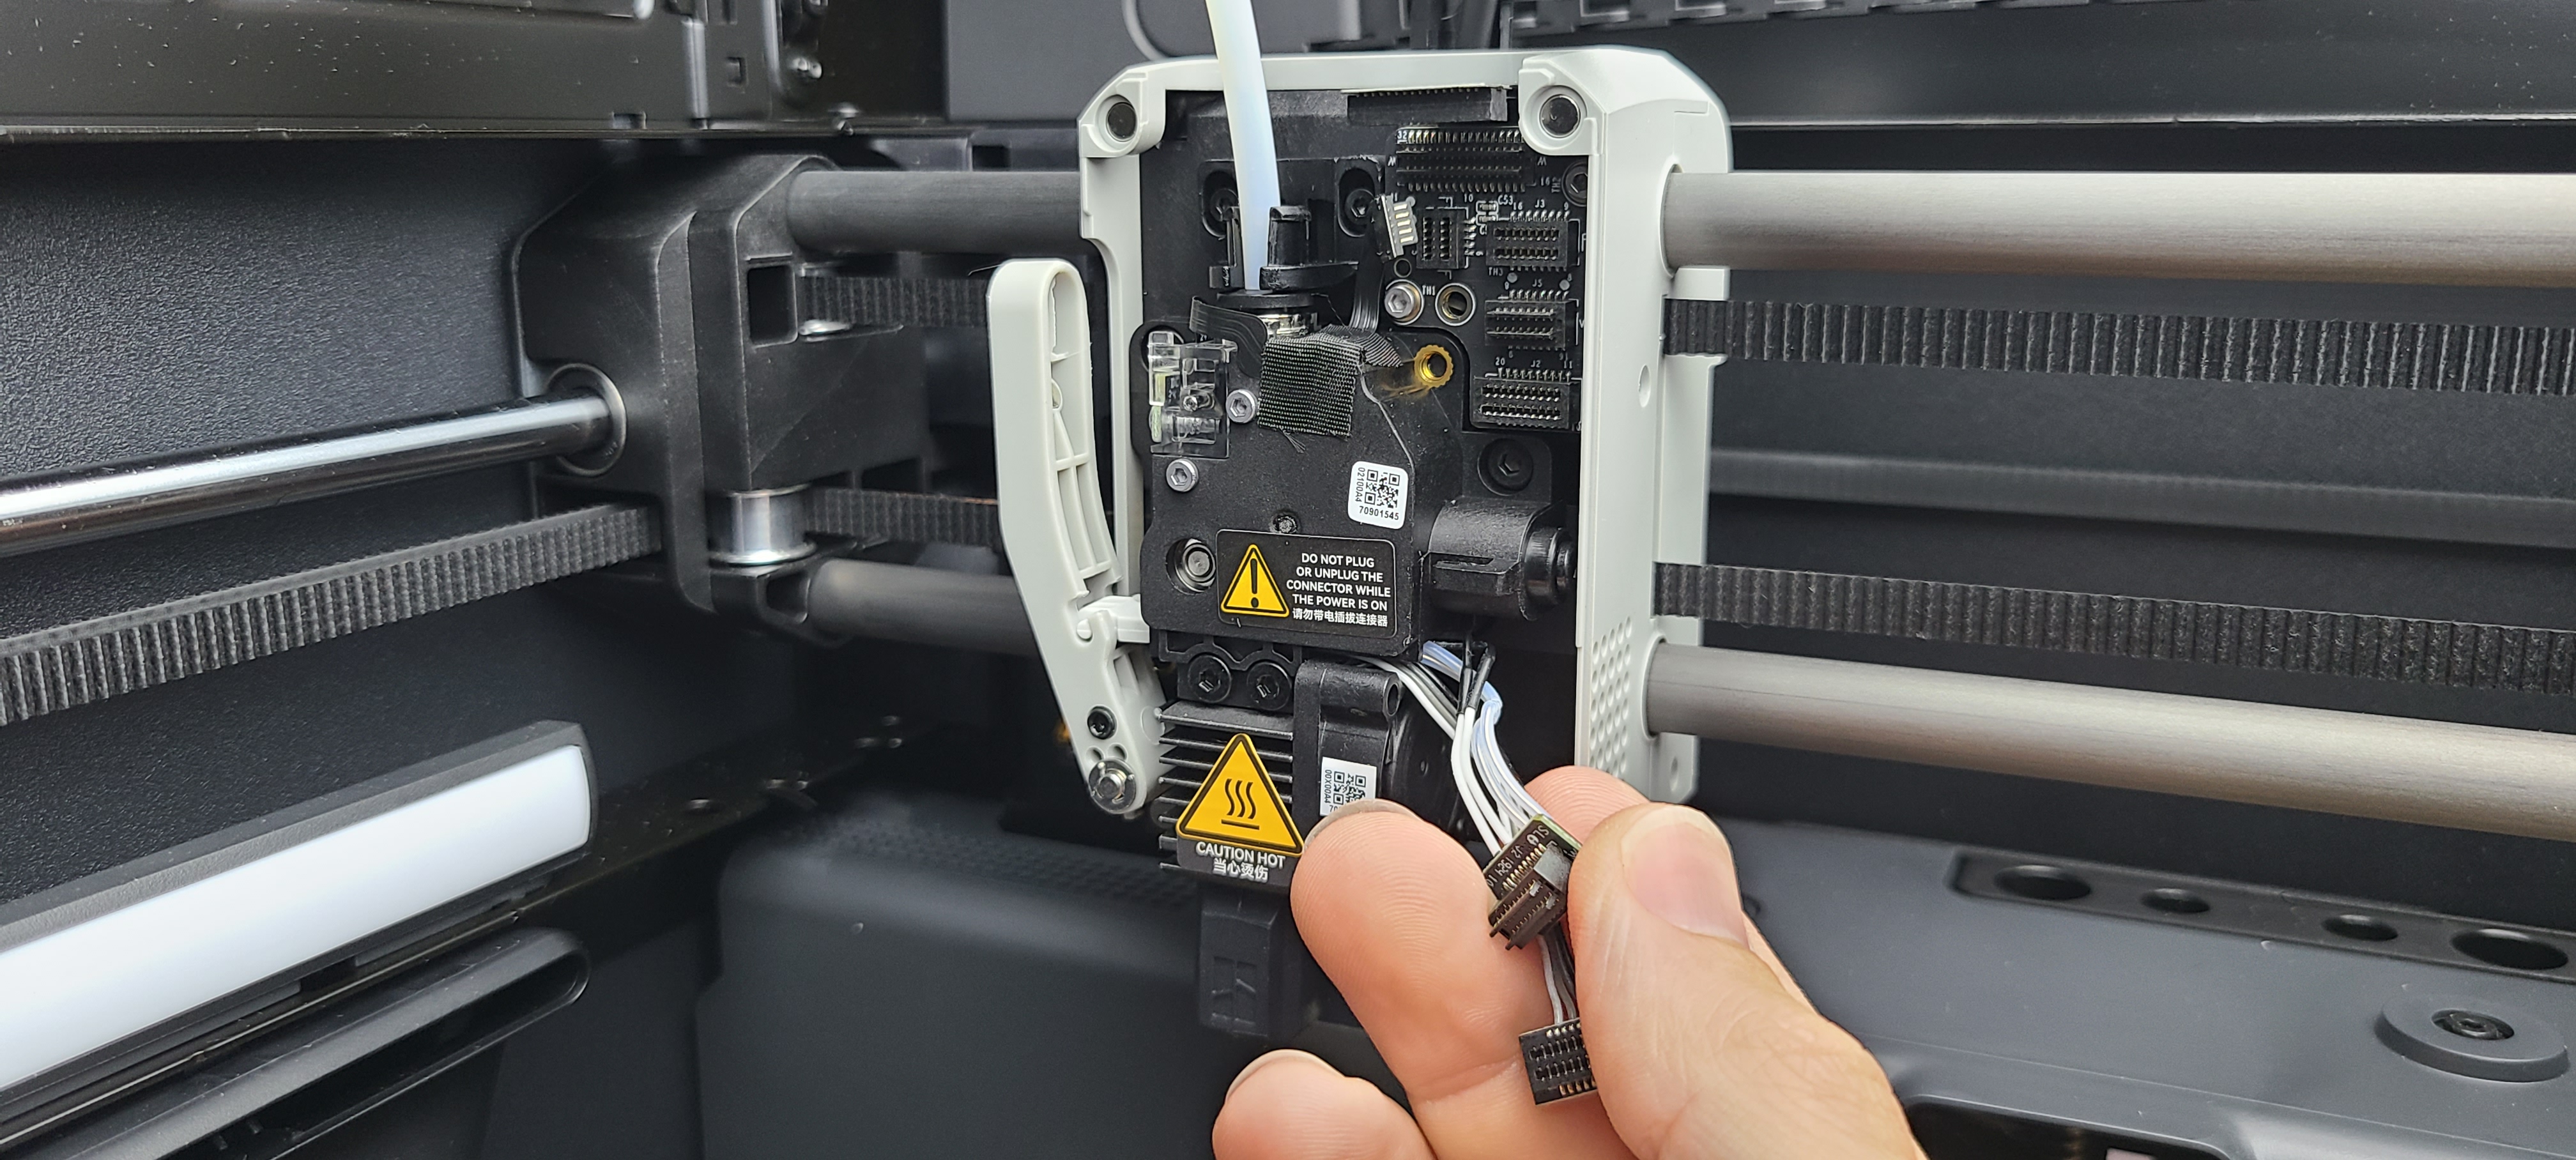
Next, disconnect the four connectors described above. The Hotend Heater Thermistor wire and Hotend Fan wire (the bottom two) may be disconnected using the same method as the Cooling Fan connector.
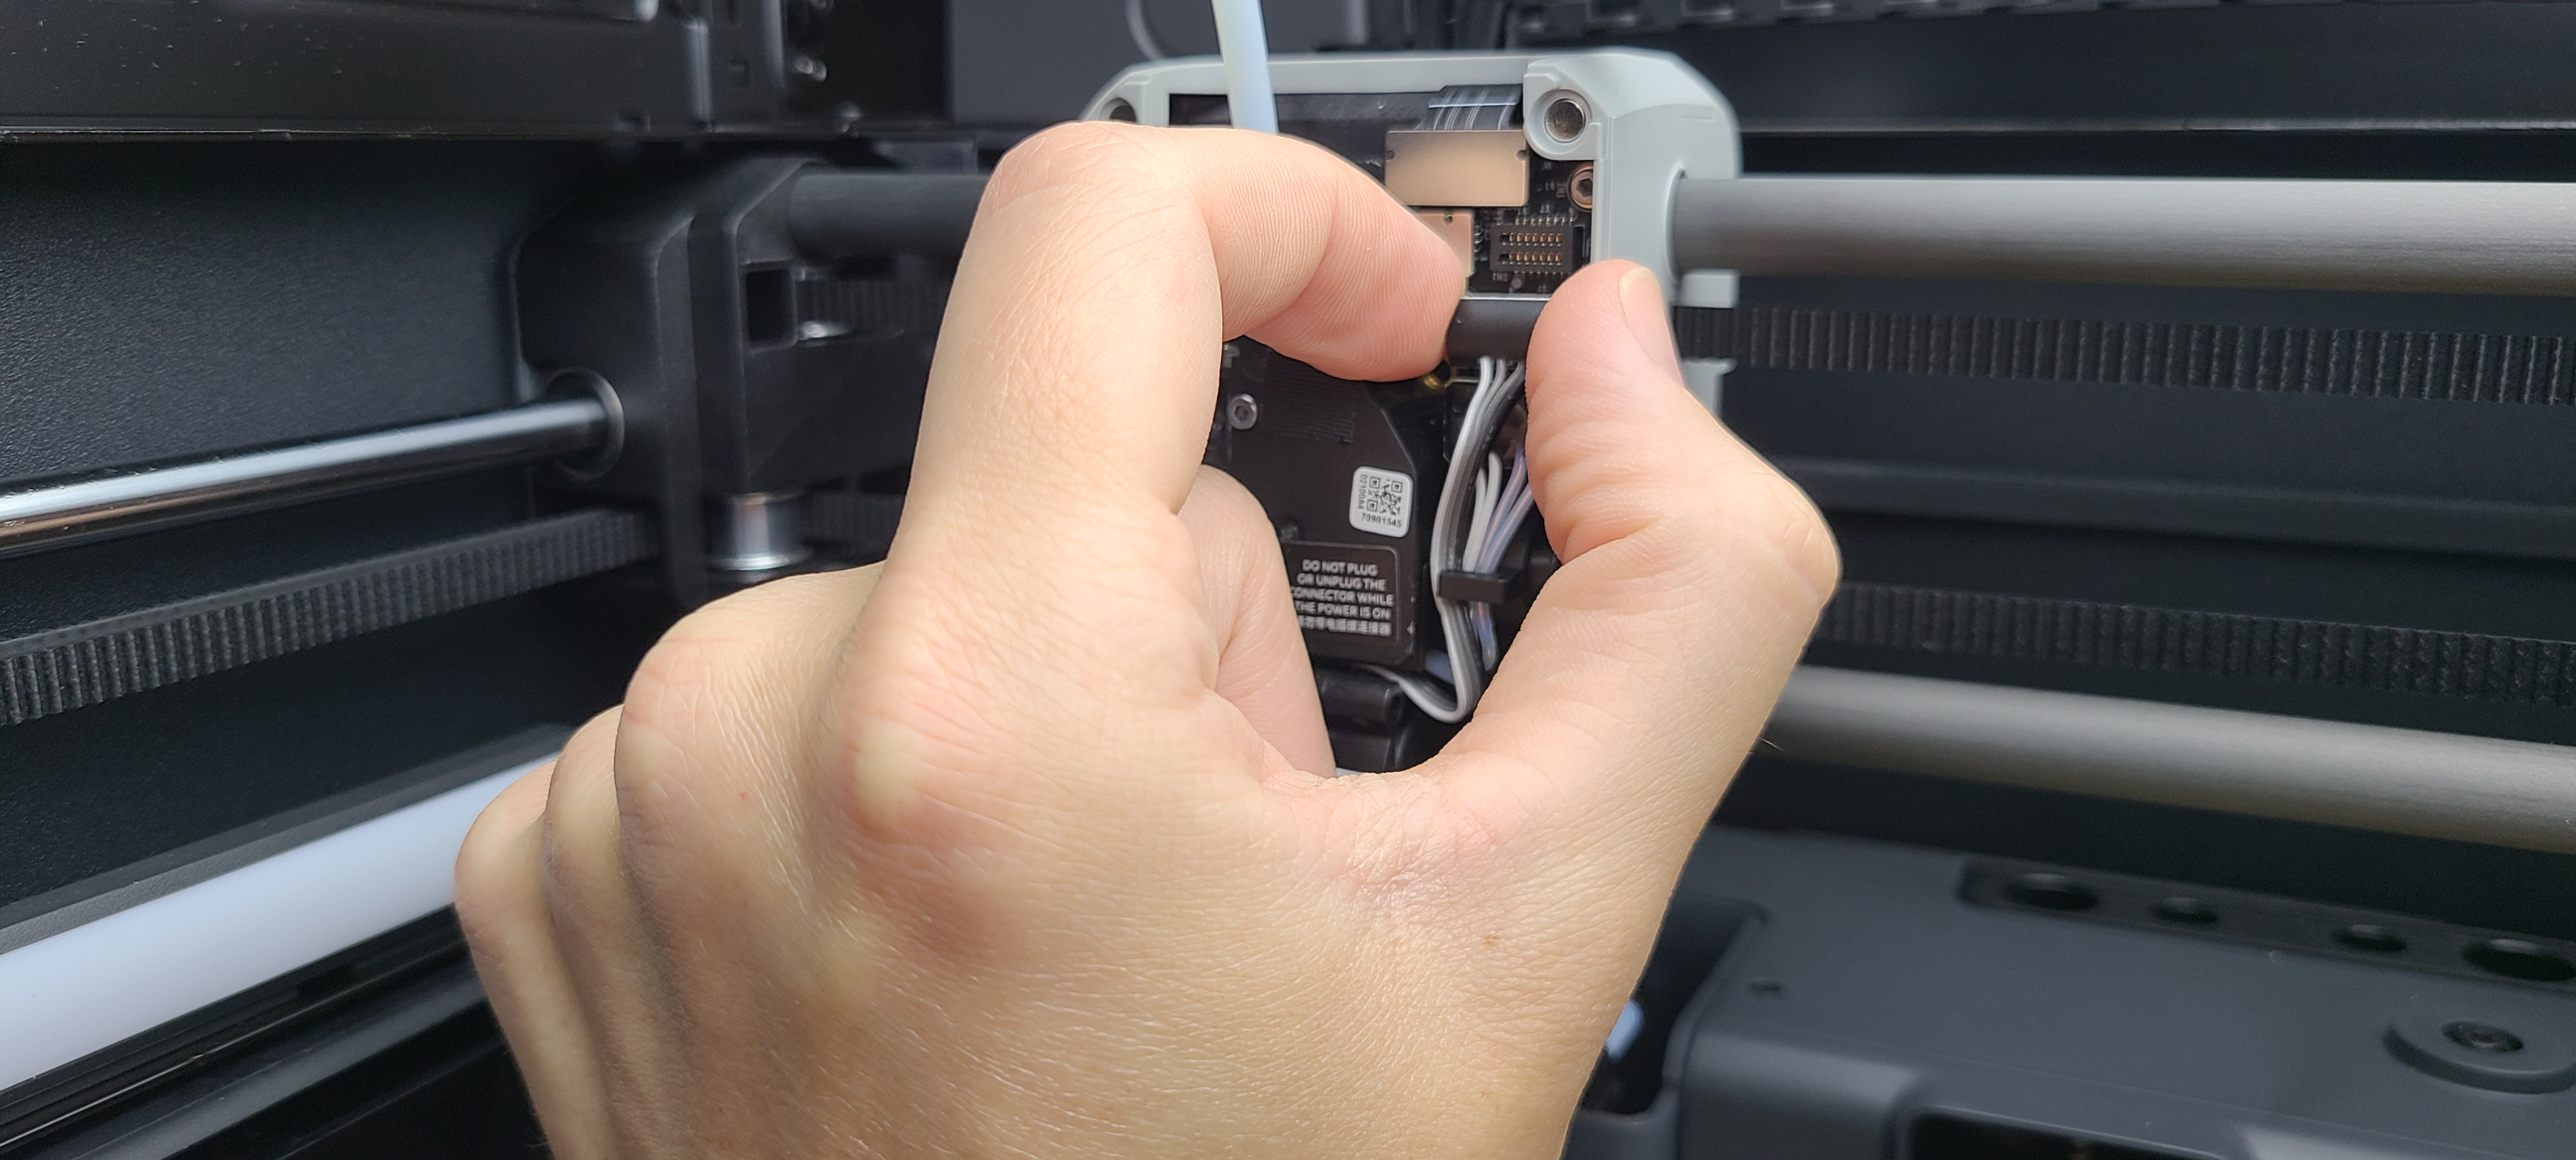
The FPC and Hall Switch may be disconnected by gently prying on the side of the connector opposite to the attached ribbon cable, as shown below.
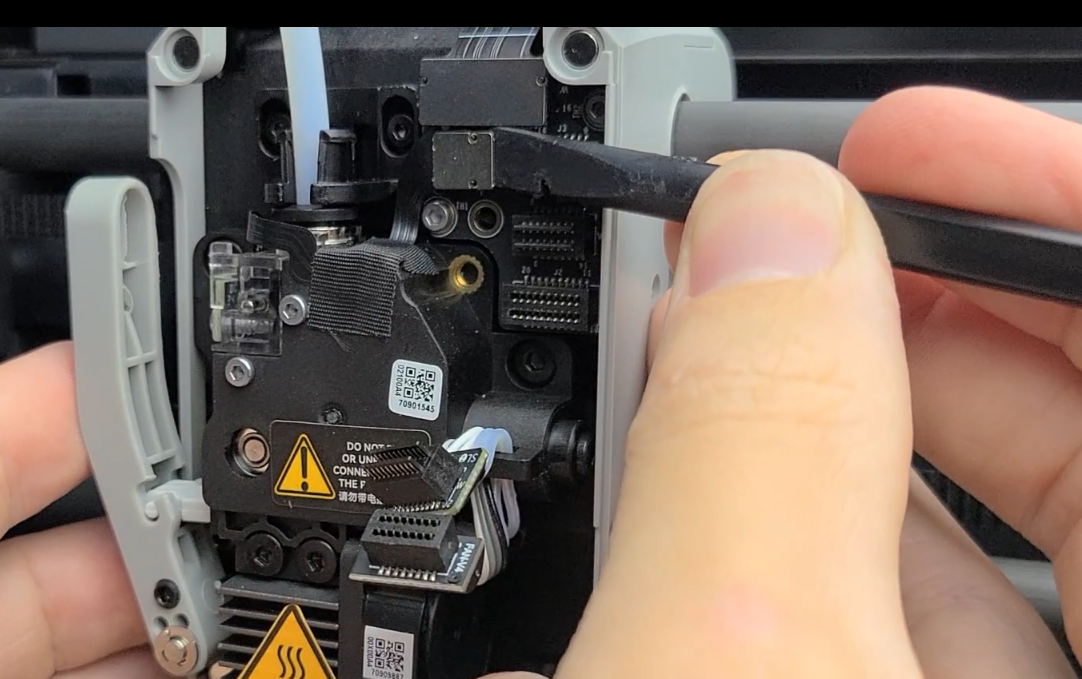
Once everything is disconnected, carefully remove the Hotend Heater Thermistor and Fan wires from the cable clip to move them out of the way.
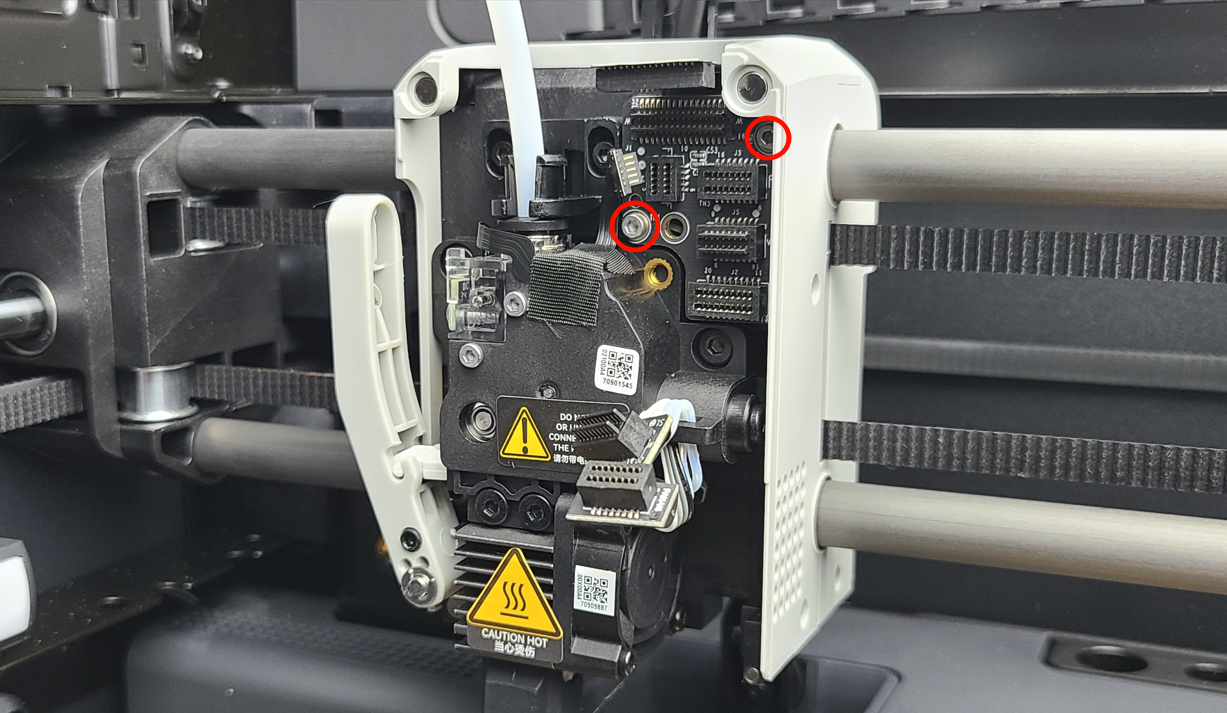
Then, use an H1.5 hex key to remove the two screws and take off the connection board. Carefully wiggle the board to the left and outwards in order to remove it fully.
¶ Assembly
¶ Step 1 - Install the extruder connection board
When positioning the new Extruder Connection board into place, take note of the two alignment pin holes, as shown below. Also be sure to avoid pinching any of the loose wires or connectors behind the board.
Insert the board from the left side at a slight angle. Then, flatten the board against the toolhead and gently wiggle it towards the right and over the upper right alignment pin (which is behind the magnet in the toolhead outer shell). The gif below demonstrates how to get the board into place over the alignment pins.
Once the board is aligned correctly, reinstall both screws.
¶ Step 2 – Reinstalling the connectors
When aligning the connectors, carefully line them up and gently attempt to push them in. Never force the connectors in place. If they do not push into their sockets easily, realign and gently try again.
Reconnect the Hotend Heater Thermistor connector at the bottom, then the Hotend Fan connector just above it. Then, reconnect the ribbon cable connectors at the top. Please take note that the ribbon connectors are correctly aligned when they are flush with one another and there is about a 1mm gap between them, as shown below.
¶ Step 3 – Install the Toolhead Front Housing
Reconnect the front cover fan cable to the extruder connection board then replace the toolhead front cover by aligning the top corners and allowing the magnets to pull the cover into place.
 |
 |
The placement of the toolhead cover should be simple and easy, as shown in the gif below.

¶ To verify completion/success
1. Visually inspect the alignment of the extruder connection board itself and its connectors, ensuring there are no loose or incorrectly aligned connectors.
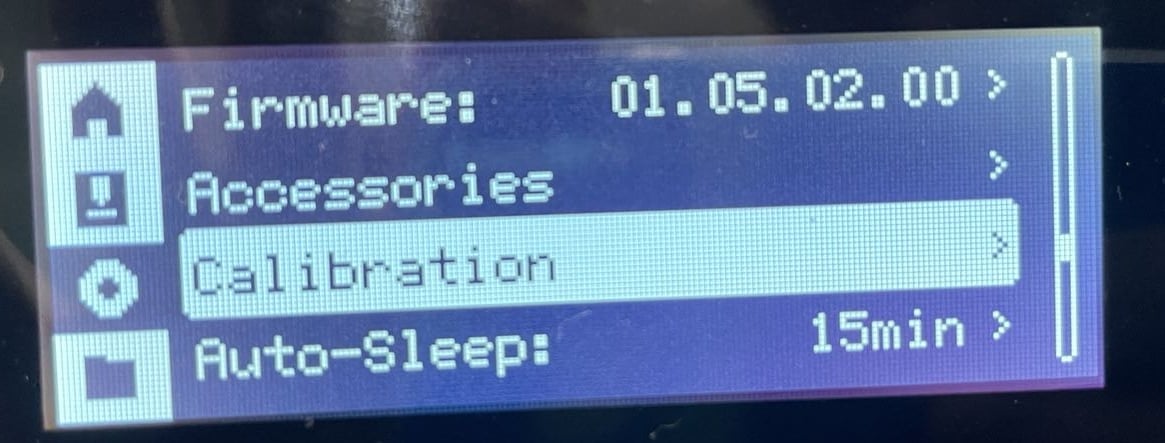
2. Power on the printer and initiate the device calibration process. If the calibration passes, the operation was successful.
¶ End Notes
We hope the detailed guide provided has been helpful and informative.
If this guide does not solve your problem, please submit a technical ticket, we will answer your questions and provide assistance.
If you have any suggestions or feedback on this Wiki, please leave a message in the comment area. Thank you for your support and attention!