¶ Extruder Filament Sensor - P1 Series
This sensor is used in the extruder to detect both the presence of the filament and the filament cutter lever.
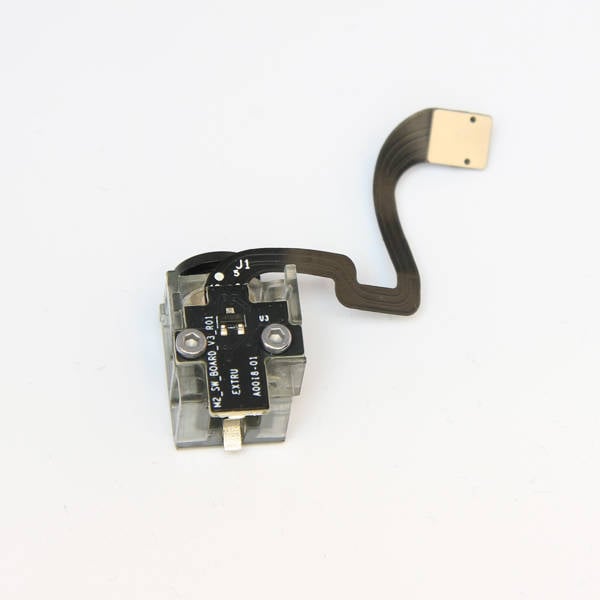
Extruder Filament Sensor - P1 Series
¶ When to use
- The cable is damaged
- There are false reports of unloading failure
- There are false reports of the cutter being stuck
¶ Tools
1x H1.5 hex key
List of screws used for the parts in this guide
| Model | Position | Drawing | |
| Screw A | BT2*05 | The base | 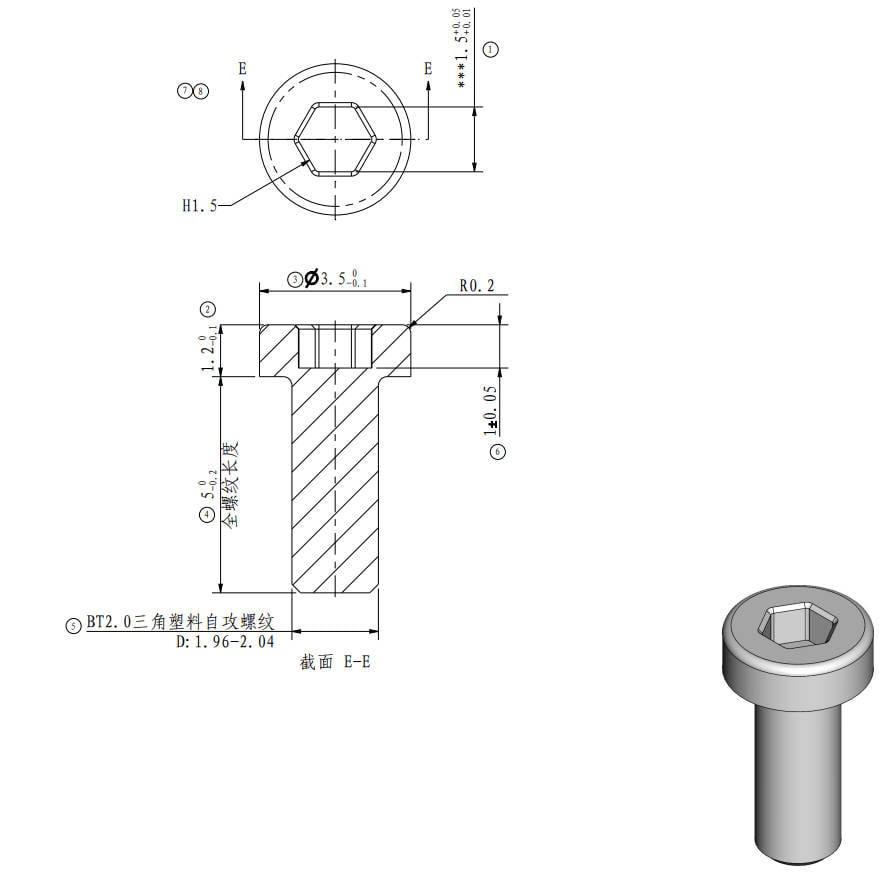 |
| Screw B | MG2.5*13 | Cutter lever | 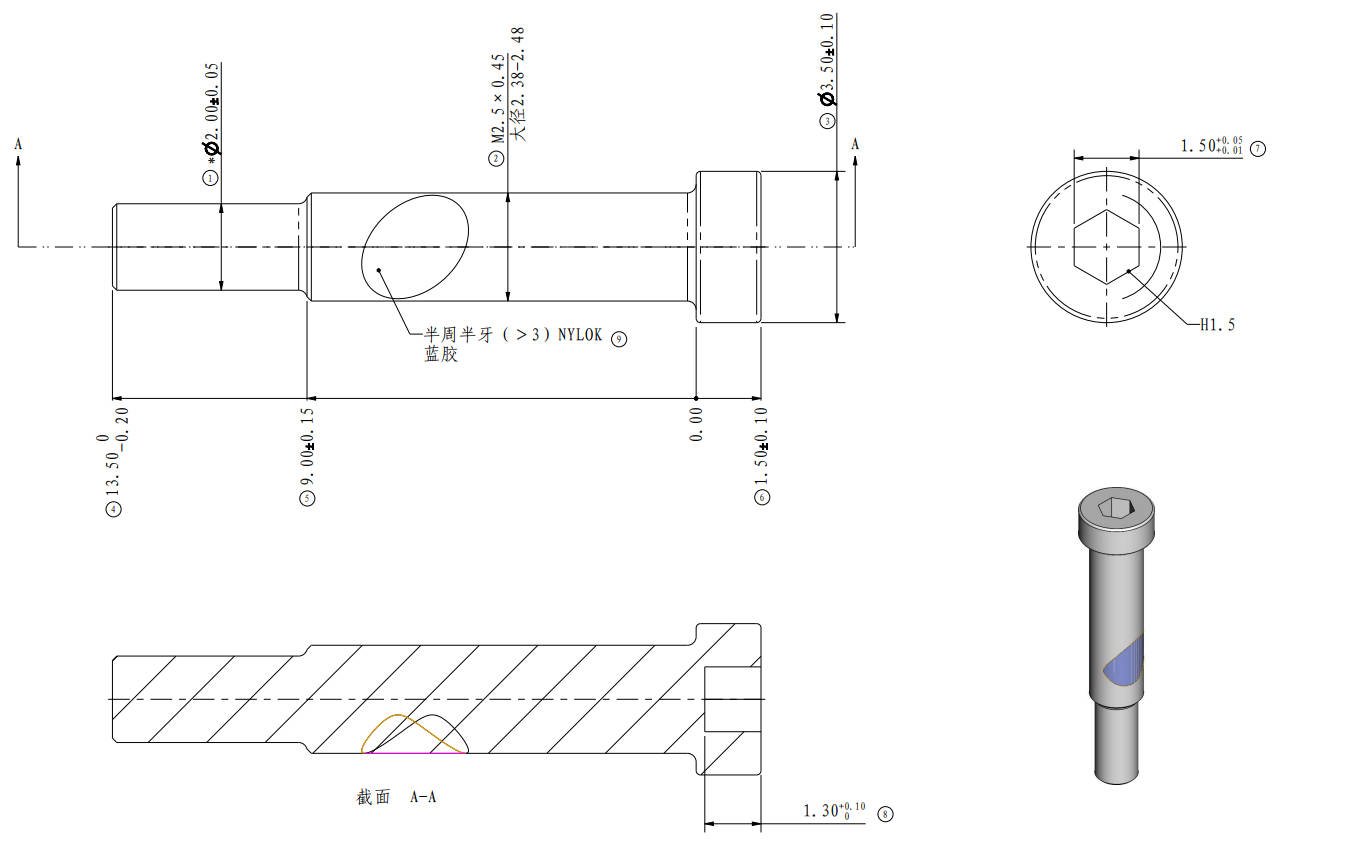 |
¶ Safety Warning
IMPORTANT!
It's crucial to power off the printer before conducting any maintenance work, including work on the printer's electronics and tool head wires. Performing tasks with the printer on can result in a short circuit, leading to electronic damage and safety hazards.
During maintenance or troubleshooting, you may need to disassemble parts, including the hotend. This exposes wires and electrical components that could short circuit if they contact each other, other metal, or electronic components while the printer is still on. This can result in damage to the printer's electronics and additional issues.
Therefore, it's crucial to turn off the printer and disconnect it from the power source before conducting any maintenance. This prevents short circuits or damage to the printer's electronics, ensuring safe and effective maintenance. For any concerns or questions about following this guide, open a new ticket in our Support Page and we will do our best to respond promptly and provide the assistance you need.
¶ Disassembly
¶ Step 1 - Remove the filament from the extruder and PTFE tube
Before proceeding to step 2 and removing the sensor, ensure that there is no filament in the PTFE tube or the sensor.
¶ Step 2 - Remove the front housing
Remove the front housing and disconnect the part cooling fan cable, then place the front housing away.
Ensure to pull on the connector, not on the wires, to avoid damage.
¶ Step 3 - Disconnect the PTFE tube and loosen the cutter lever
Press the tube bracket to disconnect the PTFE tube. 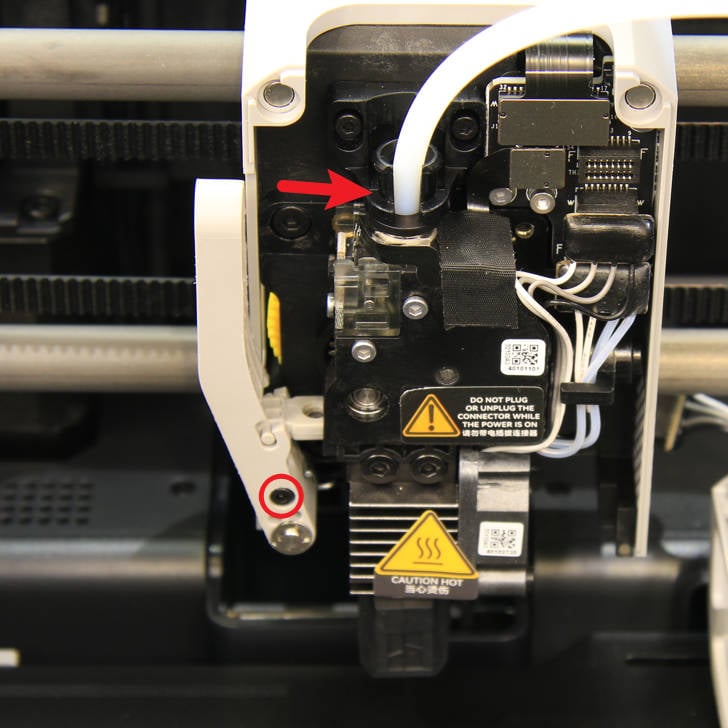 PTFE Connector |
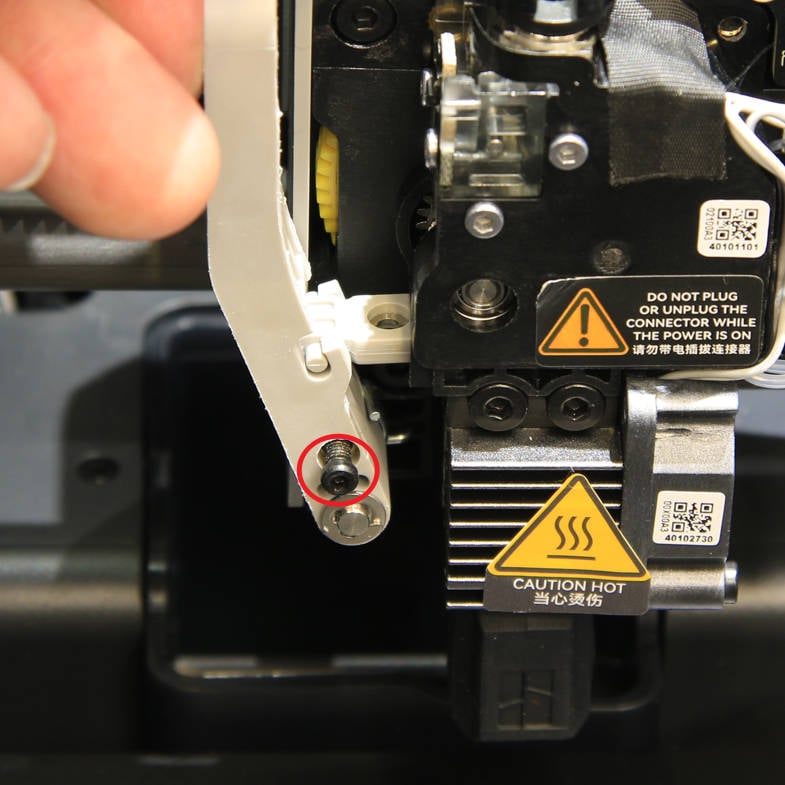
Use the H1.5 hex key to loosen the screw (screw B) on the cutter lever and release the lever.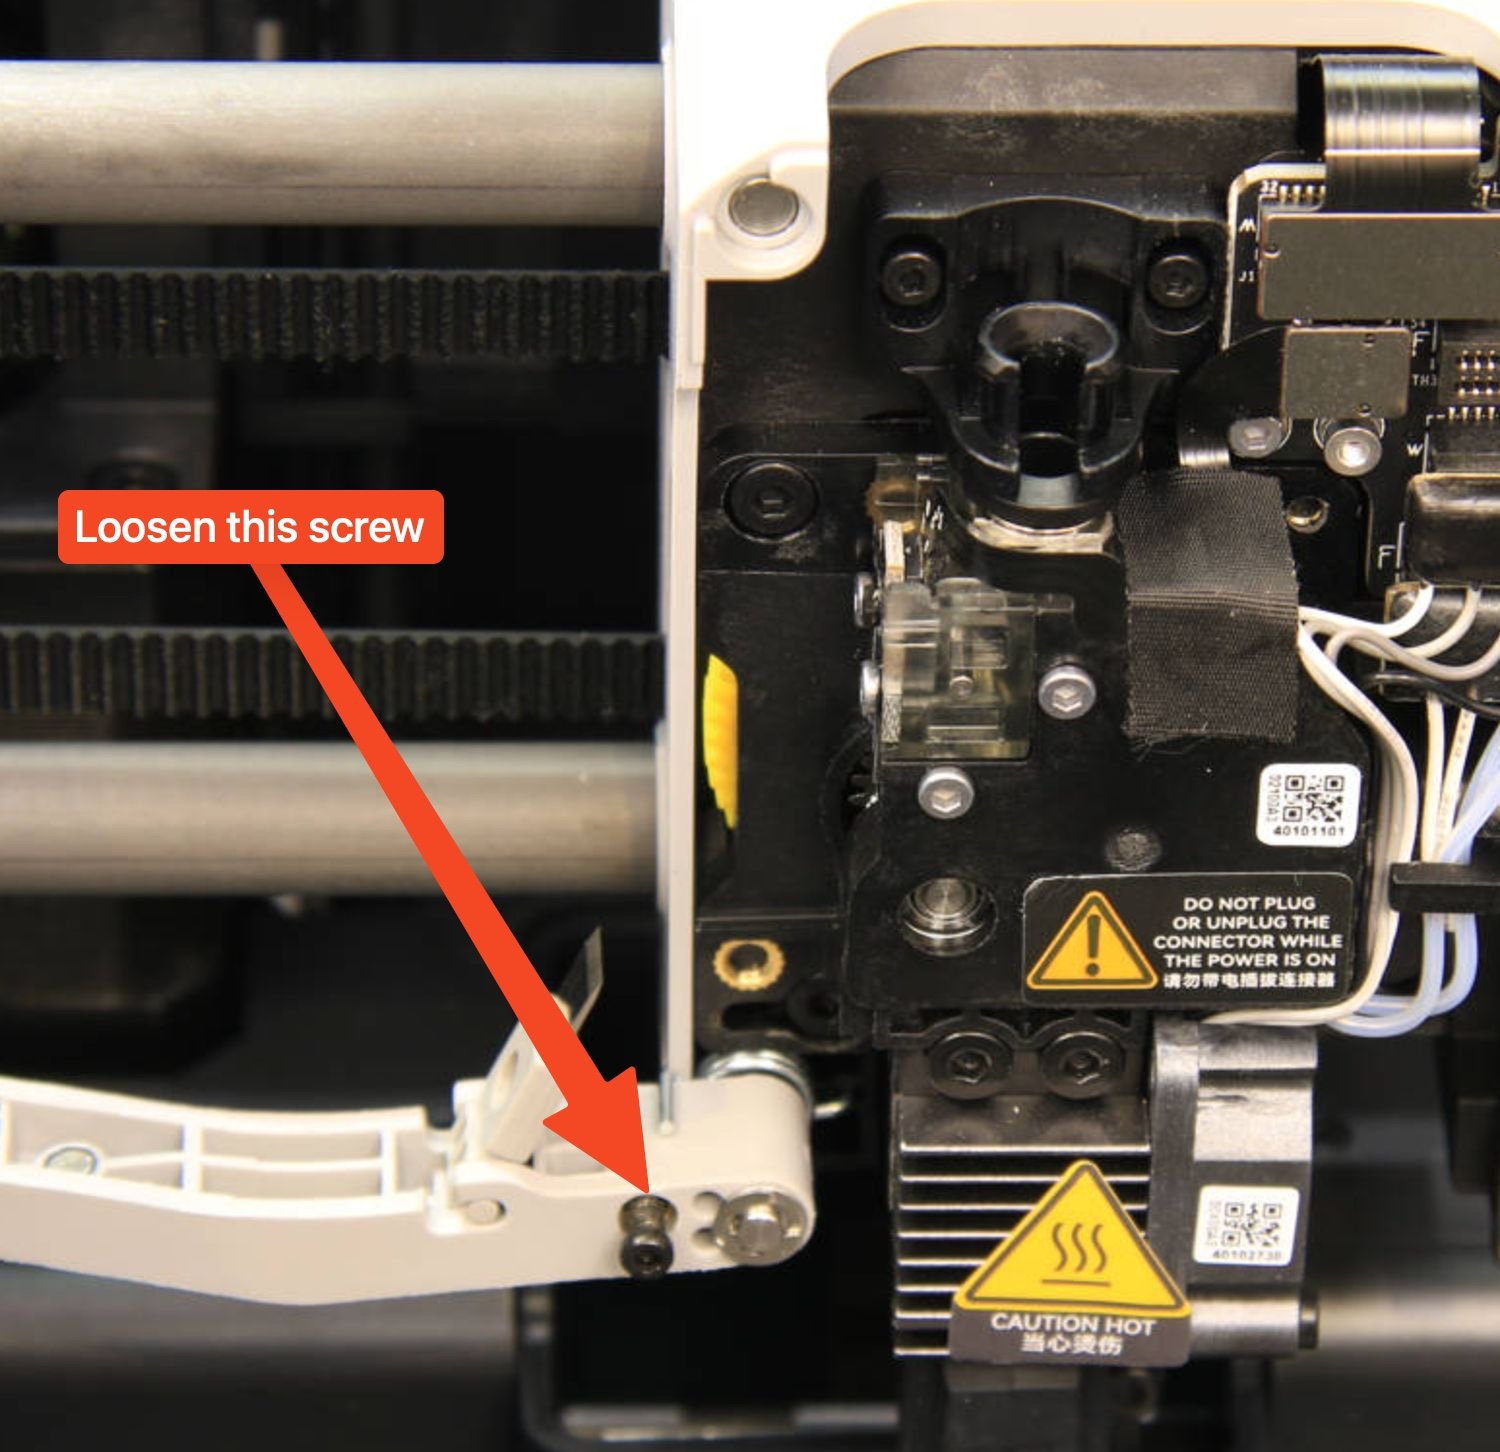 The screw on the Filament Cutter has been loosened. |
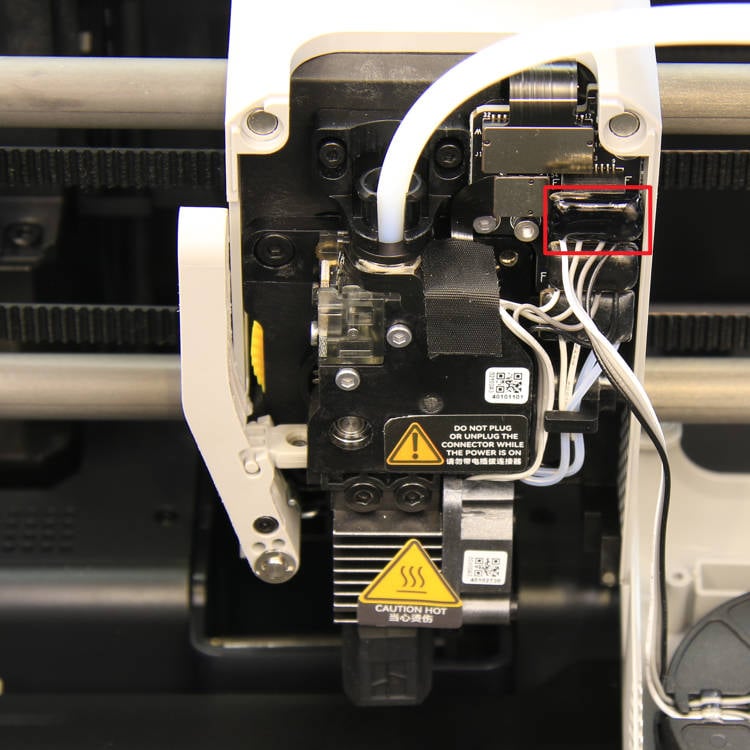
¶ Step 4 - Disconnect the flex cable
Disconnect the hall switch board cable, then remove the cable fixing tape.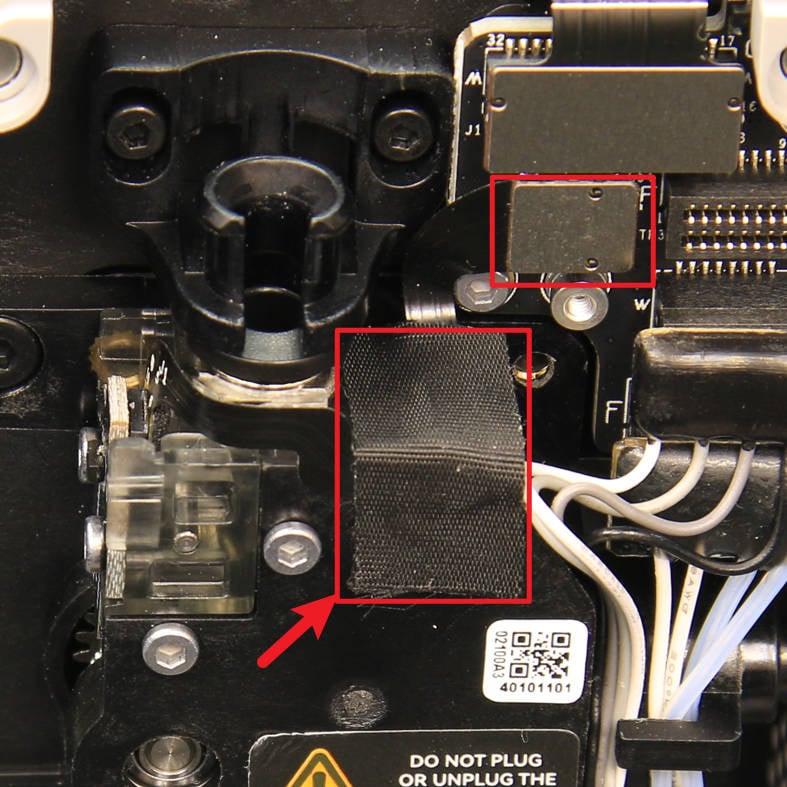 Filament Sensor ribbon cable and tape |
Remove the 2 screws shown in the picture (screw A) with an H1.5 hex key.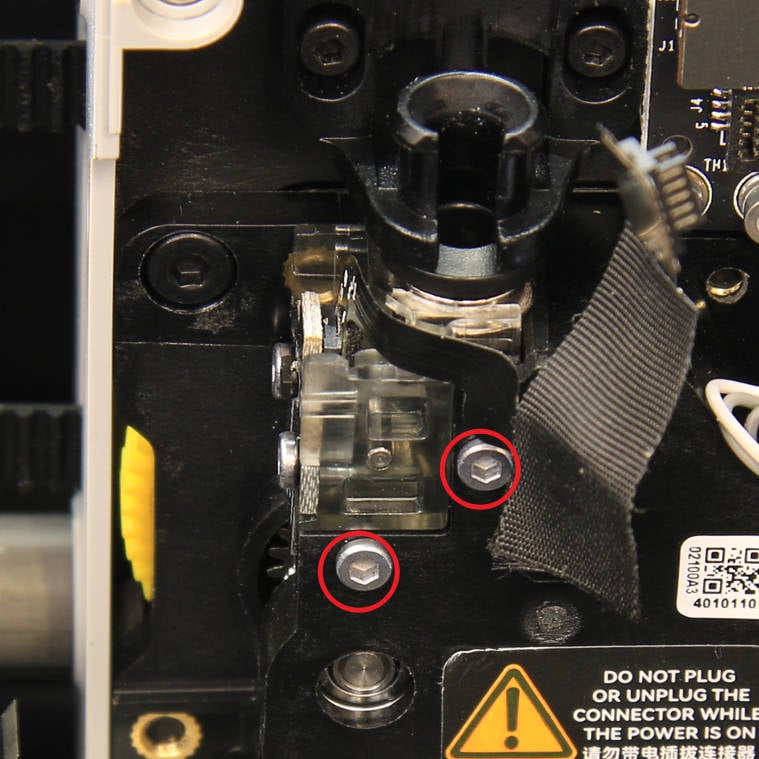 Extruder Filament Sensor screws installed on the extruder |
¶ Step 5 - Remove the Extruder Filament Sensor
Use the hex key to insert it into the PTFE connector and push it towards the left side of the extruder to loosen it.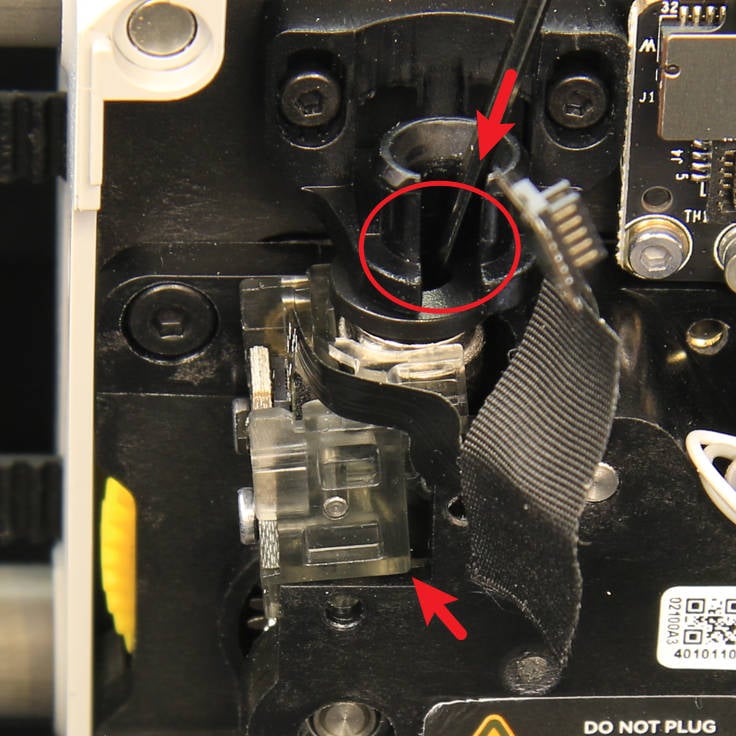 Use the hex tool to push the filament sensor away from the extruder. |
Remove the Extruder Filament Sensor from the extruder. 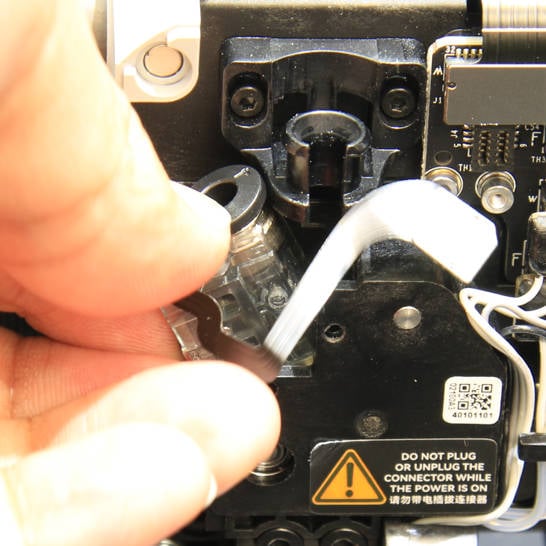 |
¶ Assembly
¶ Step 1 - Install the new Extruder Filament Sensor
Press the pneumatic connector on the hall switch board assembly to install it in place, and then lock in 2 screws (screw A) to secure it.
Press the PTFE tube connector of the sensor to install it securely.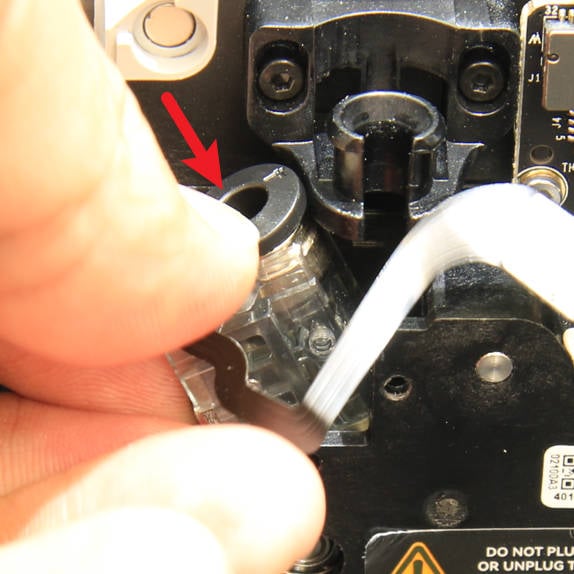 Extruder Filament Sensor |
Re-install the screws removed in step 4 from the disassembly process.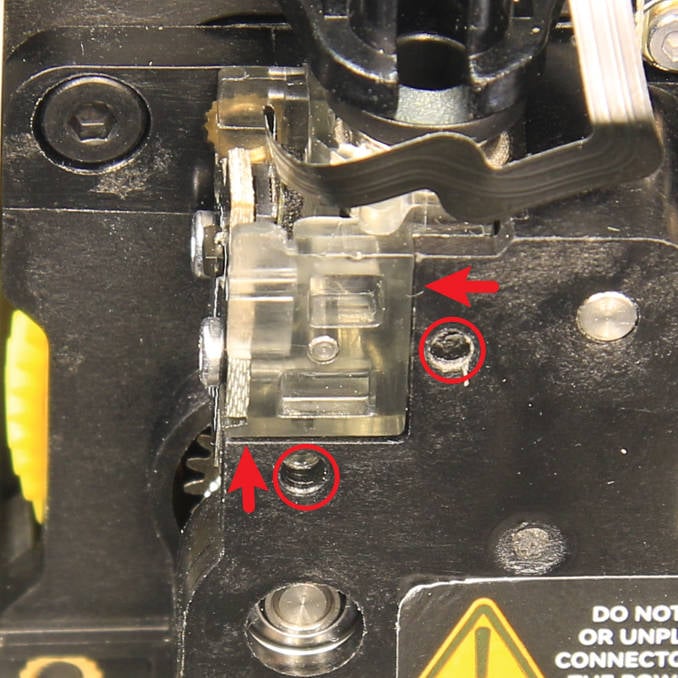 Extruder Filament Sensor screw location |
¶ Step 2 - Connect the flex cable
Align the connector and connect the sensor cable to the tool head board as shown in the image below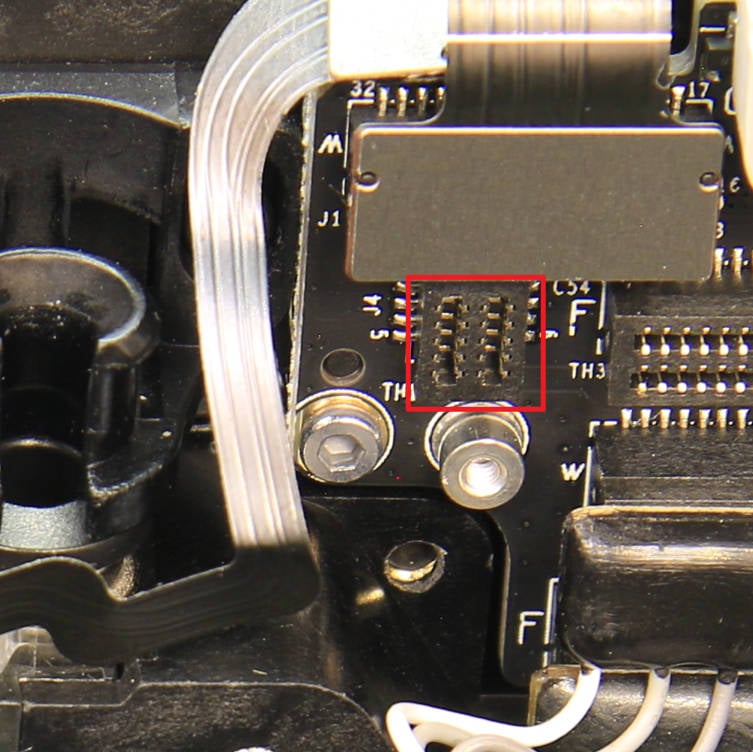 Filament Sensor connector on the TH board |
Fix the ribbon flex cable in place using the tape to avoid it getting damaged. Tape covering the ribbon cable |
¶ Step 3 - Lock the cutter lever
Hold up the cutter lever by hand, then slide the cutter into the slot, and tighten the lever screw (screw B) as shown in the picture below.
Filament Cutter screw
¶ Step 4 - Connect the PTFE tube and close the front housing
Insert the PTFE tube into the connector, connect the part cooling fan cable, and close the front housing.
Insert the PTFE tube back into the connector, and re-connect the front housing cable as shown in the image below. 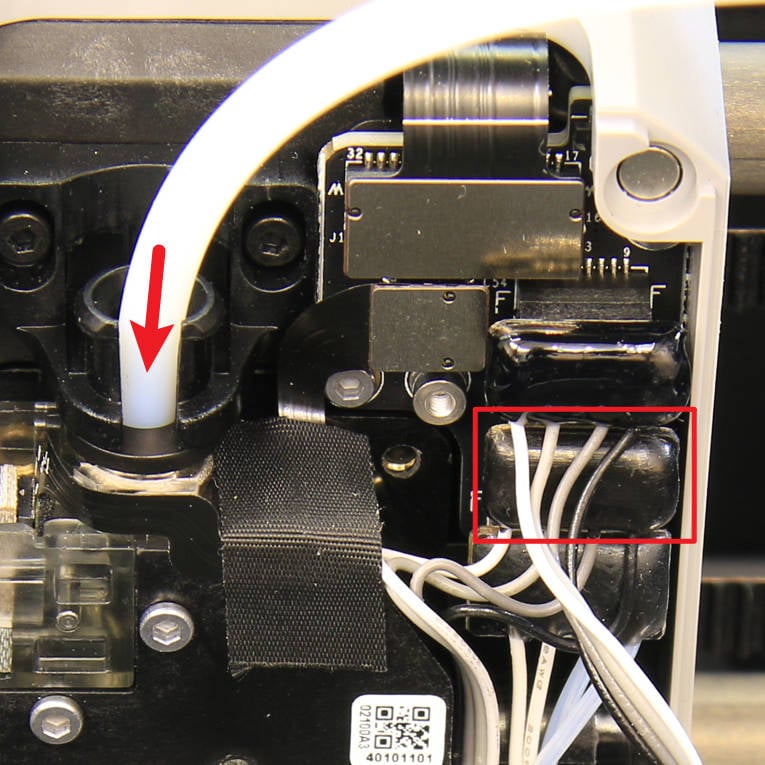 PTFE Tube and Front Housing cable installed |
Re-attach the front housing to the print head |
¶ To verify completion/success
Turn on the printer, manually load filament (or load filament via the AMS), and then perform unloading. If the process is completed without issues, the replacement is successful. If not, double-check the connections and retry. If errors persist, you can contact the technical team for further assistance.
¶ End Notes
We hope the detailed guide provided has been helpful and informative. To ensure a safe and effective execution, if you have any concerns or questions about the process described in this article, we recommend submitting a Technical ticket regarding your issue. Please include a picture or video illustrating the problem, as well as any additional information related to your inquiry.