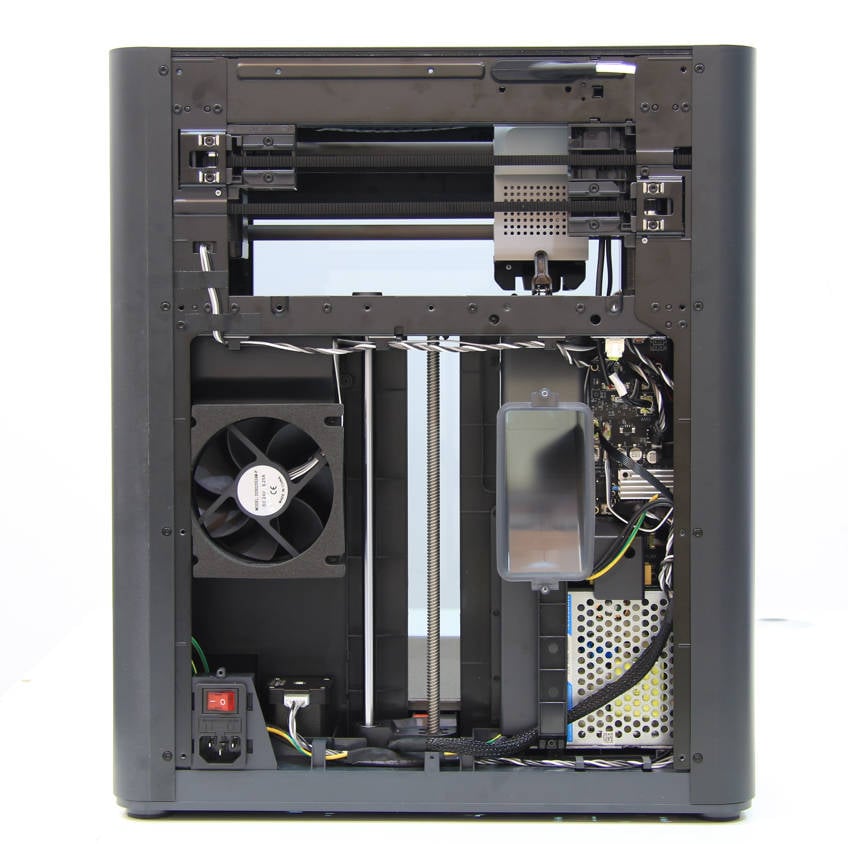
¶ Auxiliary Part Cooling Fan-P1S
The auxiliary part cooling fan, a powerful 12W unit installed on the left side of the chamber, provides a better cooling condition for high-speed printing.
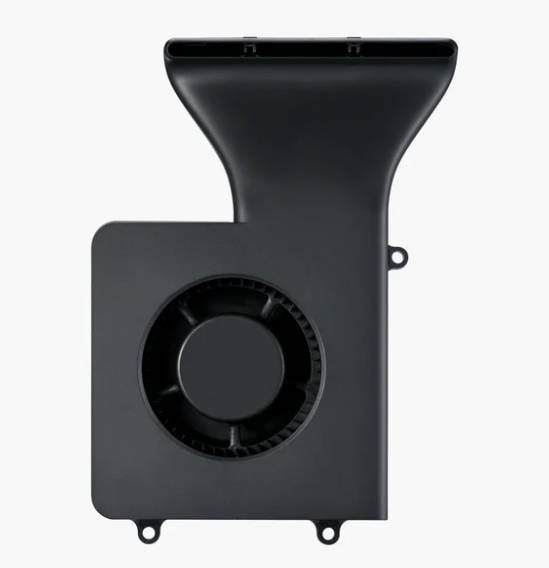
You can purchase it at our store here: Auxiliary Part Cooling Fan
¶ When to use
Damaged blades, a faulty fan motor, or a noisy fan.
¶ Tools
- New auxiliary part cooling fan
- H2.0 hex key
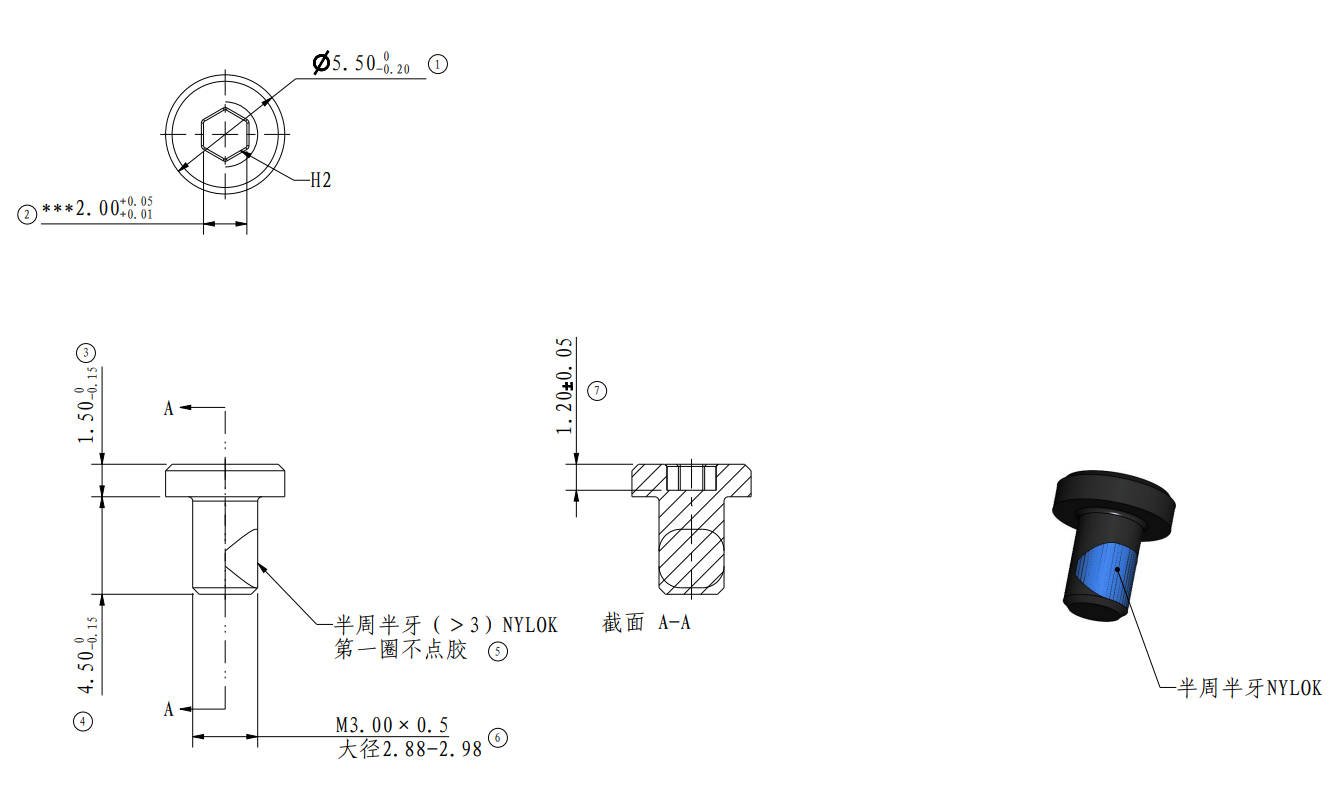
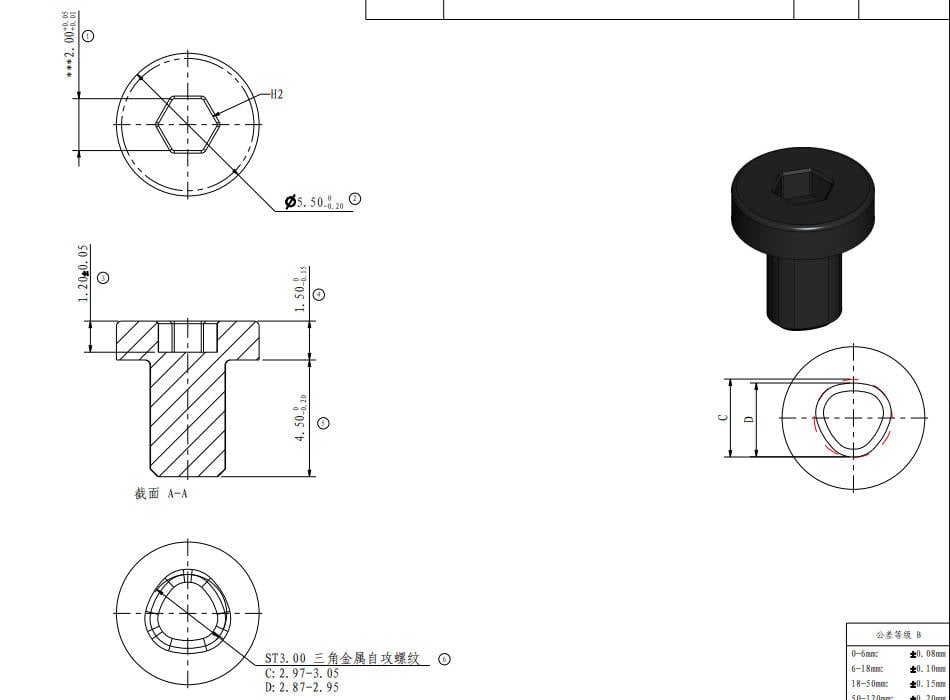
- Screws list
| Model | Position | Drawing | Model | Position | Drawing | ||
| Screw A | BT3*5 | Rear panel |
 |
Screw B | M3*4.5 | Rear panel |
 |
| Screw C | ST3*4.5 | Rear panel |
 |
Screw D | BT3*12 | Cooling fan |
 |
¶ Safety Warning
IMPORTANT!
It's crucial to power off the printer before conducting any maintenance work, including work on the printer's electronics and tool head wires. Performing tasks with the printer on can result in a short circuit, leading to electronic damage and safety hazards.
During maintenance or troubleshooting, you may need to disassemble parts, including the hotend. This exposes wires and electrical components that could short circuit if they contact each other, other metal, or electronic components while the printer is still on. This can result in damage to the printer's electronics and additional issues.
Therefore, it's crucial to turn off the printer and disconnect it from the power source before conducting any maintenance. This prevents short circuits or damage to the printer's electronics, ensuring safe and effective maintenance. For any concerns or questions about following this guide, open a new ticket in our Support Page and we will do our best to respond promptly and provide the assistance you need.
¶ Disassembly
¶ Step 1 - Lower the heatbed
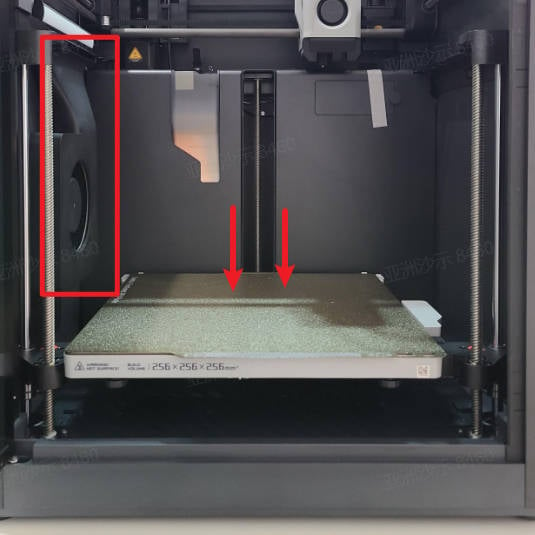
Tilt the printer, pull the Z belt, and lower the heatbed to fully expose the fan.
¶ Step 2 - Remove the rear panel
Remove the metal rear panel by following the instructions provided in the Metal rear panel.
¶ Step 3 - Disconnect the cable of the auxiliary part cooling fan
|
Find the connector of the aux fan on the MC board (FAN-2) 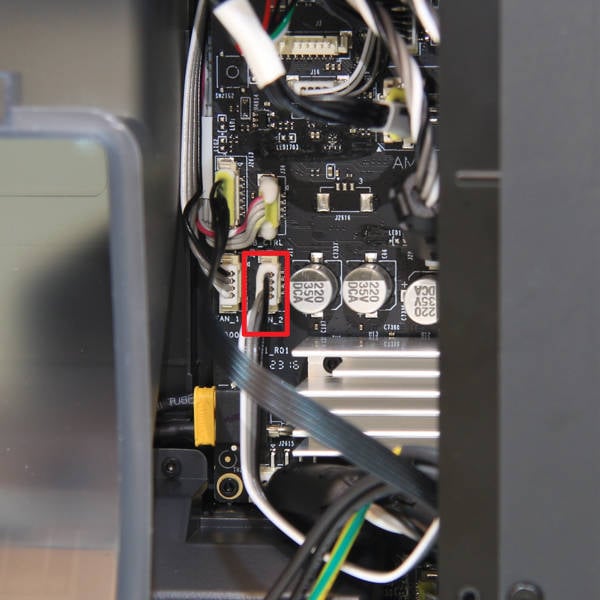 |
And then disconnect the cable 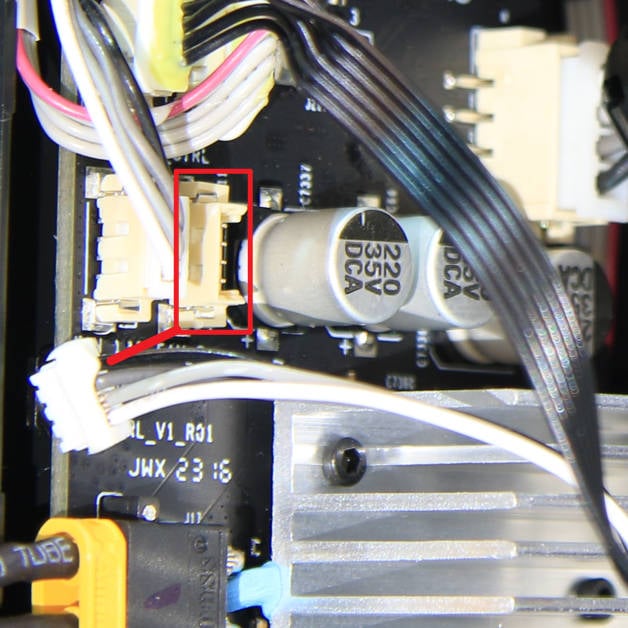 |
¶ Step 4 - Remove the auxiliary part cooling fan
|
Use the H2.0 hex key to unscrew the 2 screws D that secure the fan 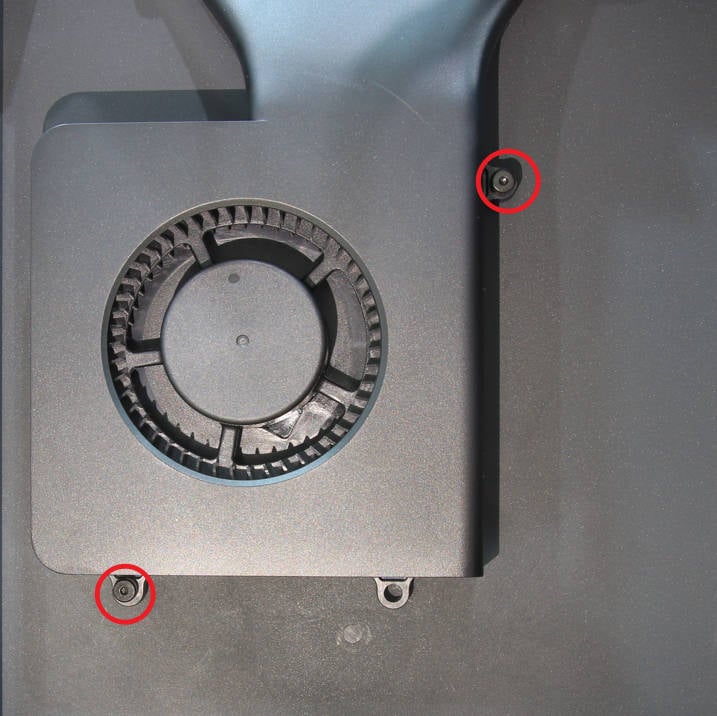 |
Separate the fan from the side panel with hand by force 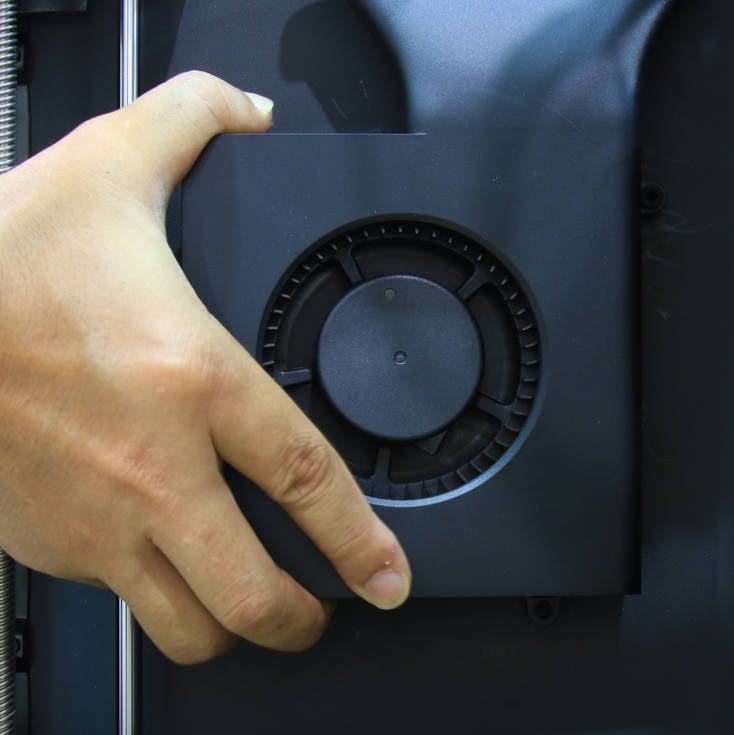 |
Pull out the fan cable toward the fan and remove the fan

¶ Assembly
¶ Step 1 - Install the new fan
|
Remove the double-sided adhesive protective paper from the new fan |
Install the fan in place according to the studs |
Secure the fan in place by tightening the 2 screws D.
¶ Step 2 - Connect the fan cable
|
Thread the fan cable through the gap between the side panel and the inner shield 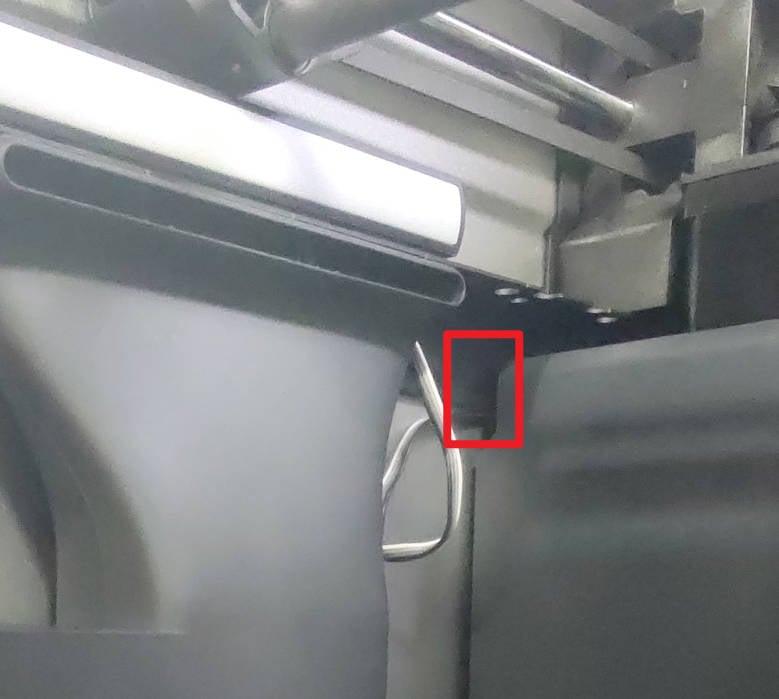 |
Connect the cable to the connector marked FAN_2 on the MC board 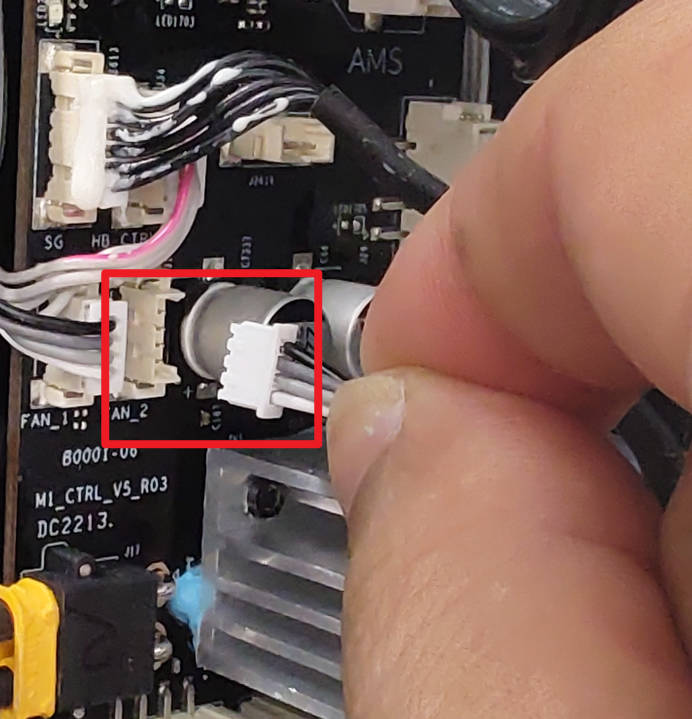 |
¶ Step 3 - Install the rear panel
Install the metal rear panel by following the instructions provided in the Metal rear panel.
¶ Verify the functionality
Connect the power cord and turn on the power. Tap the auxiliary cooling fan icon on the screen to activate the auxiliary cooling fan.
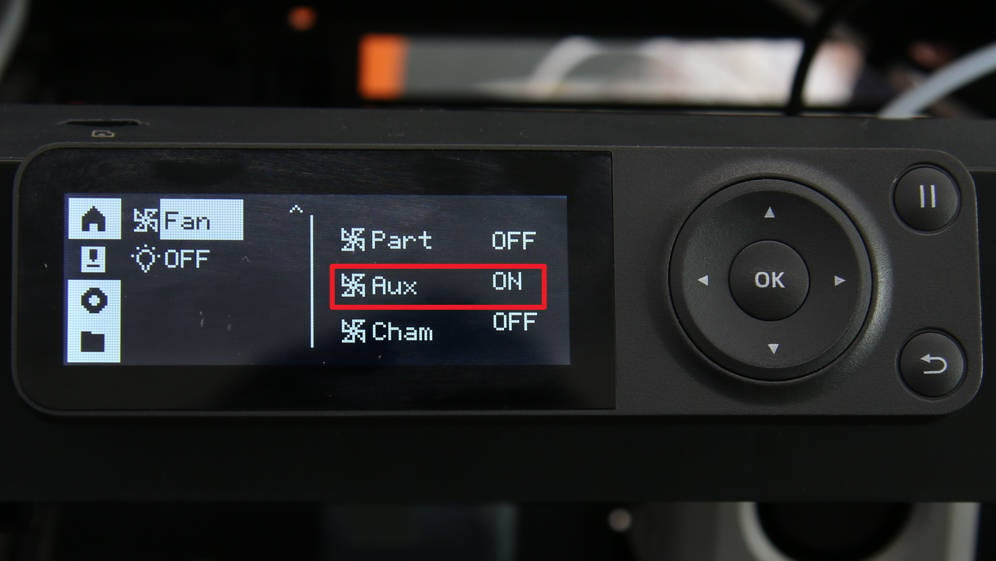
If the auxiliary part cooling fan works as expected, and the replacement is successful. Otherwise, retrace your steps, check the connections, and try again. If problems persist, contact the technical support team for further assistance.
¶ To verify completion/success
Replacing the auxiliary cooling fan does not require additional calibration.
¶ End Notes
We hope the detailed guide provided has been helpful and informative.
To ensure a safe and effective execution, if you have any concerns or questions about the process described in this article, we recommend submitting a Technical ticket regarding your issue. Please include a picture or video illustrating the problem, as well as any additional information related to your inquiry.