¶ XY tensioner idler
¶ Tools
H2.0 hex key
¶ Preparation
Power OFF the printer before doing any maintenance work.
¶ Disassembly
Note: The disassembly and assembly steps of the idlers of the two XY tensioners are similar.
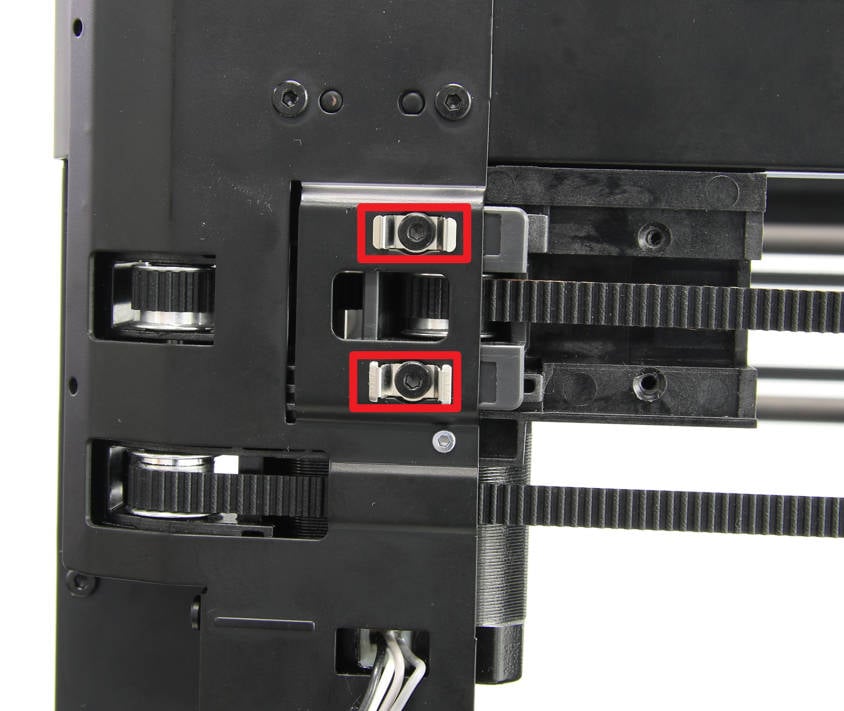
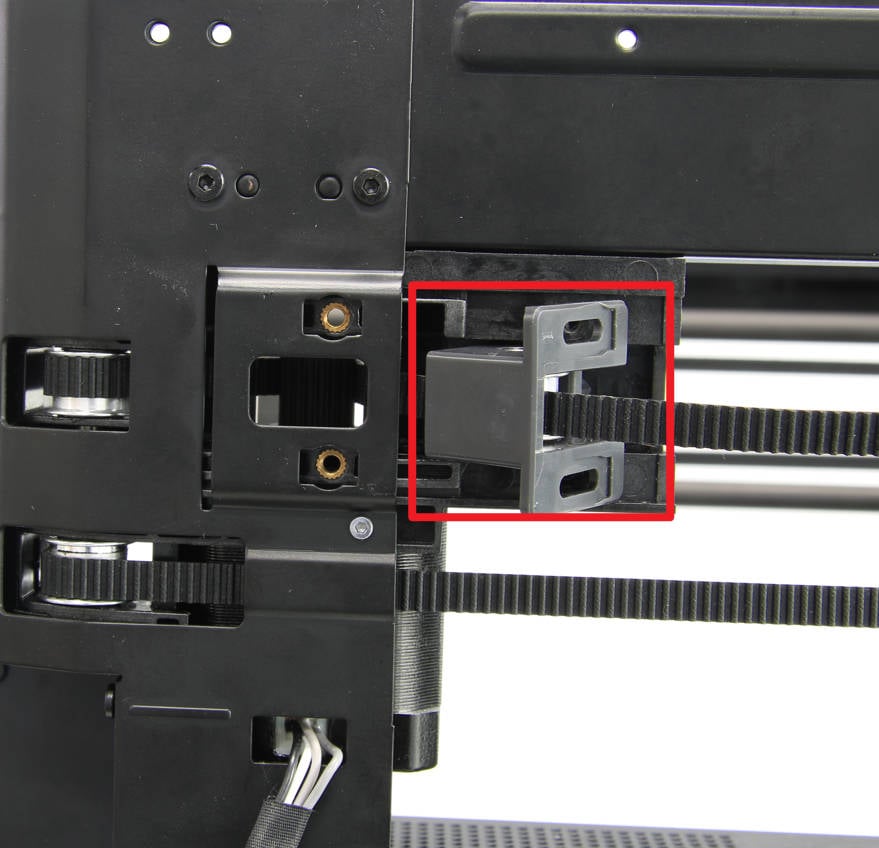
¶ Step 1 - Remove the tensioner holder
To remove the tension spring and its holder, use an H2.0 hex key to loosen and remove the two screws securing them in place.
 |
 |
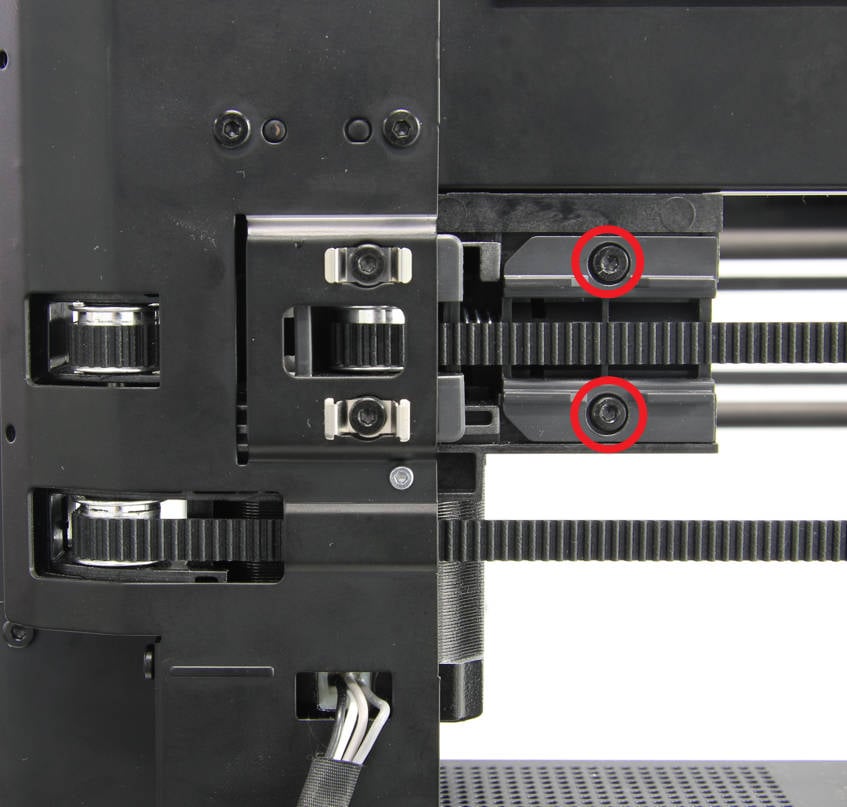
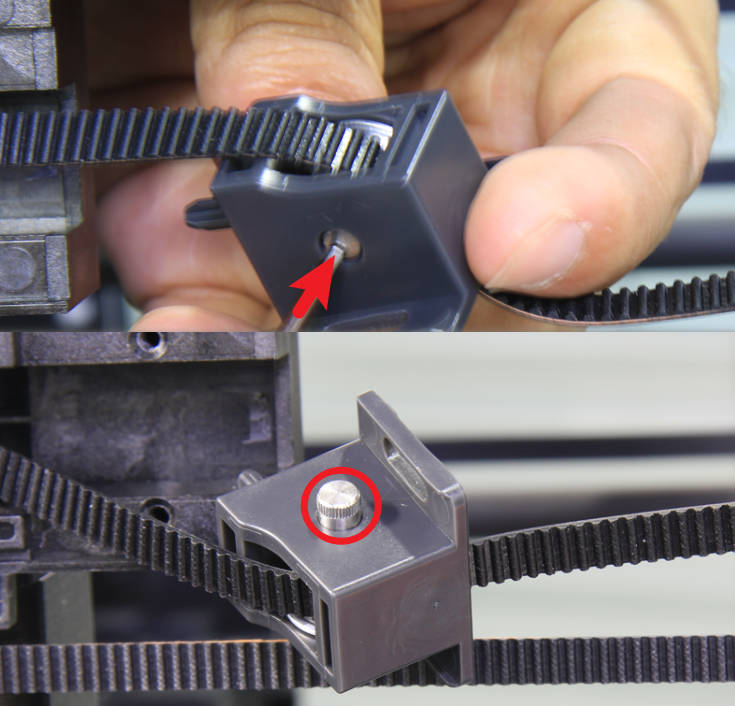
¶ Step 2 - Loosen the tensioner
Use an H2.0 hex key to loosen the two screws securing them in place. Once loosened, the tensioner can be removed freely.
 |
 |
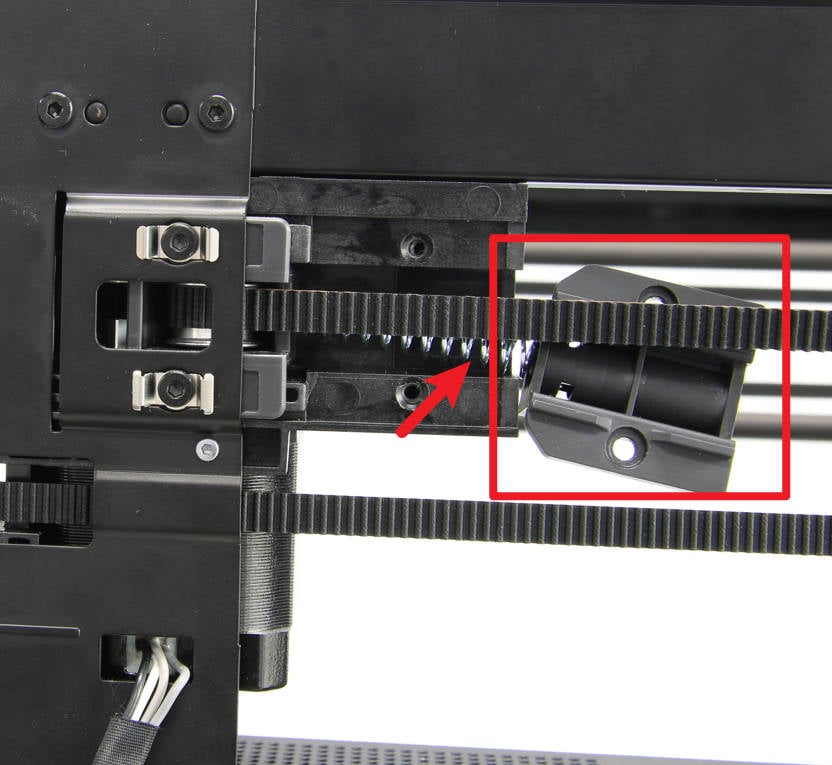
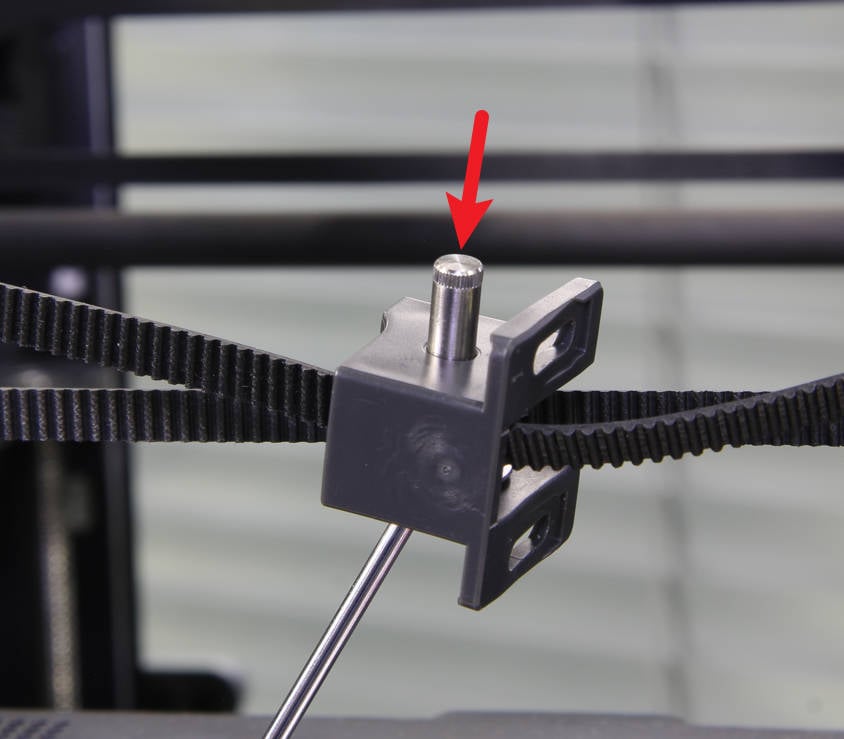
¶ Step 3 - Remove the idler
Using the hex key, push the idler shaft from the bottom up, then remove the shaft and idler.
 |
 |
¶ Assembly
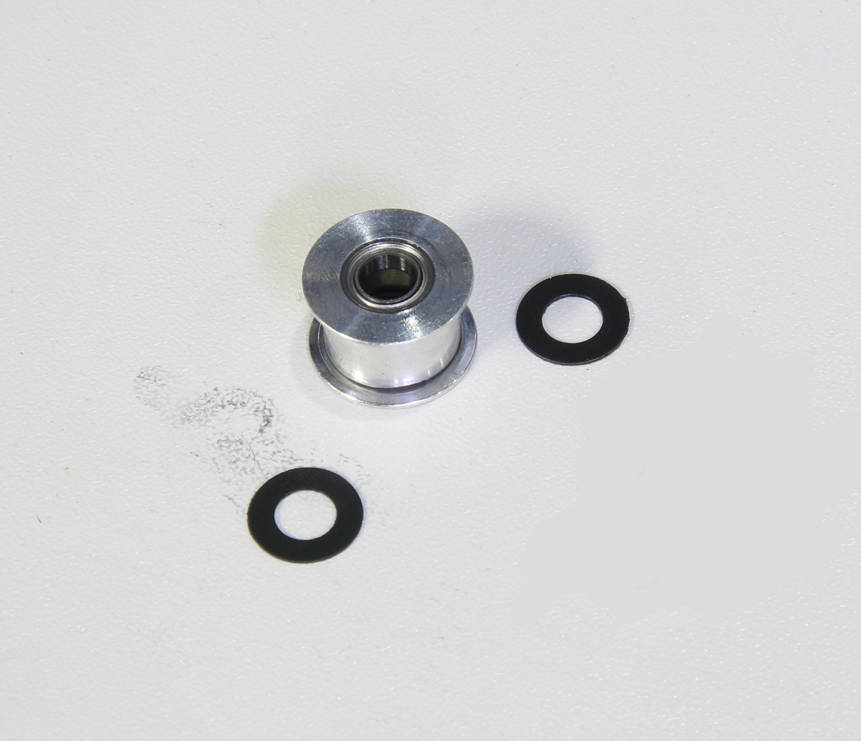
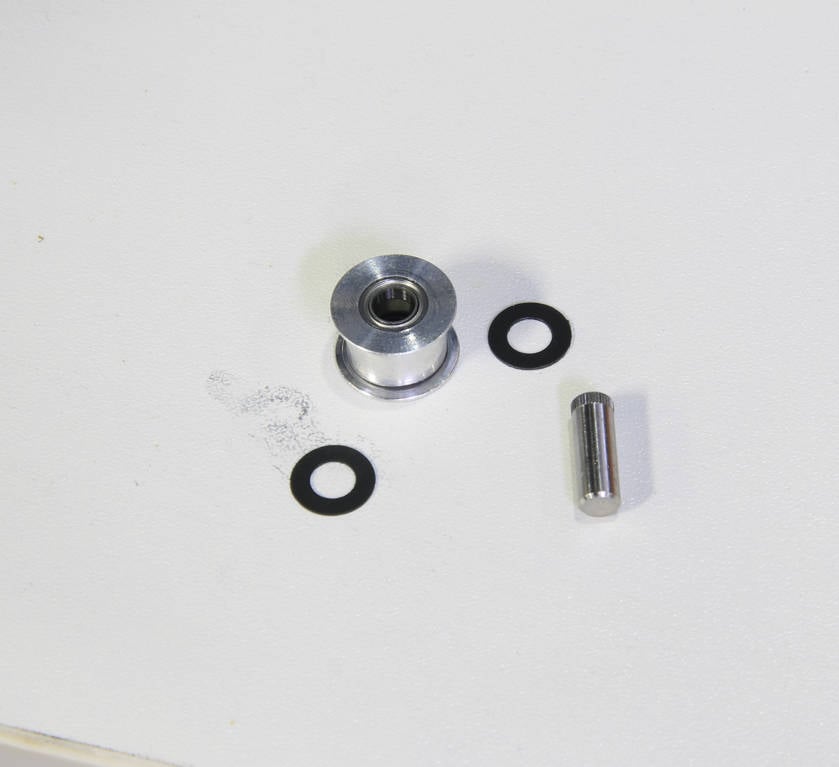
¶ Step 1 - Attach the washers
Prepare your new idler pulley and attach the two washers to both ends of the idler. You may need to use your hand to help secure it.

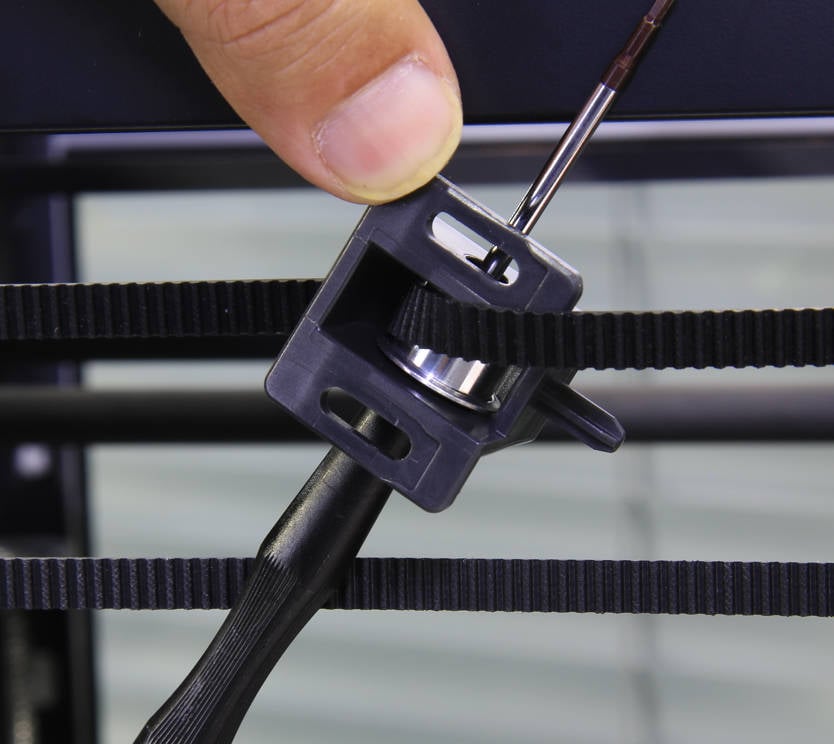
¶ Step 2 - Install the idler
Install the idler pulley onto the idler bracket. Temporarily thread it with the hex key to ensure that the idler and the two washers are in place. Then, press the shaft from top to bottom and ensure it is fully pressed in.
 |
 |
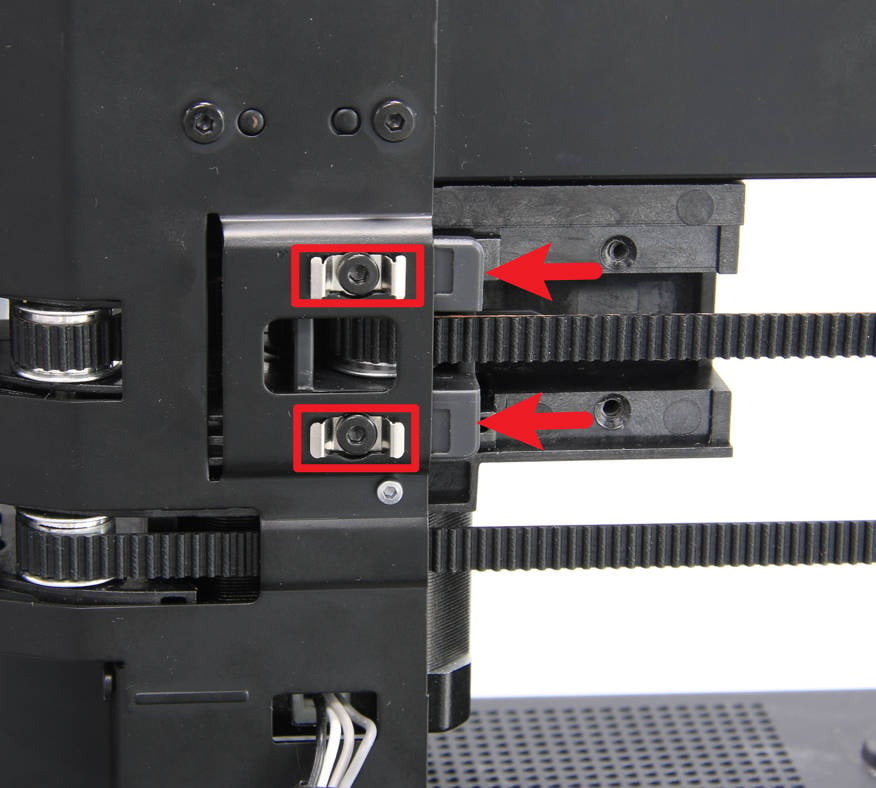
¶ Step 3 - Install the tensioner
Slide the tensioner assembly into place and screw in the 2 screws (with brackets). Do not tighten the screws yet; leave them loose for now.
¶ Step 4 - Install the tensioner holder
To install the tensioner spring and its holder, place them in the designated area and use two screws to secure them in place. Ensure the screws are tightened securely to guarantee proper attachment, thus ensuring the tensioner functions correctly.
|
|
|
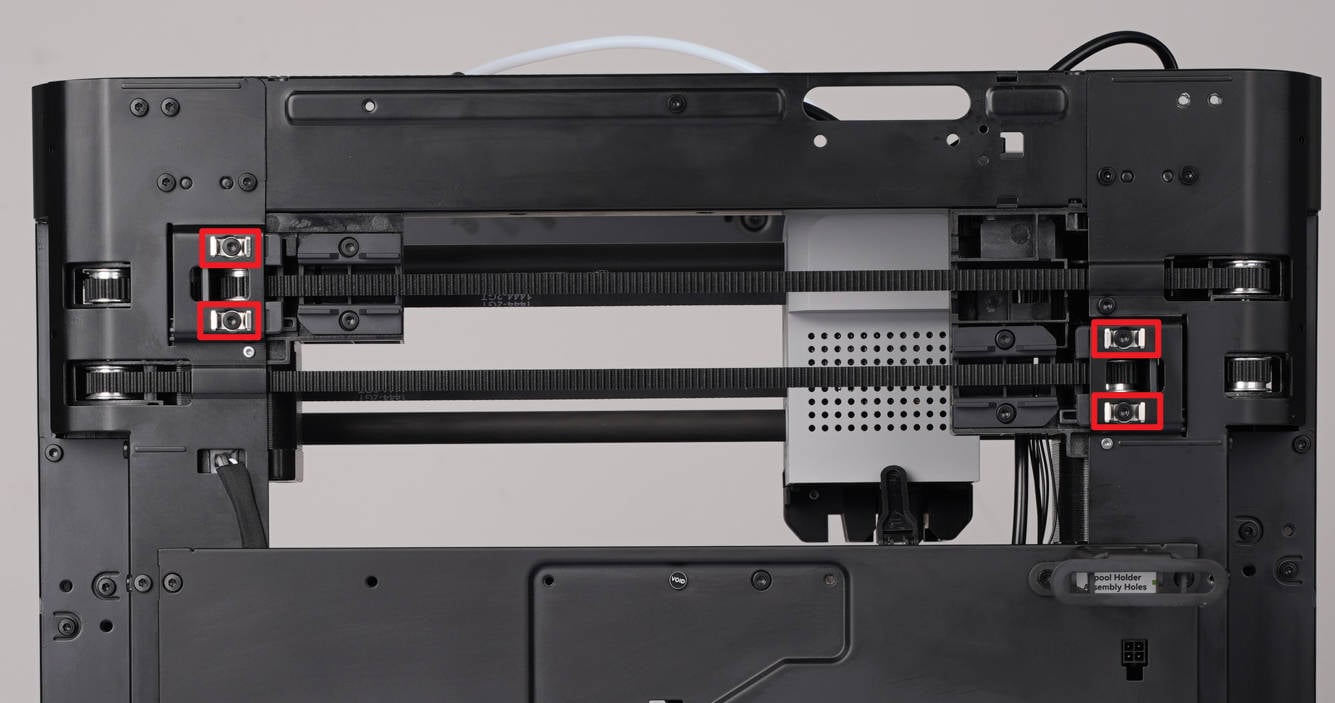
¶ Step 5 - Tension belt
Loosen the 2 screws of the other tensioner, move the toolhead back and forth several times, and bring both ends of it to the rear. Then, lock the screws on both tensioners. For more detailed instructions, please refer to our page on belt tensioning.
¶ How to verify completion/success
Power on the printer, and run the Calibration process. If no errors occur during the test, the replacement was successful.
If you encounter any issues, first retrace your steps and retension the belt before trying again. If problems persist, please contact our customer support team for further assistance.