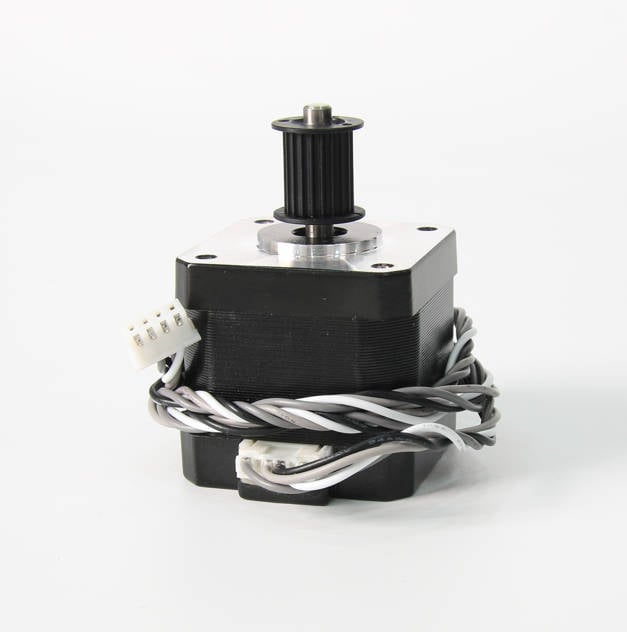
¶ Z motor
¶ Tools
H2.0/H1.5 hex key
Tweezers
¶ Preparation
Disconnect the power cord cable
¶ Disassembly
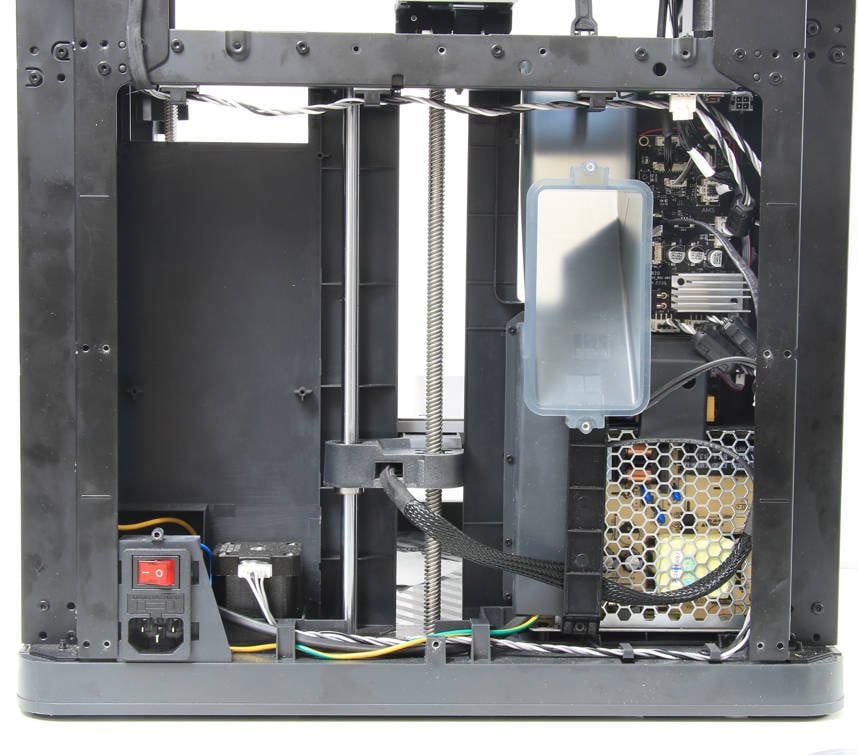
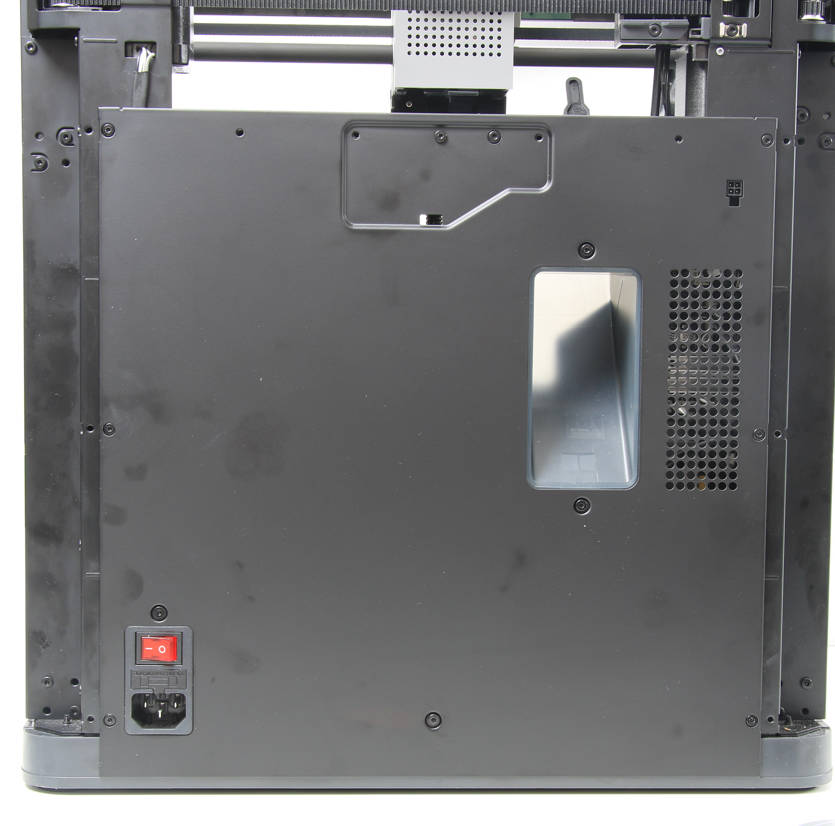
¶ Step 1 - Remove the rear panel
Refer to the related contents of the Rear panel to remove the rear panel.
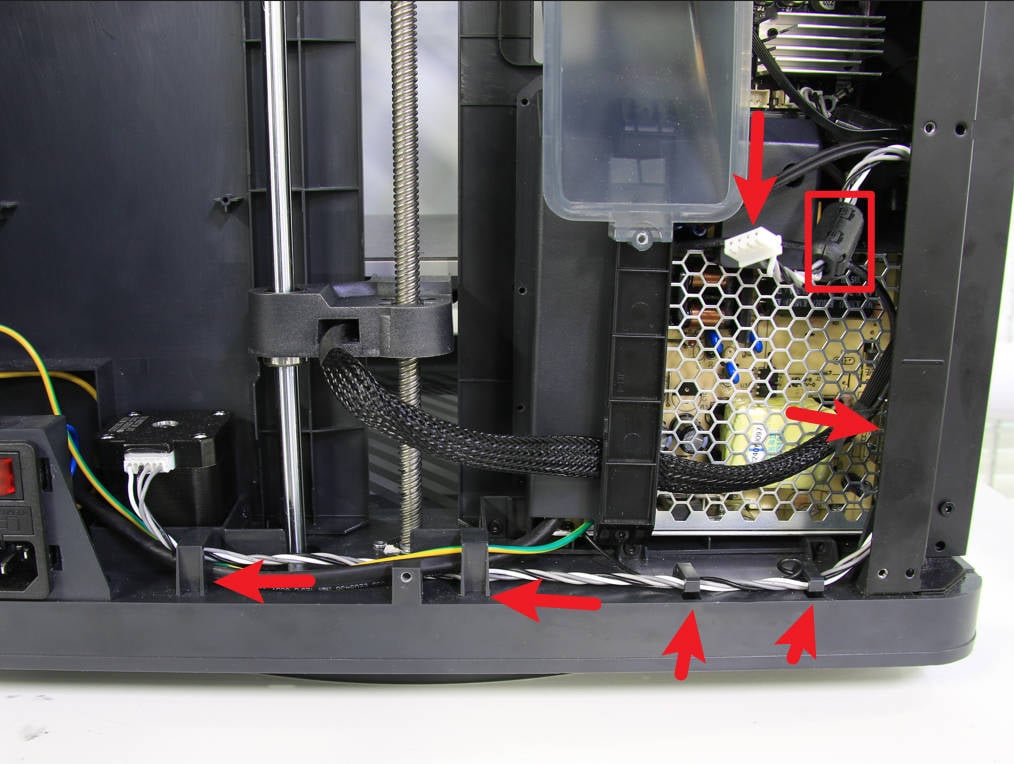
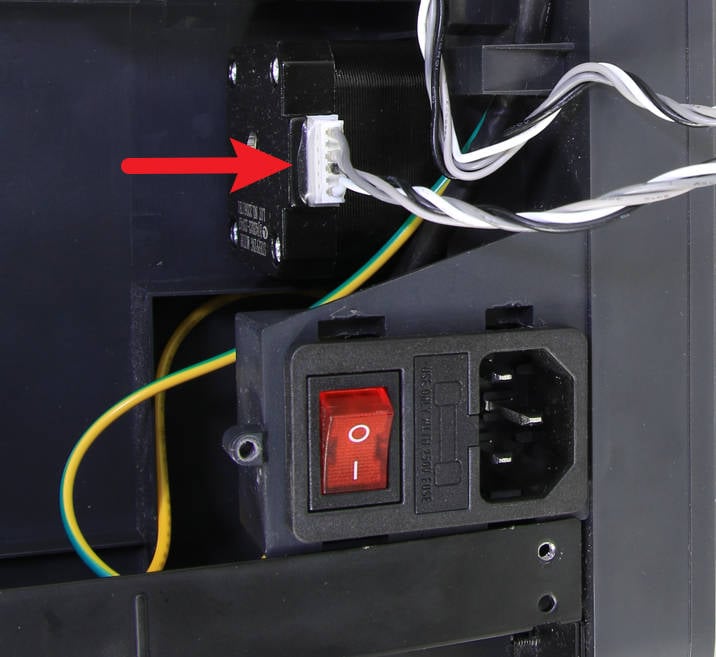
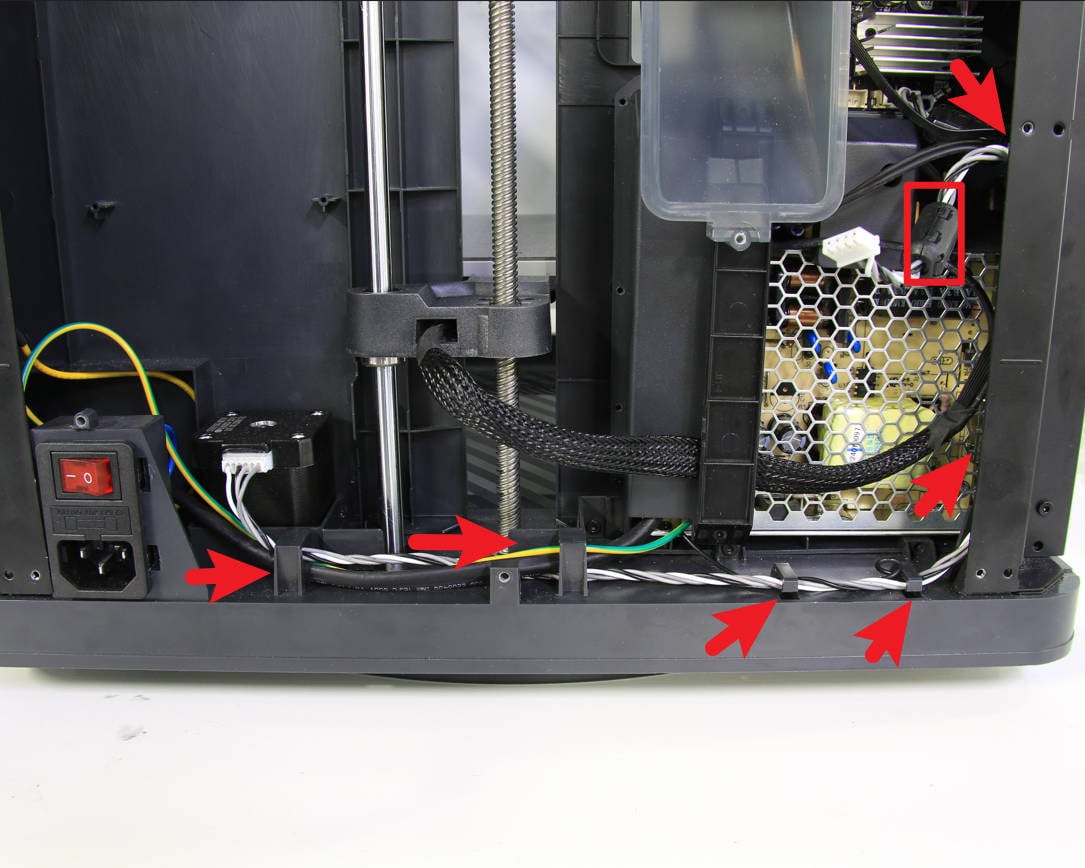
¶ Step 2 - Loosen the motor cable
To disconnect the Z motor cable from the MC board, first, remove the cylindrical ferrite ring. Then, loosen the entire cable along the route of the cable.
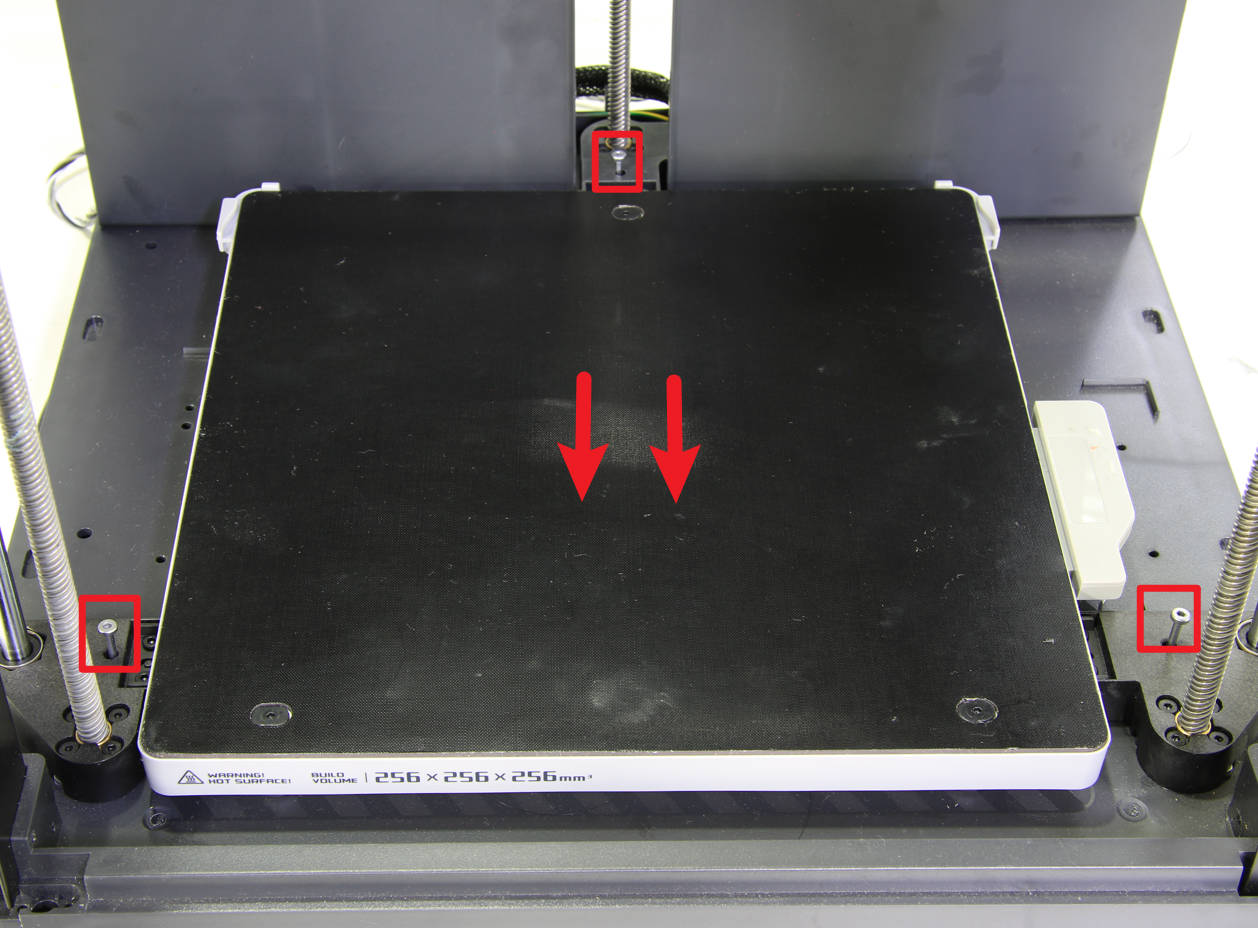
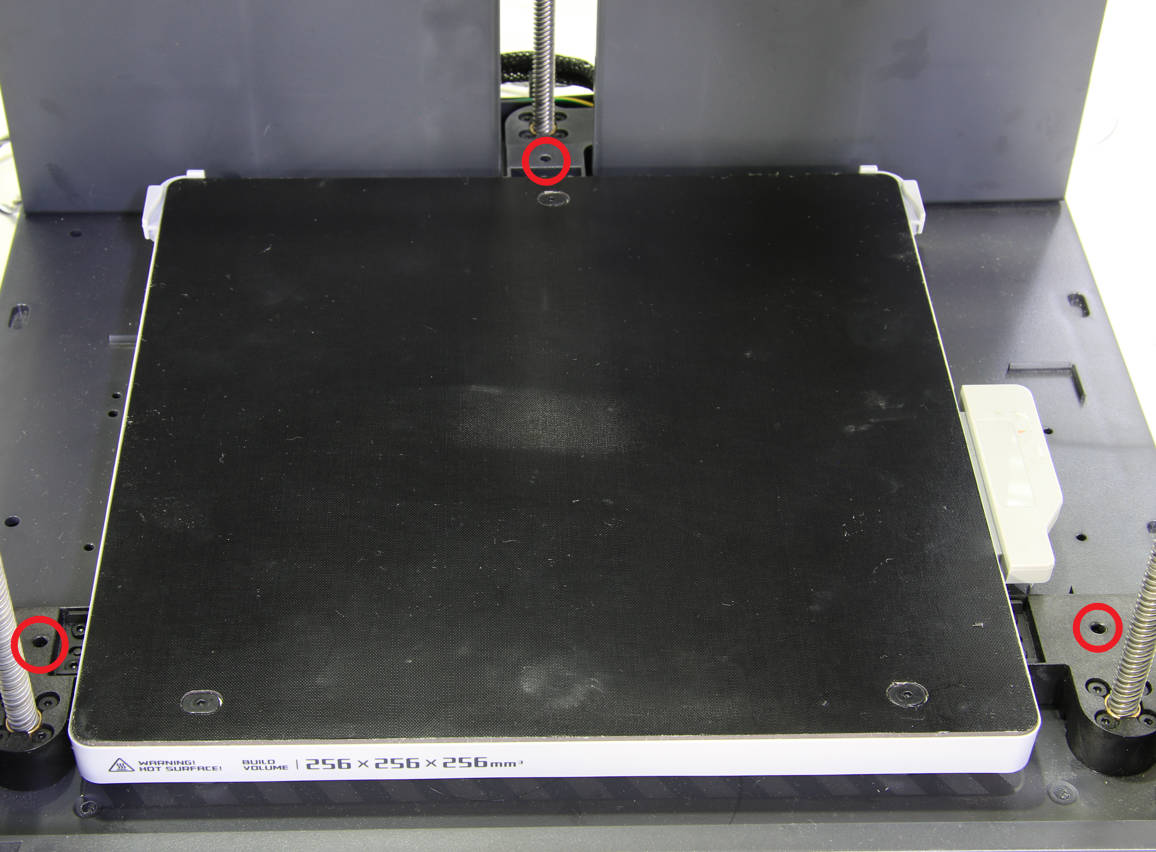
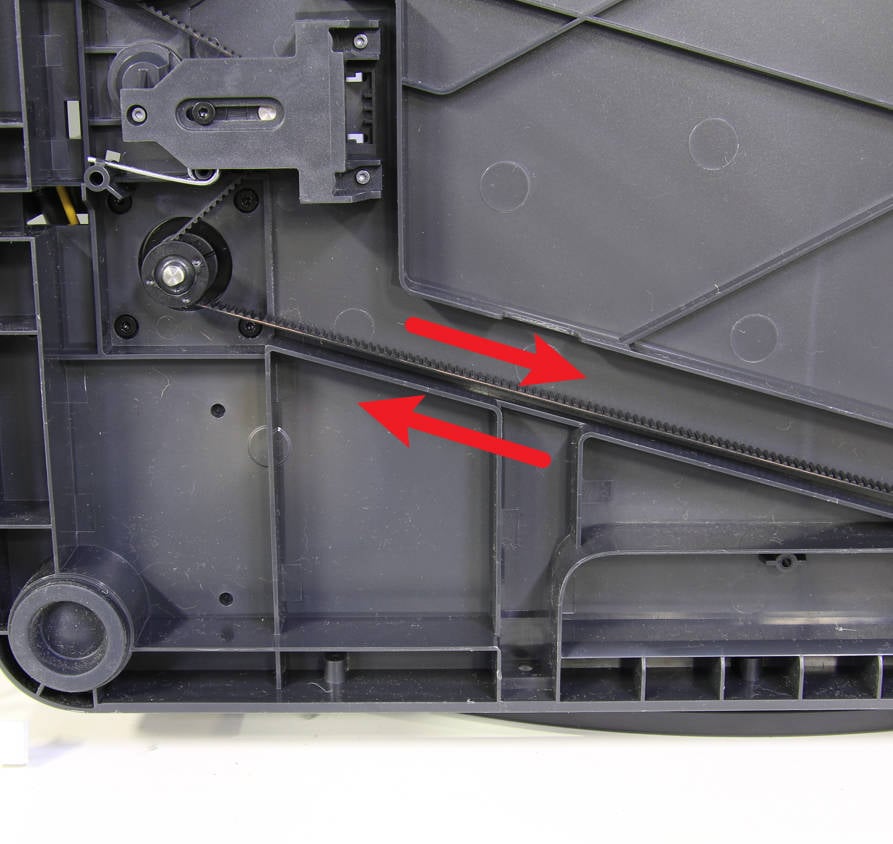
¶ Step 3 - Lower the heat bed and lock the Z-axis sliders
Tilt the printer, pull the Z-axis belt to lower the heat bed to the bottom, and lock in 3 auxiliary screws to fix the 3 Z-axis sliders.
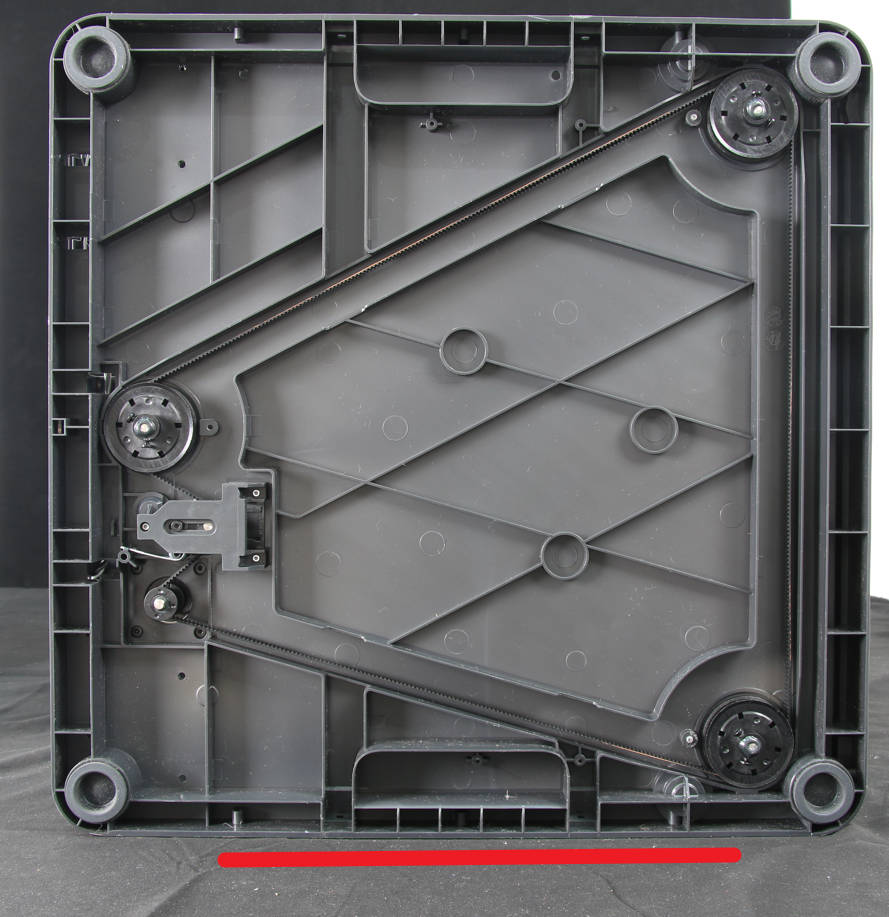
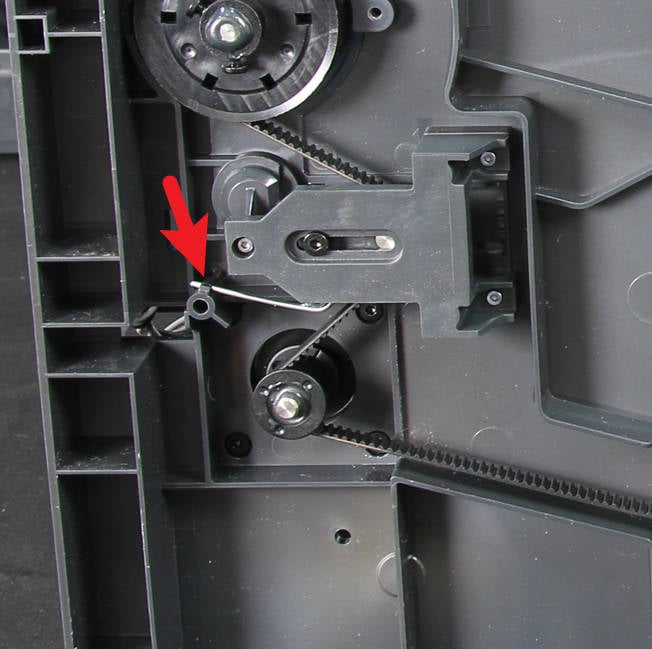
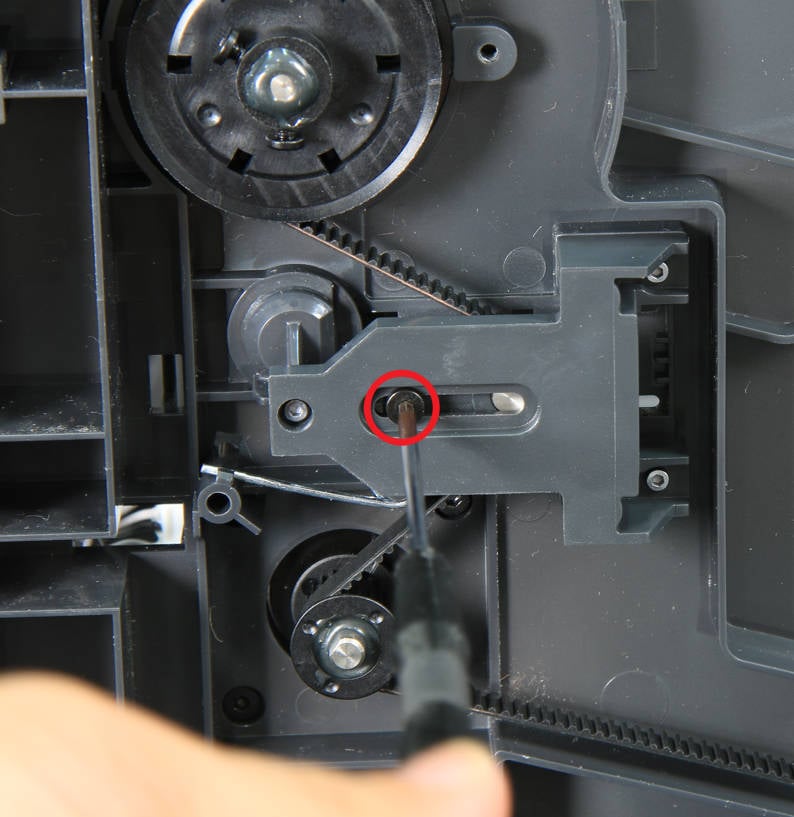
¶ Step 4 - Loosen the Z tensioner
Right side down the printer, loosen the Z tensioner screw and release the Z tension spring.
|
 |

|
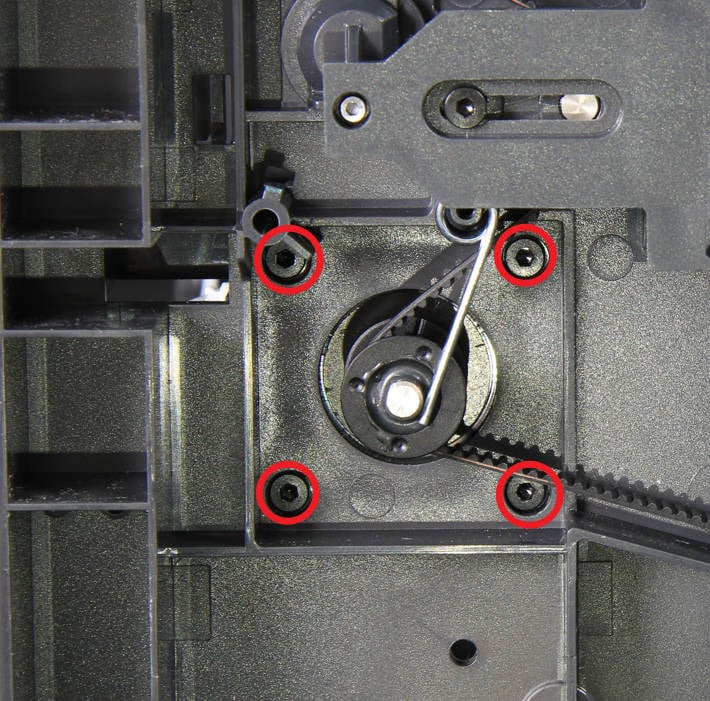
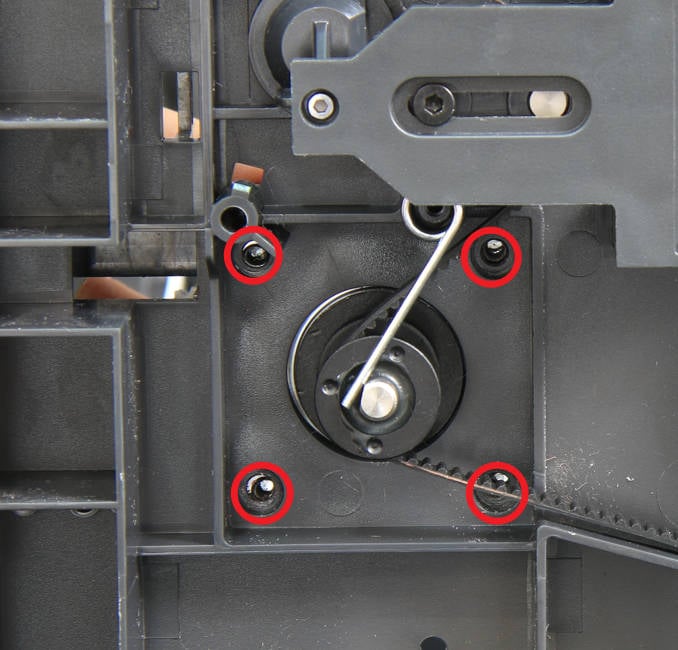
¶ Step 5 - Remove the Z motor
Remove 4 screws with the H2.0 hex key and remove the Z-axis motor.
¶ Assembly
¶ Step 1 - Install the Z motor
Install the Z motor on the bottom base of the printer, pay attention to the direction of the motor cable, and the Z belt should go around the driving pulley of the motor.
 |
 |
¶ Step 2 - Lock the motor screws
Lock in 4 screws to fix the Z motor by screwing diagonally, and then tension the spring.
 |
 |
¶ Step 3 - Unlock the Z sliders
Put the printer upright, and then remove the 3 screws that lock the Z sliders.
¶ Step 4 - Lock tensioner screws
Right side down the printer again, pull the Z belt to move the heat bed up and down, confirm that there is no abnormality in the movement, and then lock the tensioner screw.
 |
 |
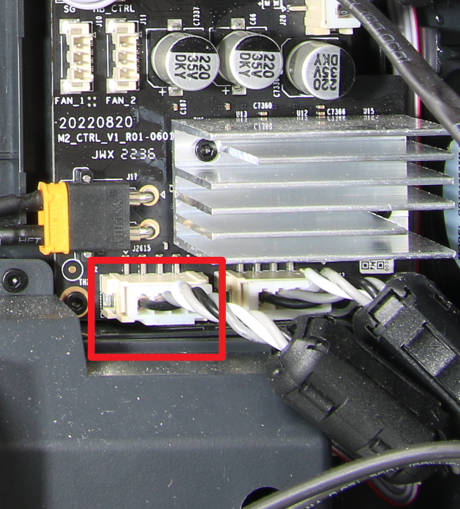
¶ Step 5 - Connect motor cables
Put the printer upright, organize the motor cable along the routing path, install the cylindrical ferrite ring, and connect the cable to the connector on the MC board.
 |
 |
¶ Step 6 - Install the rear panel
Refer to the related contents of the Rear panel to install the rear panel.
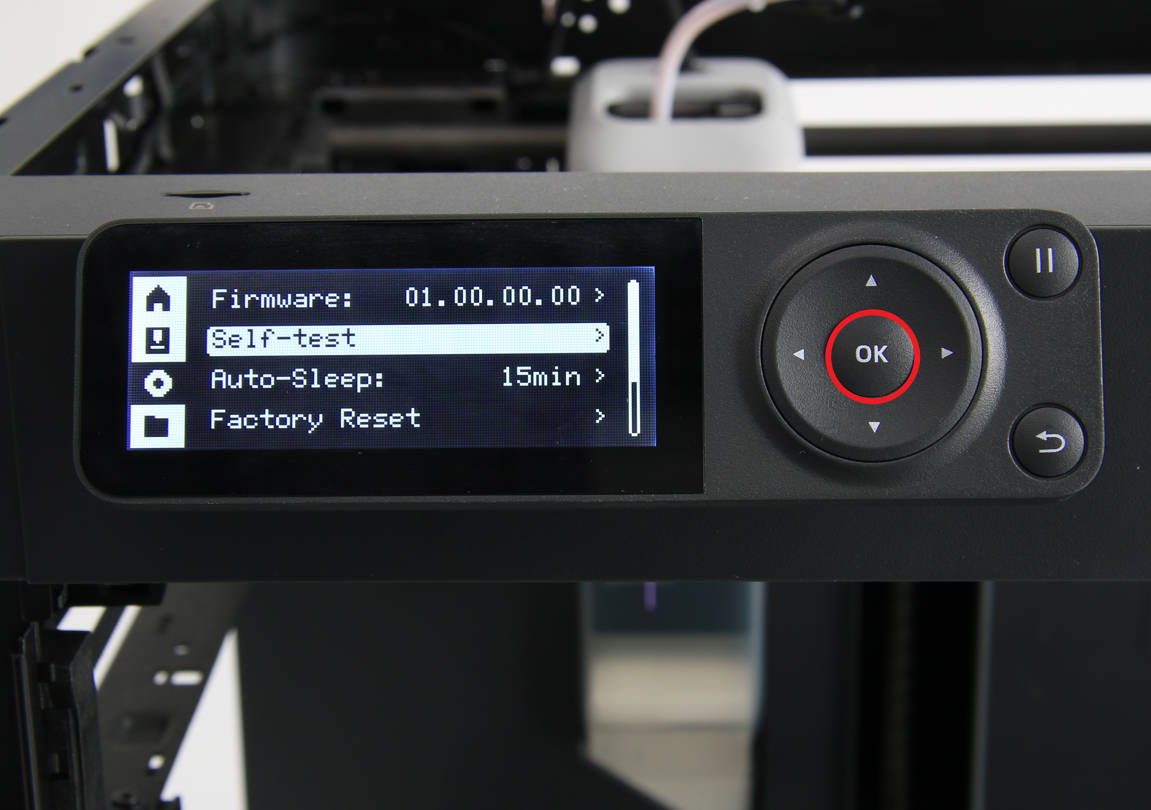
¶ How to verify
Connect the power cord cable, turn on the printer, and run the device self-test process. If the self-test passes, the operation is successful.