¶ Overview
If you have a printer or nozzle that is not available in Bambu Studio, you can use this feature to create custom printer presets or add new nozzles to existing printers. You can enable this feature in the Create Printer:
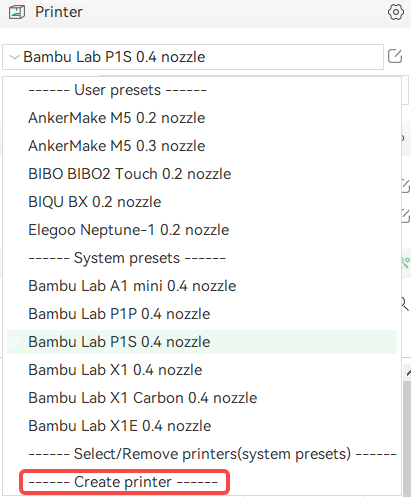
¶ Custom Printer Presets
Both custom printer presets and copied presets belong to user presets, and custom printer presets can be considered a more advanced way to create user printer presets. Here are the usage methods:
¶ Create Printer
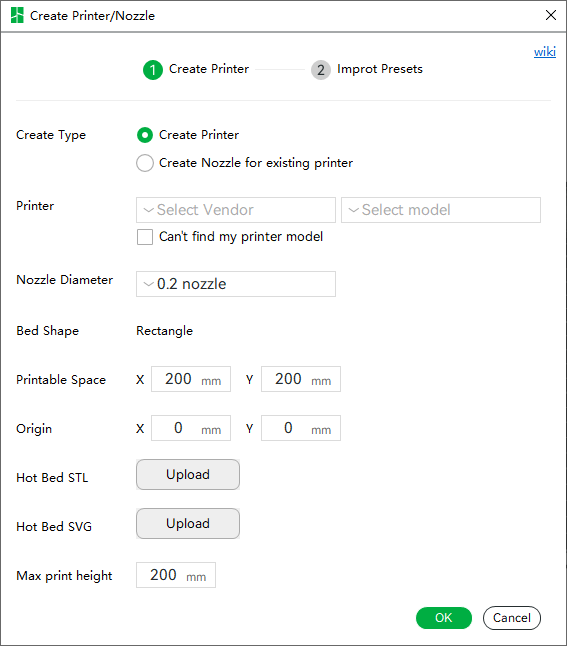
- Create Type: There are two options corresponding to creating a printer or creating a nozzle for an existing printer. If you have never created a custom printer, please choose the Create Printer option.
- Printer: Used to determine the vendor and model of the printer you want to customize. If there is no vendor you want to select, you can click on Can't find my printer model to enter the desired vendor and model.
- Nozzle Diameter: This is used to select the nozzle diameter of your printer.
- Bed Shape: The default shape of the hotbed is rectangular and cannot be modified.
- Printable Space: This is the printable size of the hotbed, in millimeters, integer type.
- Origin: This can set the origin position of the hotbed.
- Hotbed STL: This button is used to upload the hotbed STL model. If not, you can skip uploading.
- Hotbed SVG: This button is used to upload the hotbed SVG texture. Supports images of .svg and .png. If not, you can skip uploading.
- Max Print Height: This is used to set the maximum printable height of the printer.
¶ Create Nozzle for Existing Printer
¶ Create Printer
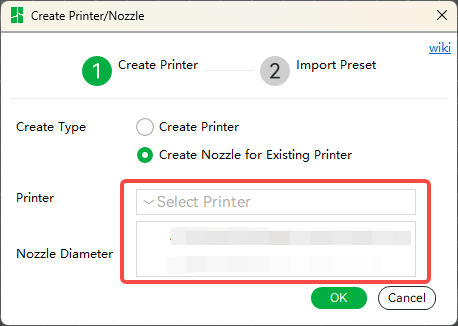
Select which custom printer you want to create a new nozzle for.
A printer needs to be created in advance.
After setting up the basic information of the printer you want to create, click the OK button to proceed to the next page.
¶ Create Printer-Compatible Filaments and Process Presets
- Create Printer-Compatible Filaments and Process Presets Based on Templates
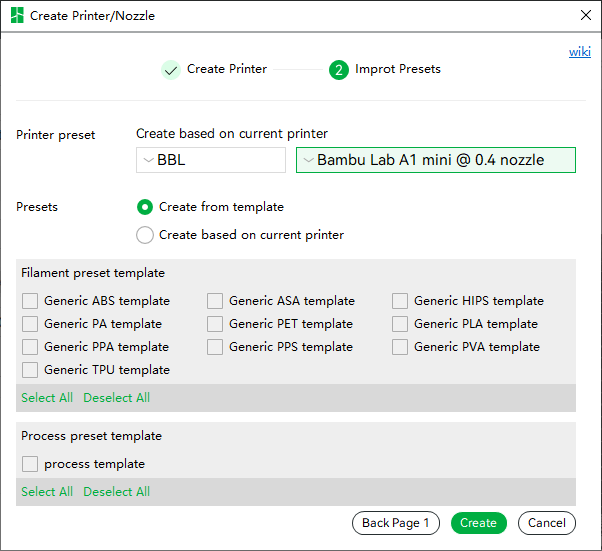
- Printer Preset: The options here are system presets and custom printer presets. Other information about your custom printer will be copied from the printer preset you have selected.
- Presets: Now Studio provides some preset templates for filament and process presets, and you can choose some templates. After creation, when you use this custom printer preset, you can choose the filament and process presets you selected here.
- Create Printer-Compatible Filaments and Process Presets Based on Current Printer
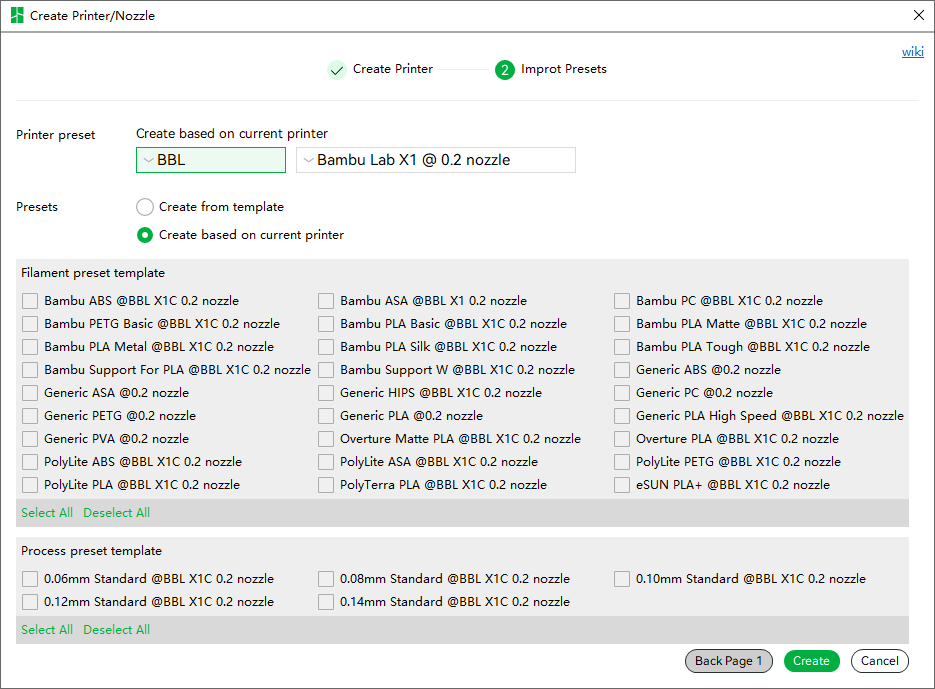
- Presets: If you have selected Create Based on Current Printer to create a filament and process preset that is compatible with the custom printer you have created, the filament and process presets you can choose are compatible with the Printer Preset you have selected.
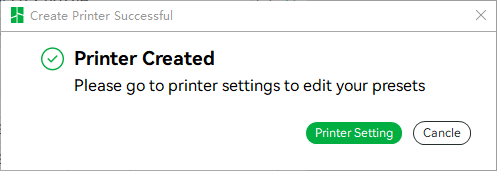
After clicking the create button, create the corresponding preset, and the new preset will be created according to a certain naming convention. Then, refresh the interface, and the current printer will be the new printer you created, and it will remind you whether to edit the preset for the current printer.
¶ Custom Printer Settings
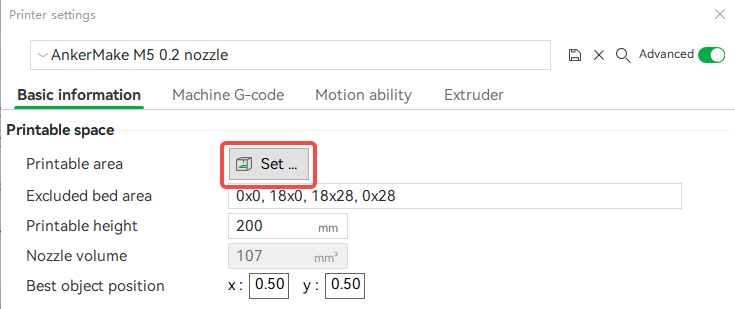
The Printer Setting interface of a custom printer provides an entry point for modifying variables defined during creation. Open the Advanced option, enter the Basic Information page, and click the Set... button.
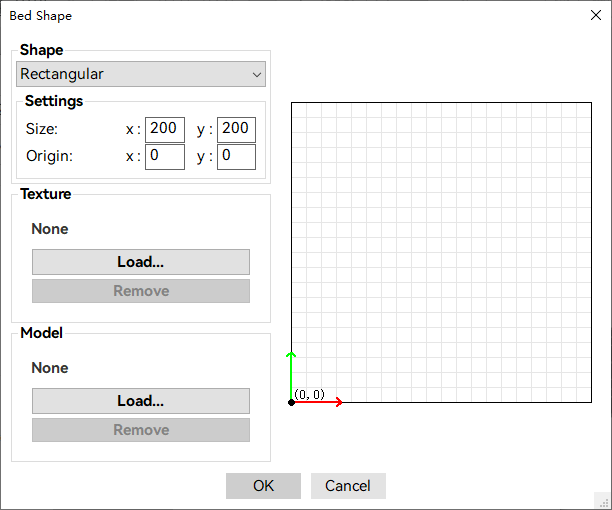
Here you can modify the size, origin, texture, and model of the heatbed.
¶ Cloud user presets limit
When user preset synchronization is enabled, the newly created printer and its associated filaments and process presets will be uploaded to the server cloud.
However, the server level can only store a limited number of user presets. Currently we only support 20 printer presets, 100 process presets, and 200 filaments.
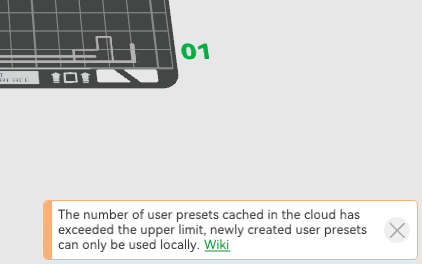
When all user presets exceed the above limits, newly created or imported presets will only be saved locally and cannot be synchronized with user presets under the current account on another computer.
In this case, Studio will have some prompts.

However, you can manually synchronize presets on multiple computers by exporting and importing presets.