¶ Introduction
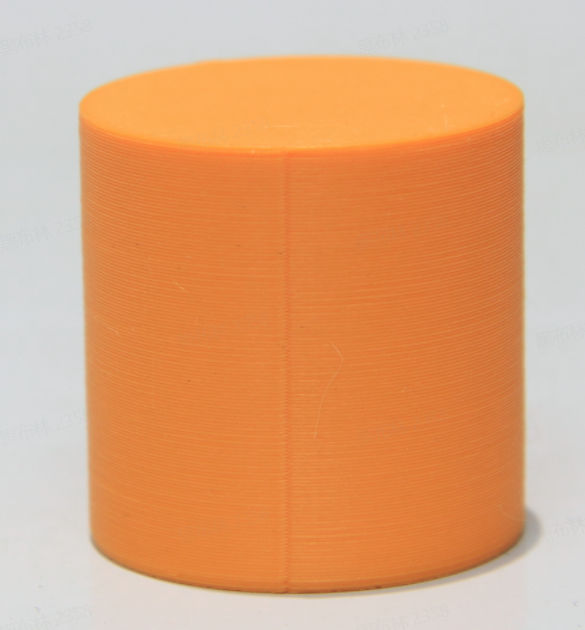
The seam is a kind of gap between the start and end points of each perimeter of the layer( Unless you enable the Spiral Vase mode, refer to Spiral Vase | Bambu Lab Wiki). It leaves vertical seams on the surface of the model, which is unavoidable in FDM 3D printing. Seams can be well hidden on irregular surfaces such as those with concave and convex vertices. On the other hand, some models with circular surfaces (such as cylinders) will not be able to hide the seams, which will be very obvious.
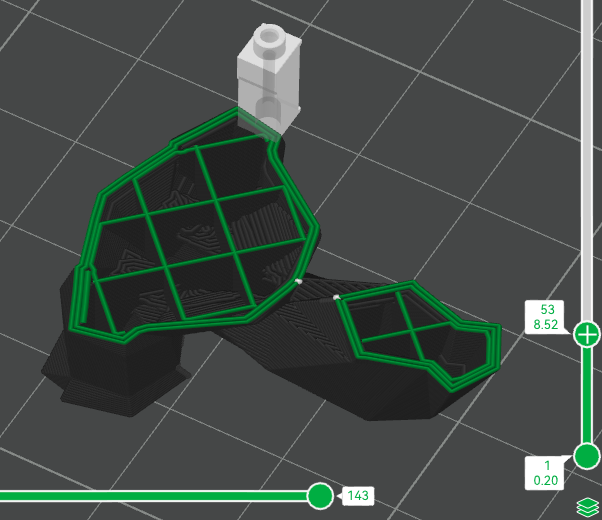
As shown in Fig.2-2, the white points are the seams of layer 53.
|
|
¶ Seam settings
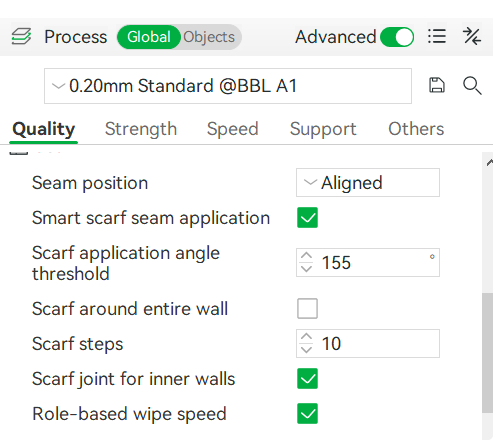
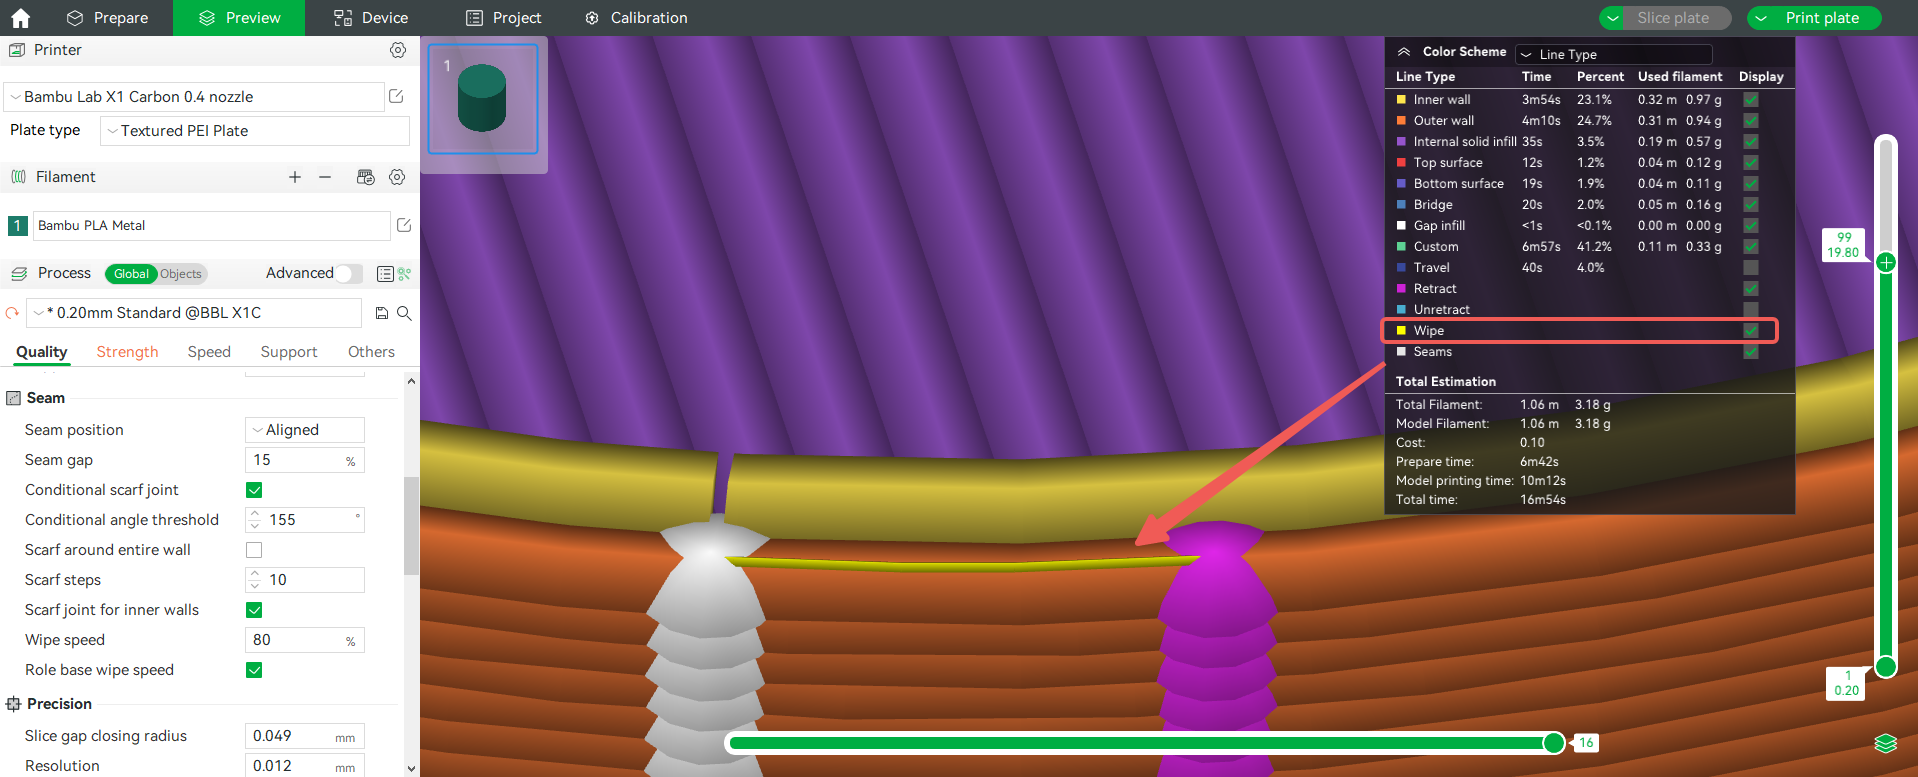
The page for seam settings is as follows, where Seam position, Seam gap, Wipe speed, and Role base wipe speed can be applied to all types of seams. The remaining settings belong to Scarf seams, which will be introduced in a separate section in the following text.
¶ Auto-seam options
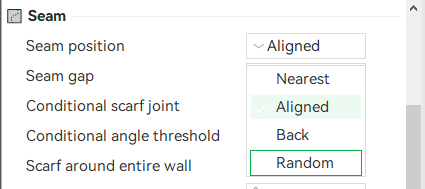
For better print quality, the seam position can be set in the process presets. There are four types of seam positions to choose from: Nearest, Aligned, Back, and Random.
¶ Nearest
“Nearest” first finds all possible candidate positions by the following priority: concave non-overhang vertex > convex non-overhang vertex > a non-overhang vertex > overhang vertex.
That is, it will preferentially select concave or convex non-overhanging vertices to make the seam position more hidden. If your model has sharp corners, this will effectively make the seam invisible.
However, if the current layer does not have either of these vertices available, it selects from among the other candidate non-overhang vertices so that it is closest to the end of the previous print path. As a result, this option optimizes the traveling path to minimize the impact of filament stringing.

¶ Aligned
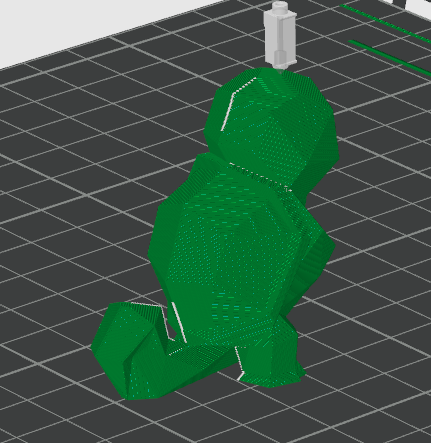
The seam placing logic is the same as “Nearest” for finding the candidates, but it will choose the one that is nearest to the start point of the previous layer. This will ensure the seam is mostly aligned throughout the whole object.
¶ Back
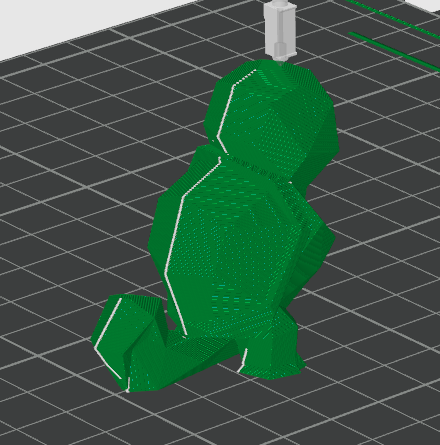
The seam will be set behind the model. If you want to get a smooth surface in the front, such as an Iron Man mask, it will be a good choice.
¶ Random
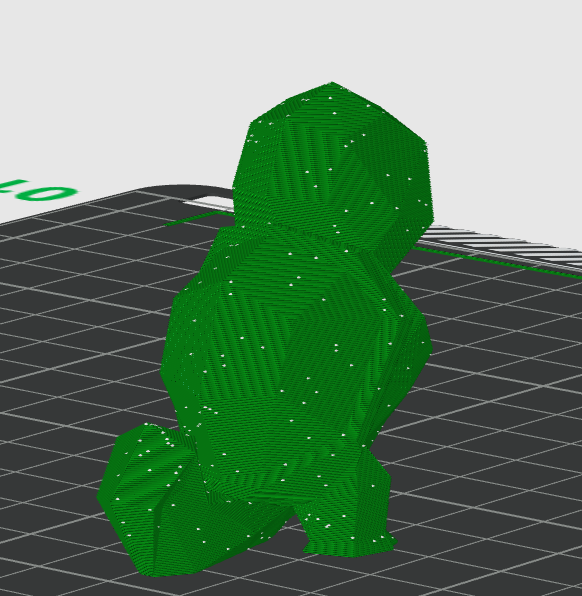
Random seams will select a different location on each layer to place the seams, making the seams look less uniform and less obvious than "aligned" or "back". But it will cause some "zits" effects on the surface of the model.
¶ Seam Gap
To make the seams look more hidden, the extrusion is stopped in advance when printing the inner and outer walls, leaving a gap at the seam position to accommodate excess material. This length is expressed as a percentage of the current nozzle diameter. The default value is 15%.
¶ Wipe speed
When retraction, a short wiping is usually performed to clean the nozzle (details can be found in Retraction | Bambu Lab Wiki), and the wiping speed can be adjusted. This value is expressed as a percentage and will be calculated based on the percentage of traveling speed. For example, setting the wiping speed to 80% means that the wiping speed = the traveling speed * 80%.
¶ Manual-seam painting
Sometimes the auto seam position may be not ideal, you can customize the seam position by manually painting the method. The seam painting function can be enabled here:
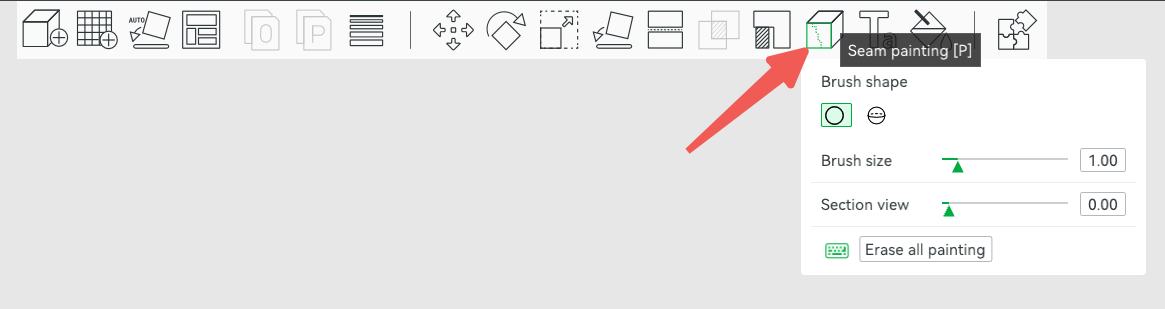
Specific operations are shown in the following GIF:
¶ Scarf seam
Bambu Studio introduced scarf seams in version 1.9, which in most cases can reduce the visibility of seams. This feature changes the routing of the seam, making it overlap like a scarf. Segmented flow control and wipe speed control, improve riveting to weaken the seam. The following is a GIF of the scarf seam.
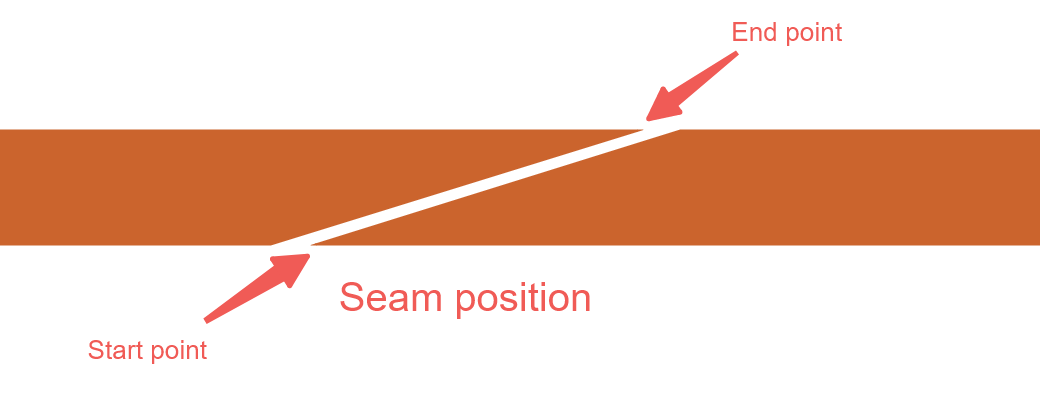
From the picture, it can be seen that by controlling the nozzle height at the starting point and the amount of extruded material, the joint can be more tightly combined at the starting and ending points. The following is a detailed rendering of the routing:
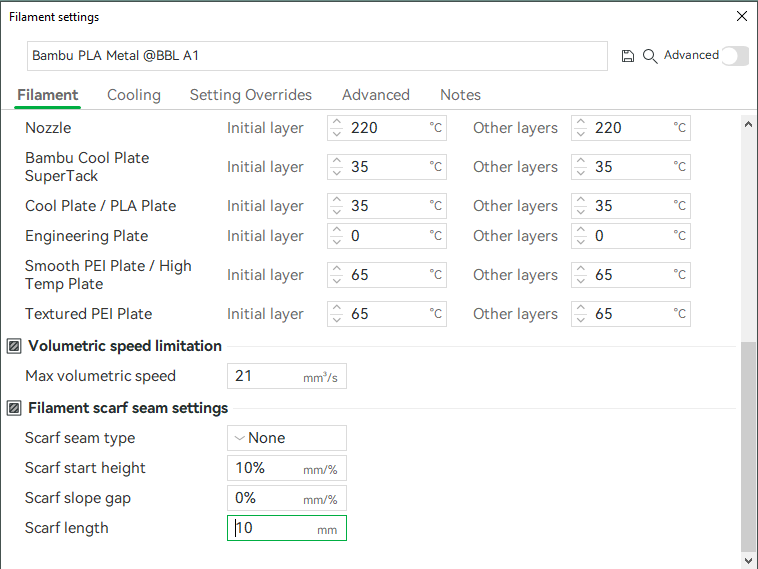
¶ Filament scarf seam settings
Starting from version 1.10, you can set whether to enable scarf seams for each filament in the filament settings.
¶ Scarf seam type
There are a total of 3 options for scarf seam types: None, Contour, Contour and Hole. To enable the scarf seam, you can select "Contour" or "Contour and Hole". Definitions of contour and hole can be found in the wiki: XY Hole/Contour compensation | Bambu Lab Wiki
Here are some examples of using torus:
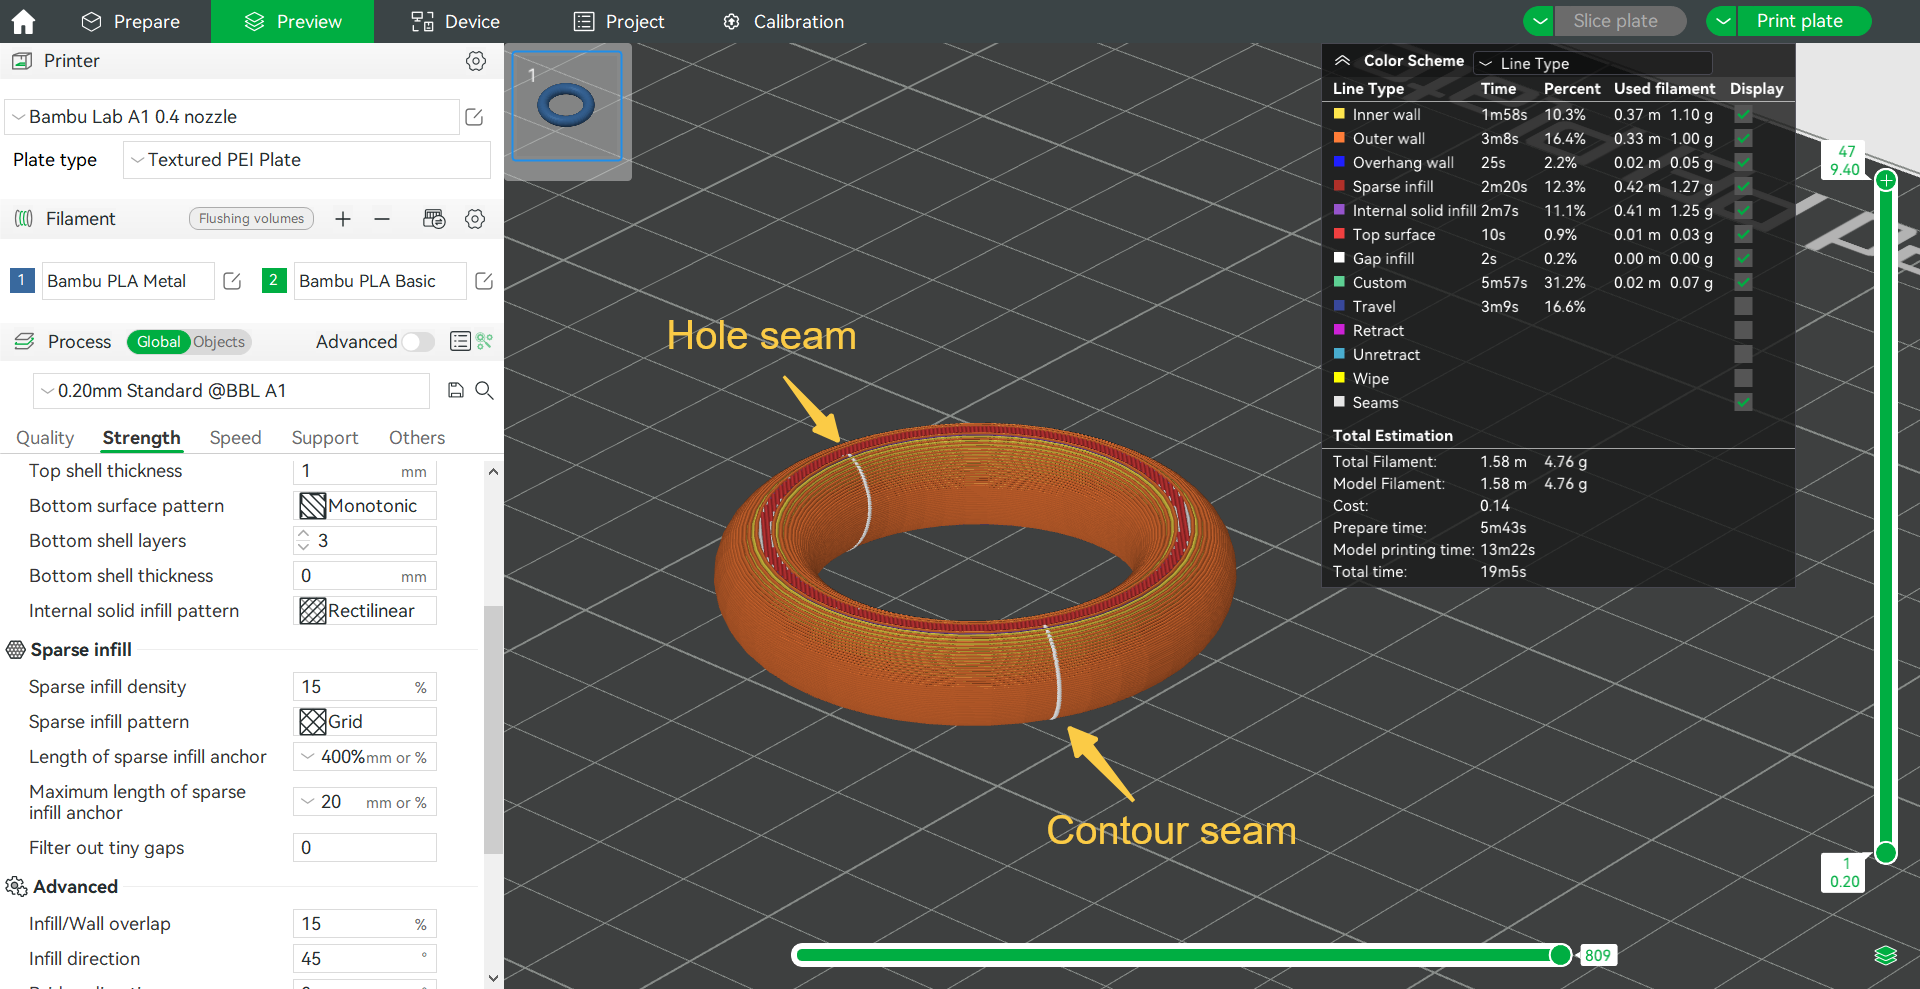
Select "Contour" at the scarf seam:

Select "contour and hole" at the scarf seam:

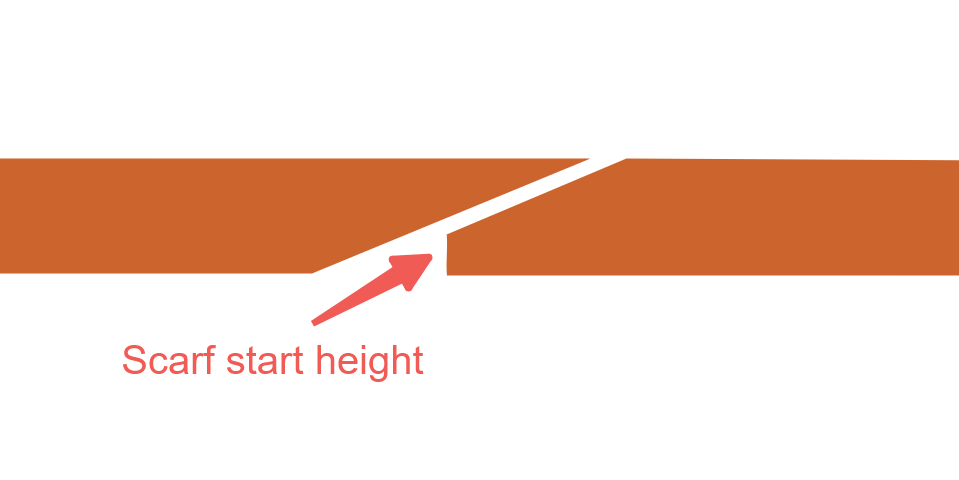
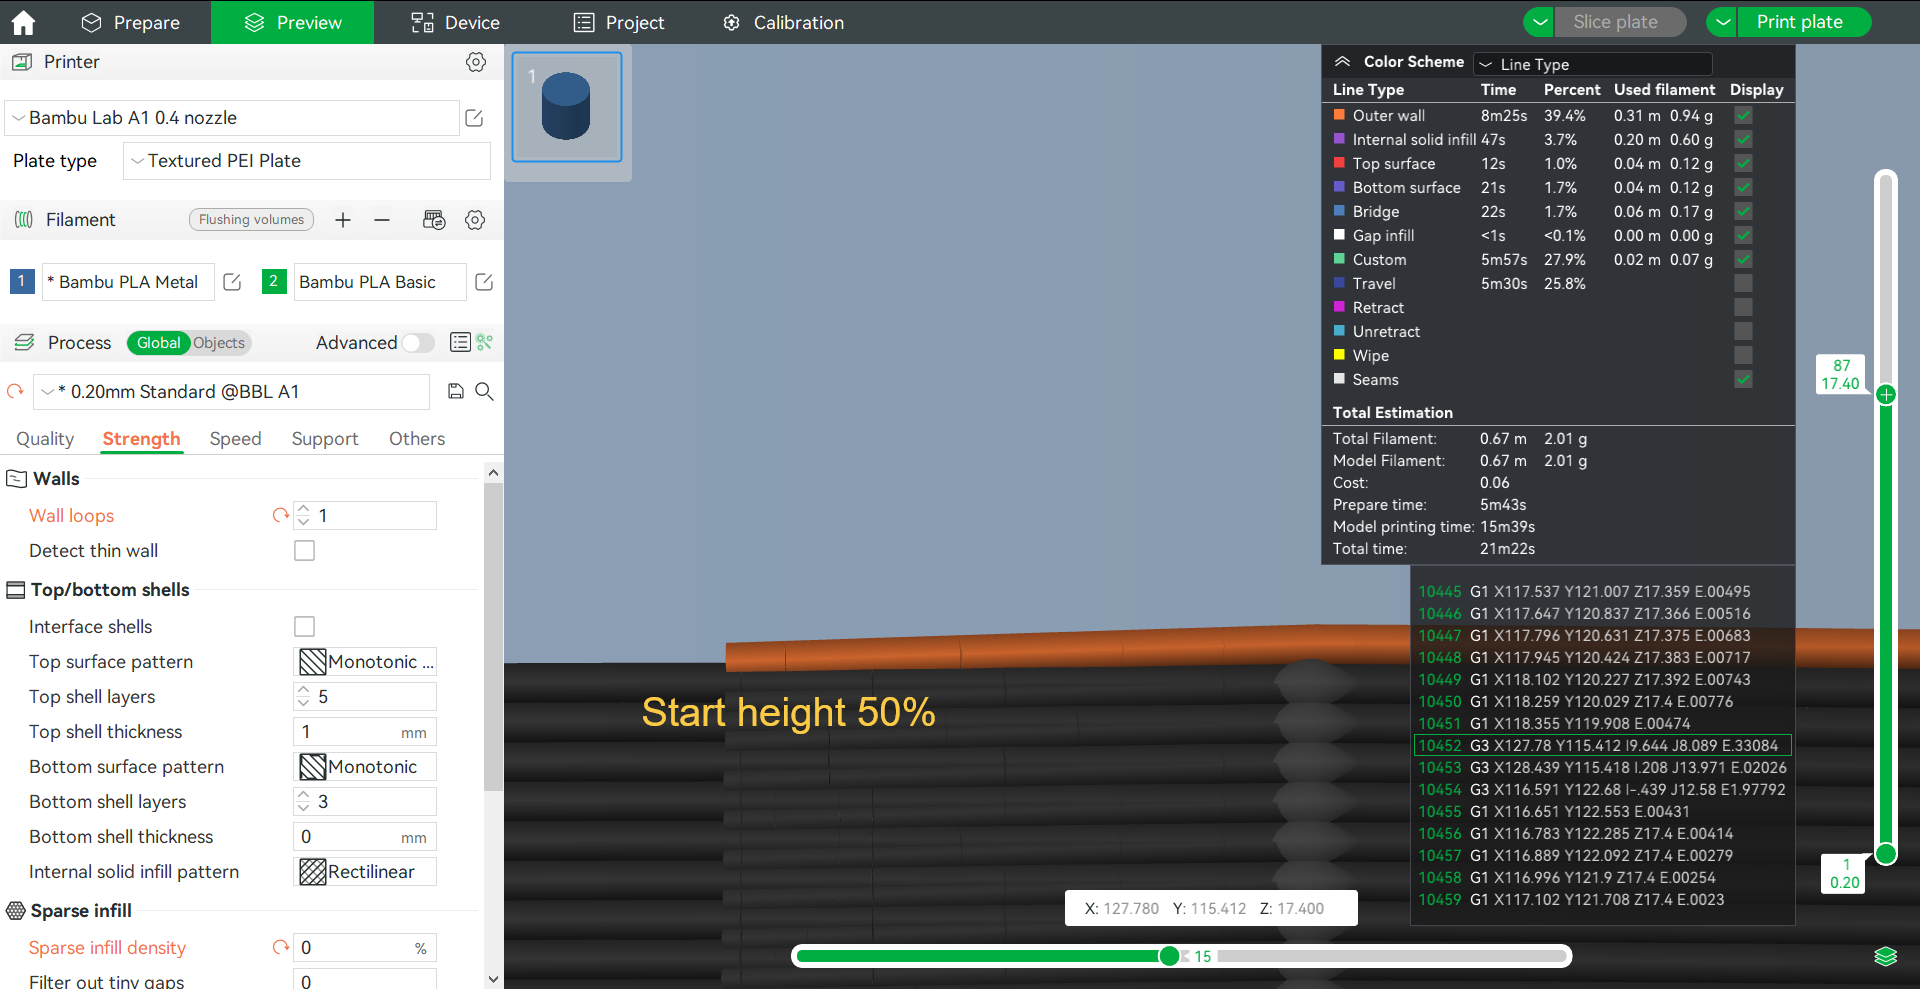
¶ Scarf start height
The scarf start height refers to the Z height when the nozzle begins to print the wall, and this value can be expressed in millimeters or as a percentage of the current layer height, such as 10% represents the starting height of the scarf seam is 10% of the current layer height. If the starting height is set to 100%, it will become an ordinary seam.

¶ Scarf slope gap
When the scarf slop gap is enabled, the inner wall is cut to accommodate the excess material. This parameter, if expressed in percentages, is calculated by multiplying a specific factor by a percentage of the nozzle diameter to determine the gap.
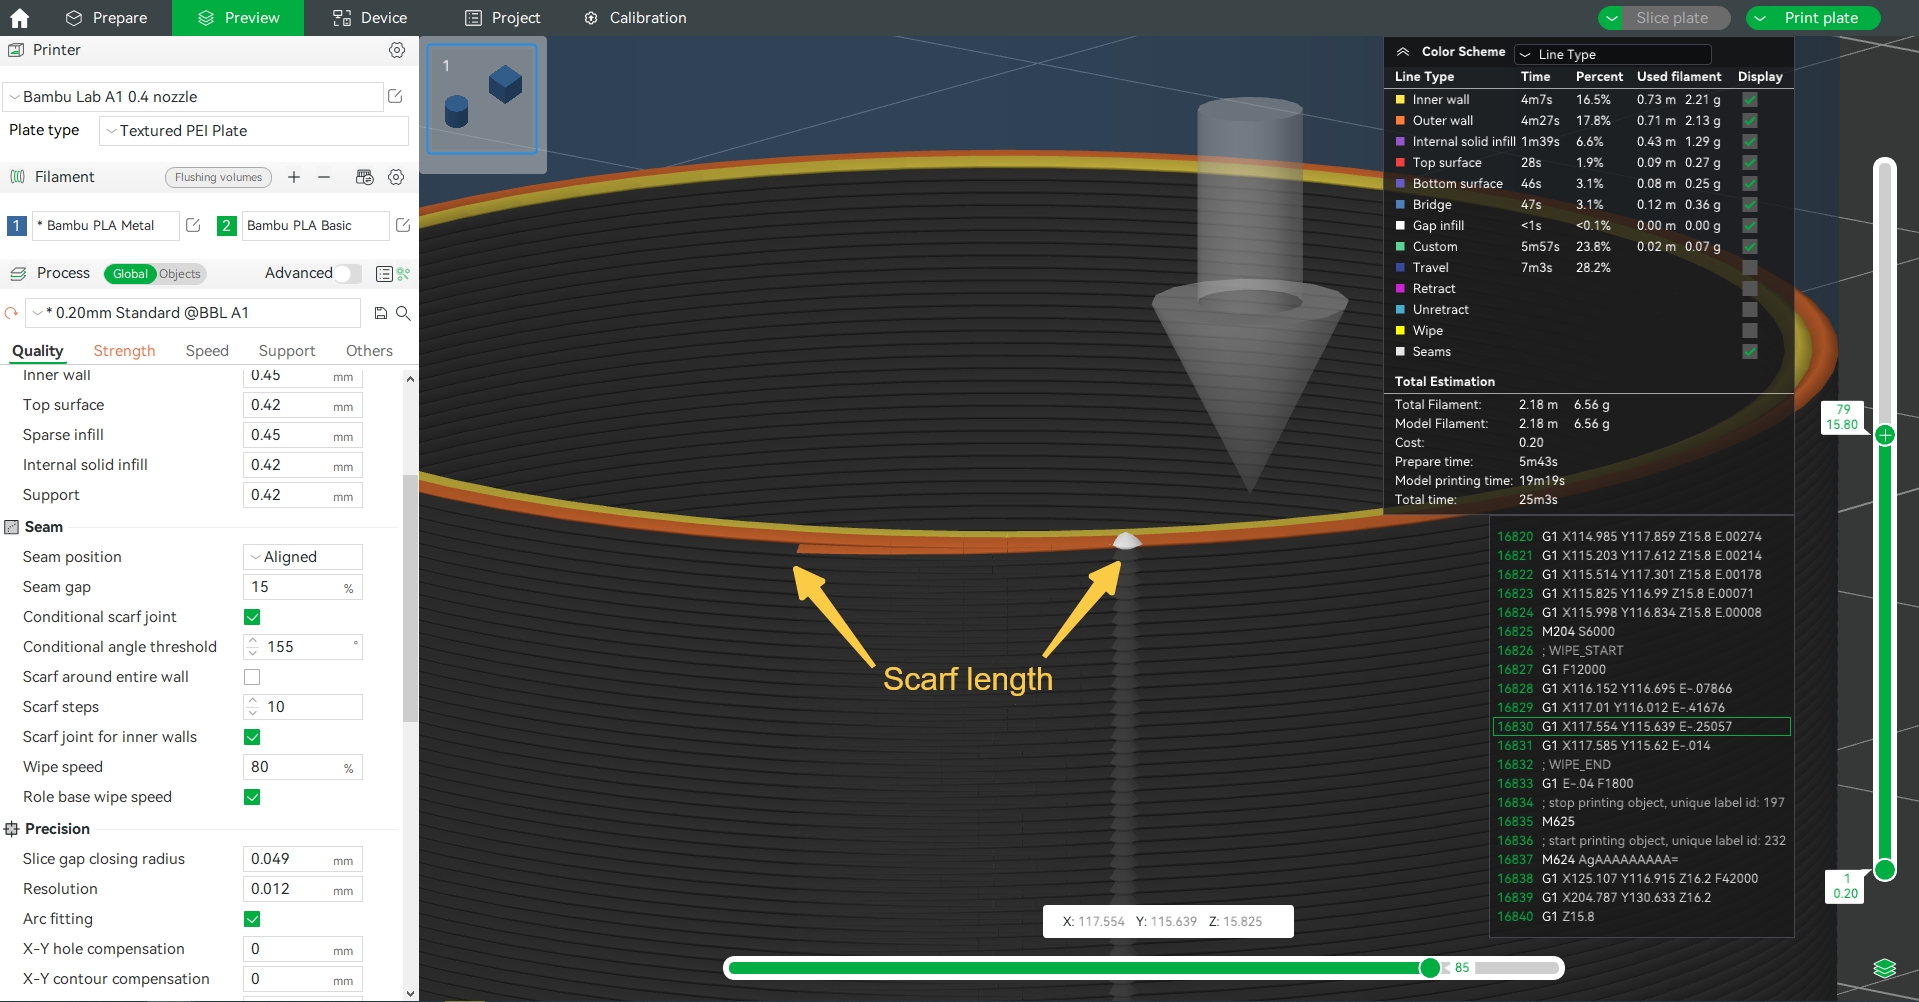
¶ Scarf length
The length of the scarf seam and the scarf seam will be disabled when the length is 0. If 'scarf around the entire wall' is enabled, the scarf length set will not work.
¶ Smart scarf seam application
Bambu Studio has a smart seam selection function, which selects whether to apply scarf seams based on the characteristics of the model. When the overhang of the seam position is too large, and when the angle of the seam position is small enough to conceal the seam, it will not use scarf seams. When the wall does not have a suitable sharp angle that traditional seams cannot effectively conceal, then scarf seams are applied. Turn off this option to apply scarf seams to all areas.
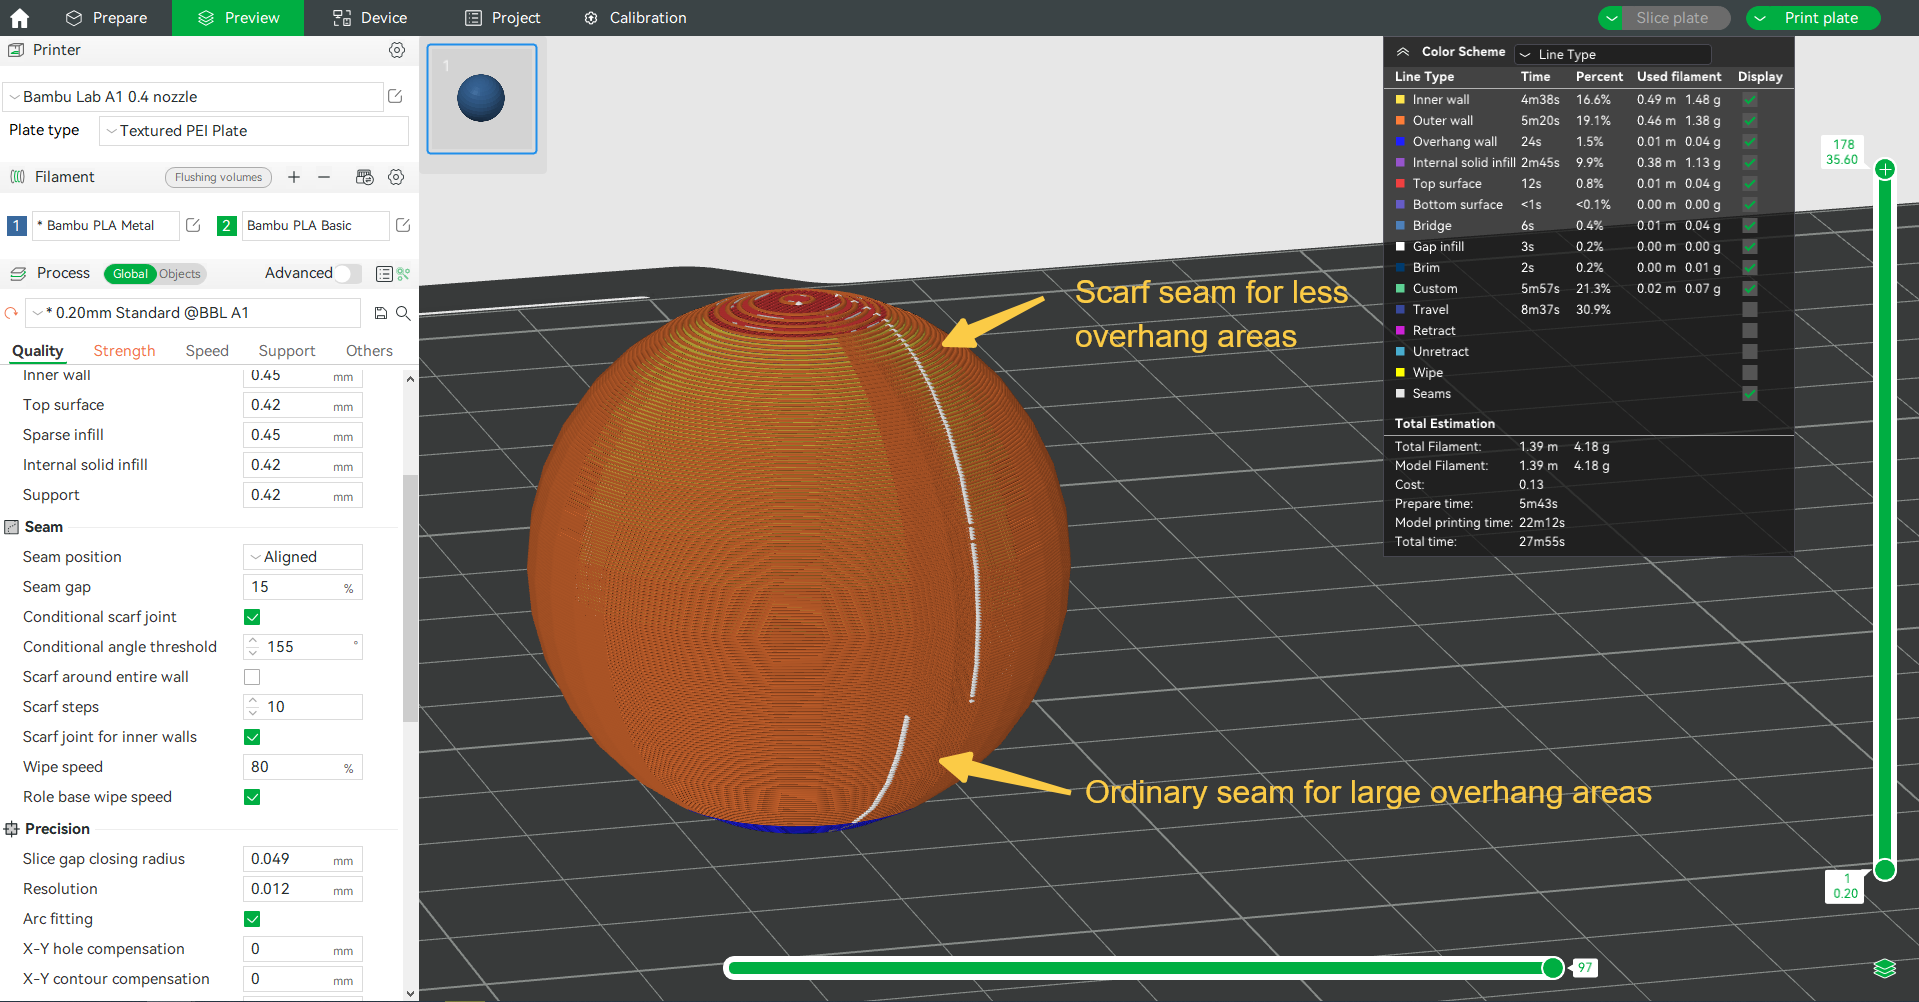
¶ Don't apply the scarf seam in the overhang area
Due to the small extrusion of the scarf seam, the lines may be difficult to bond properly in the hanging area. To ensure normal printing of the appearance surface, this option should only be applied to areas with low overhang degrees. Ordinary seams are still used in areas with high overhang degrees.
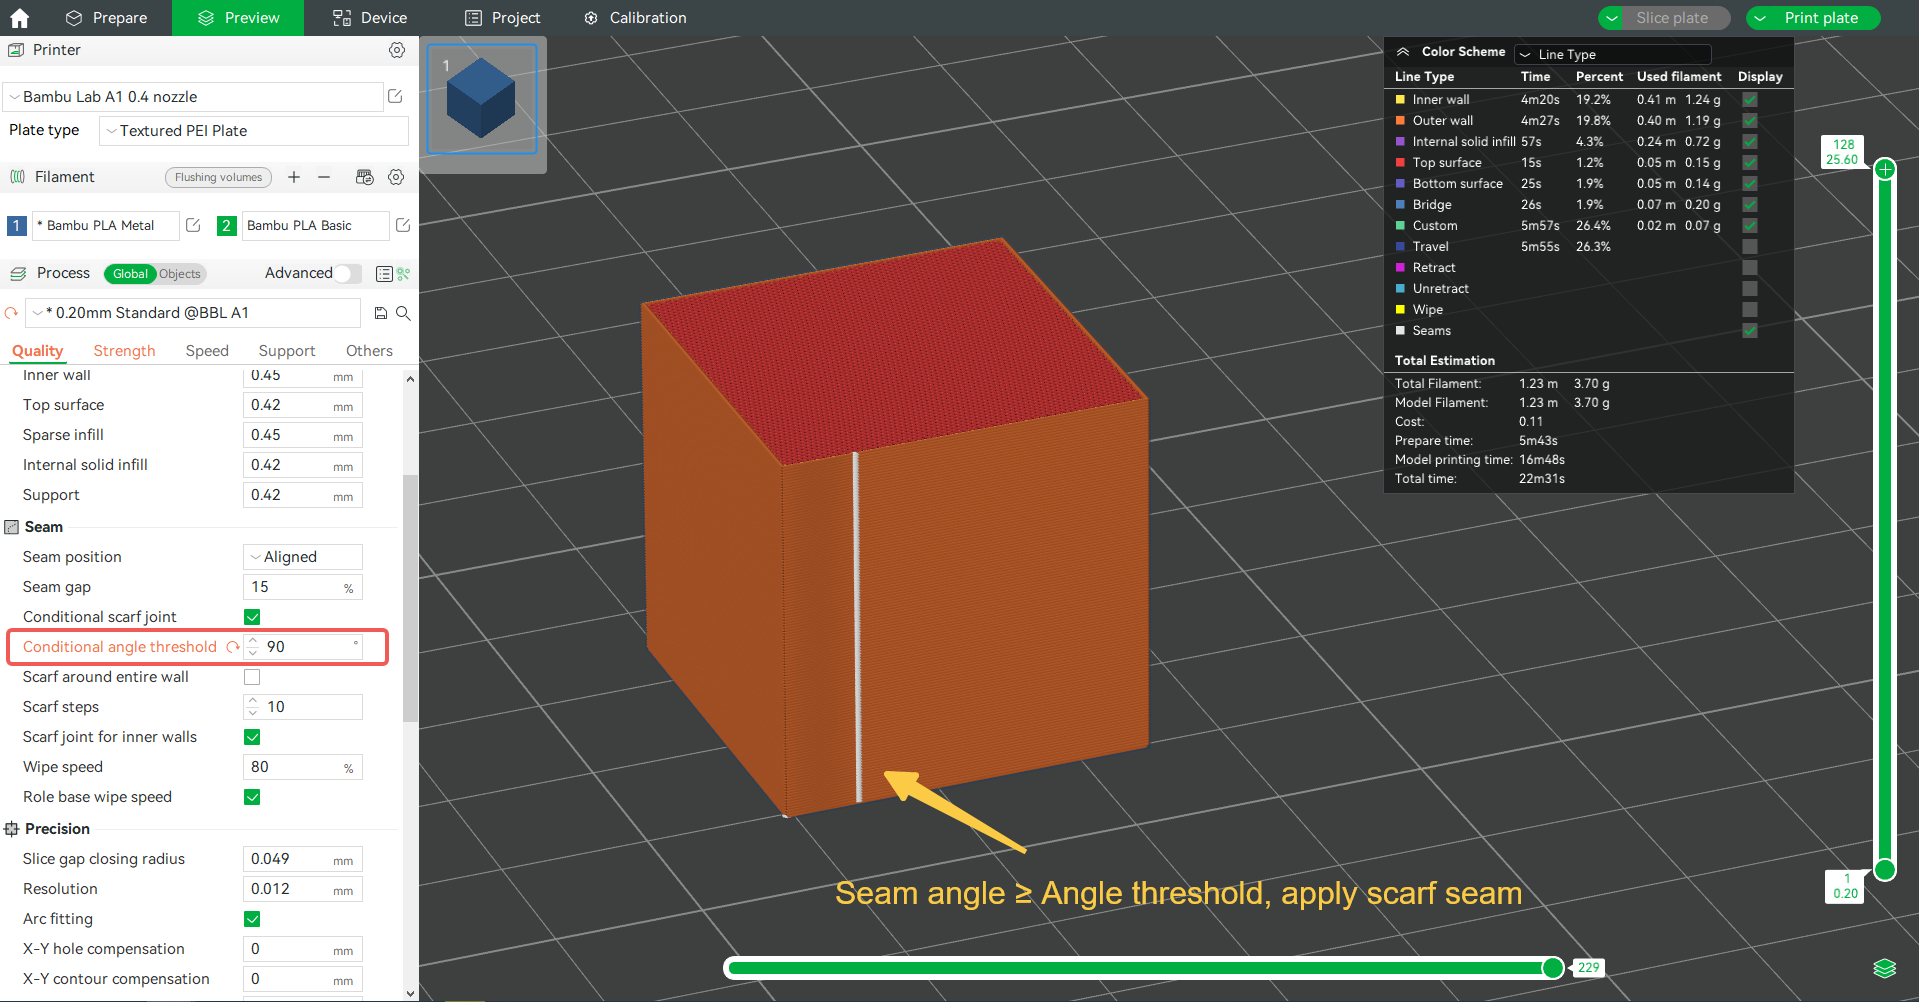
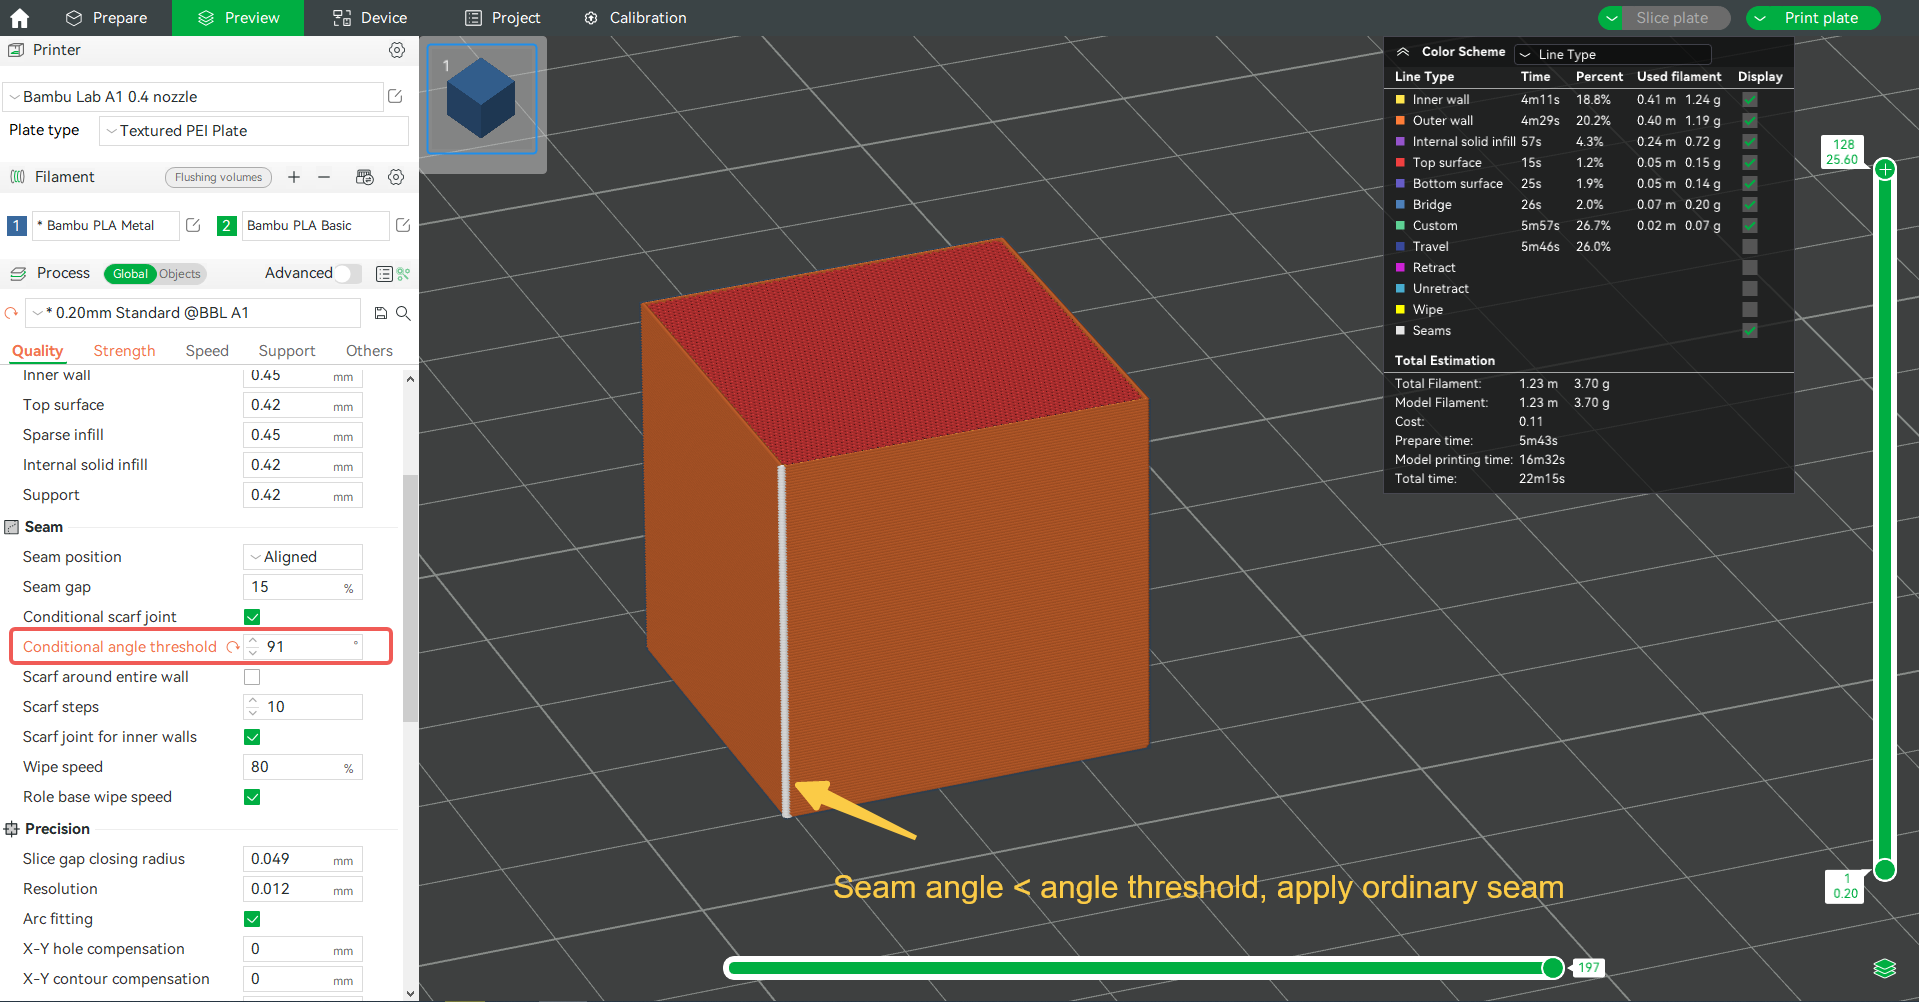
¶ Application Angle threshold
Due to the ability to effectively conceal seams at sharp angles, scarf seams are not enabled by default when the model surface has sharp angles. Instead, seams can be directly hidden at sharp angles. If you want to apply scarf seams at sharp angles or need to adjust the application range of scarf seams, you can adjust the angle threshold parameter.
This option sets the angle threshold to determine whether to apply the scarf seam. If the seam angle within the perimeter of a single layer exceeds this value (indicating that the model surface does not have a sharp enough angle), scarf seams should be applied, otherwise, scarf seams will not be applied.
¶ Scarf seam effect adjustment
If you are not satisfied with the effect of the scarf seam, you can adjust the following parameters to optimize the seam effect.
¶ Scarf around entire wall
As the name suggests, extend the scarf seam to the entire wall. Enabling this option requires caution as it may result in using a smaller extrusion amount for the entire perimeter, which may cause poor adhesion between lines and result in surface defects.
¶ Scarf steps
The minimum number of sections required for the scarf seam, that is, the slope of the starting position of the scarf seam is divided into several steps. However, it should be noted that some seam positions cannot be accurately divided into the set number of steps, so the actual scarf steps ≥ the set scarf steps.

¶ Scarf seam for inner walls
Enabling this option, the inner walls will also adopt scarf seams, and this option is enabled by default.