Timelapse photography is a shooting technology that compresses the process of minutes, hours or even days into a shorter period of time and plays it as a video.
¶ 1. Introduction to different modes of time-lapse
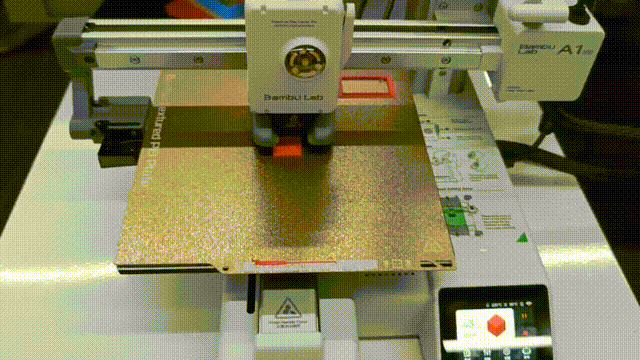
In the Bambu Studio, if you enable timelapse, a timelapse video will be generated for each print. After each layer is printed, a snapshot is taken by the chamber camera. All of these snapshots are composed into a timelapse video when printing completes.
There are two modes of timelapse: smooth mode and traditional mode. For different printers, there will be some differences in the action of shooting time-lapse photography, which is described as follows.
¶ X1 and P1 series printers
Smooth mode: the tool head will move to the excess chute after each layer is printed and then take a snapshot. Since the melted filament may leak from the nozzle during the process of taking the snapshot, a prime tower is required in this mode. So a prime tower will be automatically generated if there is no prime tower on the build plate. It will reuse the existing prime tower if there is already a prime tower on the plate.
In this mode, the toolhead in the video always stays above the prime tower and does not block the model. Therefore, the timelapse video looks very smooth. However, the overall print time will be longer because this mode adds additional paths and nozzle cleanings to the toolhead.
Traditional mode: It takes a snapshot directly after each layer is printed, so there is no need for a prime tower in this mode. In time-lapse videos, the toolhead is constantly moving.

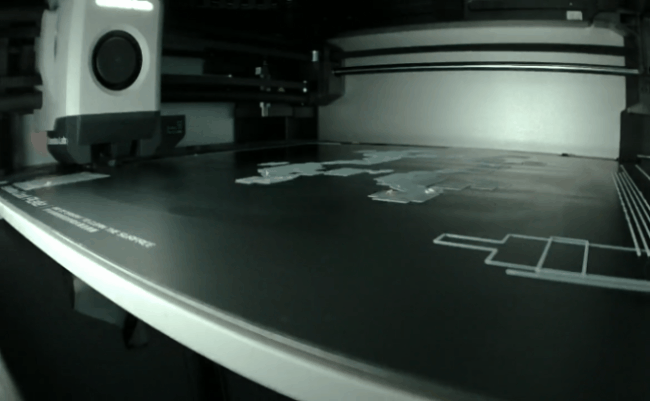
¶ A1 Series Printer
 |
 |
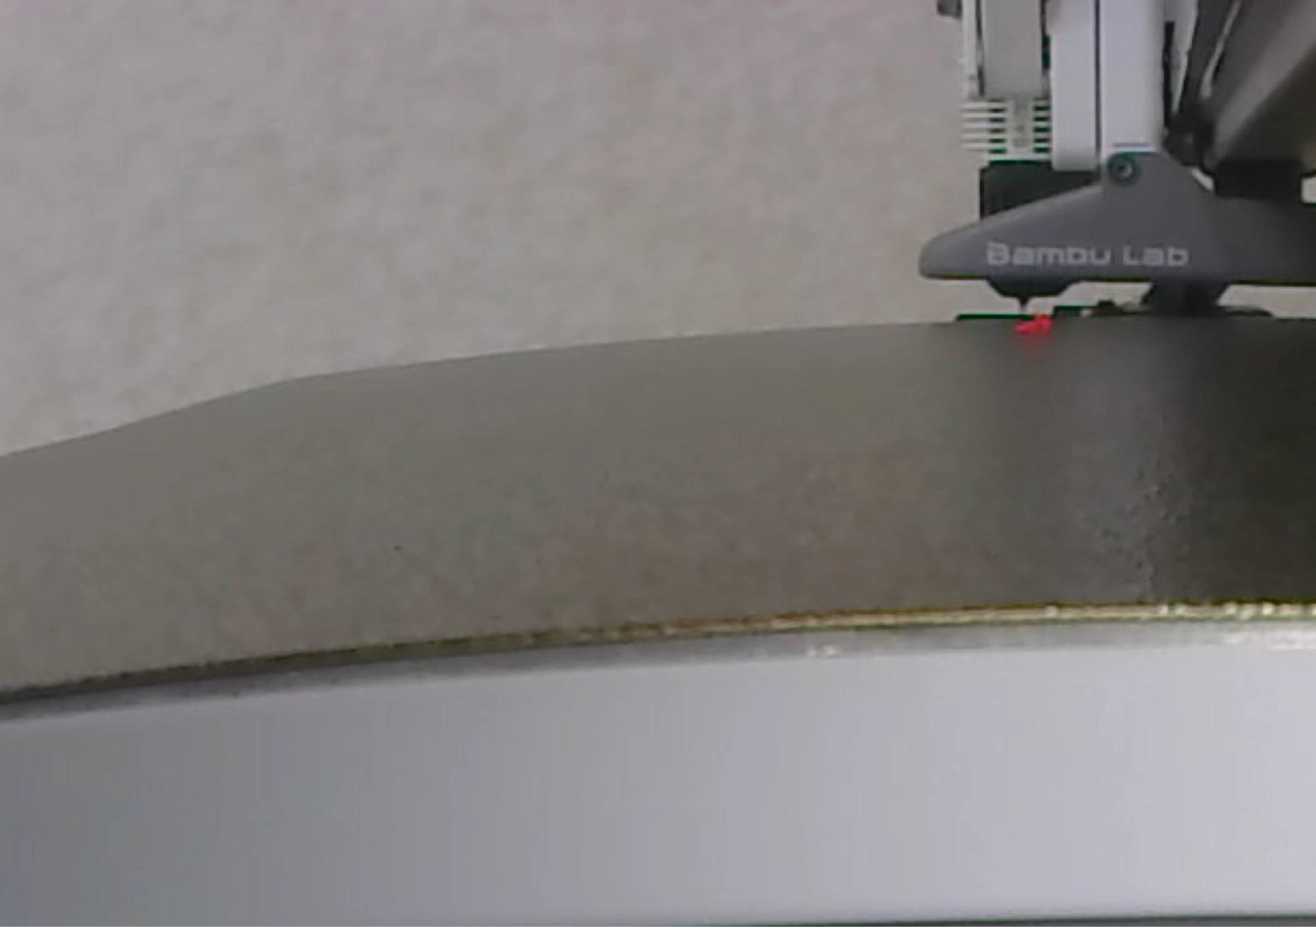
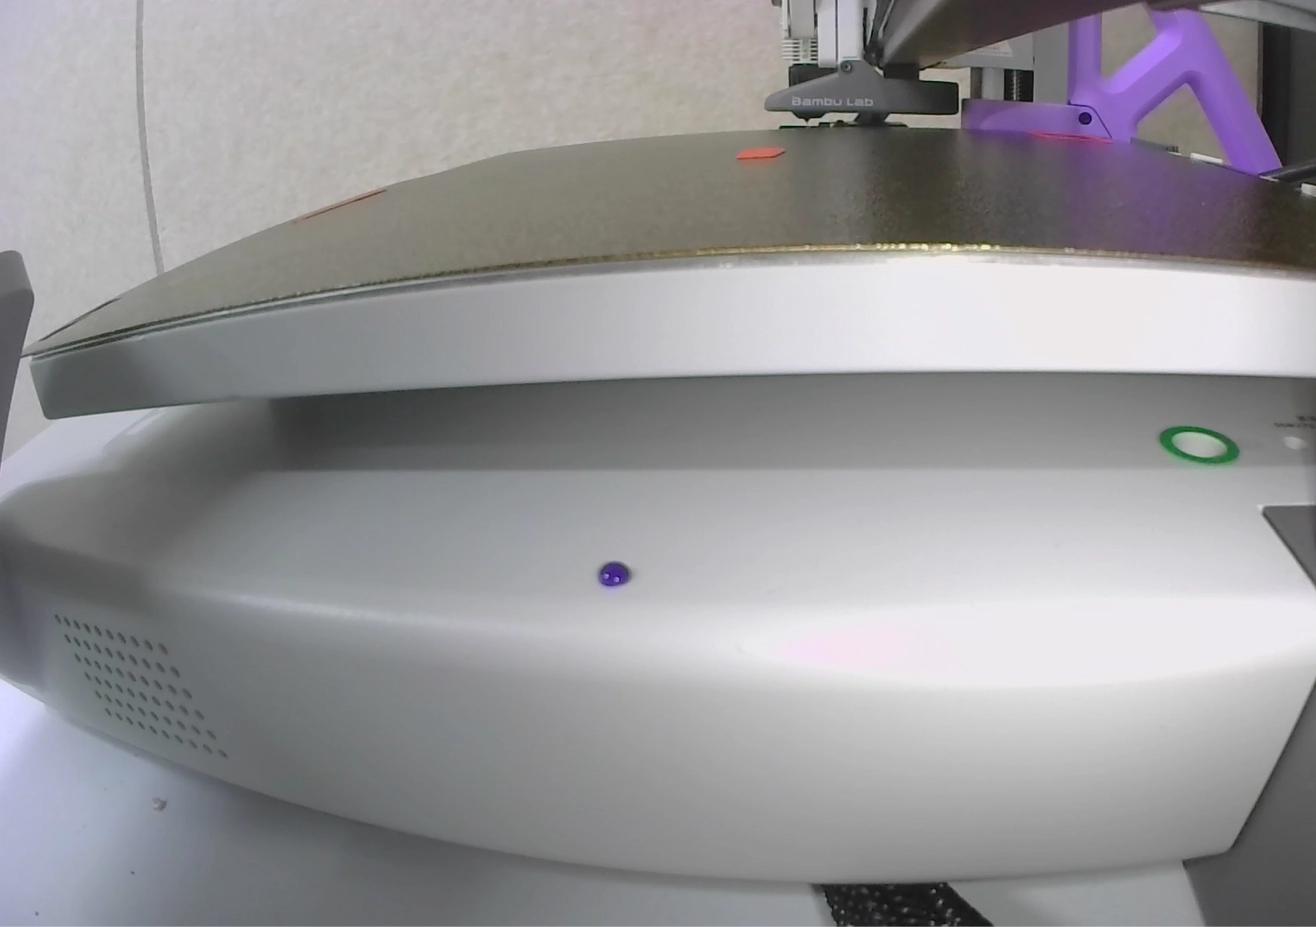
The X1 and P1 series printers only move the heat bed up and down when printing, and they change their position in the Z direction by moving the heat bed. Due to its different structure, the A1 series printer changes its position in the Y-axis direction by moving the heat bed back and forth, allowing the heat bed to move continuously in the horizontal direction during the printing process.
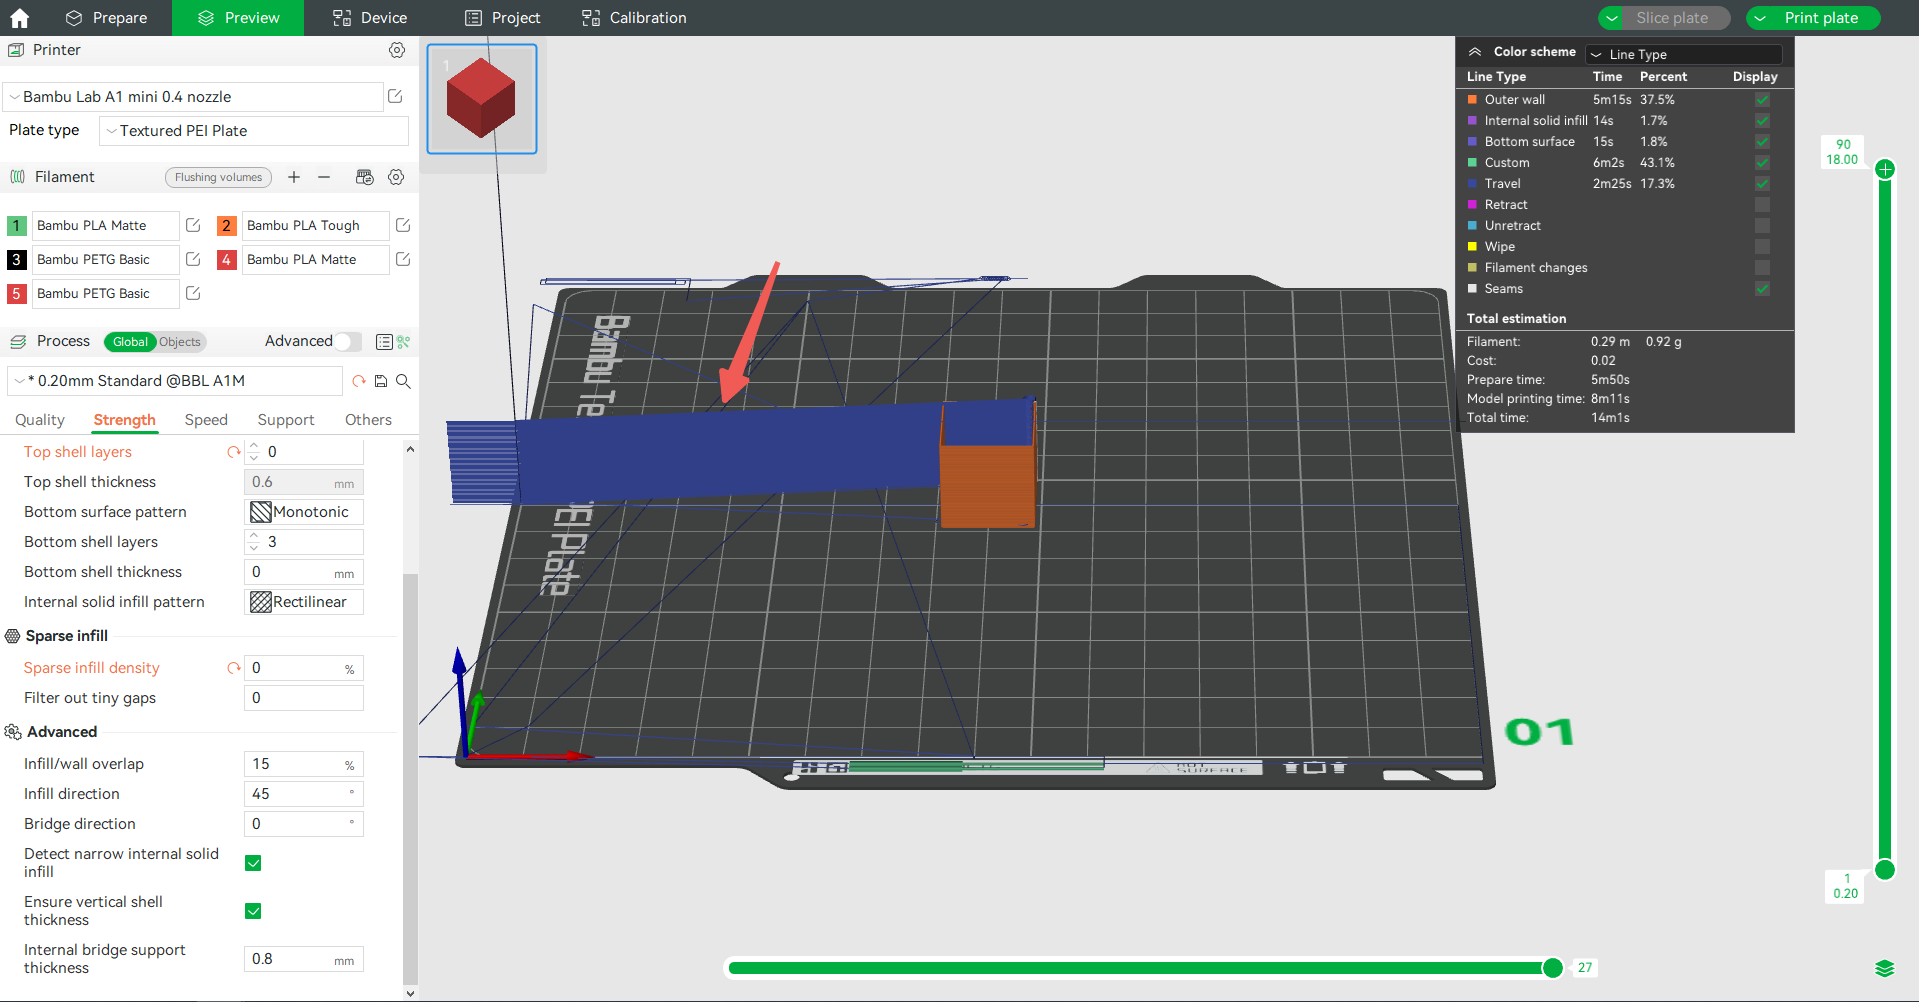
When shooting the time-lapse video, it is necessary to keep the horizontal position of the heat bed fixed and only change the position in the Z direction. However, the A1 series printer's heat bed was constantly moving during printing, causing the model to move horizontally as well. So, to successfully shoot time-lapse videos, the A1 series printer moves the heat bed to a fixed position and the nozzle to the purge wiper before each shooting then moves them back above the model to continue printing. Whether it is the traditional mode or smooth mode time-lapse photography, it will move the heat bed and tool head to a fixed position before taking the photo. You can see the moving path to the purge wiper in the traveling path previewed after slicing (see below), but if you do not enable the time-lapse feature before sending the print job, these moves will not be executed during the actual print process.
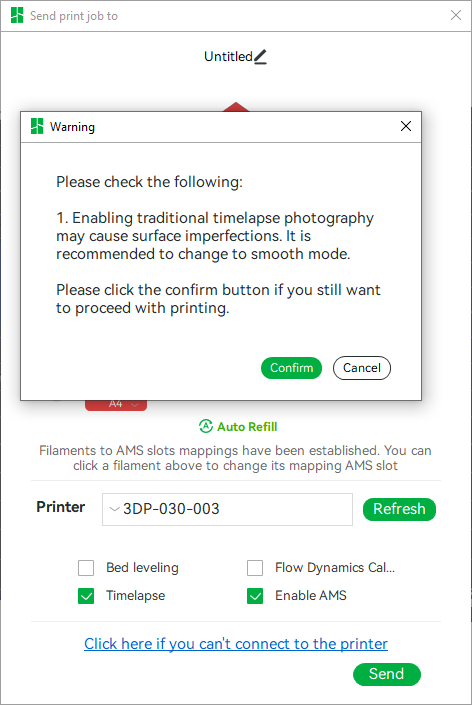
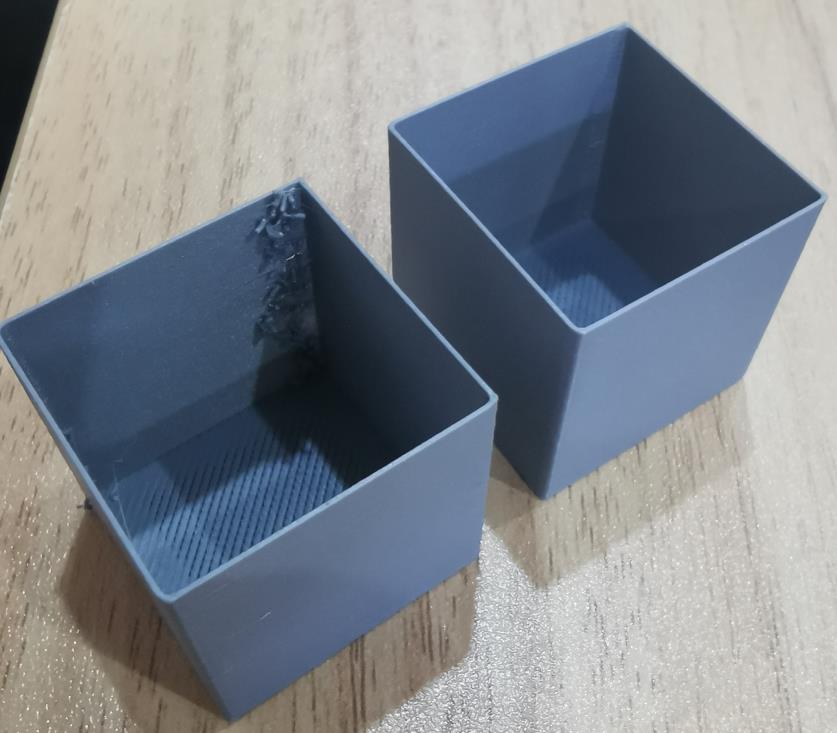
Traditional mode: During the printing process, due to the leakage caused by the pause when taking the snapshot, the traditional mode of time-lapse photography lacks a prime tower to absorb this flaw, thereby affecting the printing quality. Our strategy is to print defects into the infill as much as possible to ensure surface quality. However, if the model has no infill area in this layer, defects are inevitable. In this case, it is recommended not to enable time-lapse photography in traditional mode, but to use smooth mode instead. You will also receive a prompt before sending the print job.
Smooth mode: After selecting smooth mode time-lapse photography, a prime tower will be automatically generated by default. During the printing process, after pausing to take photos, the nozzle will first print on the prime tower and then continue printing on the model, allowing the leakage defects caused by the pause to be absorbed by the prime tower.
Below is a comparison of print quality between traditional time-lapse and smooth mode time-lapse for an unfilled model:
Timelapse Fade-on Mode: When this mode is turned on, a cropping effect will appear when printing the first layer. As the number of layers increases, the image gradually changes from zooming in to zooming out.
This feature can be enabled/disabled from the printer screen: Select “Settings > Camera Options > Timelapse Fade-on Mode”.
If the time-lapse Fade-on Mode is turned off, the zooming effect will not appear.
¶ 2. How to enable timelapse
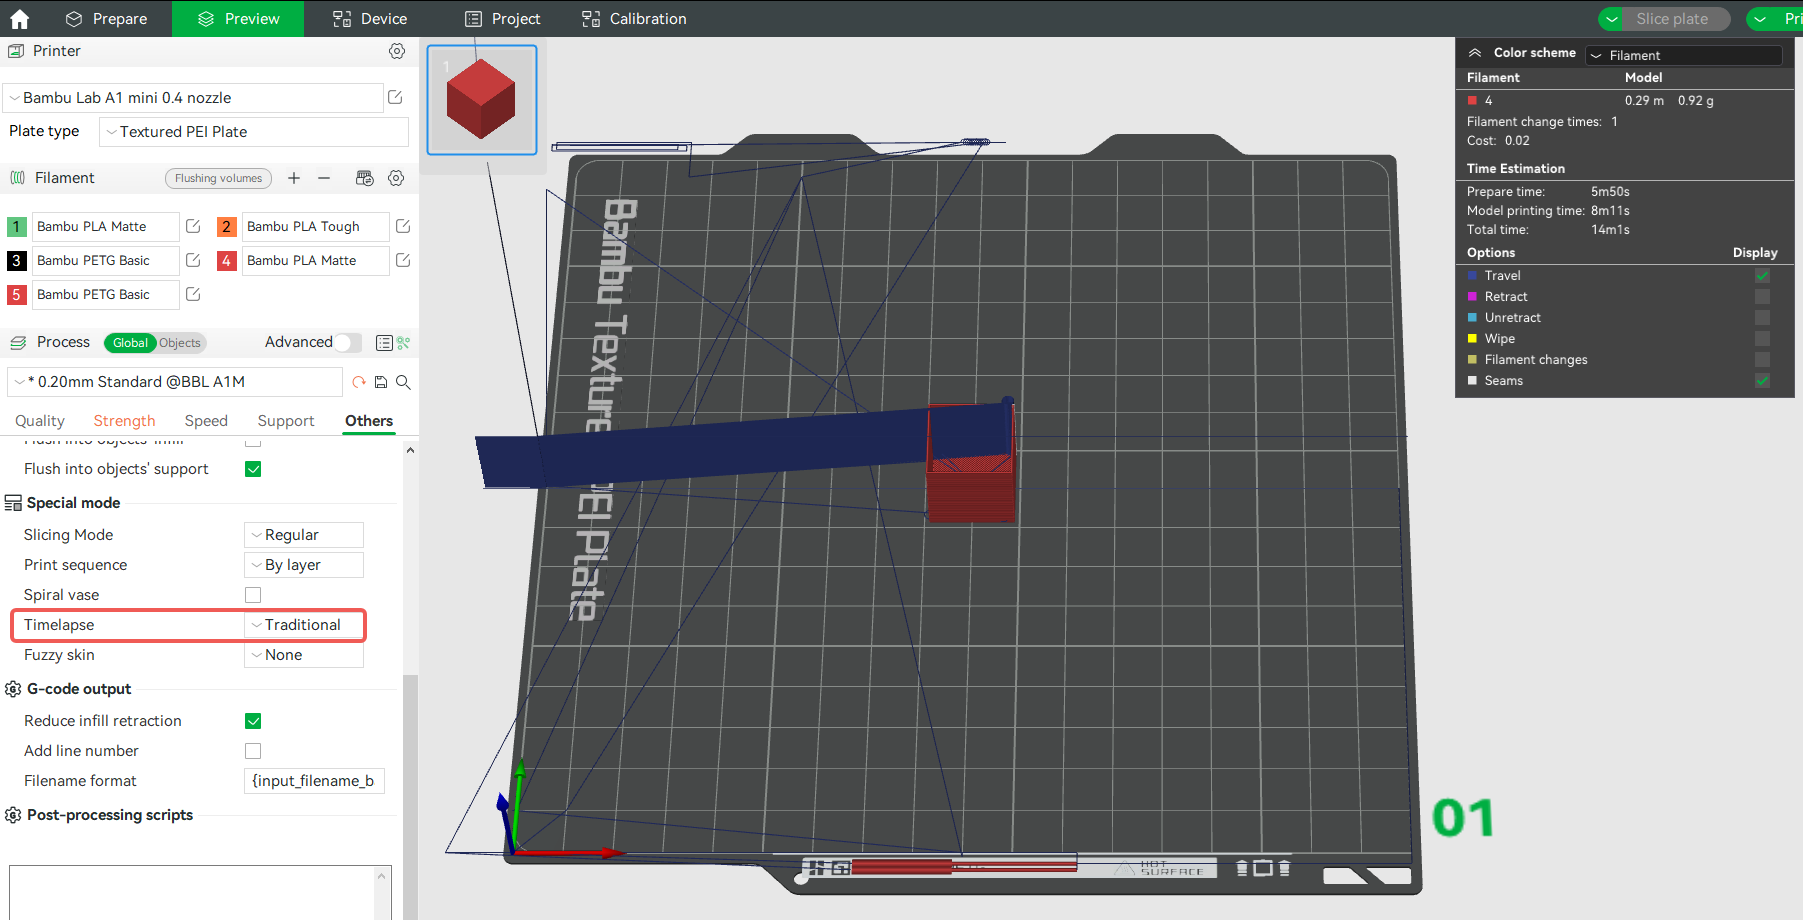
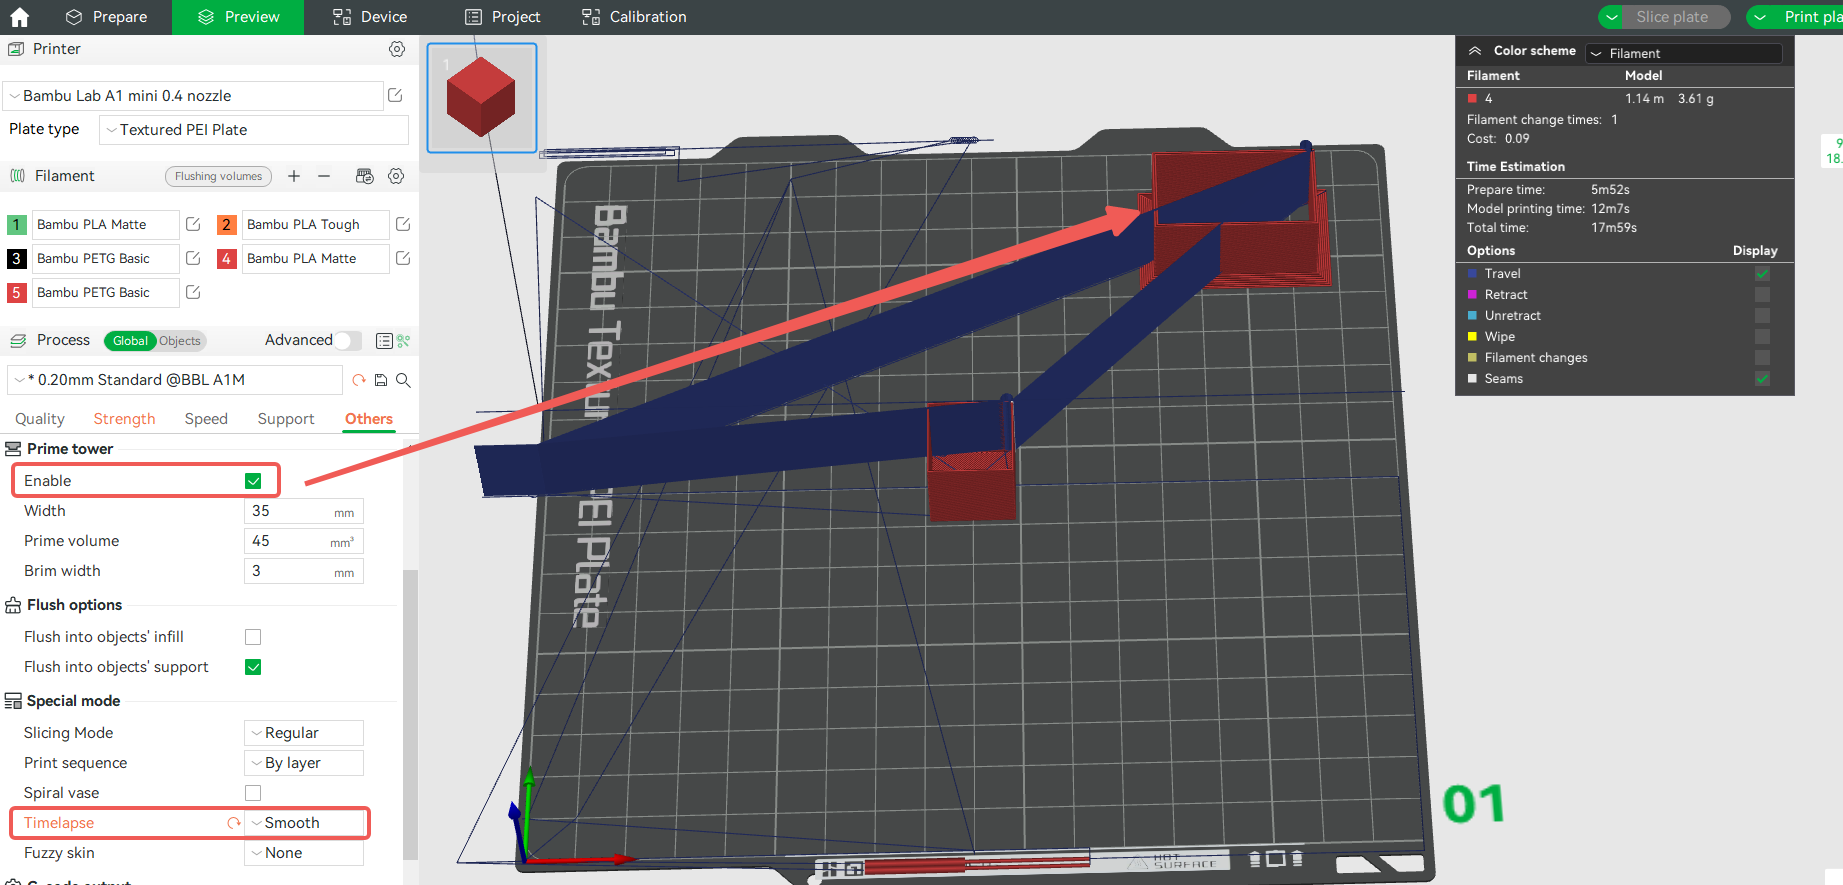
In the menu bar, under the "Special Mode" option in the "Others" section, you can find the "Timelapse" feature.
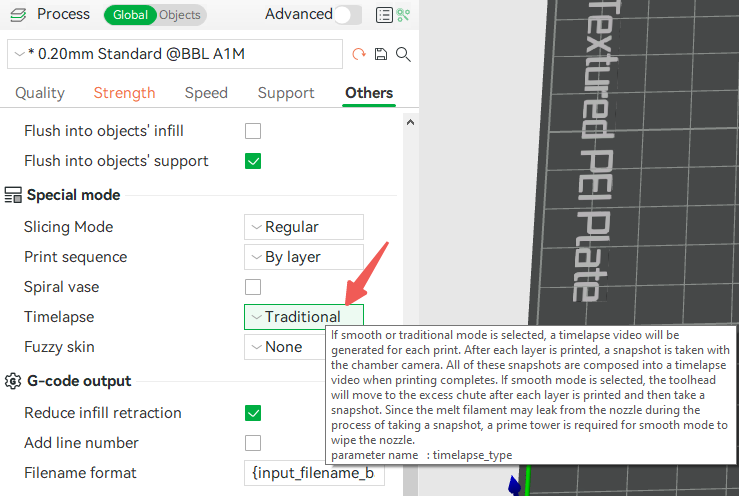
When you select Smooth mode, ensure that the Prime tower is enabled (this feature is turned on by default), as it is necessary for cleaning the nozzle.

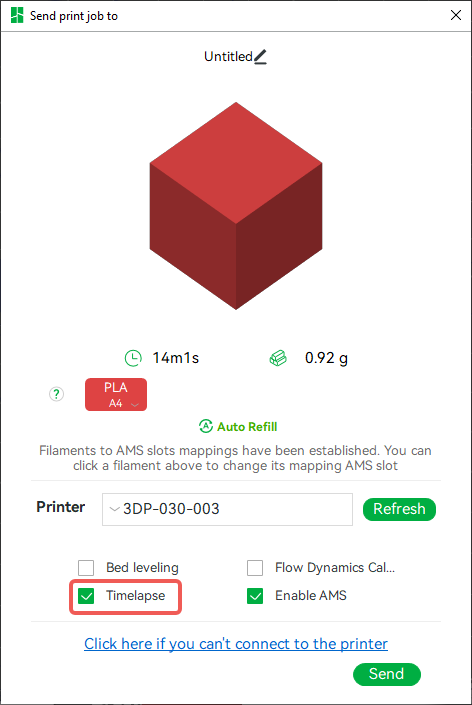
Before you start printing, ensure that an SD card with sufficient memory space is inserted into the printer, and check the "Timelapse" option when sending the print job.
¶ 3. Where to get the timelapse video files
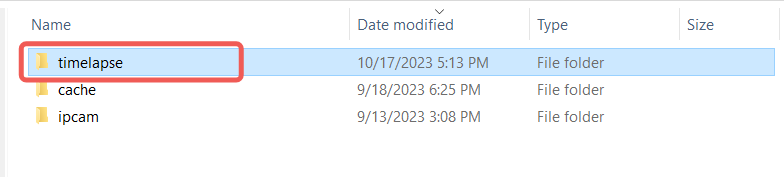
After printing, the generated timelapse video will be stored in the printer's SD card. You can find timelapse video files in the "timelapse" folder on your SD card:
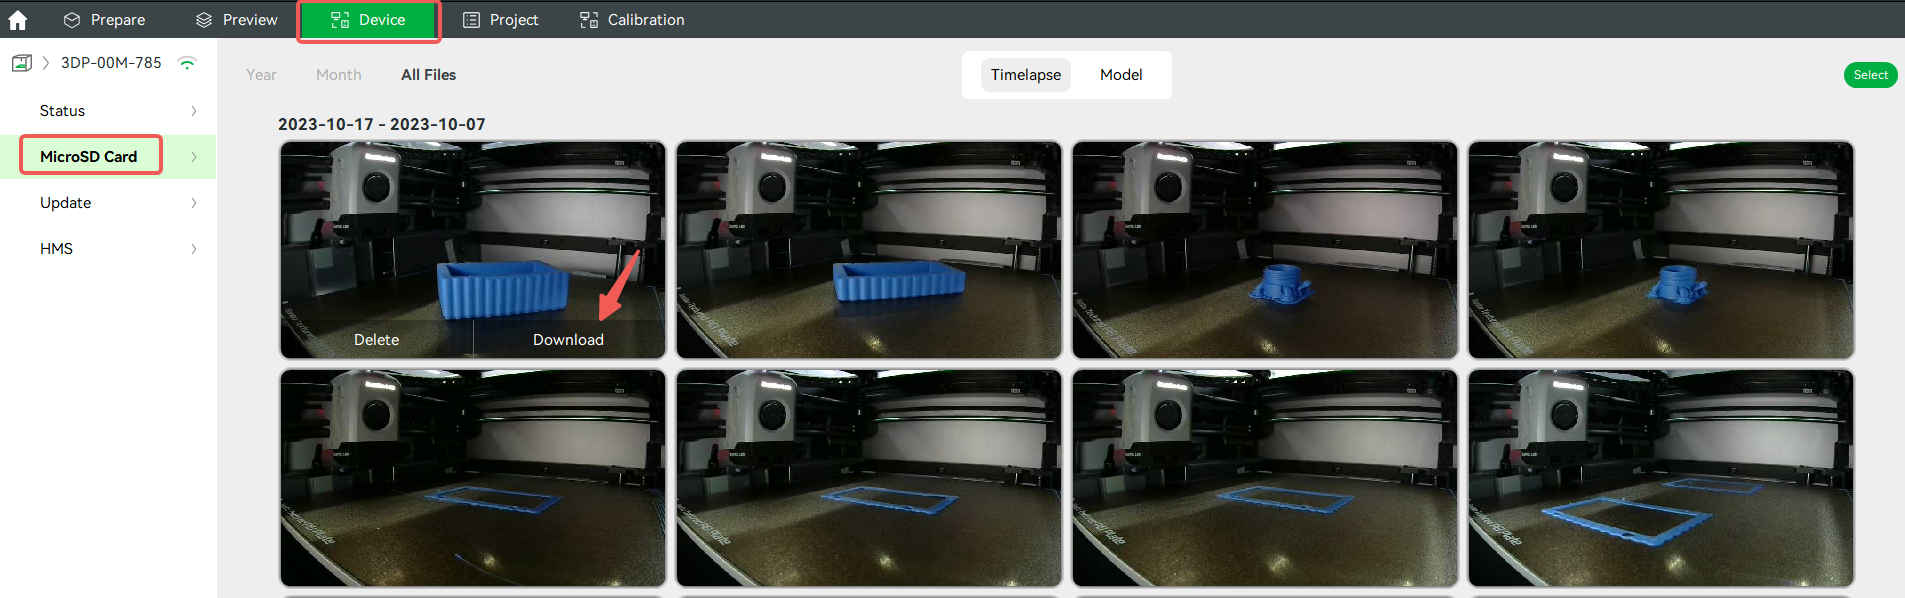
In Bambu Studio, you can also download timelapse video files from the "Device" - "MicroSD Card" page:
¶ 4. Enable Timelapse on Bambu Handy
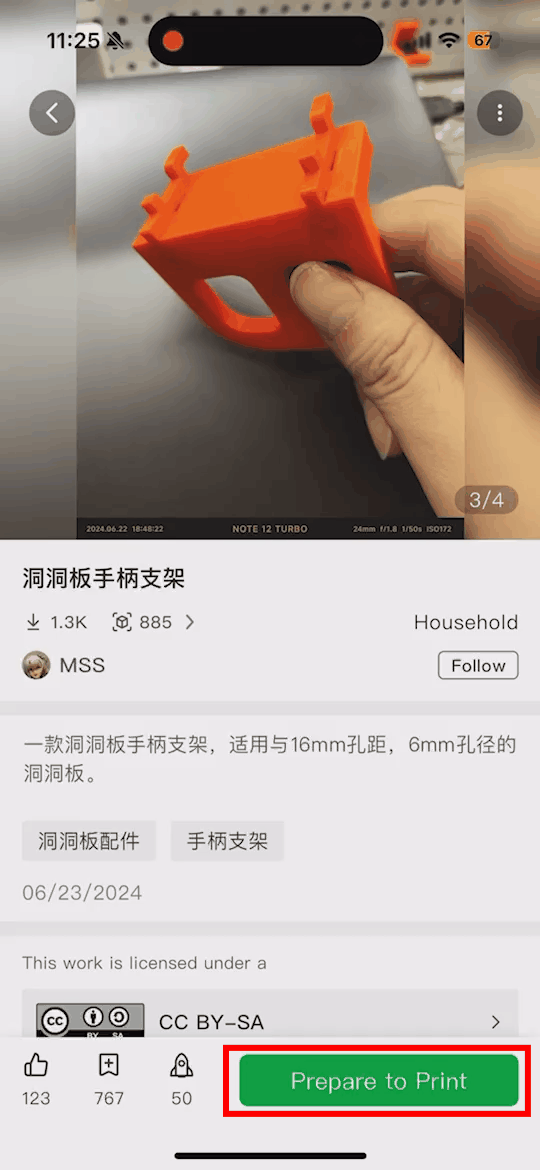
In Bambu Handy, you can enable the timelapse feature by navigating to Prepare to Print -> Options -> Timelapse, as shown in the GIF below:
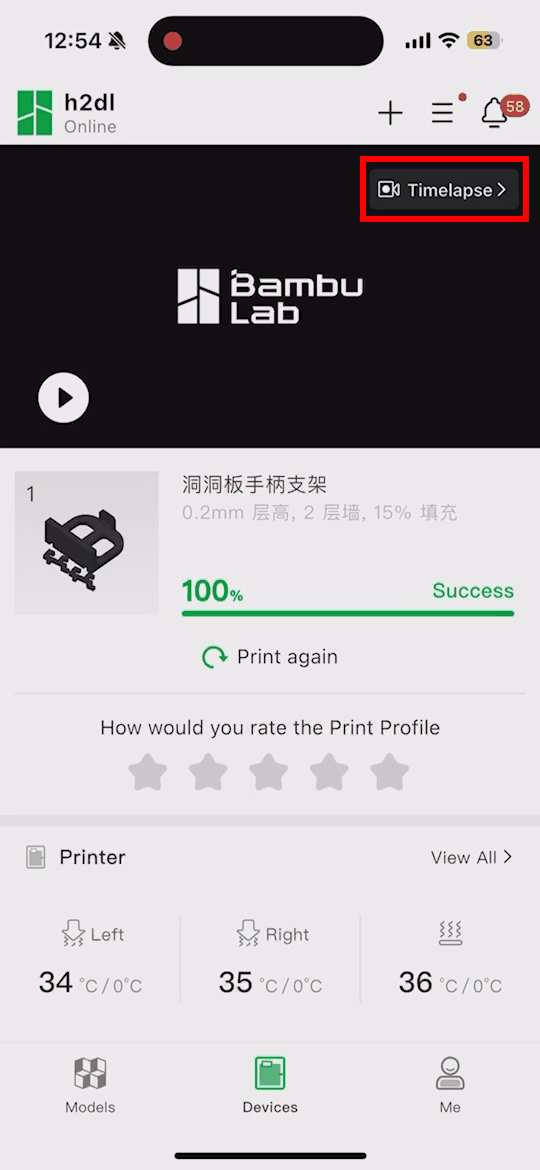
Once the print is complete, you can find the recorded timelapse video under Device Interface -> Timelapse, and choose to download it to your local photo gallery.
¶ FAQs
¶ 1.The relationship between the time-lapse duration and the printing duration
The duration of the timelapse video is independent of the actual printing time; it is solely determined by the number of layers and the frame rate.
Consequently, some models with a larger print area but lower layer height may still result in a shorter timelapse video, even if their overall print time is longer.
Total frames = the number of layers (N) , frame rate = 30 (fps).
video duration (seconds)=Nframe rate (fps)\text{video duration (seconds)} = \frac{N}{\text{frame rate (fps)}} video duration (seconds)=frame rate (fps)N
For example: 1000 layers / 30fps → video length ≈ 33.3 seconds.
¶ 2. Dark preview duringthe printing process
To prevent flickering or inconsistent brightness caused by changes in ambient light, the timelapse process locks the exposure, ensuring consistent brightness throughout the sequence. However, if printing begins in a bright environment, the locked exposure setting will cause the Live View to appear too dark when the ambient light decreases, such as the transition from day to night.
¶ End Notes
We hope our guide was helpful. If you have any questions or concerns about the process, please contact our customer service team. We're here to assist you.
Click here to open a new ticket in our Support Page.
We will do our best to respond promptly and provide you with the assistance you need.