¶ Infill patterns types and their properties of sparse
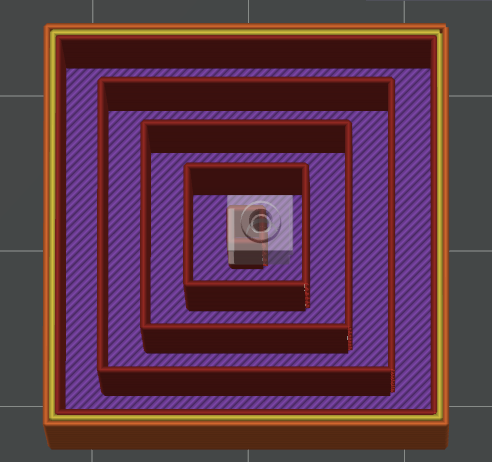
¶ Concentric
In sparse infill patterns, concentric circles are created as a series of parallel loops resulting from wall contraction. When printed with transparent materials, this pattern can produce an aesthetically pleasing visual effect.
However, the infill has lower load-bearing capacity in the horizontal direction compared to the vertical direction, making it unsuitable for models that experience horizontal stress.
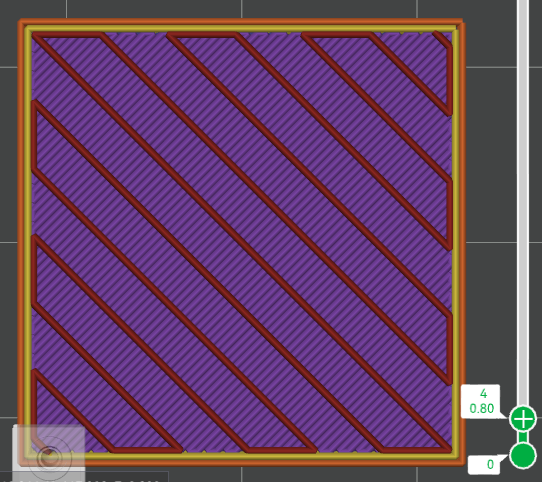
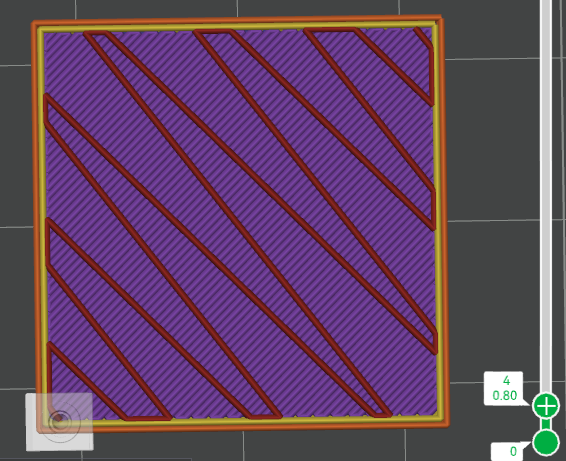
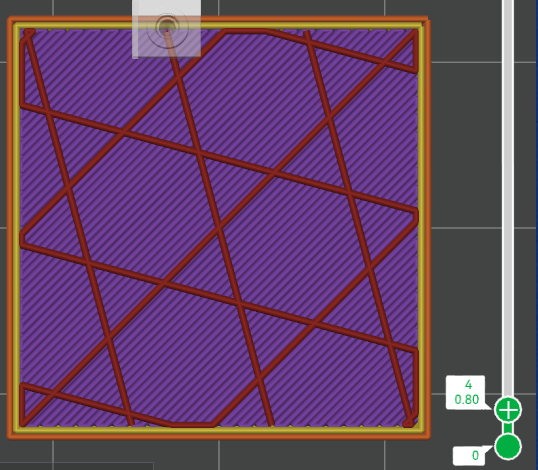
¶ Rectilinear
This pattern features a single diagonal line direction per layer, with alternating orientations between adjacent layers (e.g., layers 1, 3, and 5 share the same direction, while layers 2, 4, and 6 are perpendicular), forming a non-continuous grid structure.
The use of a single-direction line per layer significantly shortens the print path, greatly improving print speed and reducing filament consumption. It is suitable for scenarios where the model does not require high structural strength.
 |
 |
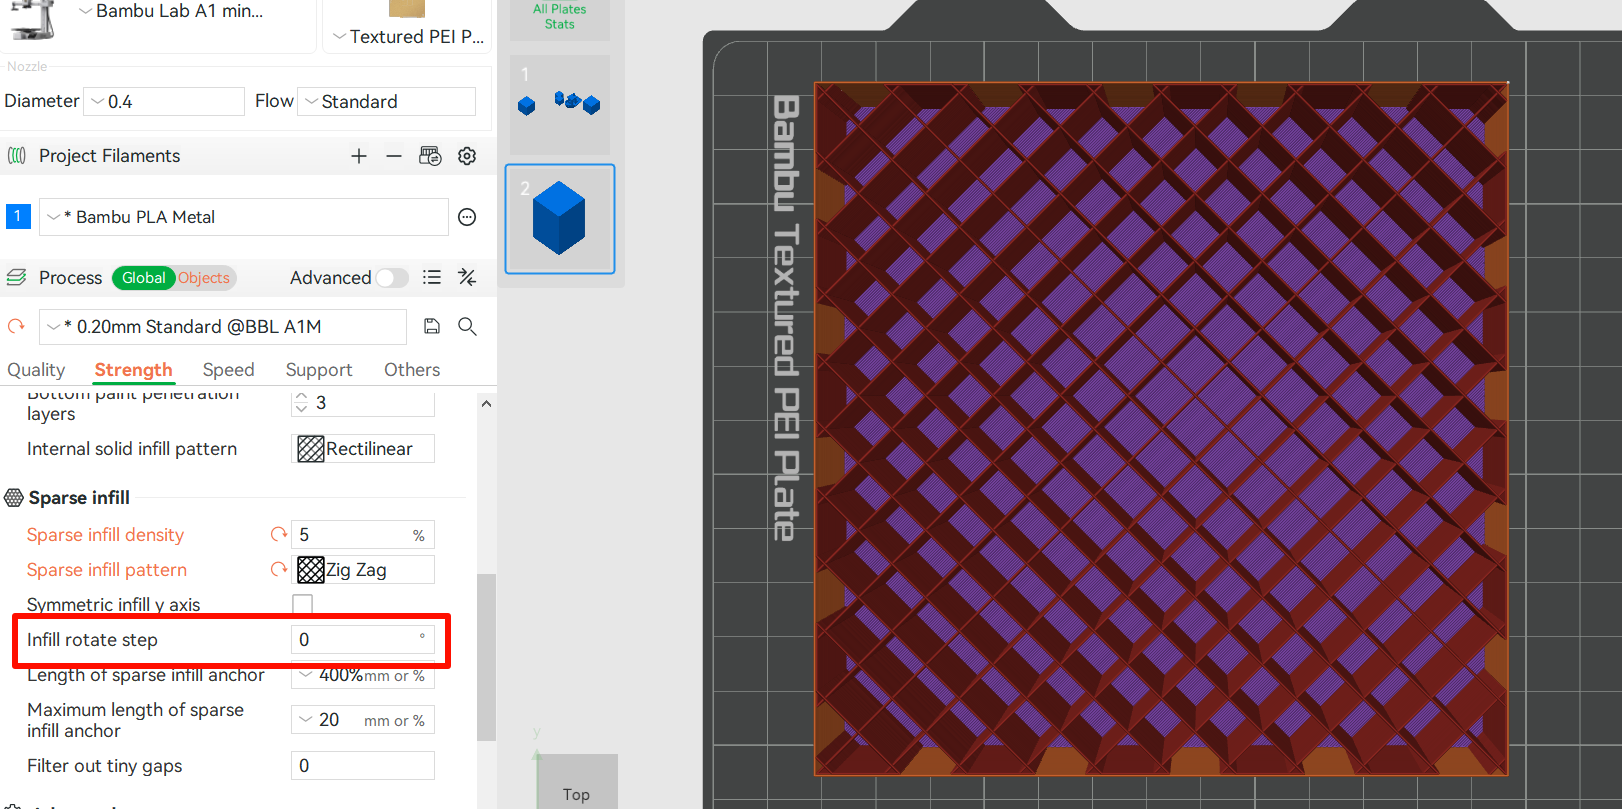
¶ Zig zag
Zig Zag infill consists of continuous straight lines arranged in alternating directions within each layer, forming a zigzag pattern. The appearance of the pattern can be adjusted by modifying the “infill rotation step” between layers.
This infill type allows the nozzle to extrude continuously during printing, minimizing retractions and pauses, which helps increase print speed. However, due to its low structural strength, it is generally used for parts with low load-bearing requirements.
If the rotation angle is set to 0, the pattern will resemble a rectilinear infill.
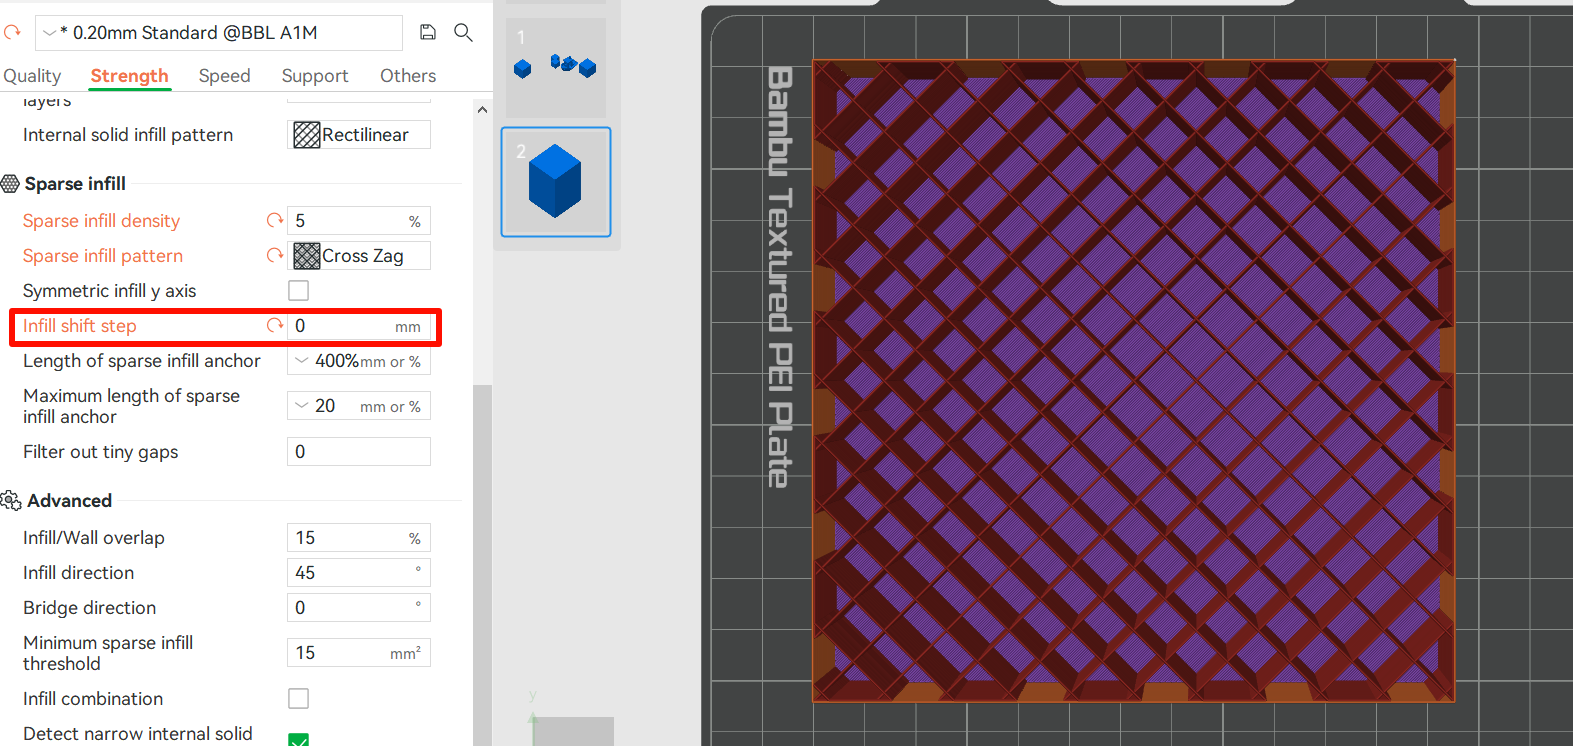
¶ Cross zag
Traditional Rectilinear infill typically generates a perpendicular crosshatch pattern in each layer, while Cross Zag builds upon this by introducing directional control at the intersection points of the crosshatch.
The orientation of these intersections can be adjusted by modifying the infill shift step, allowing for more precise control over the infill structure.
Similarly, when the infill shift step is set to 0, the pattern becomes similar to a standard rectilinear infill.
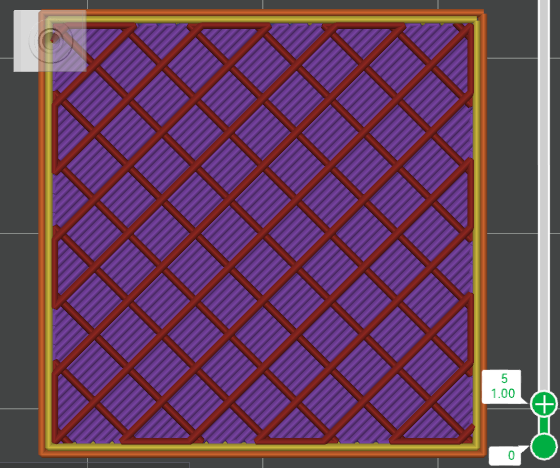
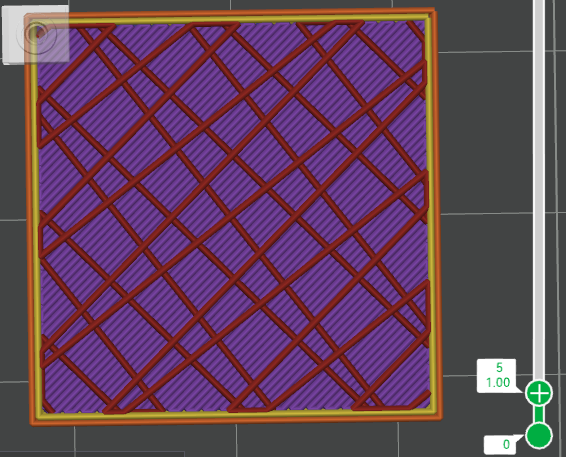
¶ Grid
The grid infill consists of two sets of parallel lines intersecting perpendicularly, forming a crosshatch mesh. It is one of the simplest and fastest infill types.
However, the overlapping intersections can cause slight material buildup, and during high-speed printing, this may lead to nozzle scraping or abnormal noises due to collisions with the model.
¶ Line
Similar to rectilinear infill, but the line is not parallel. This infill has the same advantage as rectilinear.
 |
 |
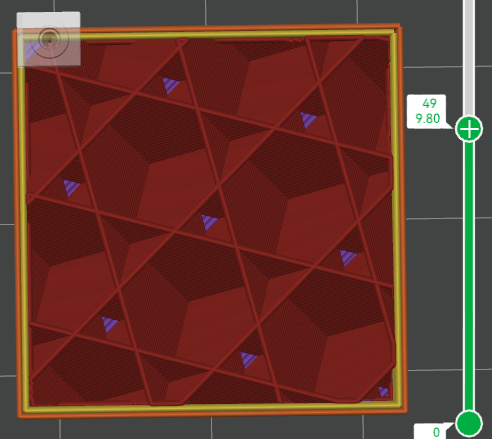
¶ Cube
Cubes with one corner facing down be created, providing numerous air spaces that may help the object float on water and insulate the heat.
At the same time, this infill pattern provides a relatively uniform strength distribution, delivering stable mechanical performance across the X, Y, and Z axes. It is well-suited for scenarios that require a balance between structural strength and printing efficiency.
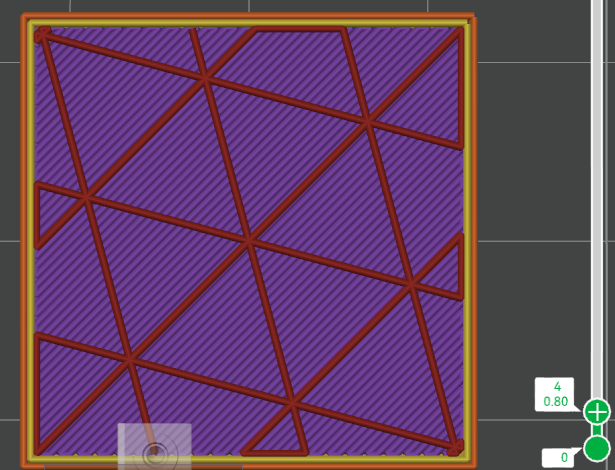
¶ Triangles
The triangle pattern, as a type of infill in 3D printing, has notable characteristics: it offers excellent shear resistance and provides relatively uniform strength across all horizontal directions. However, the top lines of this pattern often need to bridge long gaps, requiring additional top layers to achieve a smooth and even surface.
Additionally, during printing, material flow can be significantly hindered at the intersection points, which may lead to reduced overall strength when using high infill densities.
¶ Tri-hexagon
Similar to the triangle pattern, this infill type is formed by three sets of intersecting parallel lines, creating a hexagonal structure that includes both small triangles and larger hexagons within each layer. This design provides exceptional shear resistance in all horizontal directions, making it one of the strongest infill patterns under tensile stress.
Additionally, the short connection lines between the infill and the model walls help minimize warping issues caused by insufficient cooling.
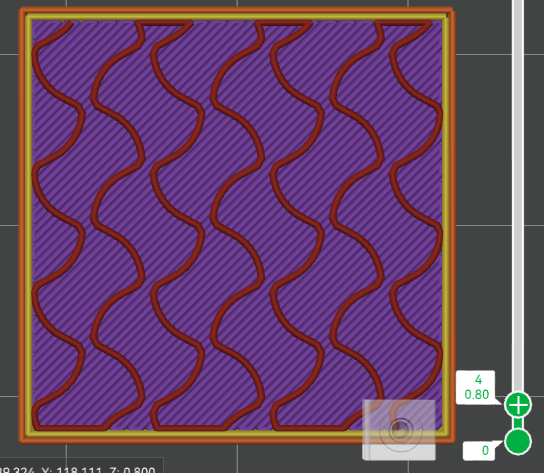
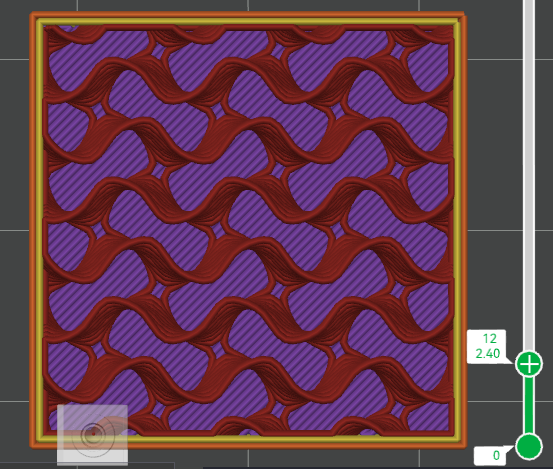
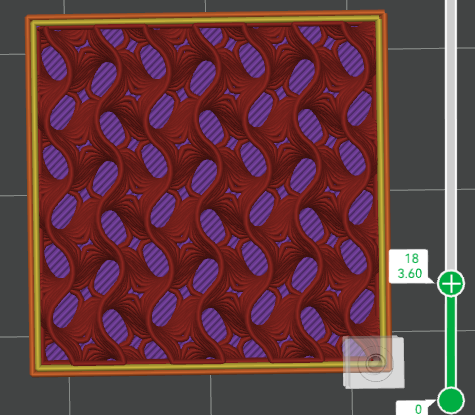
¶ Gyroid
This infill pattern is a type of three-period minimal surface (TPMS) lattice structure. The spiral shape provides excellent support in all dimensions, and since there are no intersecting lines within the same layer, it offers relatively fast printing speeds.
However, due to the more complex printing path, slicing time will be longer, resulting in larger G-code files. Additionally, at higher densities and during high-speed printing, significant vibrations may occur.
 |
 |
 |
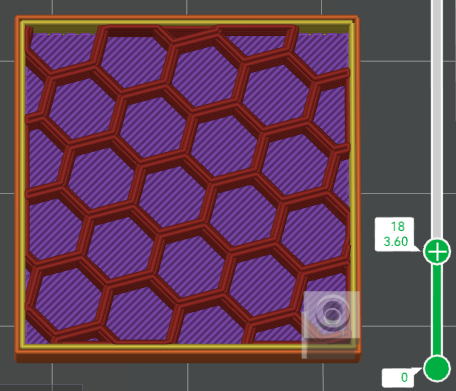
¶ Honeycomb
Honeycomb infill is an innovative pattern that mimics the structure of a beehive, using hexagonal cells to create a high-strength yet lightweight internal structure without any intersections inside. However, it consumes approximately 25% more material compared to other infill types.
This infill significantly enhances the rigidity and impact resistance of printed parts. However, due to the complexity of the printing path, it also increases both slicing time and overall printing time.
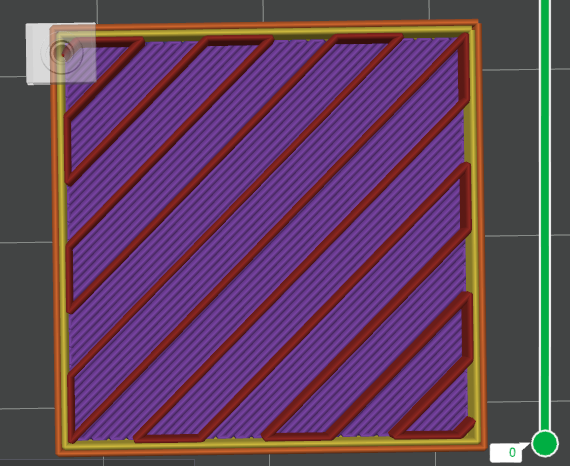
¶ Aligned Rectilinear
This infill is formed by parallel lines. It saves time and materials, however, if the top layer has the same direction as the infill, the top surface may fall.
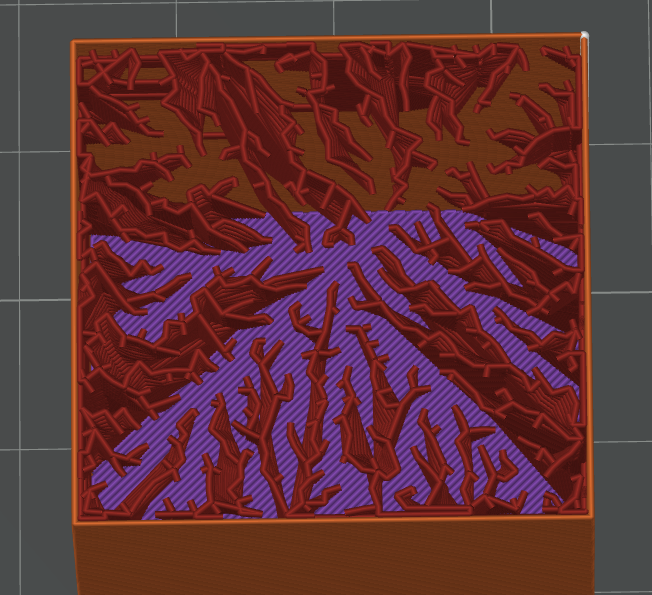
¶ Lightning
The Lightning Infill is a serrated minimal pattern designed specifically to support the top surface of a print. The specified infill density is applied only to the layer directly below the top surface.
This pattern helps save significant print time and material consumption, making it ideal for aesthetic models or parts that do not require structural strength or load-bearing capabilities. It is well-suited for decorative models that don't need to endure stress.
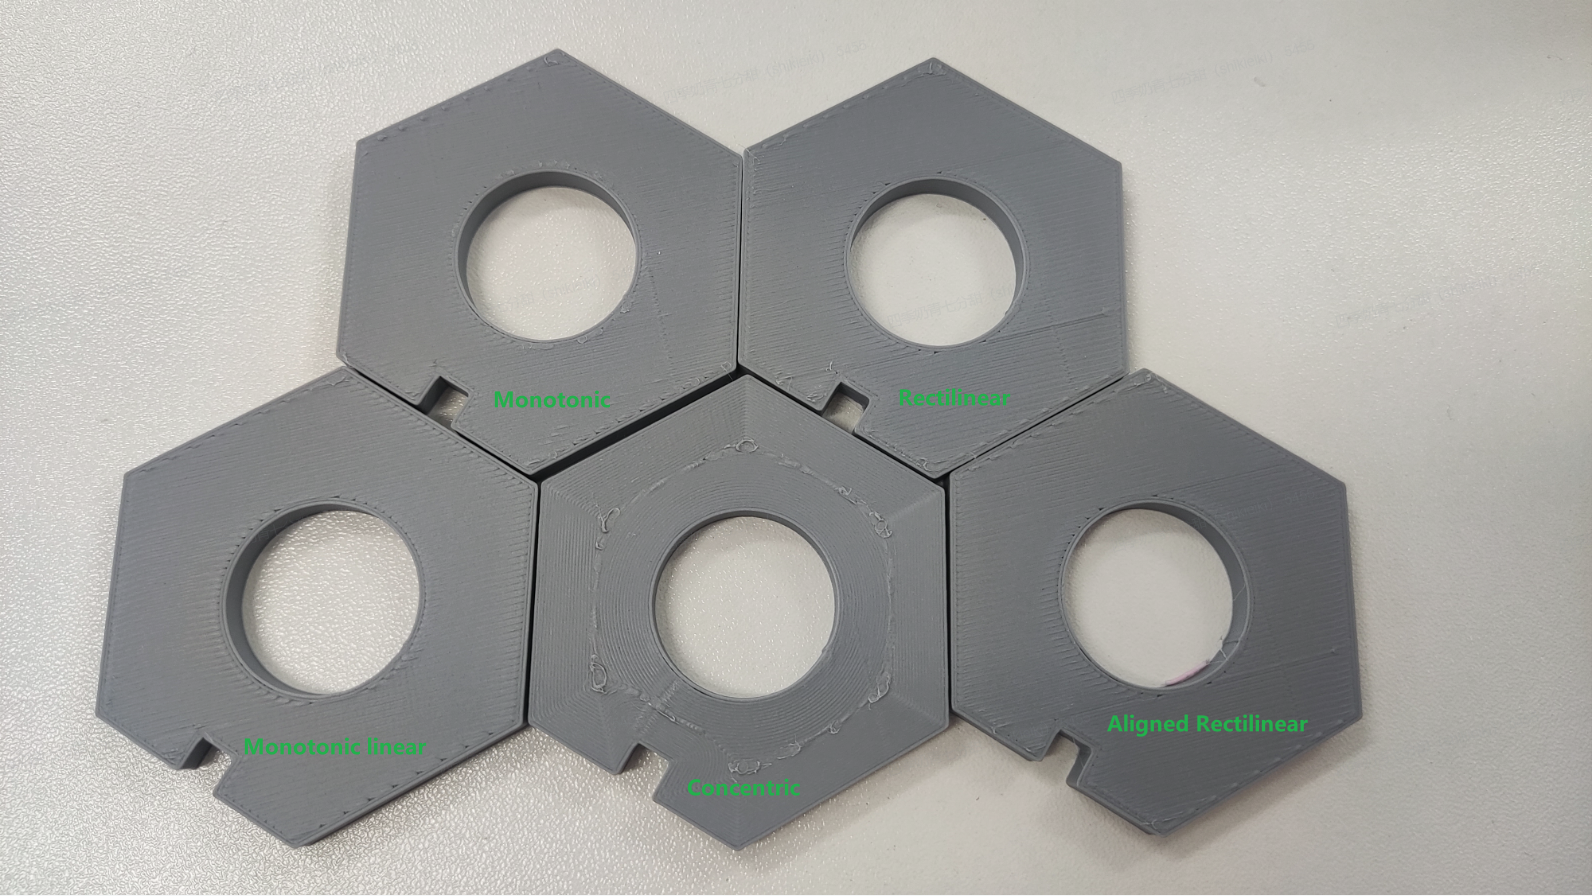
¶ Infill of the top surface and bottom surface
There are 5 options: Concentric, Rectilinear, Monotonic, Monotoic linear and Aligned Rectilinear; and 3 new options: Hilbert Curve, Archimedean Chords and Octagram Spiral.
If the object has no holes, then the surface would be nice. Otherwise, it may have redundant material.
Monotonic has uniform lines which get a more smooth surface compared to Rectilinear infill.
Compare to Monotonic, Monotonic linear infill has no overlap with the perimeter, some seam may appear on the surface, but will not has redundant material in connected areas.
Aligned Rectilinear infill of the surface should be used with Aligned Recitlinear infill of sparse to get a good view with transparent material.
¶ End Notes
We hope the detailed guide provided has been helpful and informative.
If this guide does not solve your problem, please submit a technical ticket, we will answer your questions and provide assistance.
If you have any suggestions or feedback on this Wiki, please leave a message in the comment area. Thank you for your support and attention!