¶ How to Enable Locked Zag Infill
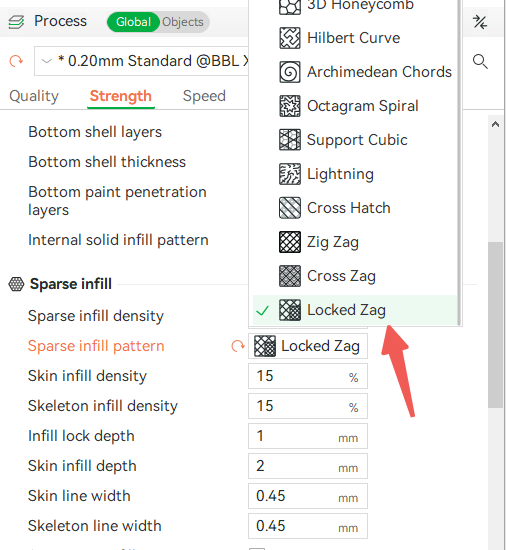
In the Bambu Studio interface, navigate to: Process → Strength → Sparse Infill Pattern
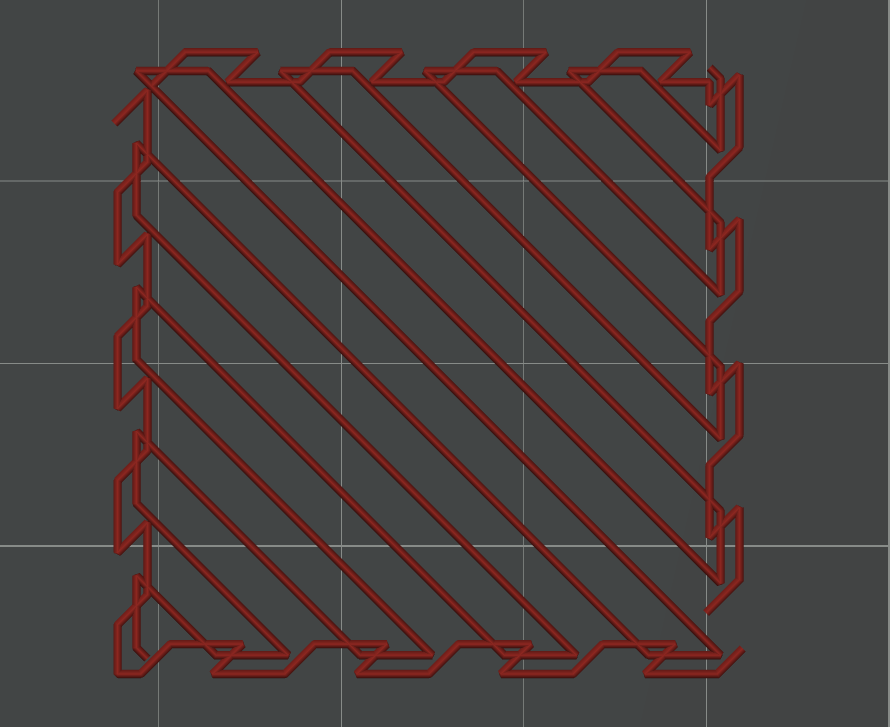
Select "Locked Zag" from the dropdown menu. The infill structure is shown in the following diagram.
¶ Infill Structure Introduction
Locked Zag is an infill pattern that balances appearance and structural strength. It consists of two parts:
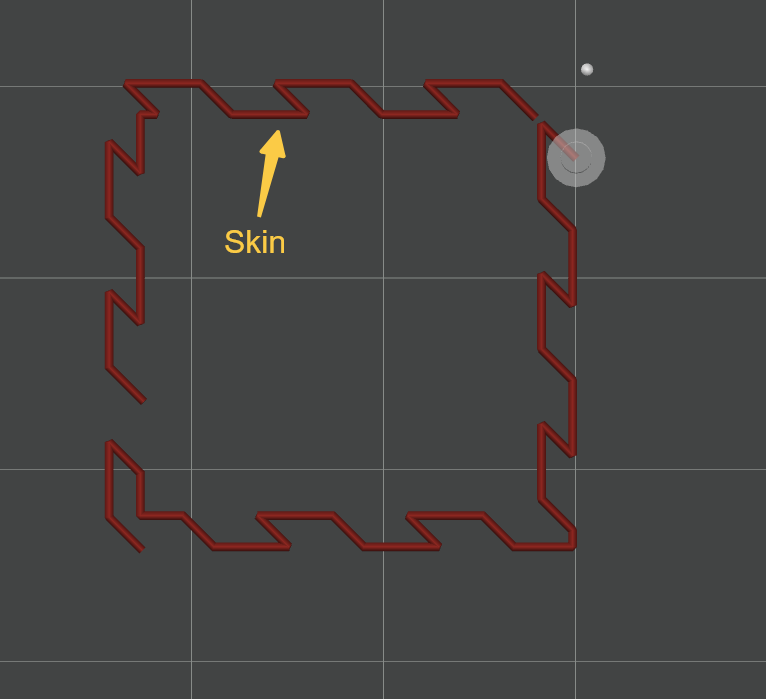
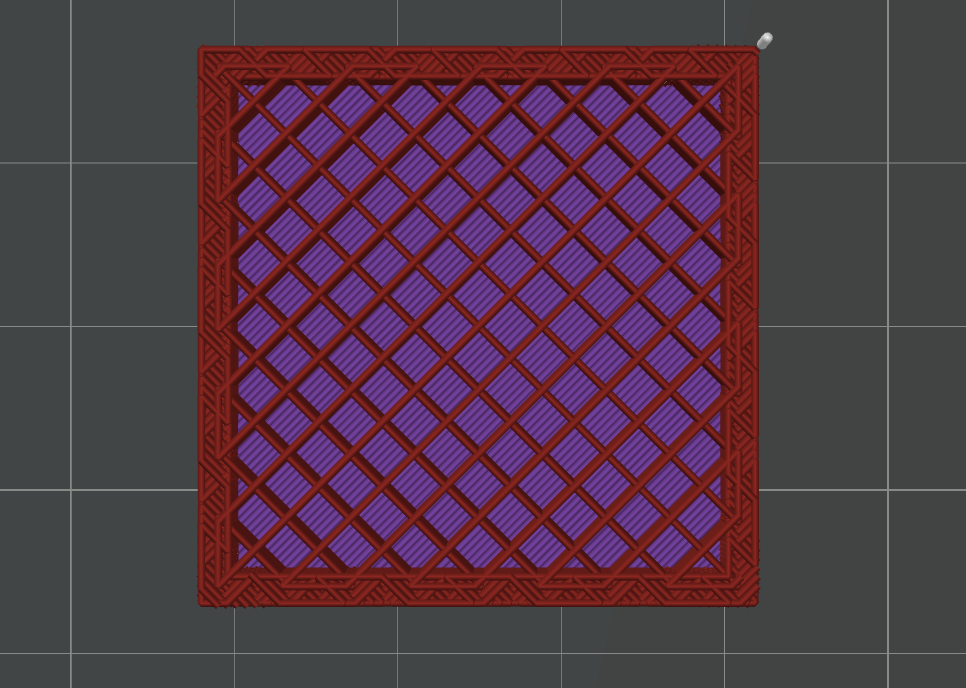
Skin:
-
Location: The infill area immediately adjacent to the model's inner walls
-
Pattern: Uses Cross Zag pathing
-
Effect: Ensures side surface texture the same as the Cross Zag infill
-
Viewing Tip: Turn off "Inner/Outer Wall Display" in Line Type settings to clearly observe the infill side effects, as shown below.
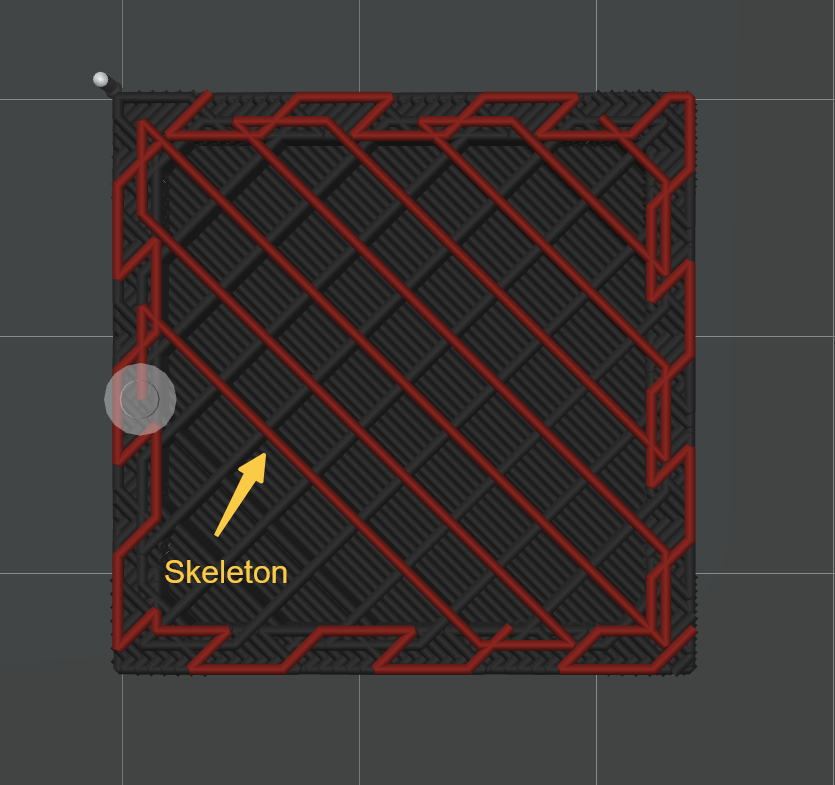
Skeleton:
-
Location: Central area of the infill
-
Pattern: Uses Zig Zag pathing
-
Feature: Overlaps with the Skin to enhance structural strength (complete cross-section shown below)
Key Advantages:
-
Zig Zag skeleton provides higher strength (stronger than Cross Zag infill)
-
Maintains Cross Zag's surface texture
-
Adjustable overlap between skin and skeleton for optimized bonding strength
¶ Parameter Explanation
Sparse Infill Density: Controls overall internal infill density (shown below)
Note: Skin and skeleton densities are child parameters of sparse infill density:
-
Adjusting sparse infill density will automatically update skin/skeleton densities
-
You can still individually adjust skin/skeleton infill densities within effective ranges
Skin Infill Density:
Only adjusts density in the skin area of sparse infill, which further affects side density (shown below)

Skeleton Infill Density:
Adjusts density in the skeleton area of sparse infill, affecting internal path density (shown below)

Infill Lock Depth:
Adjusts overlap width between skin and skeleton. Deeper depth = stronger structure.
Skin Infill Depth:
Controls skin thickness. Higher values make surface layers deeper, making sides more Cross Zag-like.
Note: Infill lock depth cannot exceed skin infill depth (default: 50% of skin infill depth)

Skin Line Width:
Adjusts the line width of the skin pattern.
Skeleton Line Width:
Adjusts the line width of the skeleton pattern.
¶ Solving "Infill Partitioning" Issues
What is infill partitioning?
When different model areas use different infill densities/line widths, infill may split into separate blocks, causing:
-
Gaps between infill → weaker bonding
-
Increased risk of tearing or print failures
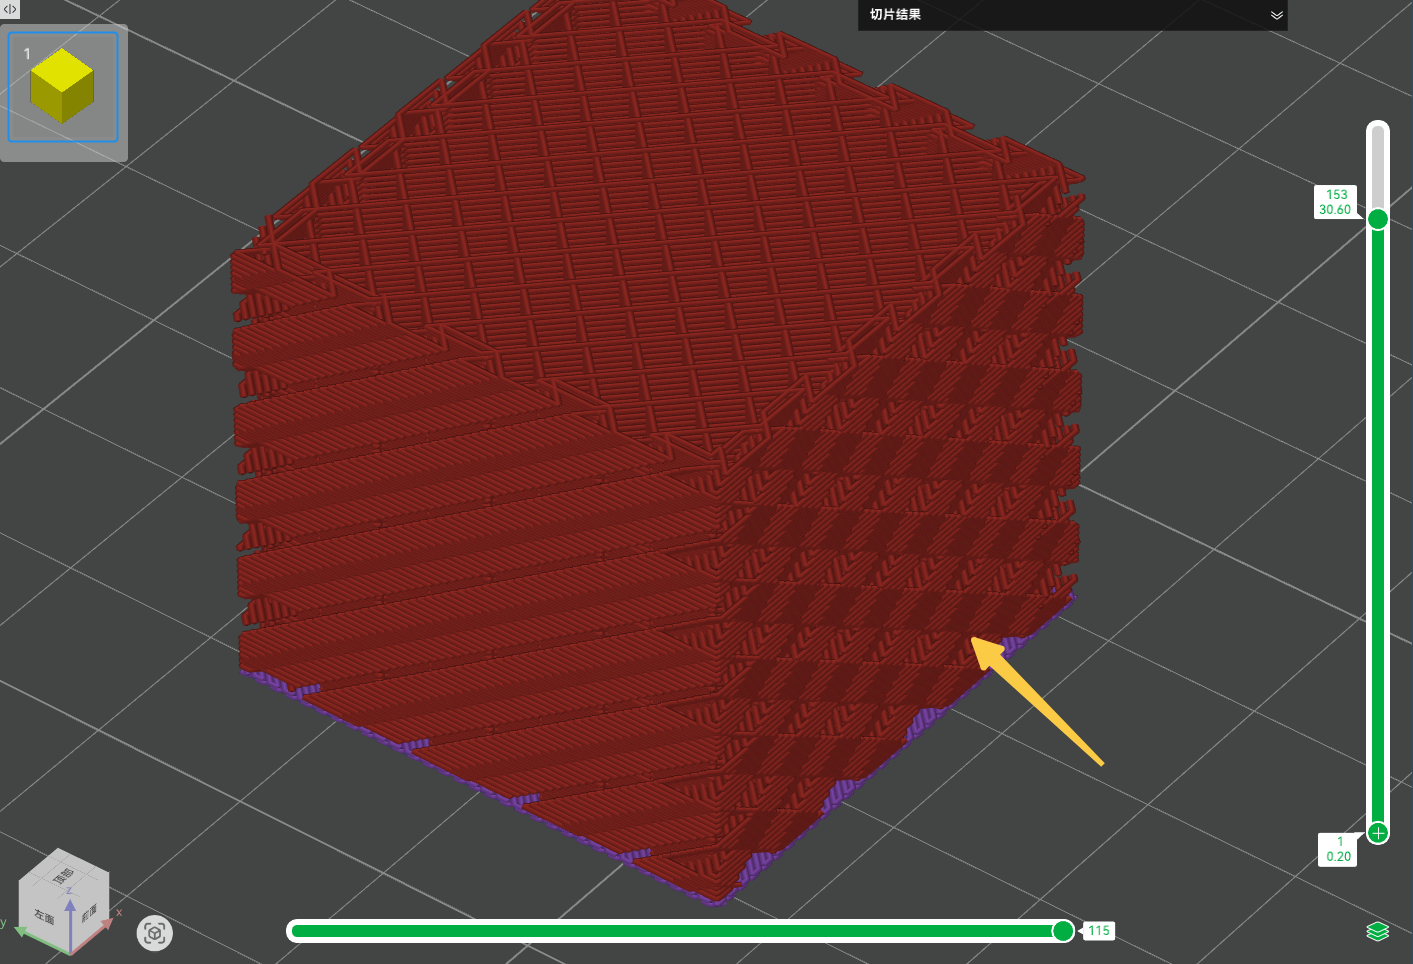
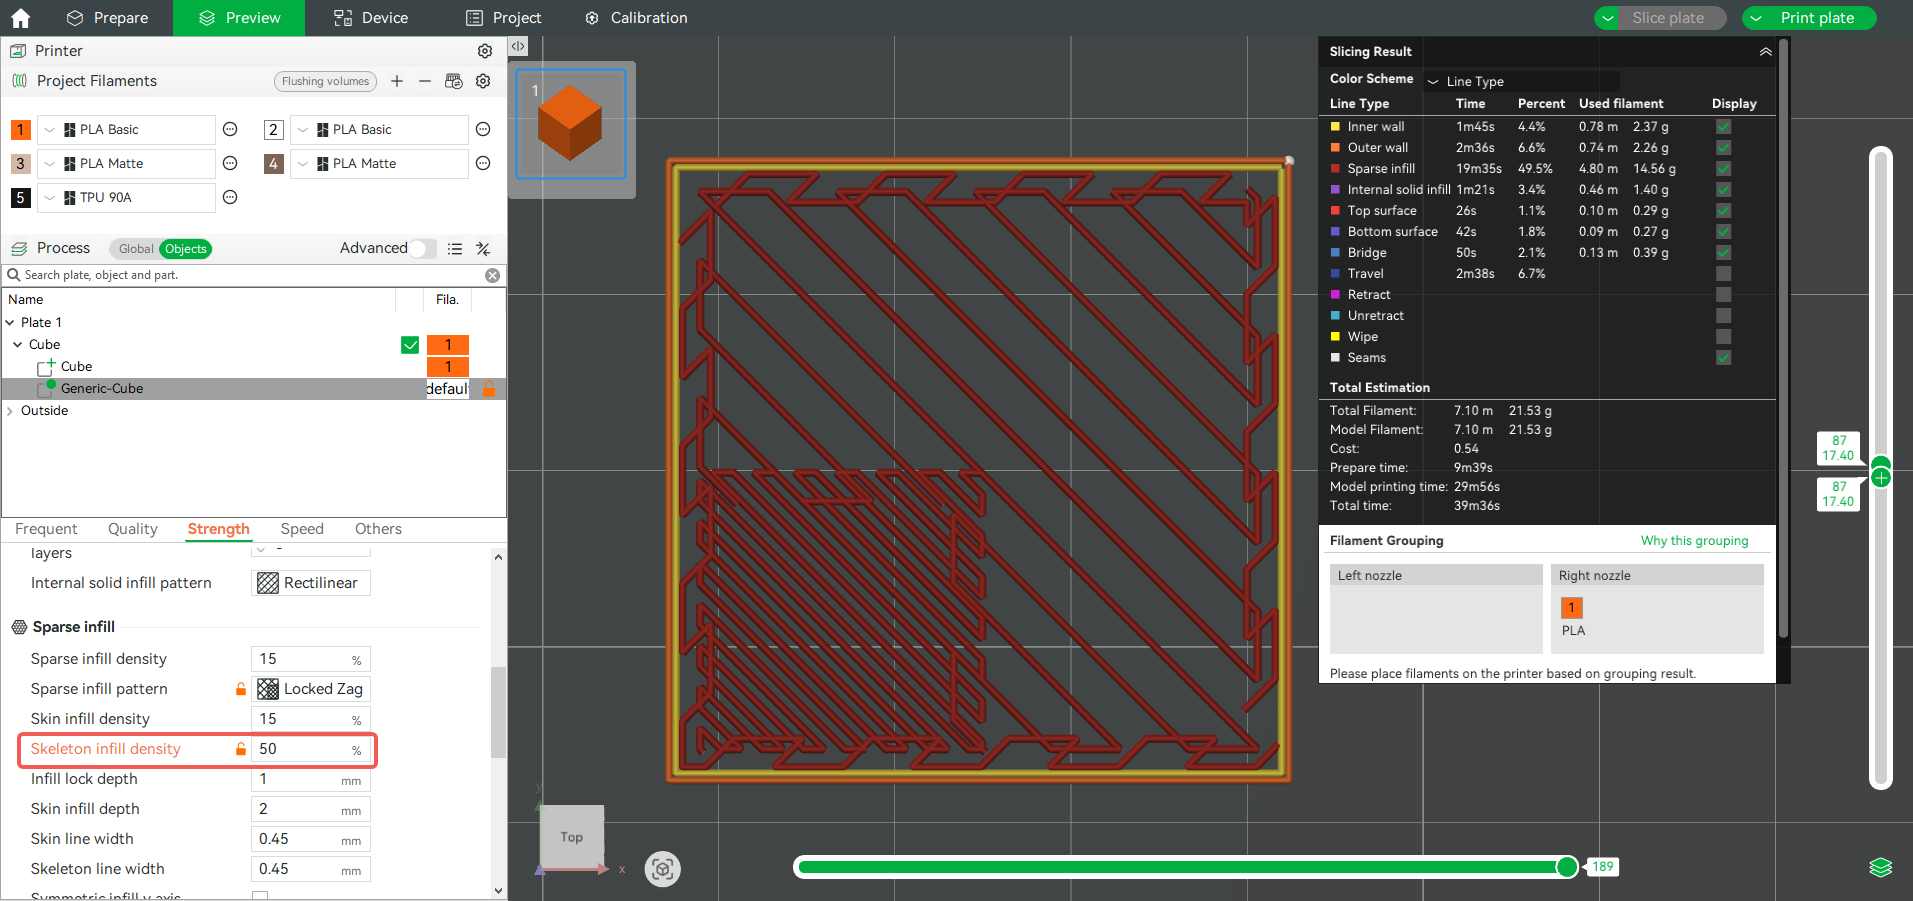
The example below shows a cube with locally modified parameters, demonstrating clear partitioning between adjusted and unadjusted areas.
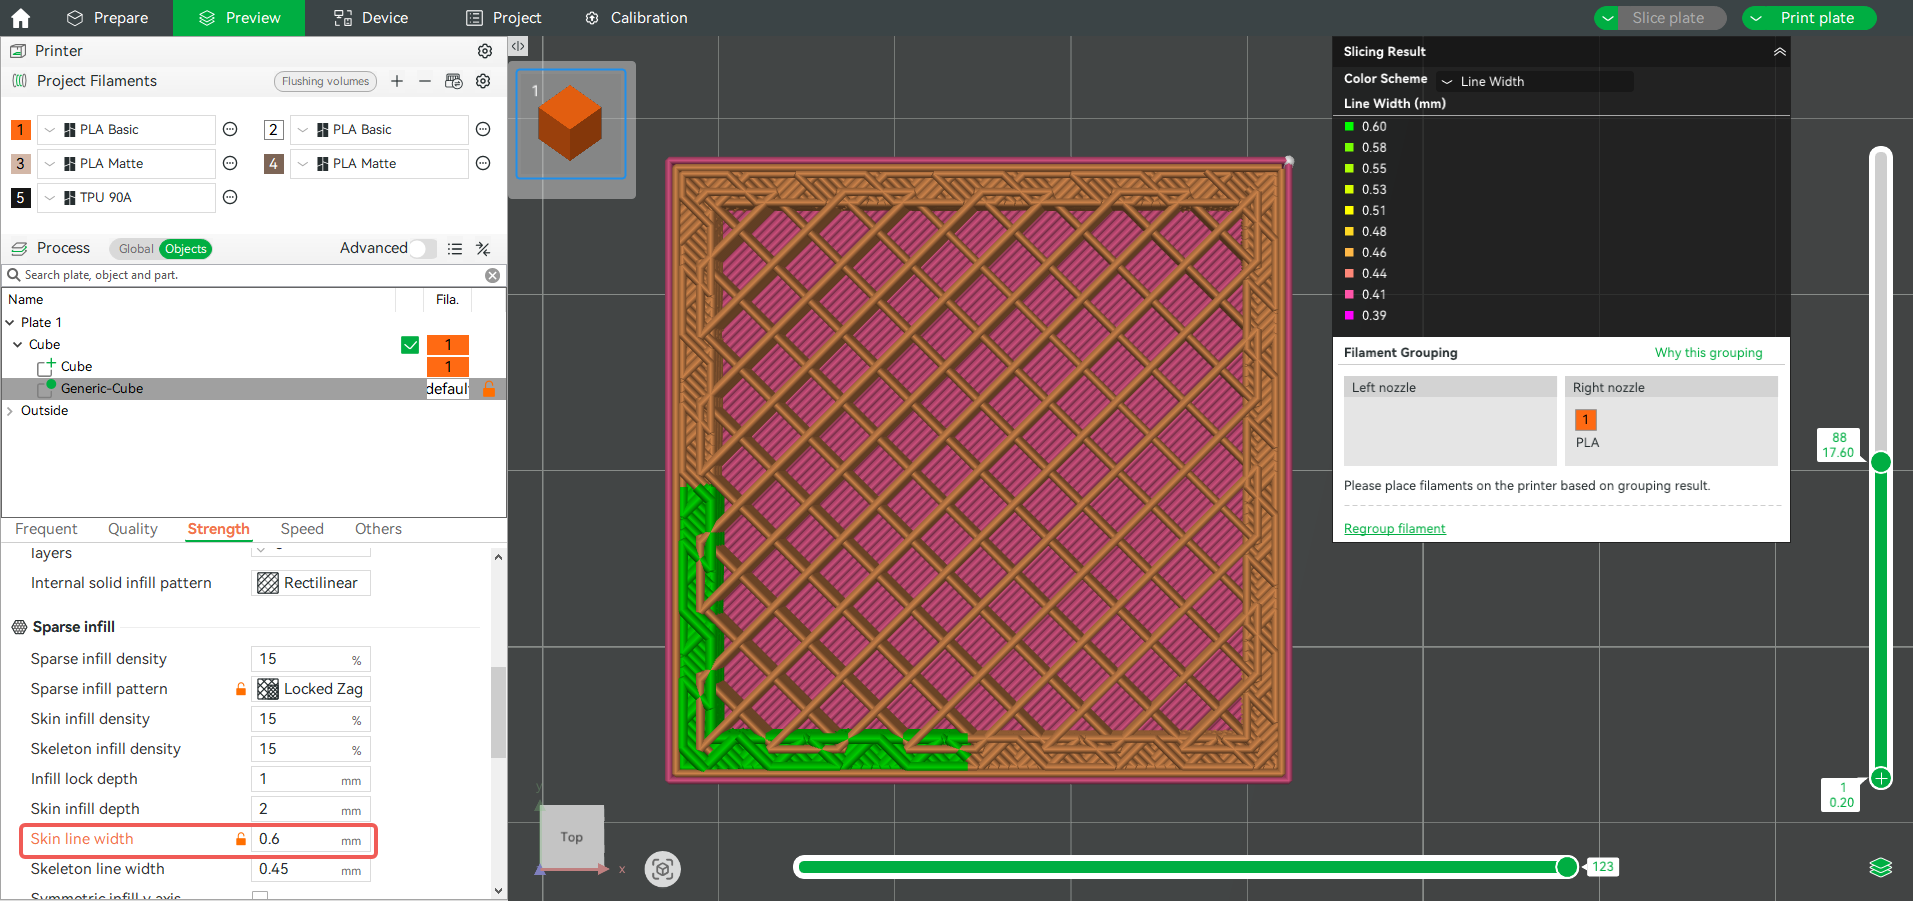
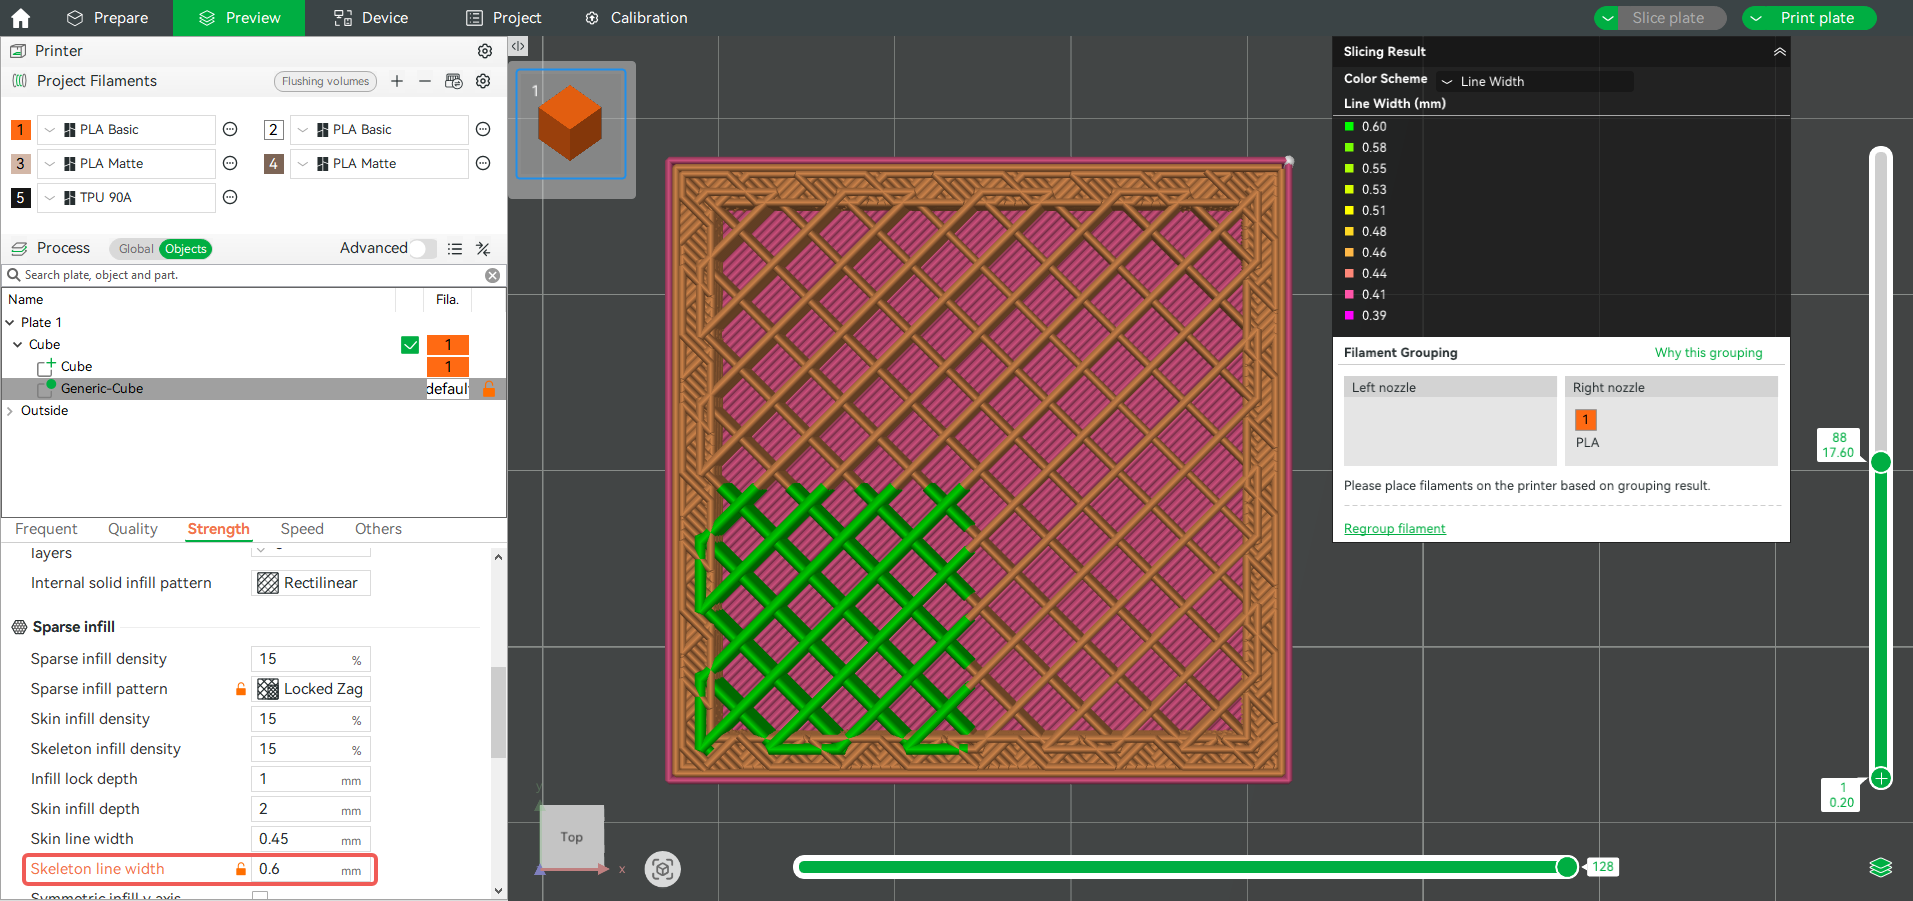
Locked Zag's four adjustable parameters ensure seamless connections between infill areas with different densities/line widths, preventing partitioning. Below are examples after applying modifiers to a cube:
Modified skin/skeleton densities:

Modified skin/skeleton line widths:
¶ Recommended Use Cases
We recommend Locked Zag when you:
-
Need Cross Zag surface texture but require more strength
-
Want to balance aesthetics and durability
Especially when printing models of high stress parts such as shoes, you can choose the Locked Zag pattern for printing.
¶ End Notes
We hope the detailed guide provided has been helpful and informative.
If this guide does not solve your problem, please submit a technical ticket, we will answer your questions and provide assistance.
If you have any suggestions or feedback on this Wiki, please leave a message in the comment area. Thank you for your support and attention!