¶ Preface
Bambu Suite uses a top-notch Auto Arrange feature that makes it quick and easy to place patterns in the right spots on your material with just one click. This feature is perfect for getting things ready for the next steps in your project. Here’s what makes it special:
-
Works with Any Material Shape: It can handle materials of all shapes, even tricky ones with holes.
-
Great with Odd-Shaped Materials: It easily deals with materials that have unusual or uneven edges, like concave shapes.
-
Smart with Complex Designs: It can arrange bound objects in a way that saves space, making it ideal for complicated patterns.
¶ Usage scenario
Both laser cutting and die cutting are typical subtractive manufacturing techniques. Their core process involves cutting one or more specific shapes from a material, which are then assembled into the final product. For example, the image below shows a case of assembling a small airplane: the left side displays the patterns to be cut from a flat material, while the right side shows the assembled result (model from JoeSnuffie).
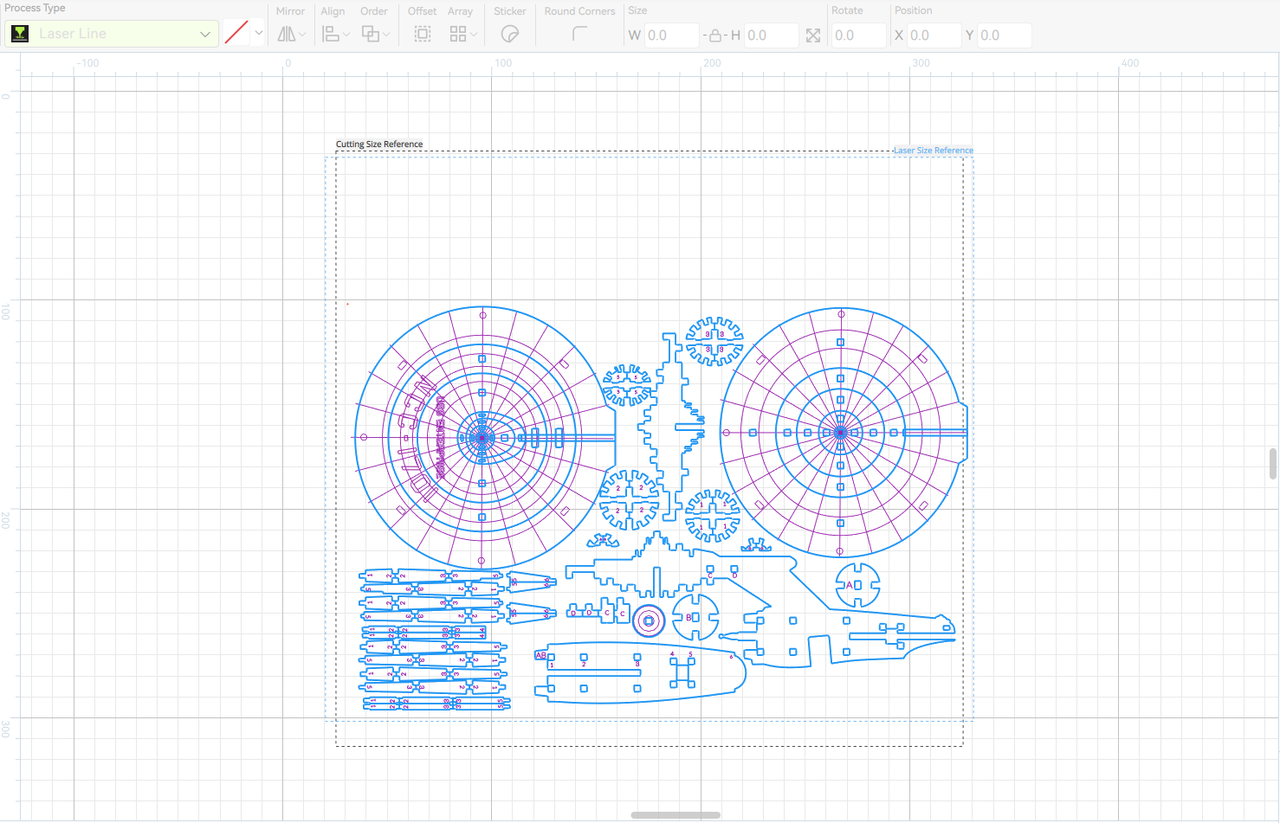

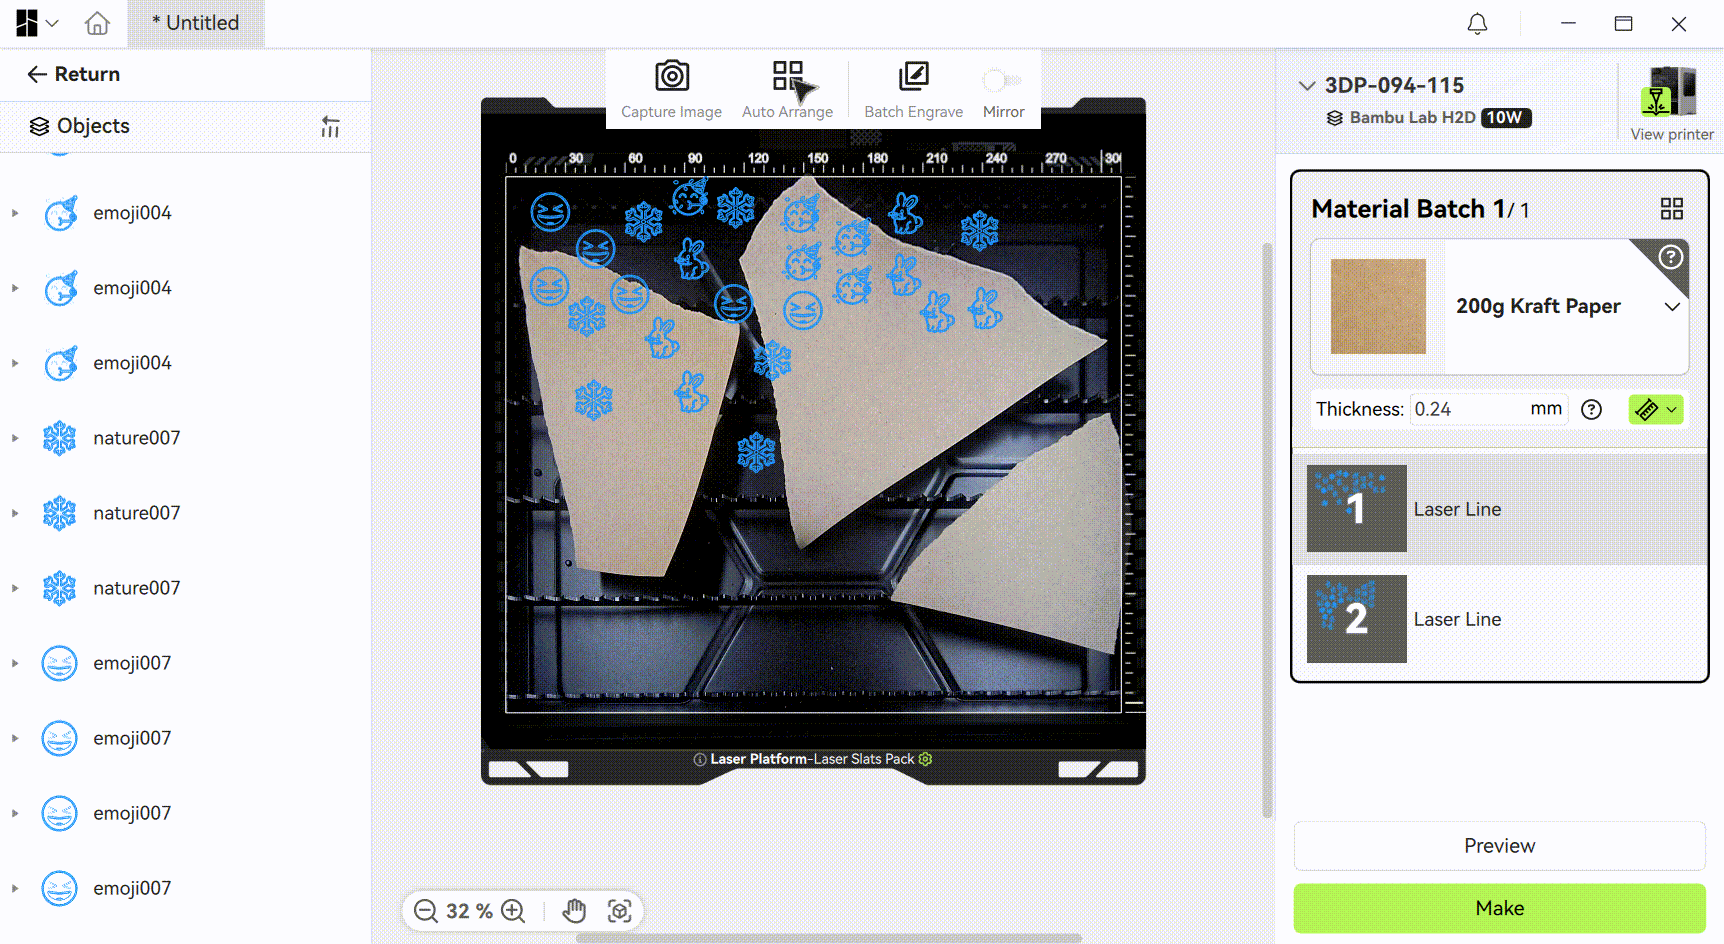
When working with a full sheet of material, you usually don’t need to adjust the pattern placement before starting the cutting process. However, when using partially cut or irregularly shaped leftover materials, the irregular shape may make it impossible to place the entire pattern directly. In such cases, the pattern needs to be split into multiple objects, which are then arranged separately on the uncut areas of the material. As shown in the image below, the leftover material cannot accommodate the entire pattern, so the pattern placement needs to be adjusted to make the most of the remaining material.

¶ How to Use Auto Arrange
Bambu Suite offers two core Auto Arrange modes: Single Plate Auto Arrange and Global Auto Arrange. Additionally, it supports Incomplete Material Arrangement and Multi-Connected Domain Object Arrangement to handle different material and object characteristics. Below is a detailed introduction to each feature:
¶ Prerequisites
Taking a photo to get a top view of the material is a prerequisite for automatic plating. Click Capture Image to get a top view of the processed material.
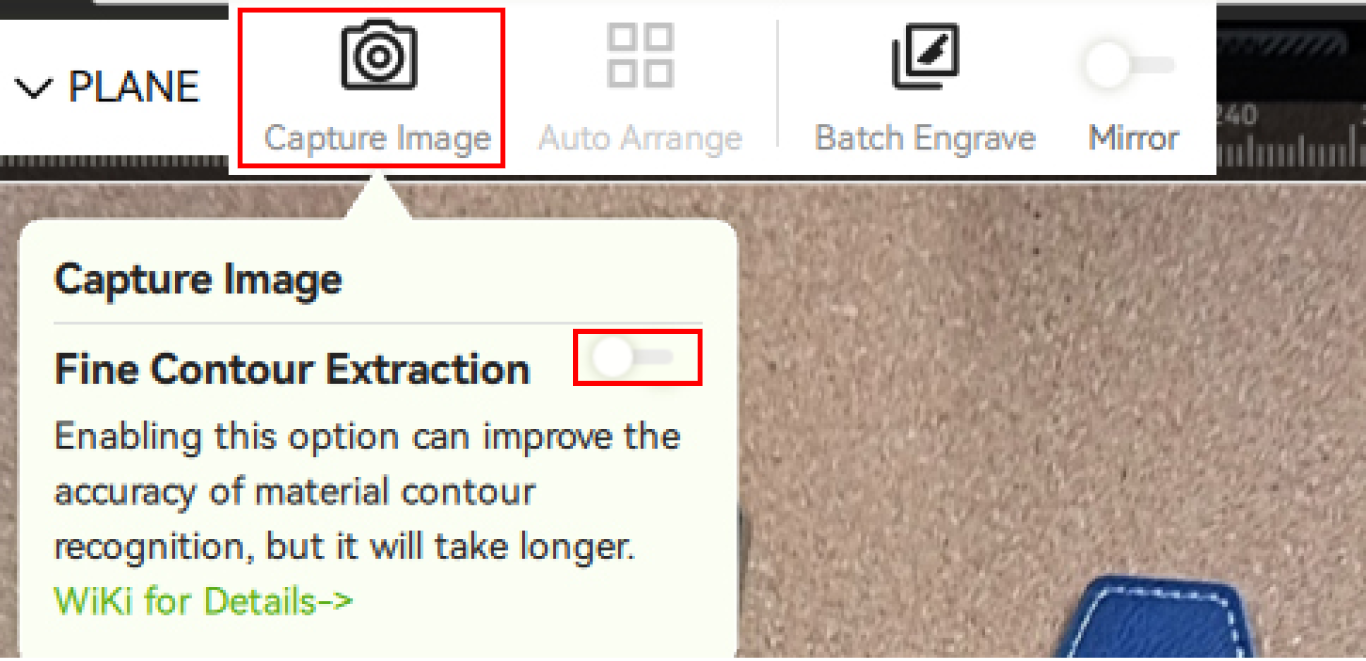
If you need a finer material outline, you need to manually turn on the Fine Contour Extraction switch. By default, the fine outline is turned off, which means that the default automatic plate placement uses a relatively rough outline. In most cases, using the fine outline will get a more accurate material outline boundary, but the outline extraction process will be more time-consuming.
- Move the mouse over the Capture Image button, and turn on fine contour extraction in the floating window.
- It is recommended to enable this option to increase the success rate when objects area placed tightly or when objects are relatively thin or tiny.
- Enabling fine contour extraction will improve the accuracy of contour processing, while also increasing the calculation time of contours. Batch Engrave and Auto Arrange will wait for the completion of fine contour calculation.
- When starting fine contour extraction for the first time, the "Fine Contour Extraction AI Model" will be downloaded online. After downloading, the fine contour of the target object can be processed when taking photos.

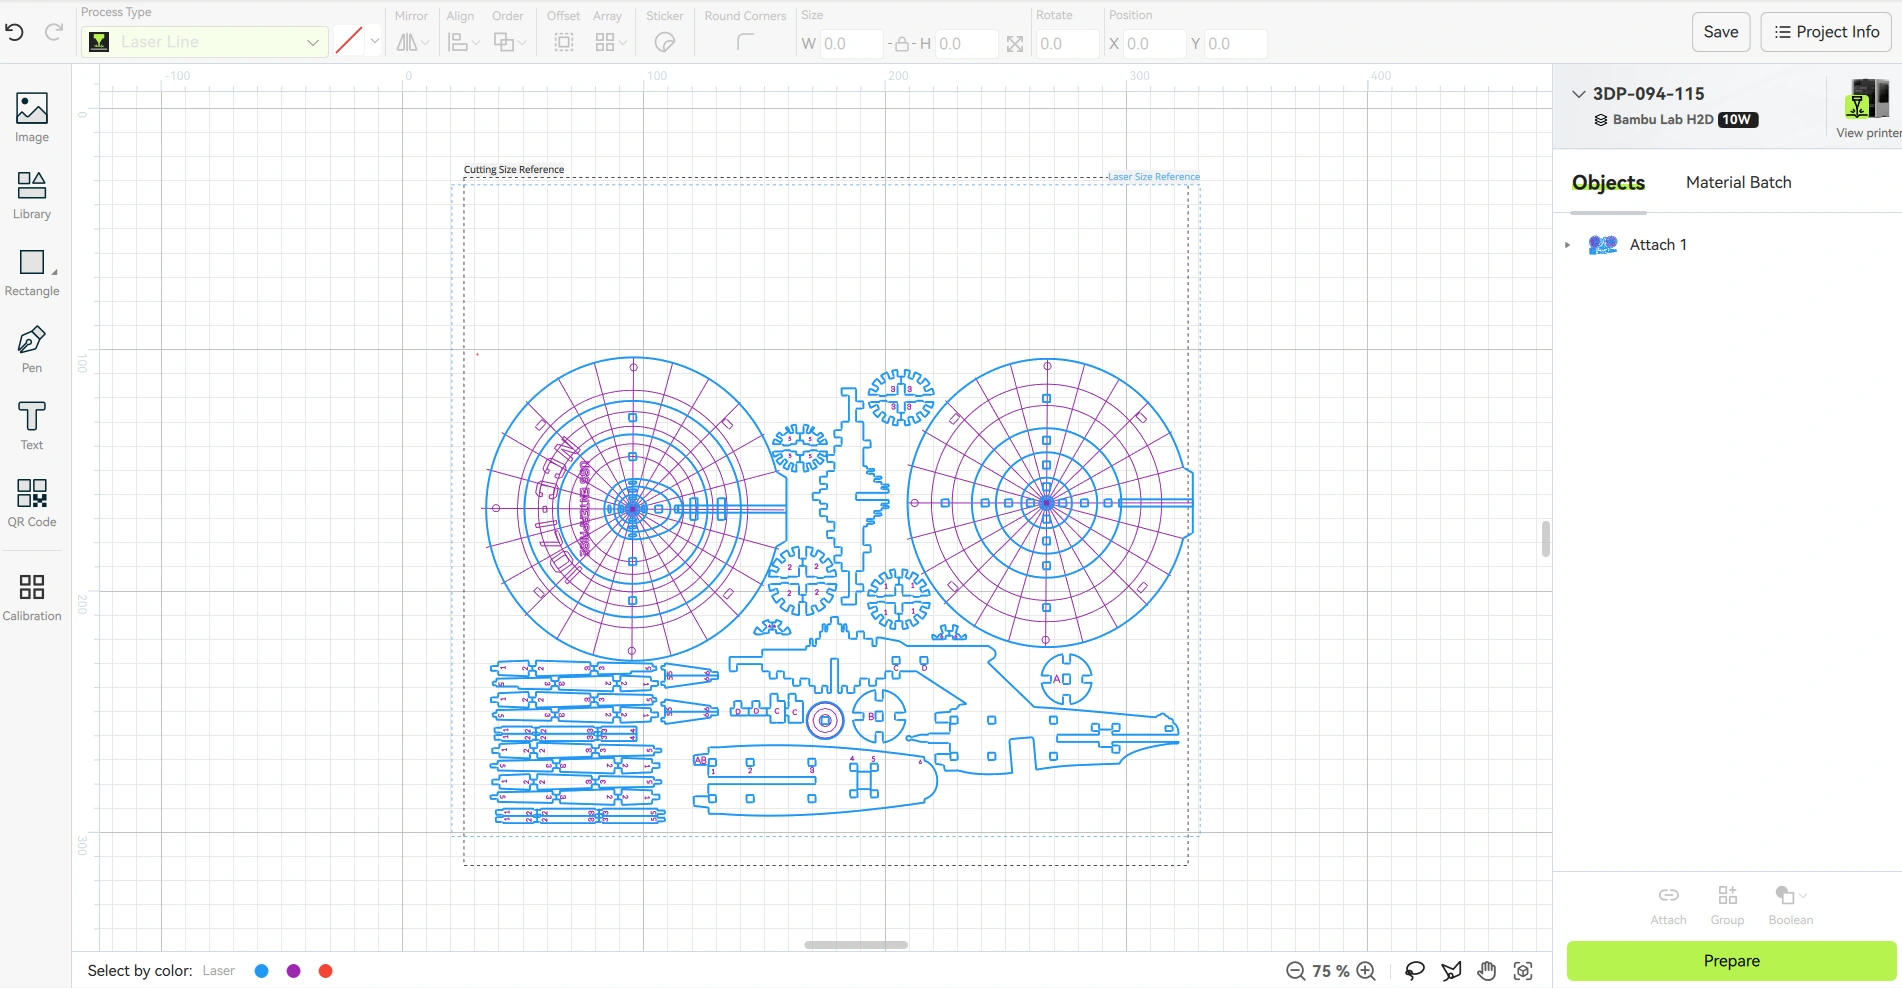
¶ 1. Single Plate Auto Arrange
The Single Plate Auto Arrange feature automatically arranges objects on the current plate. Here’s how it works:
-
Capture the Workspace Background: Click “Prepare” -> “Take Photo” to capture and generate a background image of the current processing area.
-
Auto Arrange: Click the “Auto Arrange” button at the top. The software will automatically detect the material’s outline and holes, then precisely place each pattern object in the available uncut areas, avoiding unusable sections. This feature not only maximizes the use of leftover material but also eliminates the need for manual adjustments, significantly improving efficiency.
Notes:
-
For bound objects, the system will arrange them as a single unit since their relative positions are fixed.
-
To maximize material usage and arrange each object individually in the available area, it’s recommended to unbind them first.
¶ 2. Global Auto Arrange
The Global Auto Arrange feature works on all objects within the current material group. Right-click on an empty area of the plate and select the “Auto Arrange” option. The system will then perform a global auto arrangement for all objects. If the material group contains multiple plates, some objects may be reassigned to the same plate to optimize space utilization.
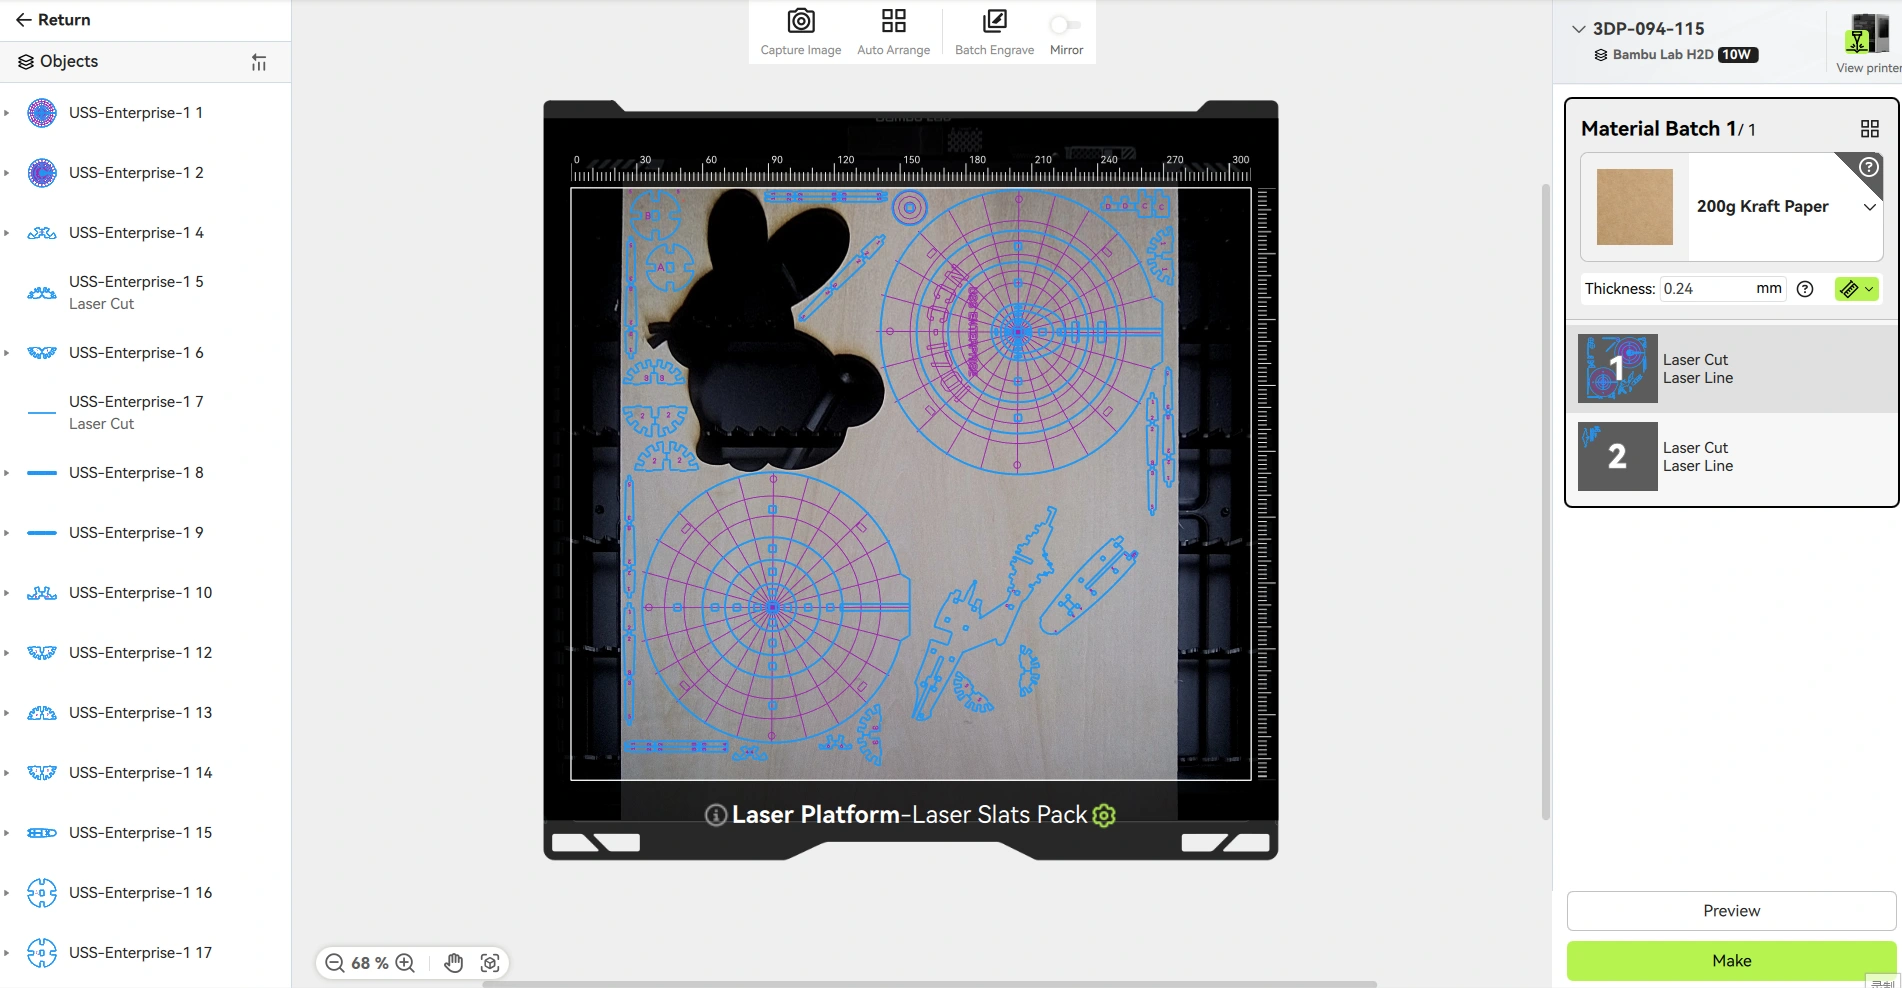
¶ 3. Incomplete Material Arrangement
One of the most important use cases for Auto Arrange is arranging patterns on incomplete materials. This is particularly useful when working with partially used materials or unprocessed leftover scraps. Whether part of the material has already been cut or multiple irregular scraps are placed on the plate, the system can intelligently identify available areas and precisely place pattern objects in these regions to maximize material usage. If no workspace background image is captured, the system will default to using the full processing area (i.e., the interior of the white rectangle) as the arrangement plane.
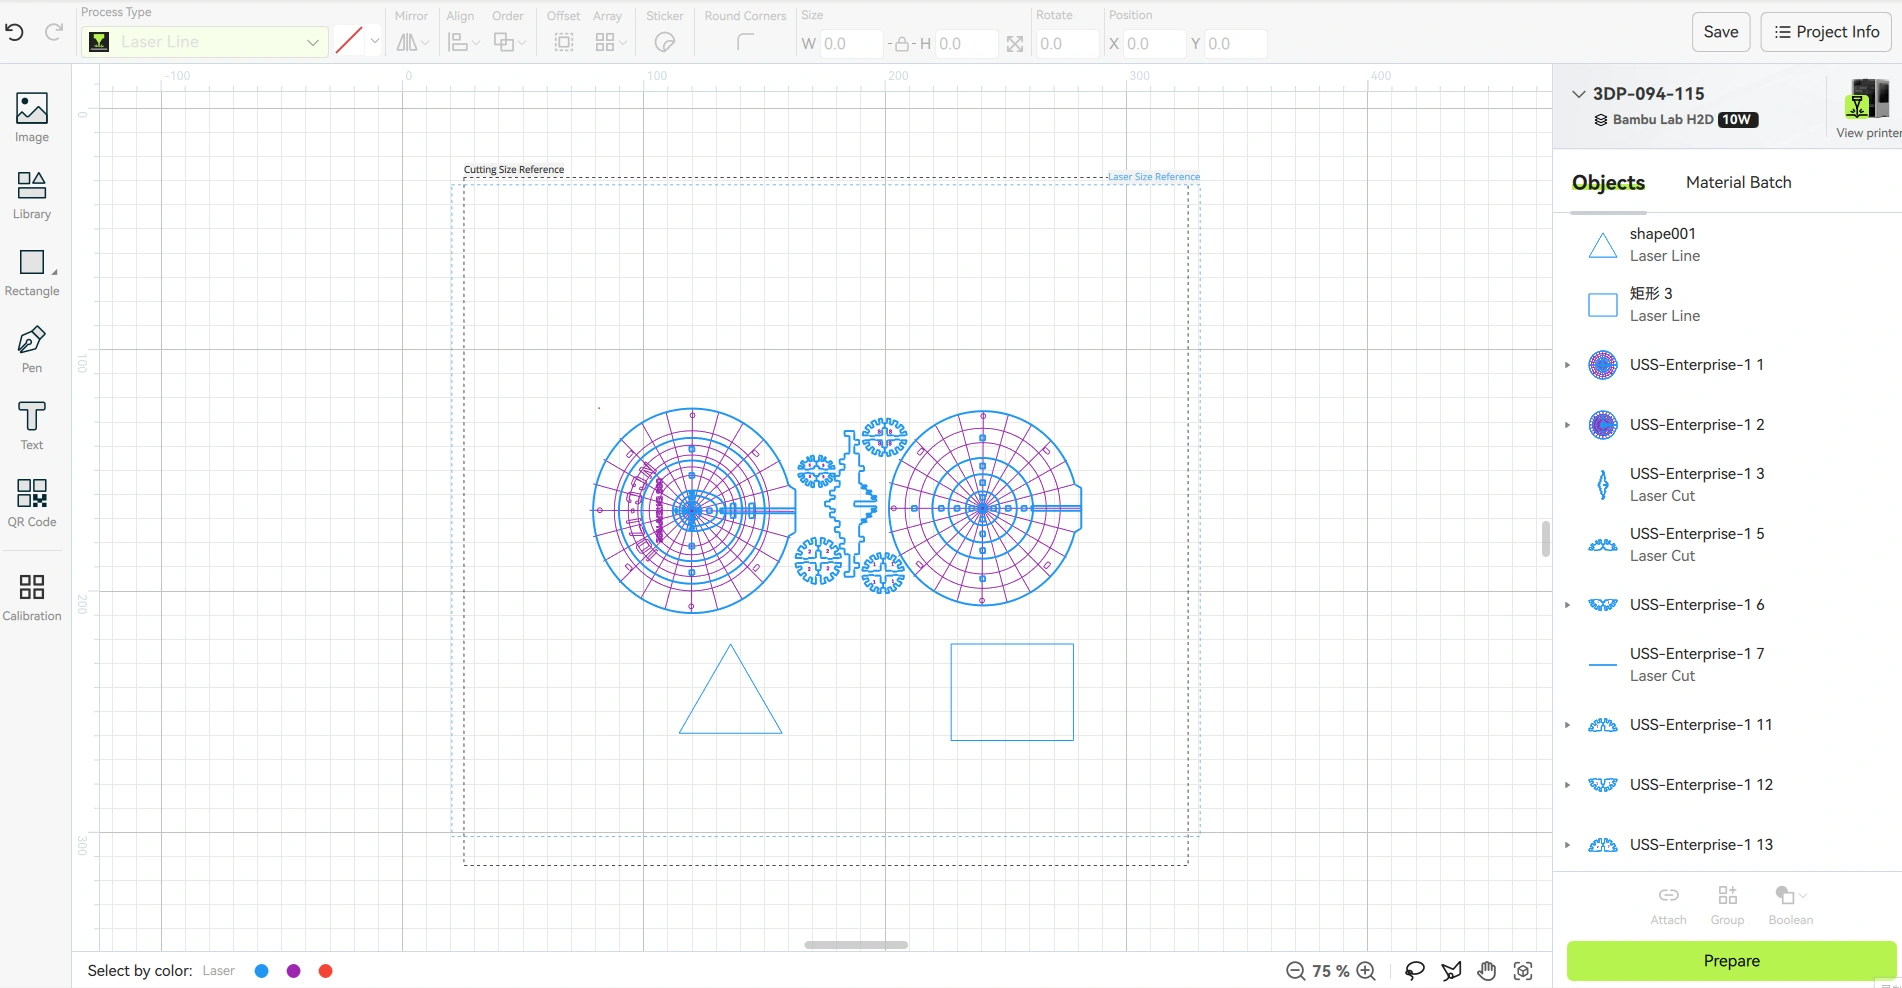
¶ 4. Multi-Connected Domain Object Arrangement
When multiple objects are bound together as a single group, they are treated as a combined unit during the arrangement process. However, traditional arrangement algorithms often fail to fully utilize the gaps between objects, leading to material waste. Bambu Suite’s advanced arrangement algorithm elegantly solves this issue: while maintaining the relative positions of the objects within the bound group, it intelligently utilizes the gaps between them to precisely place other objects, ensuring every inch of space is used efficiently. This significantly improves material utilization.
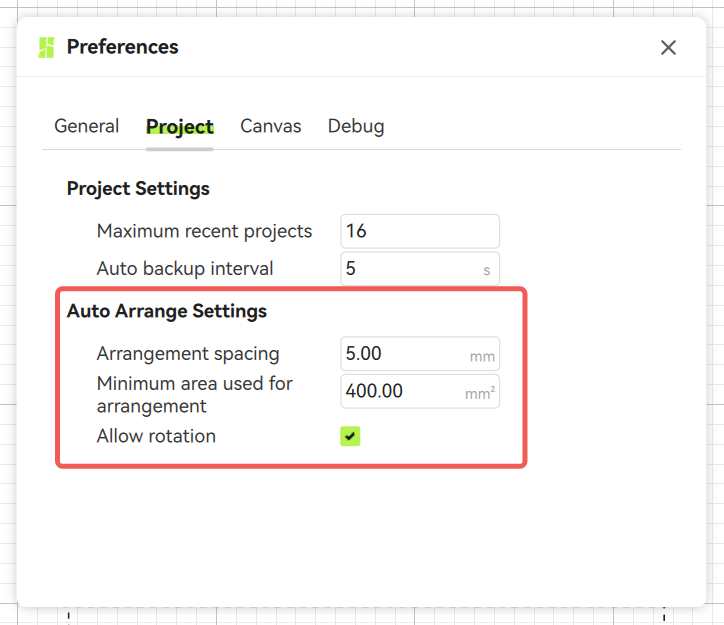
¶ Arrangement Parameter Adjustment
In the preferences settings, you can customize the parameters related to Auto Arrange. The available options include:
-
Arrangement spacing: Sets the minimum distance between objects during Auto Arrange, with a default value of 2mm. Adjusting this parameter optimizes the layout density of patterns on the material.
-
Minimum area used for arrangement: Defines the smallest area on the material that can participate in the arrangement. If a region’s area is smaller than this threshold, the system will automatically ignore it and exclude it from the arrangement process.
-
Allow rotation: When enabled, the system will attempt to rotate objects during Auto Arrange to find the optimal placement. Specifically, it will try the object’s initial angle as well as additional rotations of {0°, 45°, 90°, 135°}. Note that the angles attempted are part of the algorithm’s internal logic and may be adjusted at any time to further enhance arrangement performance.
By configuring these parameters, you can flexibly adjust the behavior of Auto Arrange to meet different processing needs.
¶ Scenarios That May Cause Arrangement Failures
Although some objects may appear easily placeable to the human eye, the algorithm might fail to arrange them automatically. Currently known common scenarios include the following:
- Object Rotation Angle Exceeds Algorithm Range: Some objects may require specific rotation angles (e.g., 22°) to be successfully placed, but the current algorithm only attempts fixed angles (such as 0°, 45°, 90°, 135°), resulting in placement failures.
-
Inaccurate Material Edge Detection: If the system identifies the material contour as smaller than it actually is, edge areas may not be fully utilized, causing objects with more challenging placement requirements to fail.
-
High Contour Complexity: If the material or object contours are overly complex, the calculation time for the arrangement algorithm may increase significantly (the arrangement progress bar may appear stuck), leading to the misconception that the arrangement has failed. In reality, the algorithm is still running and may eventually succeed.
¶ End Notes
We hope the detailed guide provided has been helpful and informative.
If this guide does not solve your problem, please submit a technical ticket, we will answer your questions and provide assistance.
If you have any suggestions or feedback on this Wiki, please leave a message in the comment area. Thank you for your support and attention!