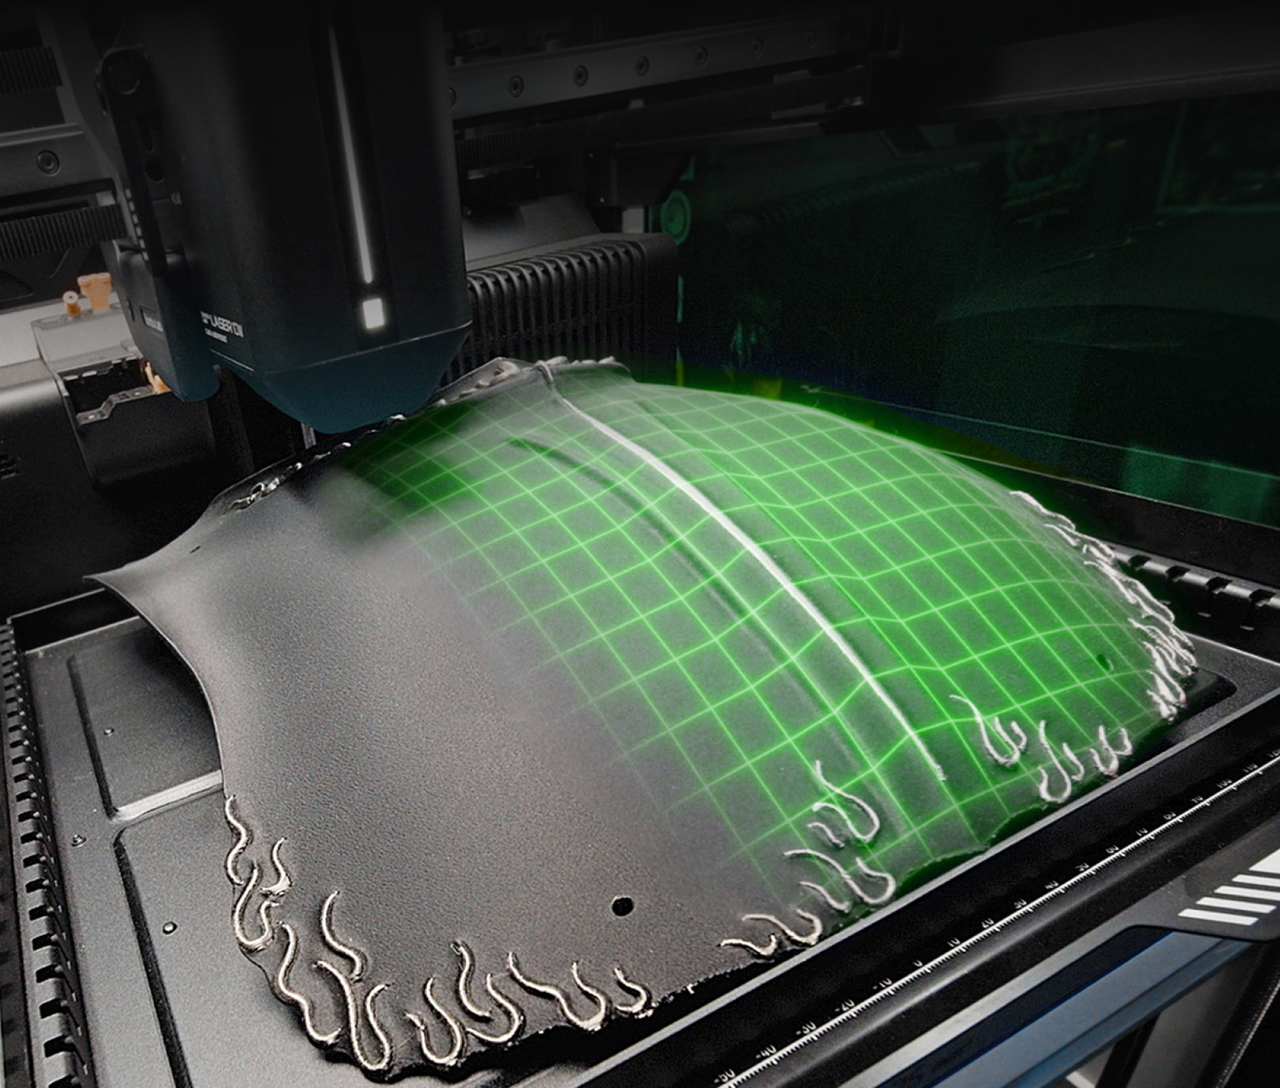
¶ Introduction to Curved Surface Machining
Curved Surface Machining is an advanced function of the Bambu H2D 3D printer. By using a high-precision laser module and an integrated laser height probe, it enables engraving patterns on three-dimensional curved objects. Unlike traditional flat laser engraving, the H2D’s Curved Surface Machining function automatically measures the surface shape of an object and adjusts the laser path, ensuring the laser spot stays focused on the curved surface during engraving.
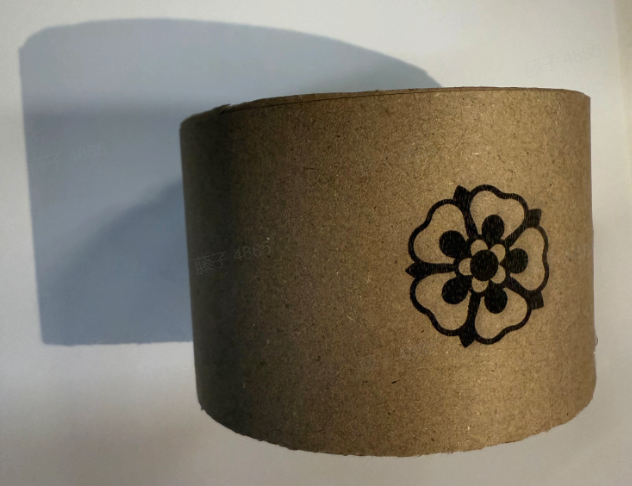
Typical Applications: Engraving text or patterns on curved objects in daily life (such as soda cans, thermos bottles, and tableware), or marking serial numbers on items like tool handles.

Firmware Requirement: H2D firmware version no lower than 01.02.00.00.
¶ Material Requirements for Curved Surface Machining
Before machining curved objects, ensure the material’s shape and surface meet the following requirements:
¶ Surface Characteristics
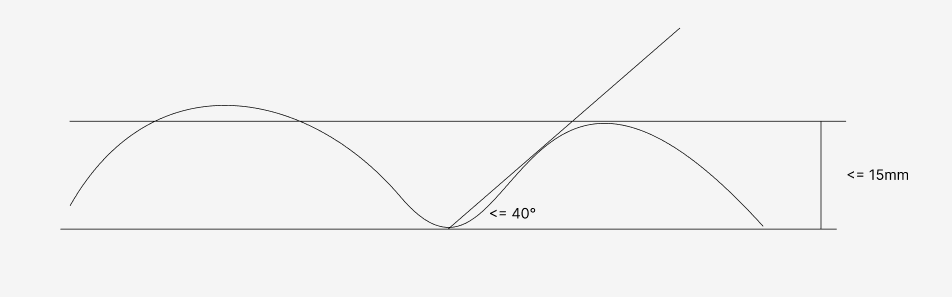
- Must be a smooth curved surface without drastic fluctuations (maximum supported height difference: 15mm)
- The tangent angle at any point on the curved surface relative to the horizontal plane should be ≤ 40°
¶ Geometric Limitations
- Height discontinuities (e.g., step-like objects)
- Sharp corners / inner chamfers (some areas cannot be scanned by the laser)
Not supported: height discontinuities, sharp corners, and inner chamfers.

- Hollow structures (unstable for scanning and engraving)
¶ Material Limitations
- Transparent materials (such as ordinary glass, clear acrylic) and mirror-like reflective materials (e.g., polished metals, mirrors) are not supported.
The laser height probe may generate noise or abnormal readings when scanning these materials. If such materials must be used, carefully check the scan results. If anomalies are found, do not proceed with machining to avoid damaging the material.
- Size Limitations: If the object is small (cross-section less than 3 cm × 3 cm), it is recommended to place it on a flat plate with a larger surface area or elevate it (height > 2 cm) before engraving. The material must be opaque and non-reflective to prevent the scanner from capturing the surrounding Laser Base and slat pack during the scanning process. In such cases, please secure the small object firmly to the plate to prevent movement during machine operation, which could affect engraving quality.
 Without Base Plate
|
 Scan Result — Without Base Plate
|
 With Base Plate Under the Object
|
 Scan Result — With Base Plate
|
¶ Workflow for Curved Surface Machining
¶ 1. Add Pattern and Select Processing Mode
- Import or create the desired pattern in the Bambu Suite design page (supports SVG, PNG, etc.), and select Laser Line, Laser Fill, or Laser Image as the process type.
 |
 |
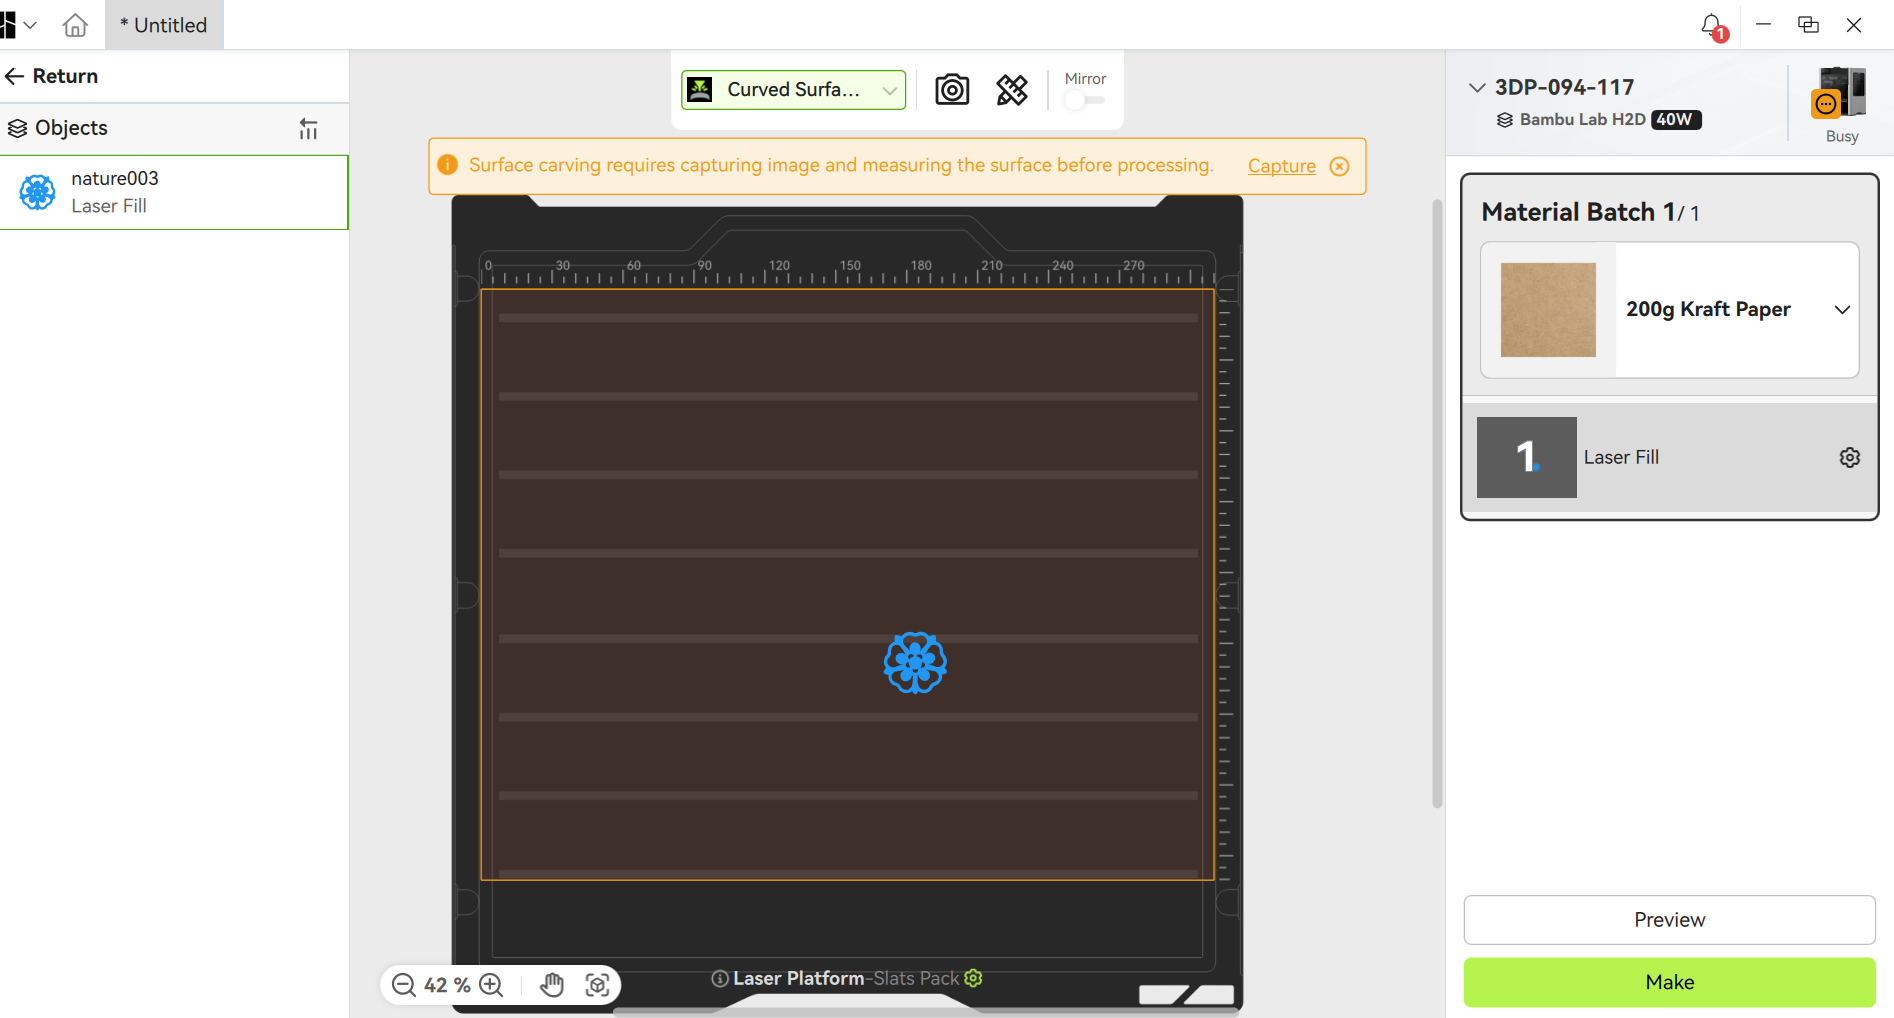
- Enter the Make Page, and in the processing mode, choose Curved Surface Machining.
¶ 2. Surface Imaging and Measurement
¶ Preparation
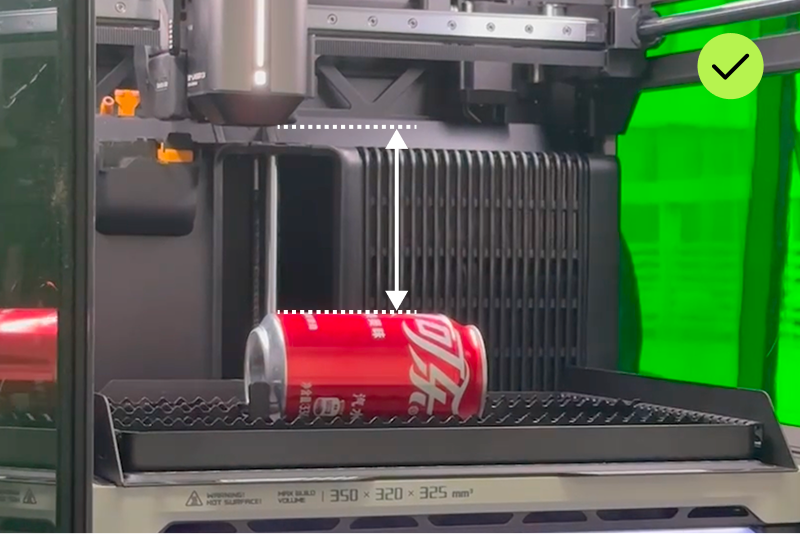
- Ensure the highest point of the material does not exceed the height of the H2D laser module (to prevent collisions).
- The workpiece should be stably placed in the center of the build plate to avoid shaking.
- Only one workpiece should be placed inside the chamber.
¶ Birds Eye Camera Imaging
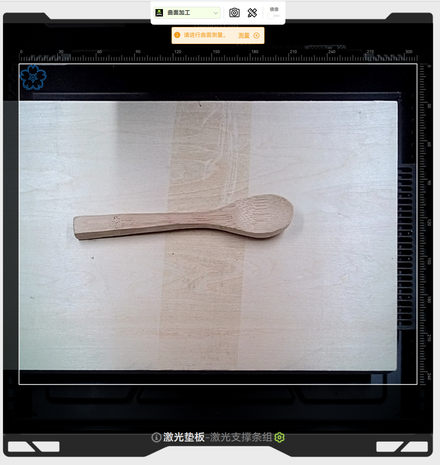
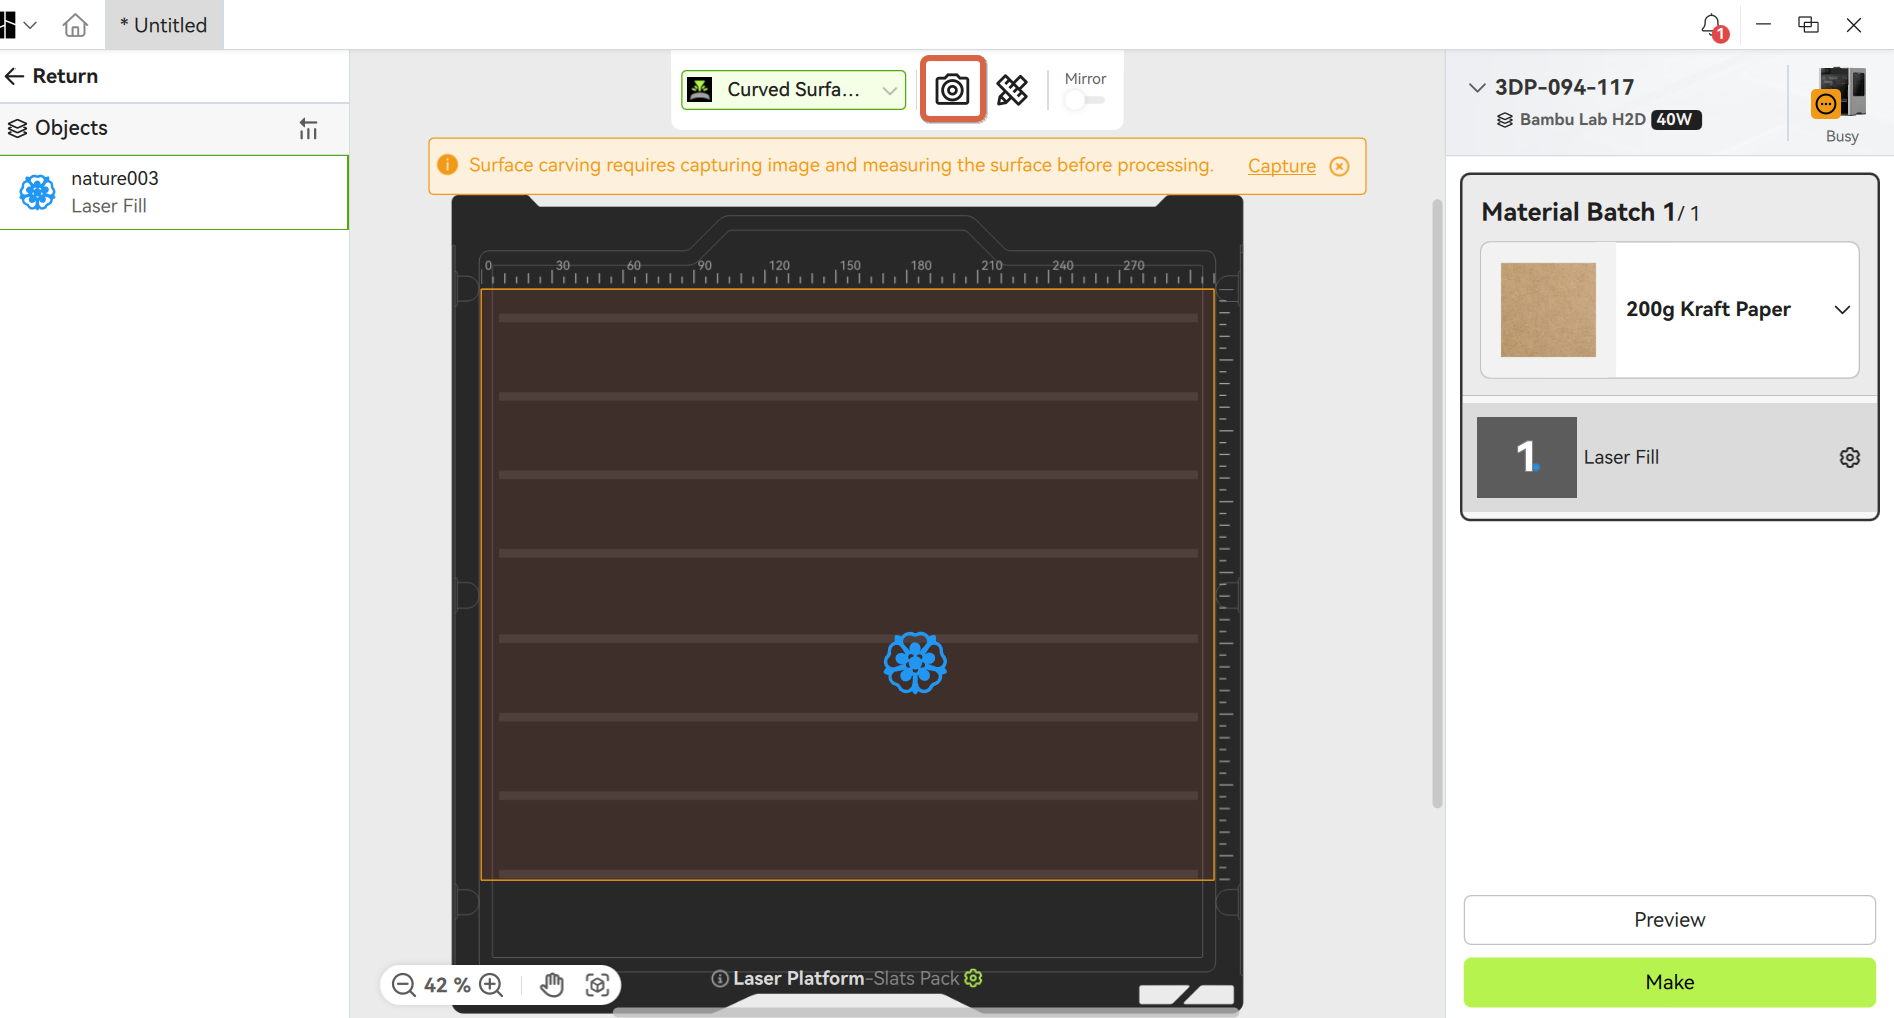
- Click “Capture Image”. The H2D’s birds eye camera will capture the object’s surface, ensuring the contour is fully captured.
- Before surface measurement, a photo must be taken to obtain the processing plane image, which will be used to select the measurement area.
¶ Curved Surface Measurement
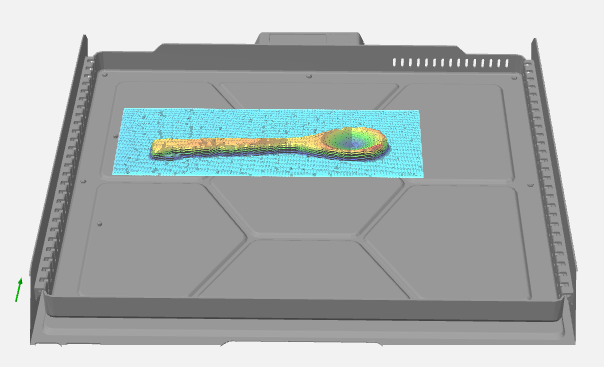
- Click “Curved Surface Measure”, then select the area to be measured as guided in the software.
(It is recommended to select a region slightly larger than the object’s surface. Only one measurement region is supported. If the selection is incorrect, reselect and measure again.)
Do not power off the printer or let the computer enter sleep mode during measurement.
 |
 |
- The H2D uses its laser height probe for high-precision surface modeling. Once the point cloud data is generated, the 3D contour of the object can be previewed.
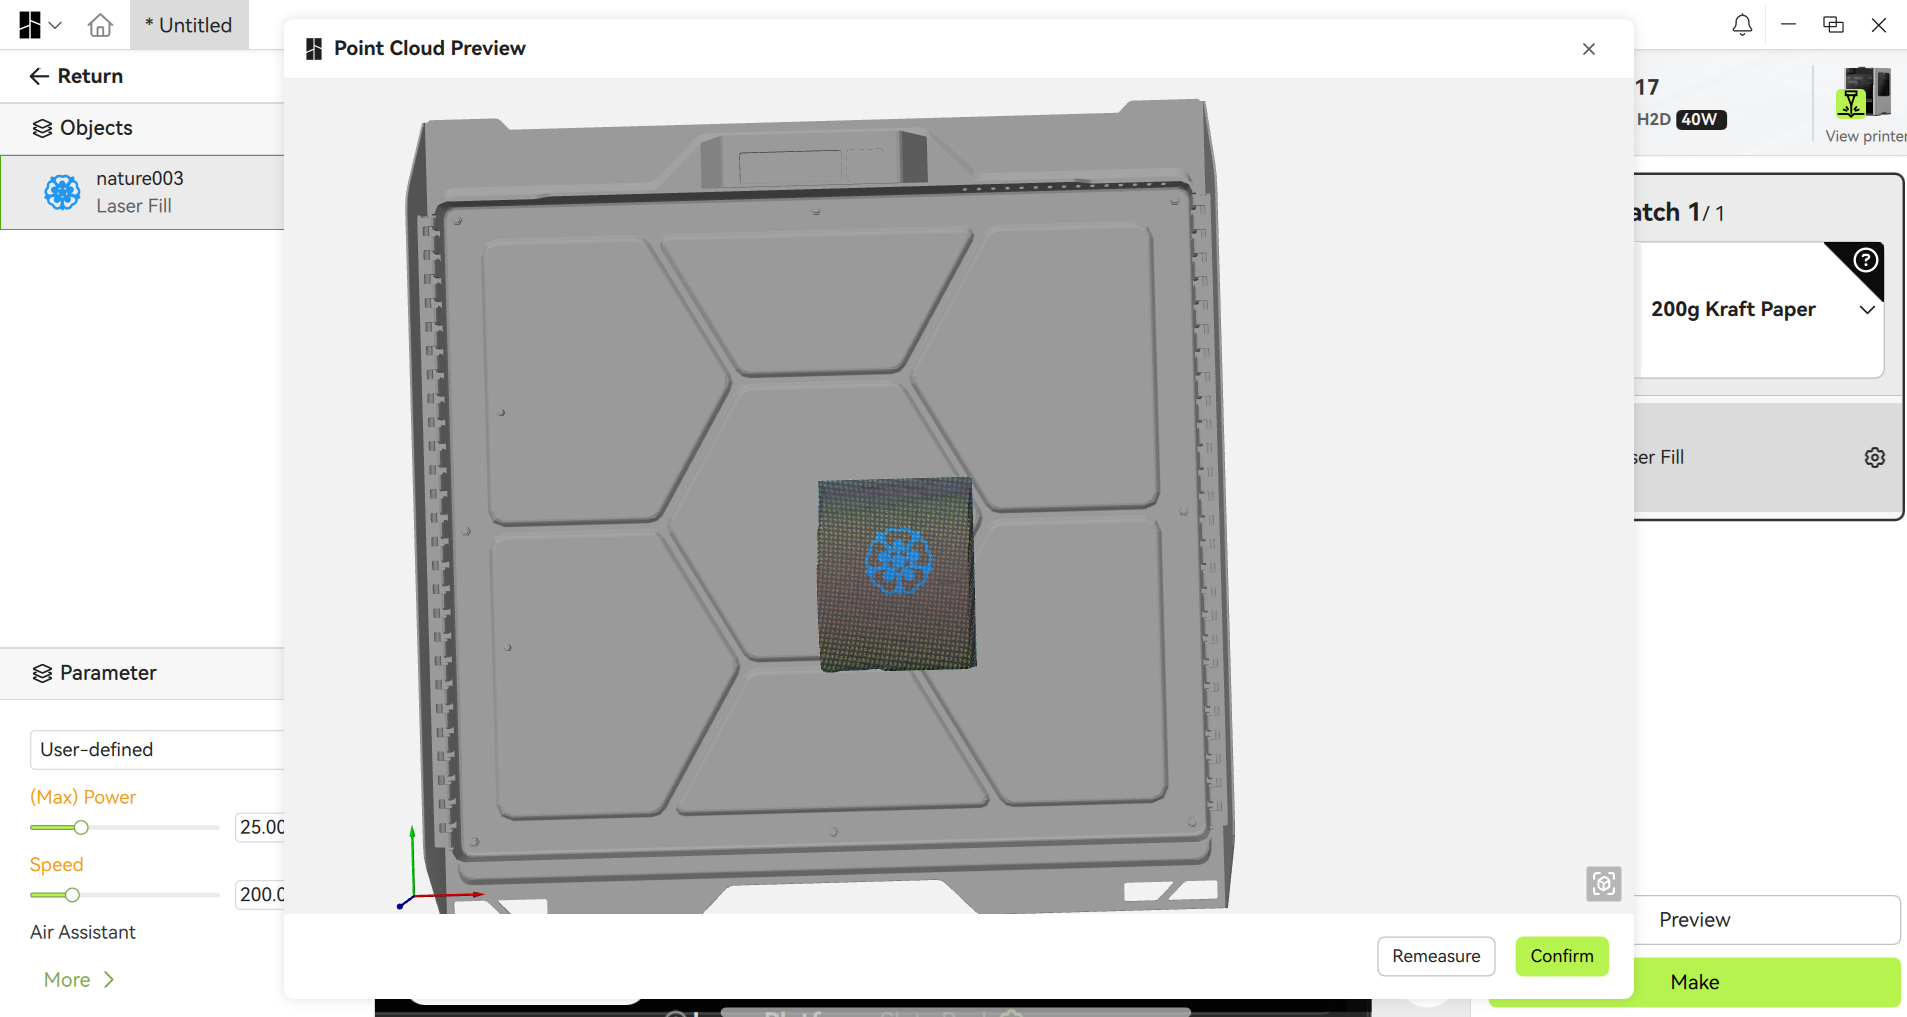
- To rescan, click “Remeasure”, return to the measurement page, and reselect the region.

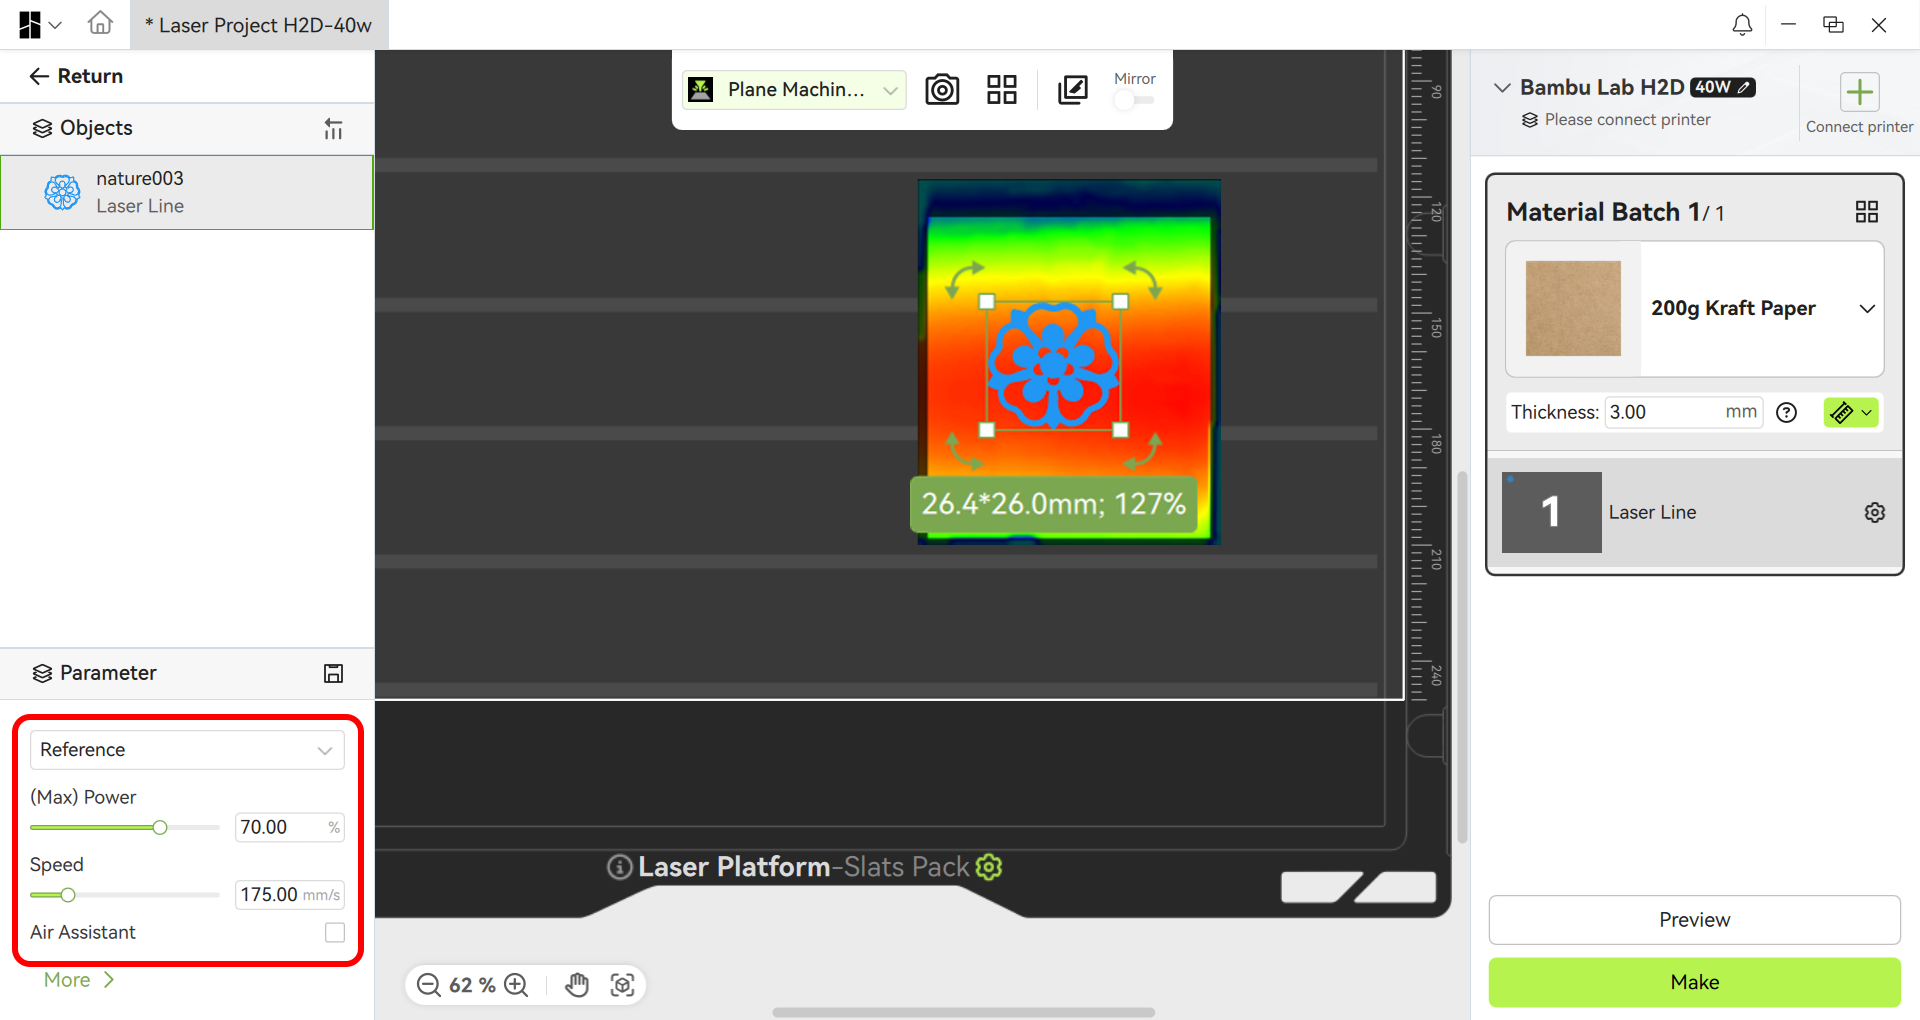
¶ 3. Machining Settings
- In the preparation page, align the pattern to the point cloud area. The preview helps visualize the pattern placement and effect on the curved surface.
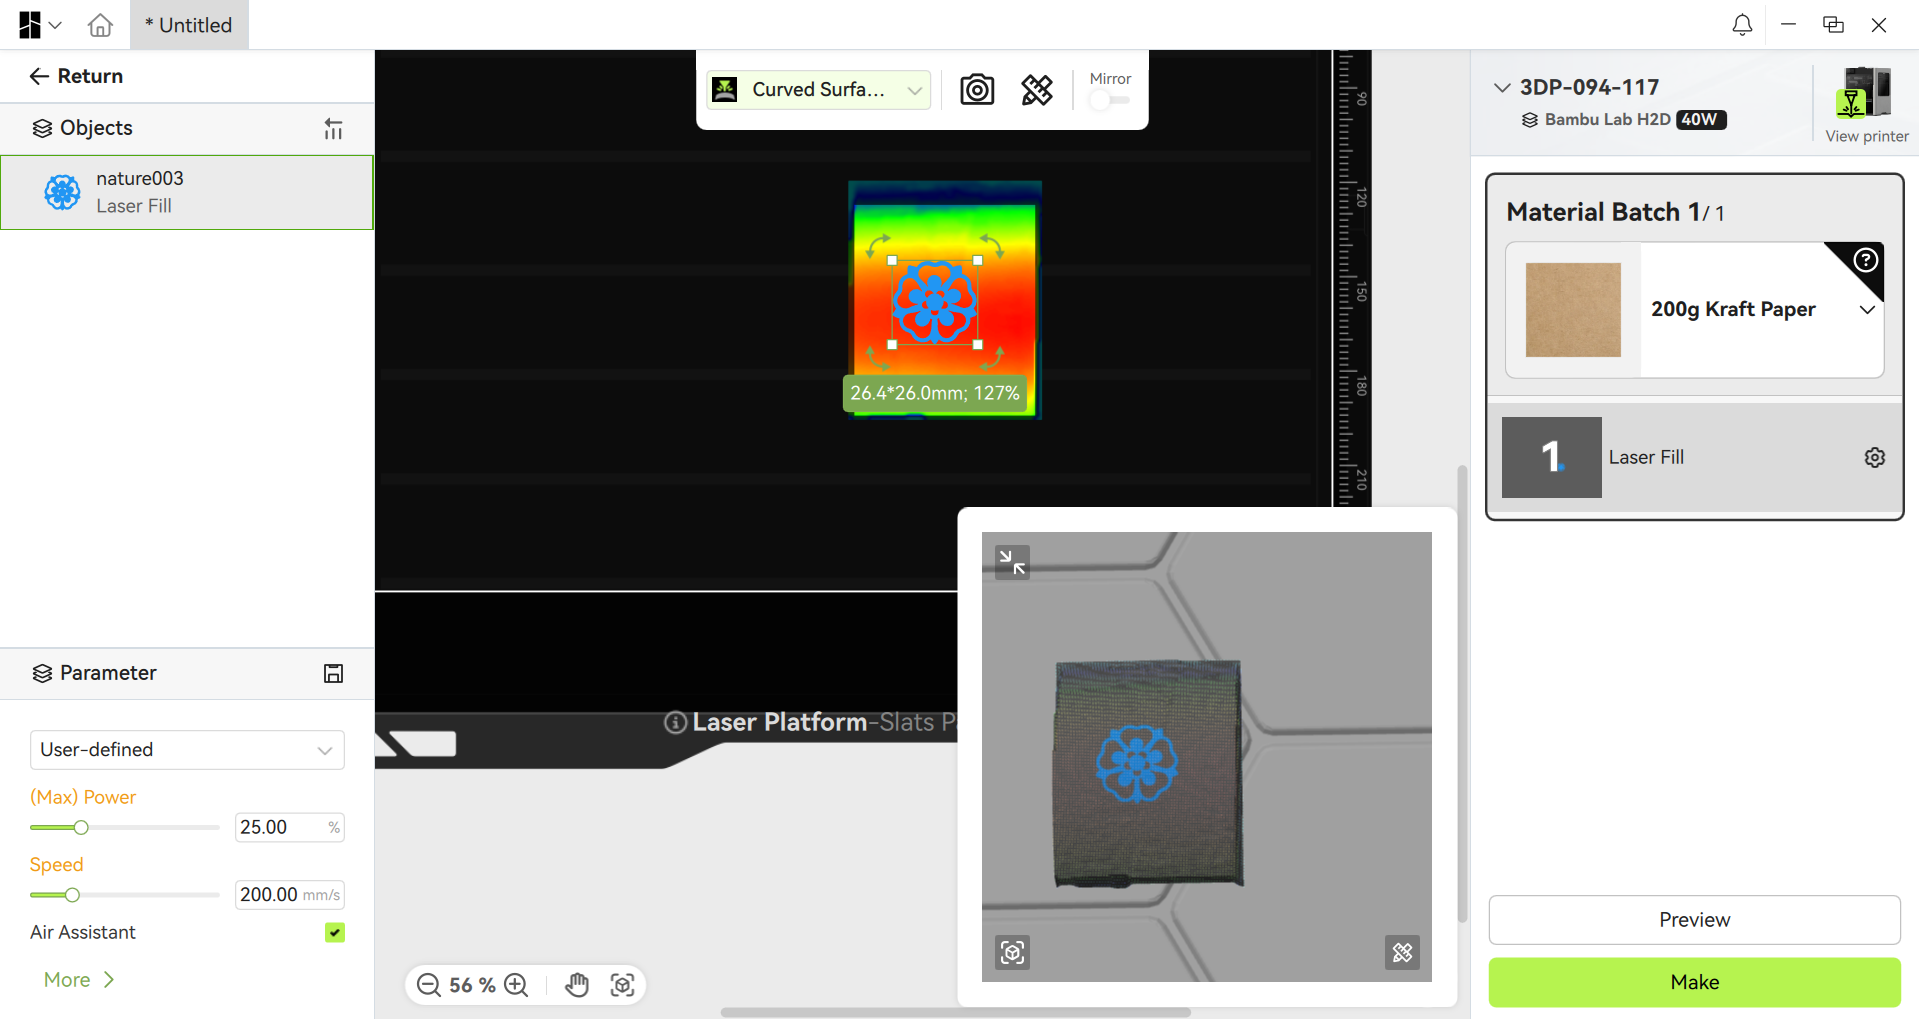
- In the material panel, select the material and configure laser power, speed, and passes (testing parameters beforehand is recommended).
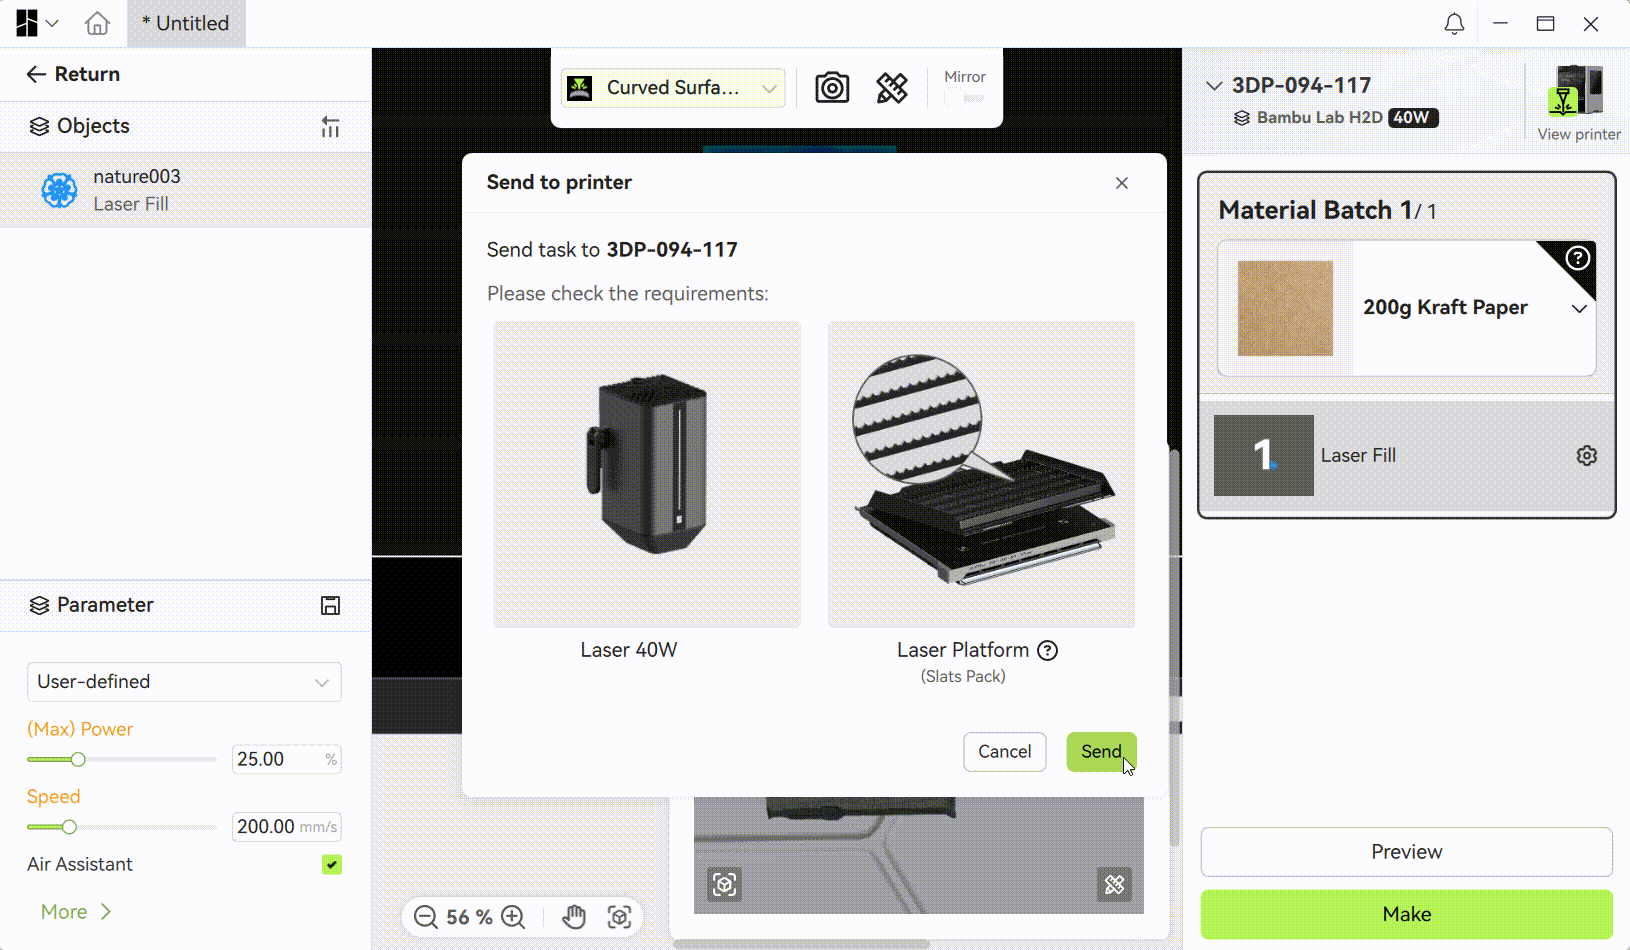
- Click “Make”. The software will send the job to the printer, and engraving will begin.
¶ 4. Check Engraving Results
After machining, inspect the clarity and surface conformity of the engraved pattern. If unsatisfactory, adjust the parameters and repeat scanning and engraving.
¶ Notes for Curved Surface Machining
¶ Material Placement
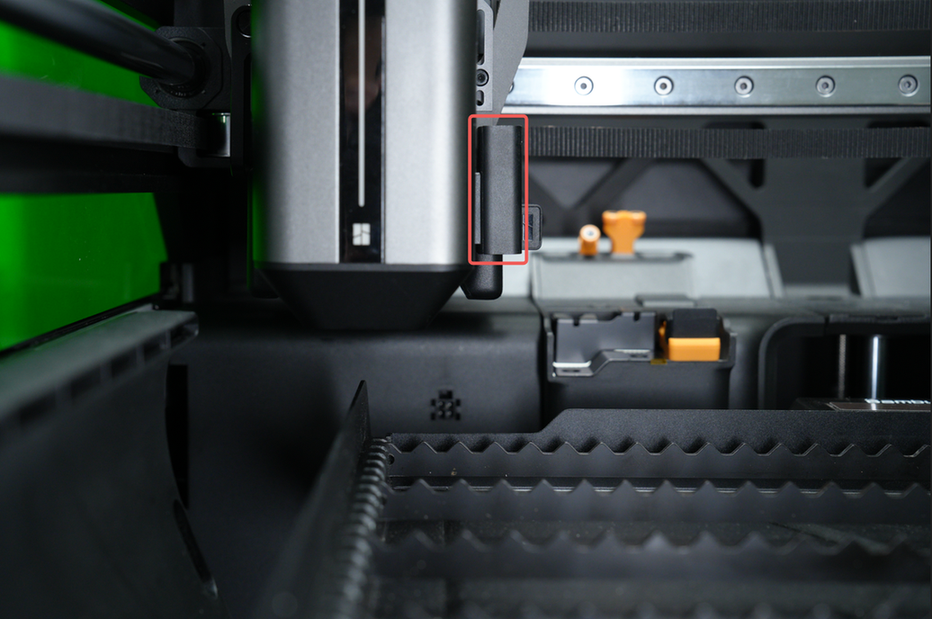
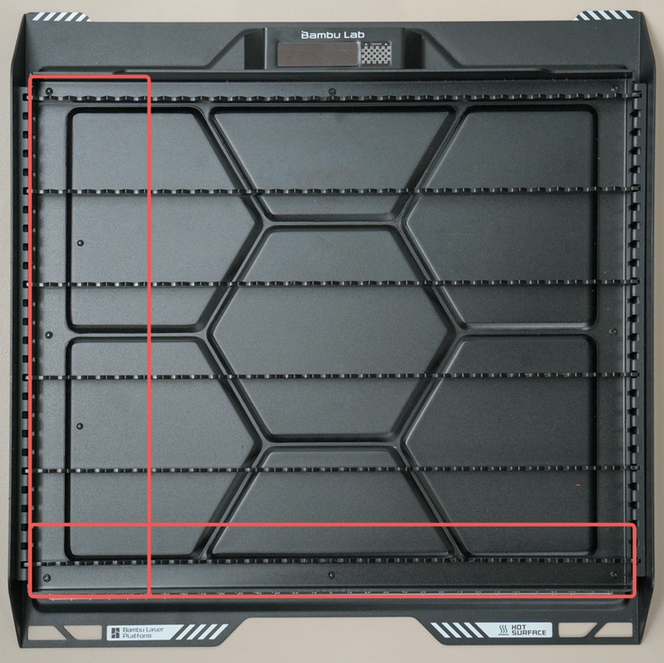
- Place the workpiece in the center of the build plate to avoid blind spots in scanning. Blind spot range for the laser height probe: within ~6cm from the left edge and ~4cm from the front door cannot be scanned. Avoid placing materials in these areas as they cannot be measured.
 |
 |
 |
-
Workpiece height must be < 240mm.
-
Before taking photos, the toolhead will move to the purge chute area. To prevent collisions, after placing the material, ensure the laser module is positioned above the highest point of the material to guarantee machining safety.
- The surface to be scanned must face the front door. Otherwise, the laser may be blocked, resulting in incomplete scanning.
¶ Parameter Tuning
Since Curved Surface Machining often involves non-standard materials, official fixed parameters are not provided. We recommend:
- Start by testing with parameters of the closest official material (e.g., use soda can parameters for machining metal).
- If official parameters are insufficient, use scrap pieces for multiple parameter tests.
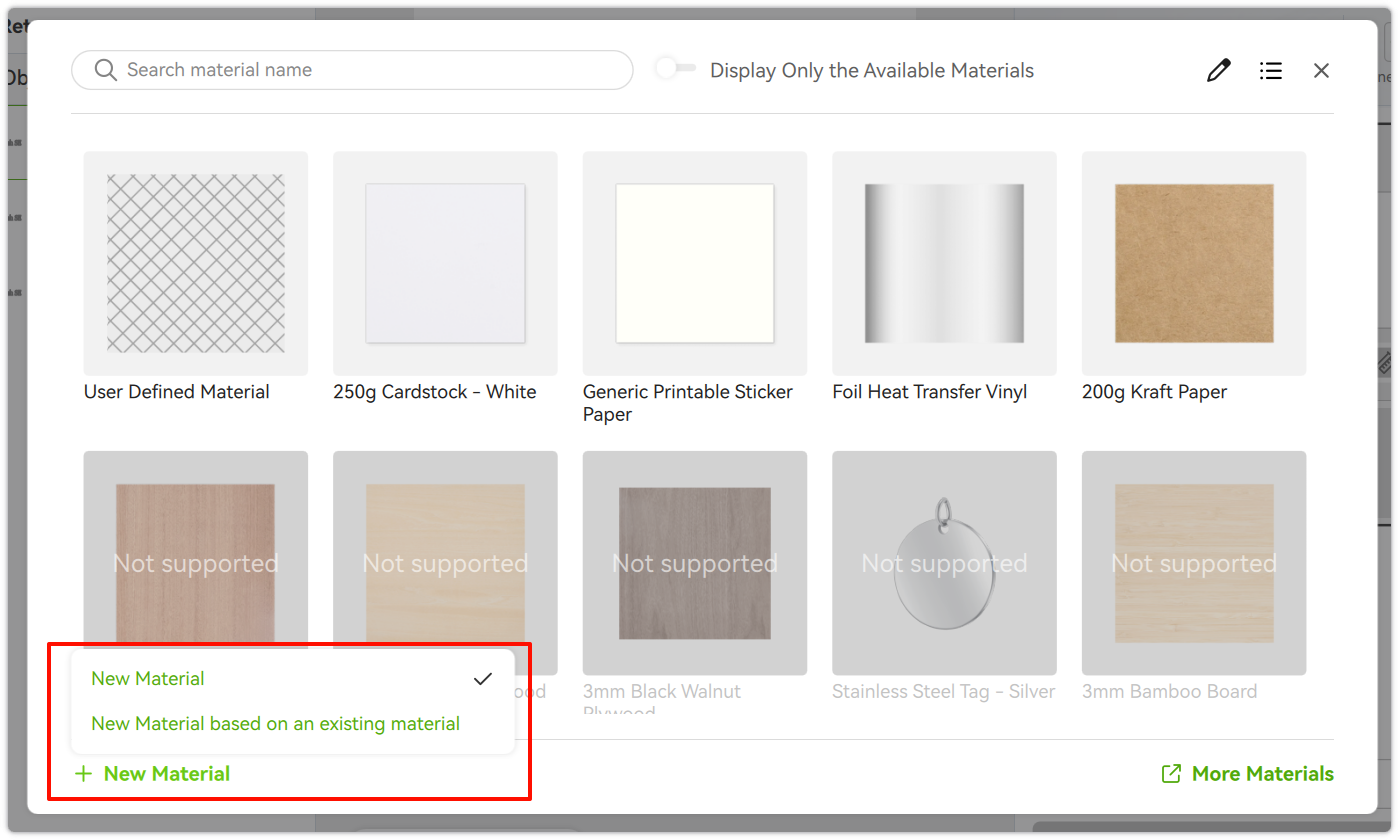
Test different power/speed combinations, record the best settings, and save them by clicking “New Material” in the lower left corner of the material panel for future use.
¶ End Notes
We hope this guide has provided clear and practical support.
If the issue remains unresolved, please submit a support ticket and include your recent printer logs and additional pictures or other details. Our technical team will review your request and provide detailed assistance.
You can also visit Bambu AI, which can instantly answer common questions and provide you with operational guidance.