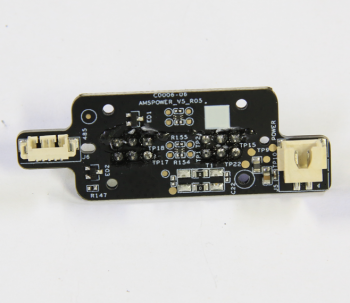
¶ AMS Power Board
The AMS Power Board is a circuit board that receives power from the printer and supplies it to the AMS.
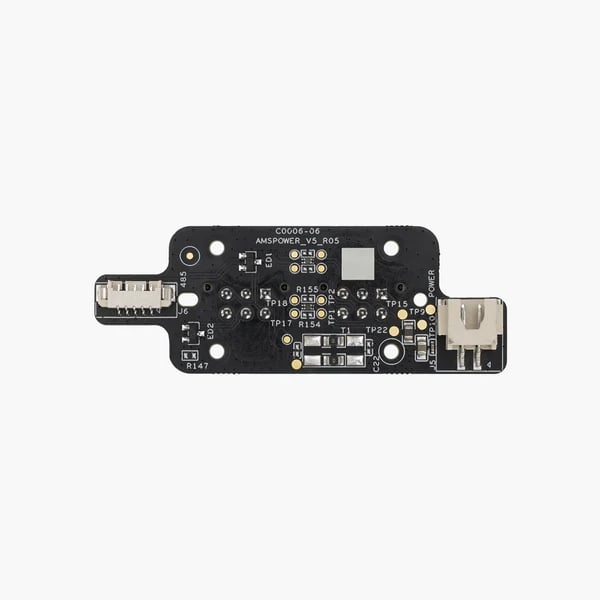
You can purchase it at our store here: AMS Power Board
¶ When to use this guide
- If the AMS has no power even after the Bambu Bus Cable 4pin / 6pin is checked, and the power output from the AMS interface board is normal.
- If the AMS power board has burned out.
- If any of the connectors or components on the AMS board are broken.
¶ Tools and materials needed
- New AMS power board
- H2.0 & H1.5 Allen keys
¶ Safety Warning
IMPORTANT!
It's crucial to power off the printer before conducting any maintenance work, including work on the printer's electronics and tool head wires. Performing tasks with the printer on can result in a short circuit, leading to electronic damage and safety hazards.
During maintenance or troubleshooting, you may need to disassemble parts, including the hotend. This exposes wires and electrical components that could short circuit if they contact each other, other metal, or electronic components while the printer is still on. This can result in damage to the printer's electronics and additional issues.
Therefore, it's crucial to turn off the printer and disconnect it from the power source before conducting any maintenance. This prevents short circuits or damage to the printer's electronics, ensuring safe and effective maintenance. For any concerns or questions about following this guide, open a new ticket in our Support Page and we will do our best to respond promptly and provide the assistance you need.
¶ Operation guide
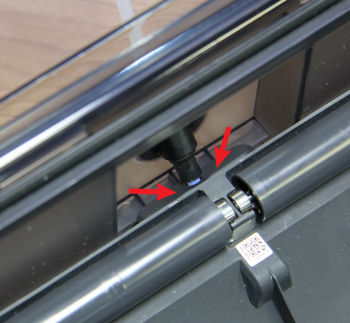
¶ Step 1 - (Disassembly) Removing the PTFE tube
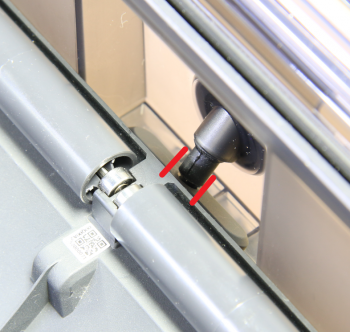
Open the AMS cover, press the flat surround the PTFE tube outlet at the back of the AMS, and pull the PTFE tube from the back of the AMS.
 |
.png) |
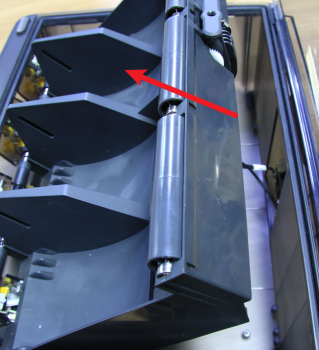
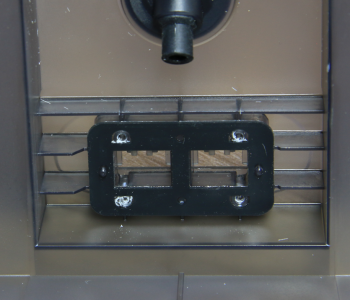
¶ Step 2 - Opening the AMS Main Frame
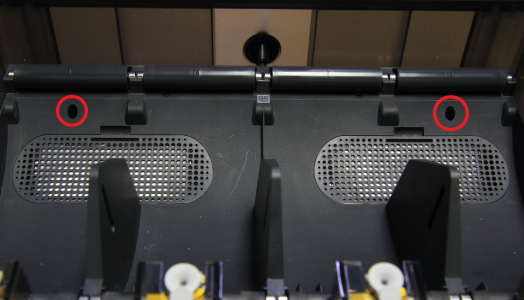
Undo the 2 screws located at the rear as shown below, and then very gently pull the AMS Main Frame towards you from the back. You might need to press on the PTFE inlet flap to free the frame. Don't pull the AMS Main Frame all the way out as there are still cables attached to it.
 |
 |
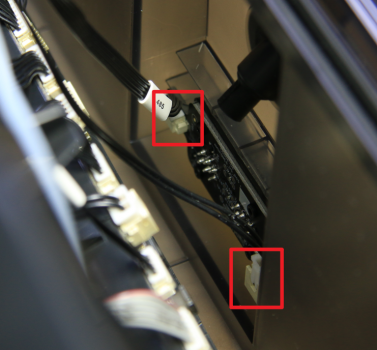
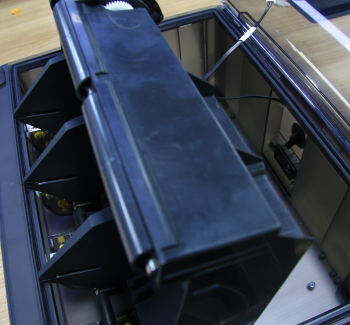
¶ Step 3 - Removing the AMS Main Frame
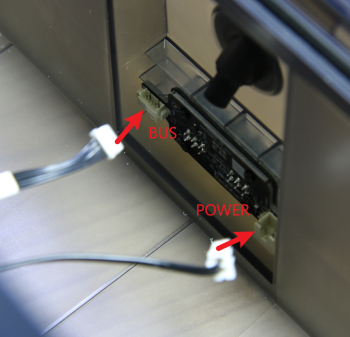
Disconnect the Bambu Bus Cable and the power cable from the AMS power board. You can now take out the AMS Main Frame.
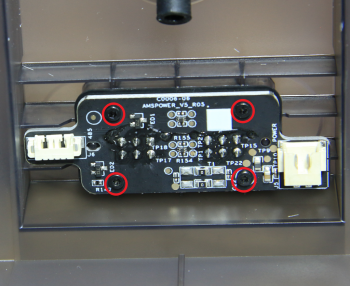
¶ Step 4 - Removing the AMS Power Board
Undo the 4 screws holding the AMS Power Board in place and then proceed to remove the power board.
 |
 |
¶ Step 5 - (Assembly) Installing the AMS Power Board
Prepare a new AMS Power Board, and secure it to the inner side of the AMS shell with 4 screws with the same orientation as shown below.
 |
|
¶ Step 6 - Install the AMS Main Frame
Place the AMS Main Frame into the AMS shell, and connect the Bambu Bus Cable and the power cable to the power board.
 |
 |
¶ Step 7 - Securing the AMS Main Frame
Secure the Main Frame with 2 screws as shown below.
¶ Step 8 - Connecting the PTFE tube
Check the alignment of the tube bracket at the rear of the inner frame module, and push in the PTFE tube from the back of the AMS. Push the PTFE until fully secured.
 |
.png) |
¶ How to verify completion/success
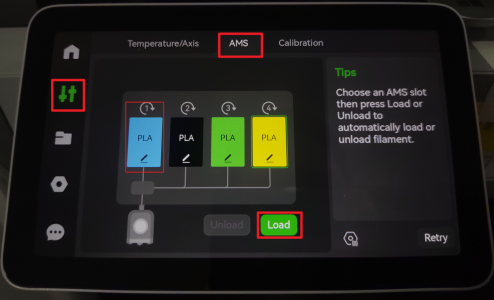
Connect the power cord, connect the AMS to the printer, turn on the power, and run the load filament procedure on the AMS menu through the machine display.
If no errors occur, the replacement is successful.
¶ End Notes
We hope the detailed guide provided has been helpful and informative.
To ensure a safe and effective execution, if you have any concerns or questions about the process described in this article, we recommend submitting a Technical ticket regarding your issue. Please include a picture or video illustrating the problem, as well as any additional information related to your inquiry.