¶ Replacing the Chamber Camera
The X1C comes with a built-in Chamber Camera, and it is also available as an optional upgrade for the X1.
The Chamber Camera enables video feedback to Bambu Studio and Bambu Handy and can provide Spaghetti Detection by utilizing AI technology to detect print failures.
To replace or install a Chamber Camera in your X1 Series Printer, please follow the guide below.You can purchase it here in our store.

¶ Video - Replacing the Chamber Camera
¶ Steps to Remove the Chamber Camera
1. Remove the Glass Cover Plate.
2. Open the small door on the top left of the printer.
3. Gently disconnect the 4-pin cable shown in the video.
4. Remove the cable from the path leading to the chamber camera.
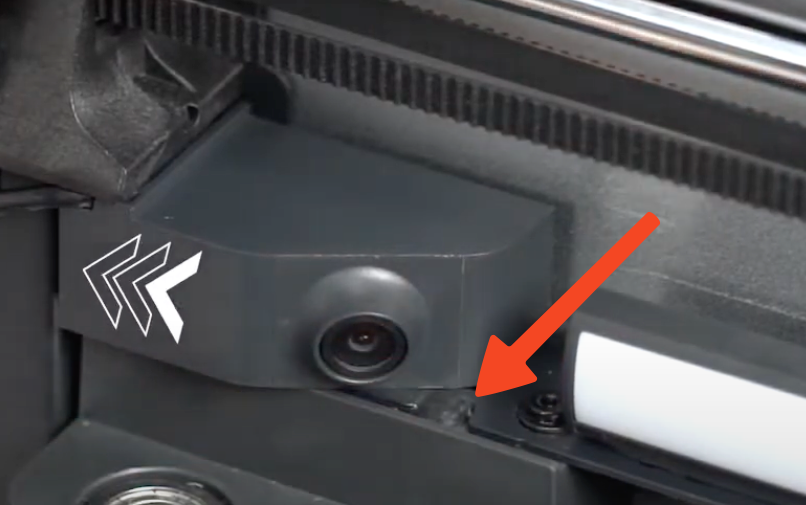
Important. There might be a small drop of black glue in the location shown with the red arrow. If you cannot remove the camera easily by following the video above, it is recommended to gently heat the black glue with a hairdryer.
The hairdryer will soften the glue, which can then be removed so the camera can be replaced
5. Slide the chamber camera to the right. (you will hear a clicking sound as it releases)
6. Remove the chamber camera.
¶ Steps to Install the Chamber Camera
1. Remove the Glass Top Plate.
2. Open the small door on the top left of the printer.
3. Slide the chamber camera to the left (you will hear a clicking sound as it latches).
4. Remove the cable from the path leading to the chamber camera.
5. Gently connect the 4-pin cable as shown in the video.
6. Close the small door on the top left of the printer.