¶ Extruder Filament Sensor - X1 Series
This sensor is used in the extruder to detect both the presence of the filament and the filament cutter lever.
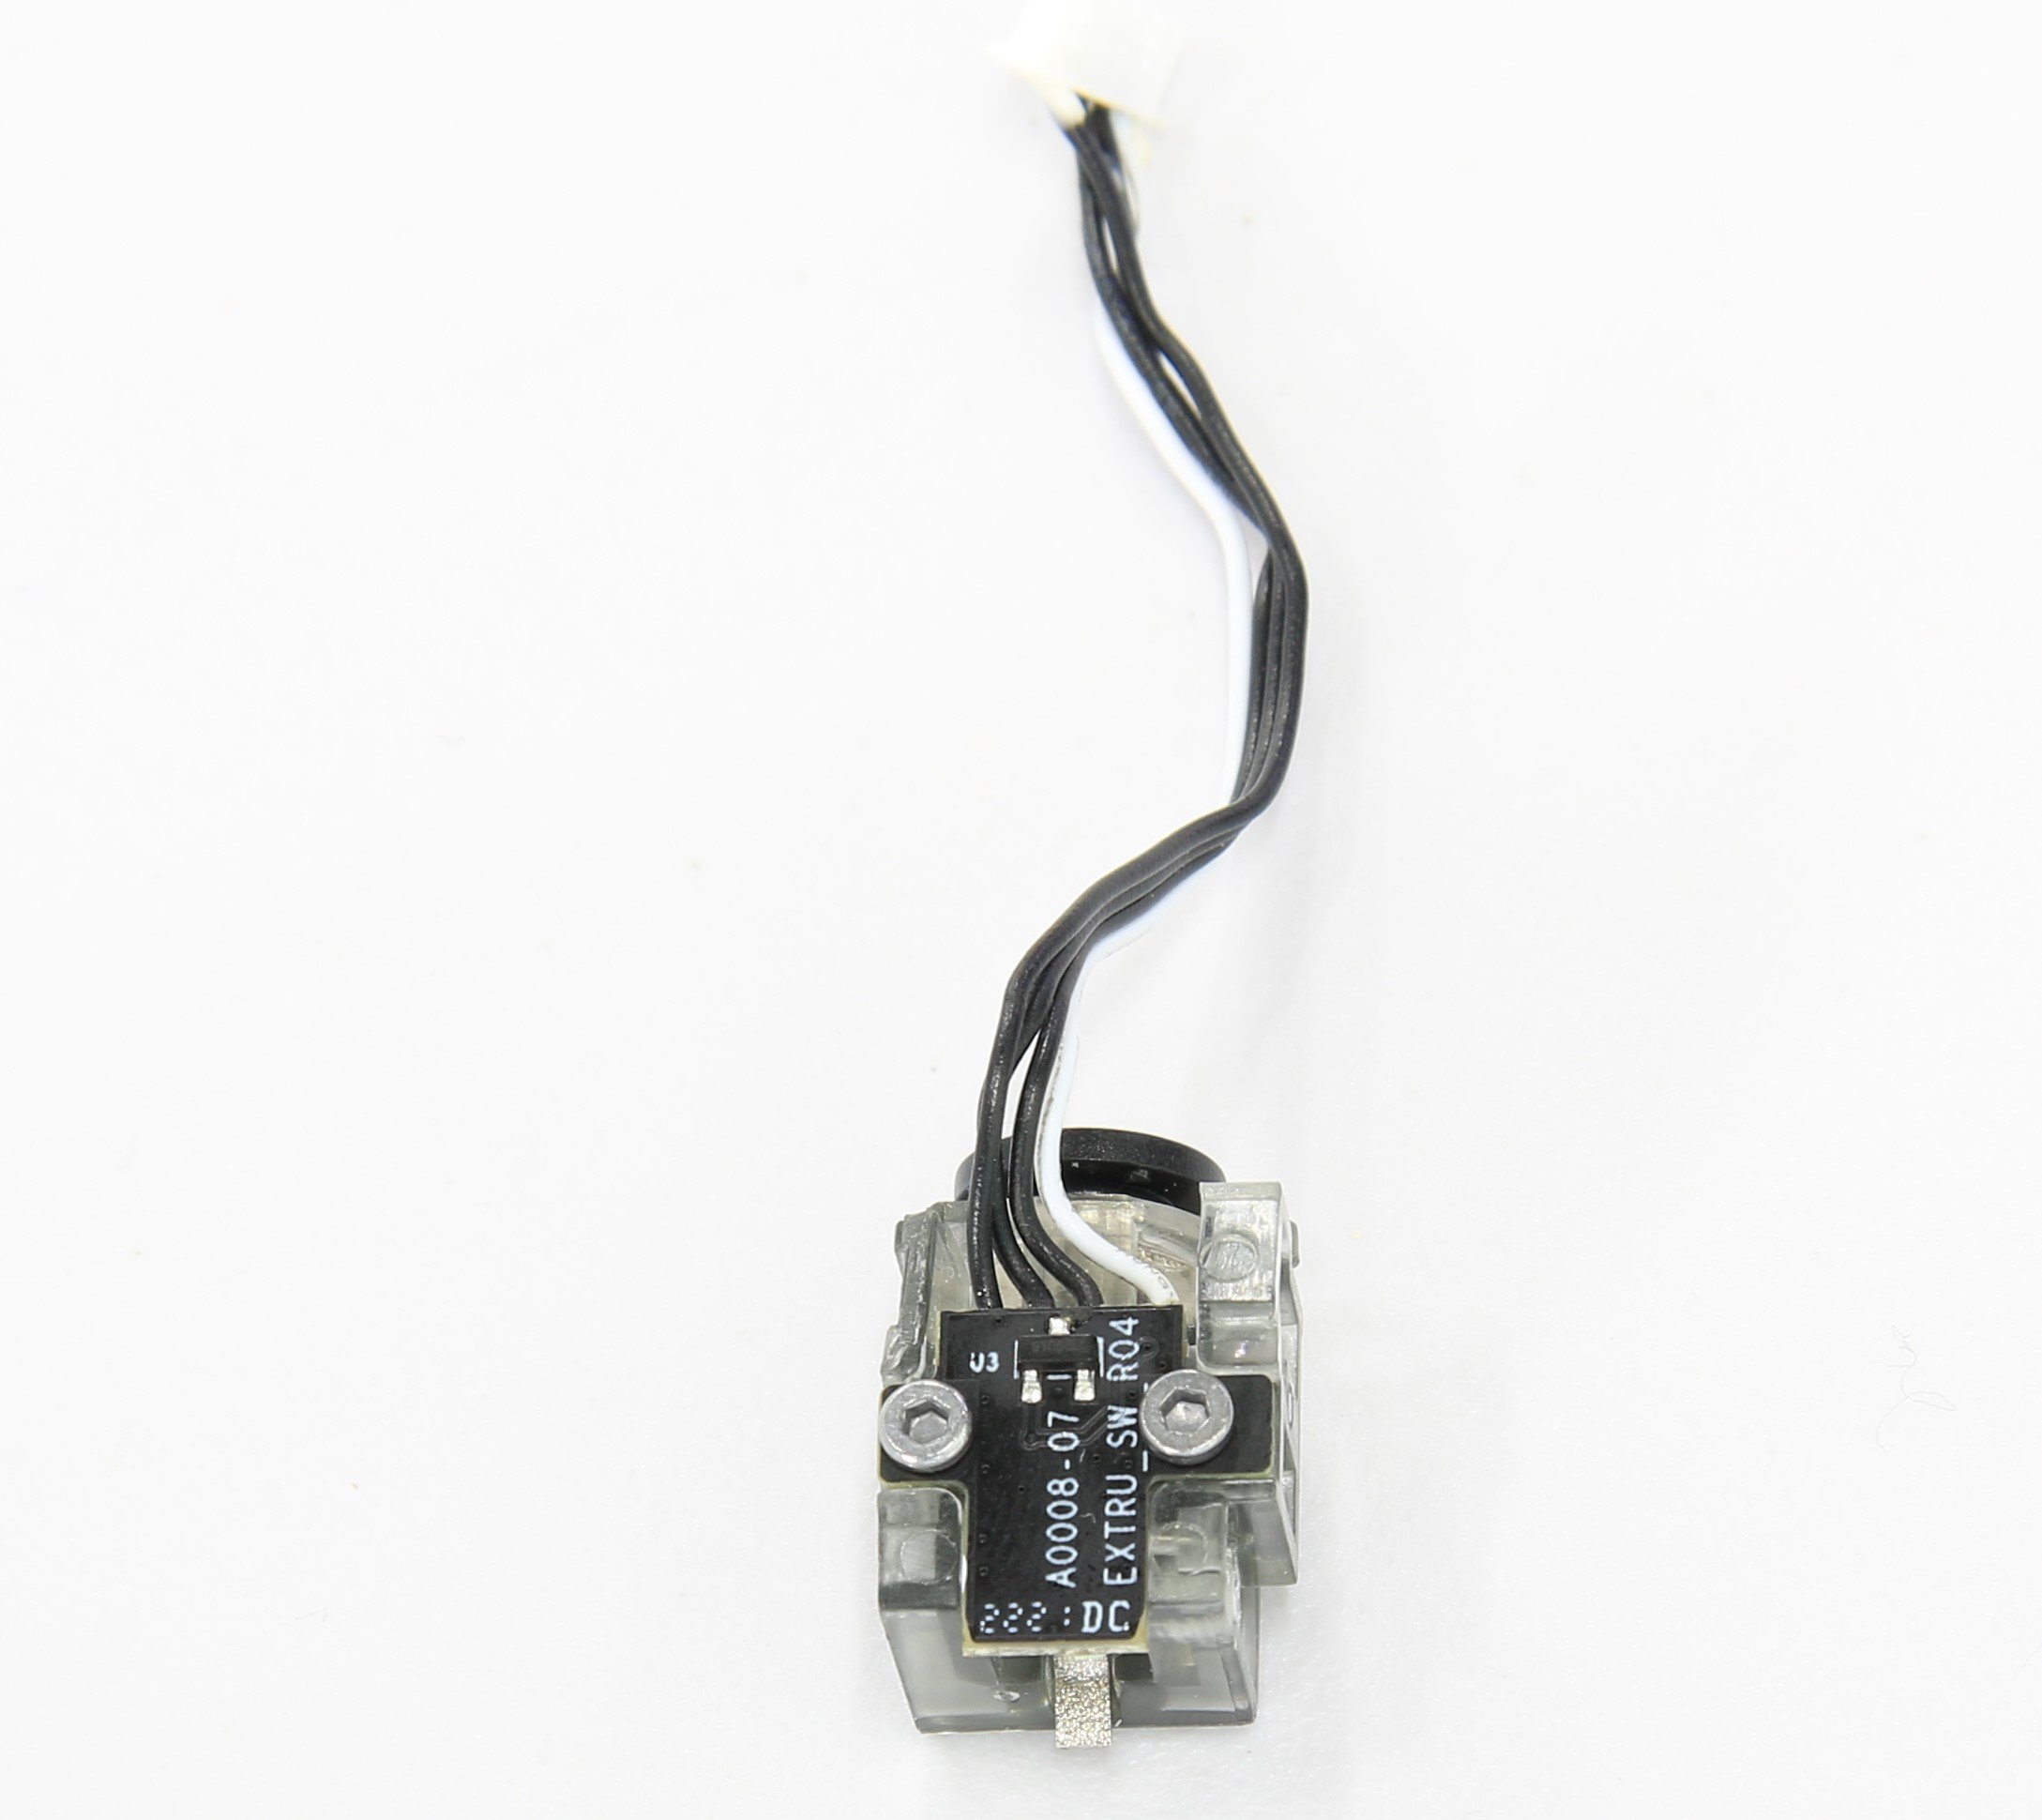
Extruder Filament Sensor - X1 Series
¶ When to use
- The cable is damaged
- There are false reports of unloading failure
- There are false reports of the cutter being stuck
¶ Tools
A new extruder filament and cutter sensor assembly
H1.5 hex key
¶ Screws list
| Model | Position | Drawing | |
| Screw A | BT2*5 | The base |
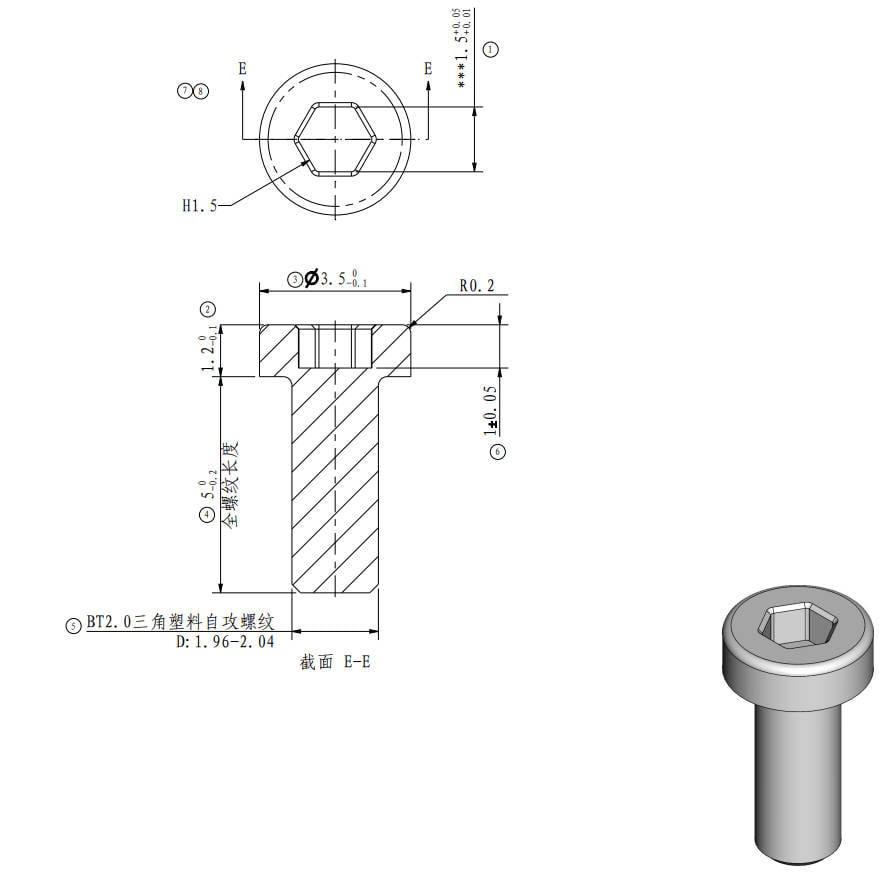 |
| Screw B | MG2.5*13 | Cutter lever |
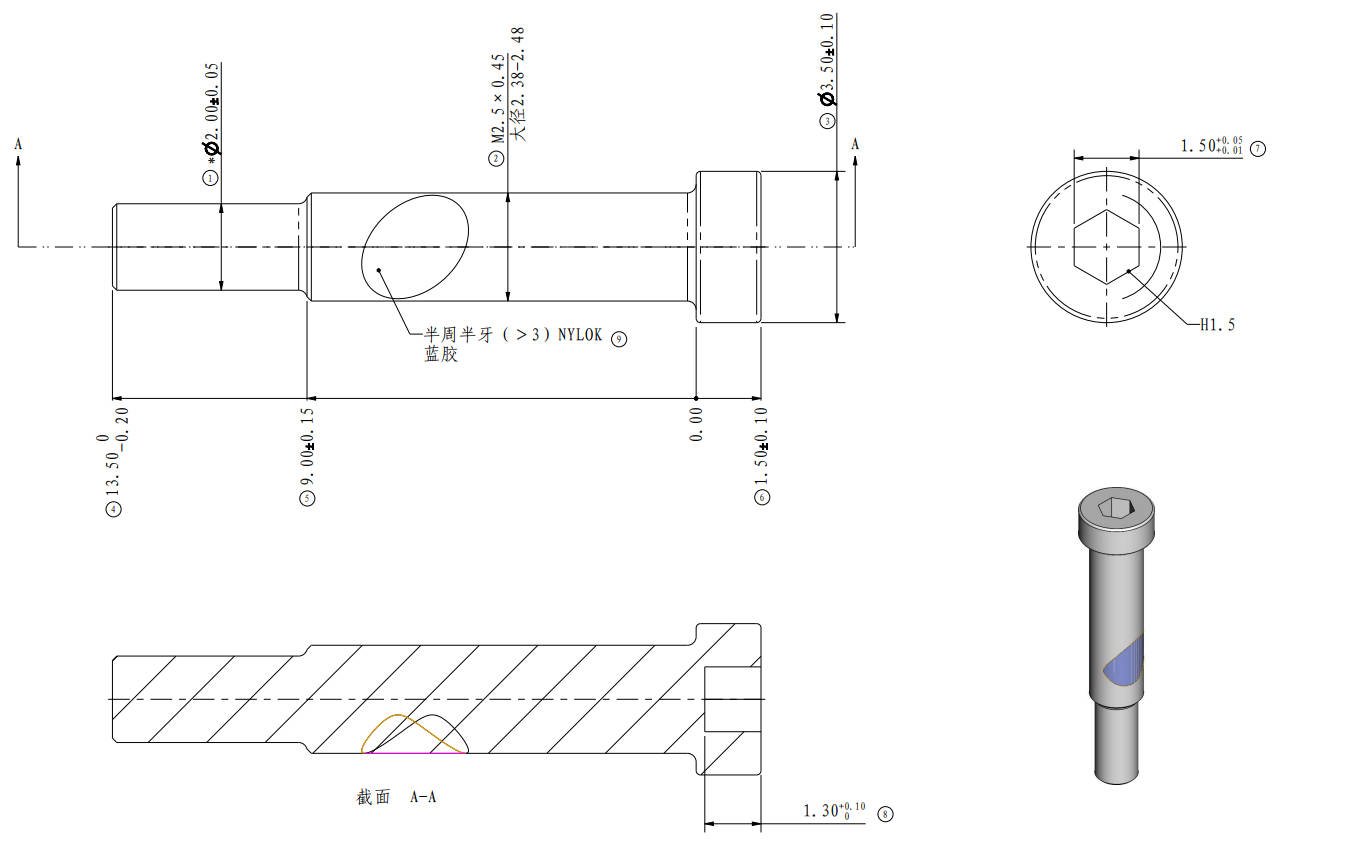 |
¶ Safety Warning
Unload the filament and power off the printer.
¶ Operation guide
¶ Step 1 - Open the front housing
Turn off the printer, open the front housing, and hang it over the carbon rod.
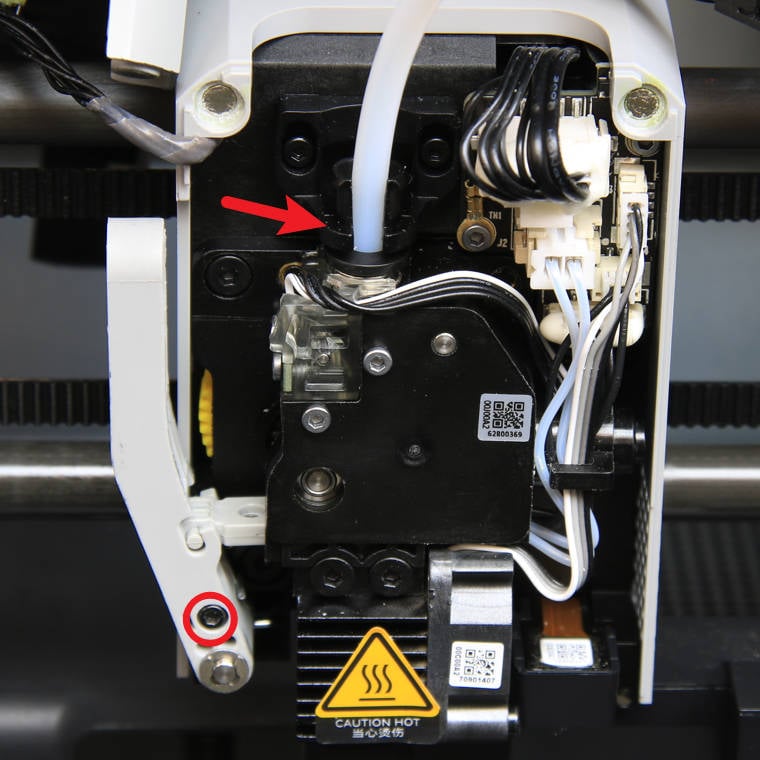
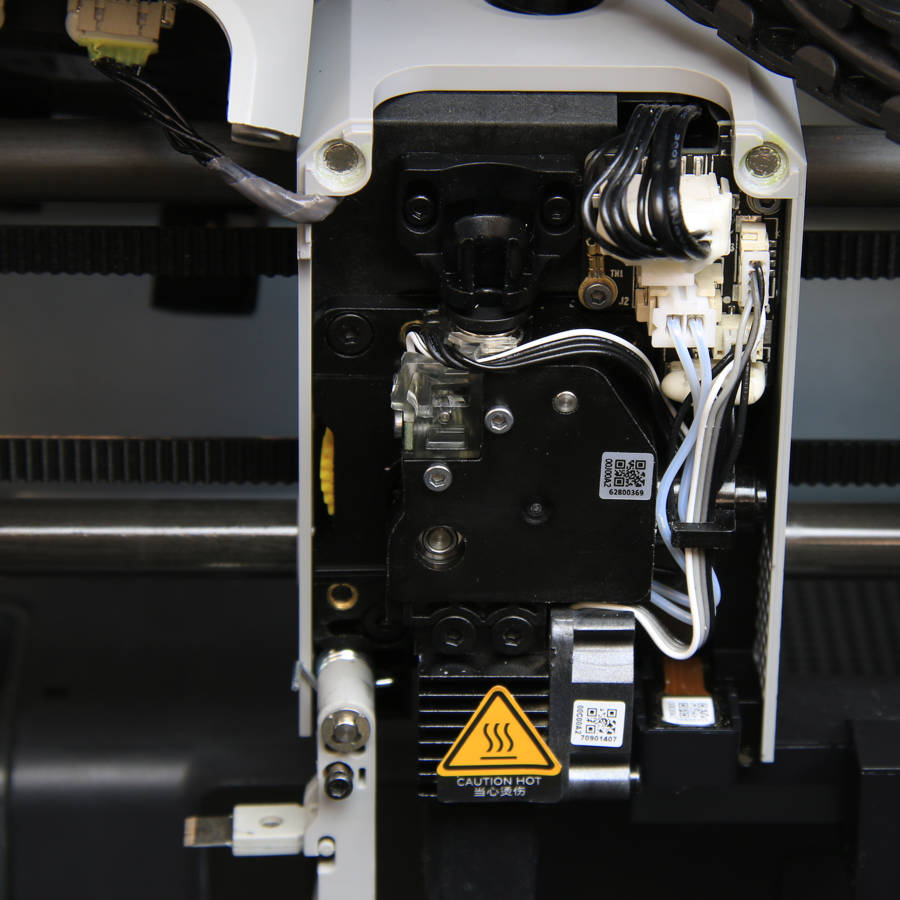
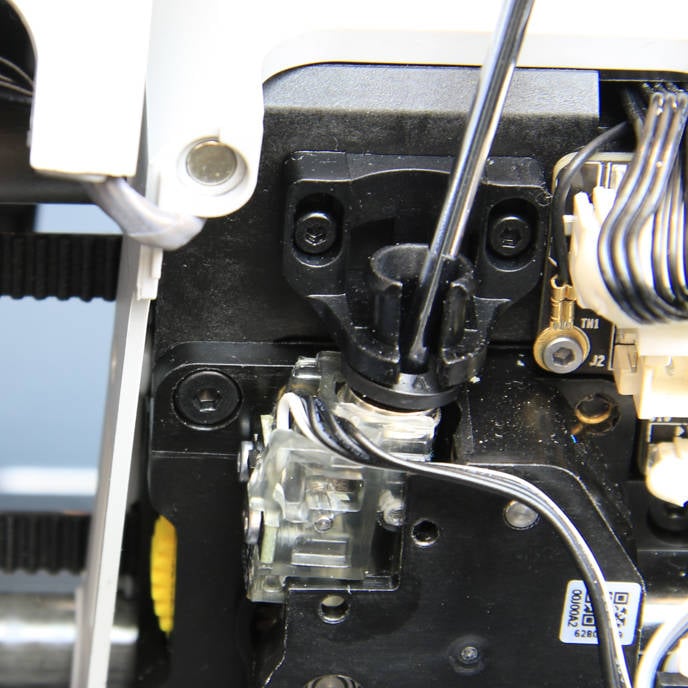
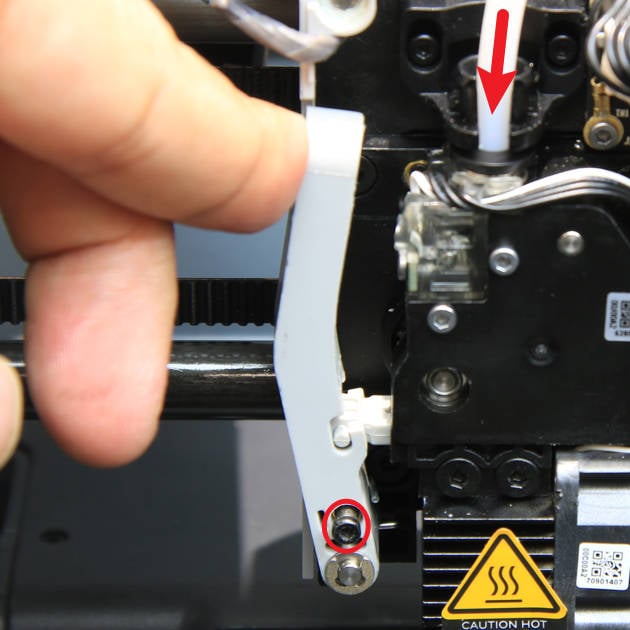
¶ Step 2 - Disconnect the PTFE tube and loosen the cutter lever
Press the tube bracket to disconnect the PTFE tube, then use the H1.5 hex key to loosen the screw (screw B) on the cutter lever and release the lever.
 |
 |
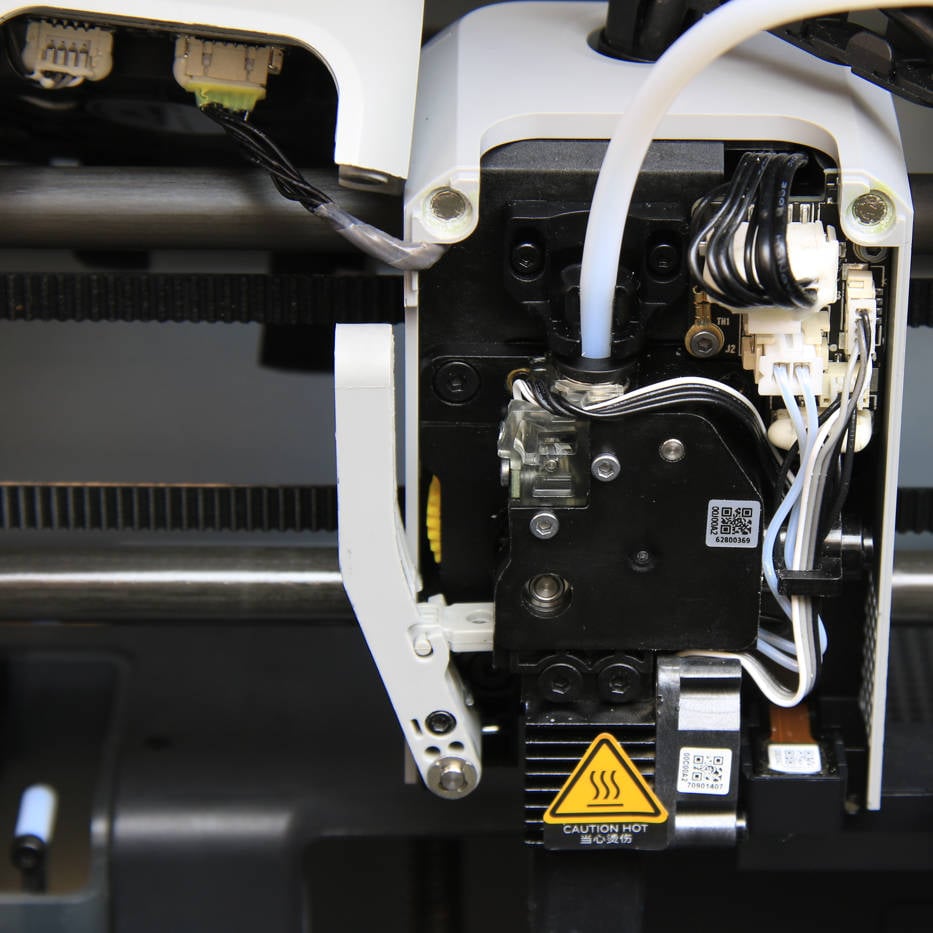
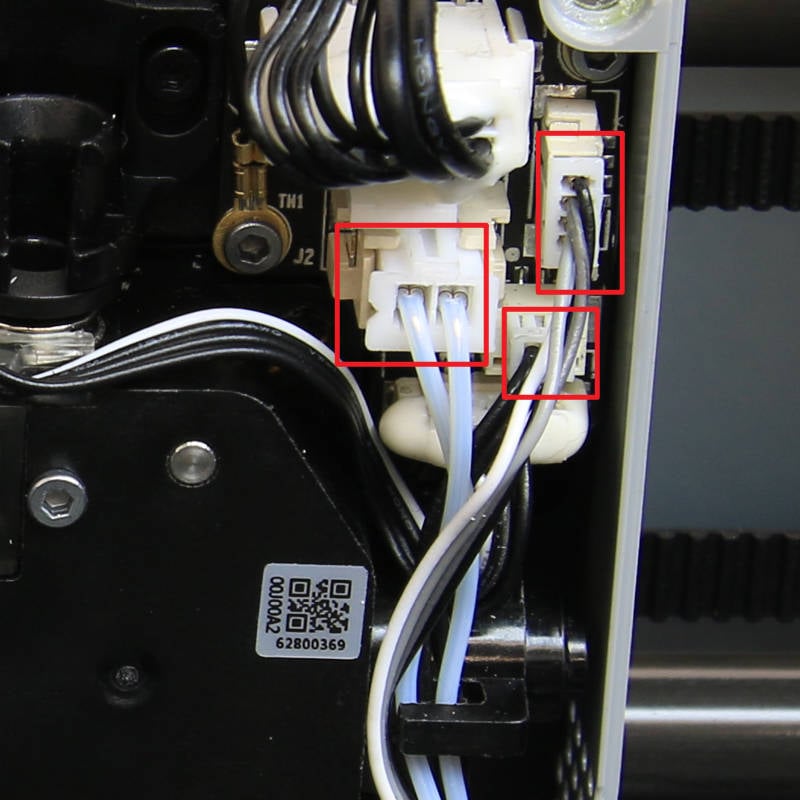
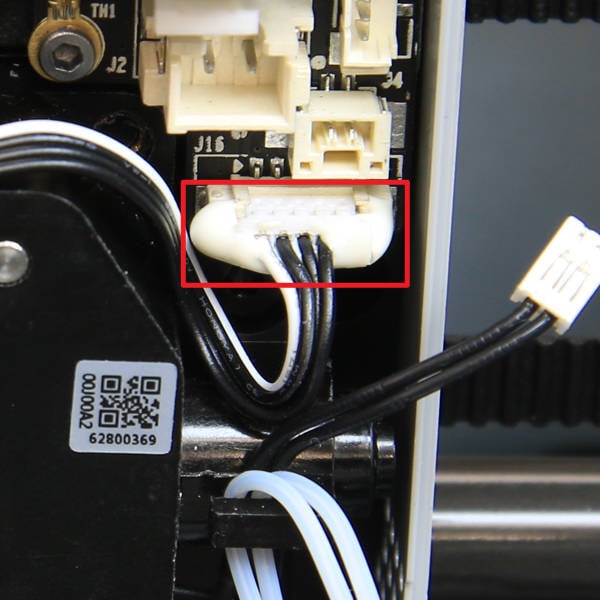
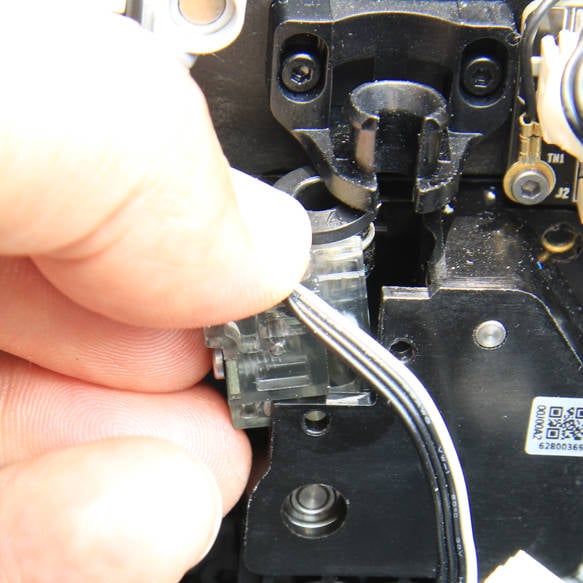
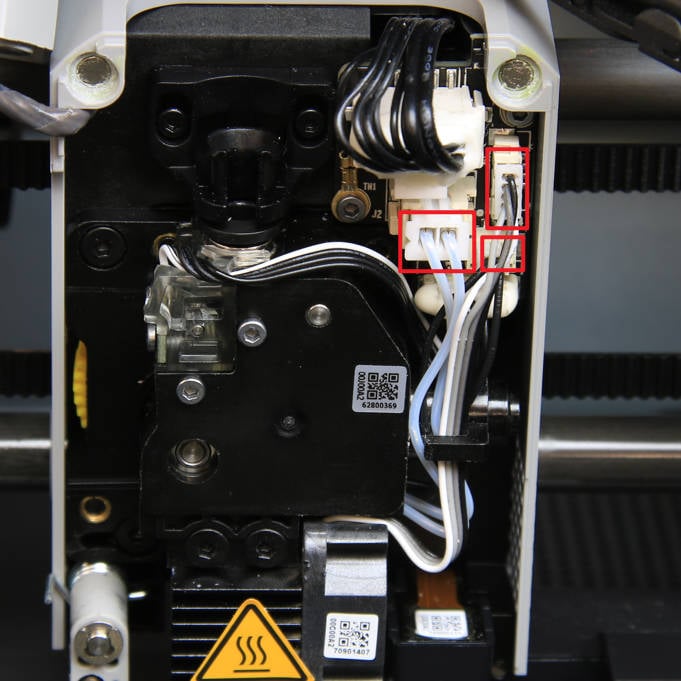
¶ Step 3 - Disconnect the cables
Disconnect the hotend heater, hotend fan, and NTC resistor cables to expose the sensor's connector. Use a hair dryer to heat the silicone glue, then disconnect the cable.
 |
 |
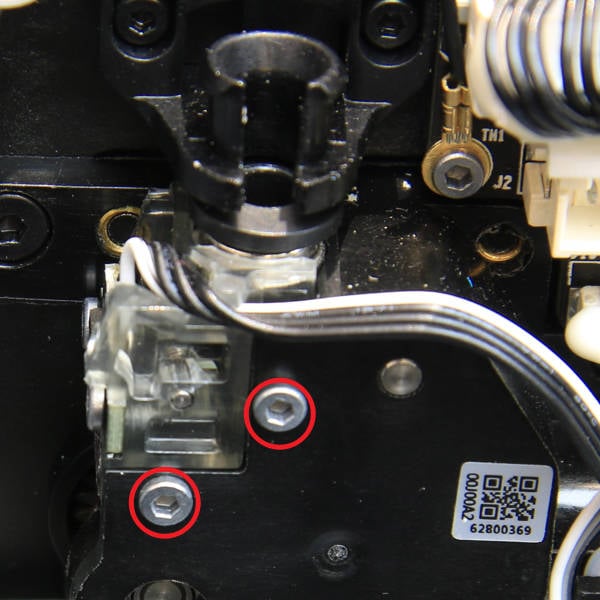
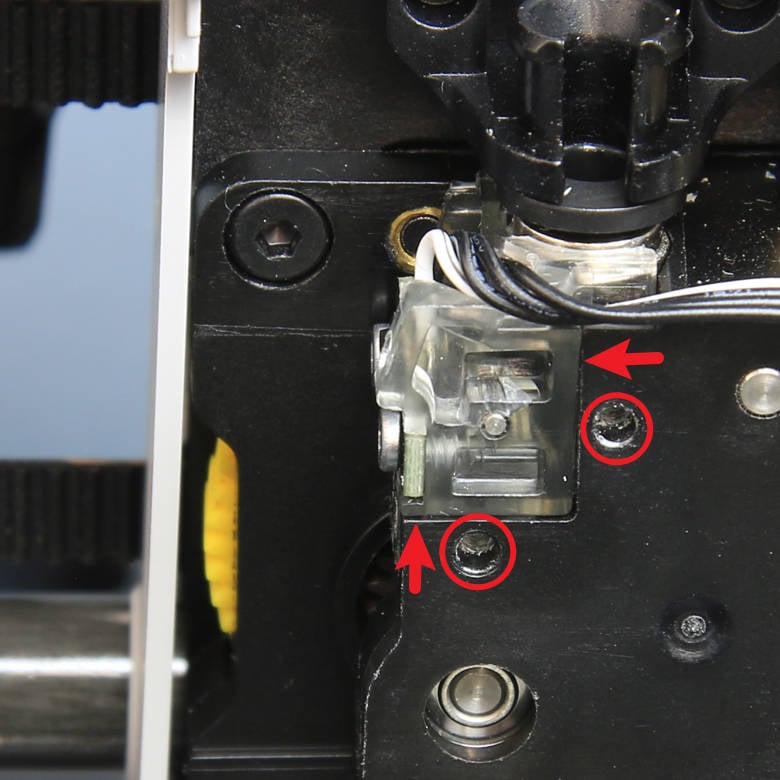
¶ Step 4 - Remove the sensor assembly
Remove 2 screws (screw A) using an H1.5 hex key. Use the hex key to pry the assembly loose from the pneumatic connector, then remove the sensor assembly.
 |
 |
¶ Step 5 - Install the sensor assembly
Press the pneumatic connector on the sensor assembly to install it in place, and then lock in 2 screws (screw A) to secure it.
 |
 |
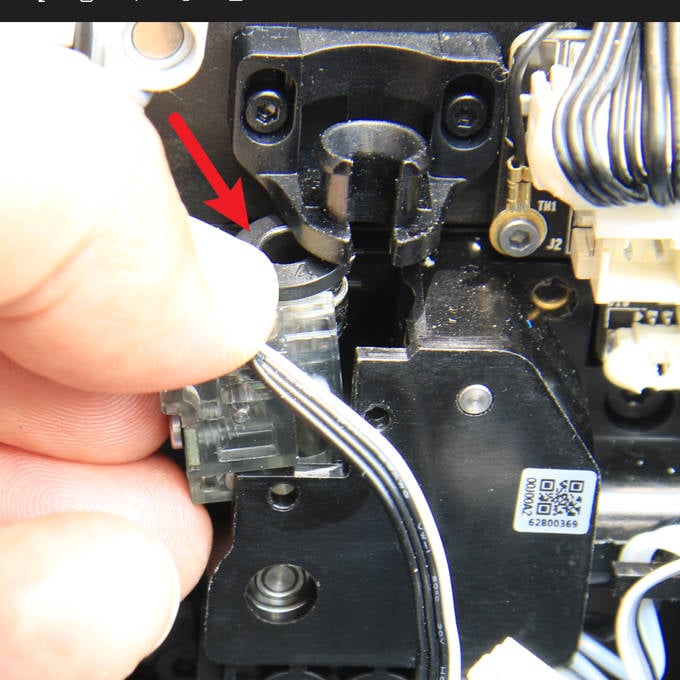
¶ Step 6 - Connect cables
Connect the sensor cable, and it's recommended to use silicone glue to reinforce this connection. Next, connect the hotend NTC cable, hotend fan cable, and hotend heater cable in sequence.
|
|
 |
¶ Step 7 - Lock the cutter lever, insert the PTFE tube, and close the front housing
Hold the cutter lever manually, insert the cutter into the slot, tighten the lever screw (screw B), reinsert the PTFE tube, and finally, close the front housing.
 |
 |
¶ To verify completion/success
Turn on the printer, manually load filament (or load filament via the AMS), and then perform unloading. If the process is completed without issues, the replacement is successful. If not, double-check the connections and retry. If errors persist, you can contact the technical team for further assistance.