¶ Z tensioner
¶ What it is
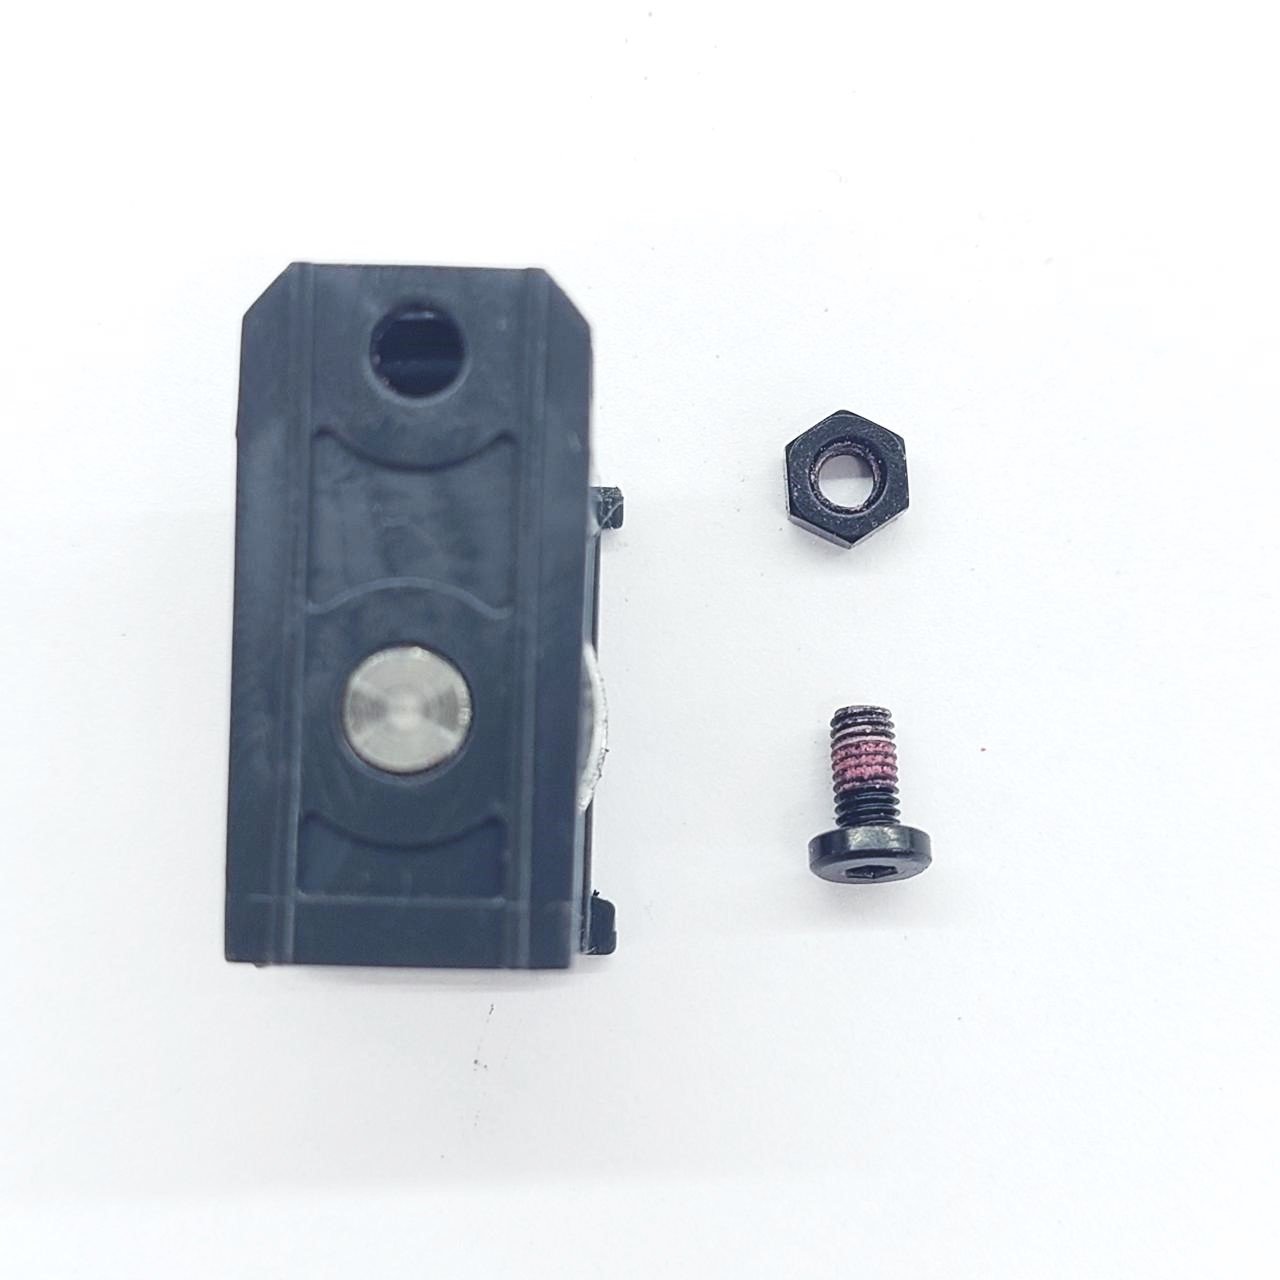
The Z tensioner is a part that mounts on the bottom of the printer and is used to tension the Z timing belt.
¶ When should you replace the Z tensioner?
- The tensioner makes abnormal noise, which cannot be solved by oiling
- Damaged tensioner bearing
¶ Tools and materials needed
- H1.5 & H 2.0 Allen Key
- New Z tensioner
¶ Safety Warning
IMPORTANT!
It's crucial to power off the printer before performing any maintenance work on the printer and its electronics, including tool head wires, because leaving the printer on while conducting such tasks can cause a short circuit, which can lead to additional electronic damage and safety hazards.
When you perform maintenane or troubleshooting on the printer, you may be required to disassemble some parts, including the hotend. This process can expose wires and electrical components that could potentially short circuit if they come into contact with each other or with other metal or electronic components while the printer is still on. This can damage the electronics of the printer and cause further damage.
Therefore, it's essential to switch off the printer and disconnect it from the power source before doing any maintenance work. This will prevent any short circuits or damage to the printer's electronics. By doing so, you can avoid potential damage to the printer's electronic components and ensure that the maintenance work is performed safely and effectively.
If you have any concerns or questions about following this guide, open a new ticket in our Support Page and we will do our best to respond promptly and provide you with the assistance you need.
¶ Operation guide - Disassembly
¶ Step 1 - Clean the bottom base
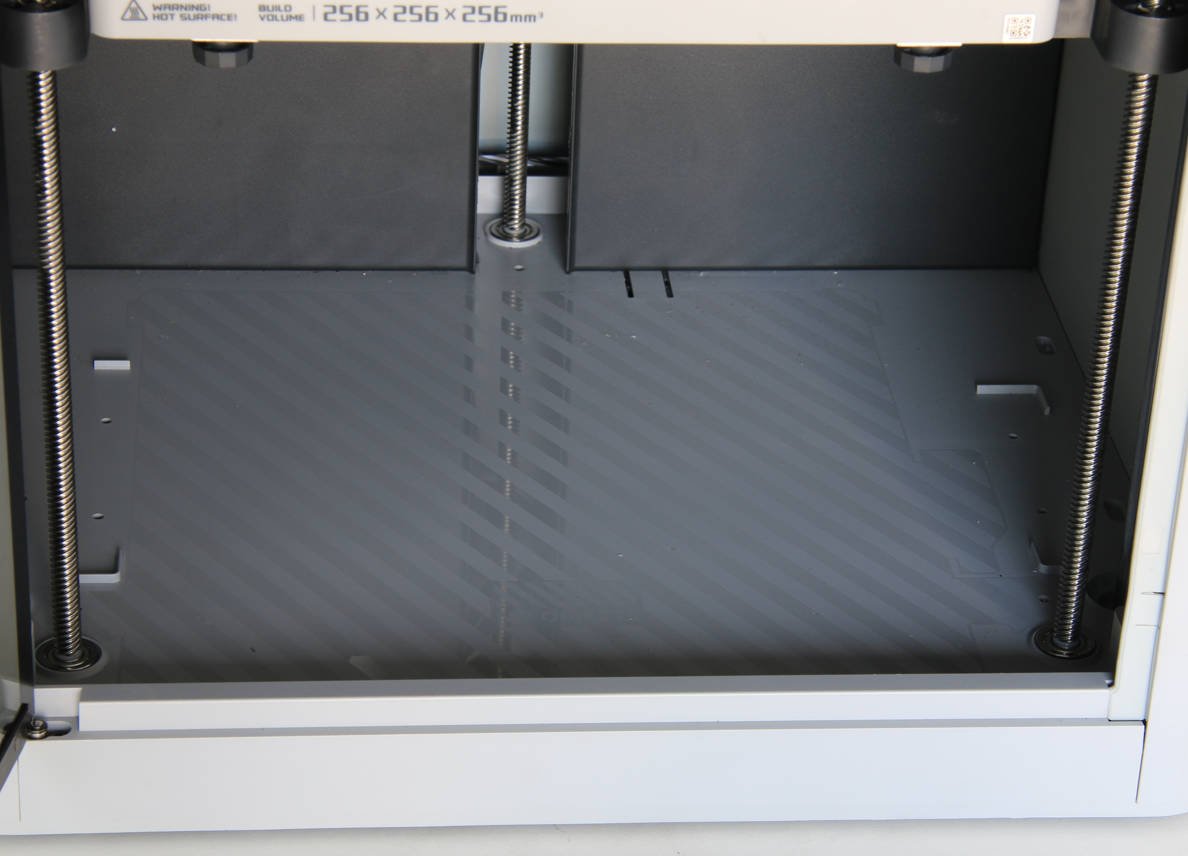
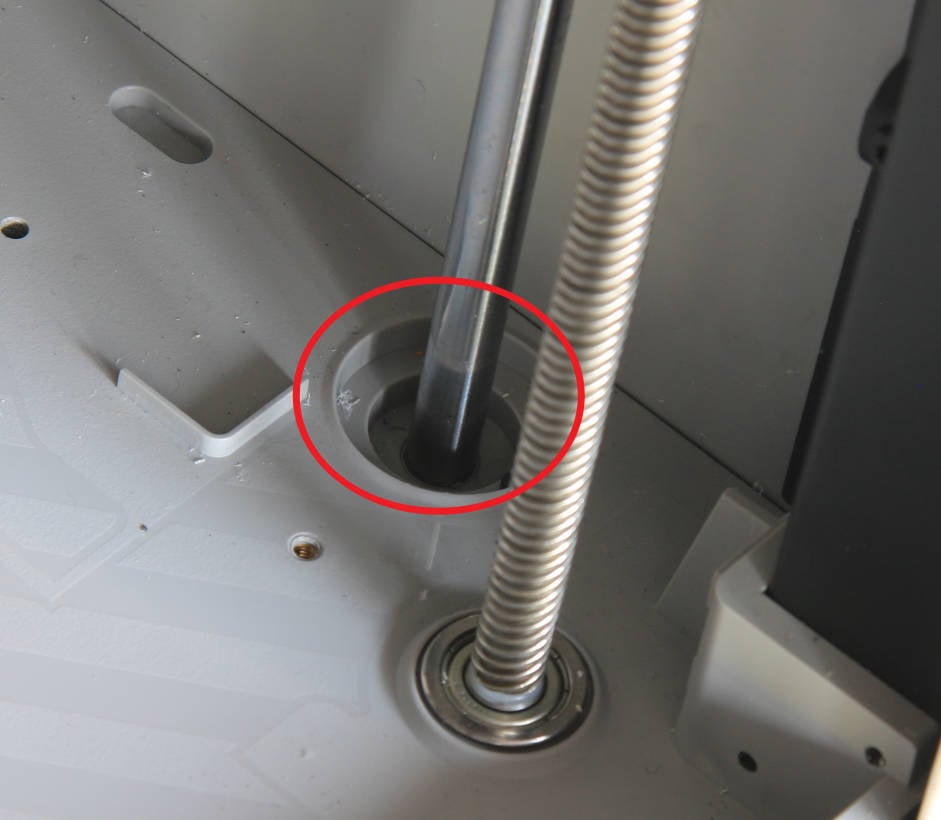
Clean the objects on the bottom base, especially any residue around the linear rods.
|
 |
 |
¶ Step 2 - Lower the heat bed to the bottom and lock the sliders
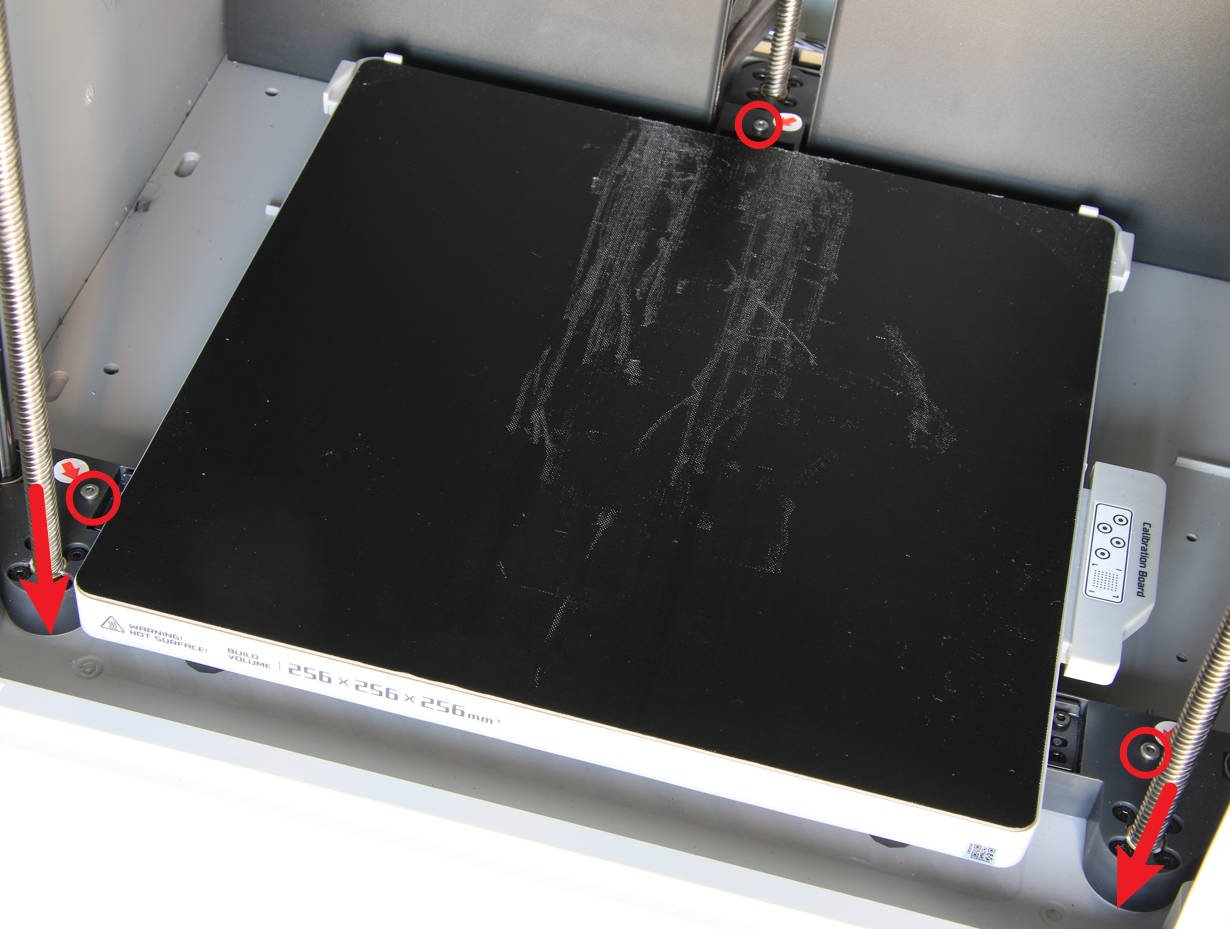
Operating on the screen, lower the heat bed to the bottom and lock the 3 sliders with 3 screws, just like when you first unlocked the heat bed on unboxing. Then turn off the printer and disconnect the power cord.
Note:Securely fasten the heat bed or sliders with screws but do not over-tighten them. If a individual sliders of the Z-axis are out of synchronization in a subsequent step due to the belt not being tensioned, the hot bed can no longer be leveled. Dont't over-tighten the screws or they might strip the parts.
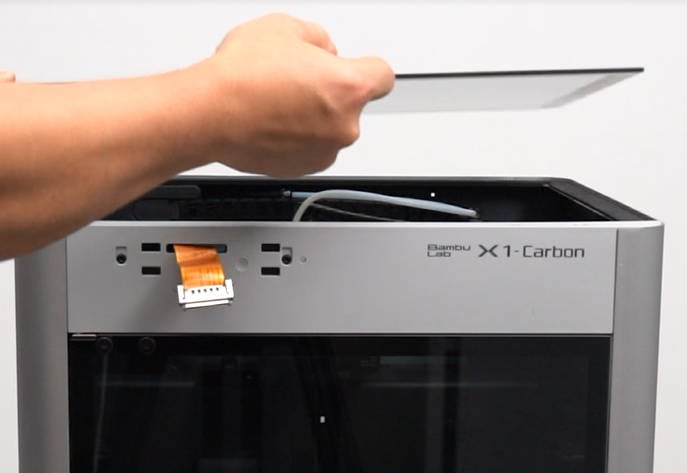
¶ Step 3 - Removing the glass cover plate and put the printer on its side
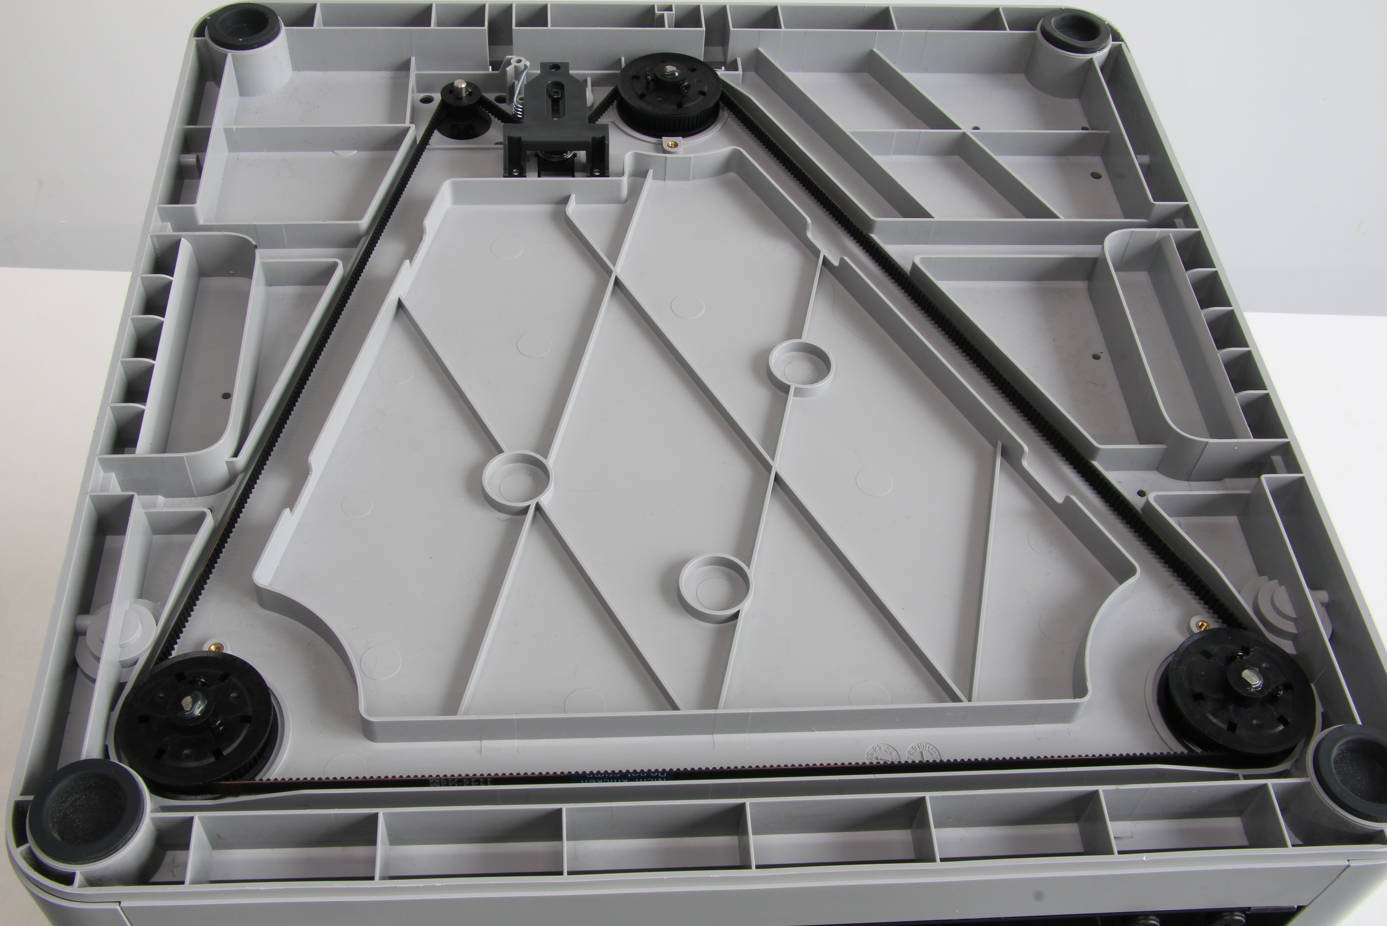
Remove the top glass cover plate, put the printer on its side so that you can see the Z timing belt.
If you want to place the printer upside down, please make sure the display is removed before the operation. Refer to this wiki to remove the display.
 |
 |
¶ Step 4 - Unlocking the screws
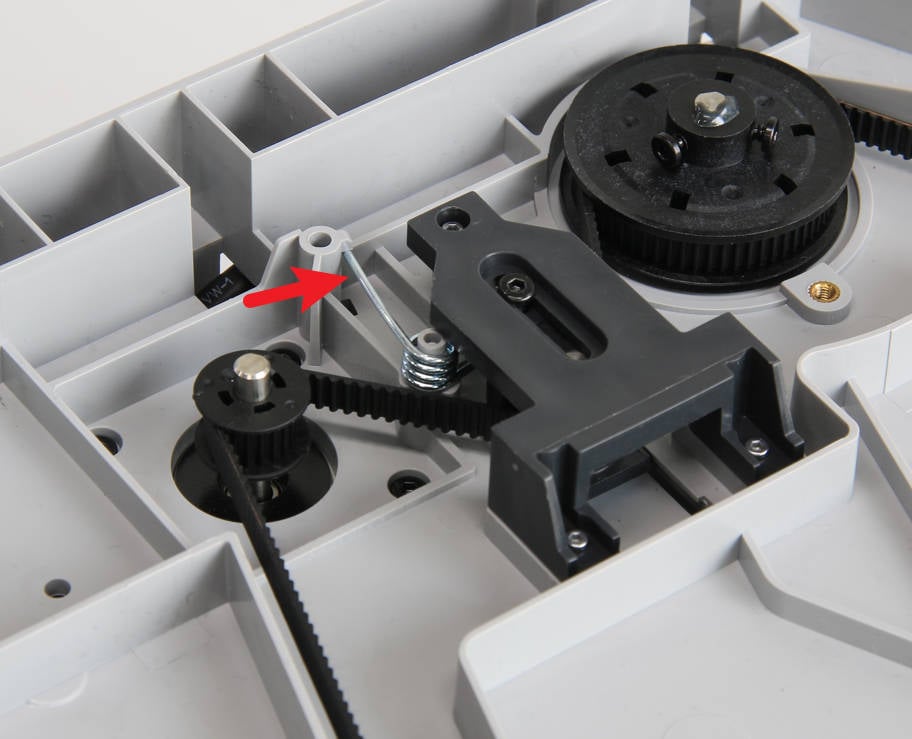
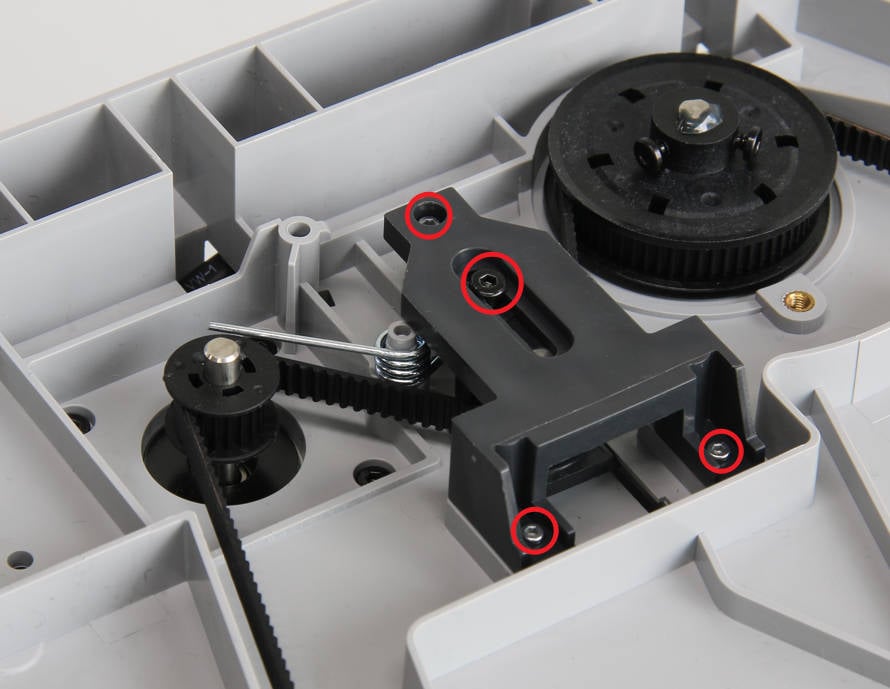
Release the torsion spring, remove the 3 silver screws with H1.5 hex key and the black adjustment screw with H2.0 hex key.
 |
 |
¶ Step 5 - Removing the tension pulley cover and torsion spring
Take off the tension pulley cover, and remove the torsion spring.
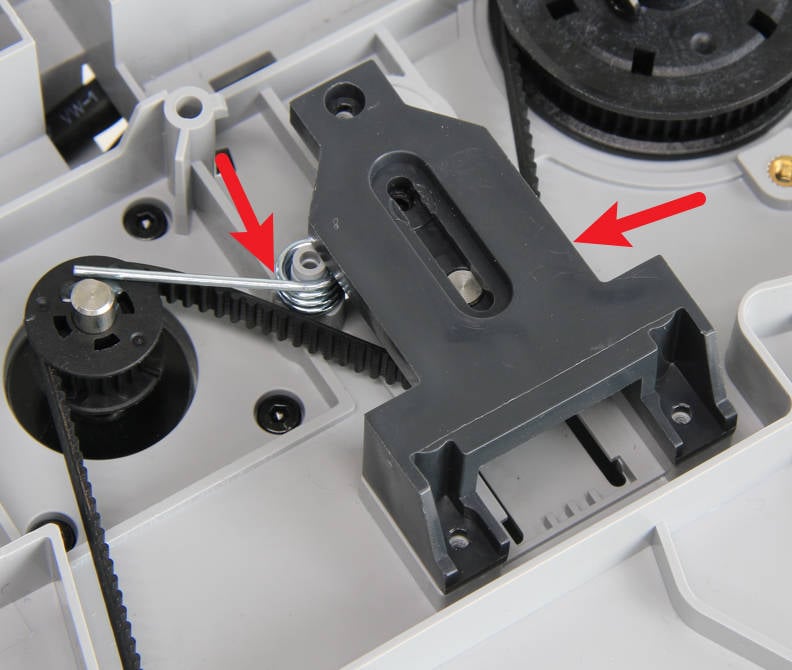
¶ Step 6 - Remove the Z tensioner
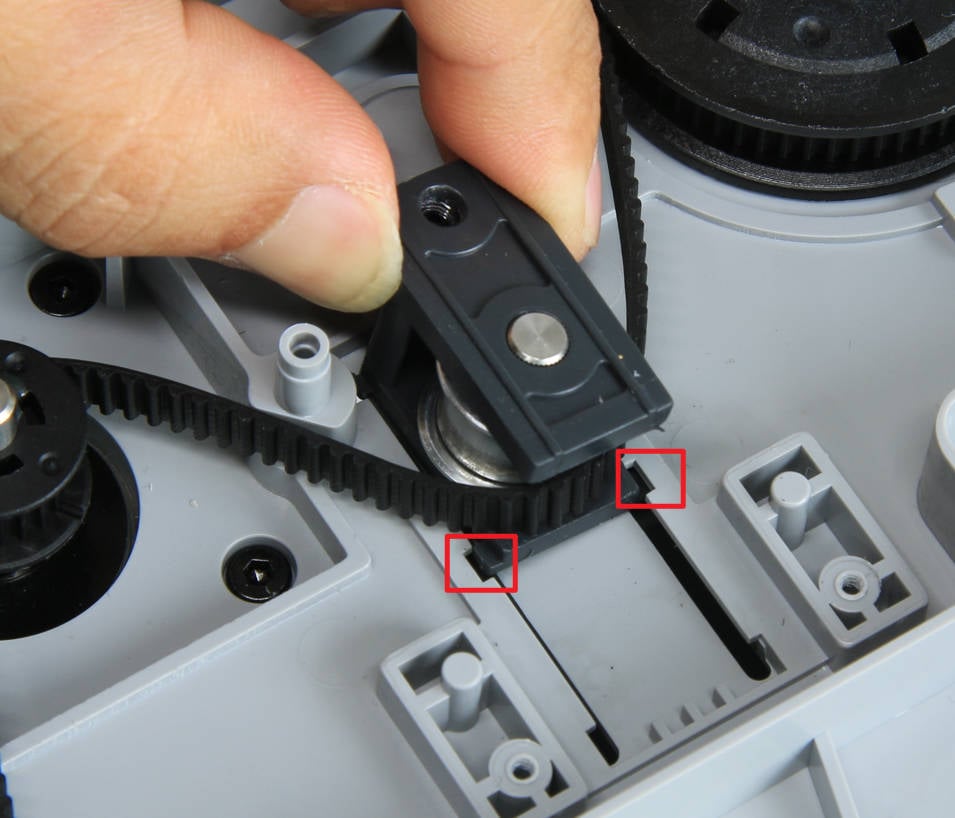
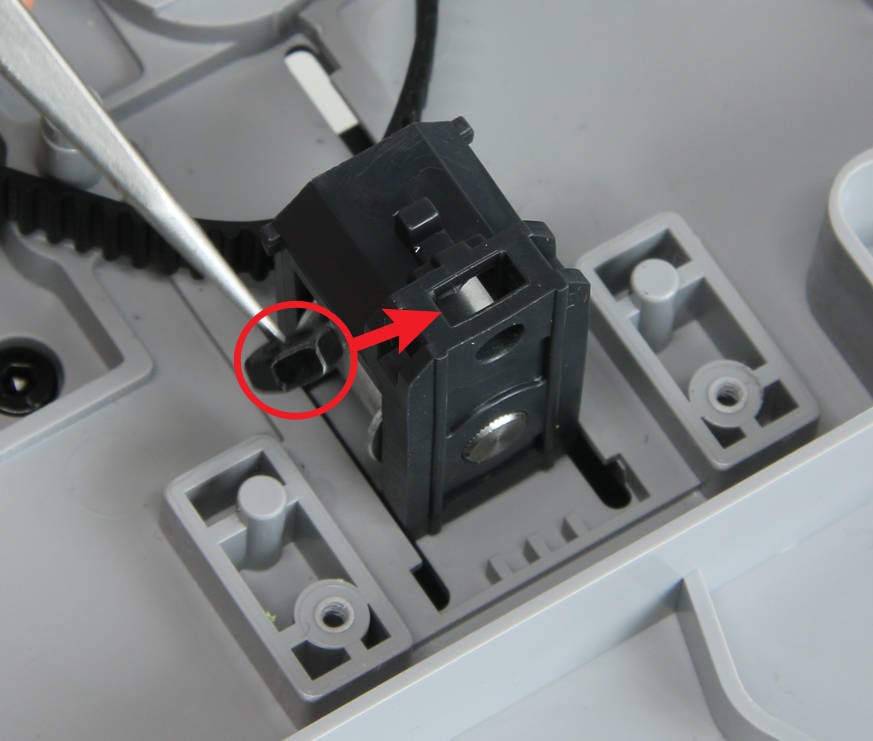
Move the tensioner to the end of the rail to remove the tensioner assembly. Note that there is a nut in the assembly, be careful not to lose it.
 |
 |
¶ Operation guide - Assembly
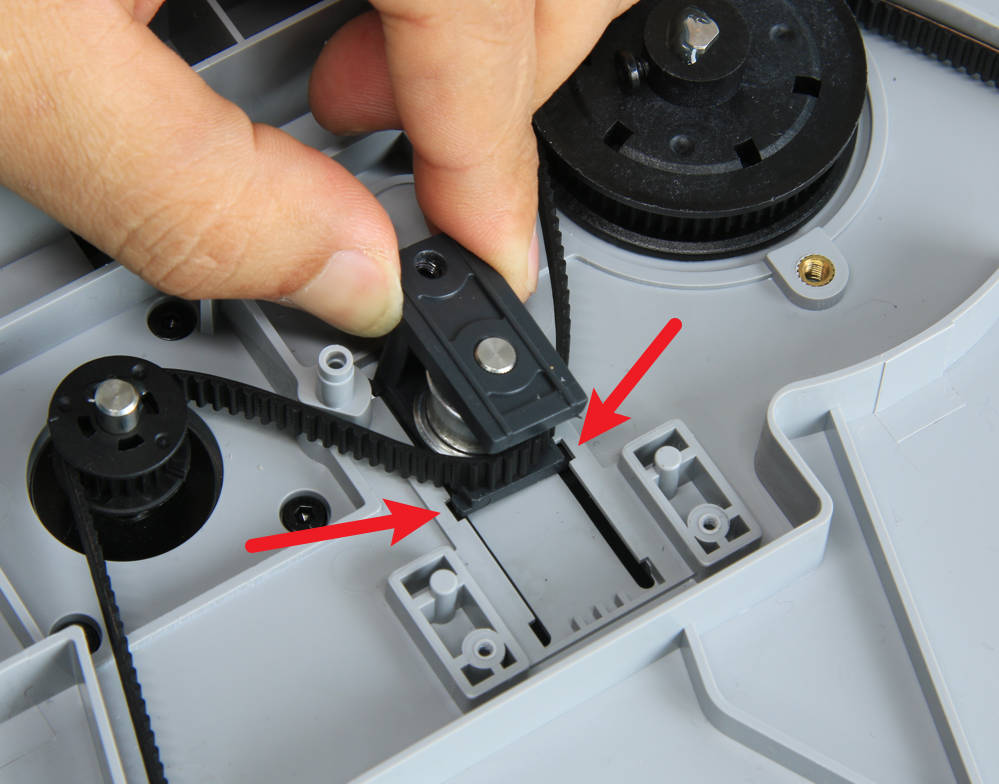
¶ Step 1 - Installing the Z tensioner assembly
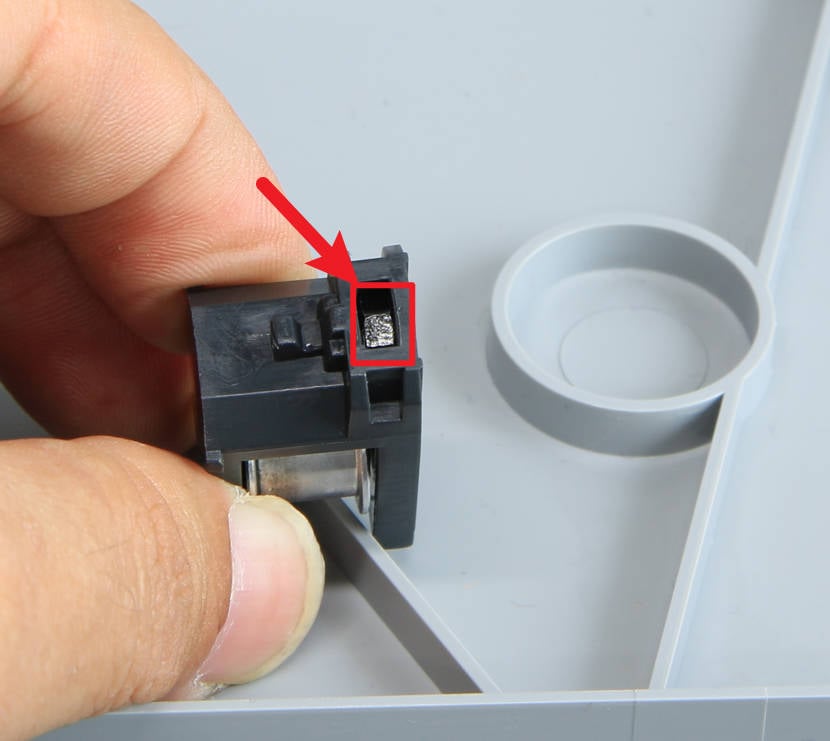
Confirm that the nut is inside the assembly, and then install the tensioner assembly into place.
 |
 |
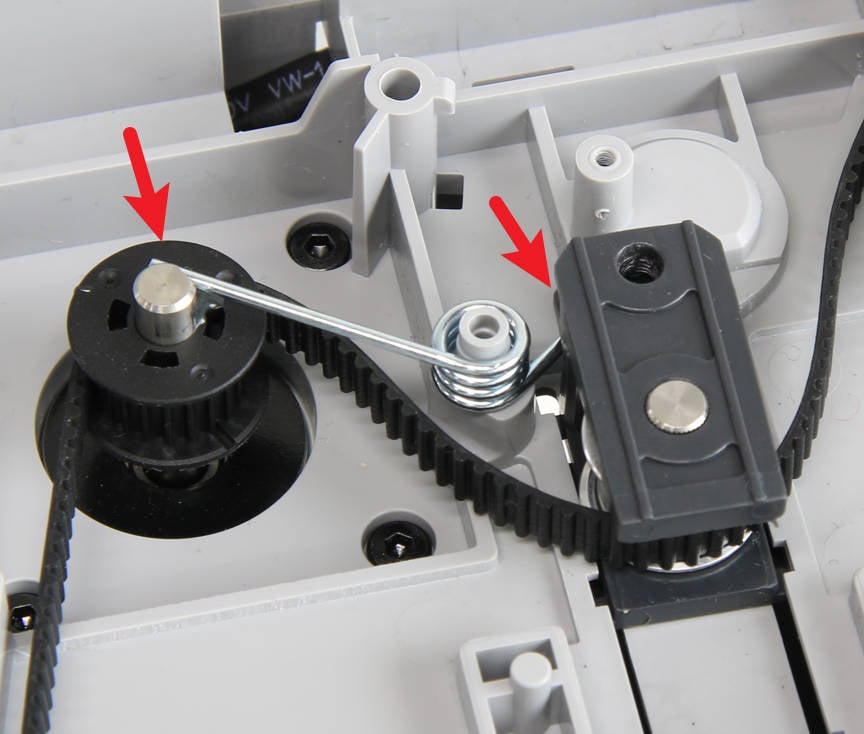
¶ Step 2 - Installing the torsion spring
Install the torsion spring, noting that the shorter end is on the right side.
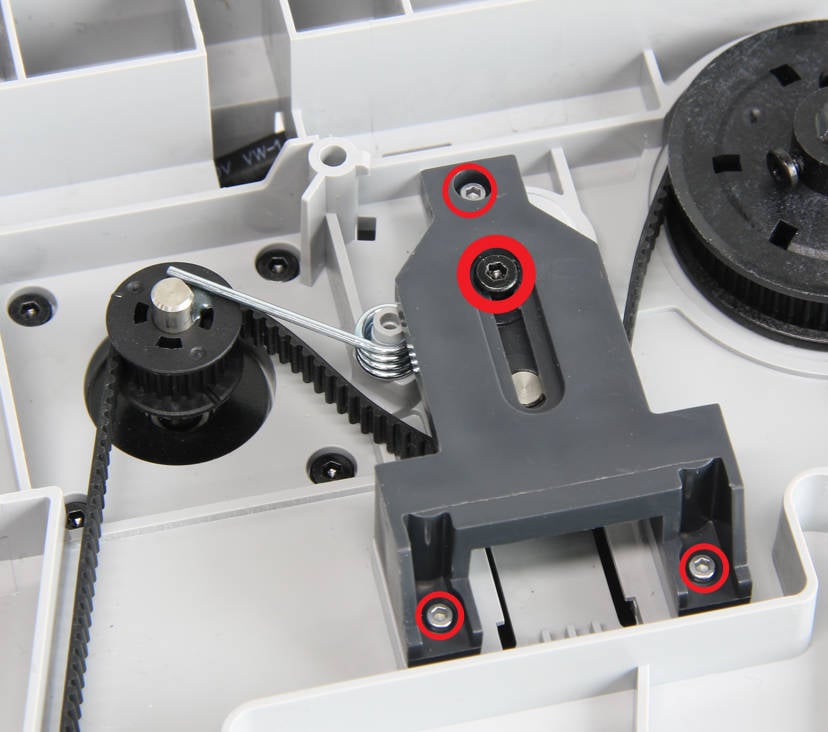
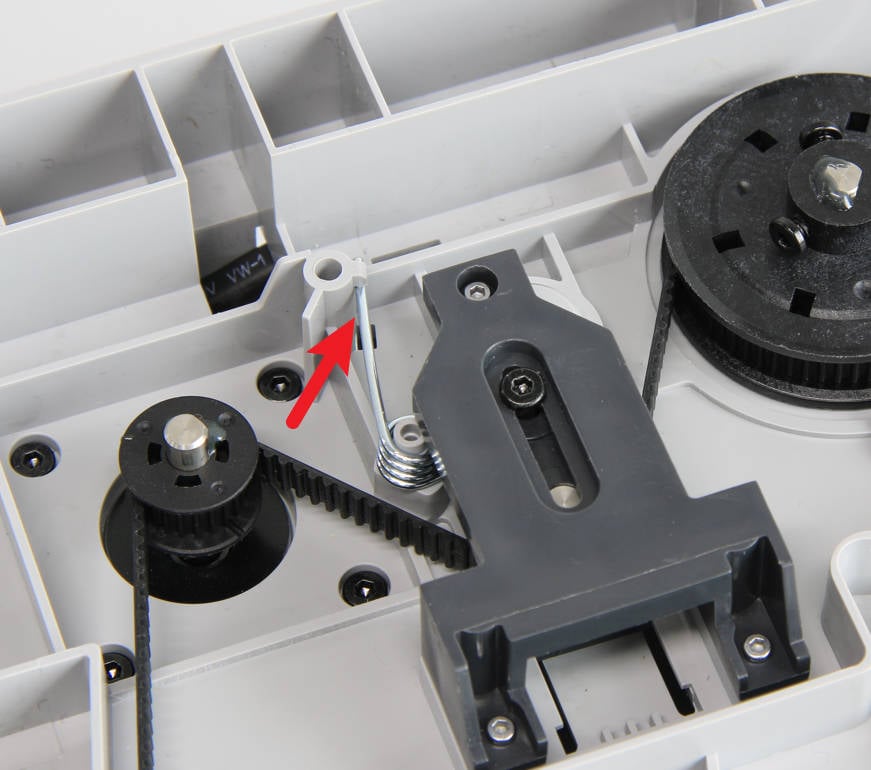
¶ Step 3 - Install the cover, locking screws and tension the spring
Place the tensioner cover on top of the tensioner. Lock the 3 silver screws with H1.5 hex key to fix the cover, and prefix the black screw with H2.0 hex key, do not tighten it. Bend the spring to place to make it tense.
 |
 |
¶ Step 4 - Remove slider set screws
Place the printer upright, and remove the locking screws on the 3 sliders.
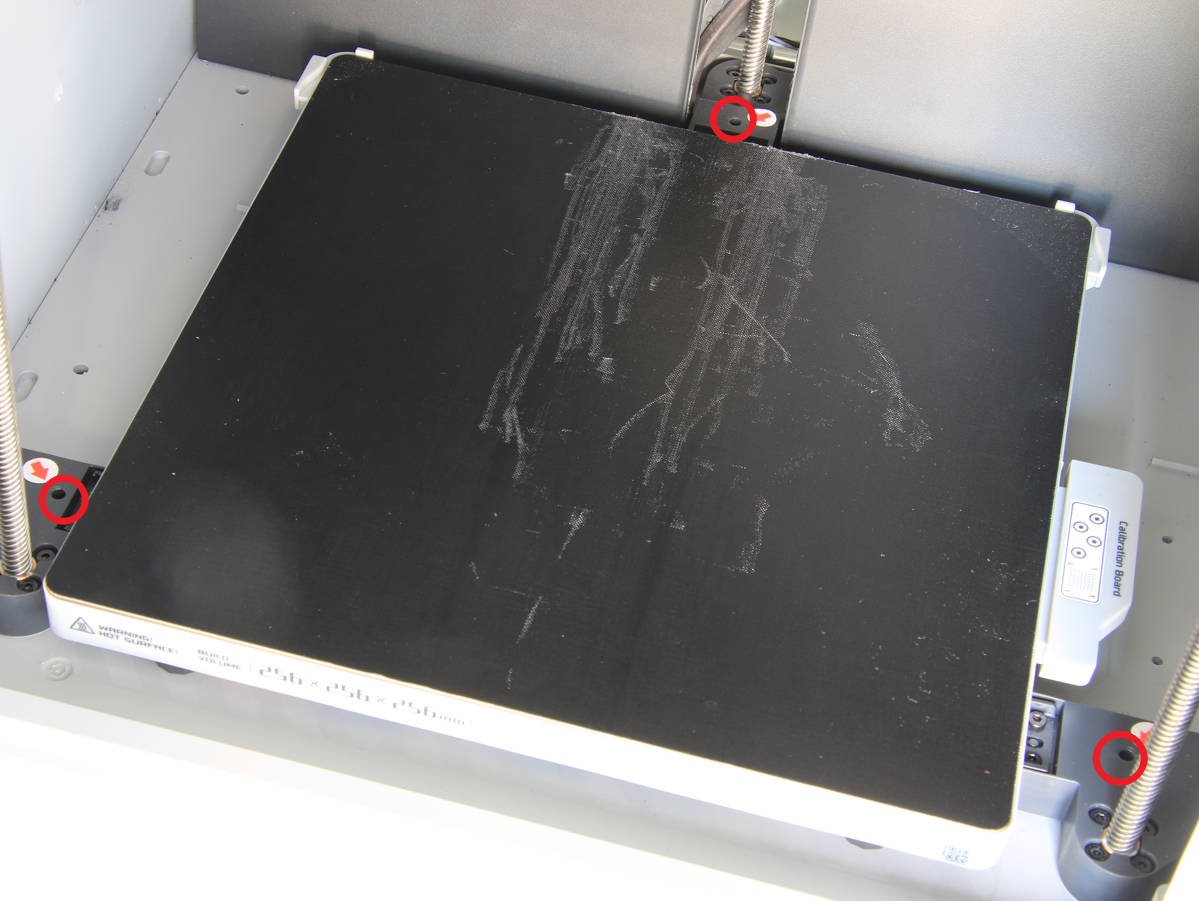
¶ Step 5 - Tension the Z belt and tighten the screw
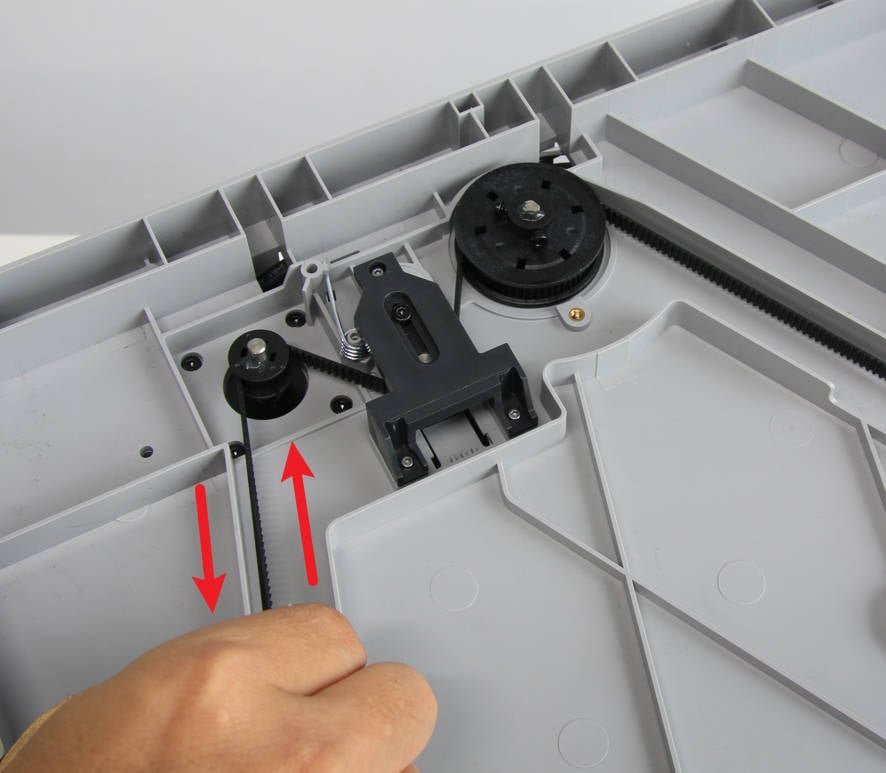
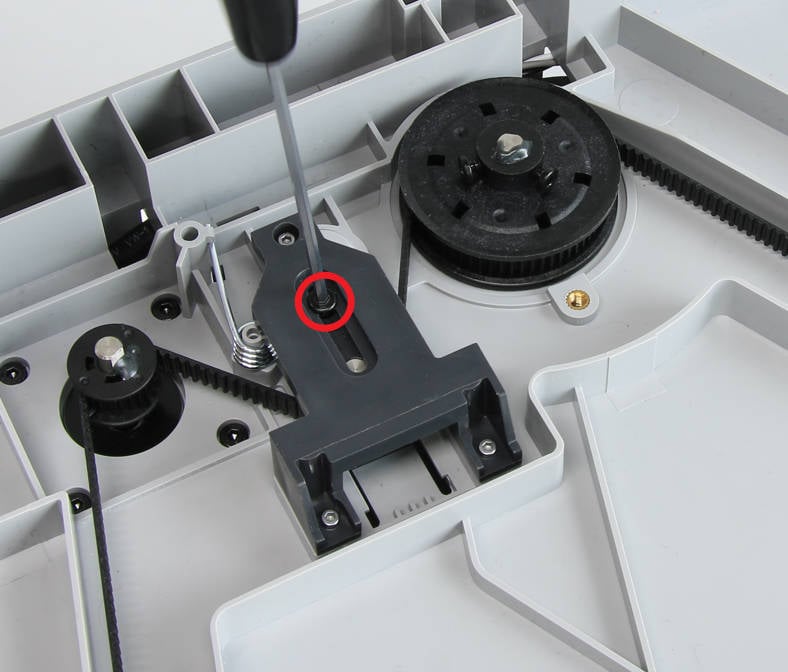
Put the printer on its side again, move the Z belt back and forth several times to make sure the movement is smooth, and then tighten the black screw.
 |
 |
¶ Step 6 - Turn the printer upright and replace the glass cover plate
Turn the printer upright again and place back the glass cover plate.
¶ Verify the functionality
Connect the power cord and turn on the printer
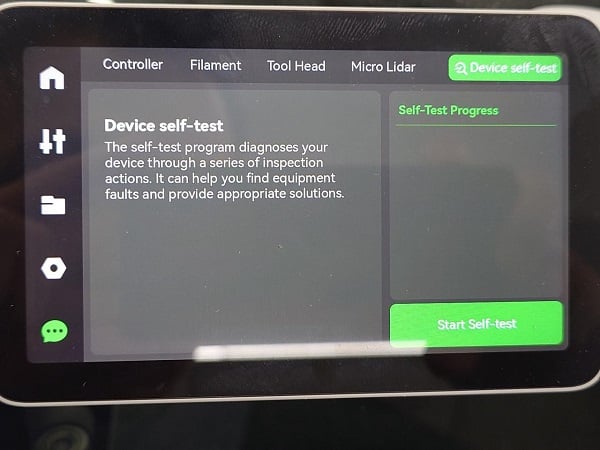
Run a Device self-test as shown below, and if no errors occur, the replacement was successful.
Should you come across any issues, first retrace your steps and check the installations, especially whether the belt is tensioned correctely, and try again. If problems persist, contact the customer support team for further assistance.
¶ End Notes
We hope that the detailed guide we shared with you was helpful and informative.
We want to ensure that you can perform it safely and effectively. If you have any concerns or questions regarding the process described in this article, we encourage you to reach out to our friendly customer service team before starting the operation. Our team is always ready to help you and answer any questions you may have.
Click here to open a new ticket in our Support Page.
We will do our best to respond promptly and provide you with the assistance you need.