¶ What is the XY tensioner idler pulley
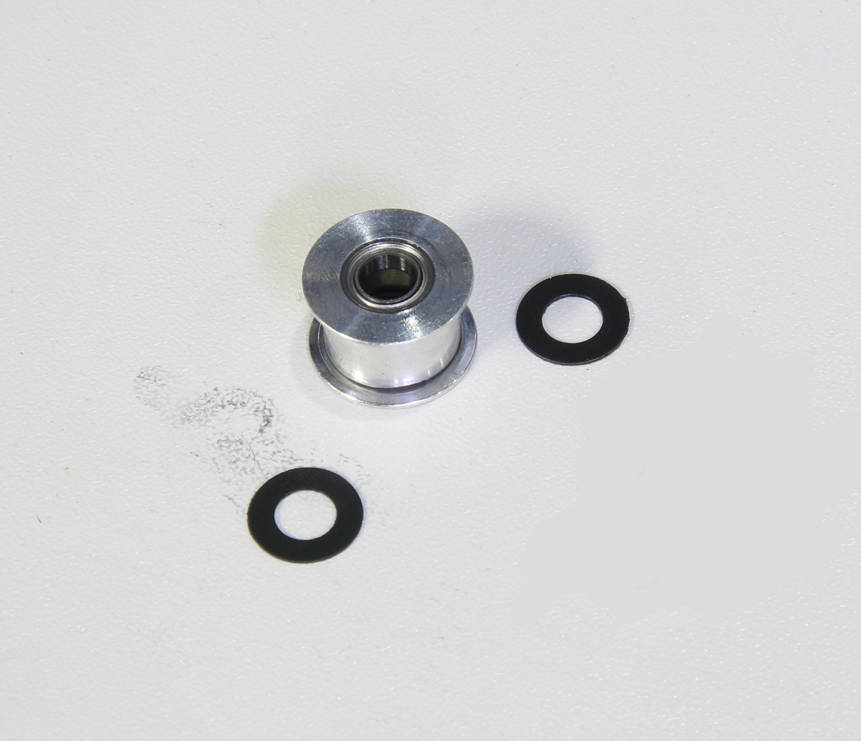
The XY tensioner idler is mounted on the XY belt tensioner, with one on each side (XY). Each contains two washers and an idler.
¶ When to use
- The idler makes abnormal noise, which cannot be solved by oiling
- The idler bearing is damaged.
Note: The replacement method of the idler in the two positions is basically the same.
¶ Tools and materials needed
- H2.0 hex key
- A new XY tensioner idler pulley
¶ Safety warning and machine status before operation
Power OFF the printer before doing any maintenance work.
¶ Operation guide
¶ Step 1 - Remove screws
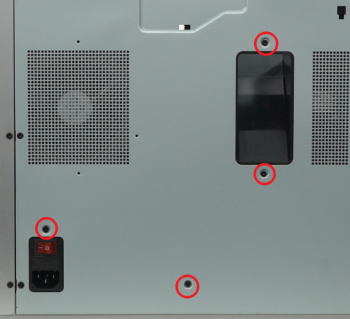
NOTE: This procedure involves a lot of screws. To prevent any issues, please ensure to label and group them into separate sections accordingly.
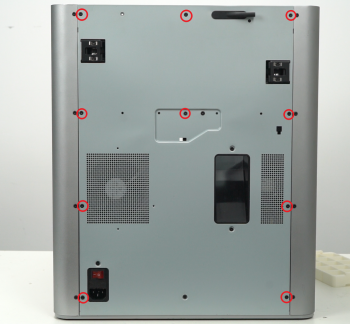
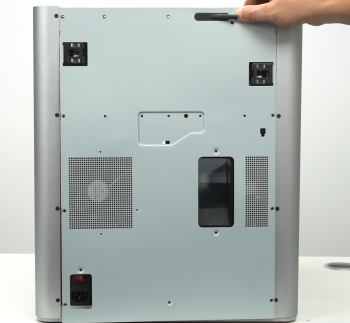
Remove the screws from the rear cover as pictured below (4 screws in the first picture, and 10 in the second). There are 2 types of screws, so keep them separate and remember which ones go where.
 |
 |
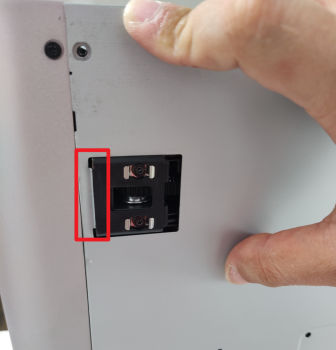
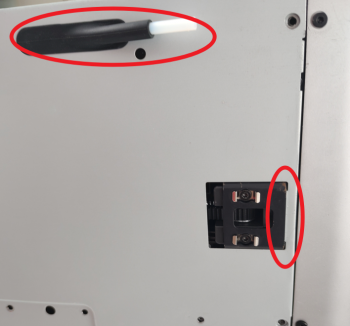
¶ Step 2 - Remove the rear cover
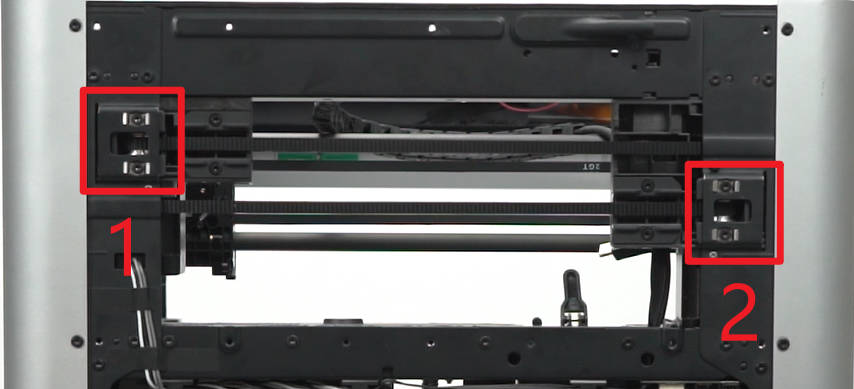
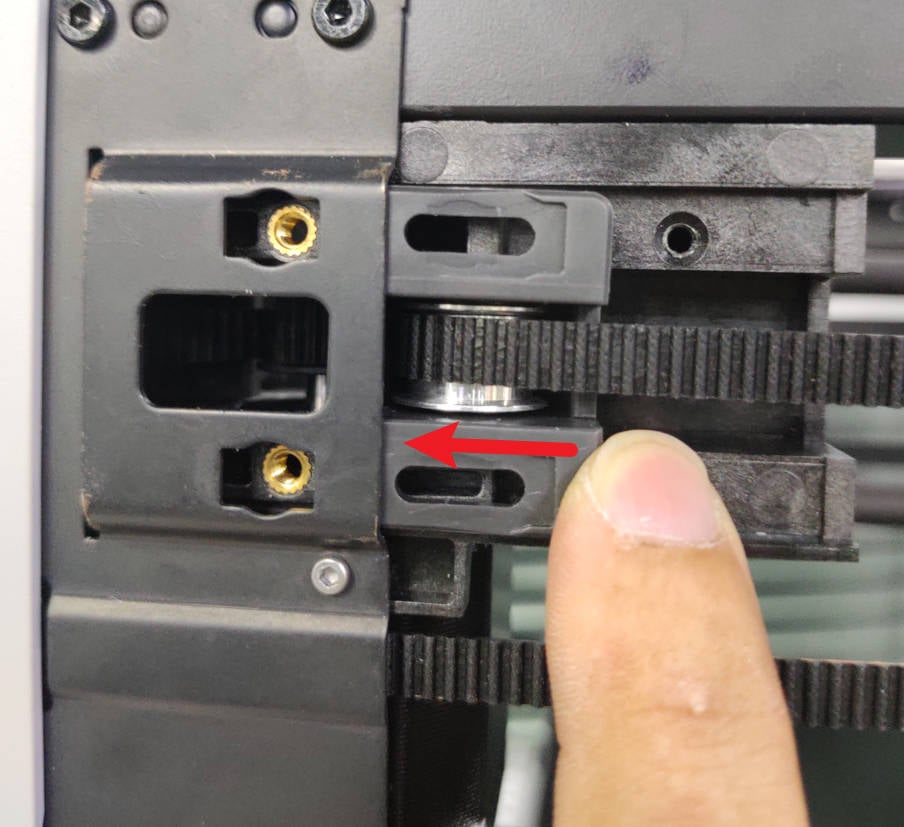
To prevent getting stuck, first unlock the left side belt tension port, followed by the right side one, before removing the rear cover.
 |
 |
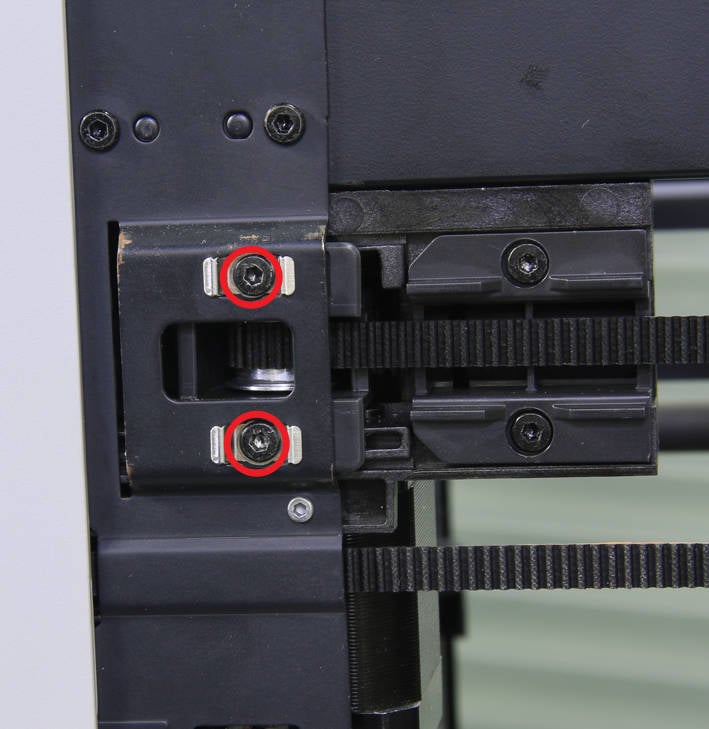
¶ Step 3 - Remove tensioner screws
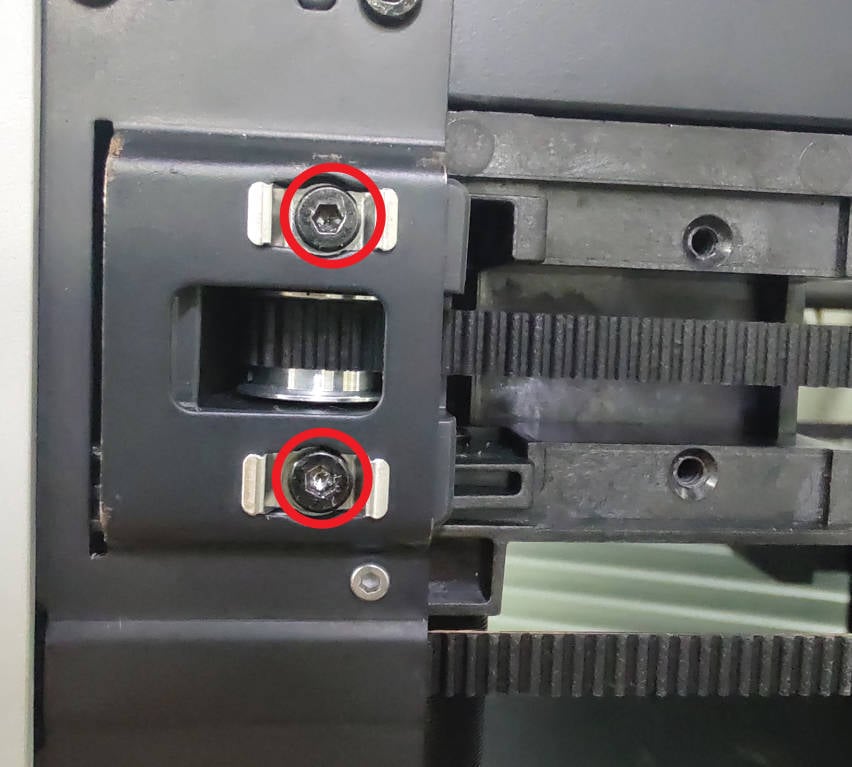
Unscrew the 2 screws that secure the tensioner and remove the two metal brackets as well.
 |
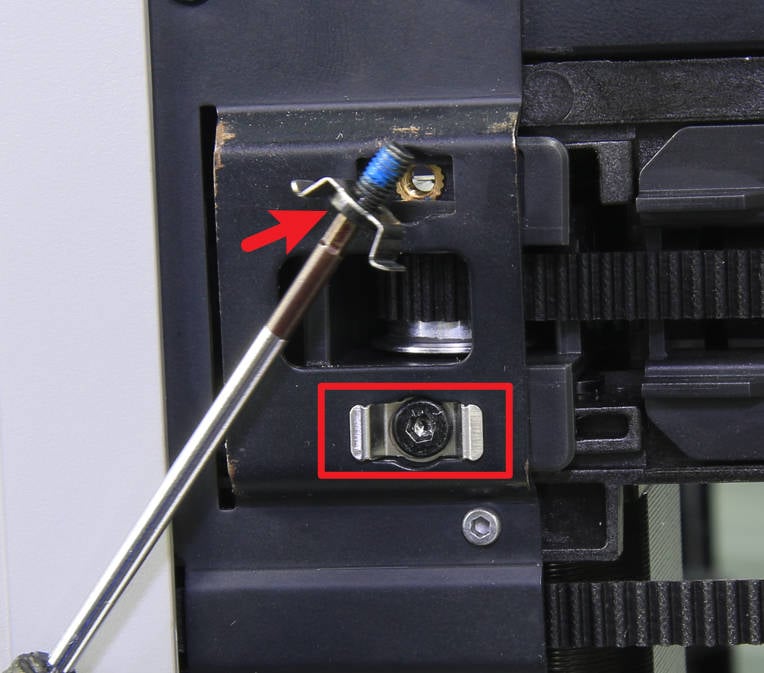 |
¶ Step 4 - Remove the tension spring and its holder
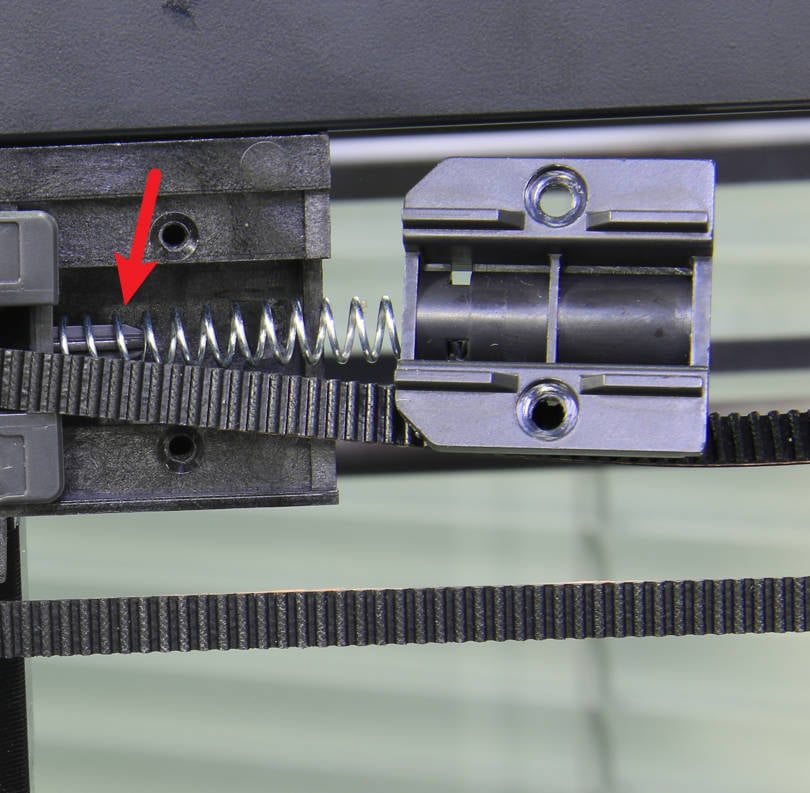
Unscrew the 2 screws, and remove the tension spring and its holder.
 |
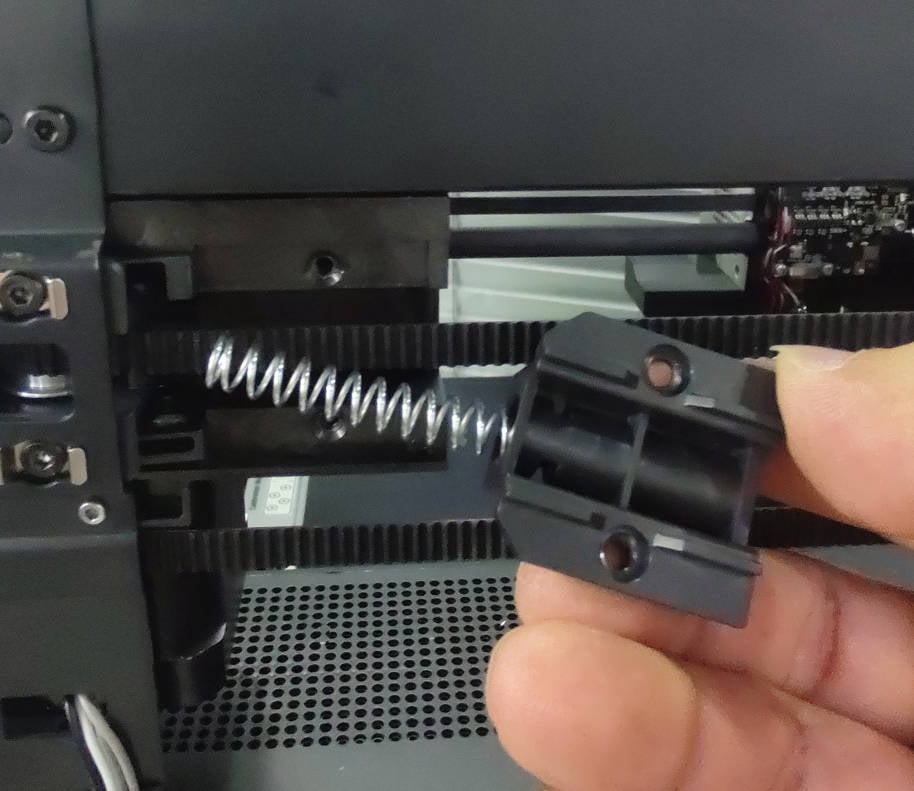 |
¶ Step 5 - Loosen the tensioner assembly
Use the hex key to push the tensioner out and loosen it.
 |
 |
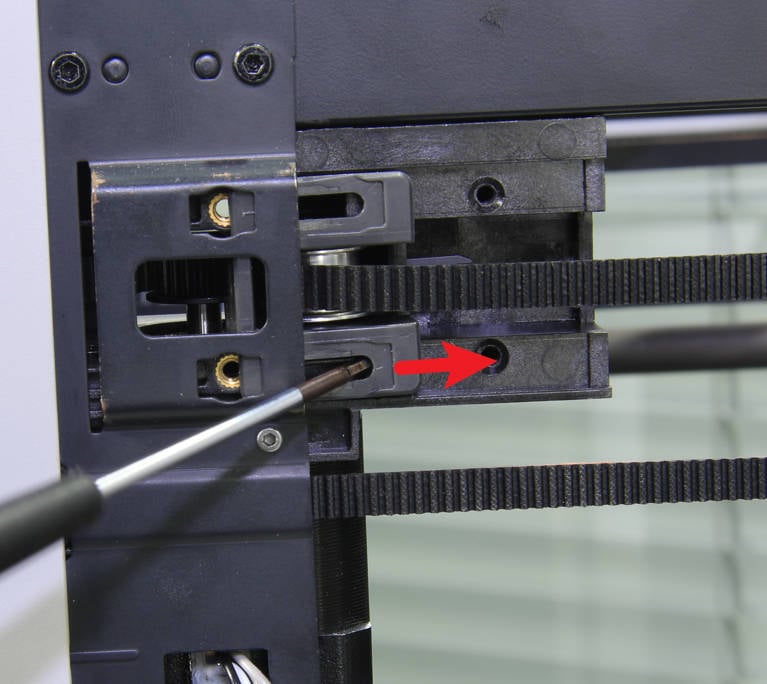
¶ Step 6 - Remove the idler pulley
Using the hex key, push the idler shaft from the bottom up, then remove the shaft and idler.
|
|
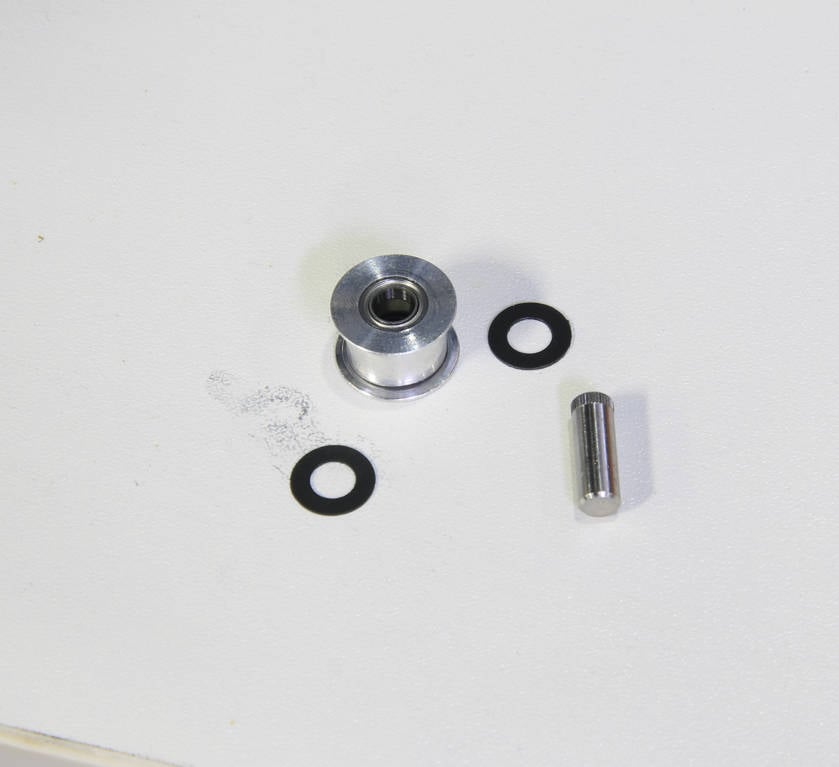 |
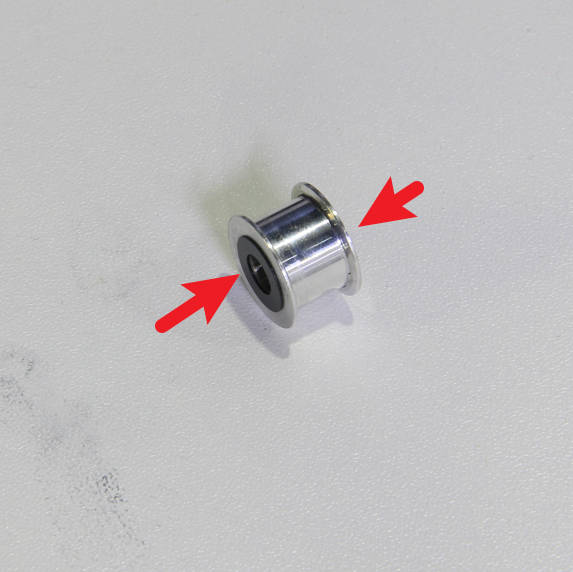
¶ Step 7 - Attach the washers
Prepare your new idler pulley and attach the two washers to both ends of the idler. You may need to use your hand to help secure it.
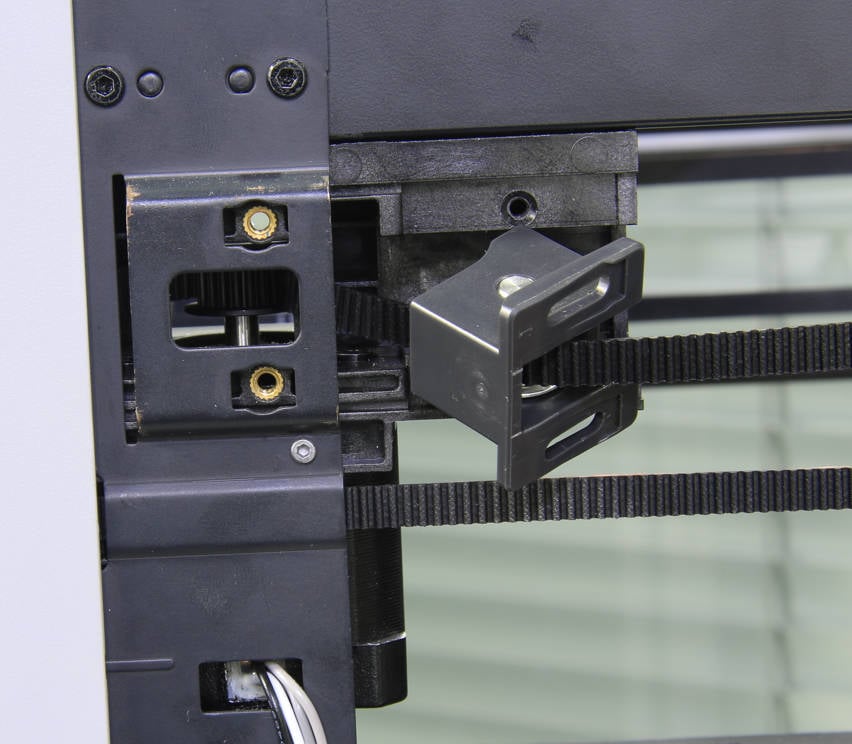
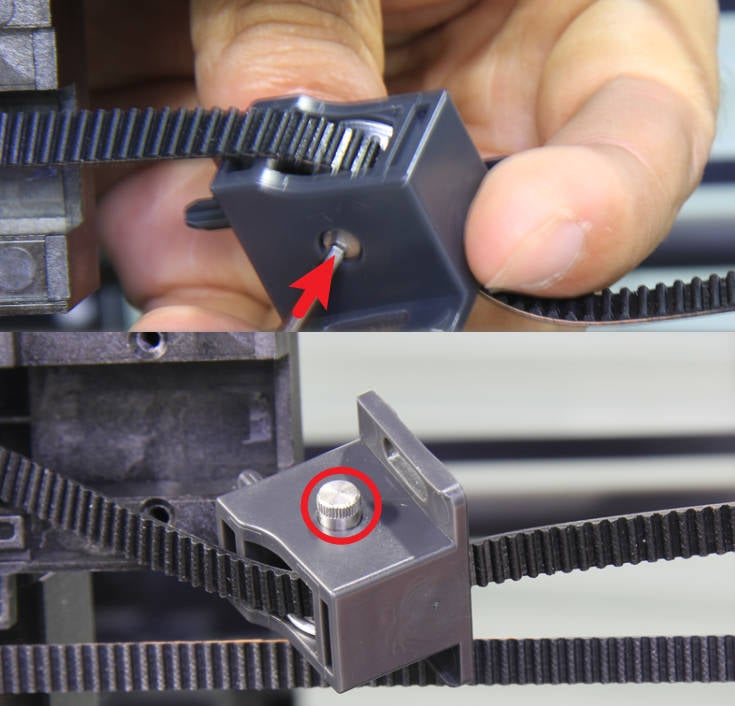
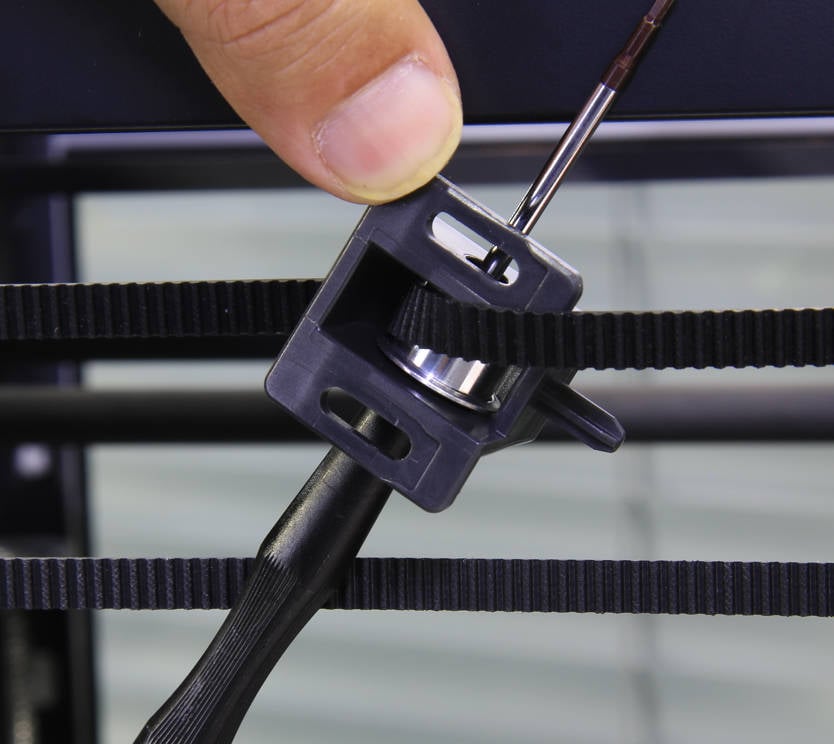
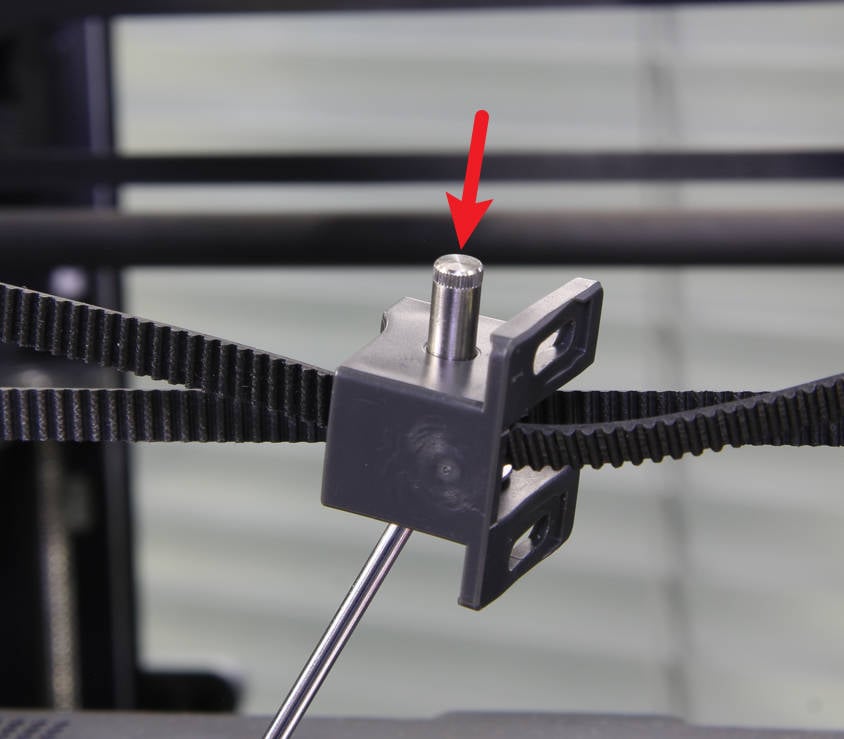
¶ Step 8 - Install the idler pulley
Install the idler pulley onto the idler bracket. Temporarily thread it with the hex key to ensure that the idler and the two washers are in place. Then, press the shaft from top to bottom and ensure it is fully pressed in.
 |
 |
¶ Step 9 - Install the tensioner
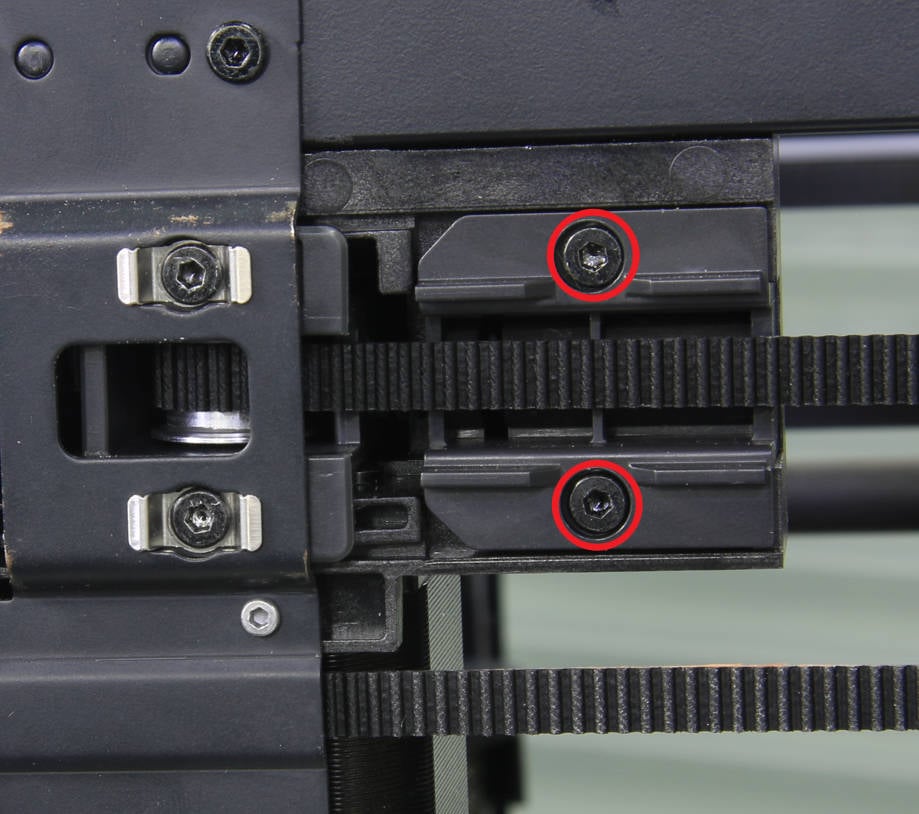
Slide the tensioner assembly into place and screw in the 2 screws (with brackets). Do not tighten the screws yet; leave them loose for now.
 |
 |
¶ Step 10 - Install the tension spring and its holder
Install the tension spring and its holder, and lock in 2 screws to fix it in place.
 |
 |
¶ Step 11 - Installing the rear cover of the printer
Pass through the tube bracket and the right side belt tension port first to install the rear cover.
|
|
 |
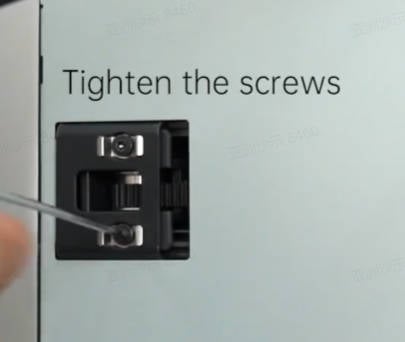
¶ Step 12 - Lock the screws
Screw the back panel back on. Taking note of the different types of screws used (10 and 4 as shown below).
|
|
|
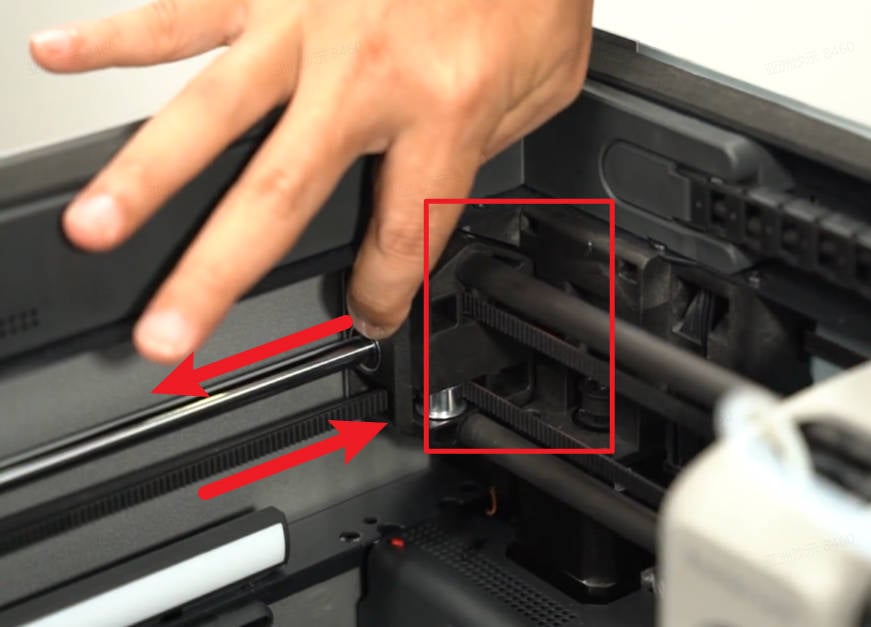
¶ Step 13 - Tension belt
Loosen the 2 screws of the other tensioner, move the toolhead back and forth several times, and bring both ends of it to the rear. Then, lock the screws on both tensioners. For more detailed instructions, please refer to our page on belt tensioning.
 |
 |
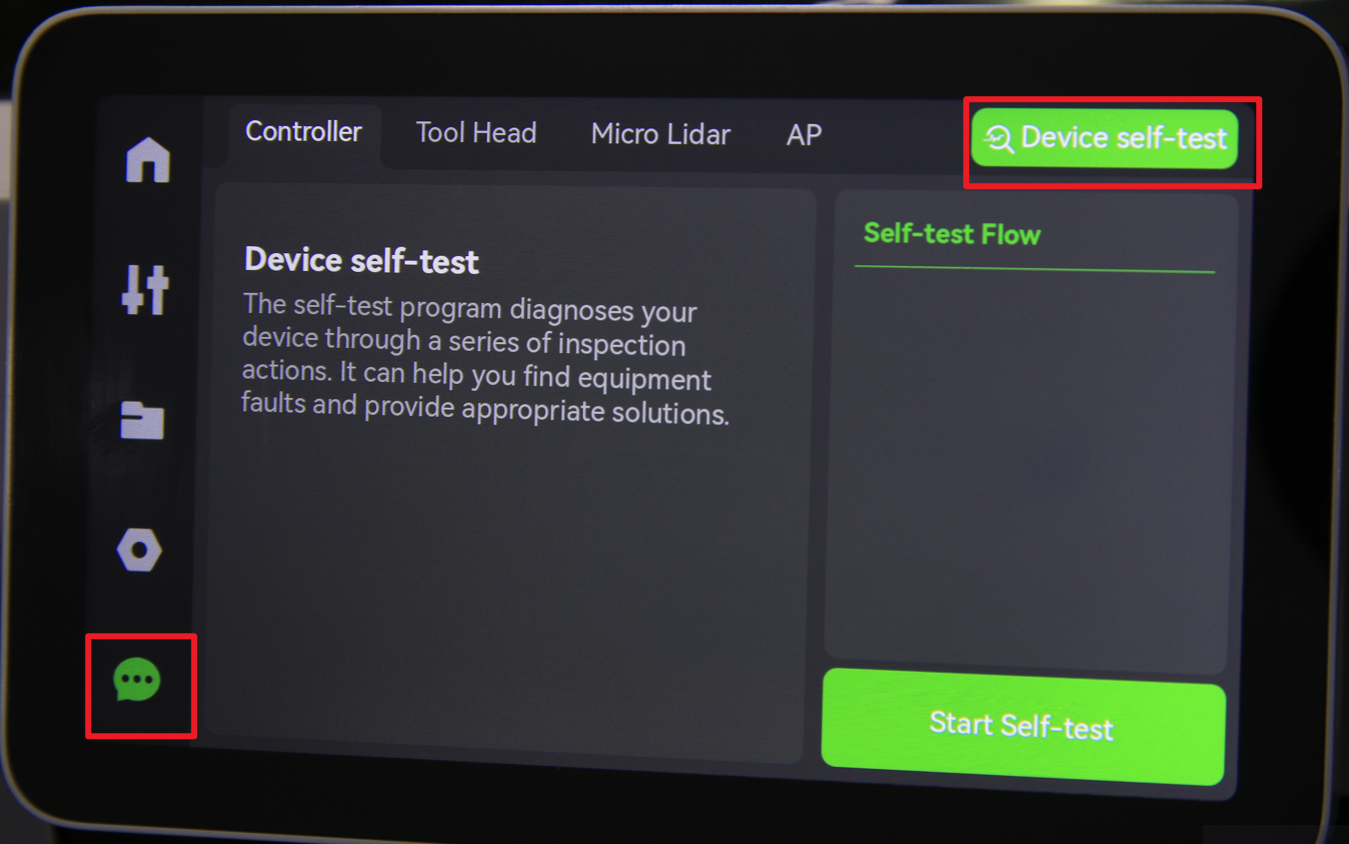
¶ How to verify completion/success
- Power ON the printer
- Run a Device self-test operation as shown below. If no errors occur during the test, the replacement was successful.
If you encounter any issues, first retrace your steps and retension the belt before trying again. If problems persist, please contact our customer support team for further assistance.
¶ End Notes
We hope the detailed guide provided has been helpful and informative.
To ensure a safe and effective execution, if you have any concerns or questions about the process described in this article, we recommend submitting a Technical ticket regarding your issue. Please include a picture or video illustrating the problem, as well as any additional information related to your inquiry.