Before you start, please refer to the AMS introduction to get familiar with the AMS. You also need to read Notes for AMS in advance to know some precautions
¶ How to connect the AMS to X1C
To connect the AMS system to the X1C, please follow the steps below:
An Assembly Video is also included to help you with the process.
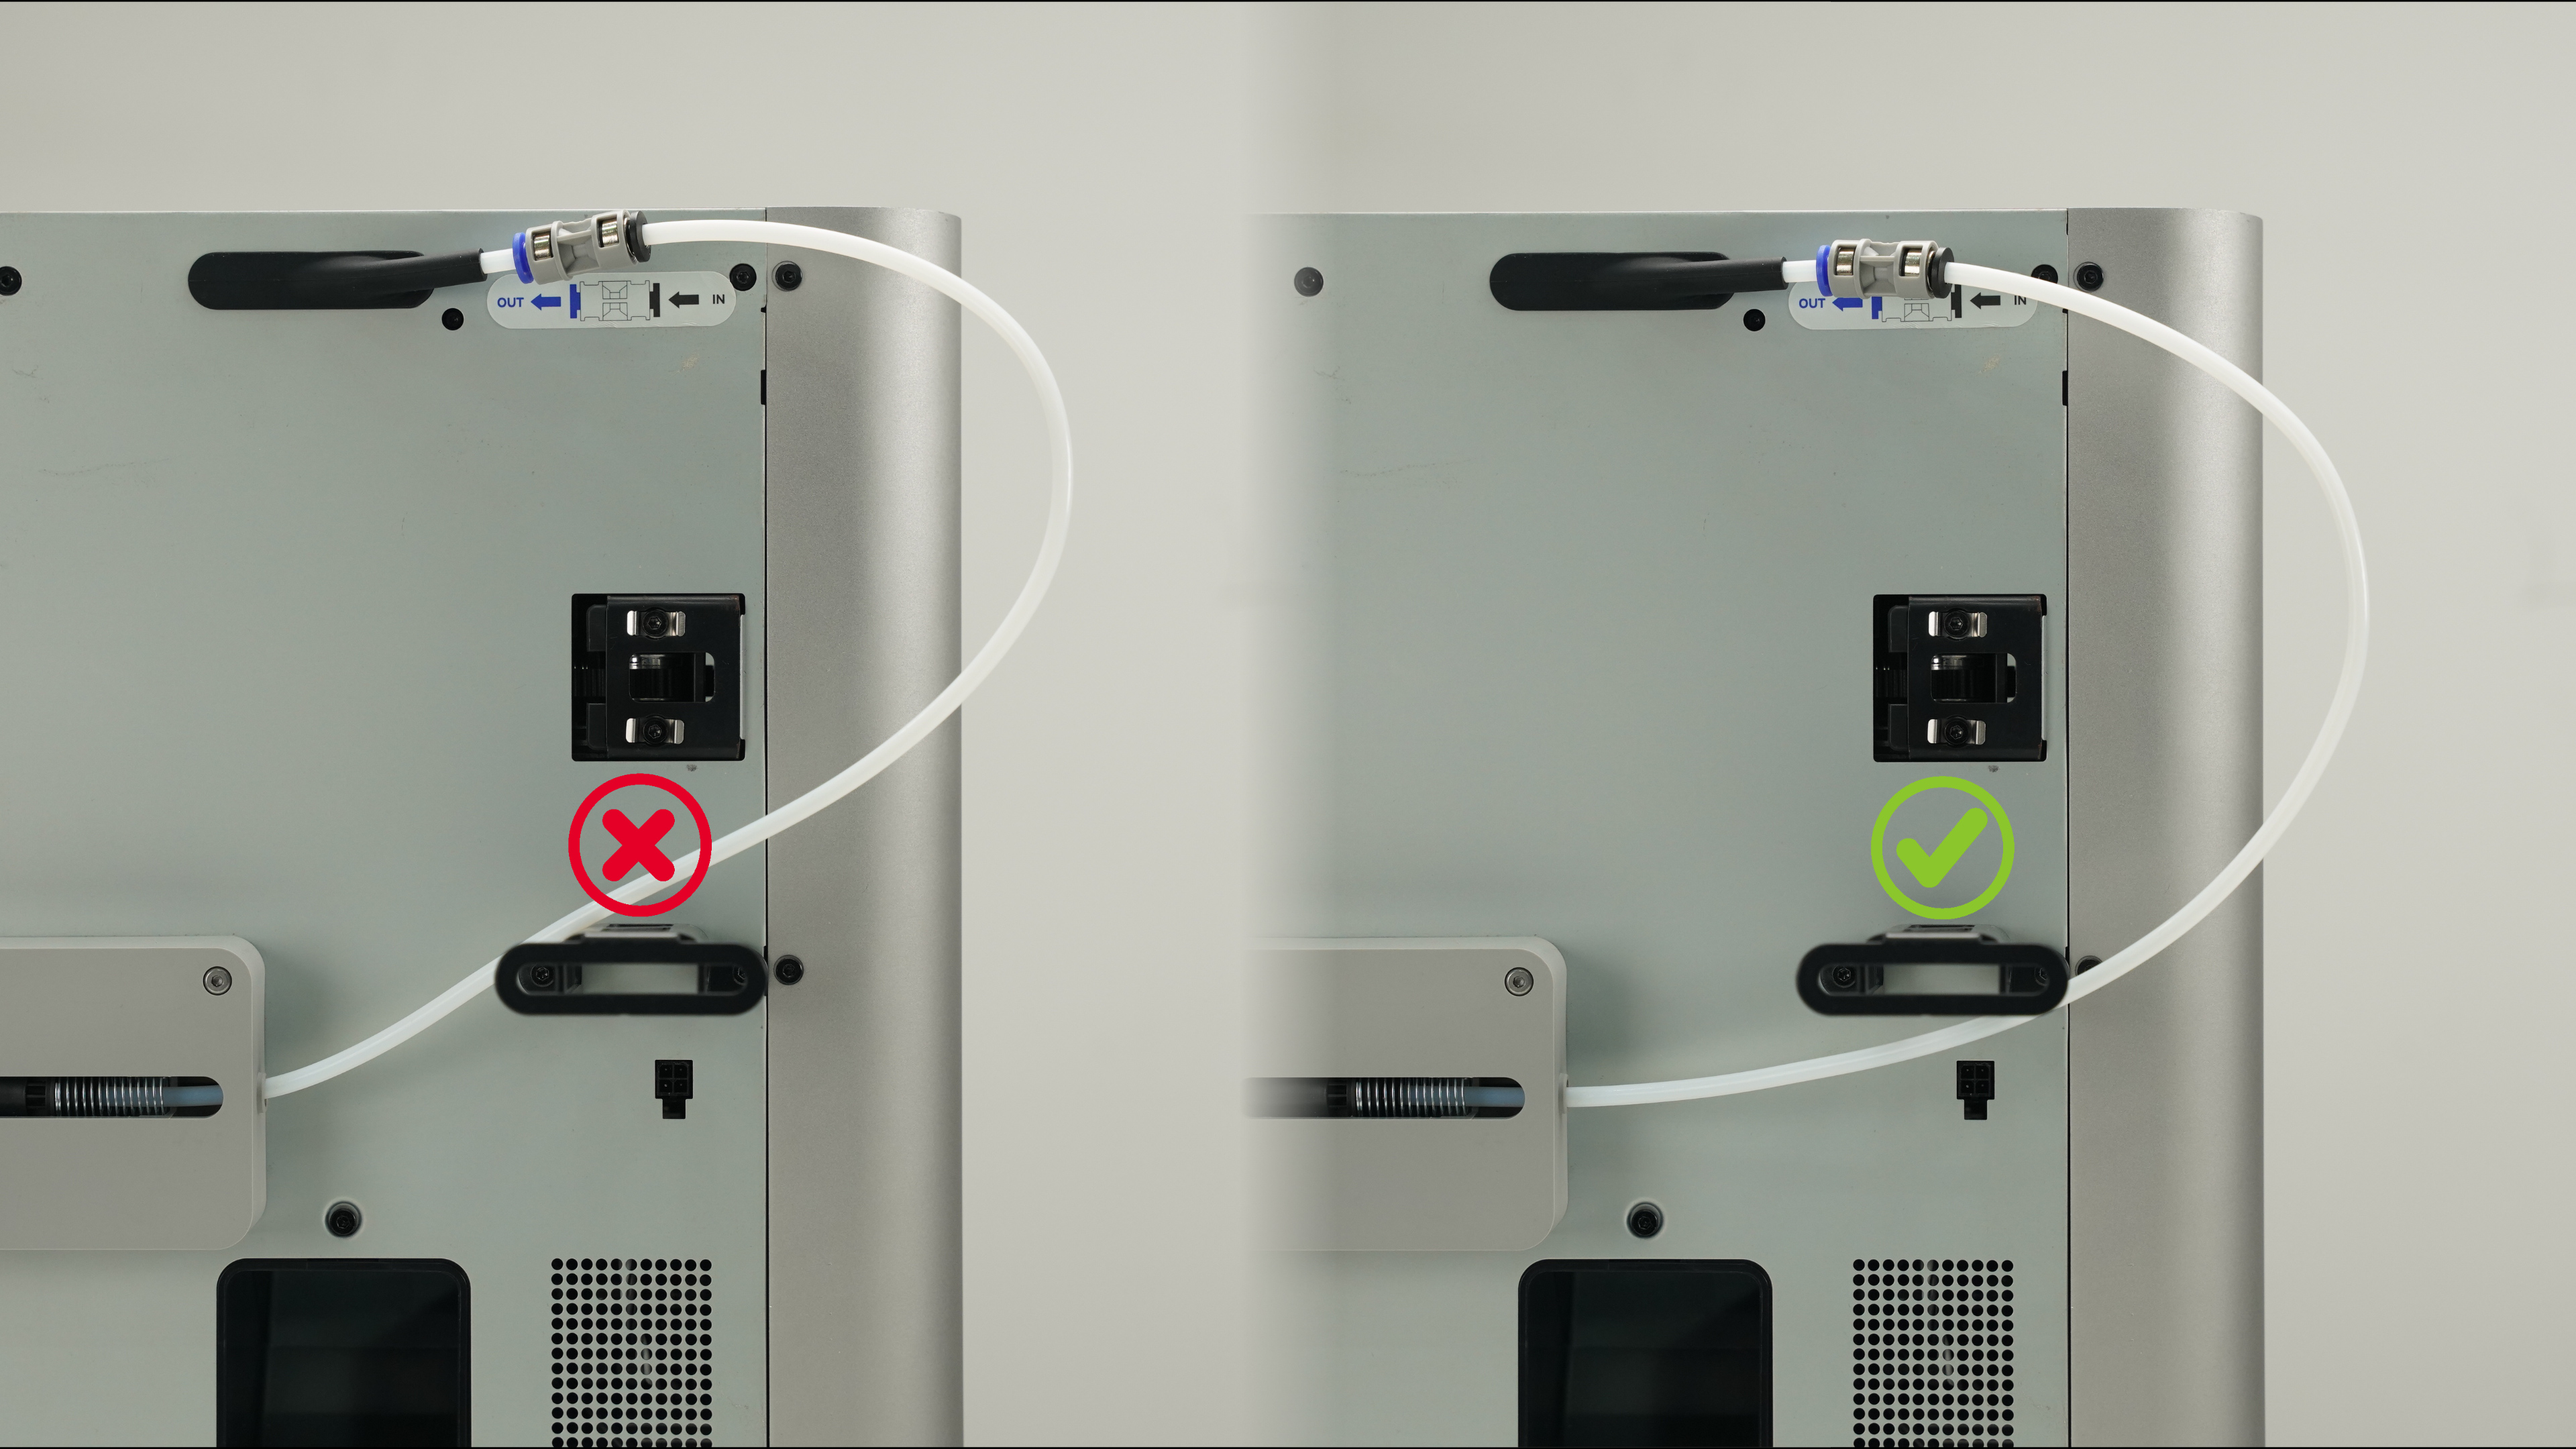
¶ Step 1 - Take the PTFE tube from inside the AMS unit, and connect it from the blue PTFE coupler on the machine to the filament buffer in the back.
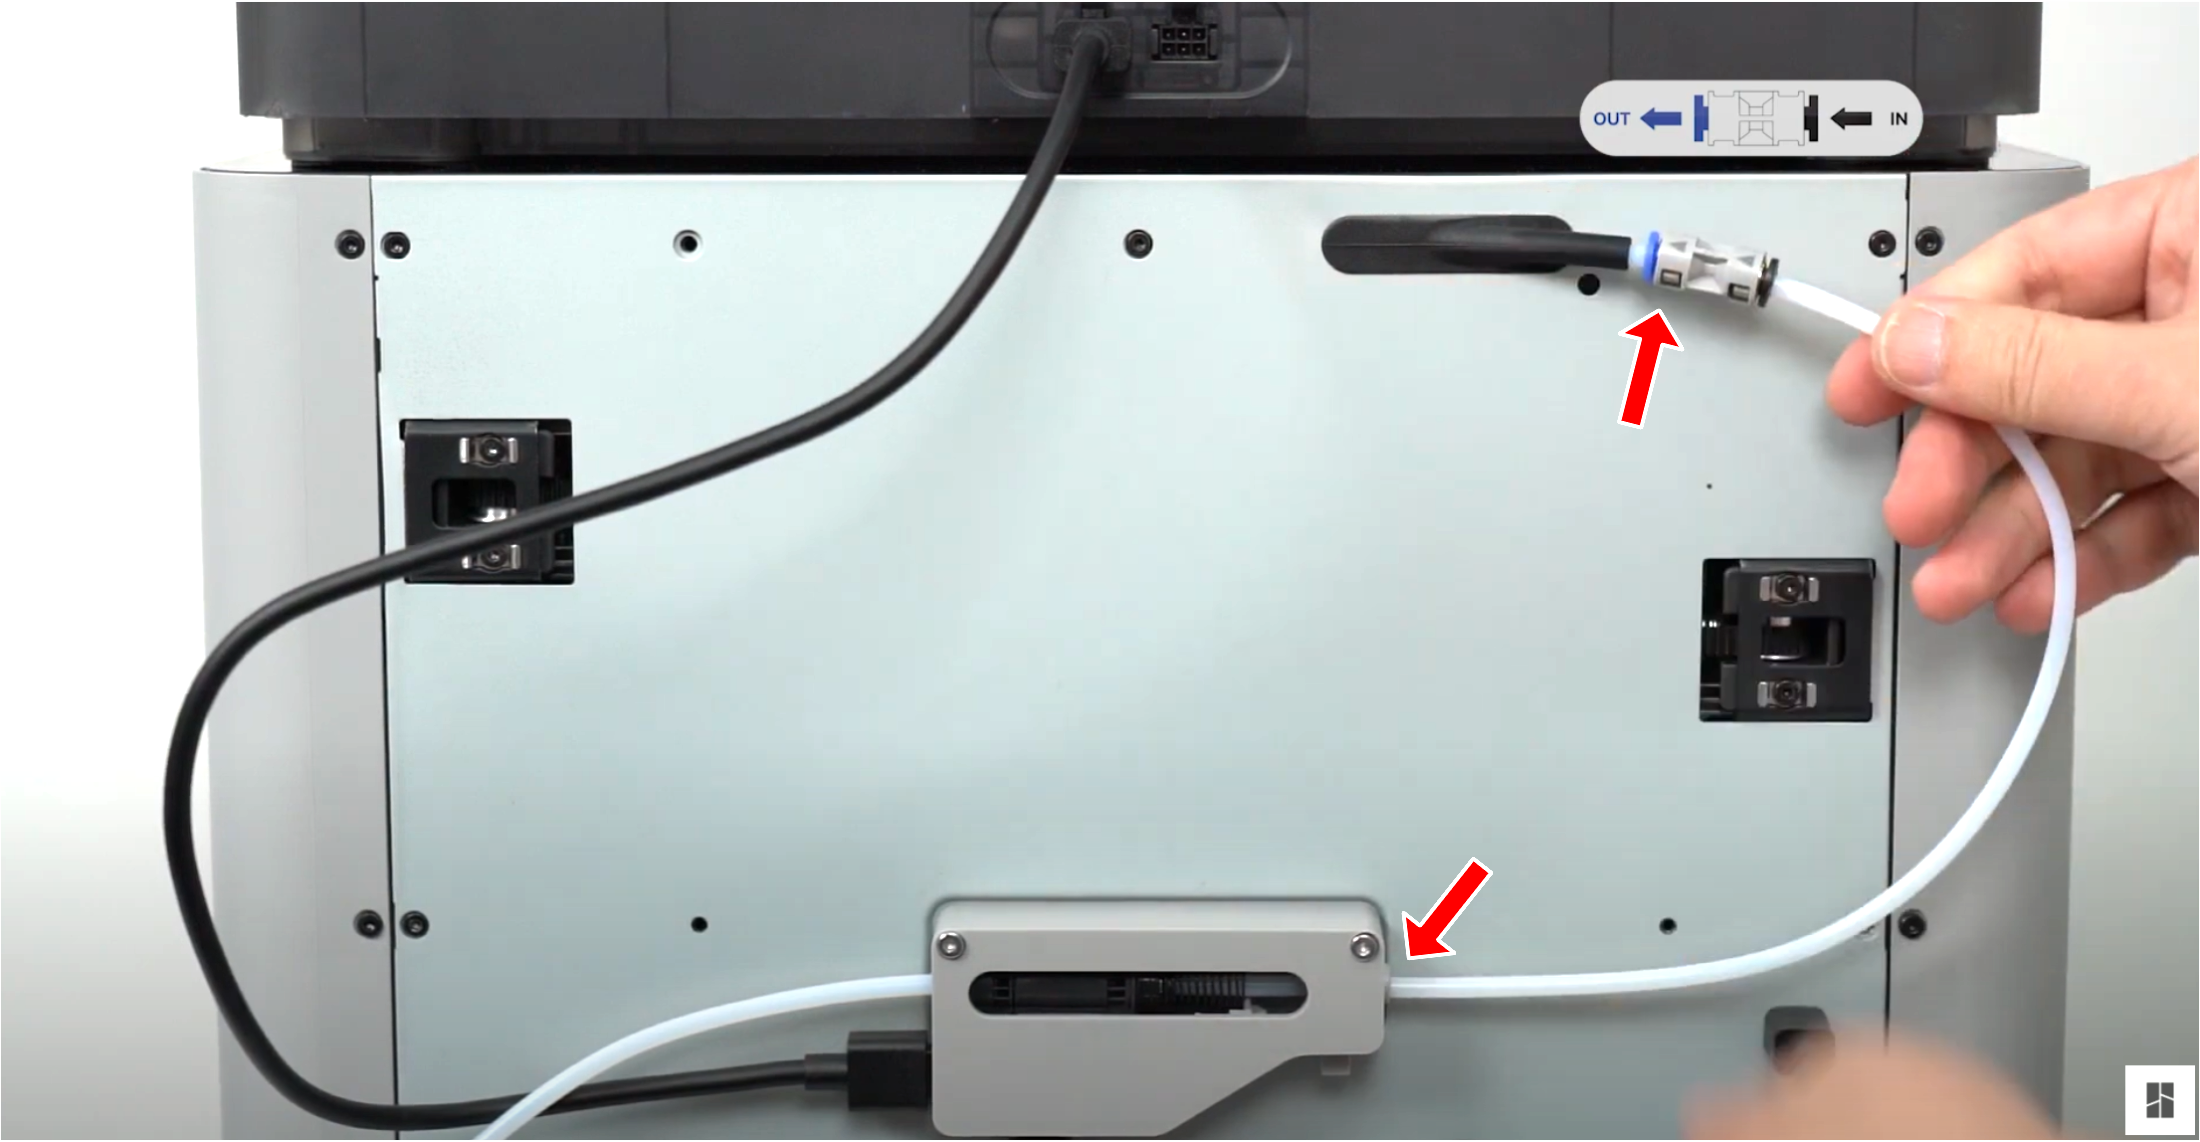
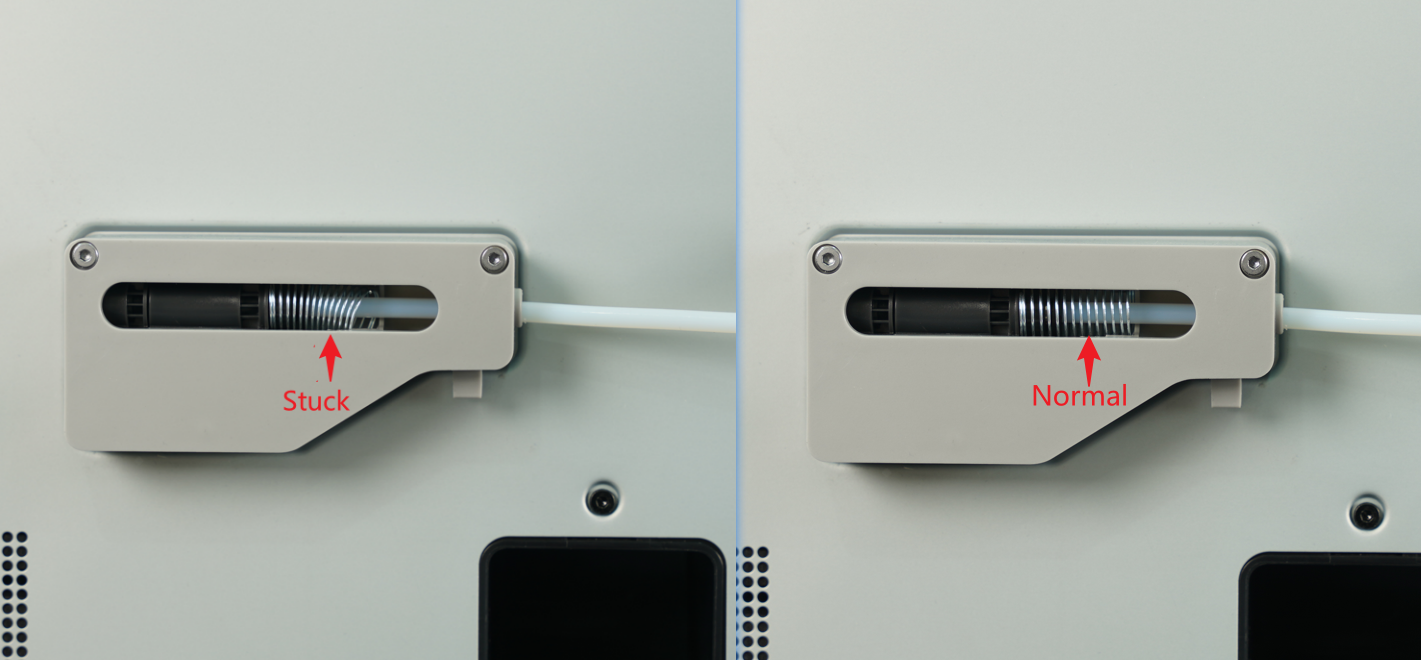
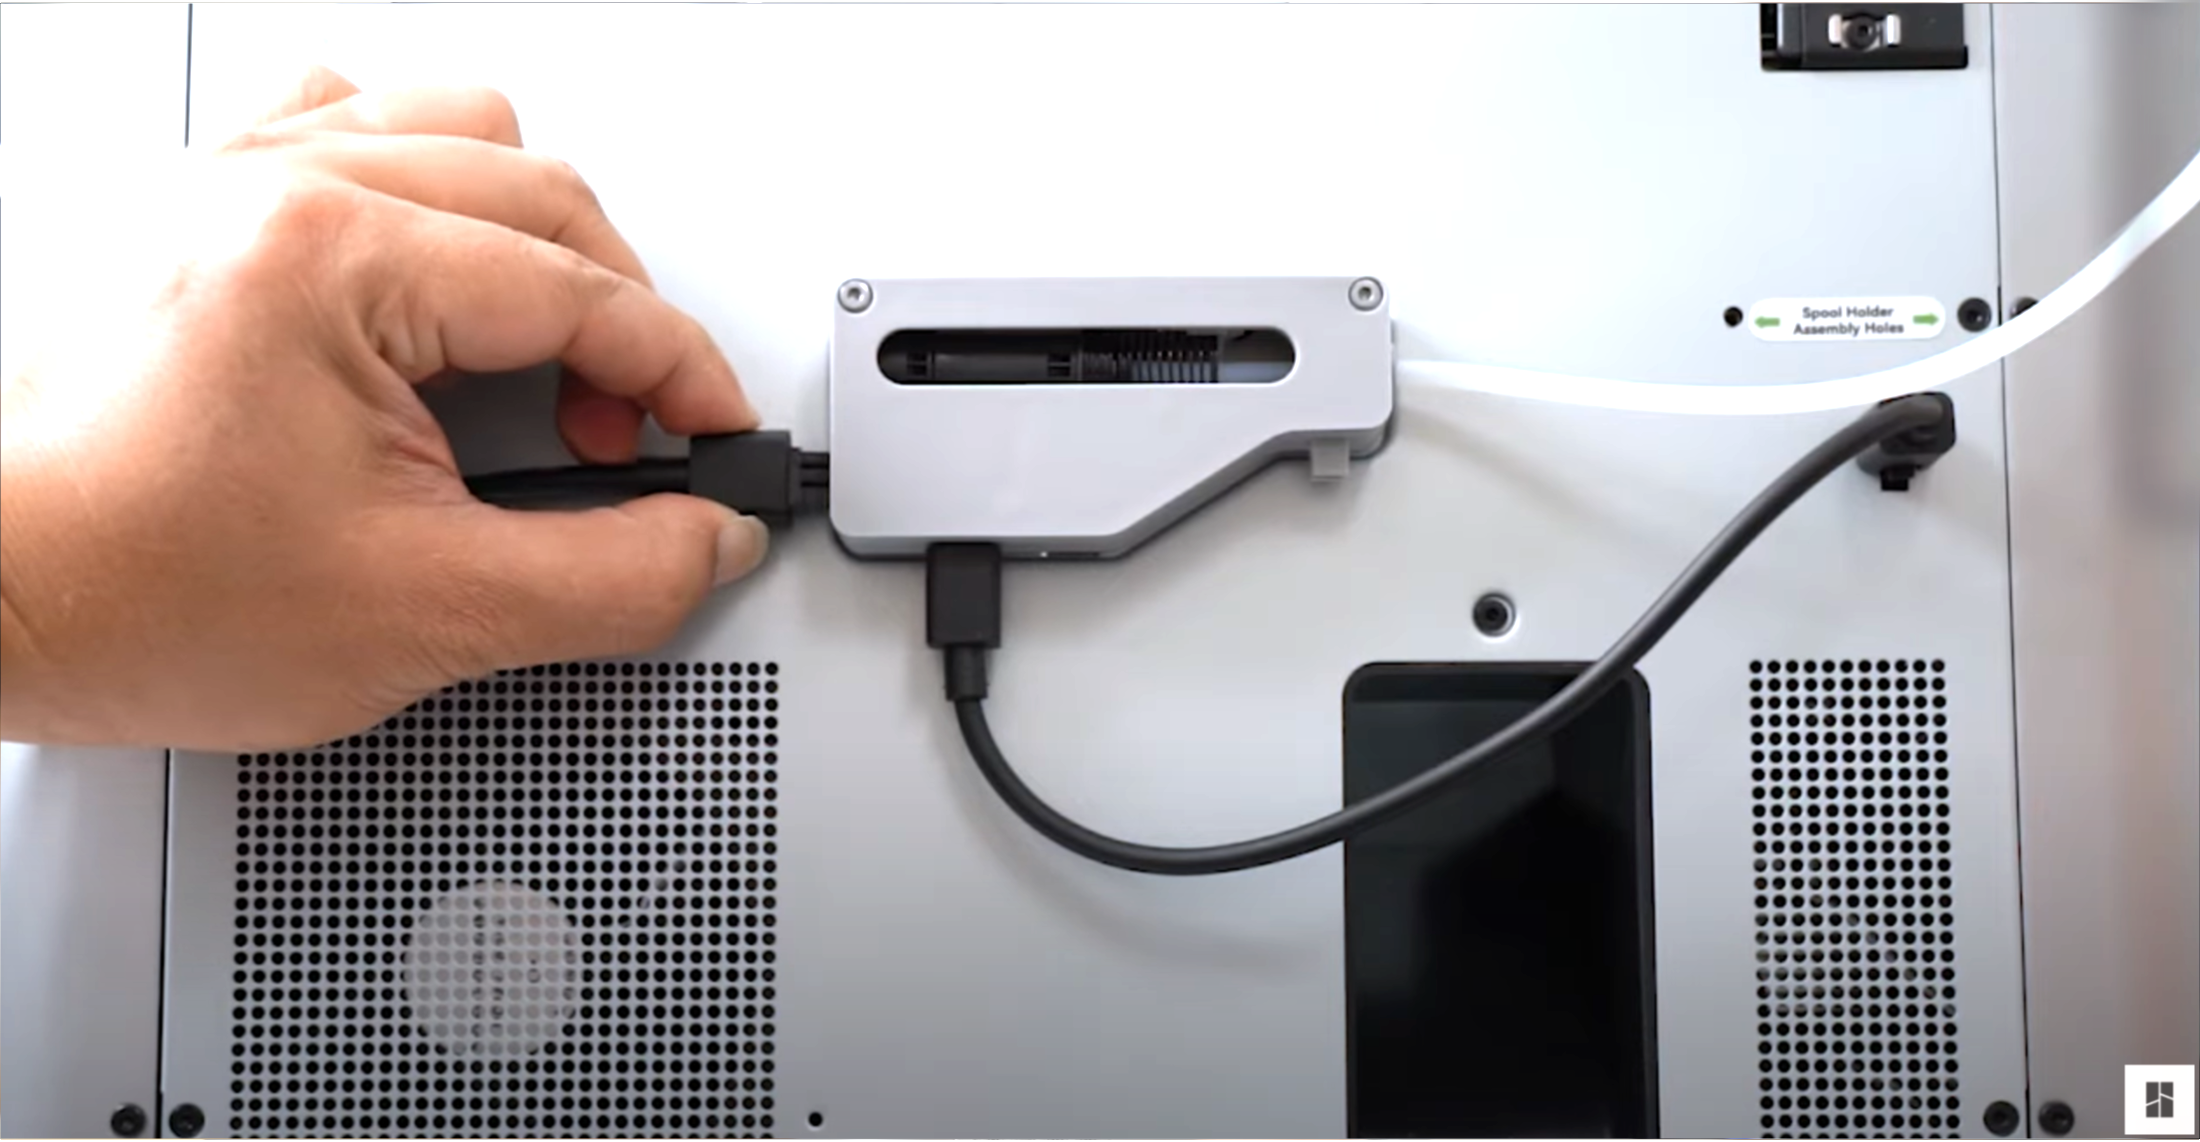
¶ Step 2 - Take the PTFE tube which is already connected to the AMS unit, and connect it to the left side of the filament buffer.
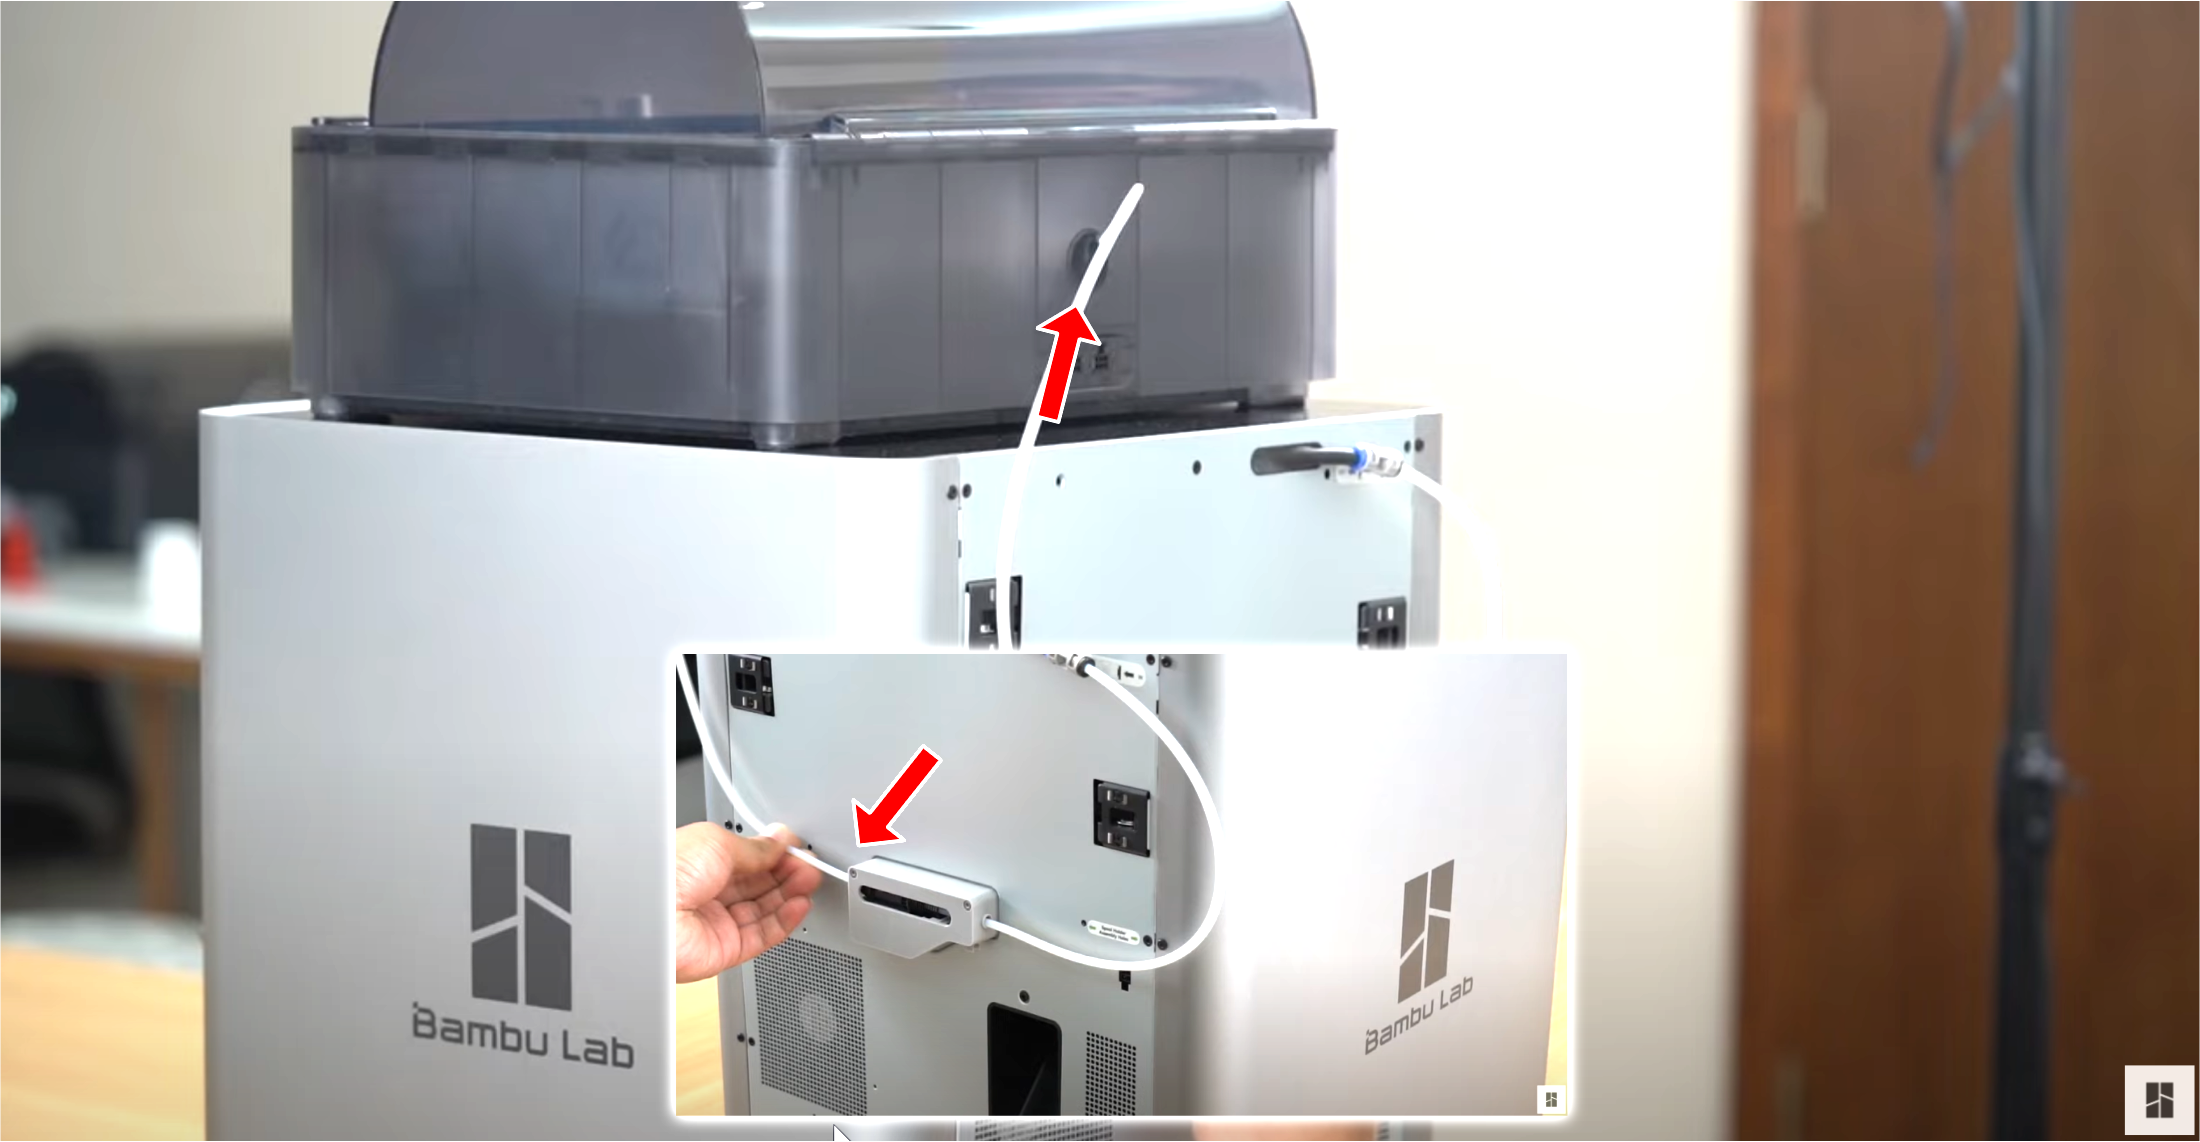
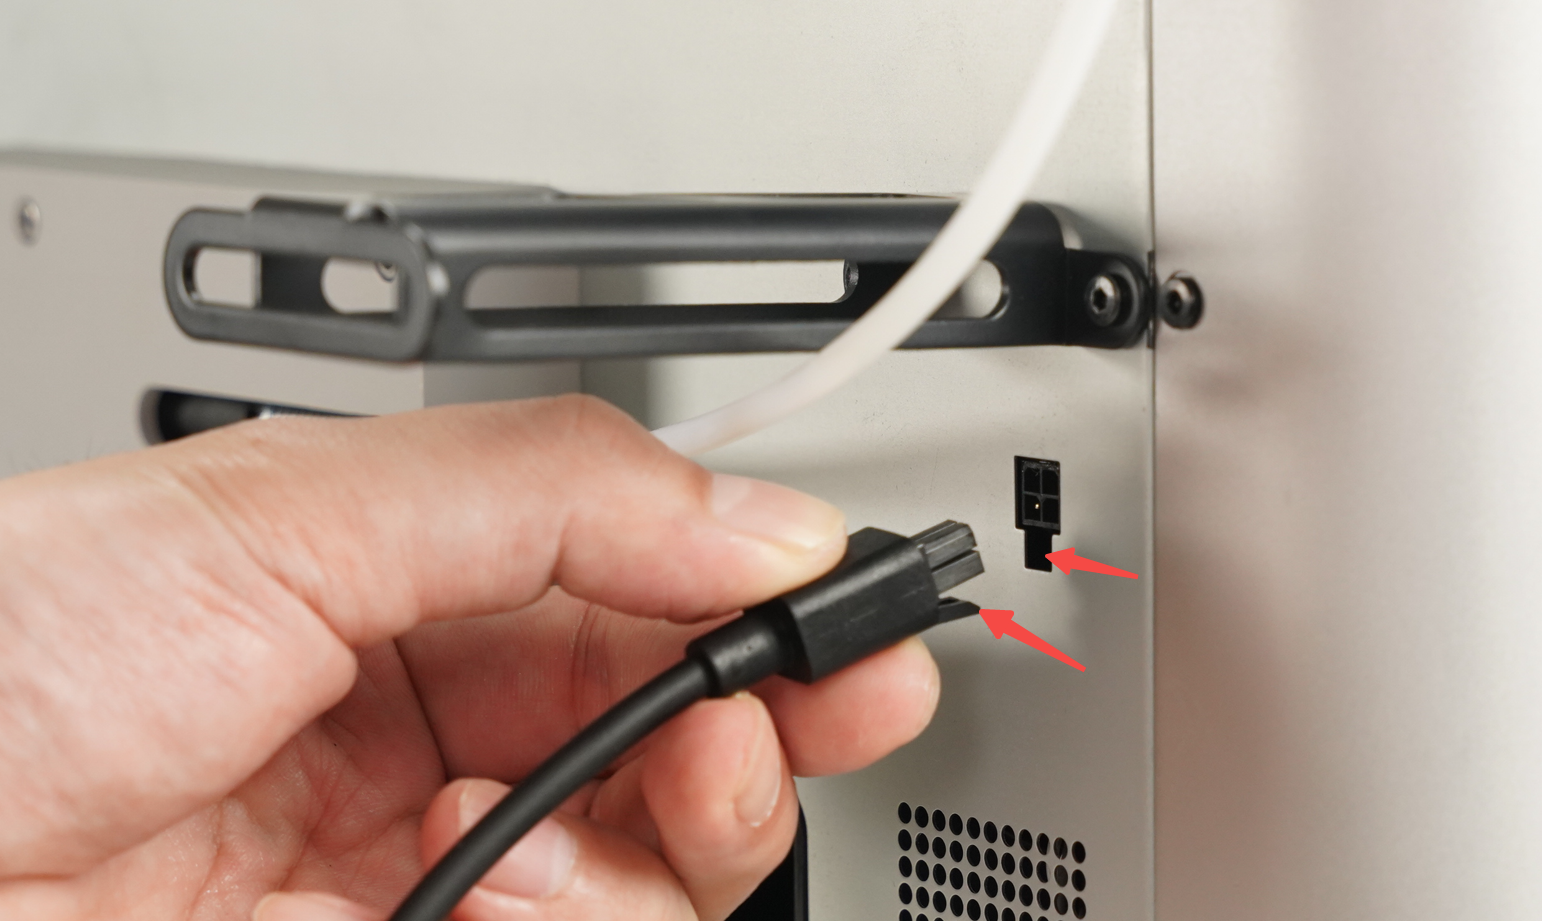
¶ Step 3 - Connect the four-pin cable to the connector located at the bottom of the filament buffer, then proceed to connect it to the printer as shown below.
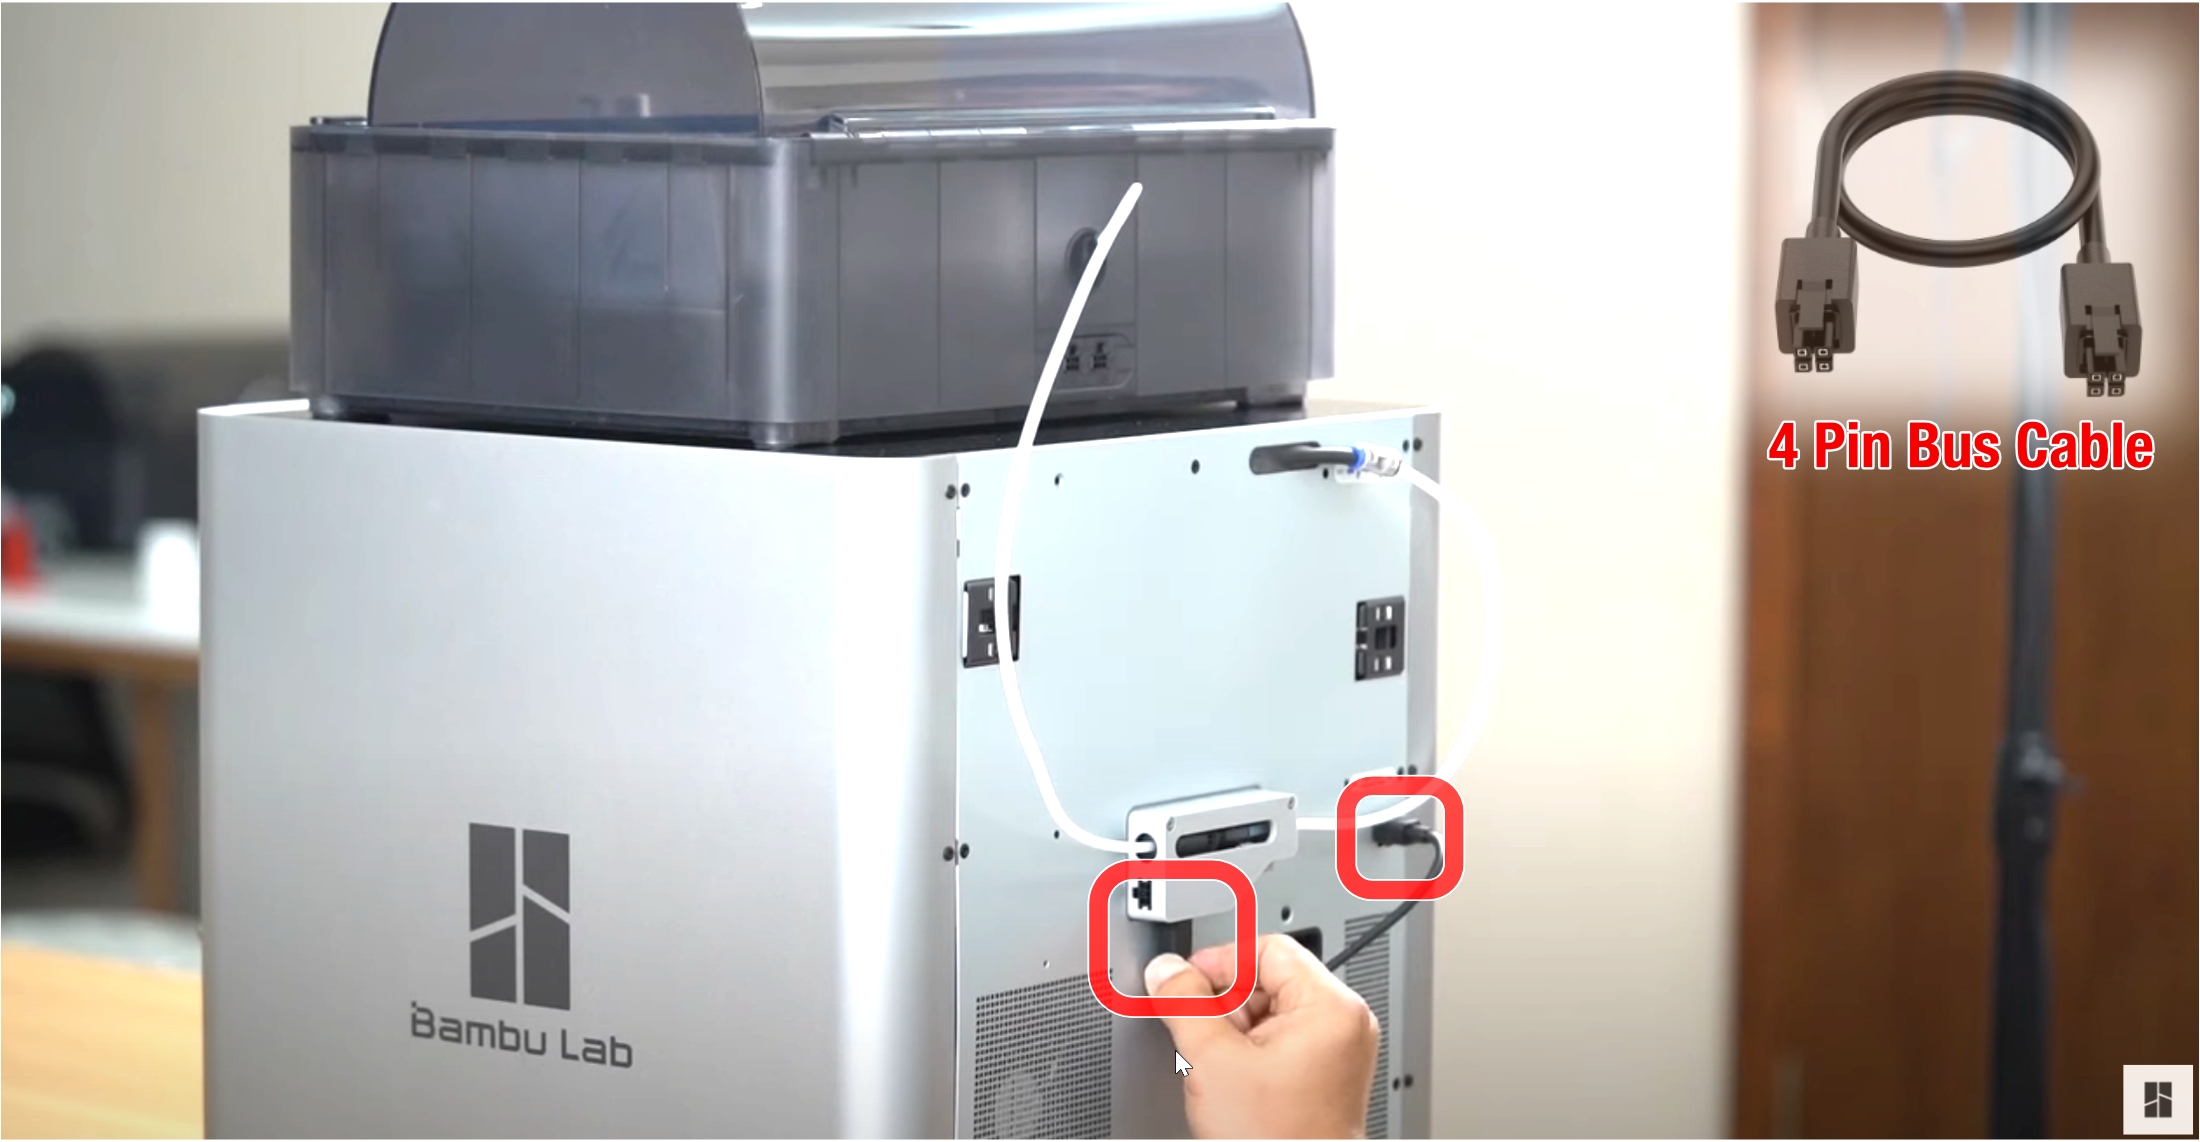
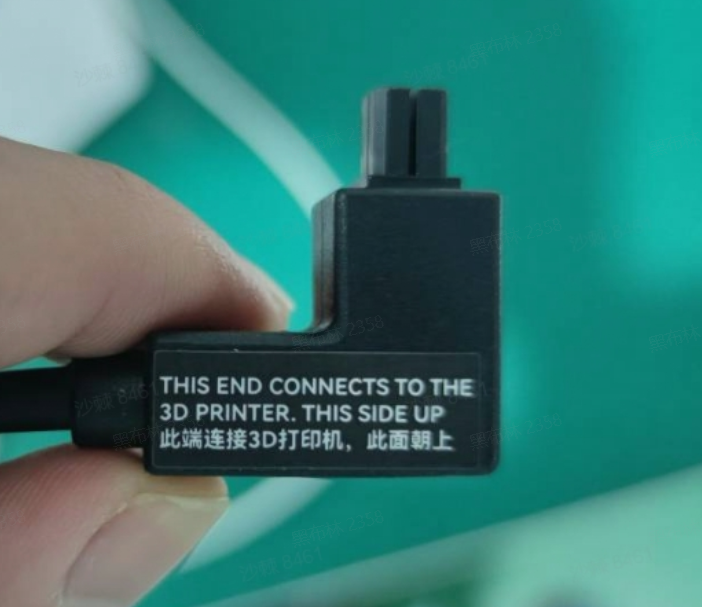
Note: Do not insert the 4-pin cable in the wrong direction. If you are using an L-shaped plug cable, pay attention to the text prompts on it. If you insert the 4-pin cable in the wrong direction, it may cause the printer and AMS mainboard to burn down.
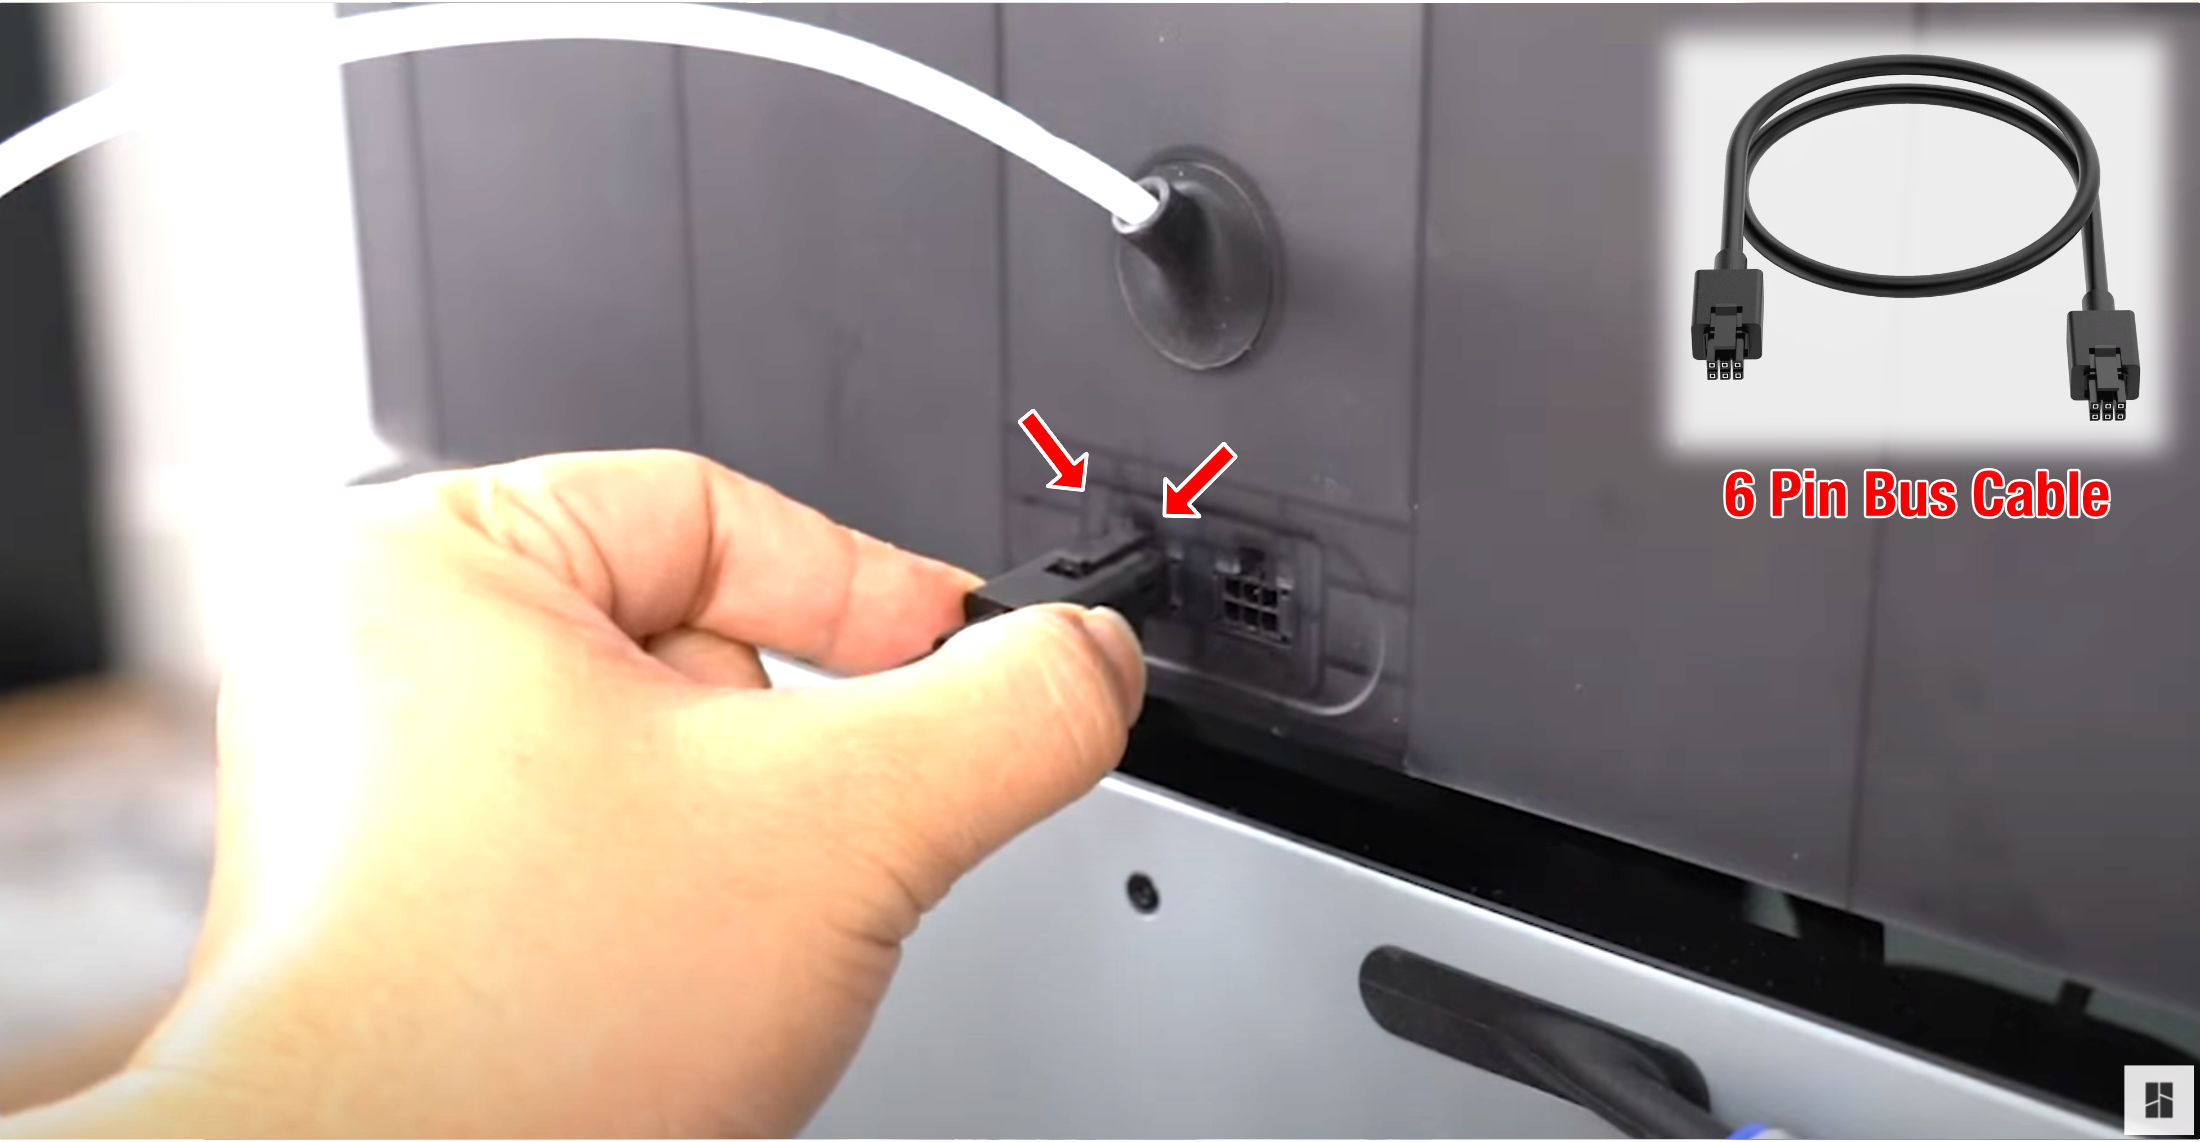
¶ Step 4 - Connect the six-pin cable to the first connector on the AMS, and the other side needs to be connected to the connector located on the left side of the filament buffer.
¶ That's it! Now you can go to the printer's menu, and start loading up some filament.
¶ End Notes
We hope the detailed guide provided has been helpful and informative.
To ensure a safe and effective execution, if you have any concerns or questions about the process described in this article, we recommend submitting a Technical ticket regarding your issue. Please include a picture or video illustrating the problem, as well as any additional information related to your inquiry.