This introduction outlines the main components of the X1 series printer, providing a general overview of the printer.
¶ How does X1 work?
The X1 3D printer is a machine that uses plastic filament as the material for creating 3D objects.
Most of the time, printable objects are files with the .stl extension that contain the 3D model, which needs to be processed by a 3D slicer. The slicer, in our case, is the Bambu Lab Studio, which takes that .stl file and slices it into layers, which are then printed by the X1. All these slices are then converted into code, a type of language that tells the machine how to move its axes to print the model.
Besides the movement, the slicer is also able to integrate various other settings inside the generated file, such as the temperatures of the filament, printing speeds, and generate supports for specific sections of the print.
¶ CoreXY motion system
The Bambu Lab X1 uses a CoreXY motion system controlled by two stepper motors. The X and Y stepper motors work together to move the printhead.
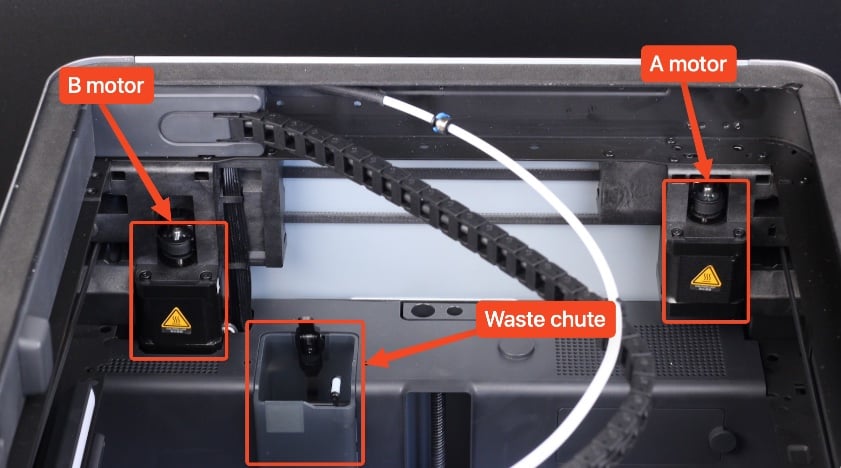
Every stepper motor has an independent belt that is connected to the print head, so a pair of belts is used to control its position. Having a CoreXY motion system allows the X1 to print much faster compared to a traditional cartesian printer because the weight is lower, which is important when it comes to printing fast.
More information about the CoreXY motion system is available in this link.
¶ Z axis
The Z-axis is comprised of three lead screws that are connected to a single stepper motor using a belt. Other 3D printers use three lead screws with a fixed bed to perform automated bed tramming but this is not the case on the X1. This type of leveling system is not necessary, as the X1 heatbed can be adjusted using the three leveling knobs located underneath the bed if needed.
The X1 comes pre-leveled from the factory and it also has two other types of leveling systems to ensure the print is successful every time.
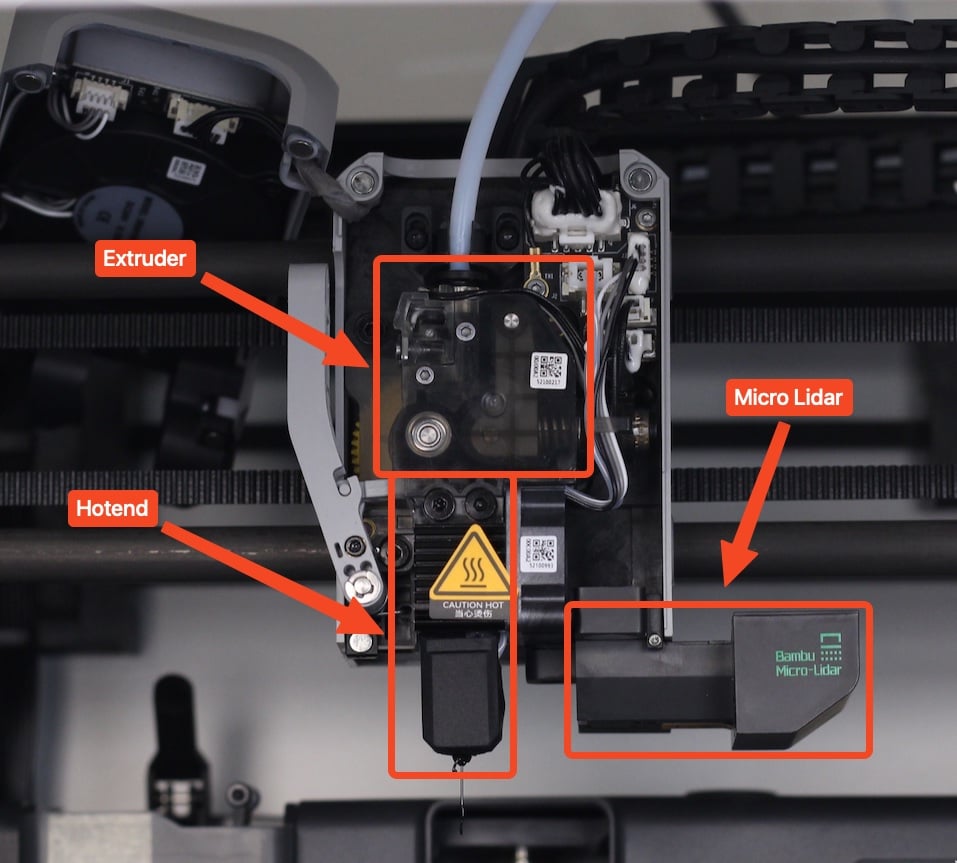
¶ Extruder
The extruder is responsible for pulling the filament from the spool and feeding it to the hotend, where it is melted and pushed through a small nozzle to generate the printed model. It’s also one of the most important components of a 3D printer, as it needs to accurately control the amount of filament pushed through the hotend.
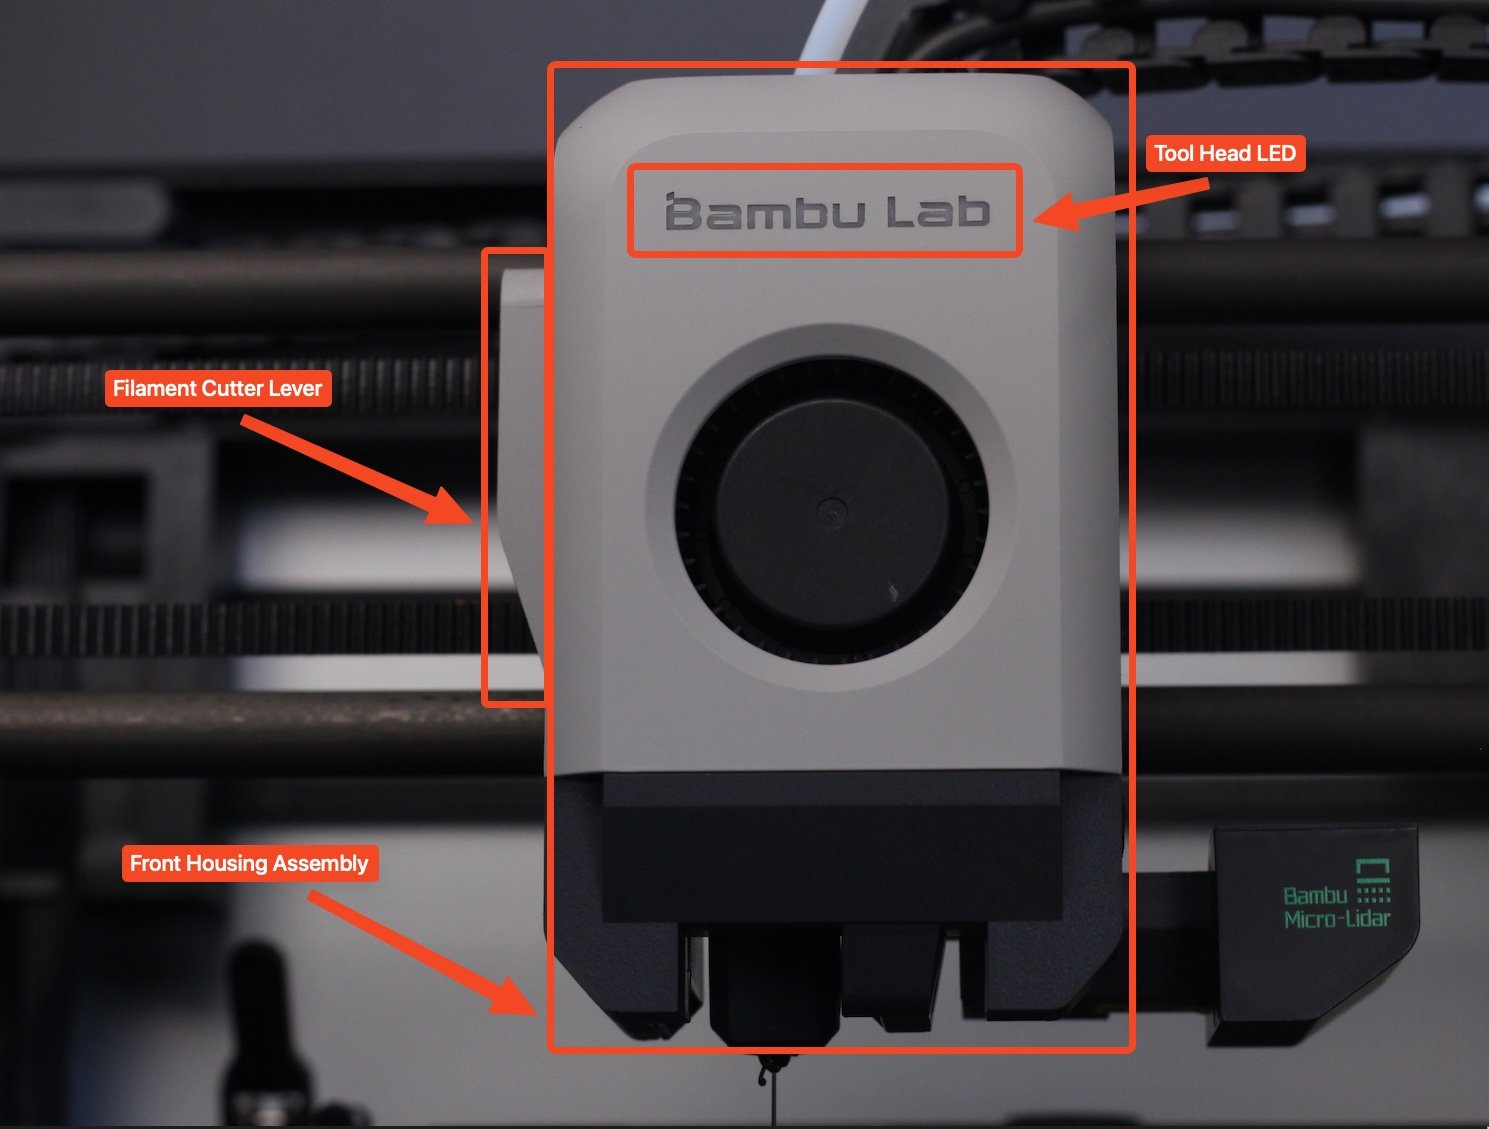
¶ Print head
The hotend is a component of the printer, responsible for melting the filament that is deposited in thin layers to create the model. Different temperatures are used for various types of filament materials. For example, PLA filament can be printed at lower temperatures, around 210-220 °C, while other filaments, such as PETG and ABS, require higher temperatures, around 250-260 °C.
The Bambu Lab X1 features an all-in-one design for the hotend. This means that the nozzle is integrated into the heatblock and connected to the heatsink via a thin metal tube for best performance.
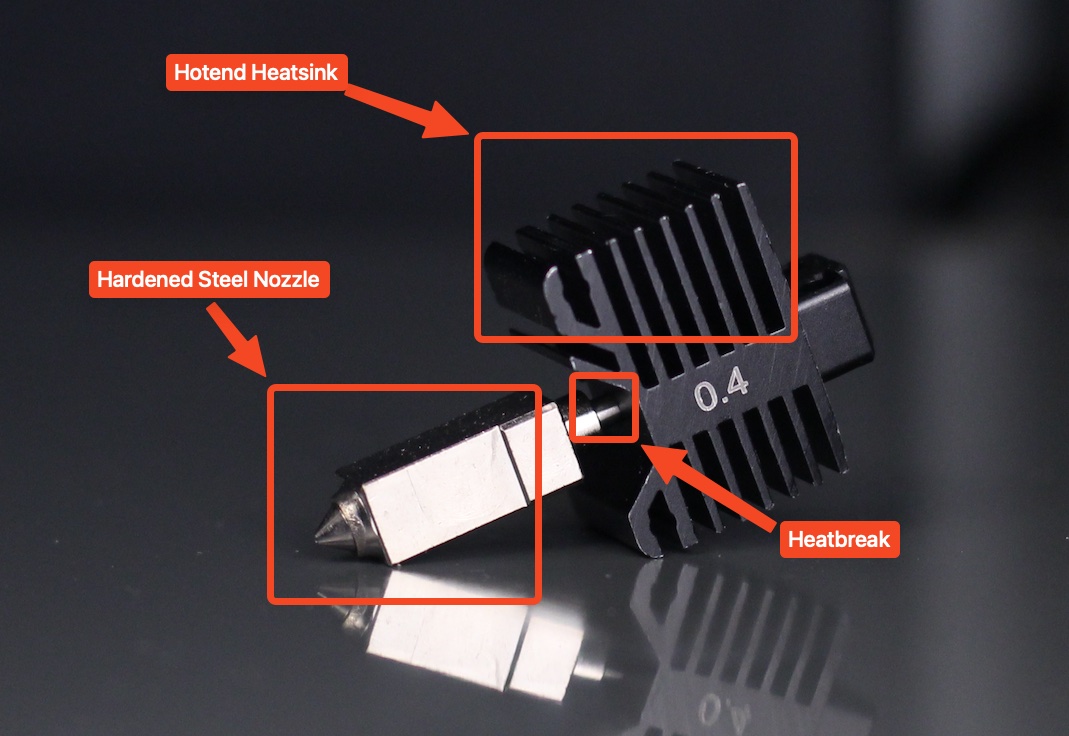
Having this design allows the hotend to heat up much faster than a regular hotend, and the all-in-one design minimizes issues that might come up when swapping nozzles.
¶ Hotbed
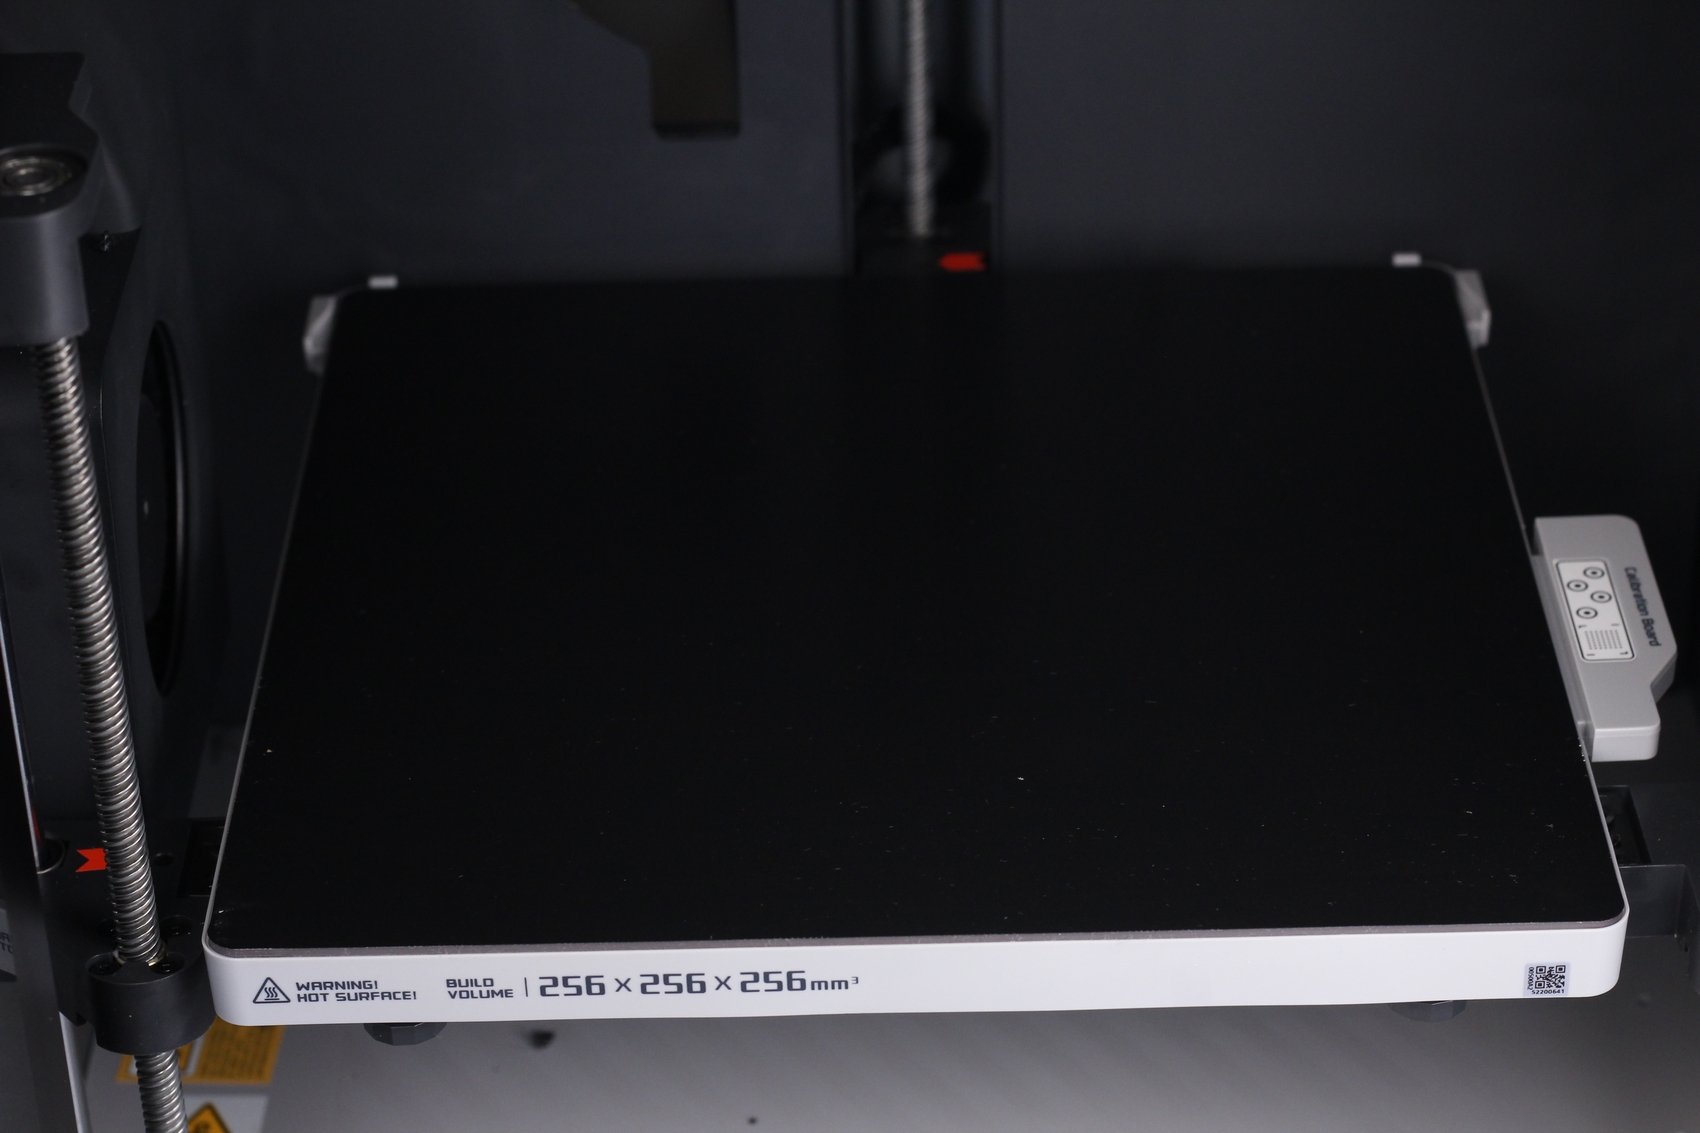
Usually, the printing surface needs to be hot to help the printed layers adhere so a heatbed is used. With the X1 3D printer, the heatbed can reach up to 110C but that can be controlled according to the filament used. For example, PLA can be printed on the Cool Plate at a temperature of around 35- 45 °C as PLA doesn’t have warping effects like other filaments like ABS or PC that require a much higher temperature at around 100- 110 °C.
If no heat is used for the printing surface, the filament deposited would cool too quickly, and the tension between the layers would cause it to warp.
¶ Build plate
The X1 series machines are randomly equipped with different types of build plates. Please check the Wiki Introduction to the Build Plates, to learn more about our build plates.
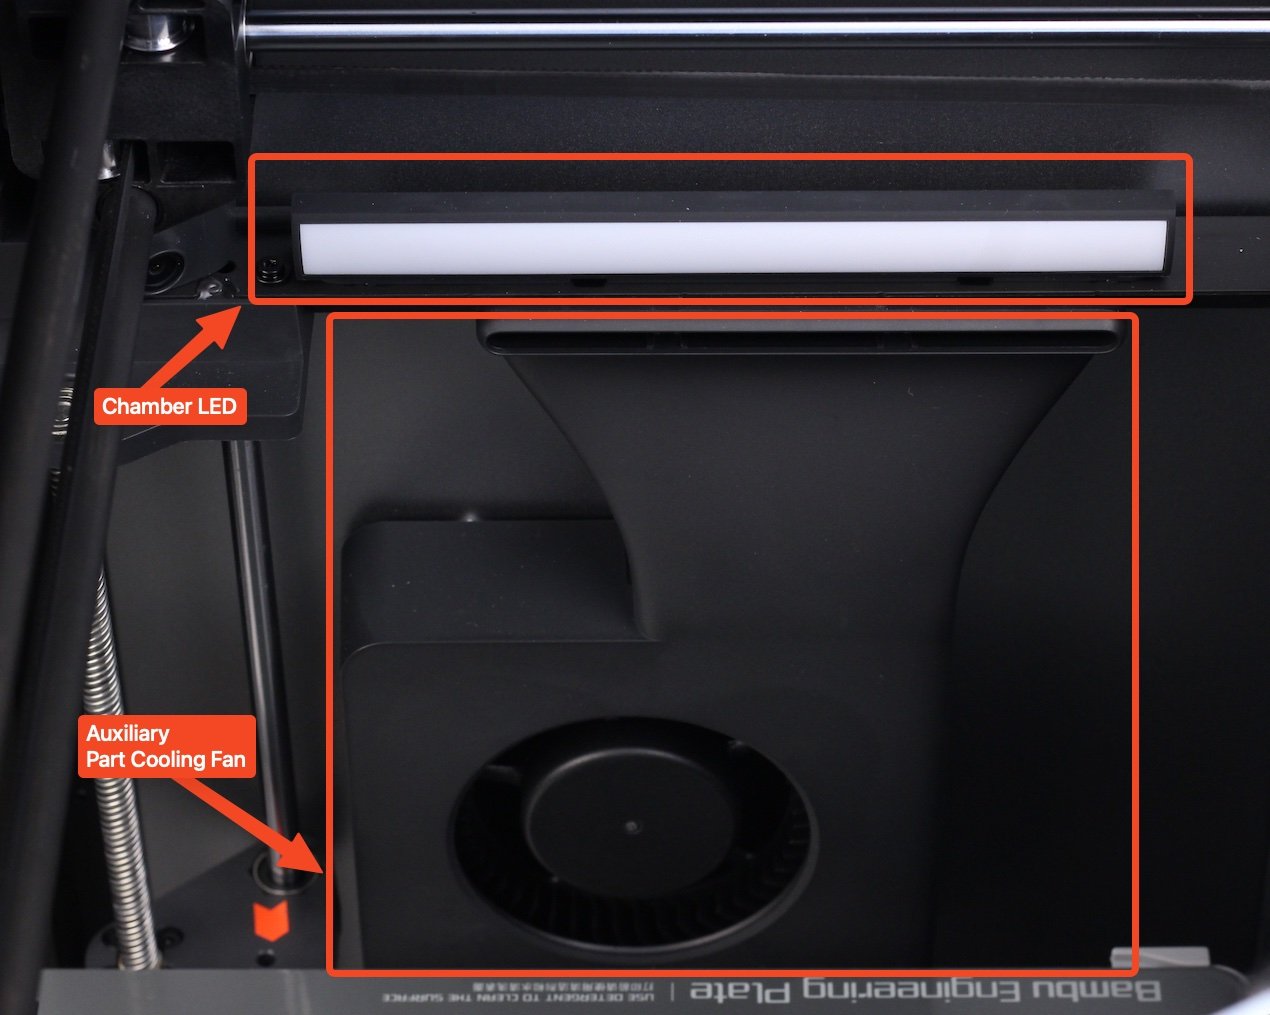
¶ Cooling system
Fast printing also requires good part cooling, and the X1 comes with a 5015 radial fan with two air ducts that direct the air underneath the nozzle.

The X1C comes with an extra cooling fan located on the left side of the machine that can be used when printing filaments like PLA that benefit from good part cooling. An “airflow blanket” is created over the print helping to solidify the printed layers as fast as possible.
¶ Belt Tensioners, Filament Buffer and Exhaust Fan
The X1 features adjustable belt tensioners at the back, which may need to be adjusted for optimal performance. The Belt Tension Monitor (BTM) will monitor the tension of the belts and notify you if they need adjustment.
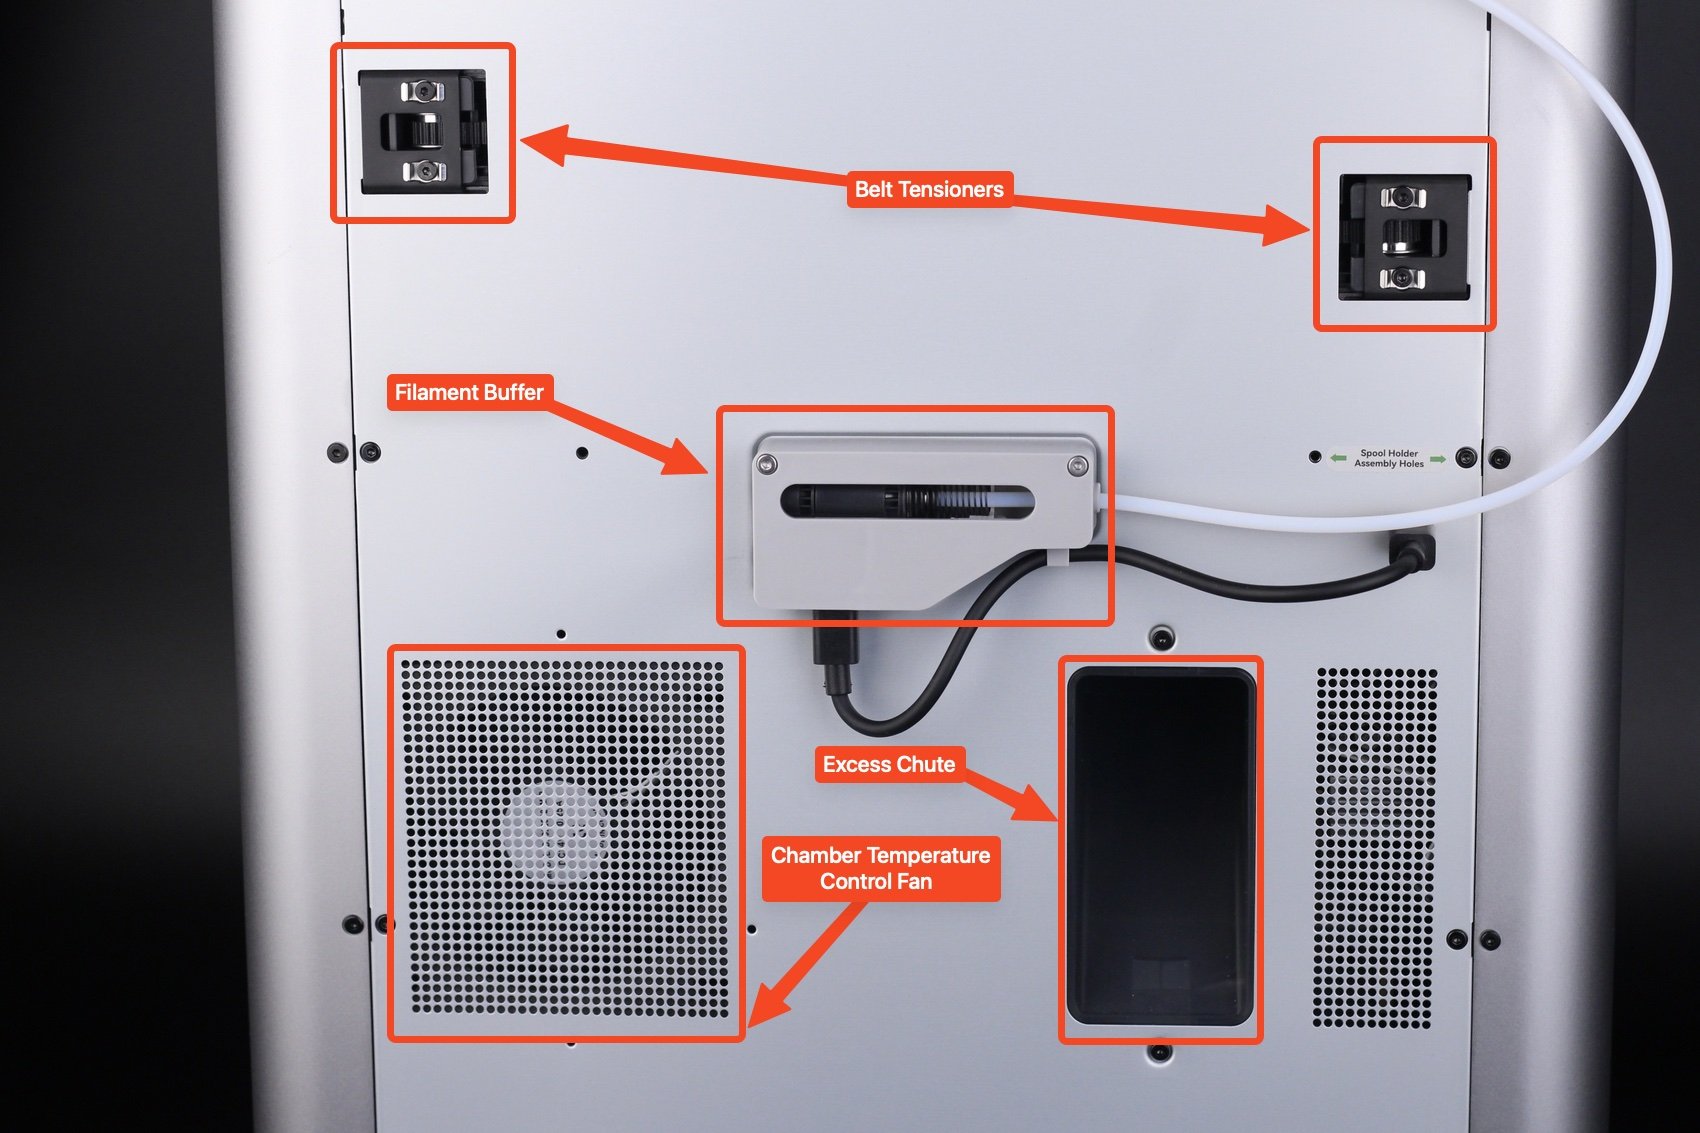
In the back, there is the Filament Buffer, used for feeding the correct amount of filament from the AMS to the extruder. Next to it, there's the Chamber Temperature Control Fan that automatically controls the amount of air expelled from the printer to ensure the correct temperature inside the chamber. The Excess Chute is next to it, where the purged filament is expelled out of the printer.
¶ Electronics
The X1 has many electronic components inside, but here are the most important:
¶ Logic Board
Every 3D printer comes with a logic board that contains the CPU, stepper drivers, and the necessary connections for various electronics attached to the printer. In the case of the X1, the board has a quad-core CPU and a dual-core MCU.
The CPU handles the smart capabilities of the X1, including the AI spaghetti detection, flow calibration, vibration compensation, and the connection between the Slicer/App and the printer.
The MCU handles the actual movement of the printer after getting the stream of G-code from the CPU.
¶ Micro Lidar
One of the innovations brought by the X1 line of 3D printers is the Micro Lidar sensor, which measures the width and consistency of the test lines, to relay that information to the CPU, which then calculates the correct flow rate value of the filament used.
The Micro Lidar is also used for inspecting the first layer quality and reporting to the printer if the consistency is not as expected, to catch any printing issue before starting the rest of the print.
¶ Spaghetti Detection
Using the integrated camera and the AI capabilities of the X1 3D printer, we can monitor the printing process and detect if a print has failed or not. If that is the case, the print will be paused and the user will be requested to check on the print to confirm if the print has failed or not, and decide if the printing process can be resumed. There are some cases when the AI is not accurate and might detect false positives, but this is to be expected with this kind of system which will continue to be improved over time.
This feature uses machine learning and it's able to operate on the X1 thanks to the 2 TOP Neural Processing Unit (trillions of operations per second).
¶ Chamber Camera
The integrated camera, located in the front left corner of the printer, is used for Spaghetti Detection. It can also be used for real-time monitoring of prints using the Bambu Slicer or the Bambu Handy app.
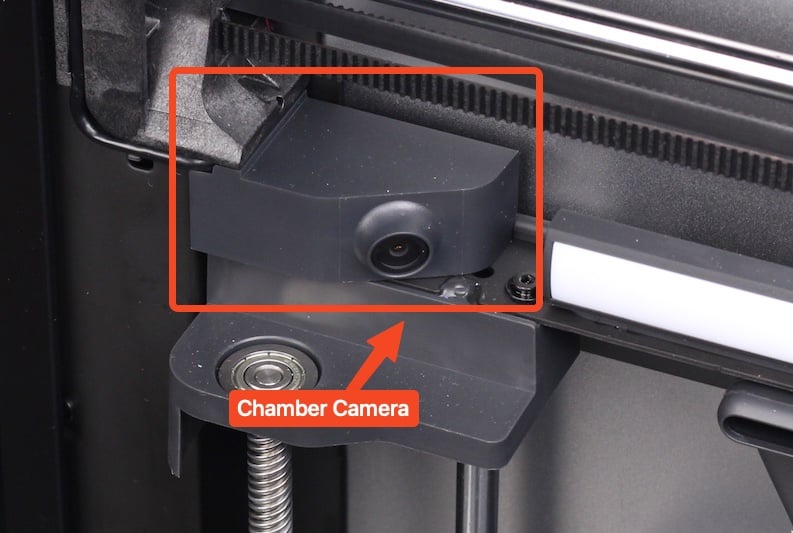
Besides the monitoring capabilities, the camera can also record a video of the print to the SD card, and generate a time-lapse video. There is no night vision present, but the LED light bar on the side illuminates the print.
¶ End Notes
We hope the detailed guide provided has been helpful and informative.
To ensure a safe and effective execution, if you have any concerns or questions about the process described in this article, we recommend submitting a technical ticket regarding your issue. Please include a picture or video illustrating the problem, as well as any additional information related to your inquiry.