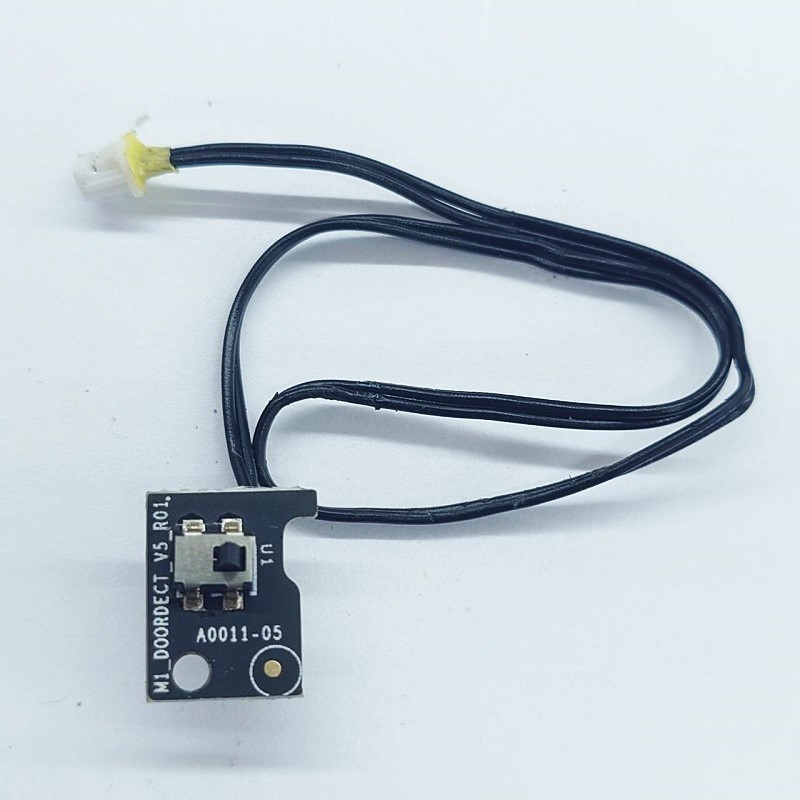
¶ Door Detection Switch
¶ What it is
The Open Door Detection Switch is a physical switch located under the silicone cushion strip on the right side of the X1 Series front door frame. It is used to detect if the glass front door is closed.
¶ When should you replace the door detection switch?
- When the connection cable is damaged
- When the printer front door open/close status is misreported
¶ Tools and materials needed
- New door detection switch board
- H1.5 and H2.0 Allen key.
¶ Safety Warning
IMPORTANT!
It's crucial to power off the printer before performing any maintenance work on the printer and its electronics, including tool head wires, because leaving the printer on while conducting such tasks can cause a short circuit, which can lead to additional electronic damage and safety hazards.
When you perform maintenane or troubleshooting on the printer, you may be required to disassemble some parts, including the hotend. This process can expose wires and electrical components that could potentially short circuit if they come into contact with each other or with other metal or electronic components while the printer is still on. This can damage the electronics of the printer and cause further damage.
Therefore, it's essential to switch off the printer and disconnect it from the power source before doing any maintenance work. This will prevent any short circuits or damage to the printer's electronics. By doing so, you can avoid potential damage to the printer's electronic components and ensure that the maintenance work is performed safely and effectively.
If you have any concerns or questions about following this guide, open a new ticket in our Support Page and we will do our best to respond promptly and provide you with the assistance you need.
¶ Operation guide - Disassembly
¶ Step 1 - Power off and remove the cover plate
Power off the printer, open the front door and remove the top glass cover plate.
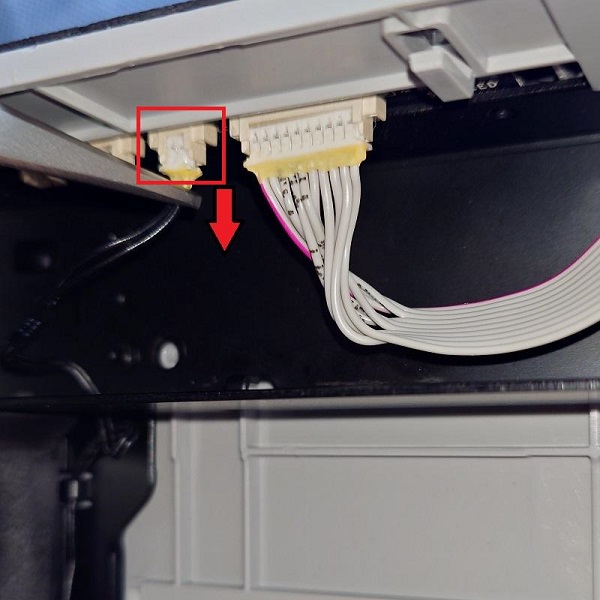
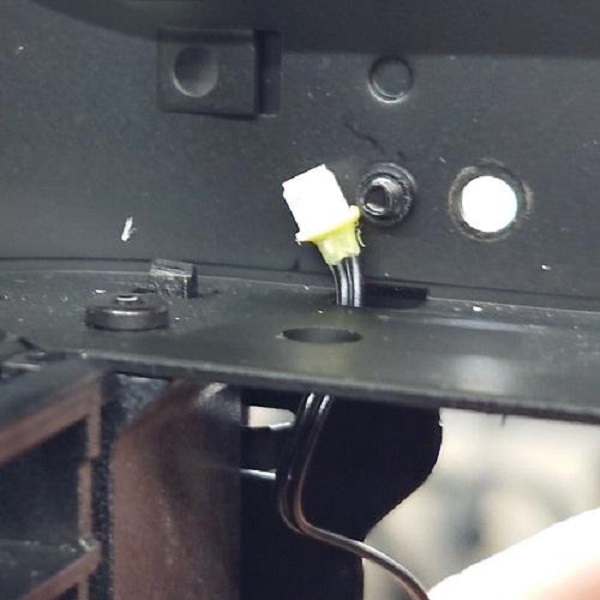
¶ Step 2 - Disconnect the door detection switch from the button board
Disconnect the door detection switch cable connector by pull it downward
¶ Step 3 - Remove door detection switch cable
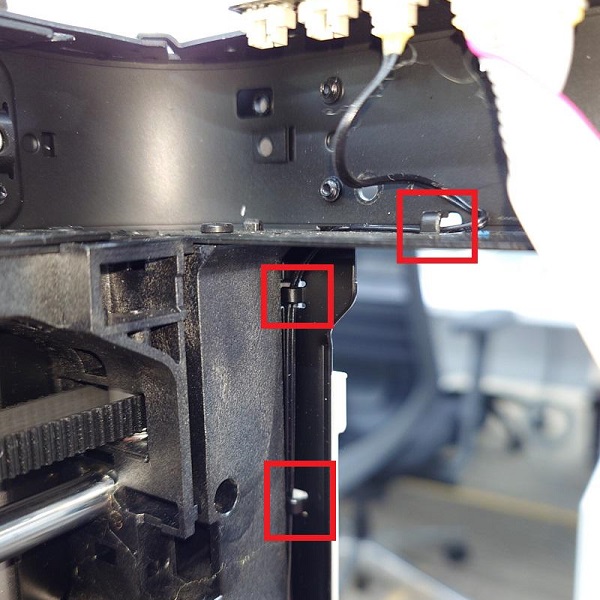
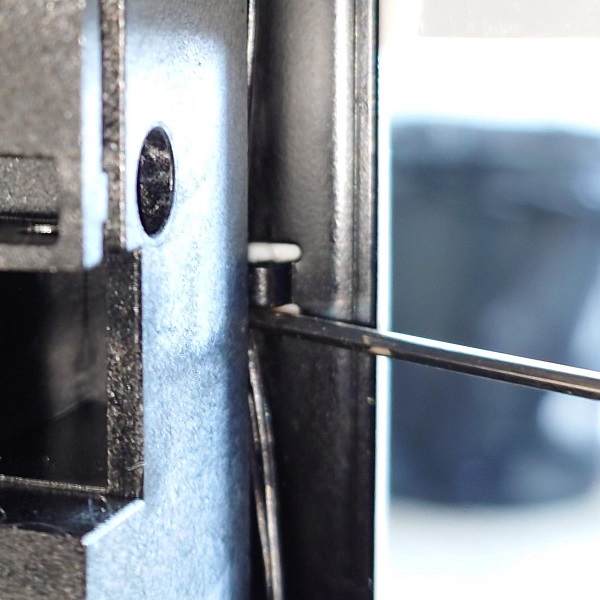
Remove the door detection switch cable from the 3 latches shown in Figure 1-3-1. Slowly use a H1.5 wrench or other tool to push the cable out of the latch. The cable connector can be removed from the frame opening after the cable is loosened as shown in Figure 1-3-3. This procedure may be difficult, but if you are unable to remove the cable from the latches and are sure the door opener switch is damaged, cut the cable and remove it.
|
|
|
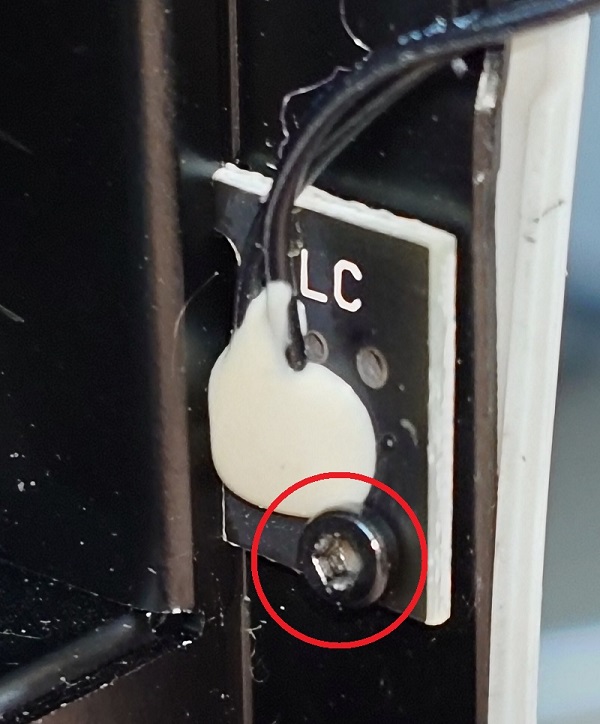
¶ Step 4 - Remove the door detection switch
Use a H1.5 wrench to remove 1 screw and remove the door detection switch
¶ Operation guide - Assembly
¶ Step 1 - Install the door detection switch
Place the door detection switch on the frame and use a H1.5 wrench to lock in 1 screw to secure it. Note that the screw needs to be fully locked, and make sure that the door detection switch does not shift when pressed from the external protrusion of the silicone cushion strip at the front, otherwise the switch will not work properly.
¶ Step 2 - Install door detection switch cable
Pass the cable through the opening at the top of the door frame and then latch the cable back into the corresponding clips from the bottom upwards. To do this, use a H1.5 wrench to move the cable to the edge of the latch and then carefully pull the cable back into the latch. Be careful not to damage the cable by using excessive force. This is a difficult procedure, but if you are unable to secure the cable in the latch, you can use tape to secure the cable to the door frame, which will not affect the function of the part in any way.
|
|
|
¶ Step 3 - Connect the door detection switch to the button board
Connect the door detection switch cable connector to the button board by pushing it upward as shown in the picture. Note you need to connect it in the socket closest to the ribbon cable for the button board. Make sure the side with notch is oriented inwards and do not plug it in backward.

¶ End Notes
We hope that the detailed guide we shared with you was helpful and informative.
We want to ensure that you can perform it safely and effectively. If you have any concerns or questions regarding the process described in this article, we encourage you to reach out to our friendly customer service team before starting the operation. Our team is always ready to help you and answer any questions you may have.
Click here to open a new ticket in our Support Page.
We will do our best to respond promptly and provide you with the assistance you need.