An issue has been brought to our attention regarding the auxiliary part cooling fan of the Bambu Lab X1C.
The auxiliary part cooling fan is fixed to the side panel using six double-sided tape pads. Following extensive research and testing in the early stages of development, this attachment solution was chosen over standard screws to eliminate vibration noise. A production process was initiated based on three important factors:
- The precise location of the double-sided tape pads
- The amount of pressure applied on the auxiliary fan to attach to the pads
- The length of time the pressure is applied in order to obtain the best possible adhesion
Following an investigation, we have noted that not all of these production processes were followed as intended, specifically process numbers 2 and 3, resulting in an initial batch of machines not compliant with the intended outcome.
We wholeheartedly apologize for this issue and we assure you we will take all the necessary precautions to avoid this in the future. The use of double-sided tape is by no means a cost-cutting process, quite the opposite. In fact, it adds cost compared to using standard screws. However, we felt that following our research, this was the best solution for longevity and also noise dampening.
Please note that this issue is present only on early units that have been shipped in the first batch, and subsequent products have been improved through process changes.
If this issue has happened to you, we have prepared a detailed guide on how to reattach the auxiliary part cooling fan back to its initial position. It takes around 15 minutes.
Even if you haven't experienced this issue, we still recommend following step 11 and applying some pressure to the fan. Doing this will ensure that the fan is properly attached to the side panel and avoid having it fail during printing.
Example of fan detaching during shipping
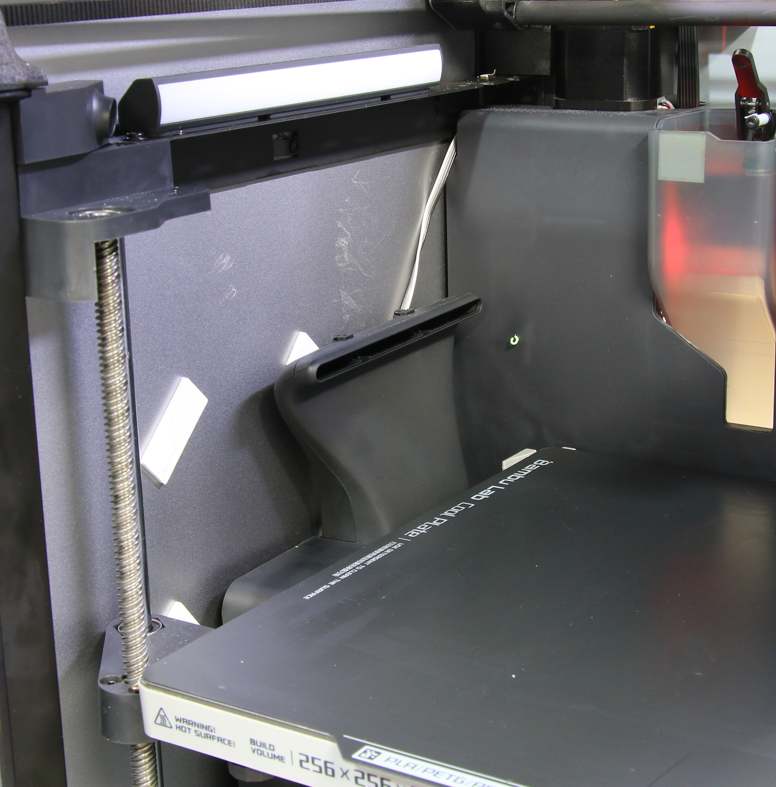
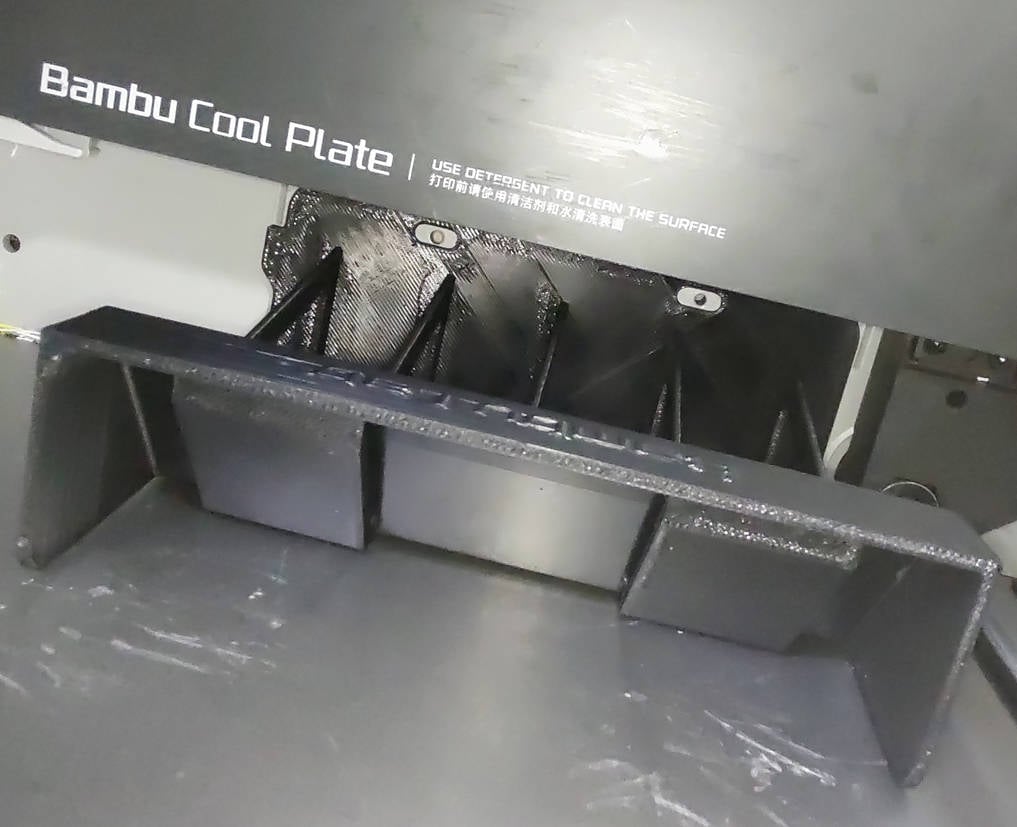
To ensure the fan is stable and has extra support from the bottom, we also include a printable model that can be printed on the X1, then installed underneath the fan.
Please take note of the following recommendations when printing the fan holder:
- We recommend printing the model with a temperature-resistant filament like PETG/ASA/ABS or other materials that can withstand temperatures higher than 60C.
- We don't recommend printing it in PLA if you plan to use the X1 for printing higher temperature filaments as the fan support can bend over time due to the chamber temperature.
- If your fan is already detached from the printer, we recommend fixing it on the side of the printer with a bit of tape, to ensure it doesn't interfere with the printing during the printing process.
You can later attach it to the printer using the provided VHB tape. - Set the AUX fan speed to 0% when printing the fan holder, to keep it off and avoid any problems. The setting can be found in Bambu Studio under Filament Settings → Cooling → Auxiliary part cooling fan → set to 0%
First, download the aux-fan-holder-final.stl and print it with your X1C printer.
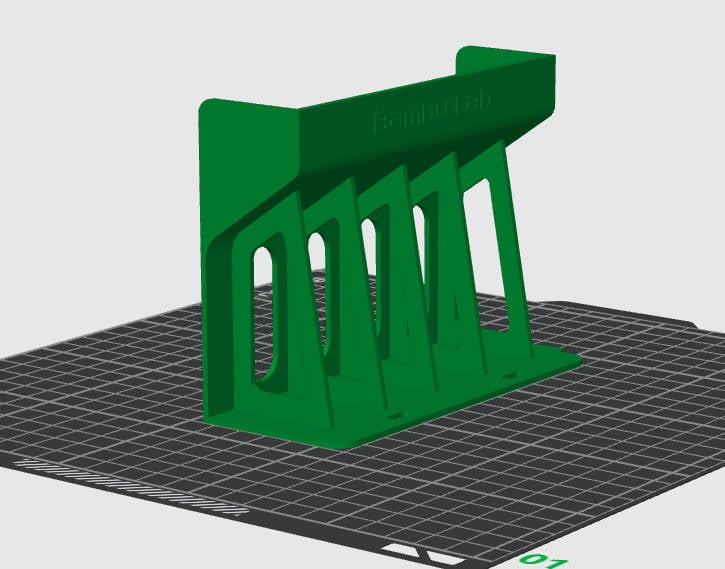
If the auxiliary part cooling fan on your printer is already fixed by double-side tape, it is OK to print the aux fan holder and place it under the fan just as an extra precaution.
Steps for reattaching the auxiliary part cooling fan
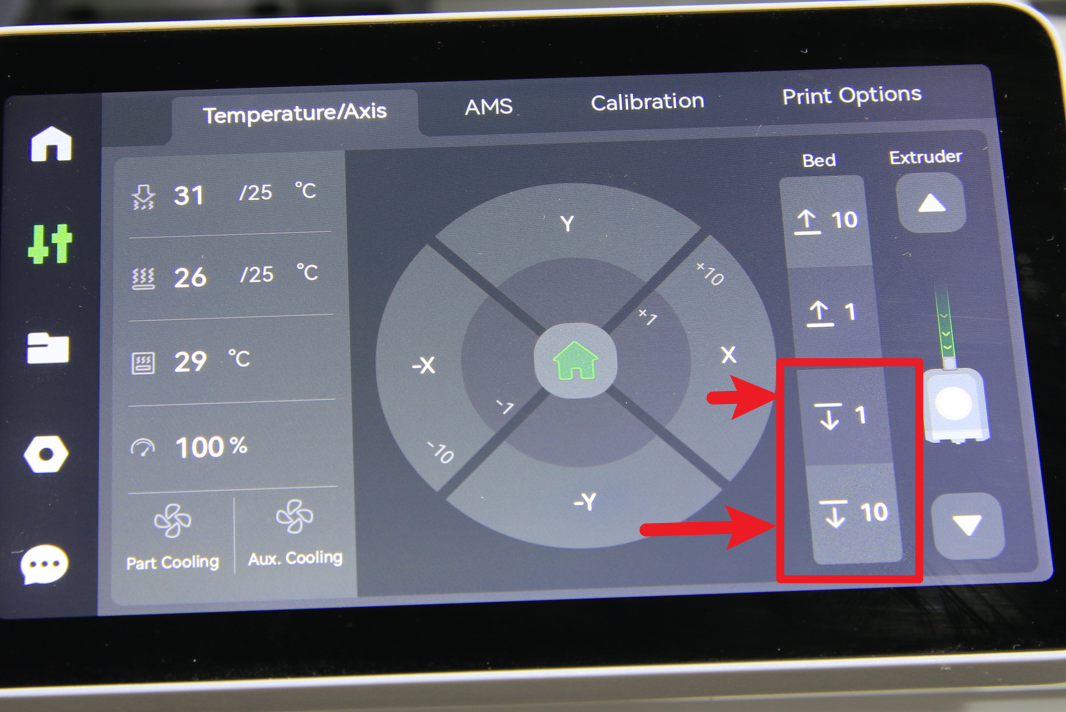
¶ 1. Turn on the printer, and using the on-screen buttons, lower the heated bed to the lowest position.
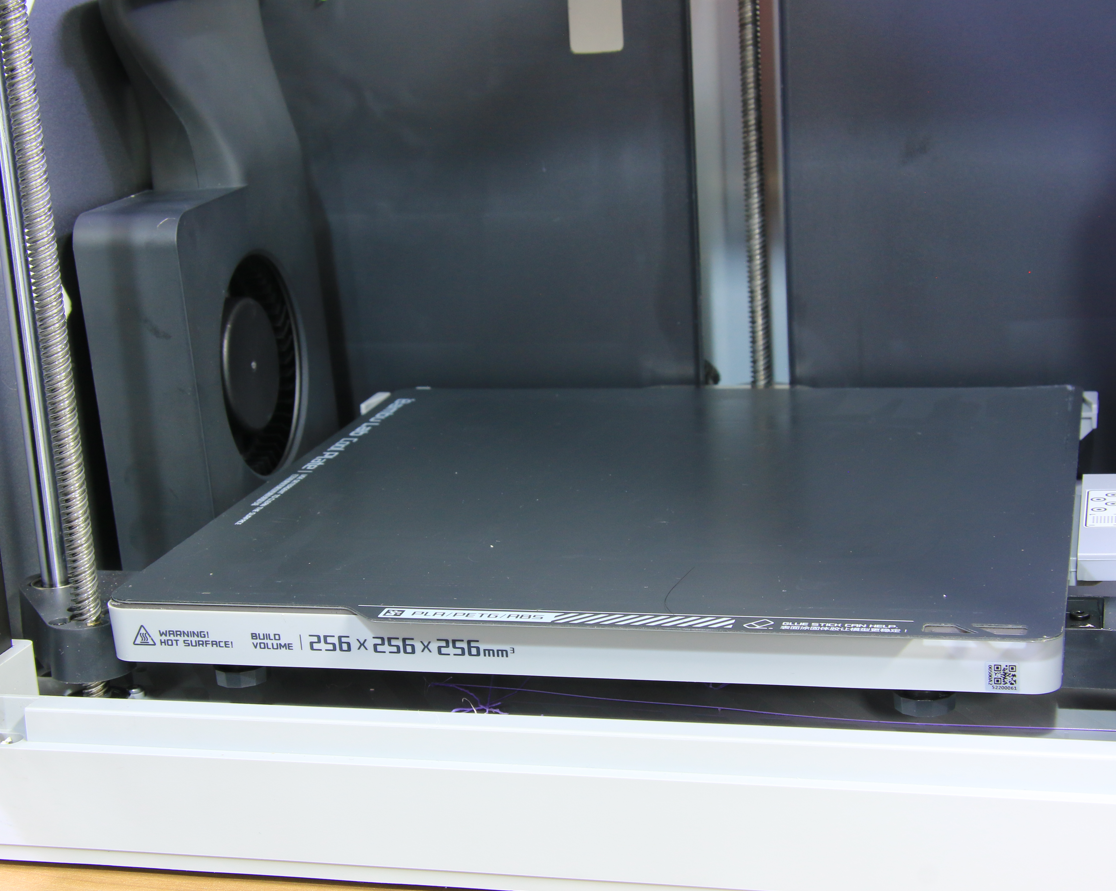
¶ 2. Gently remove the double-sided tape from the side panel.
Pulling it slowly should help detach it without leaving residue.
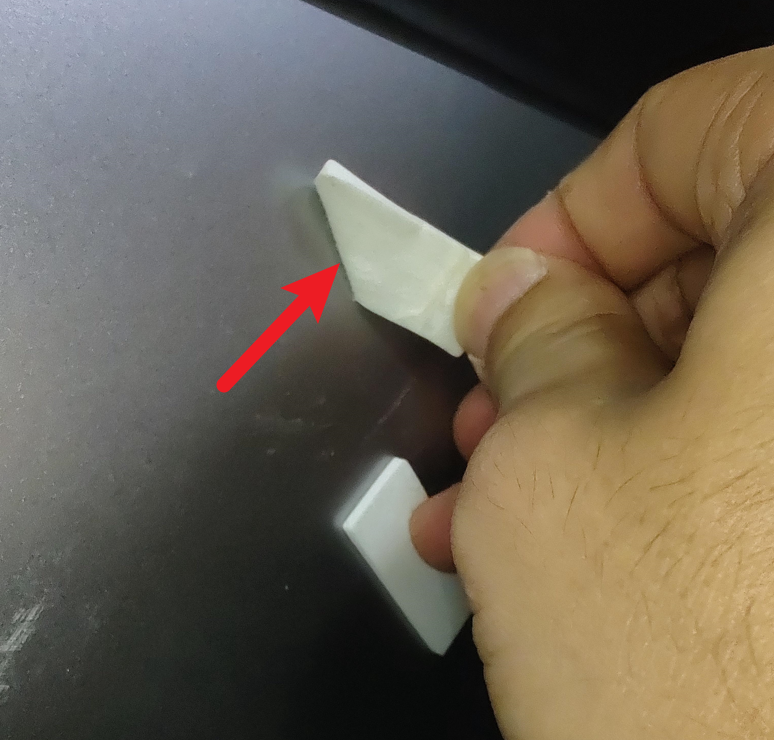
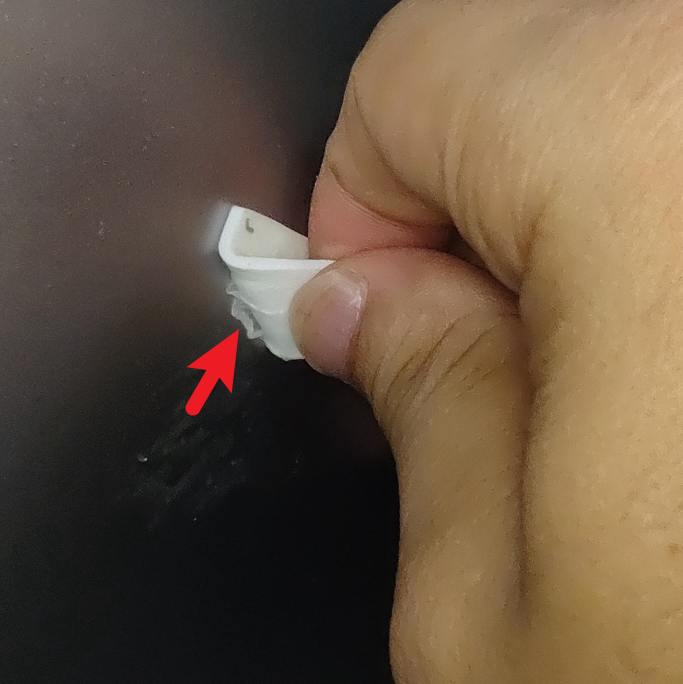
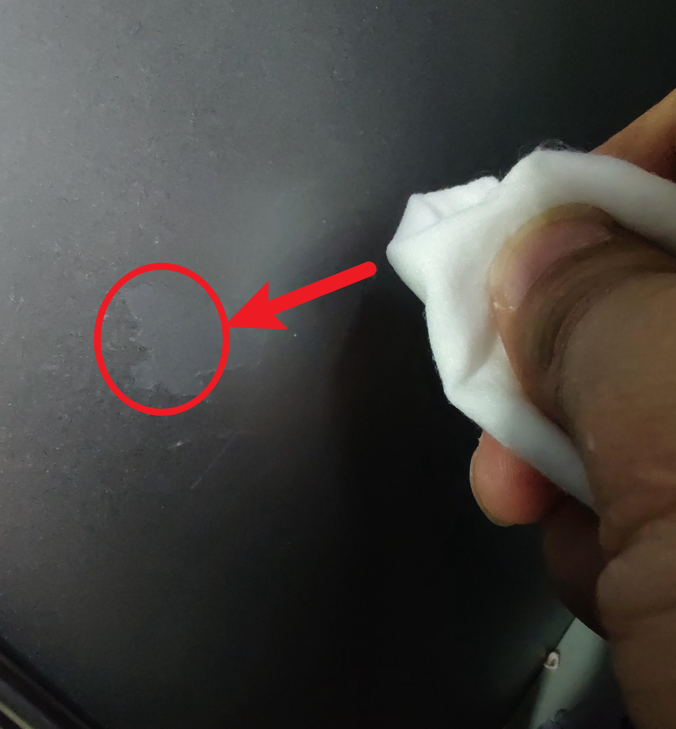
¶ 3. If residual glue is left on the side panel, use a scraper or blade to remove it.
Then use a wet wipe with isopropyl alcohol to clean the side cover. It is important to clean the side panel well, to ensure the best adhesion.
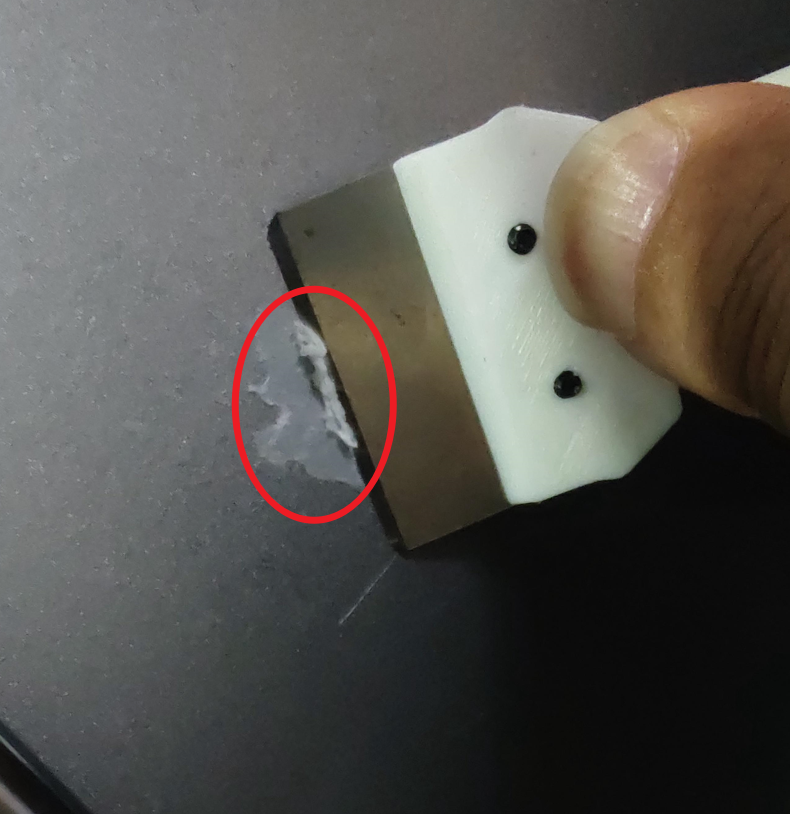
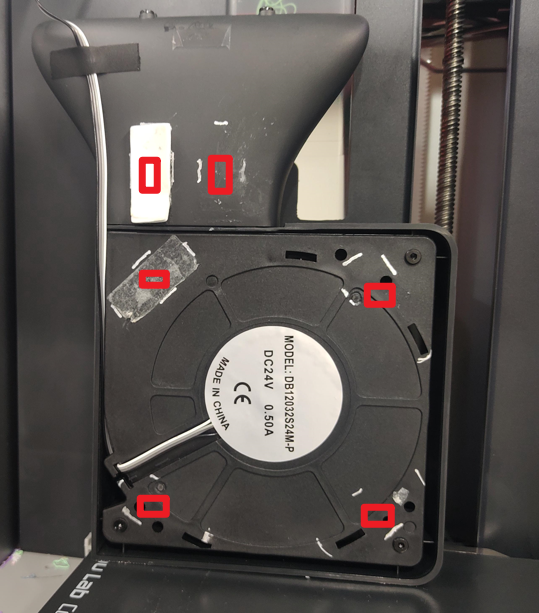
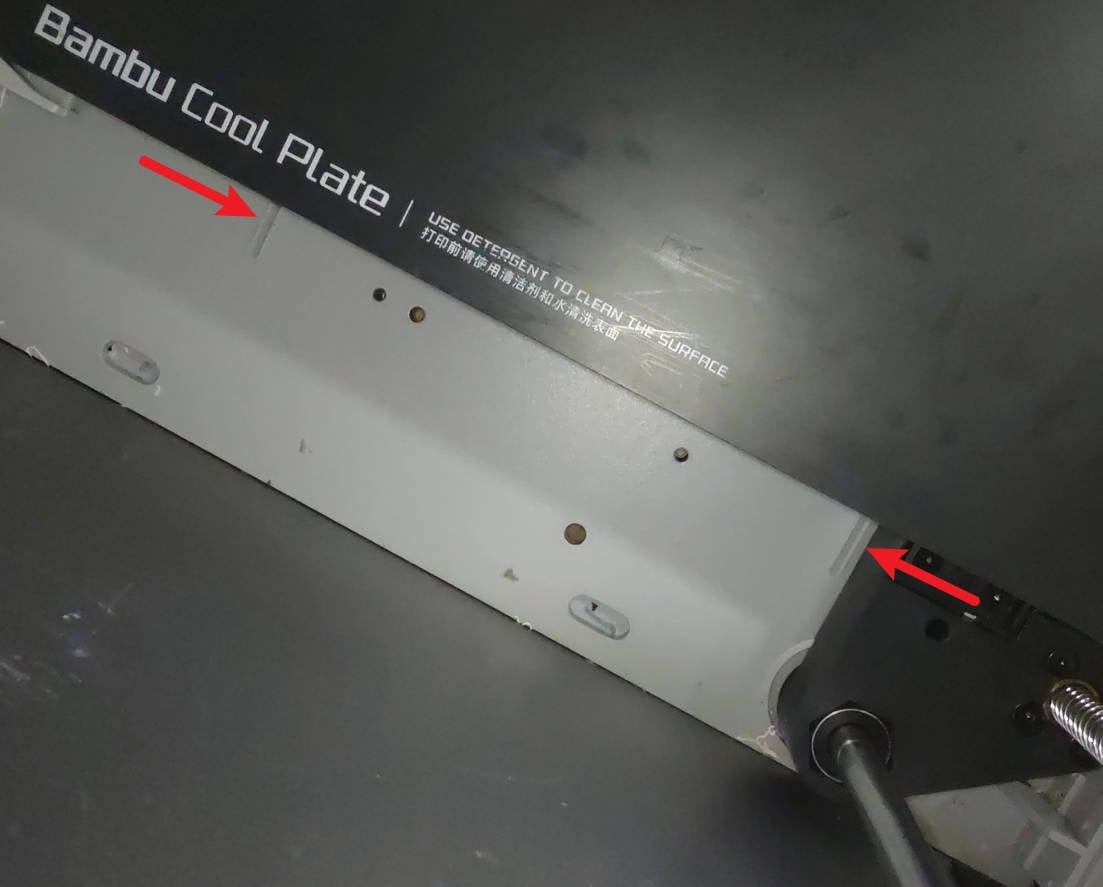
¶ 4. The old position of the double-sided tape is shown in the image below.
Feel free to also take a picture of your auxiliary fan to remember where to attach the new double-sided tape.
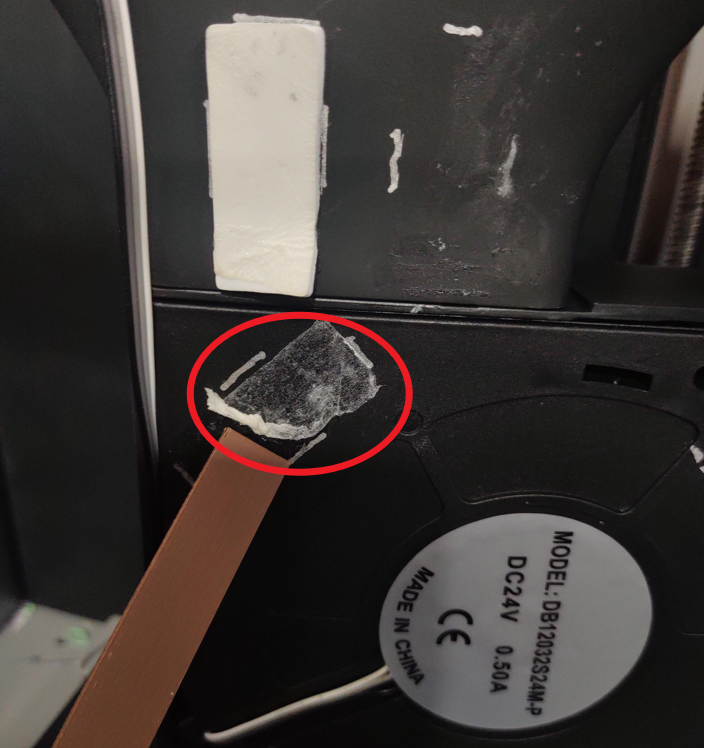
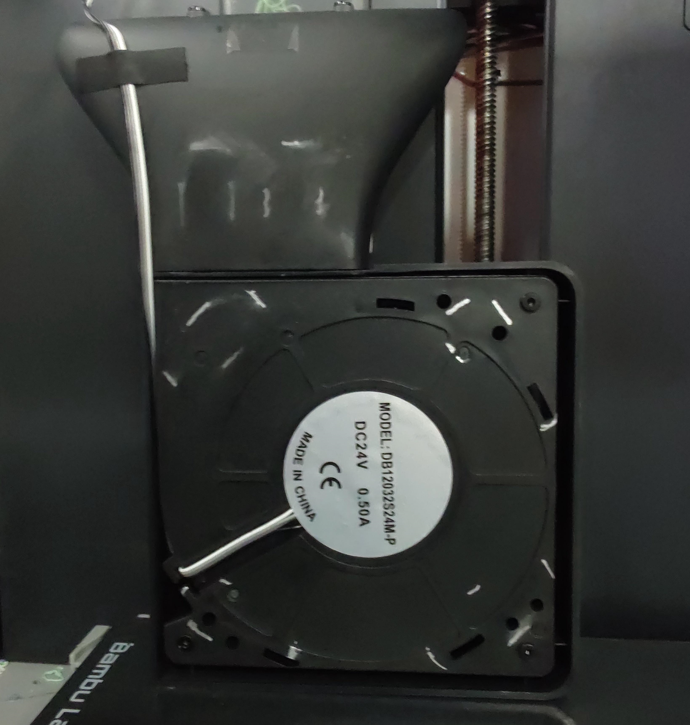
¶ 5. Gently remove the old double-sided tape from the back side of the fan.
A sharp tool can be used, but please don't use a metallic scraper as it might damage the fan. After the glue residue is cleaned, wipe the locations where the old tape was applied using isopropyl alcohol, just like you did on the side panel.
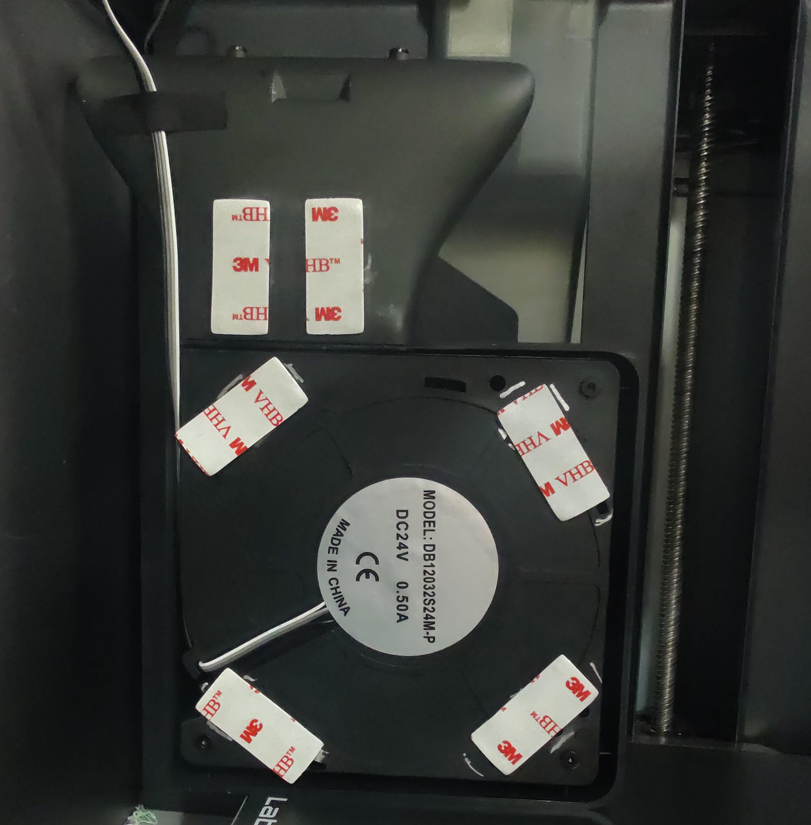
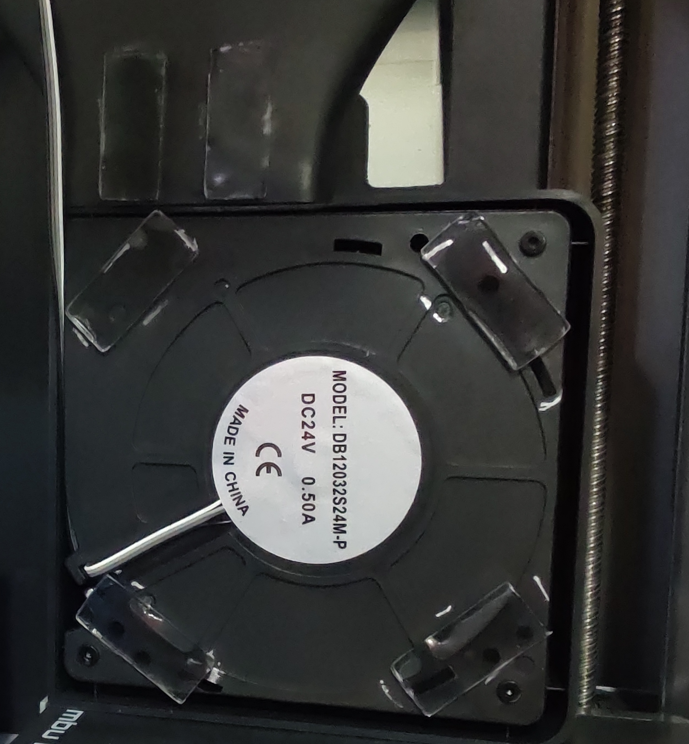
¶ 6. Attach the new double-sided tape pads as shown in the image below. There are 6 pieces in total.
Please pay attention to the position of the double-sided tape, to avoid attaching it to a raised position such as the screw caps.
¶ 7. Install the aux fan holder
Install the holder to the place between the two limit ribs on the bottom base, move the holder to show the screw holes(It is OK to fix the holder with screws)
¶ 8. We are now ready to install the fan
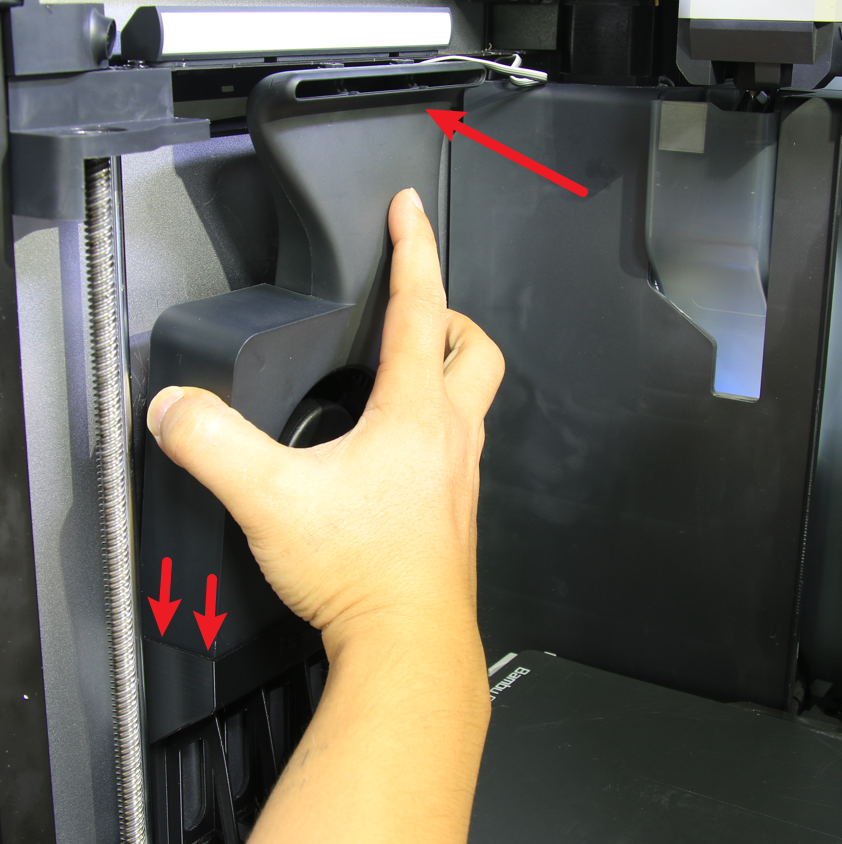
Remove the double-sided stickers from the pads, and then place the fan on the aux fan holder, and attach the fan to the side cover.
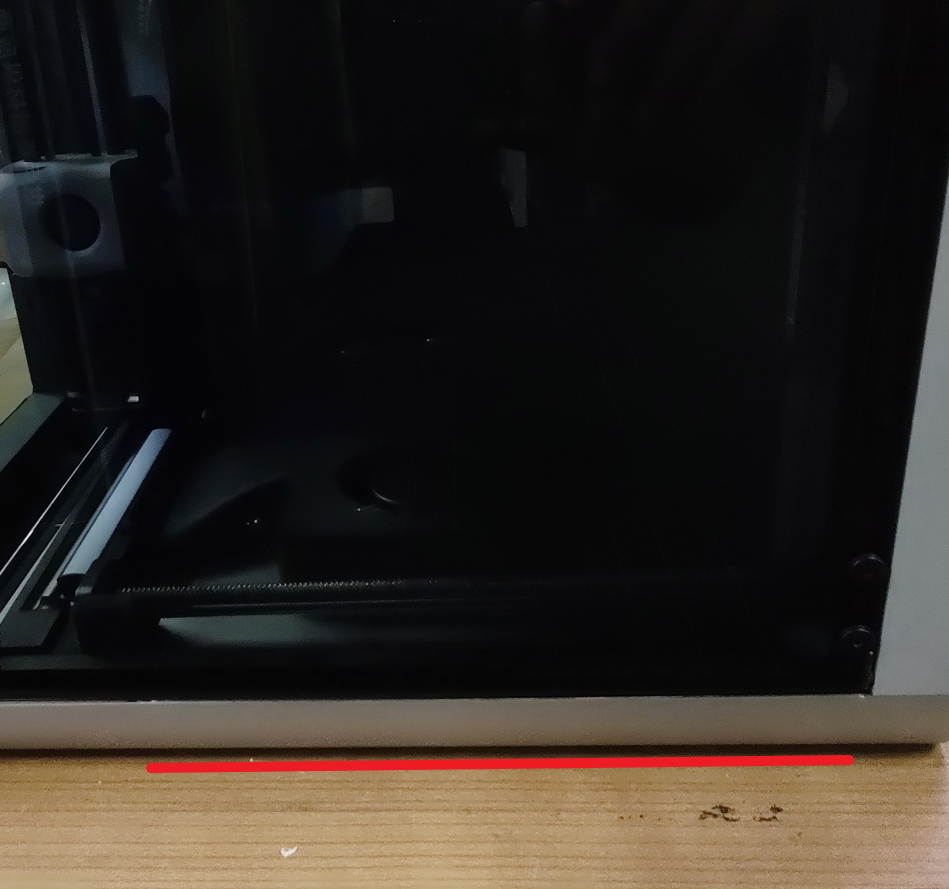
¶ 9. Next, remove the glass cover plate from the top of the printer, and lay the printer on its left side, as shown in the image below.
When opening the glass door, please ensure that it has some support underneath and avoid applying pressure to it, to minimize the risk of damaging it.
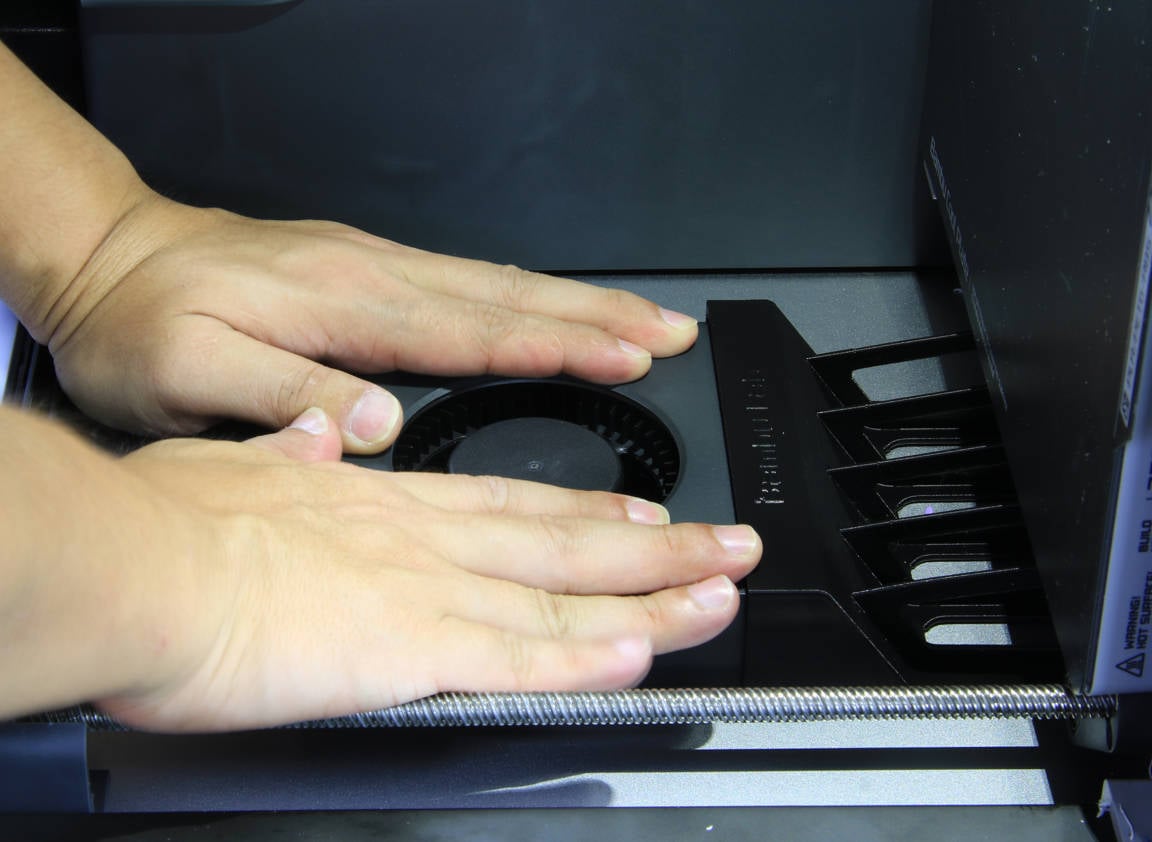
¶ 10. To ensure good adhesion, press firmly on the fan body for at least 10 seconds.
This will ensure that the fan will bond well to the side panel.
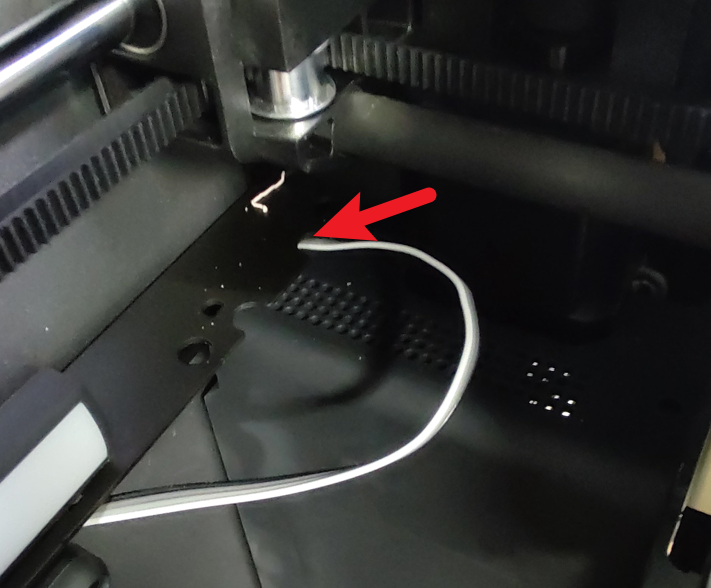
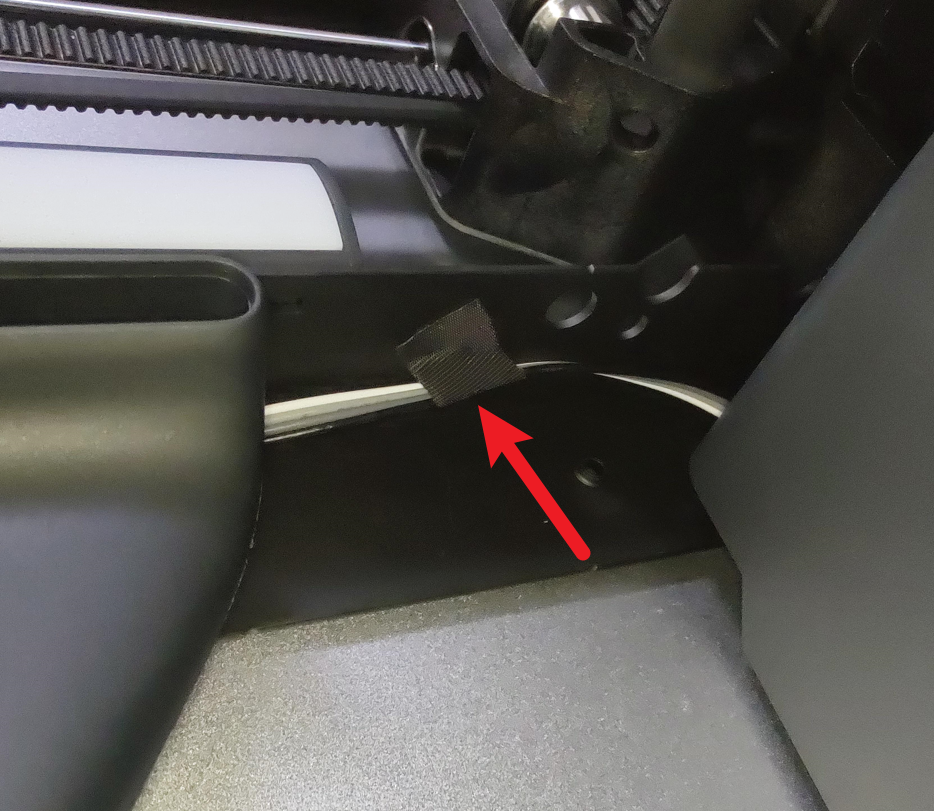
¶ 11. Finally, it's time for some wire management.
Align the cables as shown below, insert the excess cable through the hole, then using the original tape, secure it to the metal beam.
¶ 13. Congratulations!
You have successfully attached the auxiliary fan to the printer.