¶ CMYK Lithophane Filament Bundle
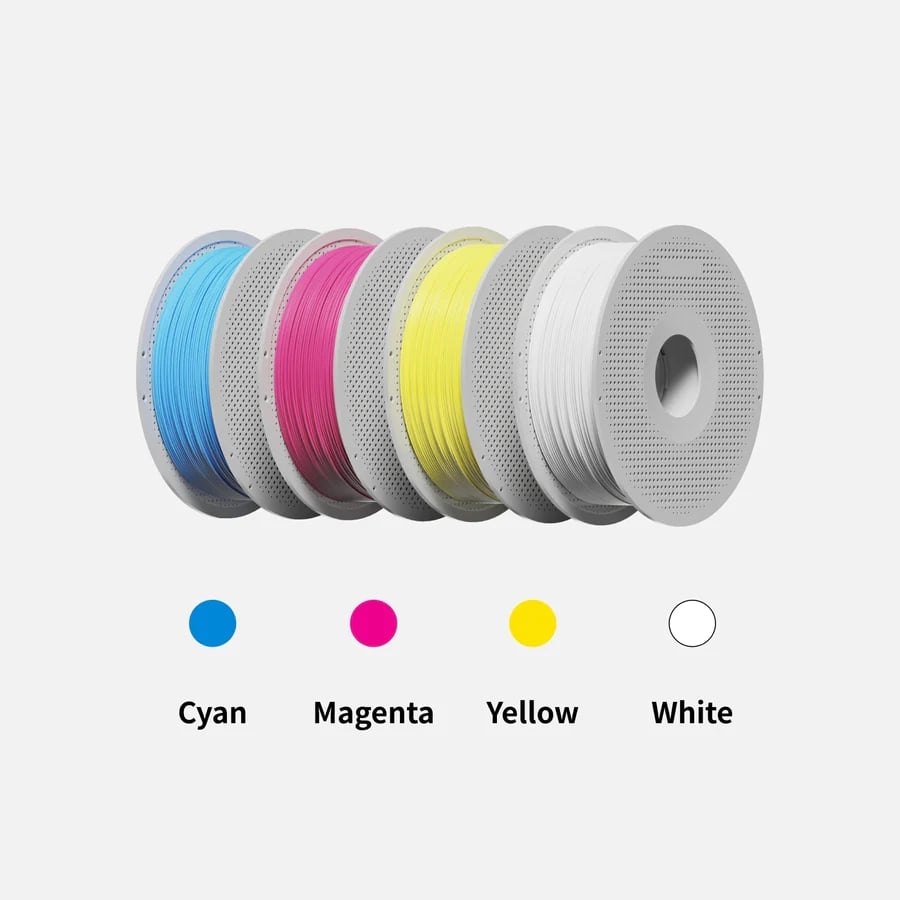
You can purchase it at our store here: PLA CMYK Lithophane Bundle
¶ Make My Lithophane
Make My Lithophane is a software to create monochrome or colorful lithophanes developed by Bambu Lab. It is optimized to be compatible with Bambu Lab's CMYK filaments.
Visit Make My Lithophane and create a project
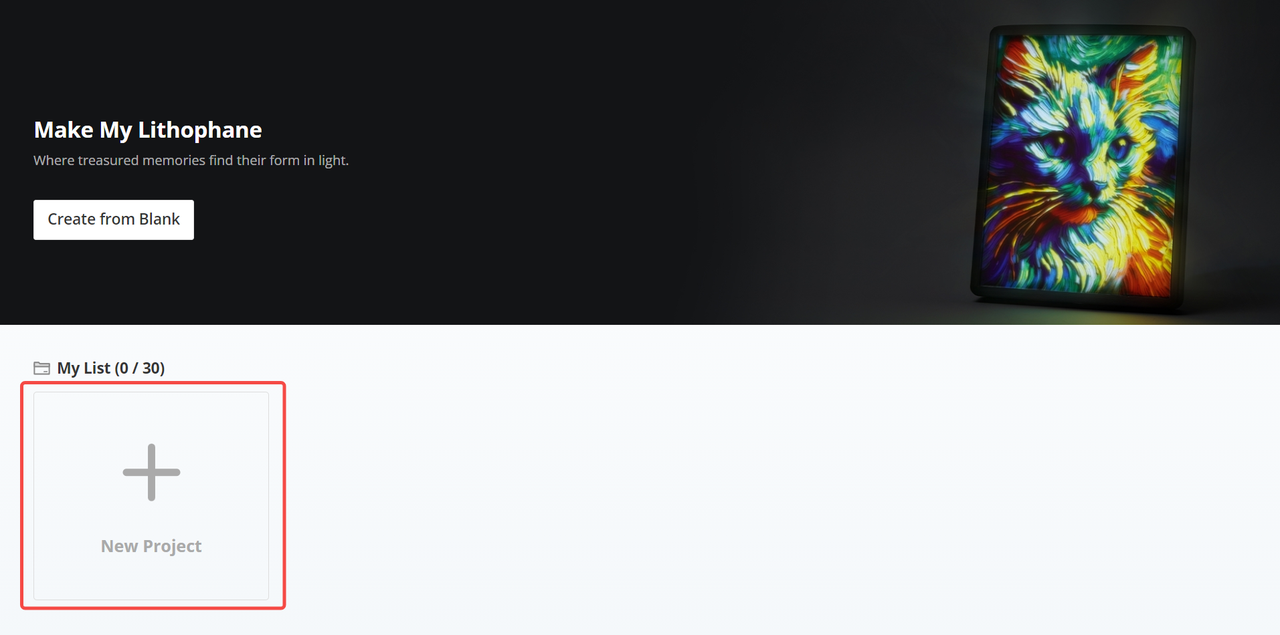
Select the lithophane types that compatible with Bambu CMYK LED Backlight Board: Mono Litho with Fixed Frame or Colorful Litho with Fixed Frame.
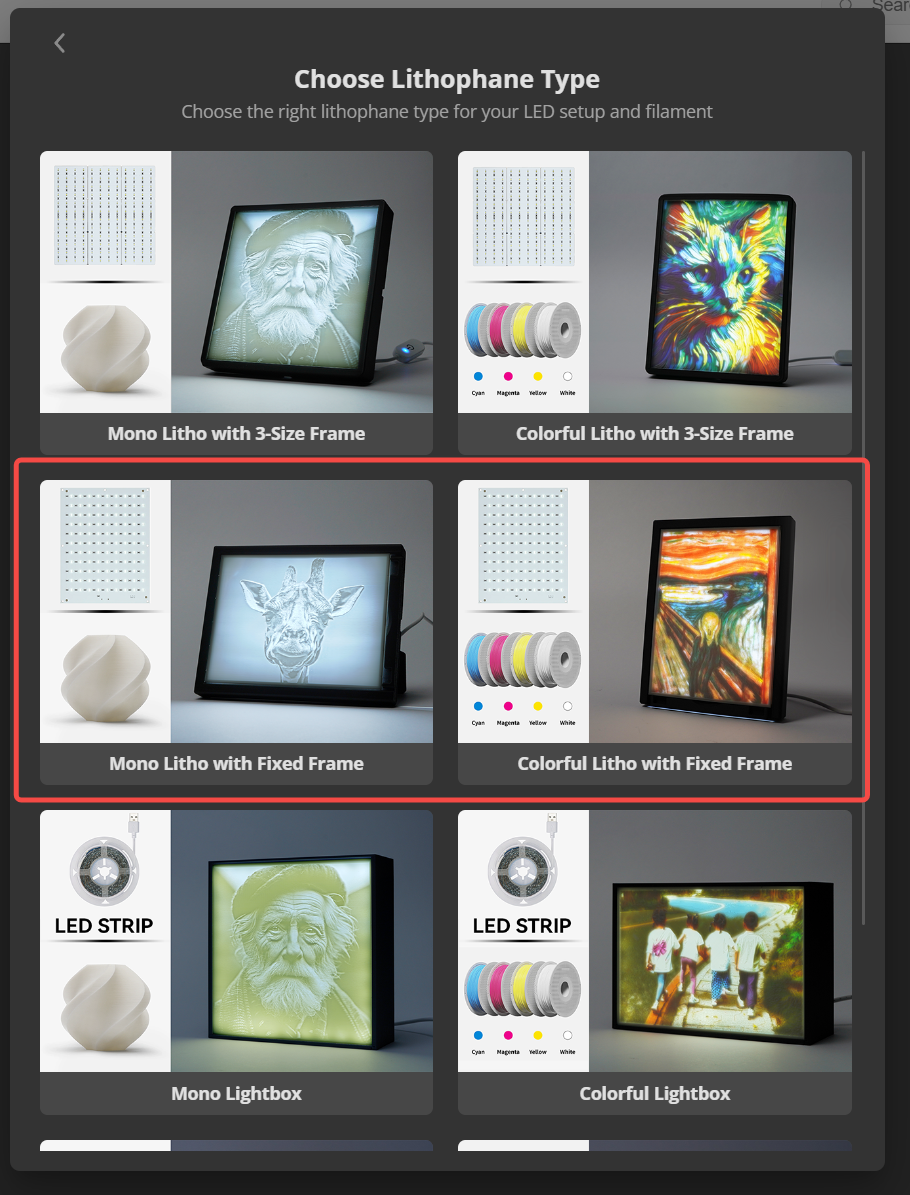
Mono Litho with Fixed Frame is used to create monochrome lithophanes that only requires PLA Basic - Jade White.
Colorful Litho with Fixed Frame is used to create colorful lithophanes that require the PLA CMYK Bundle. This article will use this type as an example. Click "Pick Image" to import your favorite image.
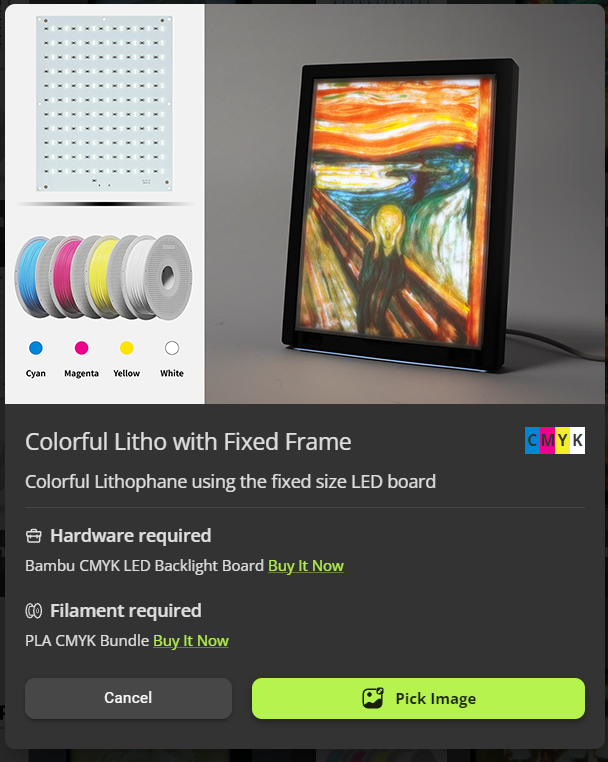
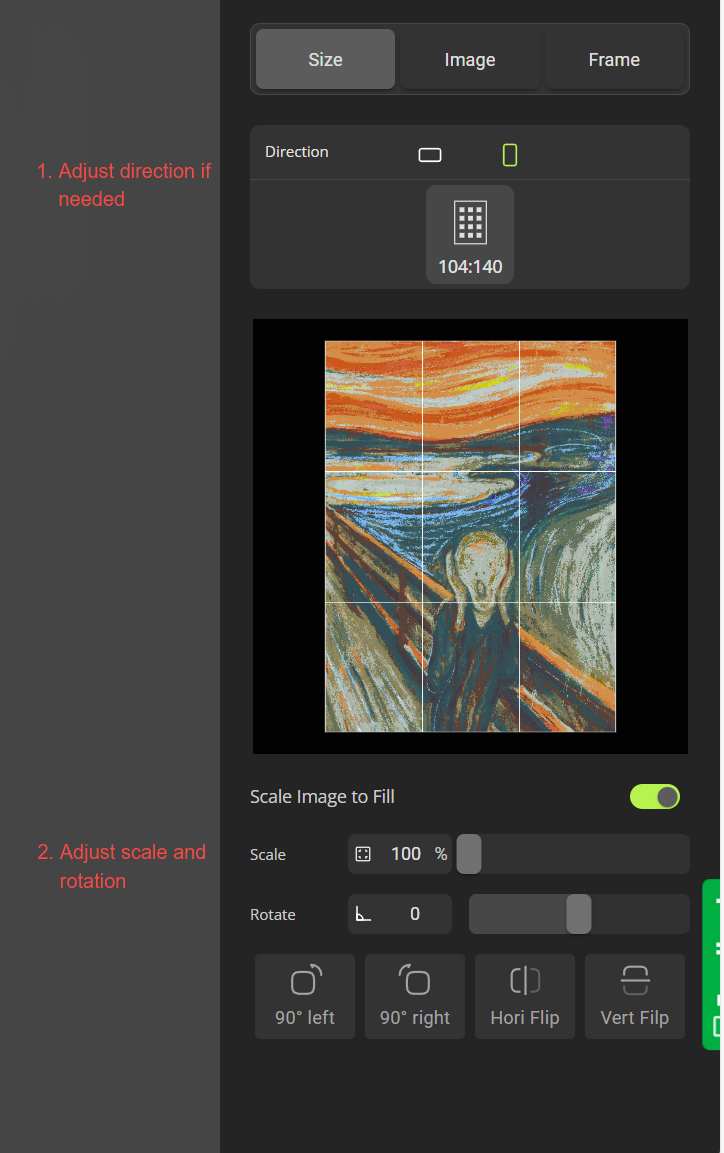
Adjust the image direction, scale and rotation if needed.
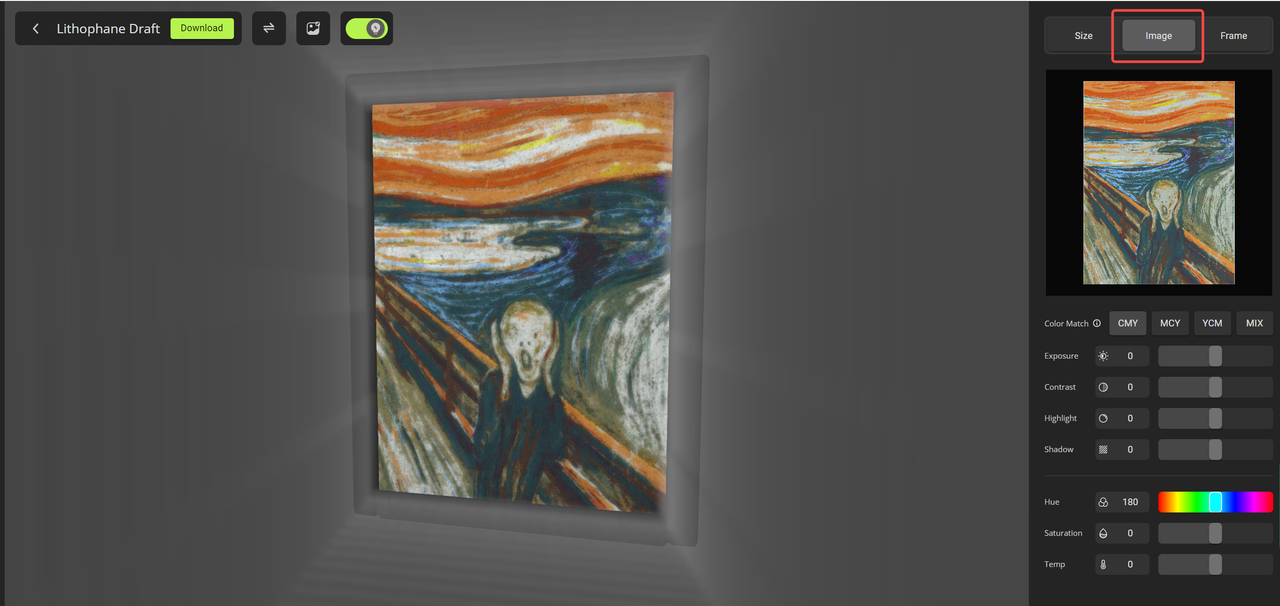
Adjust the image's color and light to optimize the result. You can preview the result inside Make My Lithophane.
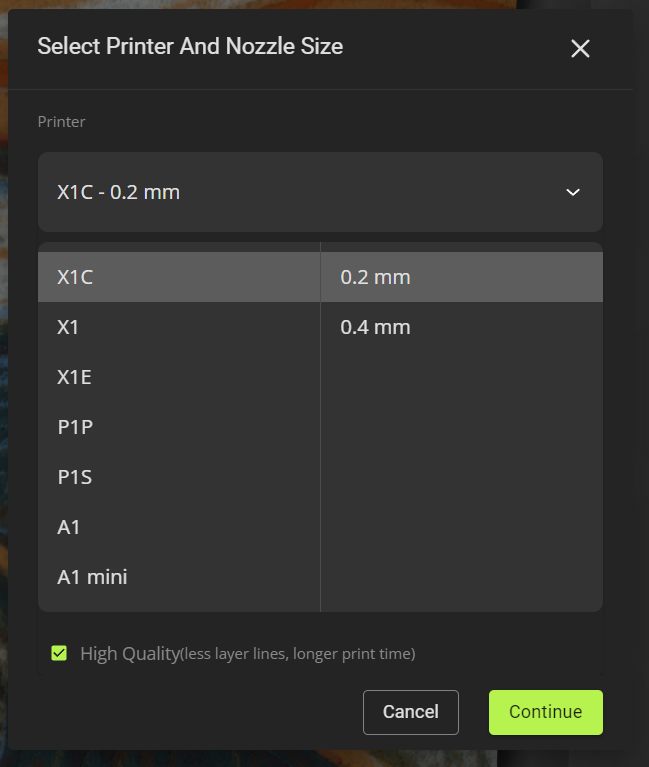
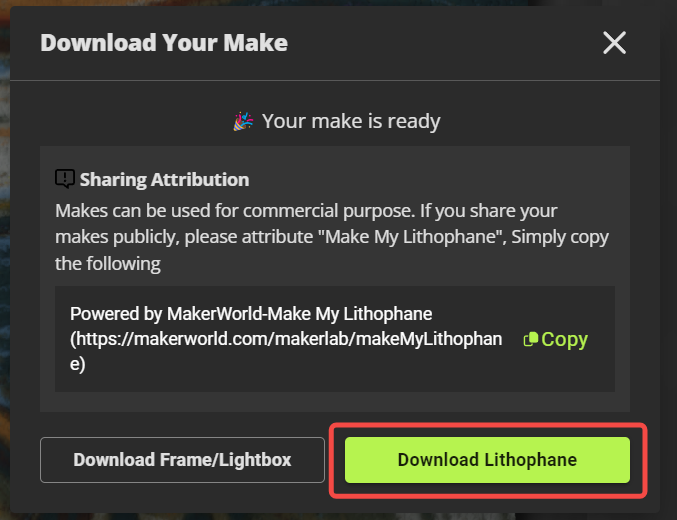
Export the 3MF file by clicking "Download" button on the top left corner. Select the Printer and Nozzle size. 0.2 mm is recommended to have better result. It takes minutes to generate the 3MF file. The generated 3MF file is ready for printing. No further configuration is required.
¶ Make My Litophane on mobile
Make My Lithophane is also available on mobile. You can access it at the latest Bambu Handy from the MakerLab Icon.
¶ 3rd-Party Software
¶ Step 1 - Generate STL files
1. Visit the Lithophane tool Lithophane Makers and upload one of your favorite JPG format photos.
- Select the 'Crop' checkbox to adjust the STL width and length.
- The recommended first layer height is 0.15mm.
- Adjusting the size 144(W)*108(H) to fit Bambu Lab Backlight Board.
- Modify the X Shift and Y Shift to change the spacing of both sides.
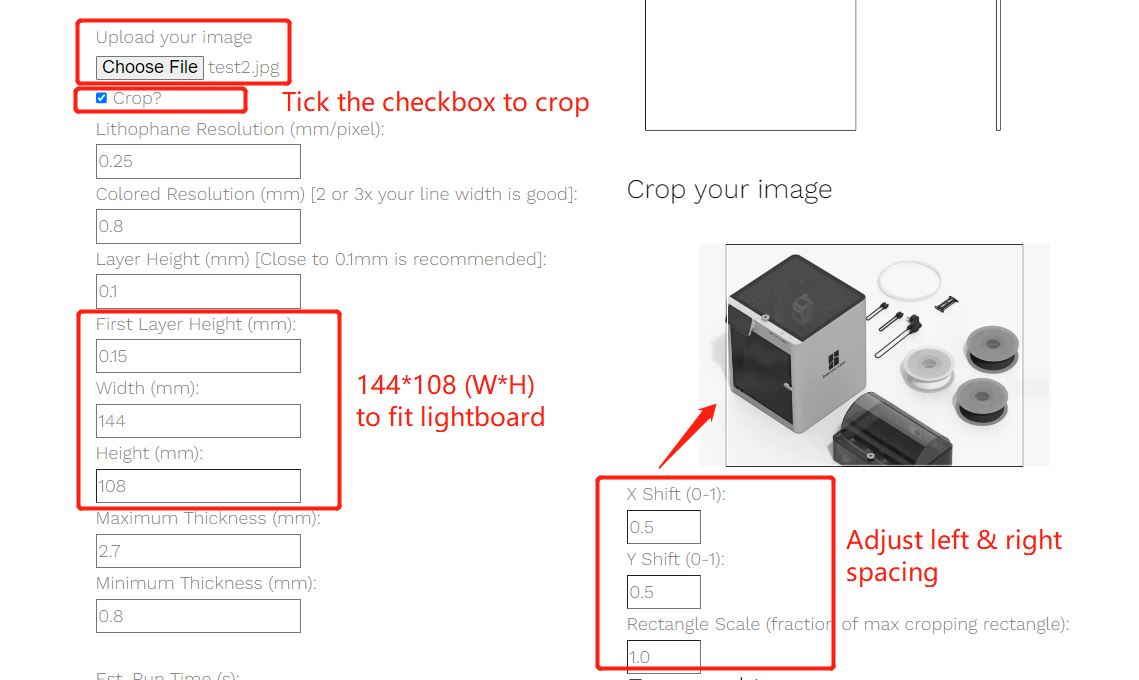
- Use the default ‘Palette’

2. Enter your personal email address and click 'Create .stl' to download the generated STL zip file.
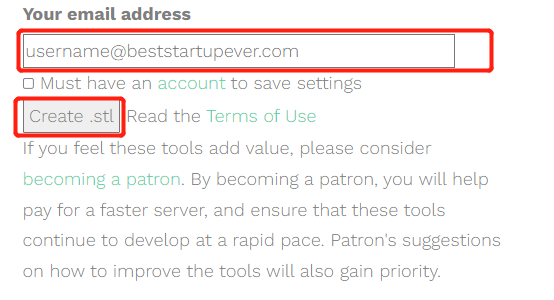
3. Preview function
After all the above information is filled in, you can use the website's preview function to preview the printing effect.
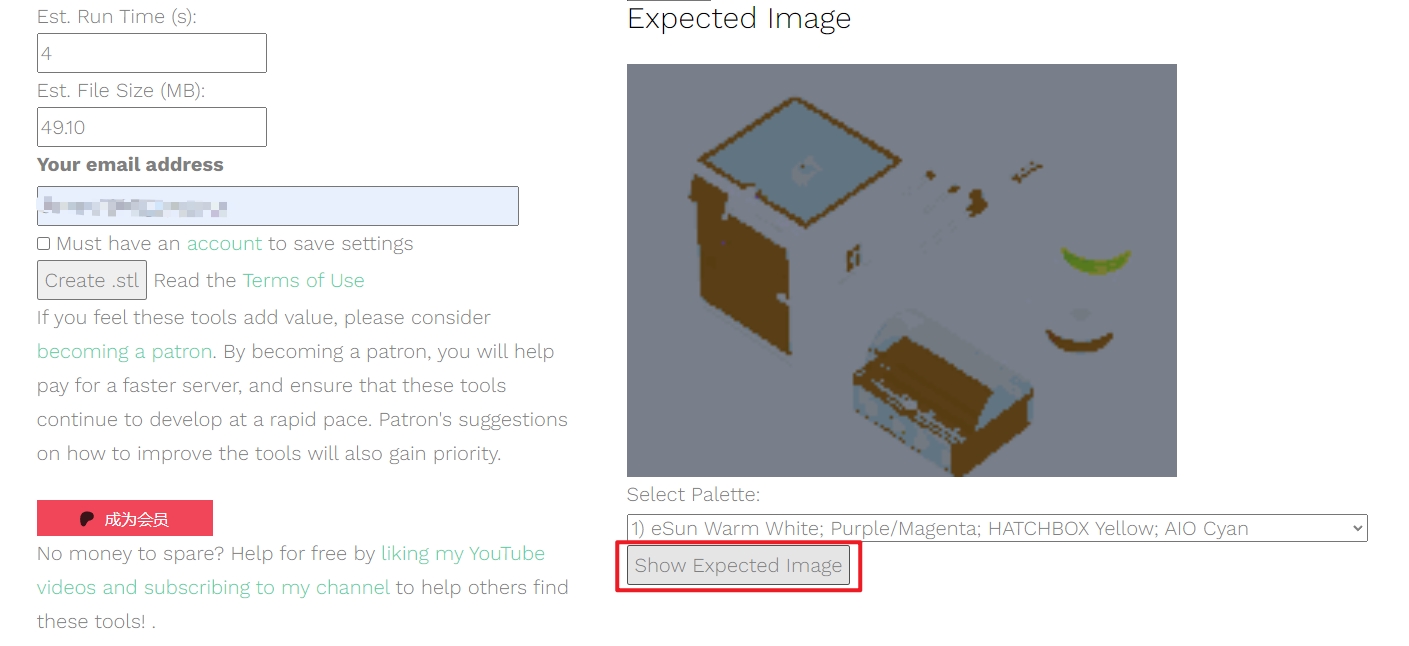
Note: Due to website display reasons, the preview function is only for previewing the printing effect.
¶ Step 2 - Configure and slice
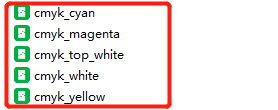
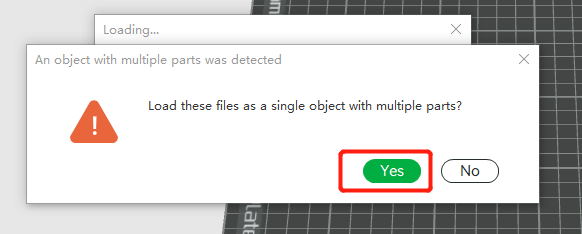
1. Unzip the folder and drag the five generated STL files into Bambu Studio. Select 'Yes' to load these files as a single object with multiple parts.
 |
 |
2. Add four colors – PLA Basic Cyan (#0086D6), PLA Basic Magenta (#EC008C), PLA Basic Yellow (#F4EE2A), and PLA Basic White (#FFFFFF) – corresponding to filaments loaded in AMS slots.

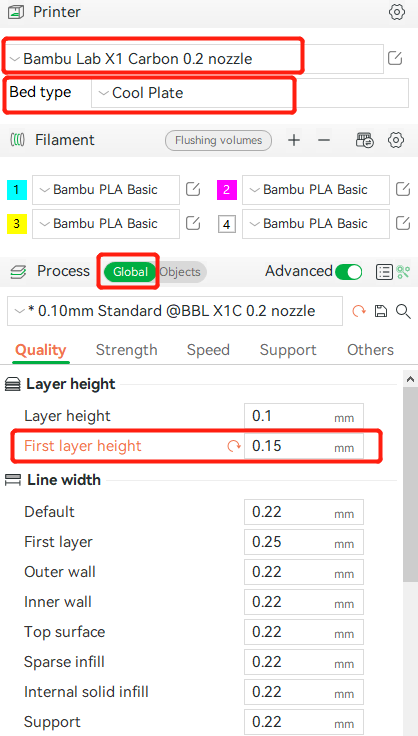
3. Setting adjustments:
- Choose '0.2mm nozzle' (recommended);
- Change the first layer height to 0.15mm;
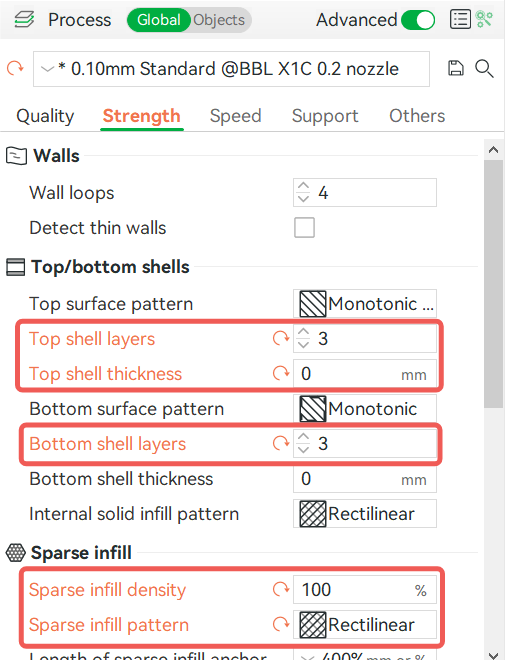
- Set the Top & Bottom Shell Layers to 3;
- Modify infill to '100% Rectilinear;
 |
 |
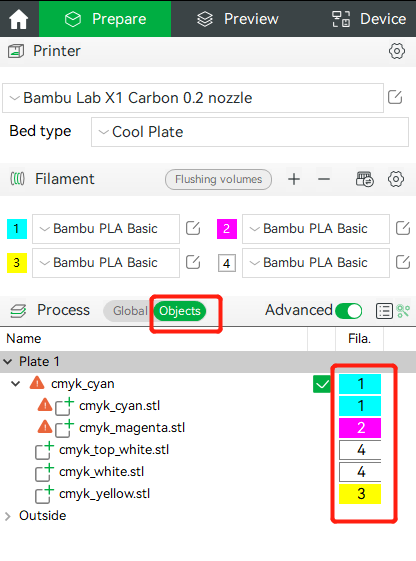
4. In the 'Objects' panel, assign the corresponding colors based on the file names.
- Start slicing!
*Note: lithophane slicing could take longer; please be patient.
¶ Alternative - Configure and Slice guide
You can download the demo 3MF file to get the above settings quickly.
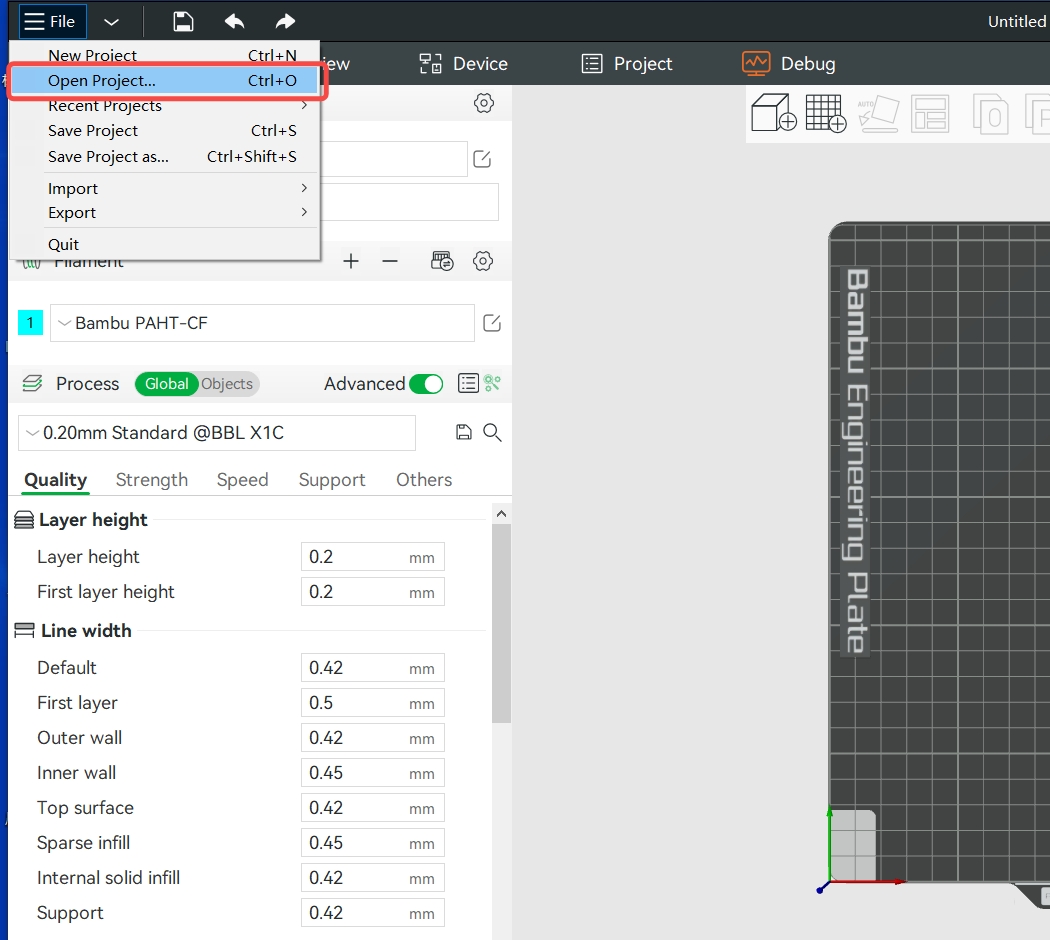
1. Download the demo 3mf file (Download Link) - Labrador, and open it in Bambu Studio.
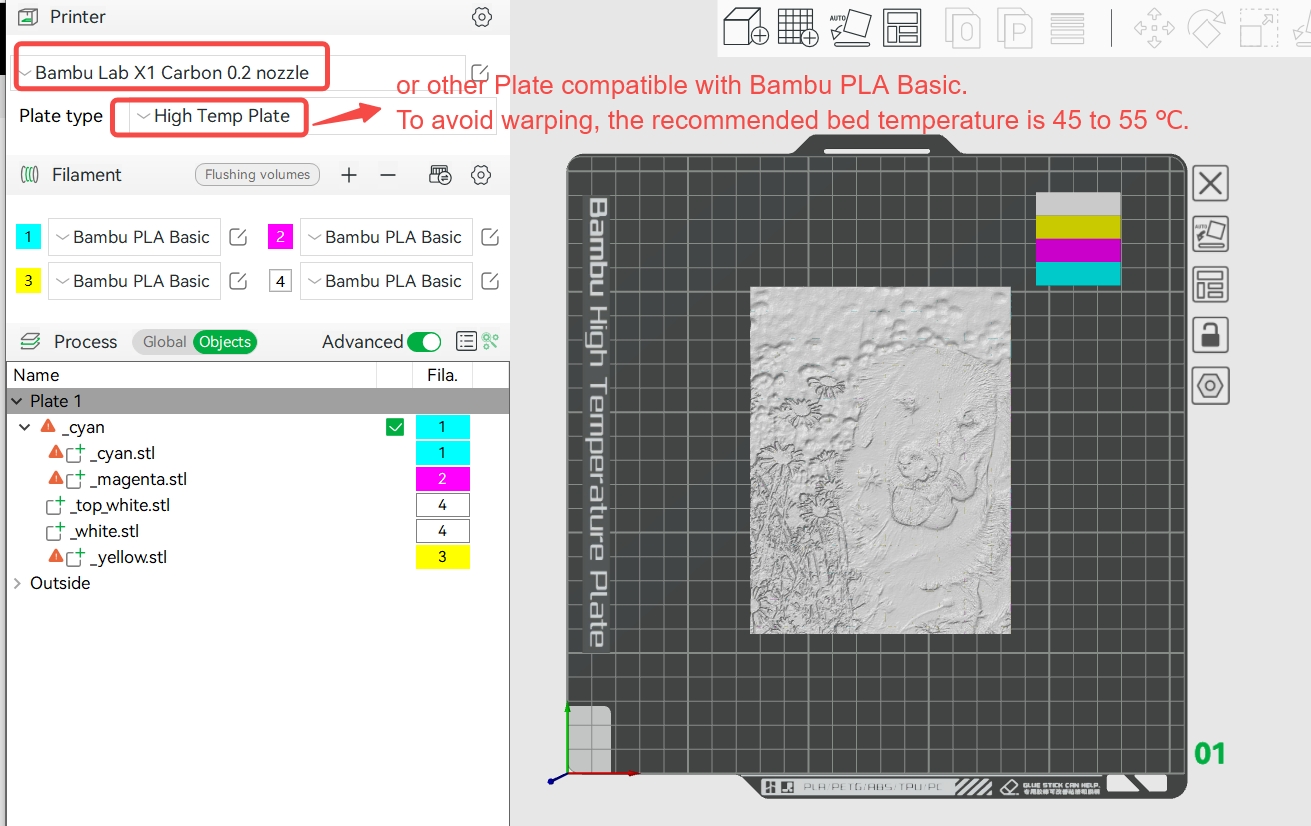
2. Adjust the printer settings according to your needs (it needs to be compatible with Bambu PLA Basic, and the recommended bed temperature is 45 to 55 ℃).
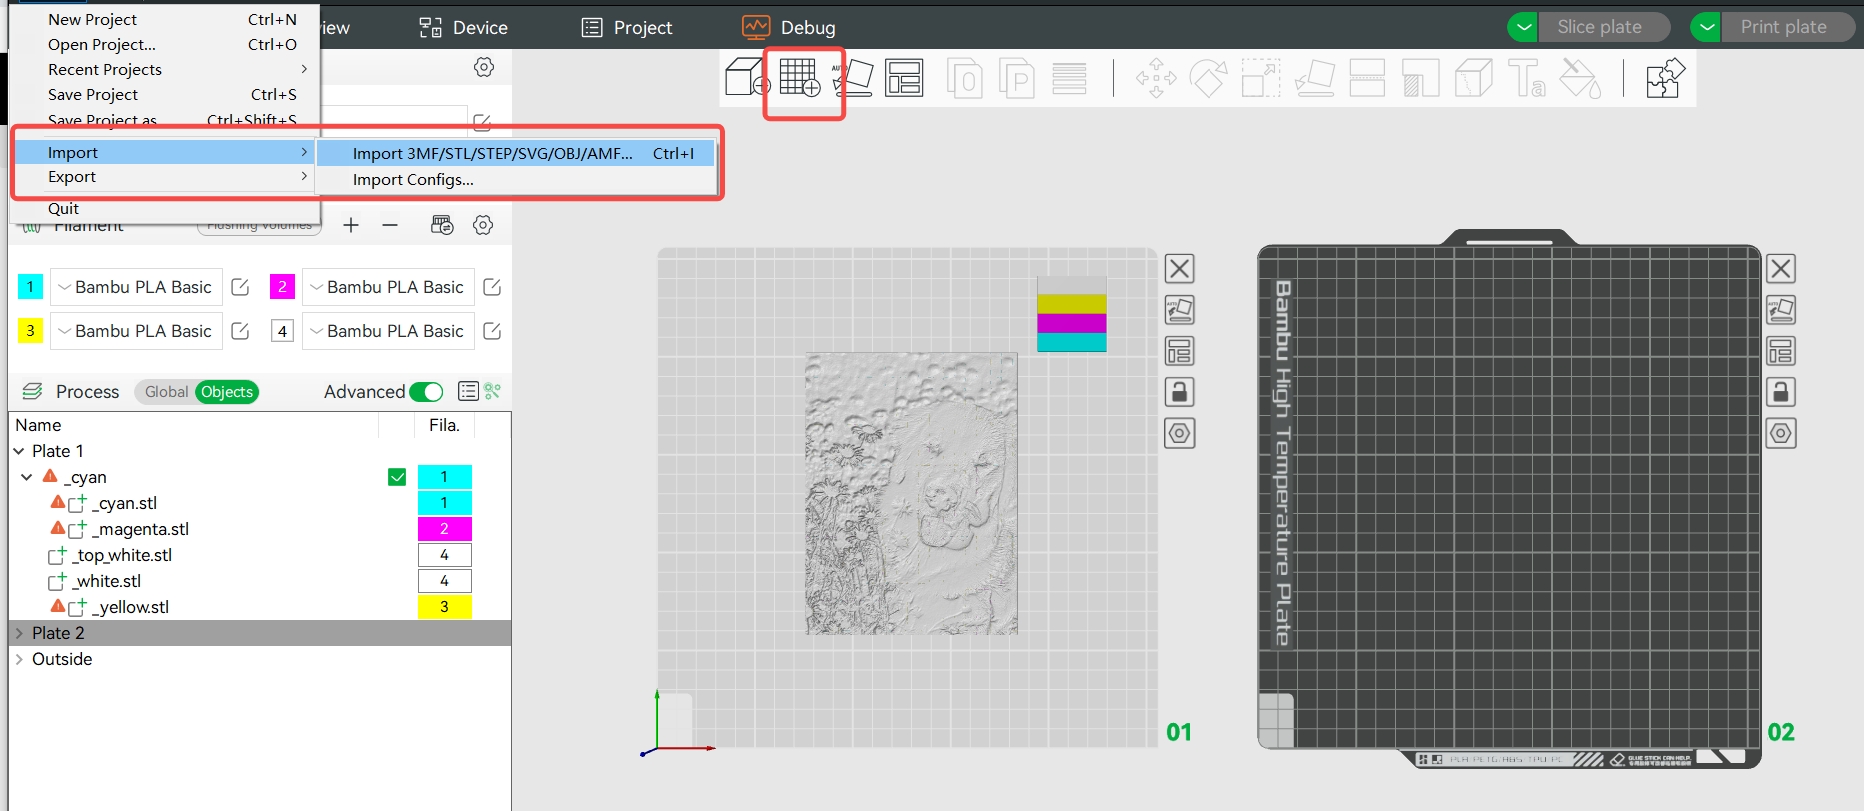
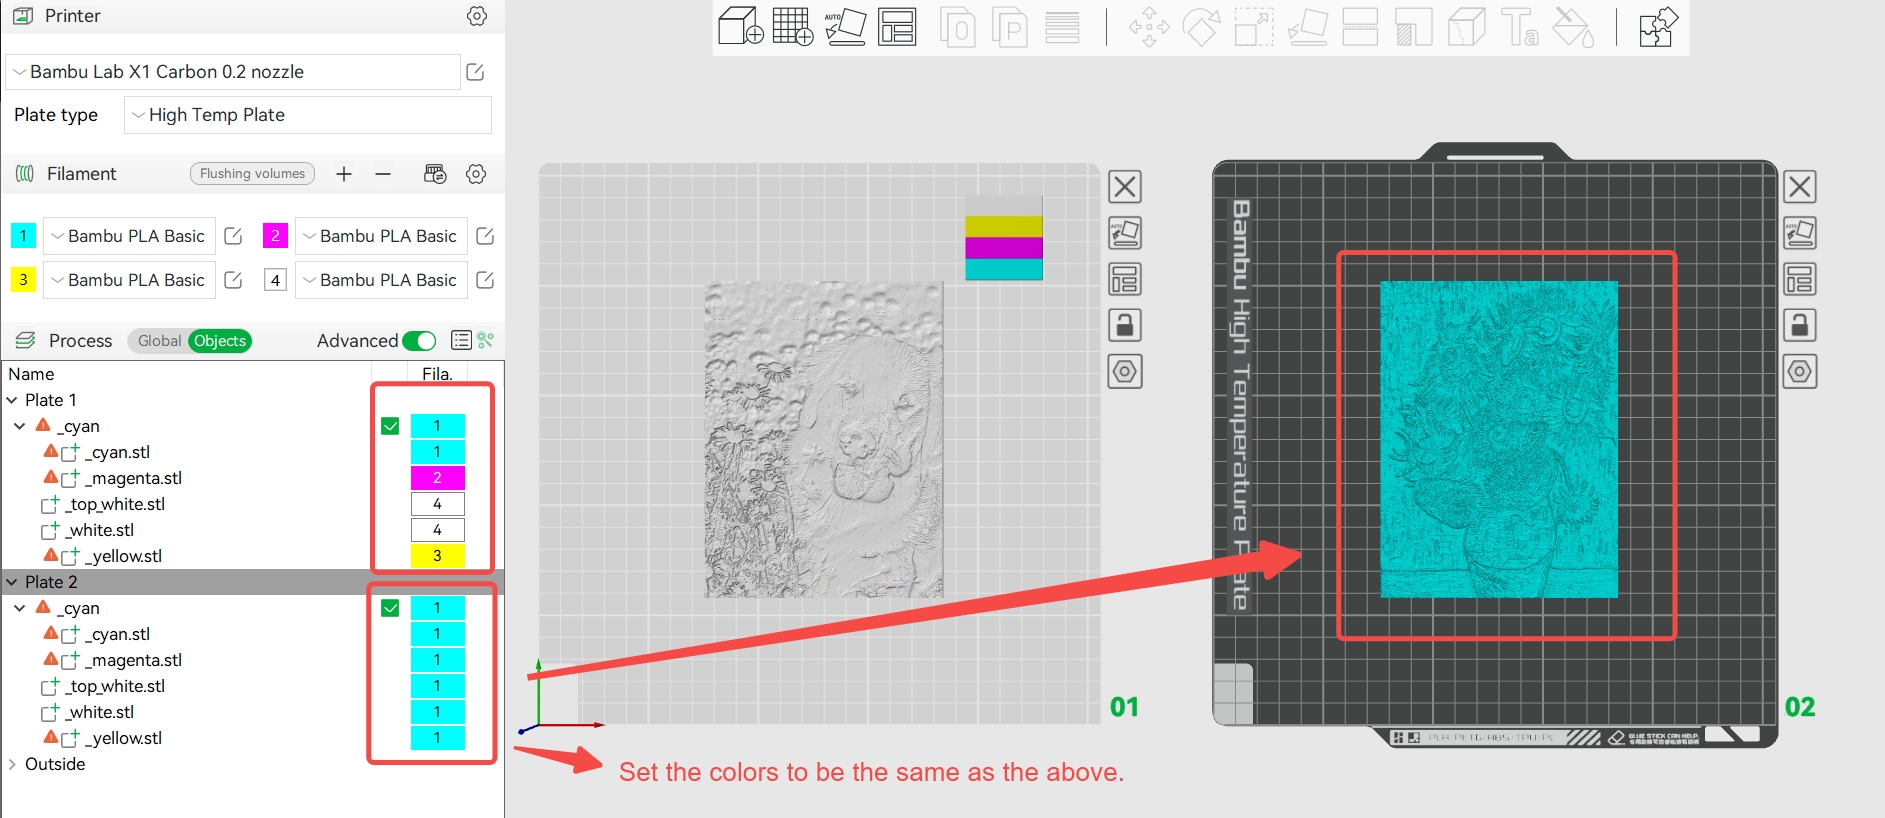
3.Add another plate and import the picture you want to print.
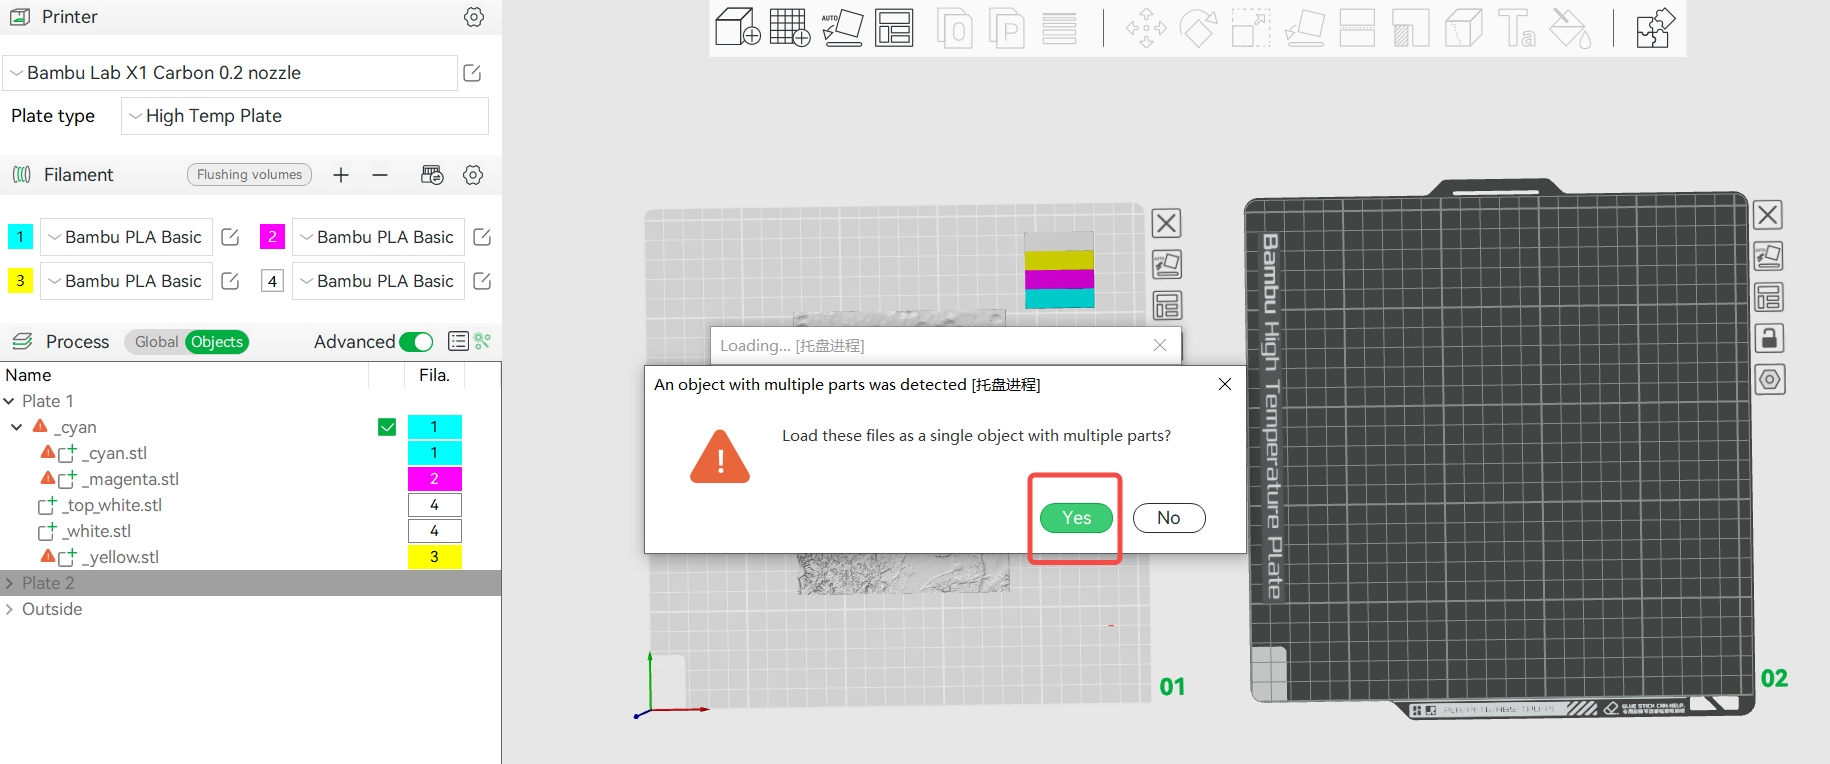
4. Set the colors to be the same as the previous 3mf file.
5. Slice your plate and wait till it is done.
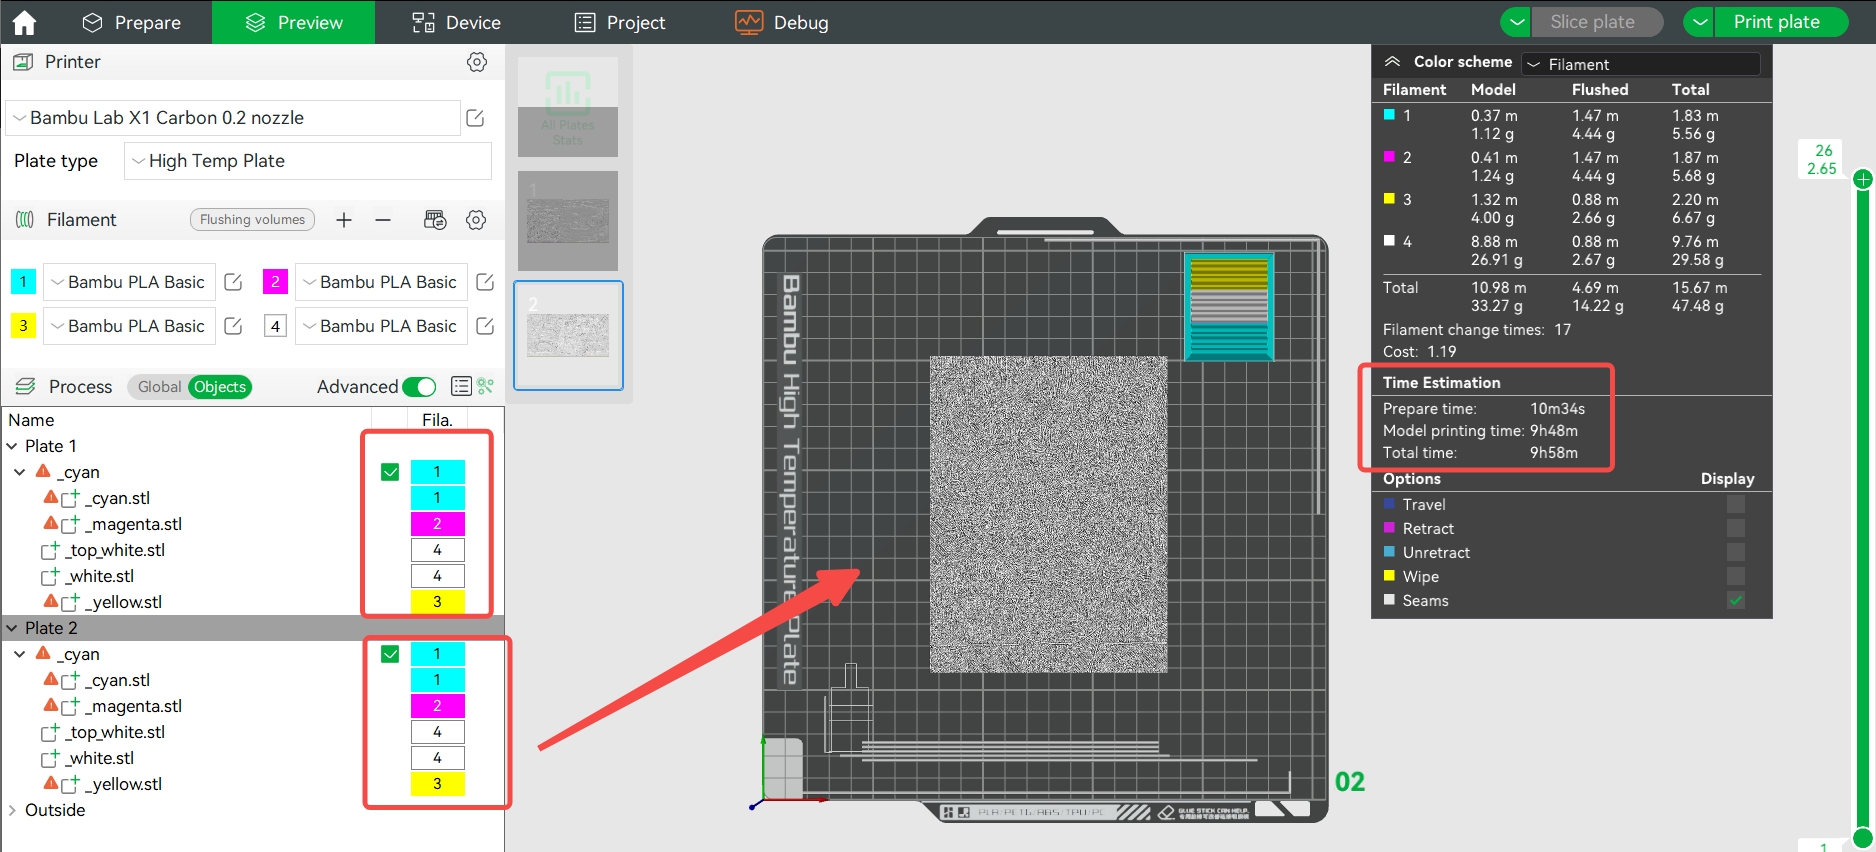
* Attribution: Puppy in the Flowers - from @larissatondim; Sunflowers - from Vincent van Gogh.
¶ Load filaments and print
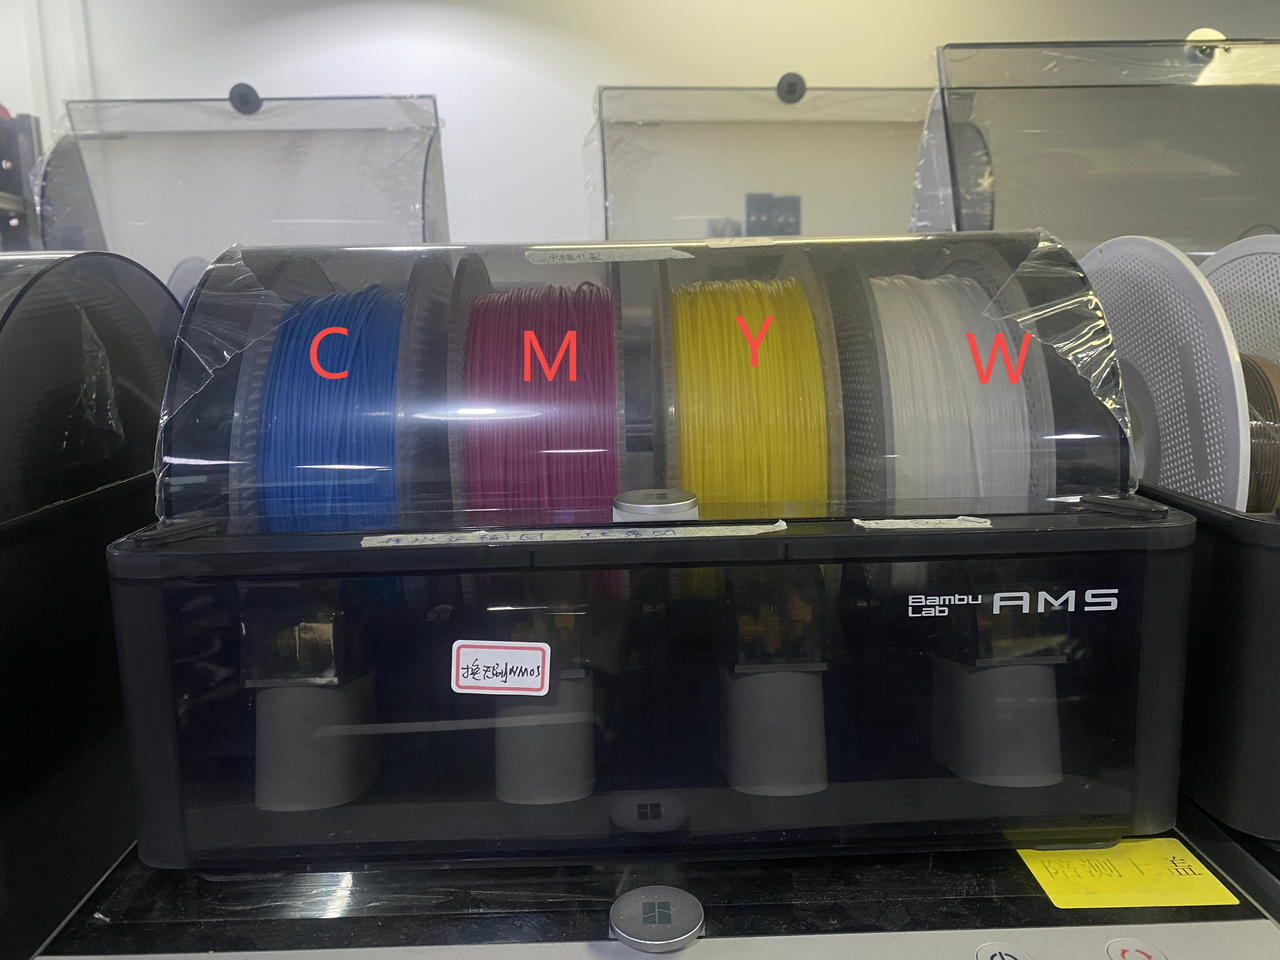
Make sure the CMYK filament placement order in AMS matches the settings order in the Studio. Otherwise, the prints' colors may be incorrect.
¶ Frame and light guide plate printing
¶ For Make My Lithophane
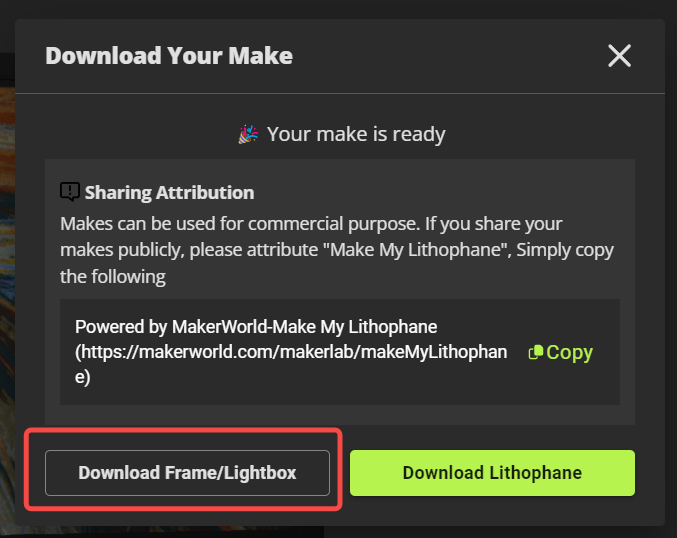
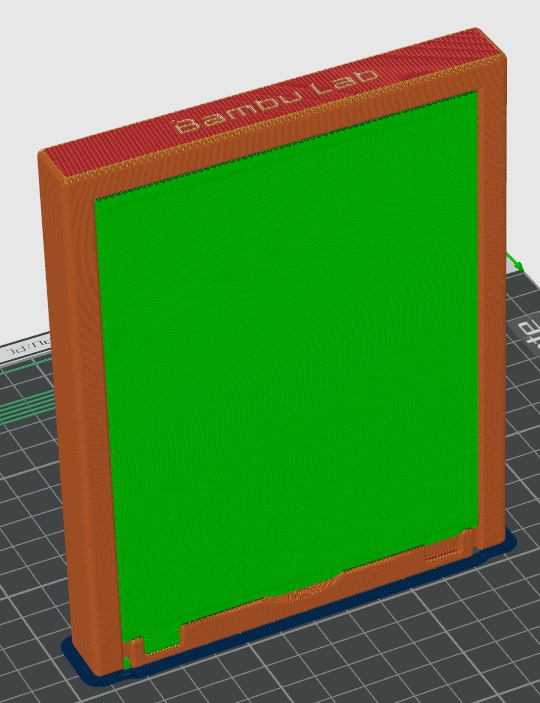
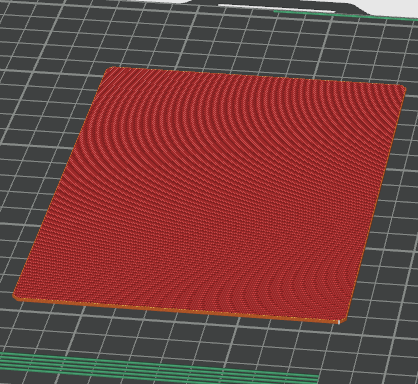
If your lithophane is generated from Make My Lithophane, the frame file and the light guide plate are already included in the generated 3MF file. The models are well configured and ready for printing.
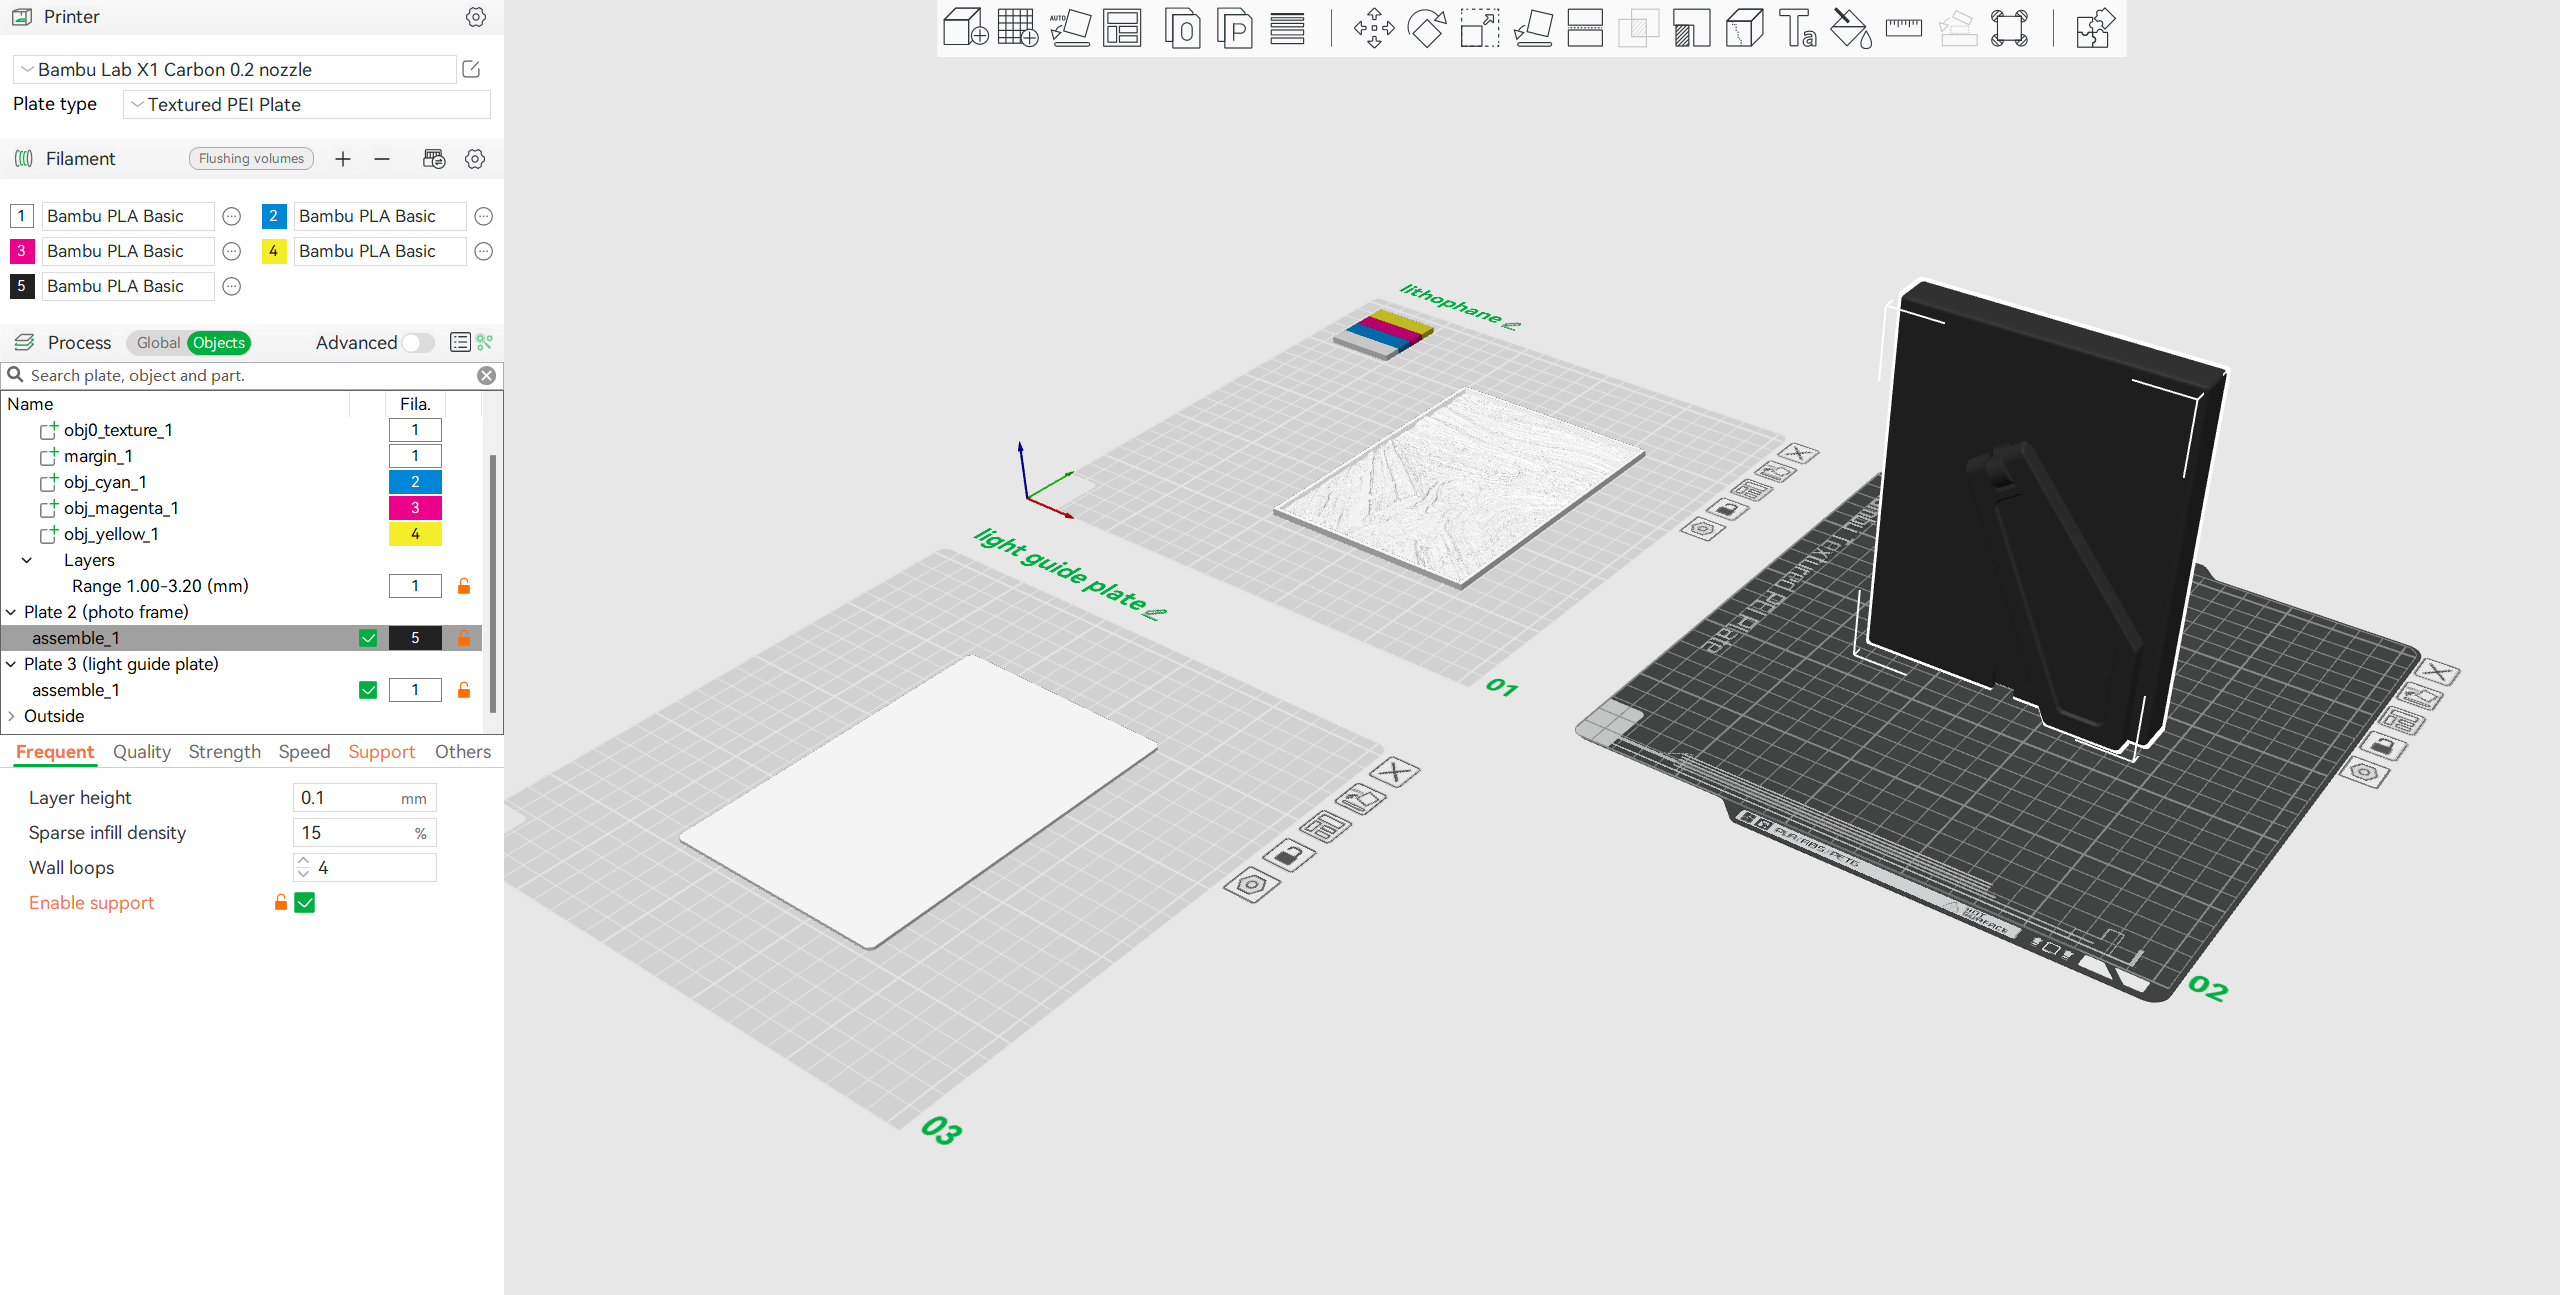
If you choose 0.2mm nozzle size, you can also download the frame and the light guide plate in a separate file with 0.4mm profile.
¶ Regular Frame
3MF File
The corresponding 3MF files have been provided for different printer models. Please select the appropriate 3MF file based on the printer model:
| X1, X1C, X1E | P1P | P1S | A1 mini | A1 |
| Download Link | Download Link | Download Link | Download Link | Download Link |
Here are some alternative formats for the model:
STL File - Download Link
STP File - Download Link
Print Settings
Filament type: Most kinds of PLA (Dark colors are recommended)
Wall loops: 5
Top shell layers: 5
Bottom shell layers: 3
Sparse infill density: 50%
Support: tree (auto)
Print time:5 hrs 35 min
**Filament usage:**240 g
Light Guide Plate
3MF File
The corresponding 3MF files have been provided for different printer models. Please select the appropriate 3MF file based on the printer model:
| X1, X1C, X1E | P1P | P1S | A1 mini | A1 |
| Download Link | Download Link | Download Link | Download Link | Download Link |
Here are some alternative formats for the model:
STL File - Download Link
Print Settings
Filament type: PLA Basic - Jade White
Wall loops: 5
Top shell layers: 5
Bottom shell layers: 5
Print time: 35 min
Filament usage: 30 g
¶ Assembly
https://www.youtube.com/watch?v=s7orBhLydgI
¶ End Notes
We hope that the detailed guide we shared with you was helpful and informative.
We want to ensure that you can perform it safely and effectively. If you have any concerns or questions regarding the process described in this article, we encourage you to reach out to our friendly customer service team before starting the operation. Our team is always ready to help you and answer any questions you may have.
Click here to open a new ticket in our Support Page.
We will do our best to respond promptly and provide you with the assistance you need.