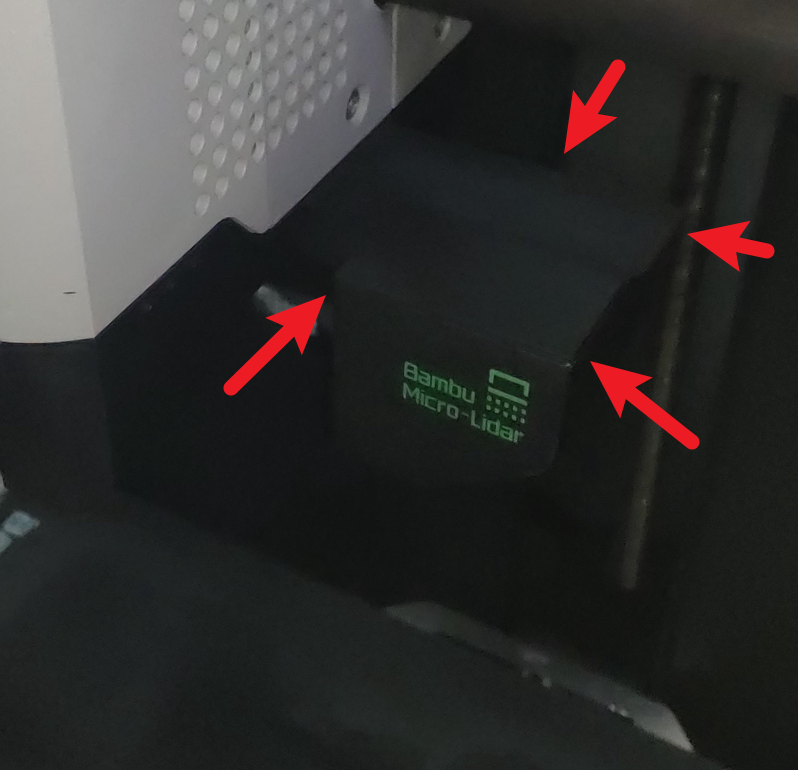
¶ What is this?
The Bambu’s micro Lidar shell consists of three segments, a top cover, a bottom cover, and a protective lens.
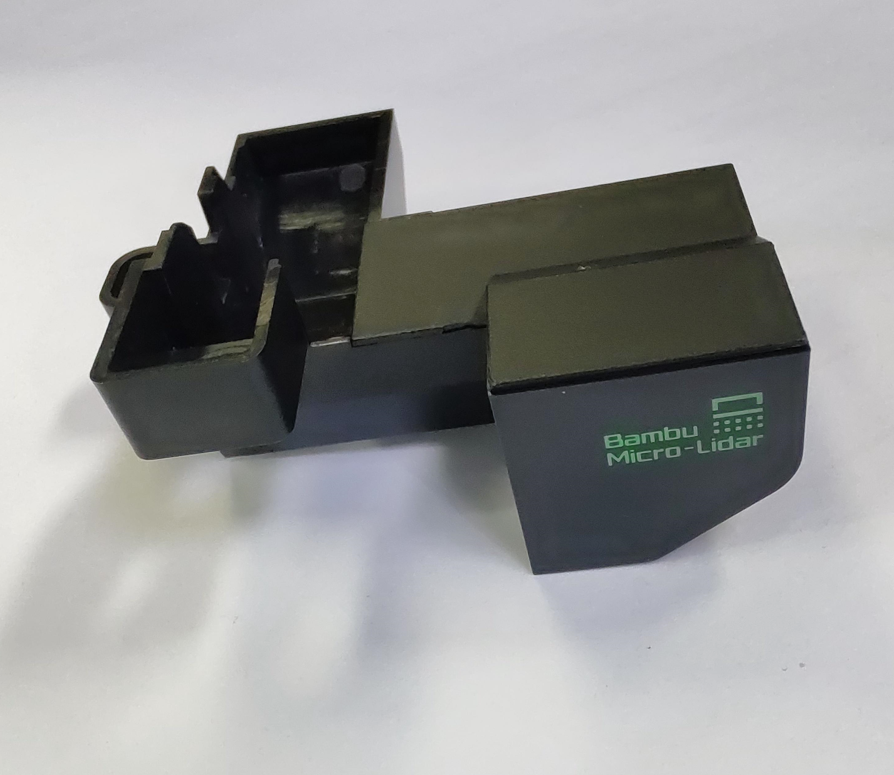
¶ When to replace the micro Lidar?
It is advised to replace the micro Lidar when a crack appears on the cover, or when the protective lens is broken which could be caused by an impact.
¶ Tools and materials needed
A thin piece of sheet metal or a thin blade, and an Allen key.
¶ Safety warning and Machine state before starting operation
For safety, please ensure that the power is turned off before dissembling/assembling the micro Lidar.
¶ Operation guide
¶ Step 1 - Lower the heatbed
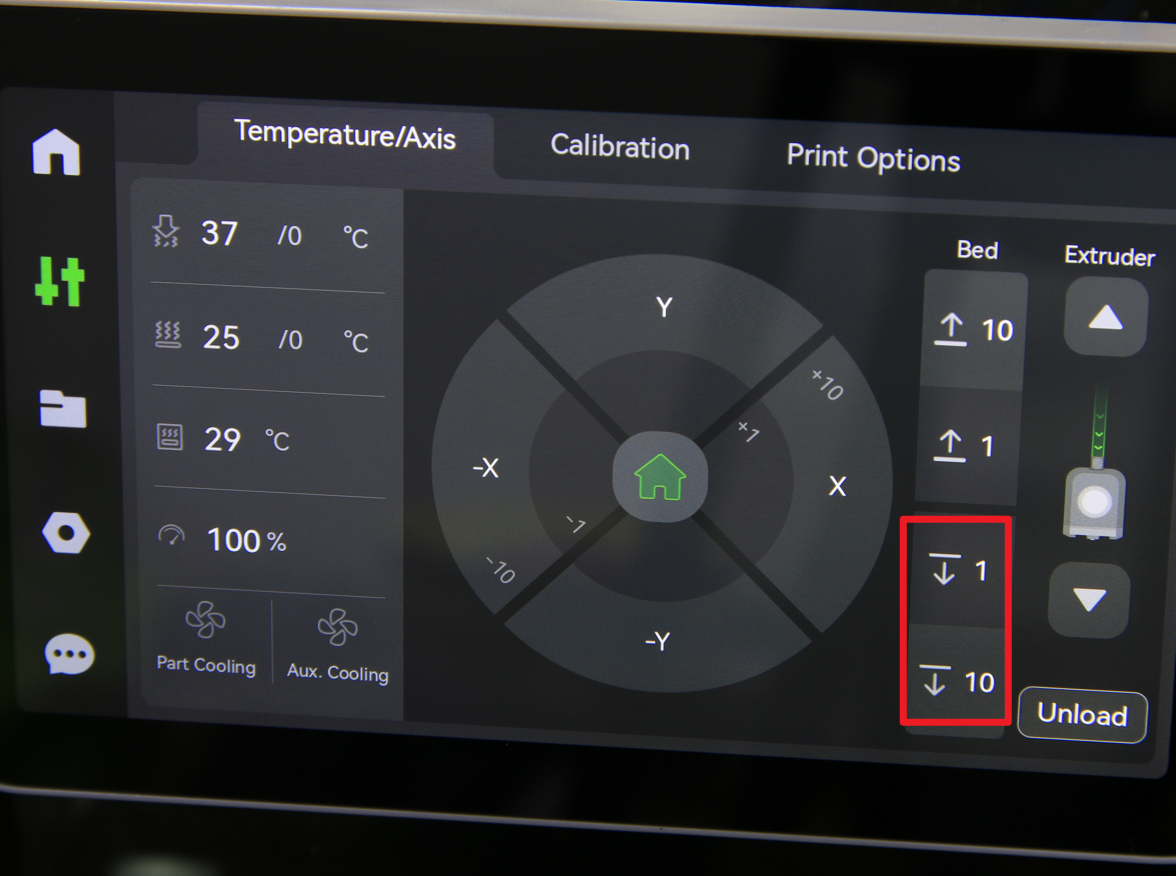
Firstly, you will need to lower the bed by using the movement menu as shown below. Once lowered to the desired level (the toolhead should be a good distance away from the bed as shown below) you can now power off the printer.
 |
 |
¶ Step 2 - Open the front housing assembly
Open the front housing assembly by gently pulling the top casing off, then place it away from the 'work' area by hanging it over the carbon rod.

¶ Step 3 - Removing the micro Lidar's upper cover
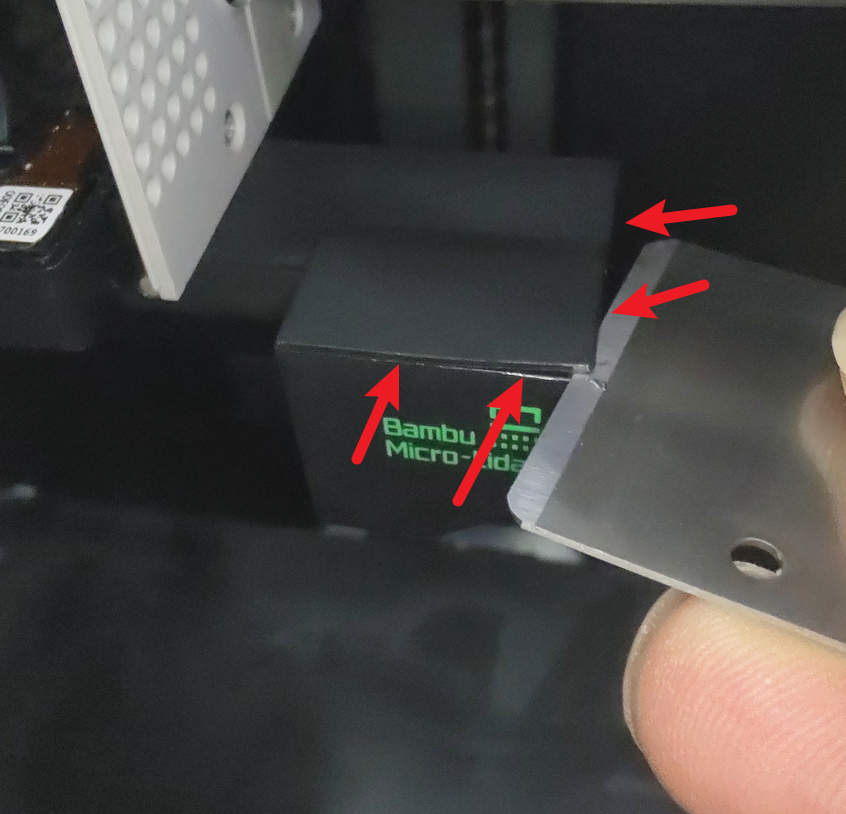
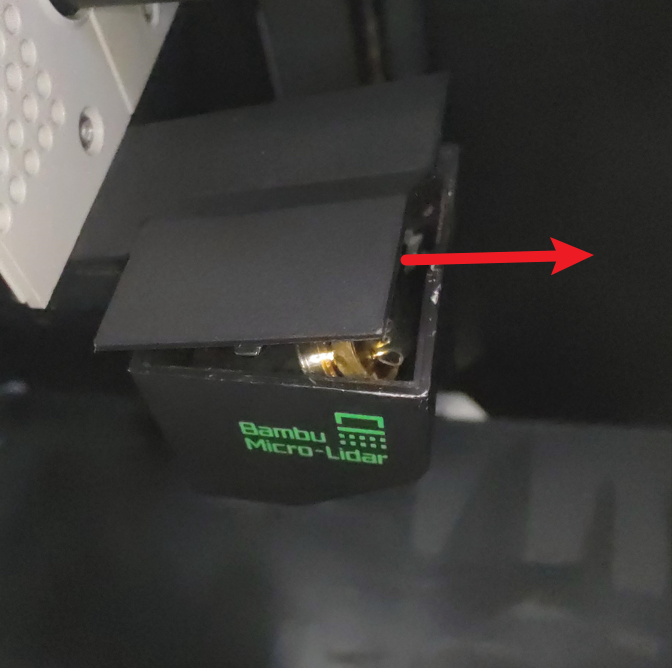
Use the prepared sheet metal or a thin blade to pry open the top cover, then carefully remove the top cover away from the micro Lidar.
 |
 |
¶ Step 4 - Remove the micro Lidar's lower cover
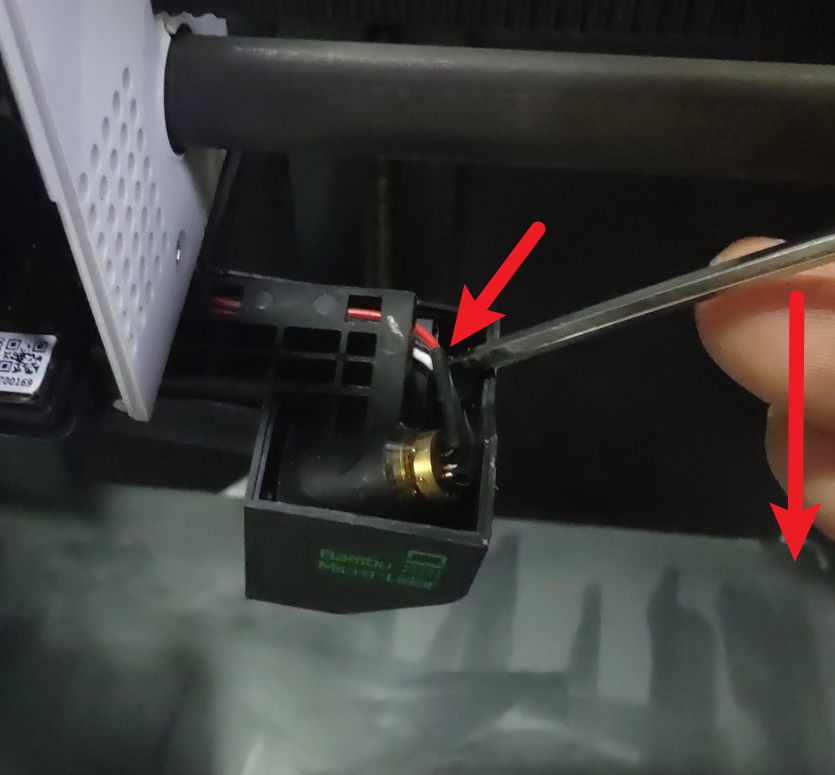
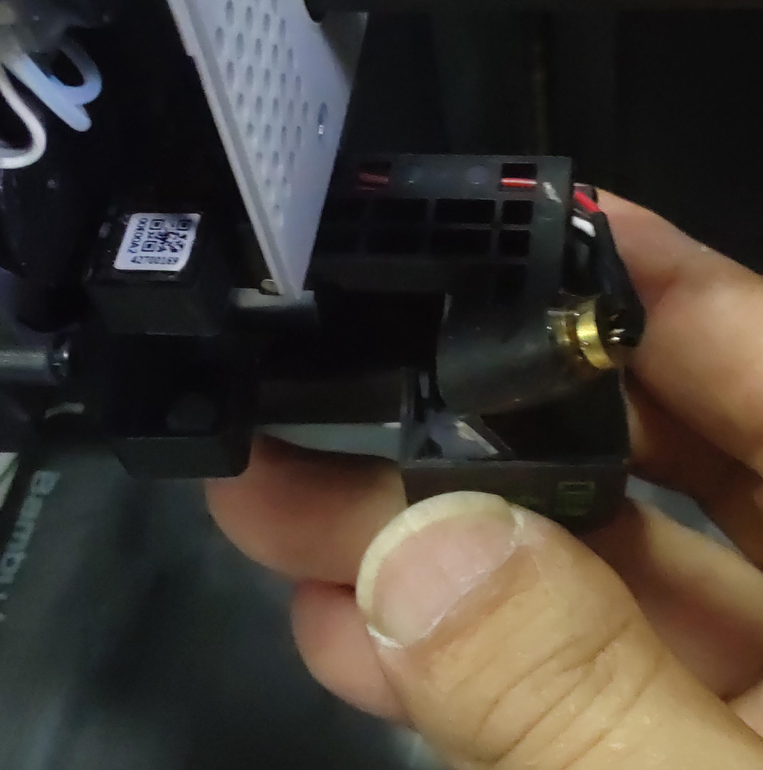
Insert the Allen key into position as shown in the image below. With a downwards force upon the Allen key, pry to unlock and remove the lower segment completely from the toolhead.
 |
 |
¶ Step 5 - Prepare the new shell
Prepare the new Bambu micro Lidar by separating the top cover from the lower segment.
*Separate the top and bottom covers
.png) |
.png) |
¶ Step 6 - Installing the lower cover
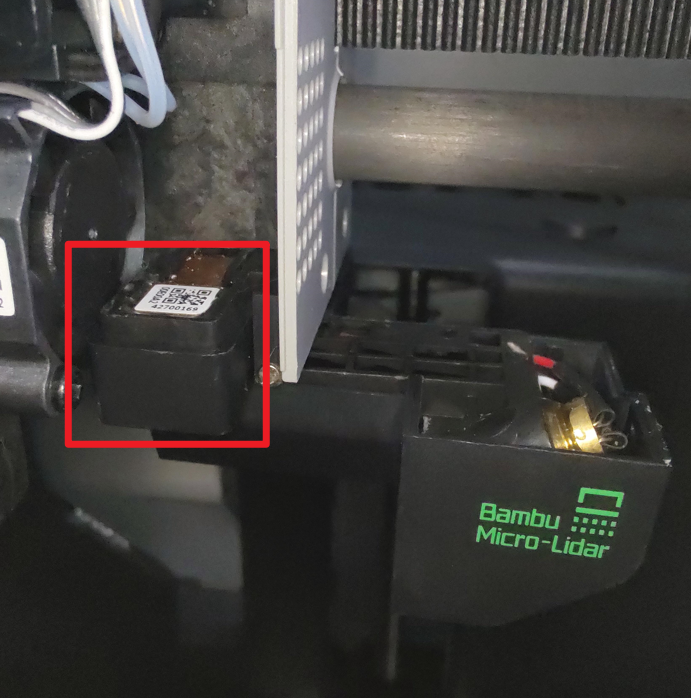
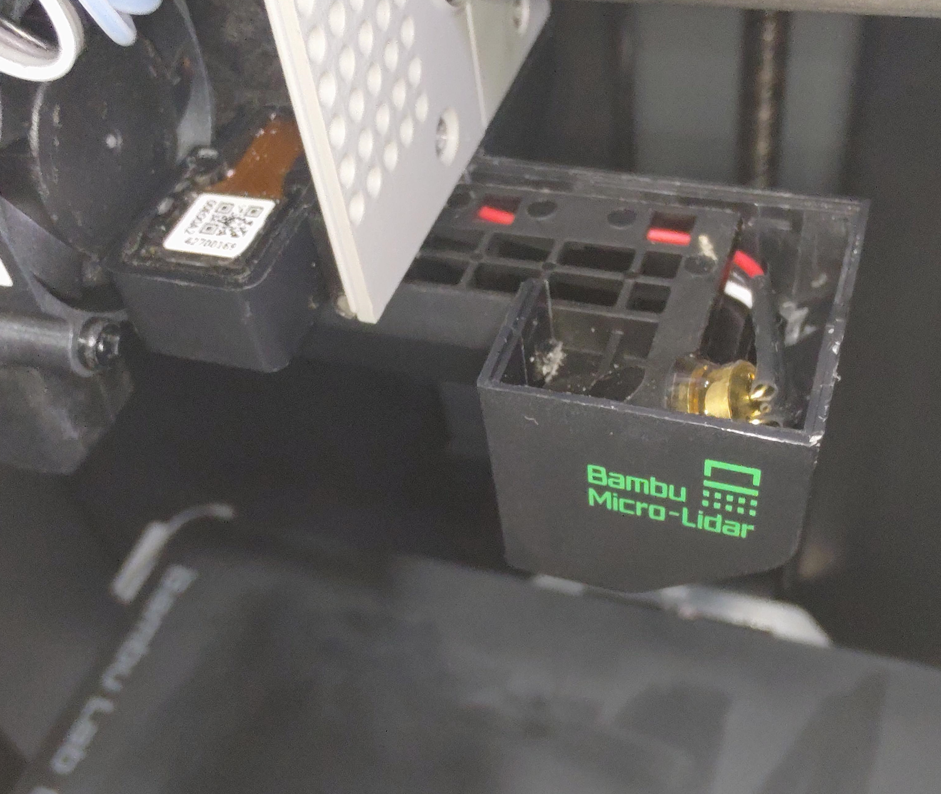
Install and position the new lower cover of the micro Lidar according to the case of the camera as shown below.
¶ Step 7 - Check the wires during installation
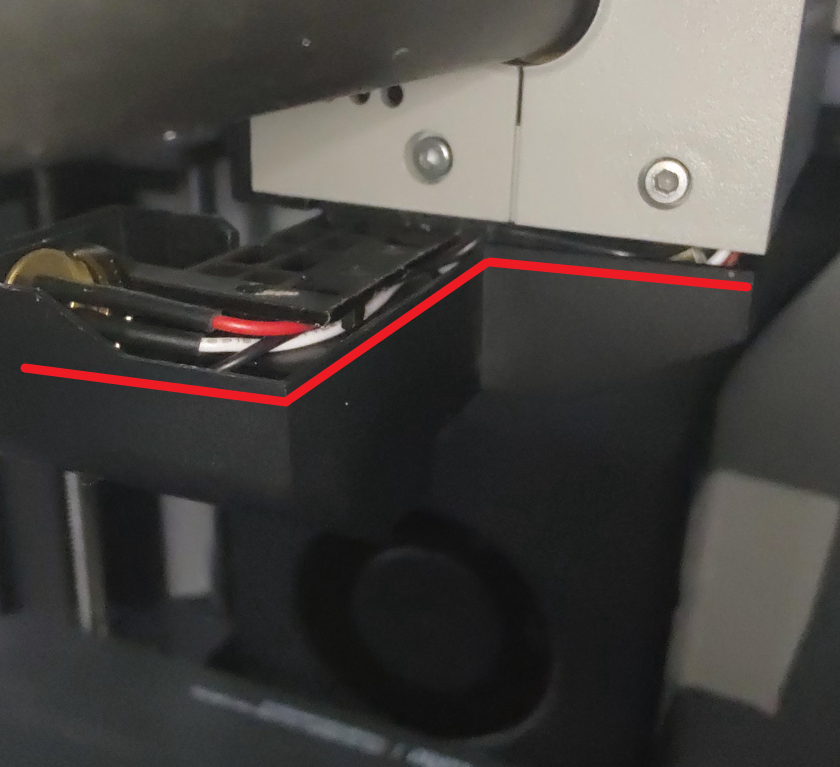
From the rear side of the toolhead, check to see that there are no protruding wires. Wires need to be properly placed into the lower segment of the micro Lidar to prevent any damage when installing the lower cover.
 |
 |
¶ Step 8 - Installing the top cover
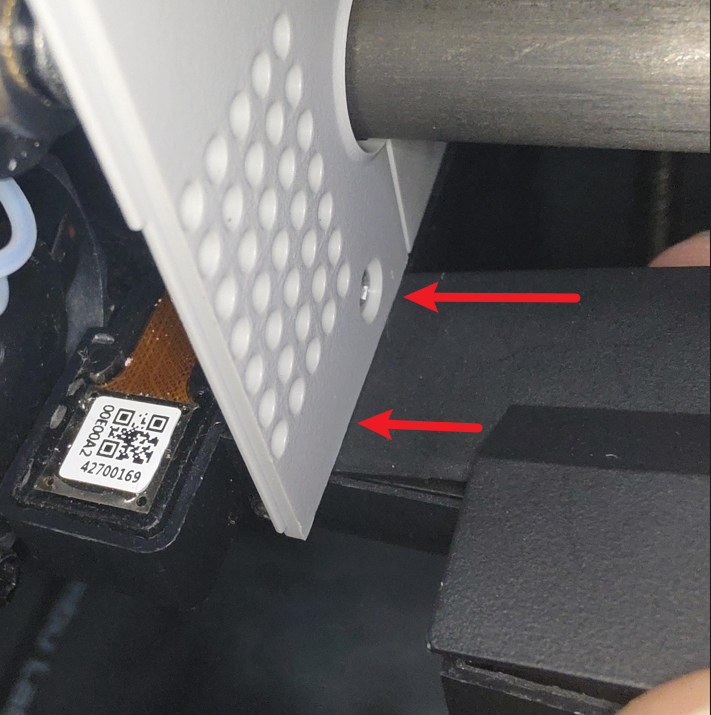
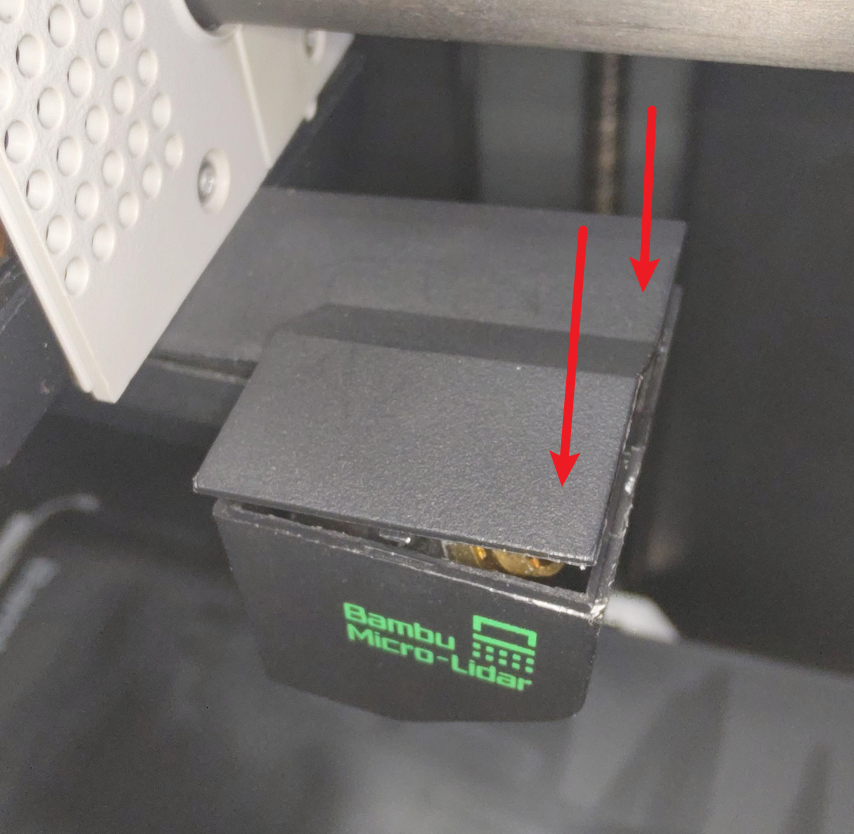
Insert and align the top cover to the toolhead as shown below. Ensure that the top cover is aligned to the lower cover of the micro Lidar, then press firmly to clip into place.
 |
 |
¶ Step 9 - Close the front housing assembly
The replacement process is now complete. Close the front housing assembly of the toolhead.
¶ How to verify completion/success
Visually check that there are no gaps or misalignment present between the top and bottom covers.
